[ad_1]

I hope you are having a wonderful Summer. Even though I love summer, I find it challenging for photography. I have never been a big fan of the midnight sun or bright nights. The mist is something I find inspiring to photograph, yet there are only a handful of mornings when there is some mist in the summer. And as soon as the nights get darker and colder, I find myself inspired to go out and photograph. So for the upcoming dark season, I started writing a comprehensive and inspiration-filled tutorial about night photography. I hope you enjoy it.
As someone who has spent quite a few nights photographing different views, I find night photography fascinating and inspiring. As I was writing this post with the amount of knowledge I’ve gathered, I felt I needed to put this into an eBook, but then I thought to share it on my blog. If you enjoy my posts, you can support me by sharing this article or even buying me a coffee to keep me recharged and continue writing!
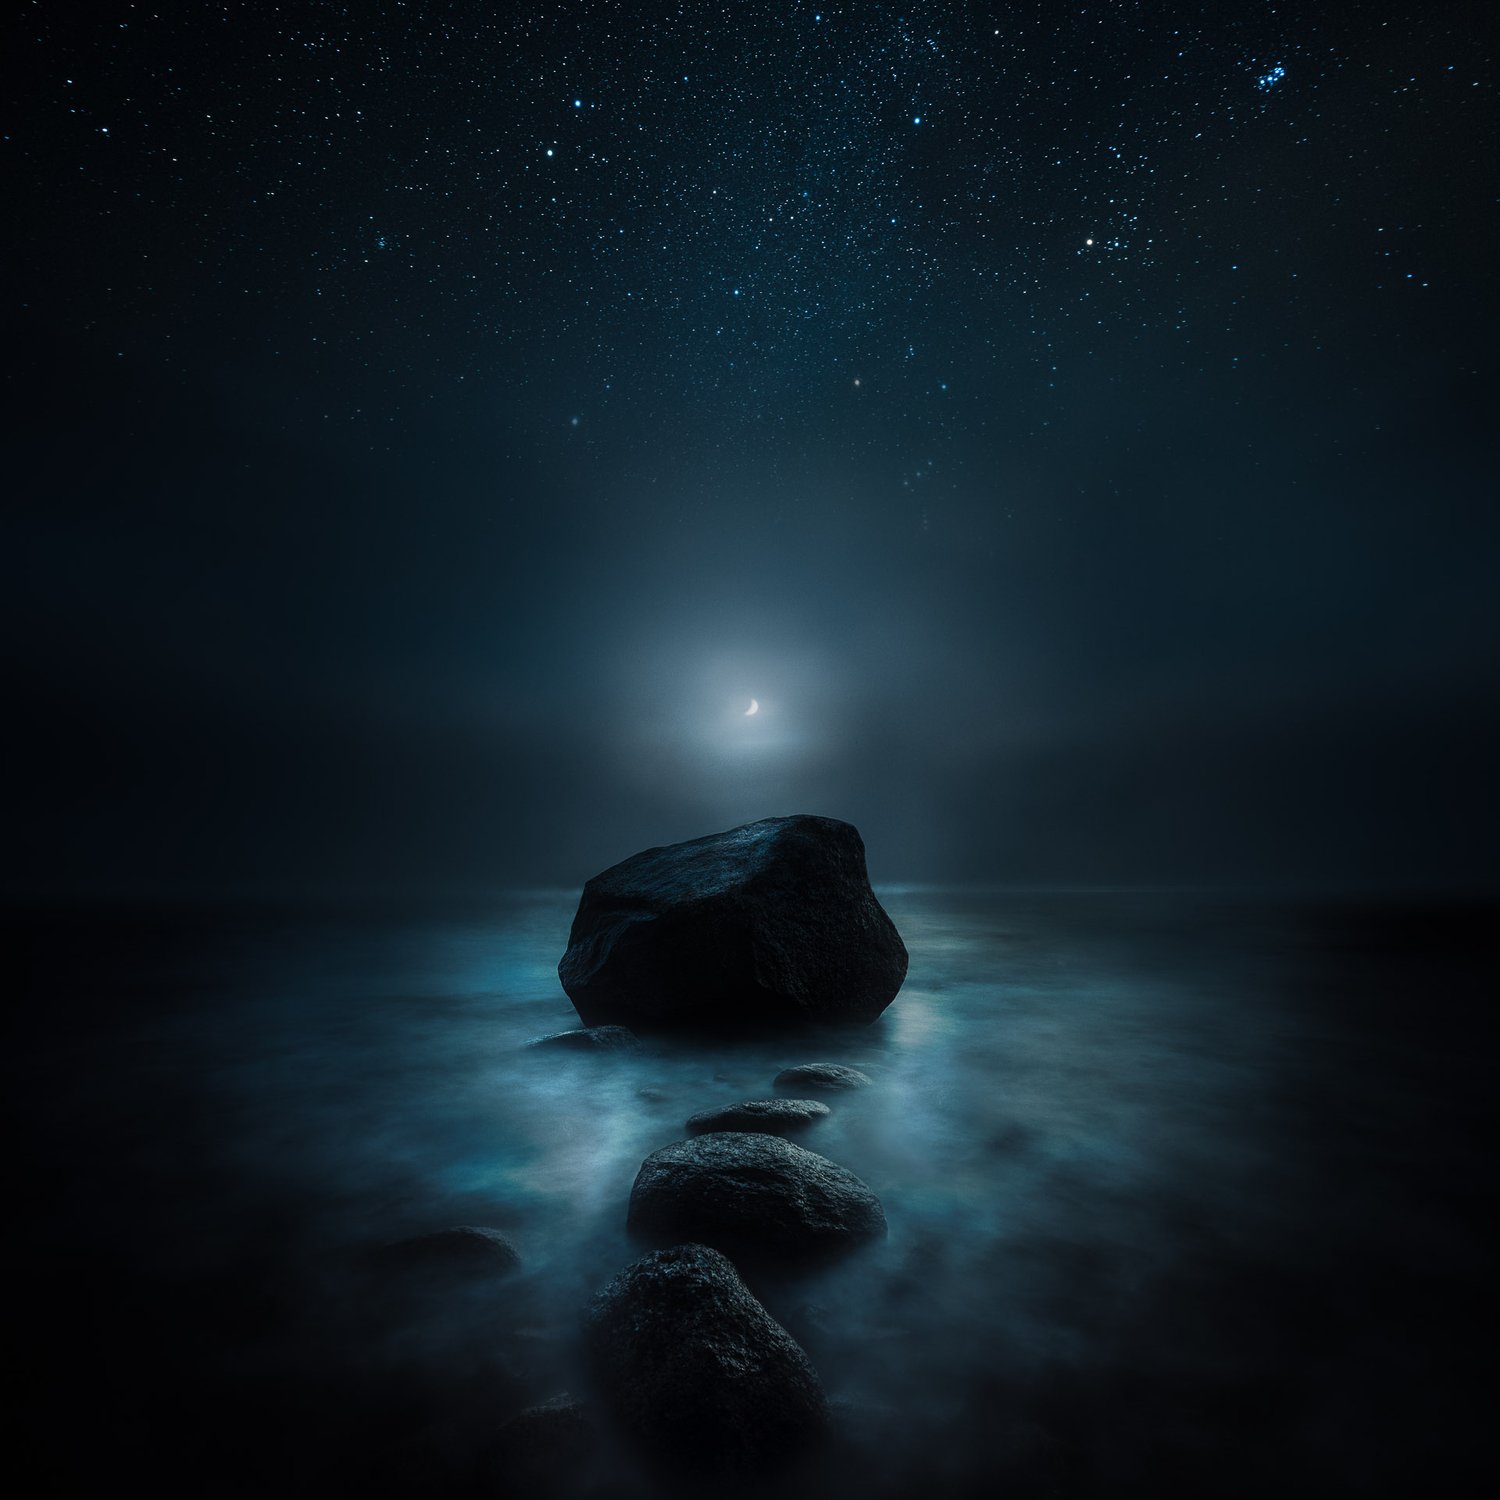
At night, our surroundings transform into a different kind of beauty. The sky becomes a vast canvas of stars, the moon casts a gentle glow, and the aurora comes alive in a luminous dance of lights and shadows. These mesmerizing views can be captured, making night photography a captivating genre full of creative opportunities and unique challenges.
The journey to night photography is planning, patience, and learning. It’s also understanding the nuances of light and darkness and mastering the technical aspects of long-exposure photography. The night presents a different kind of quiet and solitude, allowing introspection and creativity.
This tutorial explores my journey in night photography and guides those who wish to venture into this fascinating genre. Check out my Star Photography Masterclass eBook if you want to dive deeper into night photography and editing.
In this tutorial, we go into various parts of night photography, from capturing Milky Way and moon to vertoramas night. I’ll share the techniques, equipment, and settings I’ve found most effective for capturing stunning nighttime images.
Throughout this post, I challenge you to remember that photography is not just about capturing a scene; it’s about conveying a feeling and telling a story through your lens. The night reveals mystery, tranquility, and natural beauty, and I hope my experiences and insights inspire and guide you in creating unique stories under the stars.
Here are a few other night tutorials I’ve written before:
Additionally, I have written the Star Photography Masterclass eBook, which includes more details about my process.
1. The Magic of the Night Sky
It is truly unique how the sky presents remarkable spectacles every night. There is always something captivating to observe, from stars and planets to the moon. Of course, those bloody clouds can block the views, but it’s part of the game.
Sometimes, we are blessed enough to witness extraordinary events like the Northern Lights or meteor showers. Although capturing these breathtaking sights through photography can be rewarding, it takes expertise and a lot of patience.
Planning
Photographing the night sky starts with planning. Unlike other genres of photography, where spontaneity can lead to the best shots, night sky photography demands careful thought and preparation. The key factors to consider include the weather, moon phase, light pollution, and the position of celestial bodies. Clear skies are ideal for capturing stars, while the moon’s phase can significantly affect your scene’s lighting. Light pollution can hinder your ability to capture the fainter stars, so venturing away from city lights is often necessary. Finally, knowing the position of celestial bodies can help you plan your composition. There are various apps available that can help you with these aspects of planning. PhotoPills, TPE and Stellarium, are great tools to use.
Camera Settings
The next step is understanding the crucial camera settings for night sky photography. Night photography is a game of light – or, more accurately, the lack of light. Because of this, you’ll need to adjust your camera settings to capture as much light as possible. This means shooting in Manual mode and understanding the “Exposure Triangle” – the relationship between aperture, shutter speed, and ISO.
Shutter speed is critical in night sky photography. Your aperture should be as comprehensive as possible to allow maximum light into the lens. For most lenses, this will be between f/2.8 and f/4. A common rule for shooting stars without creating star trails is the ‘500 Rule’: Divide 500 by your lens’ focal length to determine the longest exposure time before stars begin to blur due to the Earth’s rotation. However, this rule isn’t infallible and may require some adjustments based on your specific camera and lens combination.
ISO settings can be tricky. A high ISO increases the sensor’s sensitivity to light, which is beneficial in low-light conditions. However, pushing the ISO too high can result in a noisy image. Start with an ISO setting around 1600 – 6400 and adjust based on the results you’re getting. I might go as high as 8000 ISO in complete darkness.
Focus
Focusing at night can be challenging, as autofocus systems often struggle in low light. A common technique is manually focusing on a bright star or distant light. Some photographers use the infinity (∞) symbol on their lens as a starting point, fine-tuning from there.
Try different compositions, play with settings, and, most importantly, take the time to enjoy the process. The night sky is a fascinating subject that rewards patience and curiosity. So, step out into the night, and gaze upwards.
[ad_2]
Source link
دیدگاهتان را بنویسید