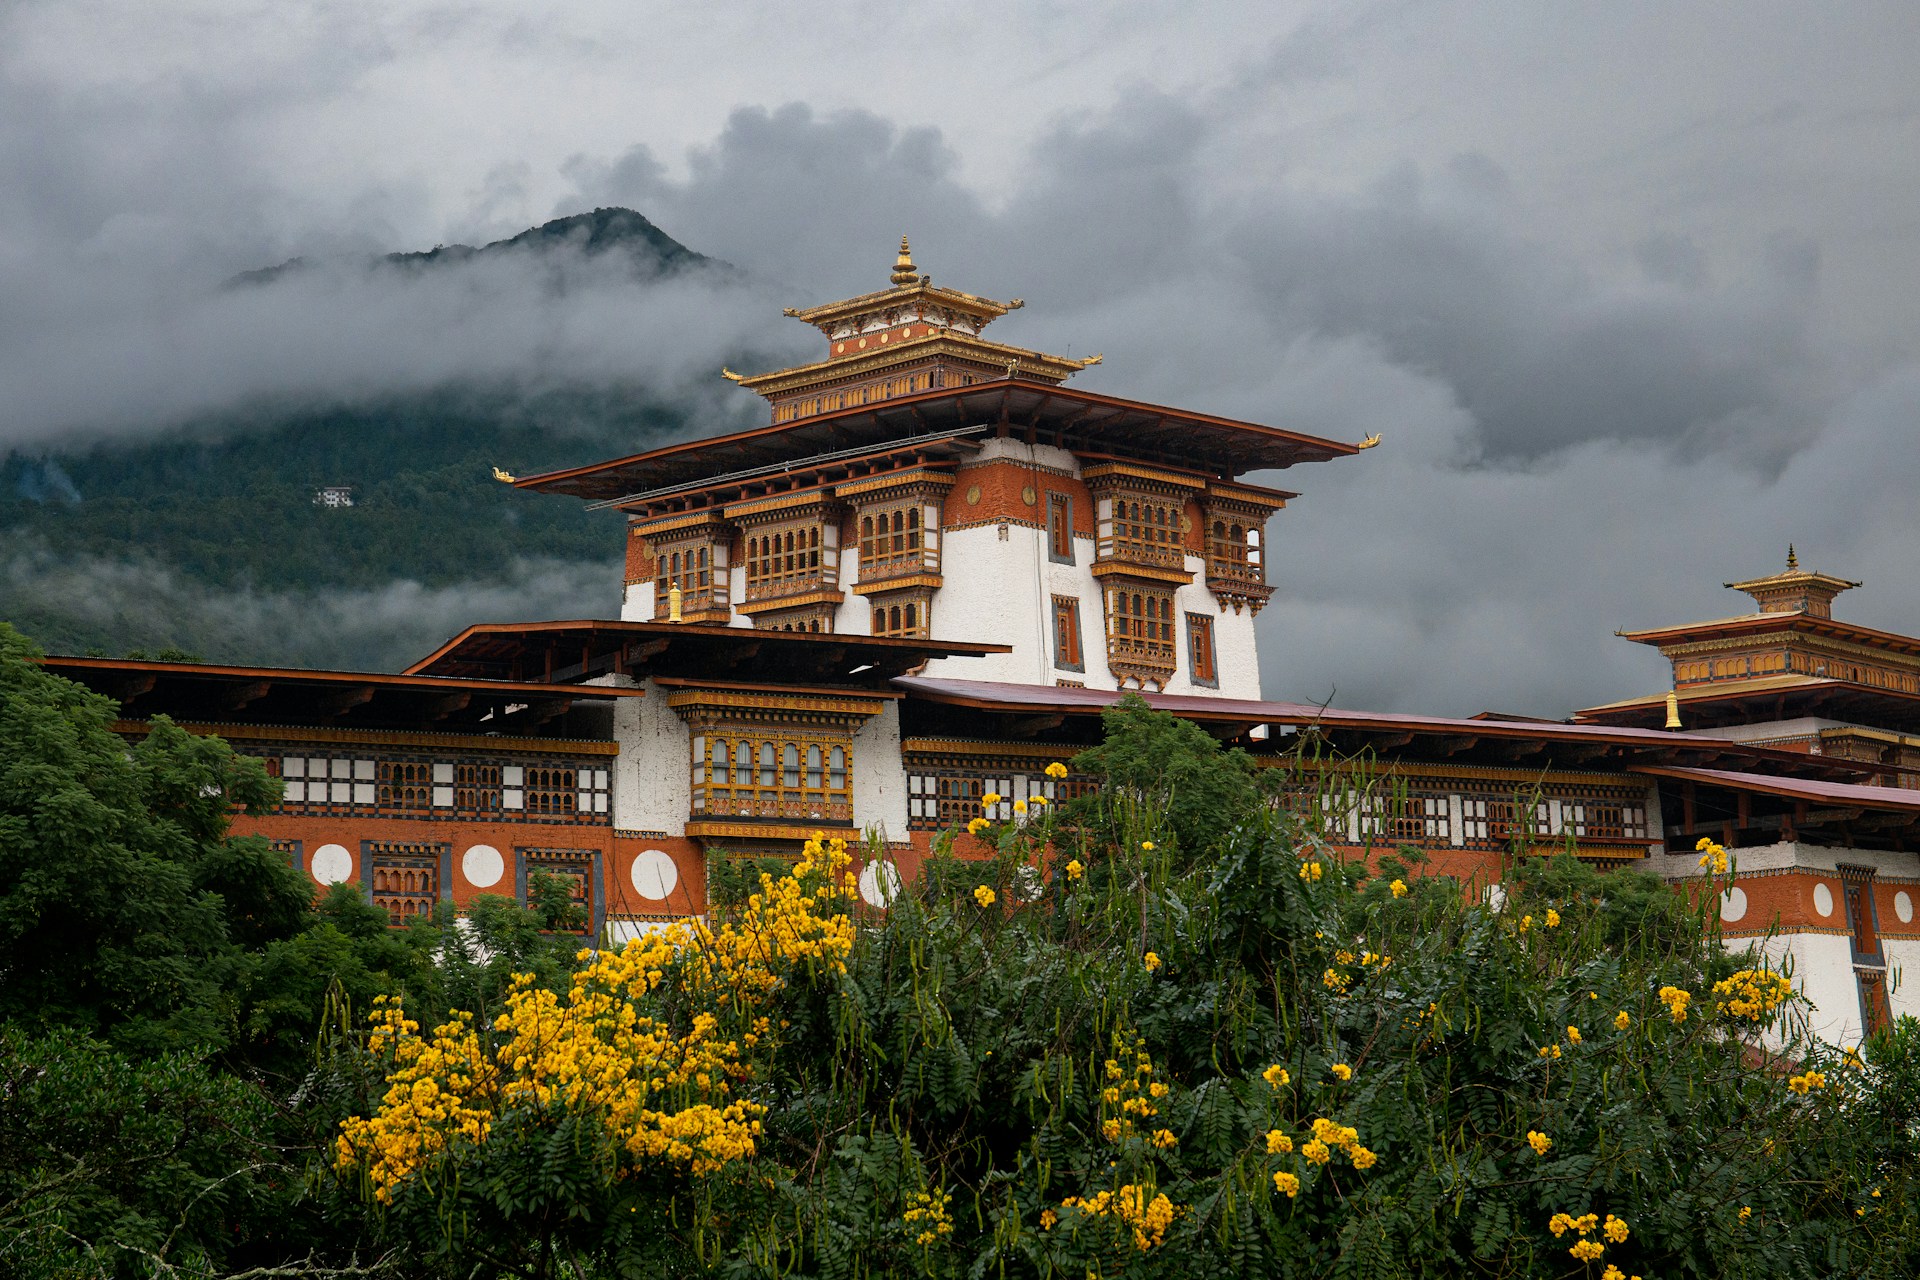
Architectural photography is not about capturing photos of just buildings, but also about capturing meaningful photographs of structures, their stories and sometimes closer photos of cityscapes as well. A lot of photographers consider it to be a boring genre or one that is used for real estate purposes but if you look closely and work with the best light conditions, while also using the right focal length, architectural photographs can be stunning and very interesting subjects for photography. These can also be combined with other genre like portraits, street, documentary, etc.
When it comes to architectural photography, it almost always involves geometry in it and using geometry in compositions can be a powerful way to capture compelling photographs. Architectural photography can be of both interior and exterior photographs of architecture and if you are new to architectural photography, learn how to capture better architectural photos with the resources listed below.
Photo by Wolfgang Staudt
When it comes to architectural photography, there are quite a lot of factors that need to be taken onto account. Depending on what you wish to shoot and the results you are looking to achieve, starting from the focal length used, you will need to take care of the aperture values, iso, shutter speed, stabilisation, the verticals and so on. This article discusses seven tips to capture perfect architectural photographs.
Photo by Hector Falcon
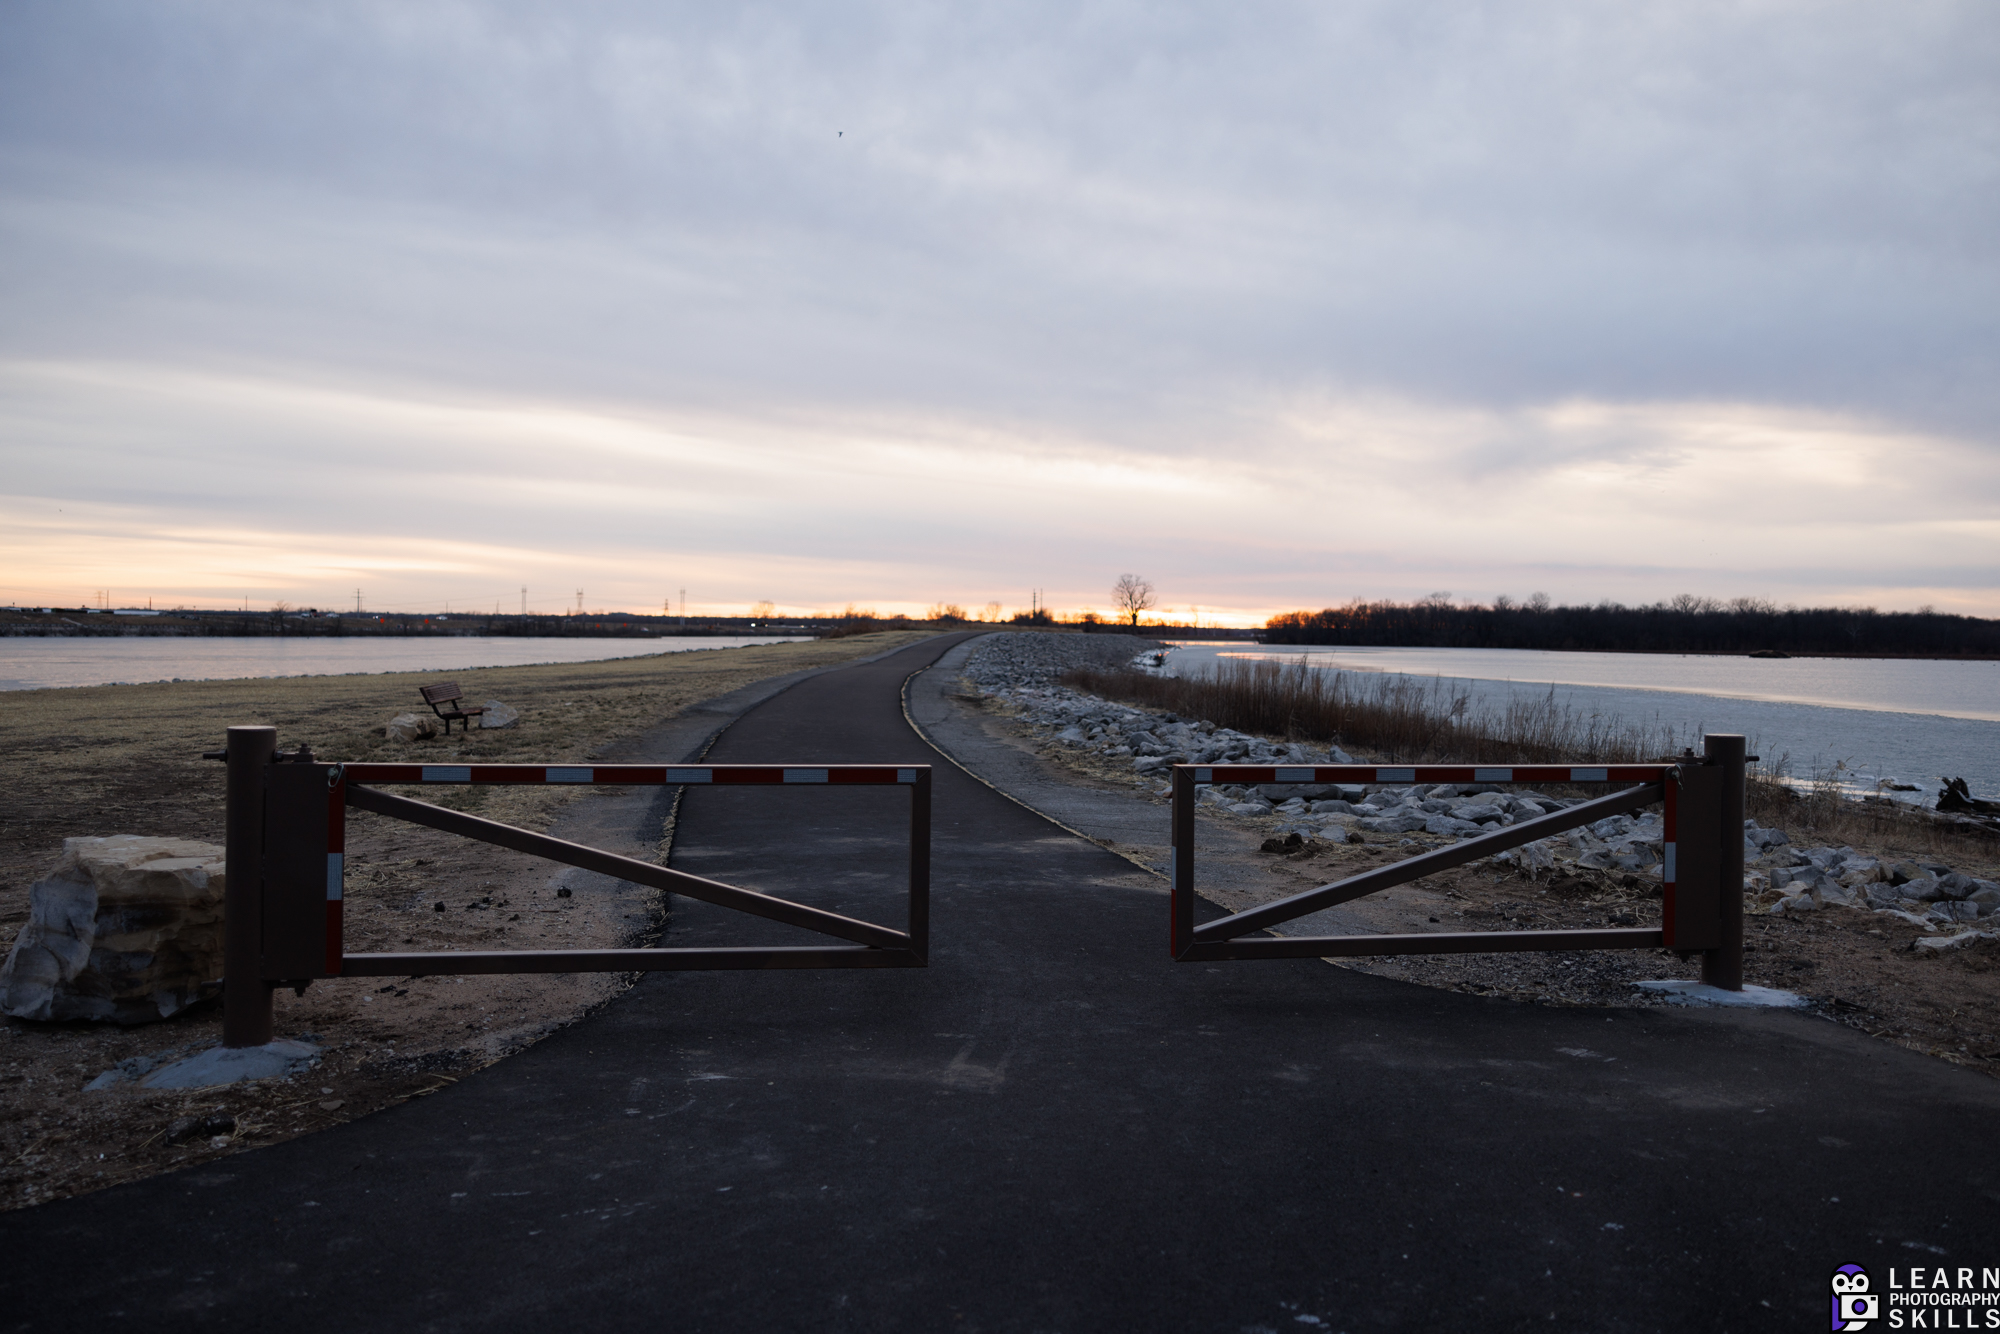
Outdoor architecture is one where the photographer captures the exteriors of an architectural structure, be it the entire structure or part of it. When capturing outdoor images of architectural structures, do not just point and shoot what is right in front of you or just capture the entire building and stop with that. Close observations under the right light conditions will reveal the intricate details and colours in architectural structures and this article talks about five things you need to consider when photographing outdoor architecture.
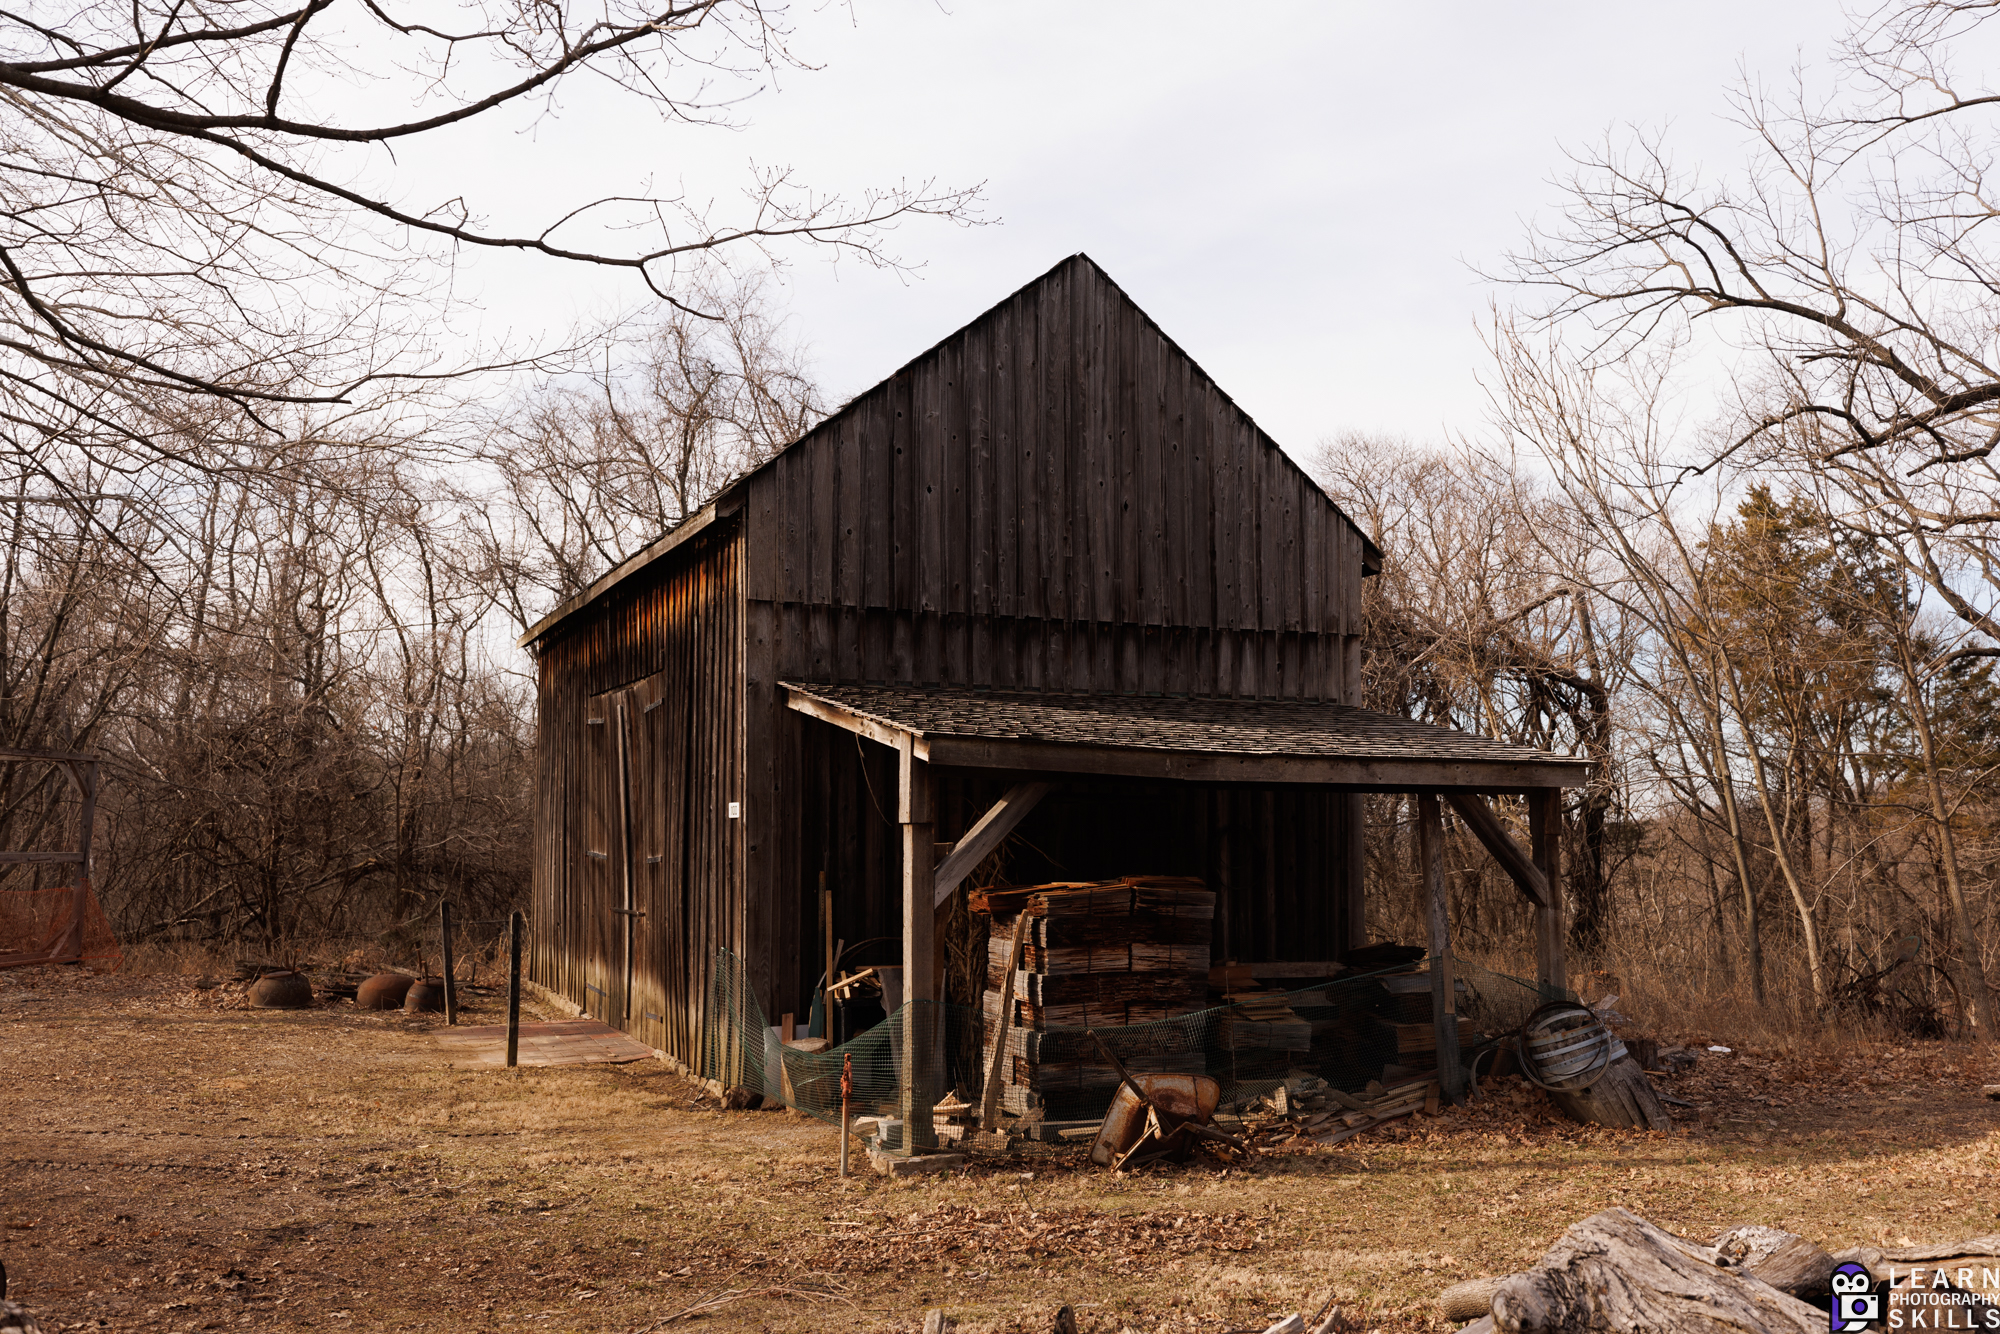
Old and new, contrast and juxtaposition are good architectural subjects. By Jason Row Photography
There was a time when photographers thought that architectural photographs could only be captured using a wide angle lens, because most photographers, even when closer to the structure, thought that the structure needs to be completely included in the frame. Architectural structures come with stunning details and colours – the patterns and the geometry can be very compelling and there are many ways in which a photographer can photograph a part of an architectural structure and this article discusses a few.
Photo by Ashim D’Silva
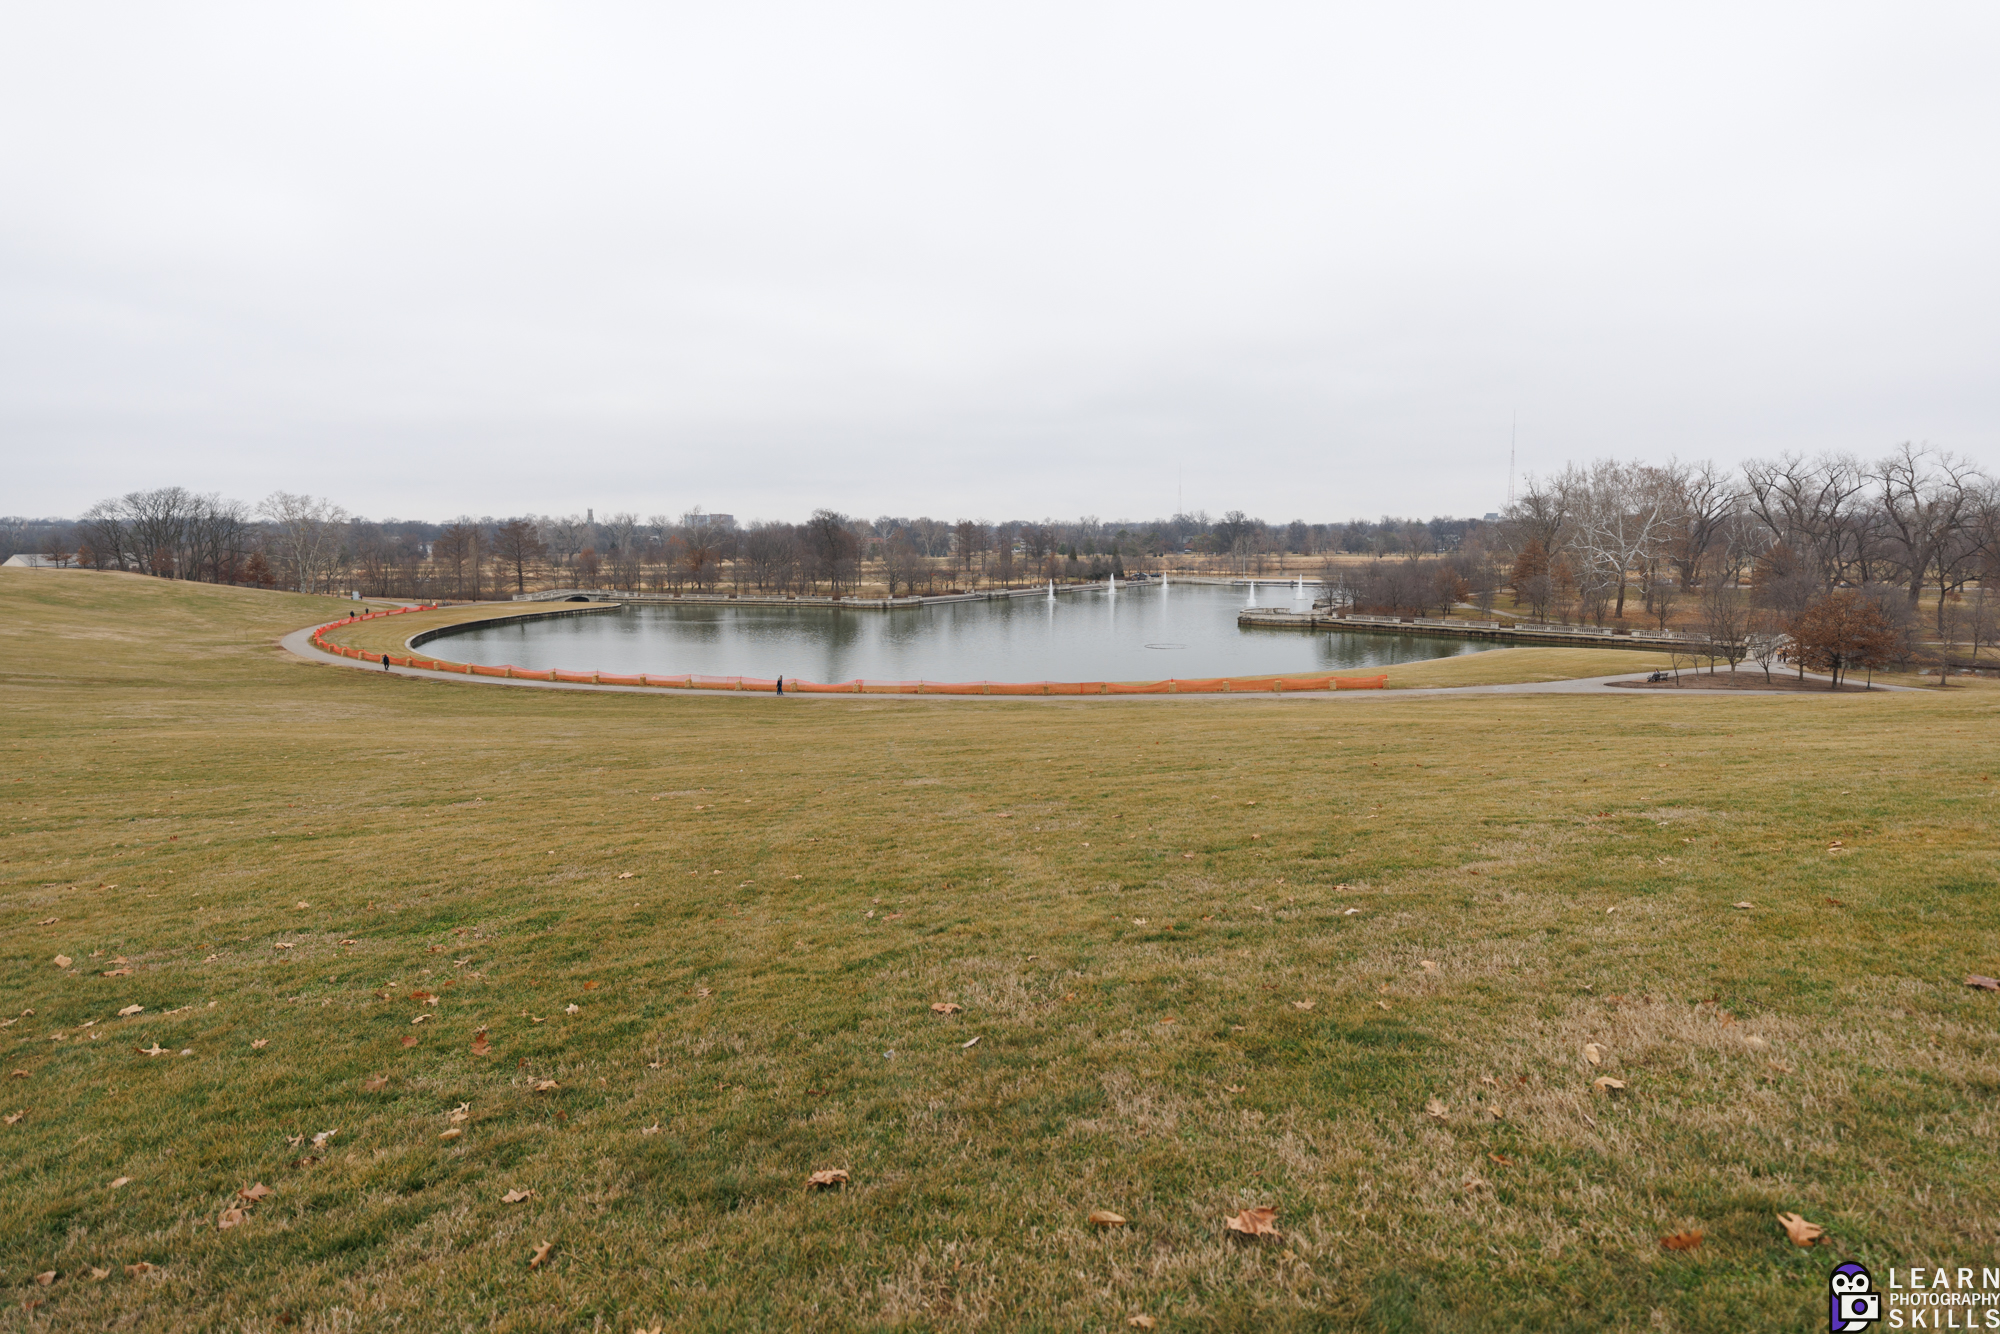
Landscape and nature photography are stunning and there are a ton of opportunities to photograph subjects in nature. The same applies for buildings that range from ancient historical structures, ruins, religious structures, cultural architecture to modern architecture. Architectural photography can also help the photographer slow down and learn to use the camera, especially if you are beginner as there are buildings and structures all around us. This article provides eight reasons why you should try architectural photography.
Photo by Germán Rodríguez
There are a multitude of religions across the world and they all have places of worship or other religious structures built for various purposes. Religious structures can look complicated both on the inside and the outside, but the intricate details are stunning to photograph, if taken time to observe and compose. This article shares some secrets to capture amazing religious architecture.
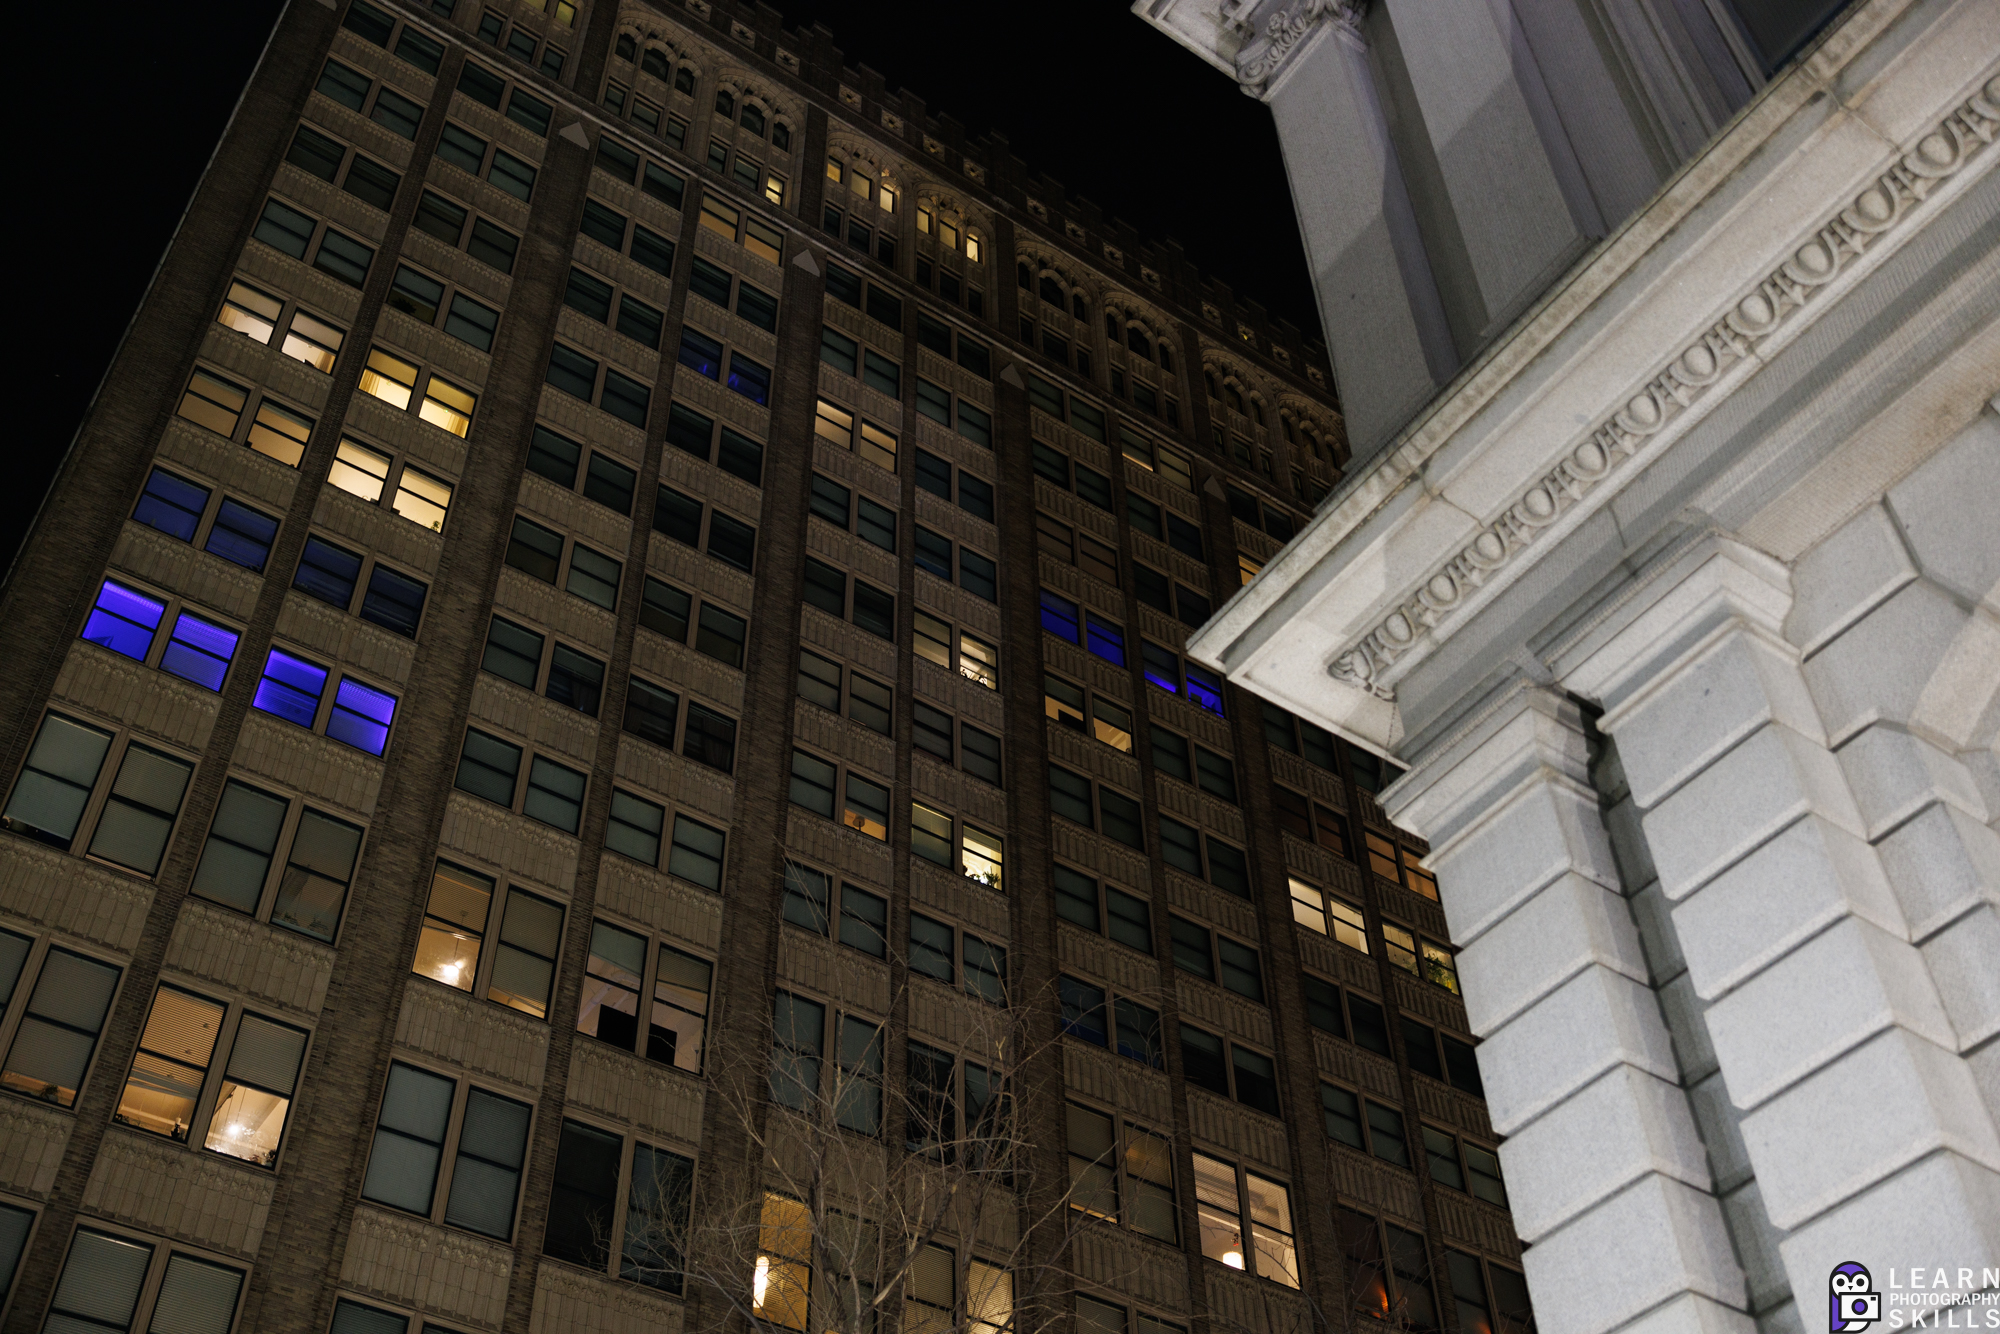
A four minute exposure using 16 stops of ND was enough to create movement in these slow moving clouds. By Jason Row Photography
Architectural subjects can be great for long exposure photography, where you have a powerful static subject which is your architectural structure, and then you can capture the movements around the structure, be it people, swaying trees in the wind, clouds, water, traffic light trails and so on. Capturing long exposure images of architecture can boost the visual impact of the frame itself and this article is a good guide to long exposure architectural photography.
Photo by Medhat Ayad
Whether you are a real estate photographer or someone interested in capturing the interiors of buildings and other structures, interior architectural photography brings out the character of a building, and shows what the great structures really look like on the inside. It can be quite tricky to capture interiors because of the limited light, sometimes also the limited or huge space inside and composition can also be quite tricky. This article provides some tips to capture indoor architecture easily.
If you are someone who is interested in black and white photography, architectural structures can be great subjects for black and white photography, if done well. Good light, tonal range, patterns or textures, composition, are some important factors to look out when shooting for black and white conversion. This article discusses the art of urban black and white photography.
Photo by William Warby
Converging verticals can be a problem in architectural photography and when shooting certain buildings and structures, it can look stunning and artistic for some buildings/structures but quite odd for the others. Architectural photographers most of the time try to get those verticals right, in order to get the best results. If you are looking for ways to get the verticals straight in your architectural images, check out this article that discusses a few tips.
There are religious architectural structures almost all around the world. When talking about religious structures or architecture, it includes churches, cathedrals, mosques, synagogues, temples, pagodas, monasteries, etc. Religious architectural photography is a bit complicated because the architecture itself can be very detailed both inside and out.
When capturing photos of religious places, one needs to compose carefully, make use of the available light and use the right camara settings and gear wisely in order to get the best results. A tripod will be of great help when shooting indoors and a wide angle or tilt-shift lens to get the entire building in the frame, or a moderate focal length to capture the architectural details.
Here are 24 religious architectural photos, that speak of their time and place.
Architectural photographs are great subjects for black and white photography. It is advised to not shoot directly in black and white, but to capture the colours in raw format and then convert it to black and white when post processing. There is more to converting an image to black and white, than just dragging the saturation slider all the way down to the negative end. If you wish to produce dynamic black and white images, check out this eBook, “Better Black And White” by Photzy, that will teach you how to properly convert a colour file to a black and white image.
Jure Tufekcic
Sonia Dauer
Manasa Putnala
Fernando Lavin
Roozbeh Eslami
Danylo Istominov
Andy Bridge
Miguel Baixauli
When capturing an image for black and white conversion, you will need to decide when photographing the structure itself, whether the image will work well in black and white. Good light and tonal range in the image is very important. Contrasting colours do not always convert to contrasting tones in black and white. If you are starting out in black and white photography, check out this eBook, “Better Black And White” by Photzy, which is a practical follow along guide that will help you to create compelling black and white shots every time.
Ricardo Gomez Angel
Jason An
Pond Gotishatiankul
Siborey Sean
Mich Stella
Benjamin Merkle
Raul Taciu
Sanjar Ganiev
When you are out in the field, depending on the light and the colours that are right in front of you, you should be able to decide whether a shot will work great in black and white. Learning how to look in black and white will greatly help and there are also a few post-processing tricks that will help you get the best results. If you wish to take your black and white photography seriously, check out this eBook, “Better Black And White” by Photzy, to understand tone, contrast and master black and white photography.
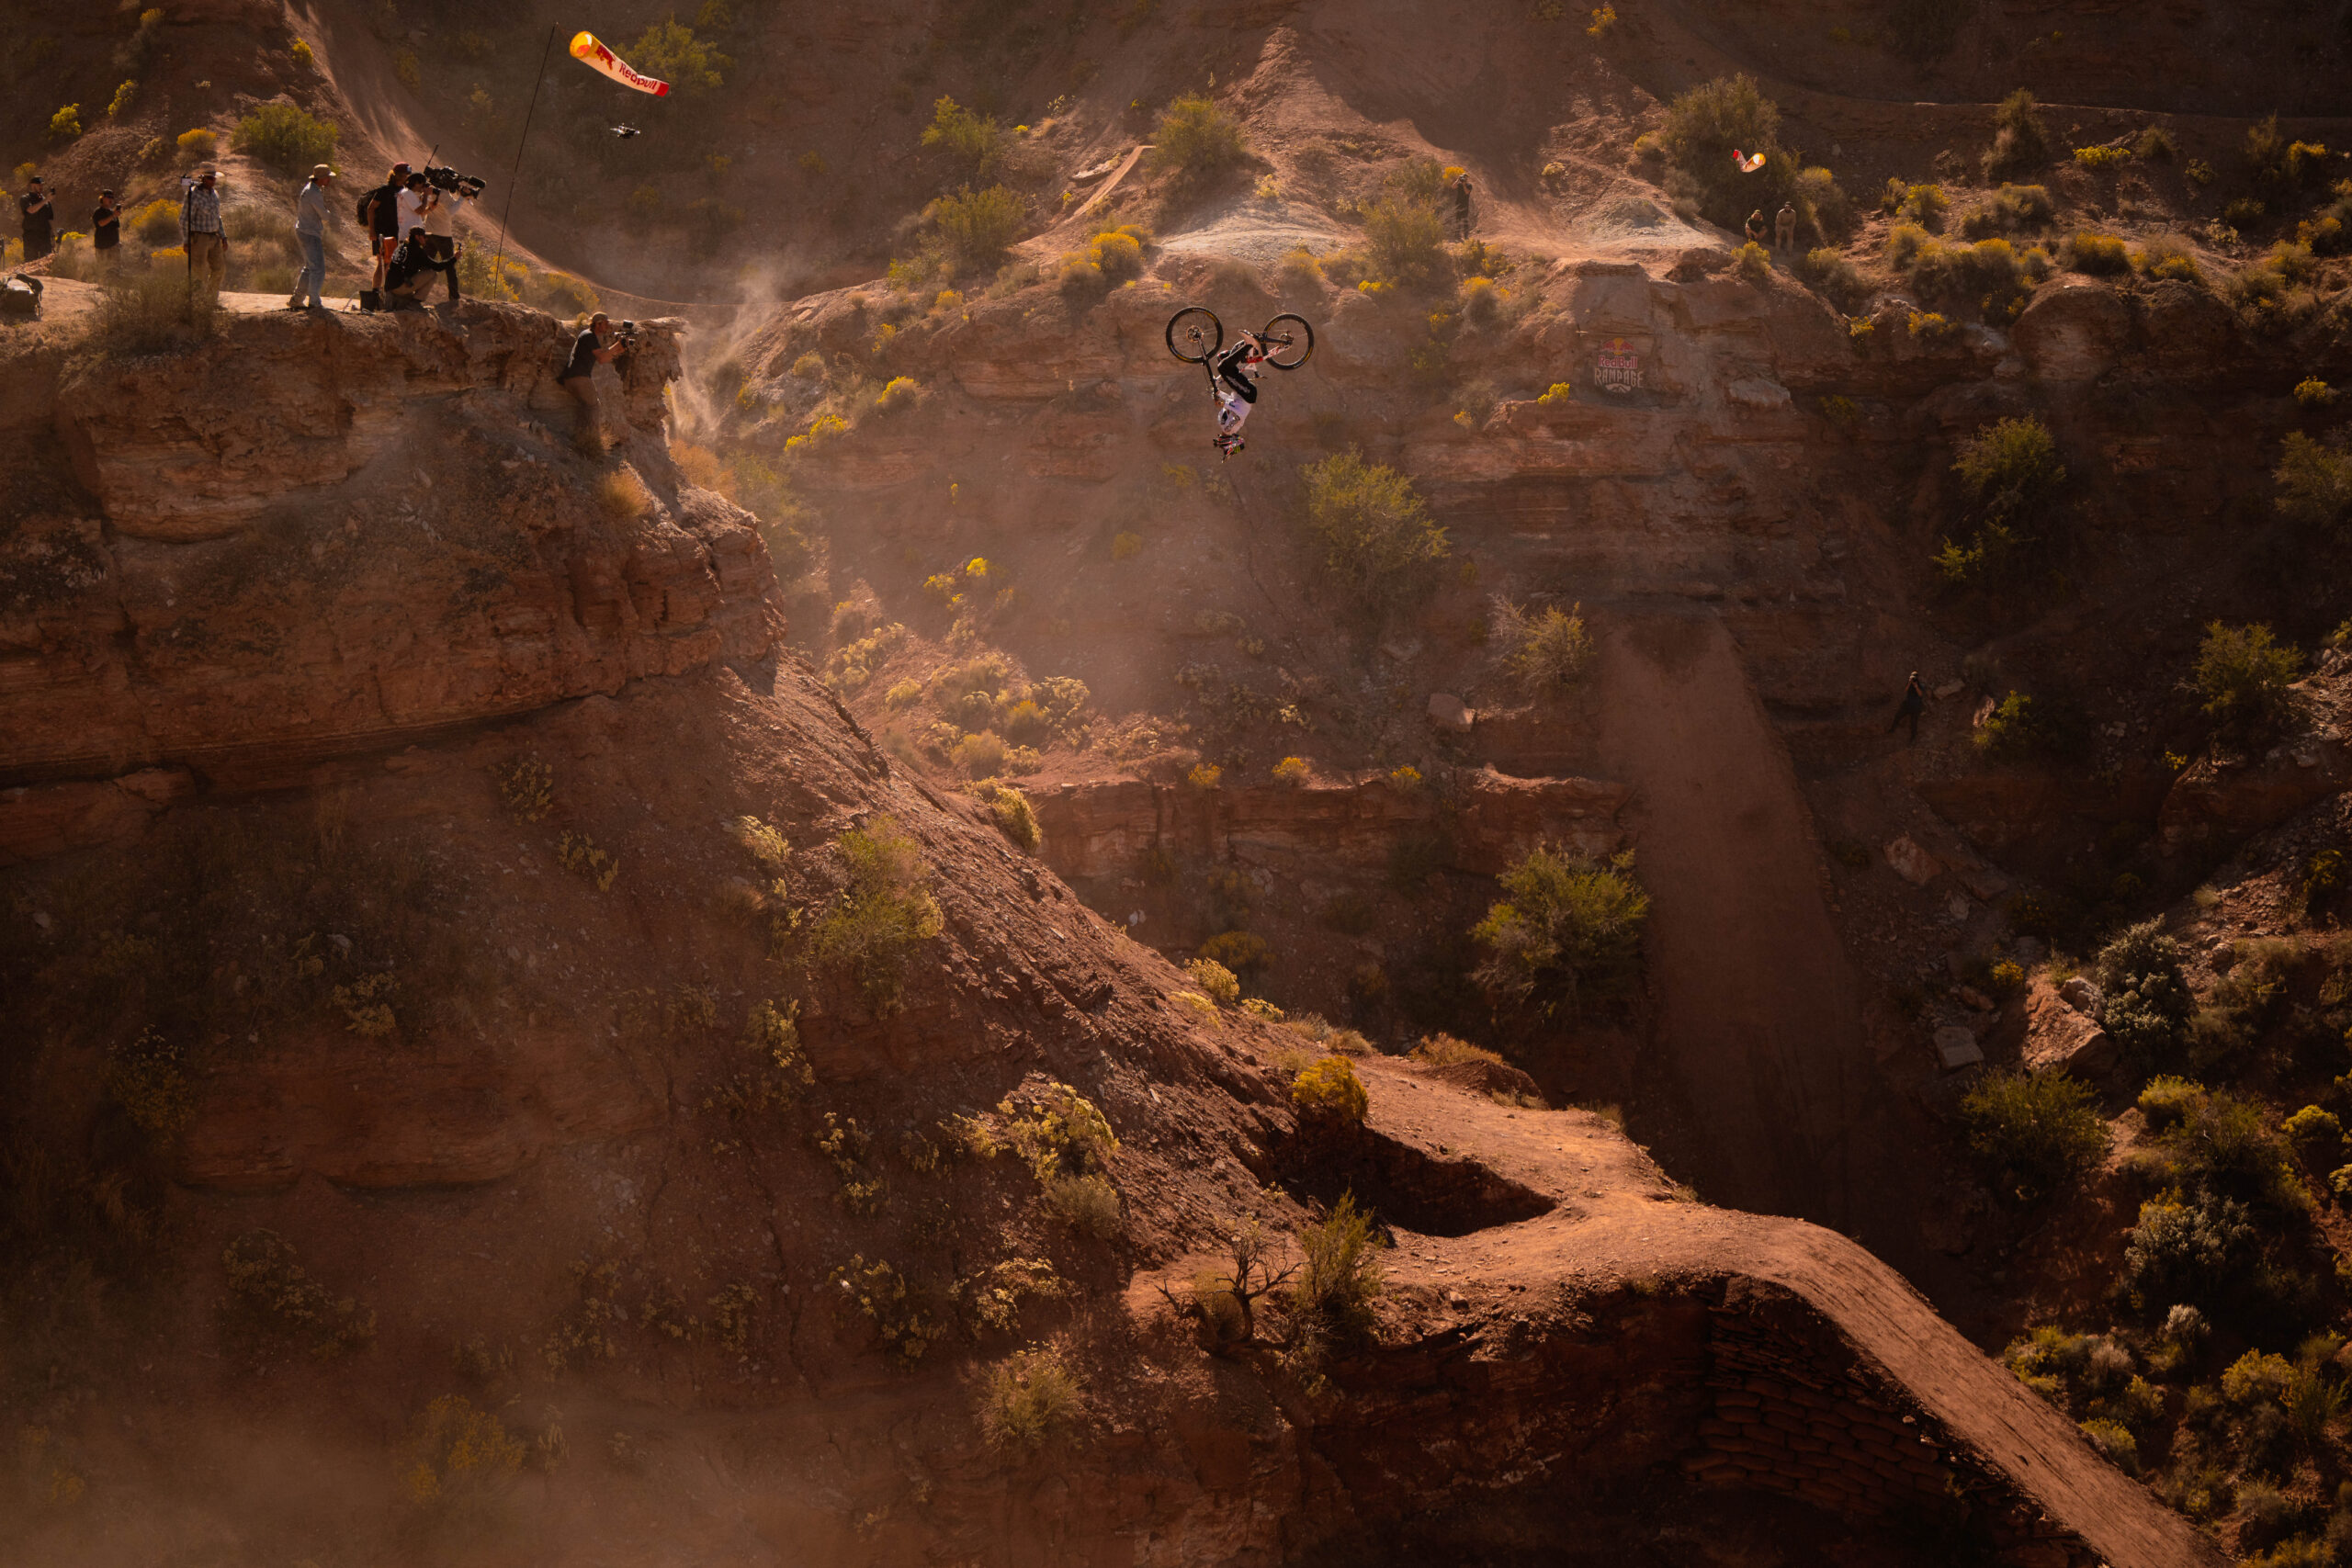
Heidi: Graham Agassiz said that even early on, you “always know where to be … you’re never getting in the way or calling out tricks” — how do you develop that sense of timing and positioning in these high-risk environments? Paris: Developing a sense of positioning and not being in the way is really just being very observant and listening to riders. Staying in the shadows a bit, but having ears and eyes on what’s going on, which can sometimes be a lot of different things at once.
How much do you choreograph vs. adapt in real time? In other words, do you visualize every shot beforehand? A lot is happening live so it really depends on where the light is and people are riding. But that said, there are shots I like to scout ahead of time before event day and have a good plan to where to go and what lens I should be using so I can make a switch while I am on the fly during the event. But most of the time it’s adapting in real time, which goes back to being very observational to calculate what’s going on and where.
Tell me about a shot you didn’t get — what went wrong? The worst miss was watching Brandon Semenuk on his winning run tailwhip off a massive drop which was a crazy move at the time with my own eyes and not from my camera. It was really dejecting as I was blind to the action, meaning I could not see him coming up to the drop and there was a delay that the announcers didn’t make clear he was on course. He just came off the drop and I was like “F*** missed that one”
You have spent nearly 10 years perched on these cliffs — hiking 10+ miles a day, carrying 50-lb camera bags, working sunup to sundown. What keeps you going through that physical grind, and how do you maintain creative energy under those conditions – other than the endless quest for the 1 in a million shot? It takes a lot out of you shooting the event, we are on site for about a 12-hour day and then still have to edit images for another 2+ so maintaining and keeping energy is really important. Especially during event day it can be really hot out and no break, so just managing water intake and food is super crucial. I generally am in the gym a lot leading up to the event to maintain a solid amount of fitness to be able to withstand the physical demand.
What changes have you seen in how you approach your craft — from planning, gear, or mindset — and can you point to a moment when your style or process noticeably shifted? I’ve gotten more efficient over the years but also it still is very much the same madness in the 12 years I’ve photographed the event. Just more tuned into what riders are doing and what kind of images I am looking for. I’ve also started running lighter and more minimal gear kits, knowing what I need to go into it and don’t have to carry as much heavy gear around.
With more conversations now about including women in high-stakes freeride events (e.g. Red Bull’s “Formation” as a step toward women’s representation) — how do you see your role (as a visual storyteller) in supporting or driving that inclusion, and how has your approach to photographing women in these environments evolved over time? I was lucky enough to photograph the first Formation event in 2019 which was awesome to be apart of at the time and witness their talents. With the full on Rampage event now for women I’ve been trying to showcase how gnarly some of the features are they are riding now that no other male riders even would touch back in 2015 when they were at the same venue which is really awesome to see.
How do you approach “landscape-first” compositions in Rampage settings — balancing epic environments with intense human action — and how has that balance shifted over the years? Rampage is so expansive and has massive terrain that needs to be showcased in a certain way to really do justice to the scale of the action. There’s times where a tighter trick shot off a jump is important but also a wider landscape style to show the sheer scale of what they’re riding down.
You’ve lived in Bellingham, WA for a while now, and you also fly airplanes, snowboard, explore wilderness. How do your off-mountain passions (flying, snowboarding, exploring) inform your perspective and instincts when you’re shooting in extreme mountain terrain at Rampage? I do a lot outside of just shooting and really love being in the mountains doing the sports I enjoy photographing. Flying for me as well has been an outlet for my own “thing” that is unique and extremely passionate about doing. Snowboarding really helps me think about Rampage a bit mainly just seeing photos from Blatt and other snowboard photographers approach to shooting big mountain terrain to apply that into a Rampage environment.
We’re happy to announce the winner of September’s competition, “The Beauty of Everyday Life.”
For those who don’t know, the Light Stalking Monthly Photography Competition carries a $100 People’s Choice Award and a $100 Overall Winner Award. The People’s Choice Winner is selected by a vote of the community, whereas our guest judge selects the overall winner.
The “Beauty of Everyday Life” Photo Contest
Capturing the beauty of everyday life is a priceless thing and it is one that helps the photographer to capture even the most ordinary moments of everyday life in a very beautiful and artistic way. This could be the little fleeting moments happening in the natural world around us, the little moments happening indoors at home or candid moments in public places.
Some ways in which the beauty of everyday life can be photographed are, finding and photographing beauty in moments that are often overlooked everyday, creatively using a particular type of light on a day because the Sun decided to peek out of the clouds at a certain time to illuminate a spot, capturing the daily life of humans, could be a hug or even a genuine smile or laughter, etc., or even capturing the intricate beauty or patterns in the subjects around us – both nature and manmade.
Participants of September’s contest cleverly submitted their interpretations of the theme that included moments from nature, moments in public and private places, their own candid moments and so on. The photos were all meaningful, portraying an interesting story.
When choosing the winning photos, we wanted to make sure that the decision process was based on a good interpretation of the theme, followed by other factors like light, composition, story, details, creative vision, etc. The results are entirely subjective and there are no losers in any competition as we all know.
Here are September’s Winners:
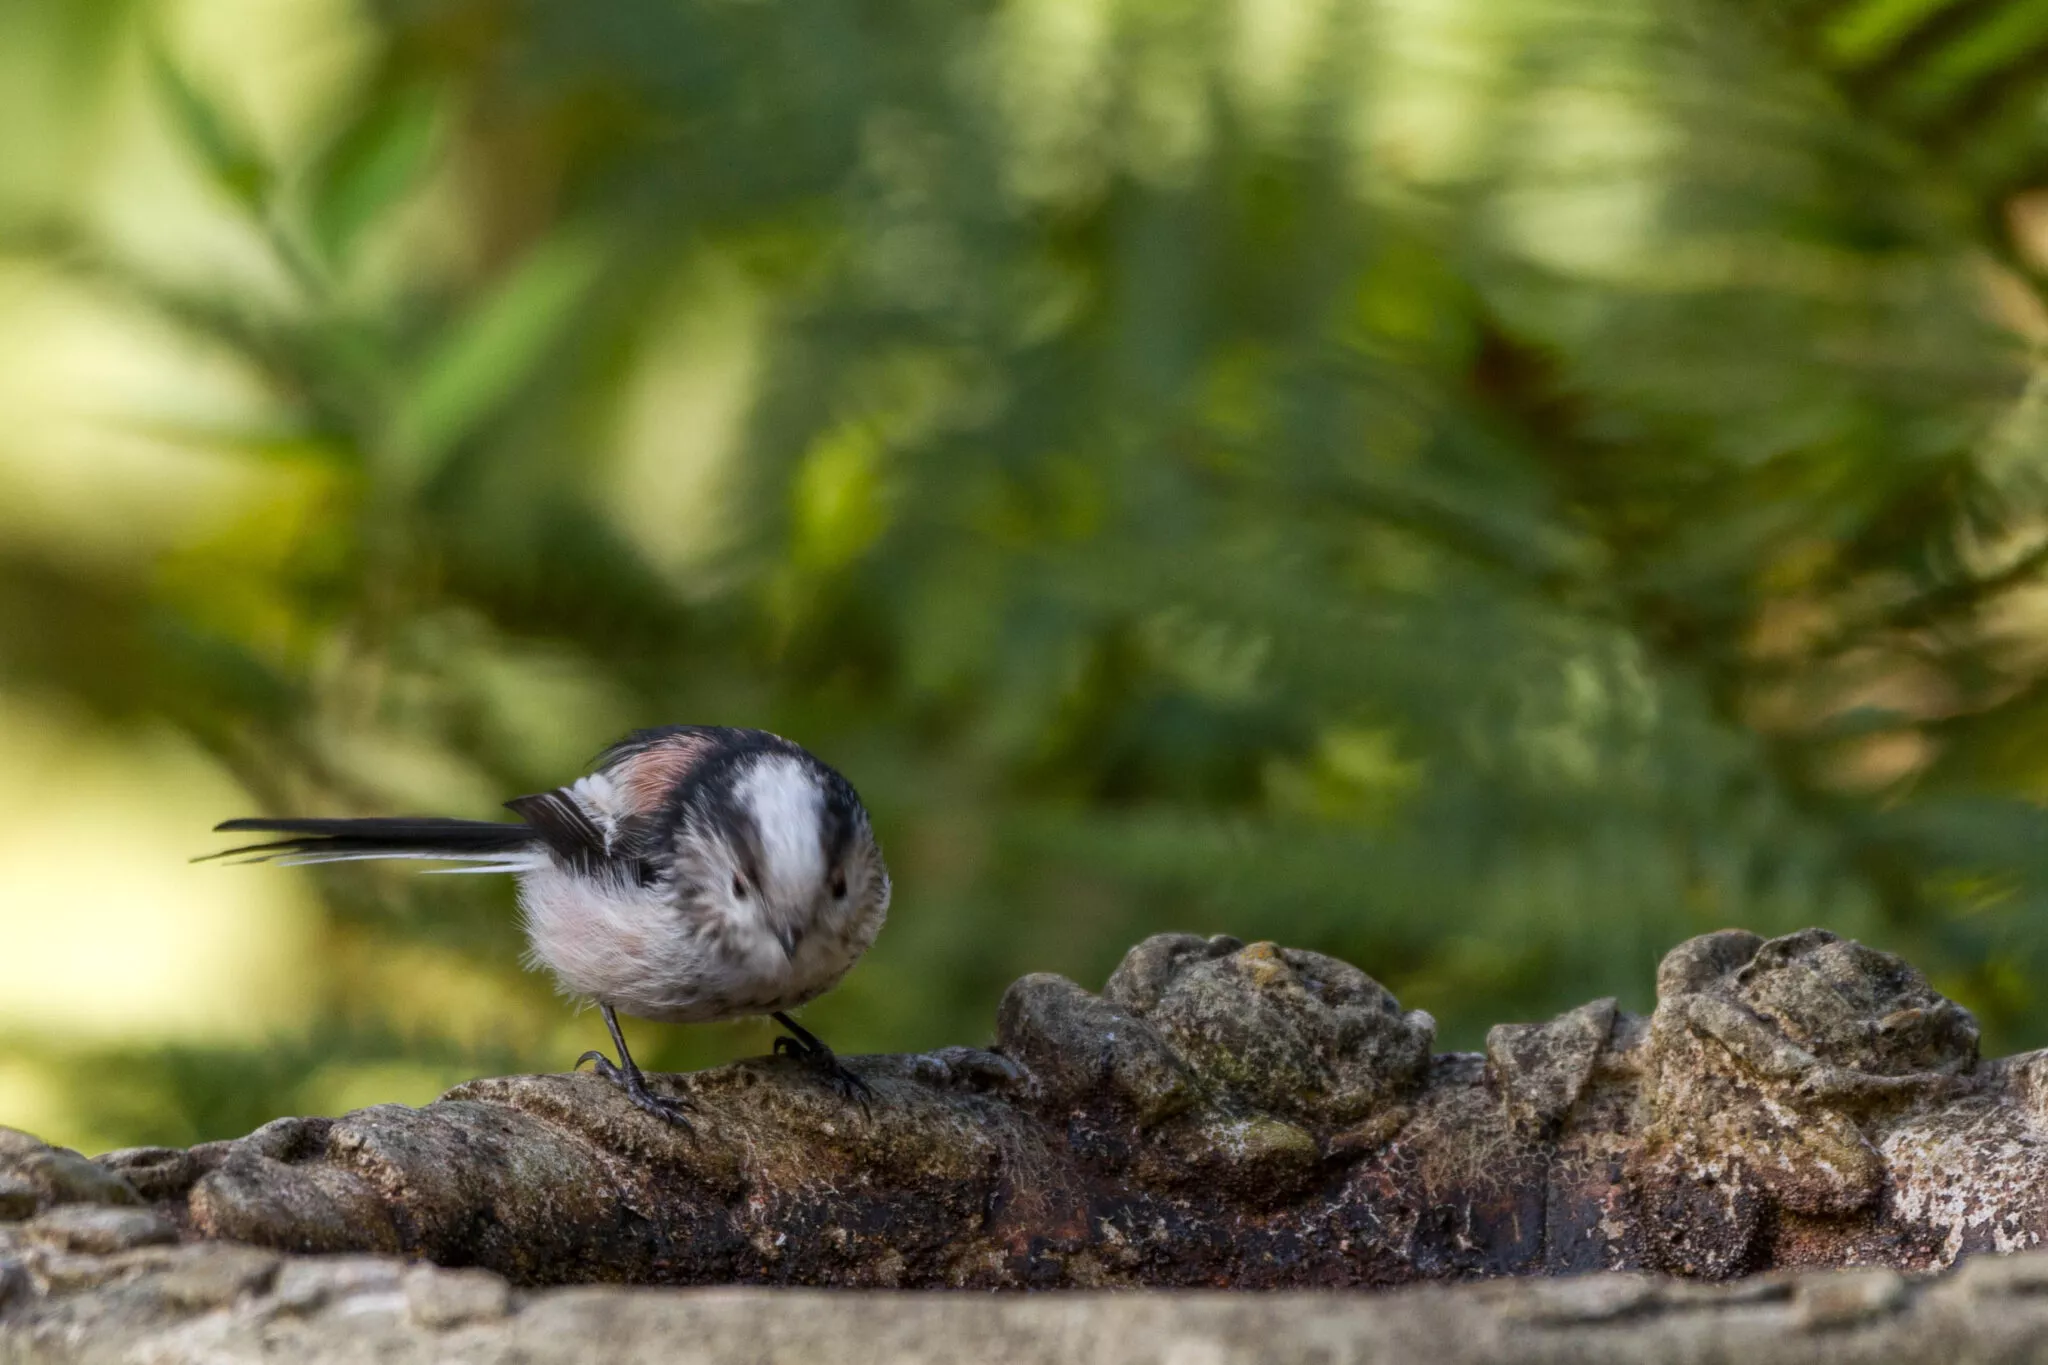
First Place: “Everyday on the birdbath” by Tersha
Copyright Tersha
Tersha’s photo of a little bird on the birdbath was a sweet moment captured and one that reminds us of the importance of looking after the wildlife around us. The head of the bird has a bit of motion blur, that shows the bird enjoying its time in the bath which may be its daily activity that it looks forward to (as the title says). Also, with the bird looking into the bath, it can make one very curious what the next moment will be.
The composition is also spot on with a simple rule of thirds and the background blurred to make the bird and the bath stand out. The golden light at the back also helps with a good contrast in the photo – the bright sun outside and the shadier area where the bird is enjoying its time at that particular moment.
Congratulations on capturing this beautiful photo and the win Tersha!
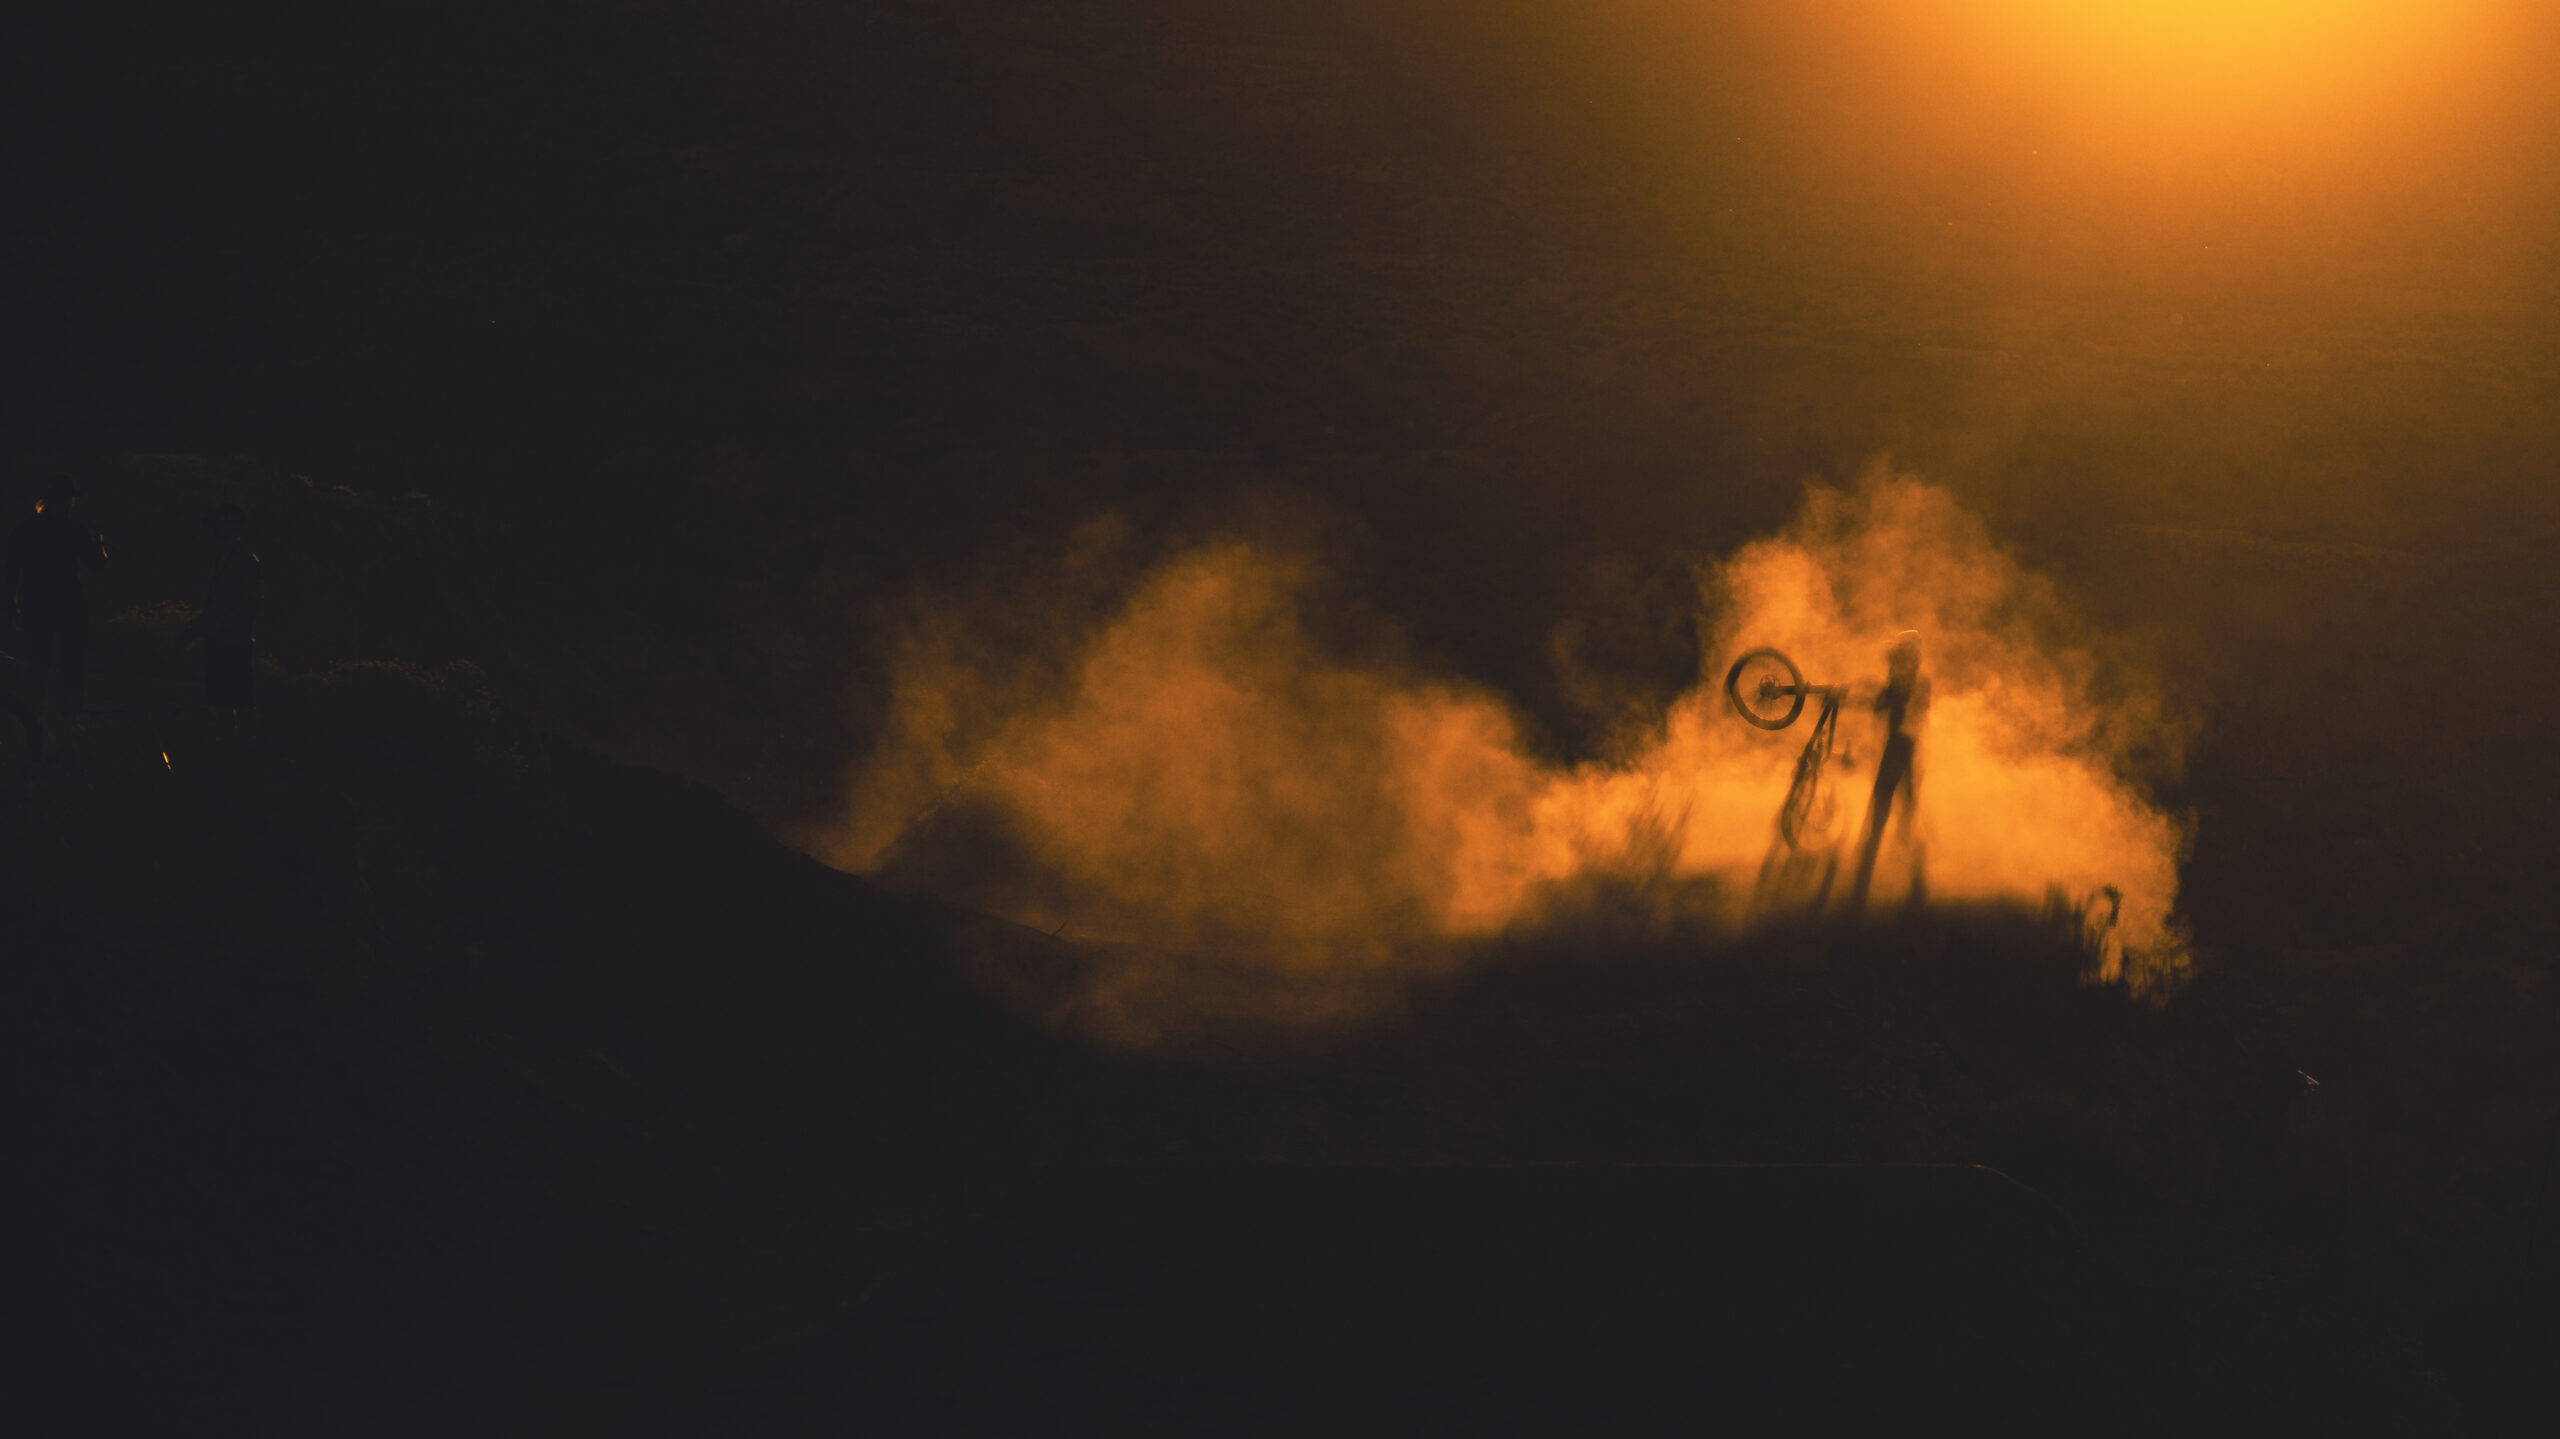
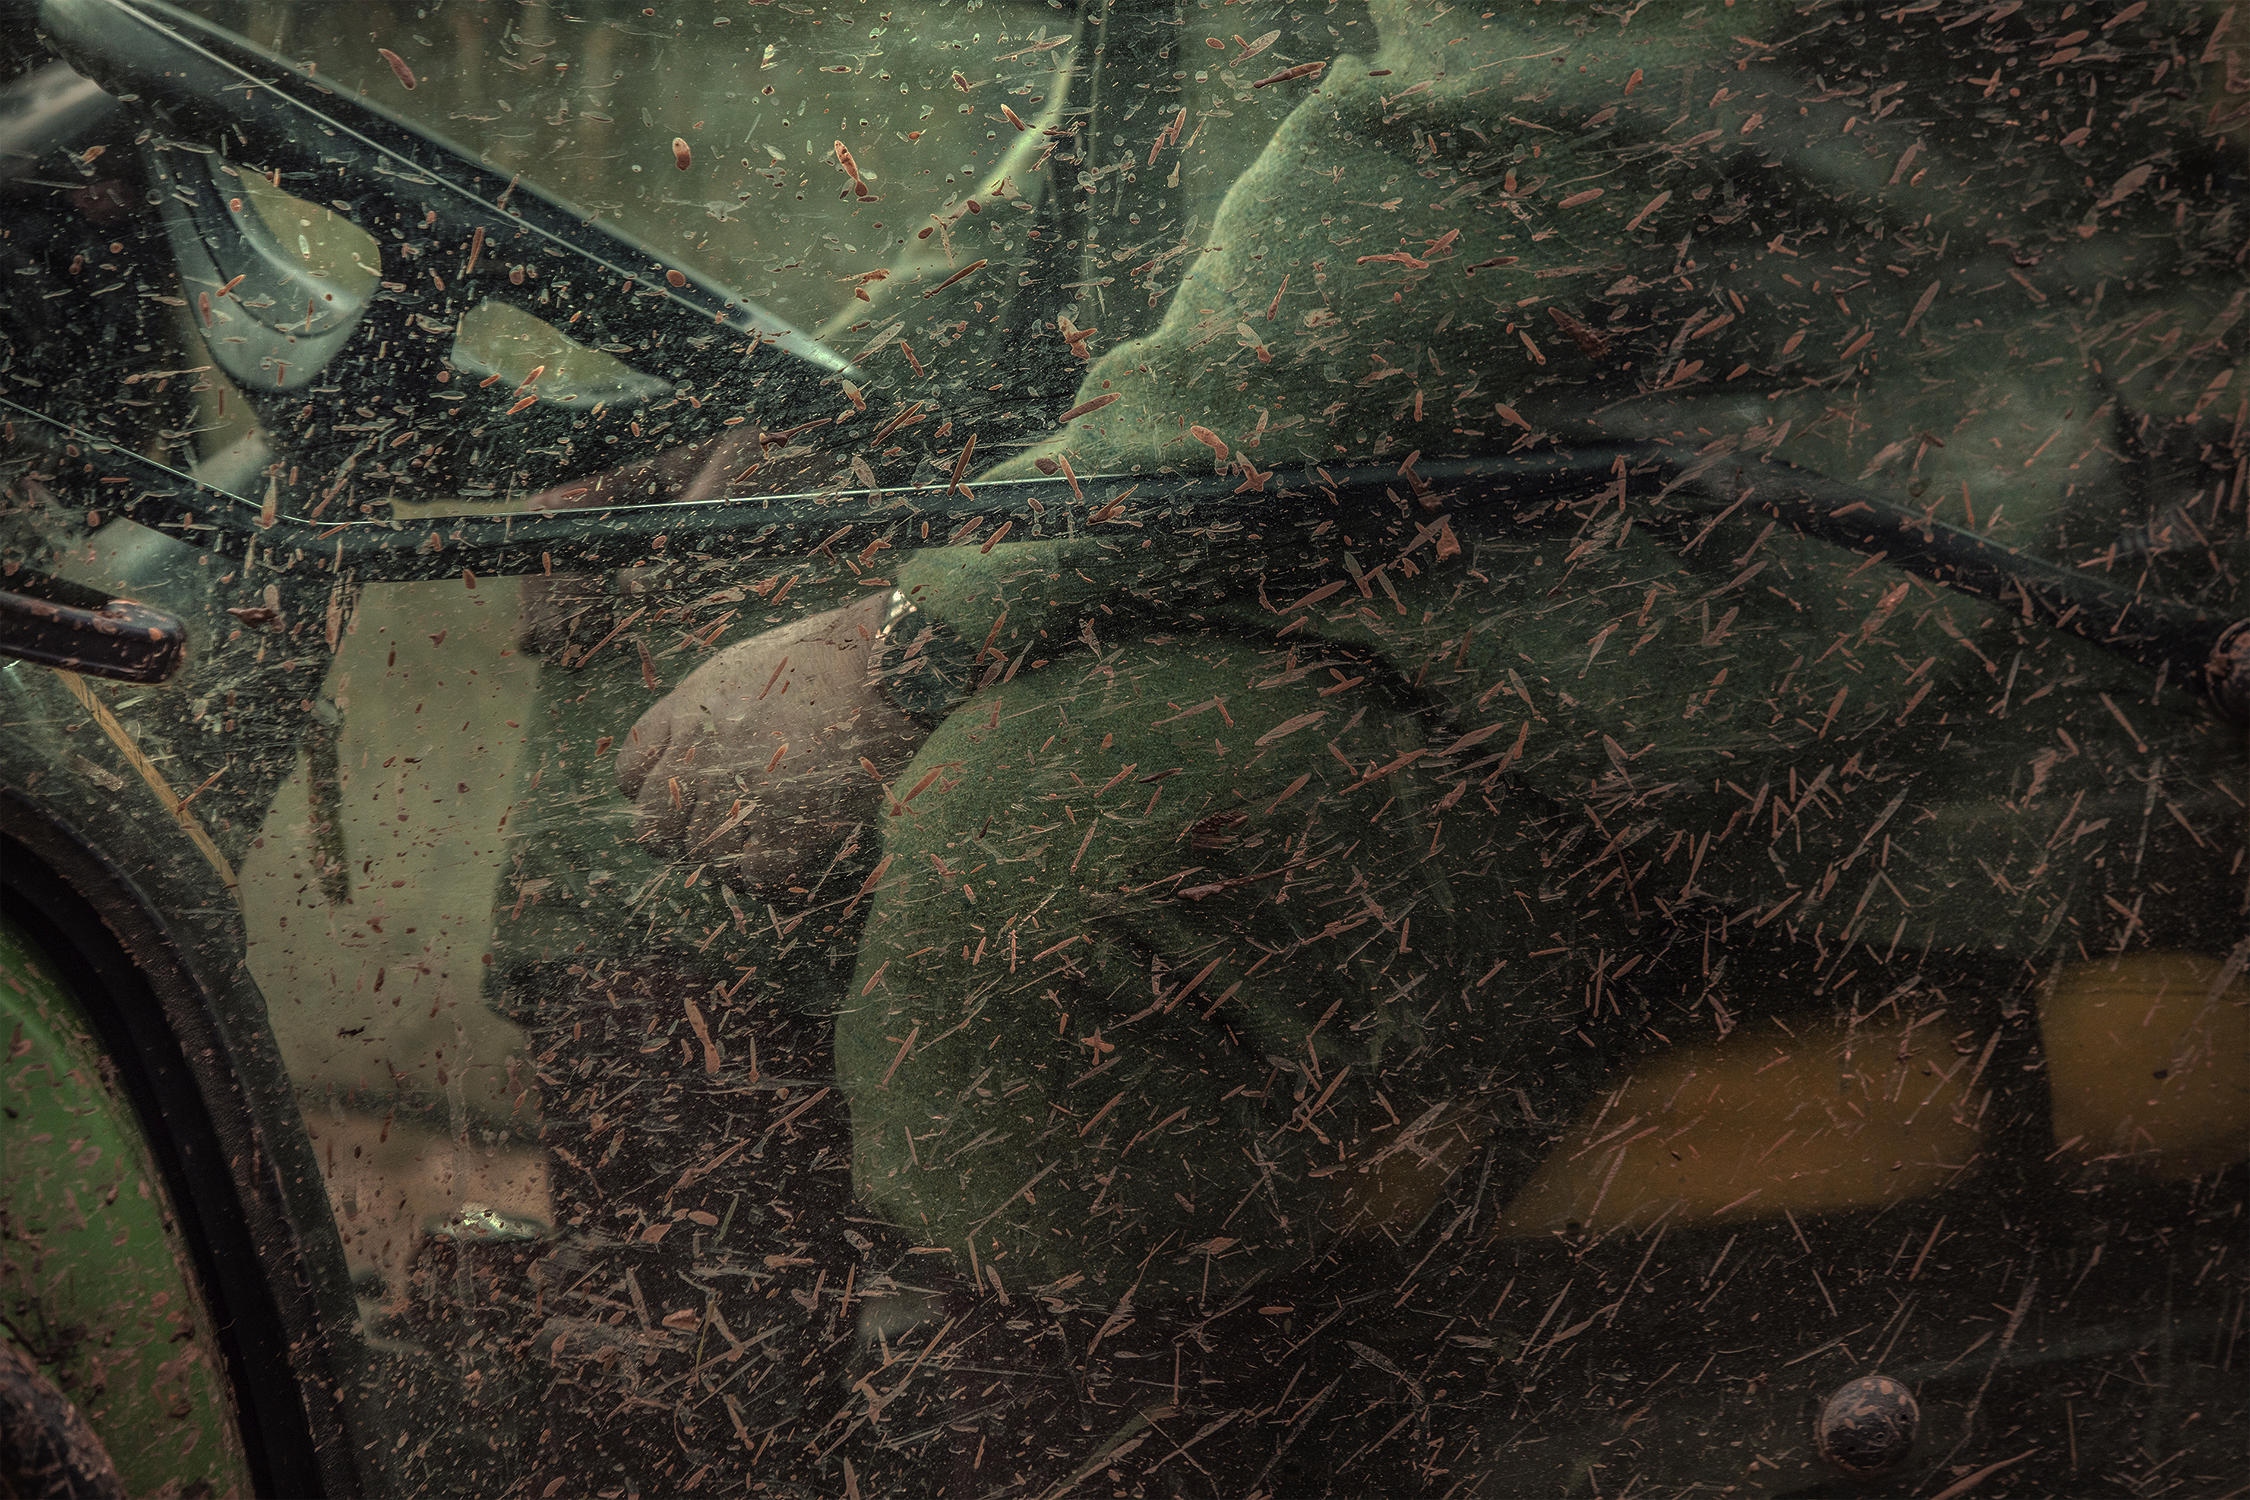
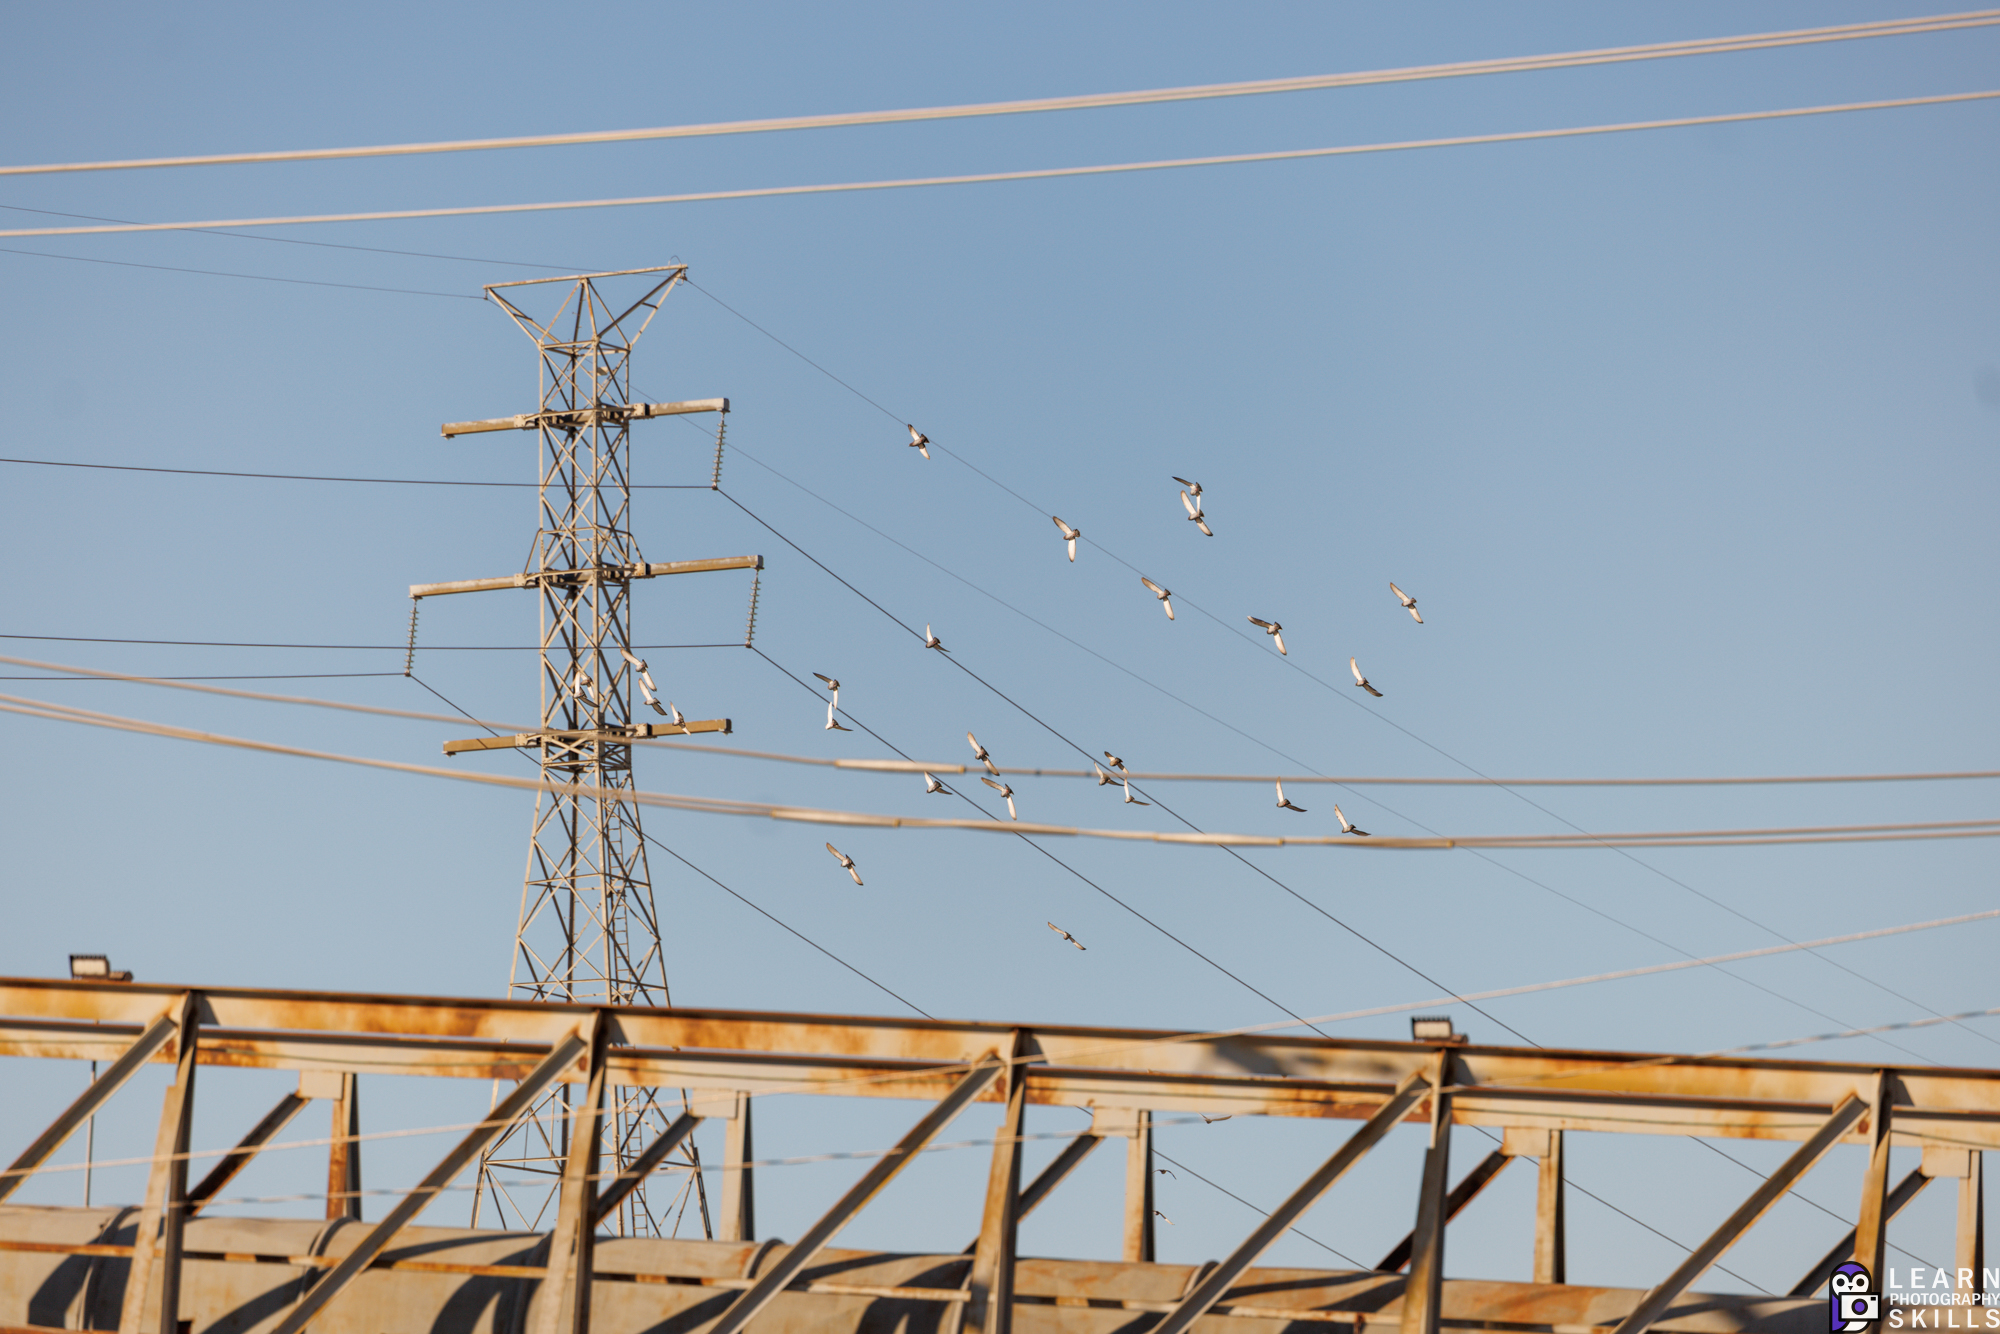
Second Place: “The ride” by Robert H
Copyright Robert H
This photo by Robert is a clever use of the golden ratio and Robert has captured the simple joys of everyday life beautifully in this photo. The light is quite hard and there must have been a lot of colours in the photo but Robert’s choice to convert it to black and white has helped focus the attention on the moment and to remove the harsh effects of the light itself.
Capturing the photo from the back has also introduced a kind of mystery and intrigue in the photo but at the same time complements the pattern of the seating area. Robert has made use of the right settings to freeze the moment and the details across the frame are tack sharp. Congratulations Robert on this beautifully captured image.
Third Place: “The Beauty of Everyday Life” by Patrick
Copyright Patrick
Patrick chose to submit a collage that showcases the beauty of his everyday life. I think this is a clever way to portray one’s own story, if you have the creativity and patience to do so. Looks like Patrick is working on a very creative project and has captured the “behind the scenes” of the process, himself working and also chilling and enjoying the process .
Presenting images in the form of a collage is not an easy one from an artistic point of view. The images need to work well together and they need to have some sort of connection in terms of story, theme, colours, etc. The images in Patrick’s collage look great with perfect range of tones while also telling us a bit about his everyday life. This is a very clever submission Patrick and congratulations!
People’s Choice Award Winner
Our monthly photo contests also come with a People’s Choice Award. The winner of this part of the contest receives $100 worth of store credit on Light Stalking which they can spend as they please on our blueprints, drills, courses or Presets.
Copyright Patrick
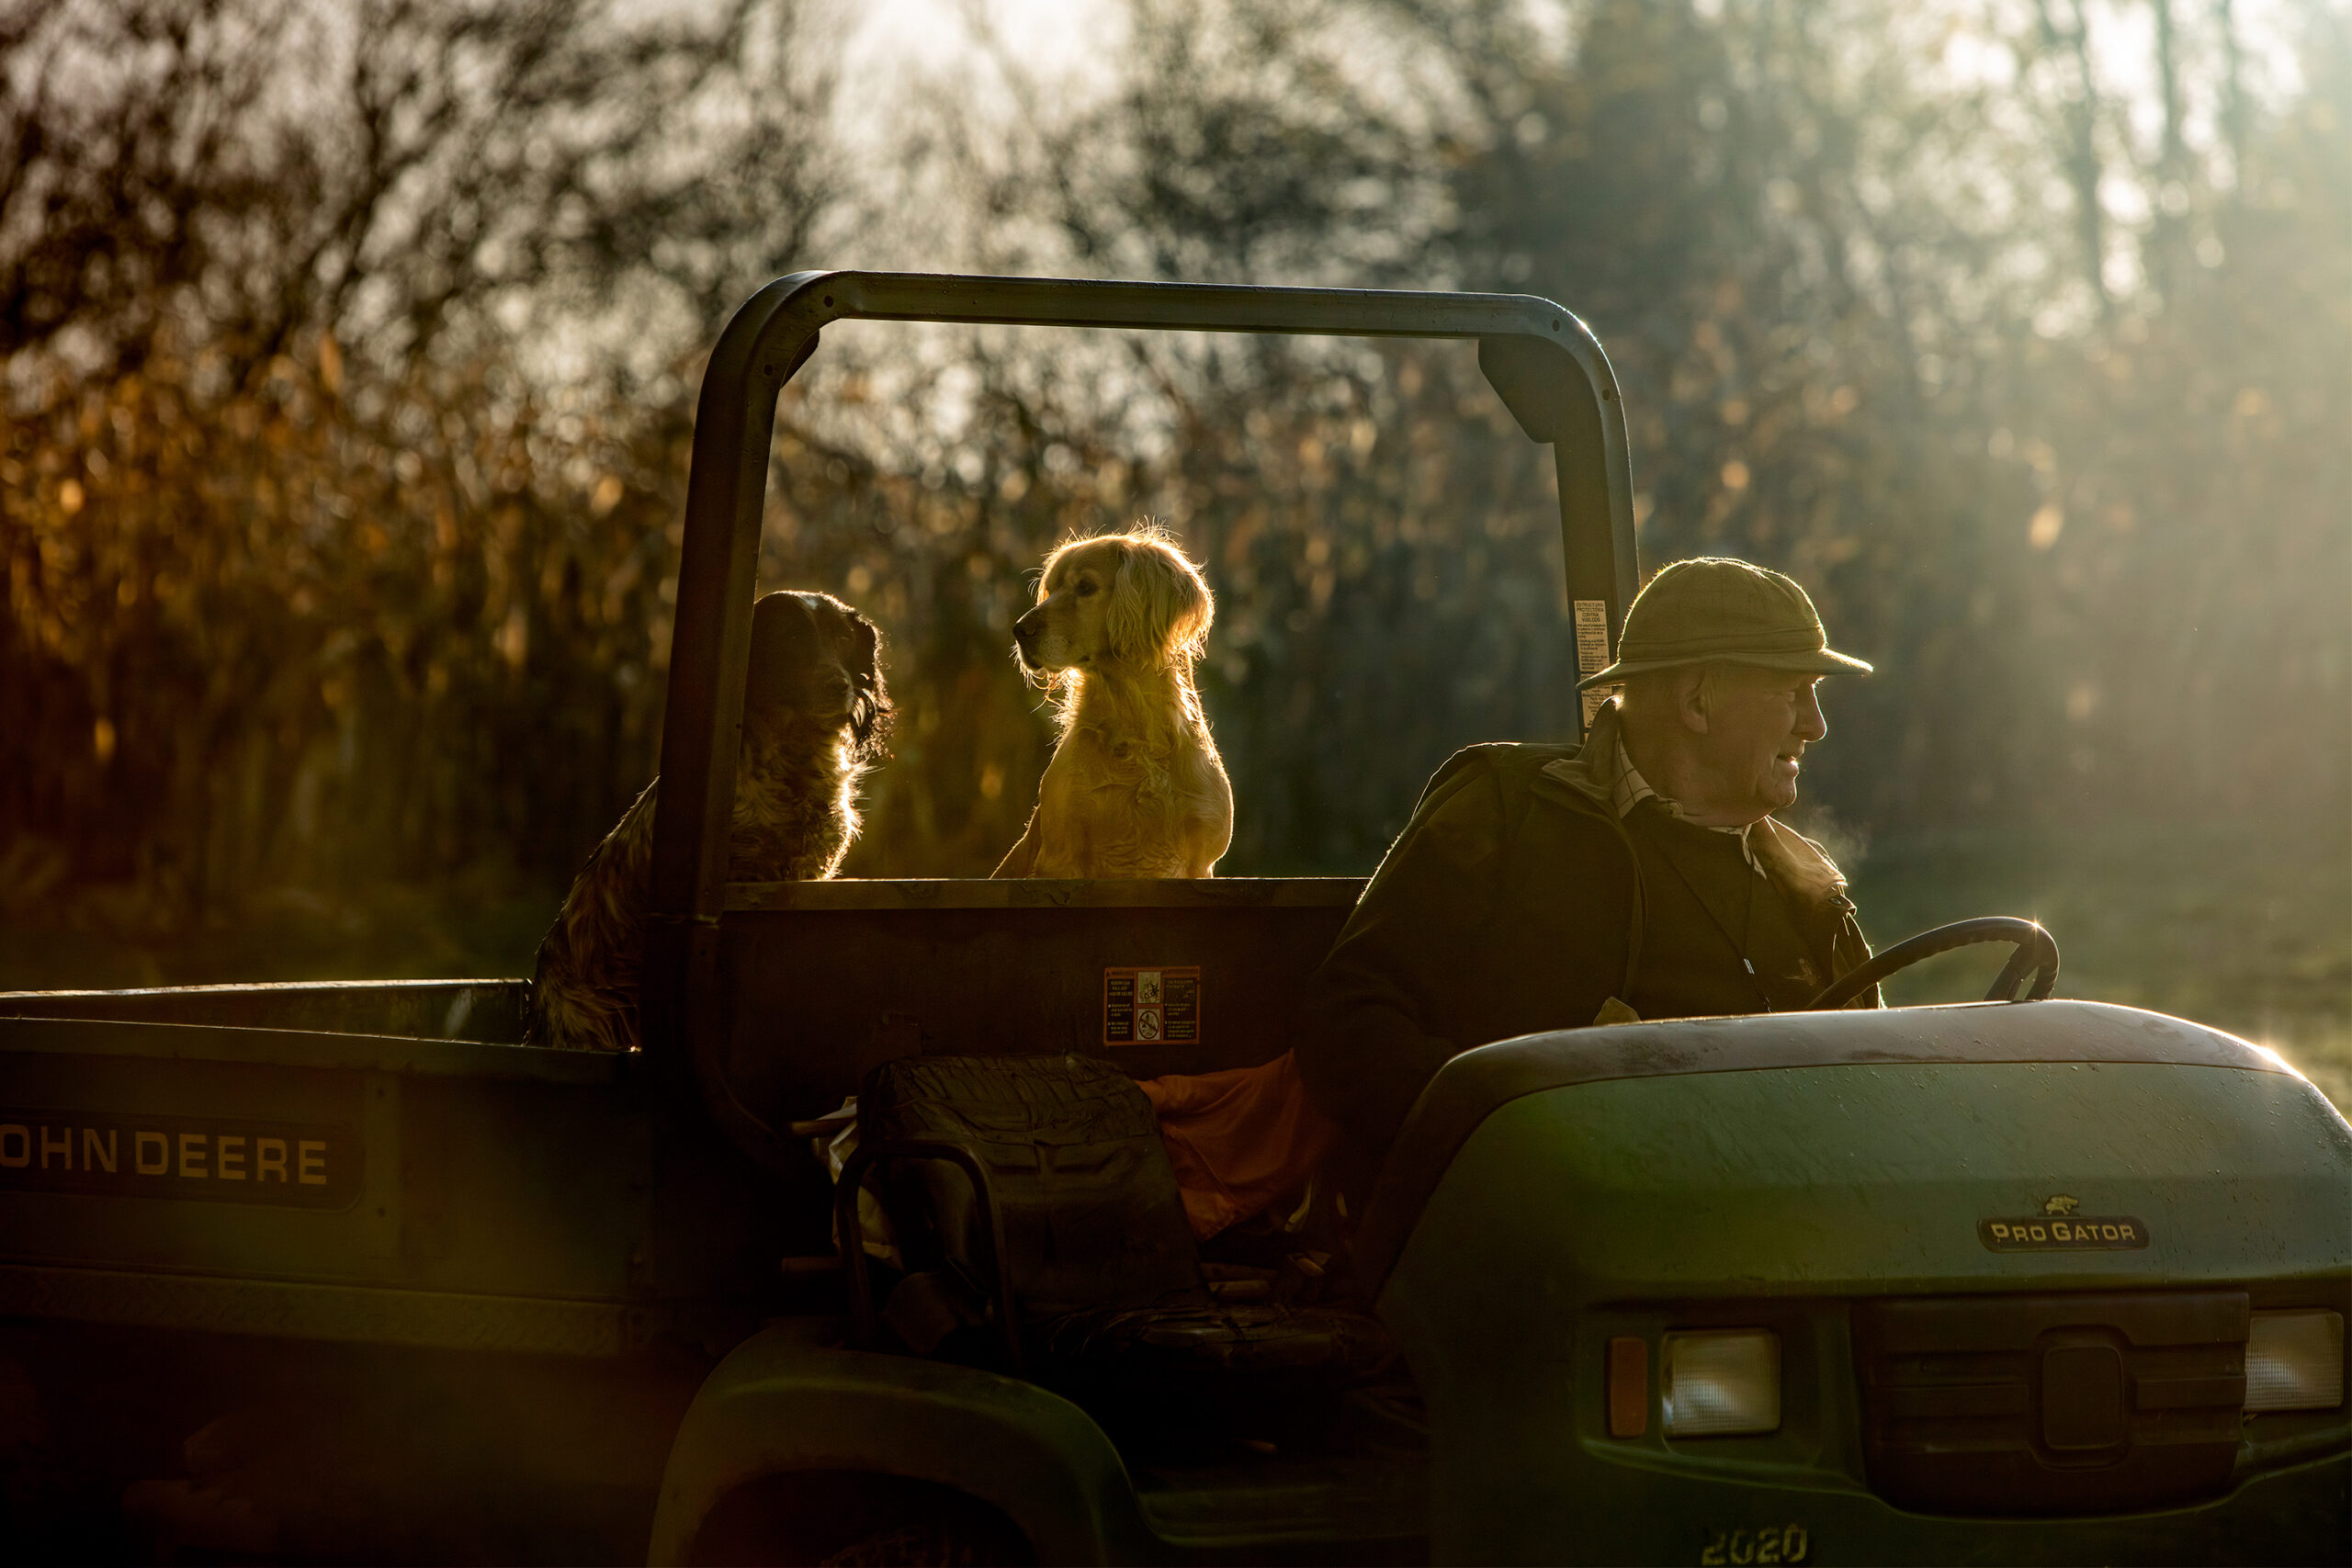
The most popular photo for September, voted by the contestants was “I’ll be watching you” by Patrick, which has won the people’s choice award. This is a very powerful photo, typical of our loyal friends who always keep an eye out and are always curious about what we are up to. The look on the dog’s face and the way Patrick has framed this image, works well together making it a great storytelling shot and a great moment to keep as one of the beauties of everyday life. Congratulations on the win Patrick.
We are almost three weeks into this month’s photo contest and still have a few days left to submit photos to our October’s monthly contest. This month, our theme is, “Abstract Realities.”
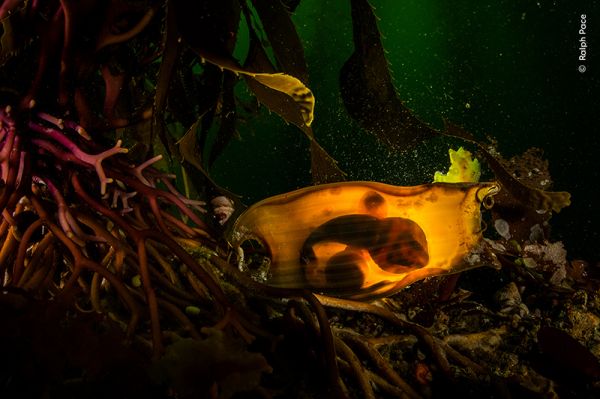
“Survival Purse” by Ralph Pace (USA): Winner, Underwater (Nikon D850, Nikon 28–70mm f/3.5–4.5 lens, Nauticam housing, 2x Sea&Sea strobes, f/14, 1/125s, ISO 640)
The Wildlife Photographer of the Year Competition has announced the 2025 winning images at an awards ceremony in London. The winners were selected from over 60,000 entries from 113 countries and territories. While underwater photographers claimed the title of Wildlife Photographer of the Year in 2023 (Laurent Ballesta) and 2024 (Shane Gross), this year’s overall winner, photographed by Wim van den Heever from South Africa, was an atmospheric image of a brown hyena on the prowl in an abandoned diamond mining town on the desert coast of Namibia.
This year’s winner in the Underwater category was American conservation photographer Ralph Pace for his unique shot of a swell shark egg case attached to a giant kelp in Monterey Bay, California. Ralph lit the egg case—aka “mermaid’s purse”—from behind to reveal the swell shark embryo within, its gill slits and yolk sac clearly visible among the dark kelp forest. Researchers estimate that kelp forests in Monterey Bay have declined by more than 95 percent over the past three decades. Swell sharks depend on kelp to lay their eggs, making them especially vulnerable to such losses.
It would be remiss of us if we didn’t also mention last year’s Wildlife Photographer of the Year, Shane Gross, taking home an award again this year. Shane’s winning shot in the “Animals in their Environment” category shows fascinating, rarely photographed behavior—a peppered moray eel scavenging for dead fish at low tide. Well adapted to the intertidal zone, peppered morays can hunt both above and below the water’s surface using their keen senses of smell and sight—staying out of water for as long as half a minute.
Congratulations to Wim, Ralph and Shane, and all the other winners! Check them out below and here.
PRESS RELEASE
Ghostly shot of rare hyena in abandoned mining town wins Wildlife Photographer of the Year 2025
Selected from a record-breaking 60,636 entries from 113 countries and territories, the category and overall winners of the world’s leading wildlife photography competition, Wildlife Photographer of the Year, run by the Natural History Museum, London, were revealed at an awards ceremony this evening.
Wildlife Photographer of the Year 2025
South African wildlife photographer Wim van den Heever has been announced as Wildlife Photographer of the Year 2025 for his powerful image, ‘Ghost Town Visitor’.
Highlighting how nature interacts with urban spaces in often unusual ways, Wim’s photograph is a haunting yet mesmerising view of a brown hyena visiting the skeletal remains of a long-abandoned diamond mining town in Kolmanskop, Namibia. Testament to the photographer’s determination and patience, using camera trap technology, it took Wim a decade to get this single shot of a brown hyena after first noticing their tracks at the site.
The rarest hyena species in the world, brown hyenas are nocturnal and mostly solitary. They are known to pass through Kolmanskop on their way to hunt Cape fur seal pups or scavenge for carrion washed ashore along the Namib Desert coast. Brown hyenas are rarely seen, so camera trap technology is an effective way for scientists to monitor behaviour and better understand the species.
Kathy Moran, Chair of the Wildlife Photographer of the Year Jury, says: “How fitting that this photograph was made in a ghost town. You get a prickly feeling just looking at this image and you know that you’re in this hyena’s realm. I also love the twist on this interpretation of ‘urban’ – it was once but is no longer a human-dominated environment. Abandoned by miners, wildlife has taken over. Repopulated, if you will. Is it still a town – it would seem that way to me – just no longer ours.”
Akanksha Sood Singh, Jury Member for the sixty-first Wildlife Photographer of the Year competition, says: “This image is an eerie juxtaposition of the wild reclaiming human civilisation. The image is haunting yet mesmerising because the solitary hyena takes centre stage as a symbol of resilience amid the decay. This picture is a multi-layered story of loss, resilience and the natural world’s silent triumph, making it an unforgettable piece of wildlife and conservation photography.”
“Ghost Town Visitor” by Wim van den Heever (South Africa): Wildlife Photographer of the Year 2025 and Winner, Urban Wildlife (Nikon D810, Nikon 17–35mm f/2.8 lens at 17mm, 2x Nikon SB-800 Speedlight flashes, Camtraptions motion sensor, f/2.8, 15s, ISO 3200)
Young Wildlife Photographer of the Year 2025
The competition’s Young Wildlife Photographer of the Year 2025 was announced as Andrea Dominizi, the first ever Italian to land the prestigious award for wildlife photographers aged 17 and under.
Andrea won for his image ‘After the Destruction’ which tells a poignant tale of habitat loss. Framed against abandoned machinery, the image spotlights a longhorn beetle in the Lepini Mountains of central Italy, an area once logged for old beech trees.
As longhorn beetles tunnel into dead wood, fungi make their way inside, helping to break it down and recycle nutrients. If the beetles’ habitat is disturbed or destroyed, the effects ripple across the entire ecosystem.
Andy Parkinson, Jury Member for the sixty-first Wildlife Photographer of the Year competition, says: “An image filled with as much narrative and importance as it is with detail. A compelling, but harrowing photograph, it’s one that encourages the viewer to contemplate the nature of this fraught relationship. This image, so beautifully and compositionally crafted will, I hope, stimulate conversation, discussion and an acceptance that we must deviate from our current path because it’s not just our own futures that we’re jeopardising.”
“After the Destruction” by Andrea Dominizi (Italy): Young Wildlife Photographer of the Year and Winner, 15–17 Years (Nikon D7100, Tokina 10–17mm f/3.5–4.5 fisheye lens at 17mm, Godox TT350 off-camera flash and diffuser, f/8, 1/80s, ISO 400)
Impact Award 2025
Now in its second year, the competition’s Impact Award recognises a conservation success, a story of hope or positive change. This year, the award was given to Brazilian photographer, Fernando Faciole, for his image ‘Orphan of the Road’.
Spotlighting an orphaned giant anteater pup following its caregiver after an evening feed at a rehabilitation centre, Fernando’s photograph highlights the consequences of road collisions, a leading cause of the decline in giant anteater numbers in Brazil. The pup’s mother was killed by a vehicle, and the hope is that it will be released back into the wild after being encouraged to develop crucial survival skills by its caregiver.
Alongside rehabilitation centres, the Anteaters and Highways project of the Wild Animal Conservation Institute is developing strategies to reduce anteater deaths on Brazil’s roads. These include erecting fences and building underground tunnels to allow the anteaters to cross safely.
Hans Cosmas Ngoteya, Jury Member for the sixty-first Wildlife Photographer of the Year competition, says: “The anteater depicted in this image symbolises many endangered animals that require our assistance. These animals, without the ability to express themselves verbally, rely on us to ensure their protection and care. This image conveys that message effectively.”
“Orphan of the Road” by Fernando Faciole (Brazil): Impact Award Winner 2025 (Nikon D850, Nikon 24–70mm f/2.8 lens at 28mm, Nikon Speedlight flash with Greica CT-16 transmitter/receiver, f/22, 0.8s, ISO 31)
Category Winners and the 61st Wildlife Photographer of the Year Exhibition
The winning photographs will be showcased in an exhibition at the Natural History Museum, London, from Friday 17 October 2025, including 19 category winners across topics ranging from underwater to urban wildlife, and photojournalism to mammal behaviour.
The exhibition will also help visitors understand how our planet’s habitats are changing. Alongside the award-winning photographs, the sixty-first exhibition will provide insight into some of the habitats pictured by including the Natural History Museum’s groundbreaking metric, the Biodiversity Intactness Index (BII). BII measures how much of a region’s natural biodiversity remains on a scale of 0 to 100%. Adopted as an official Global Biodiversity Framework indicator for decision-making, it is an essential tool for understanding, monitoring and communicating biodiversity changes on a global scale and tracking international progress towards conservation goals.
Dr Doug Gurr, Director of the Natural History Museum, says: “Now in its sixty-first year, we are thrilled to continue Wildlife Photographer of the Year as a powerful platform for visual storytelling, showing the diversity, beauty and complexity of the natural world and humanity’s relationship to it. With the inclusion of our Biodiversity Intactness Index, this year’s exhibition will be our best combination of great artistry and groundbreaking science yet, helping visitors to become inspired to be advocates for our planet.”
The category winners, as well as the full 100 images selected for the competition’s sixty- first portfolio, were selected anonymously by an international panel of experts across the disciplines of wildlife photography, filmmaking, conservation and science. The images were selected for their originality, technical excellence, and creativity.
The 19 category winners across young and adult categories are:
10 Years and Under: Jamie Smart (UK)
11–14 Years: Lubin Godin (France)
15–17 Years: Andrea Dominizi (Italy)
Animals in their Environment: Shane Gross (Canada)
Animal Portraits: Philipp Egger (Italy)
Behaviour: Birds – Qingrong Yang (China)
Behaviour: Mammals – Dennis Stogsdill (USA)
Behaviour: Amphibians and Reptiles – Quentin Martinez (France)
Oceans: The Bigger Picture – Audun Rickardsen (Norway)
Plants and Fungi – Chien Lee (Malaysia)
Natural Artistry – Simone Baumeister (Germany)
Underwater – Ralph Pace (USA)
Urban Wildlife – Wim van den Heever (South Africa)
Wetlands: The Bigger Picture – Sebastian Frölich (Germany)
Photojournalism – Jon A Juárez (Spain)
Photojournalist Story Award – Javier Aznar González de Rueda (Spain)
Rising Star Award – Luca Lorenz (Germany)
Portfolio Award – Alexey Kharitonov (Israel/ Russia)
The sixty-first Wildlife Photographer of the Year exhibition at the Natural History Museum, London, will open on Friday 17 October 2025 until Sunday 12 July 2026. The exhibition will also embark on a UK and international tour to inspire millions to appreciate and conserve the natural world.
Our Wildlife Photographer of the Year exhibition is supported by Lead Corporate Sponsor, Nuveen.
“Like an Eel Out of Water” by Shane Gross (Canada): Winner, Animals in Their Environment (Nikon Z6, Nikon Z 24–70mm lens at 24mm, Godox AD400 Pro flash with 24-inch diffuser, f/5.6, 1/250s, ISO 2500)
“The Feast” by Audun Rikardsen (Norway): Winner, Oceans: The Bigger Picture (Canon EOS R5, Canon 15–35mm f/2.8 lens at 15mm, Canon Speedlite 600EX II flash, LED torch, f/4.5, 1/200s, ISO 10000)
“Synchronised Fishing” by Qingrong Yang (China): Winner, Behaviour: Birds (Nikon Z9, Nikon 400mm f/2.8 lens, f/5, 1/2500s, ISO 110)
The Art of the Personal Project is a crucial element to let potential buyers see how you think creatively on your own. I am drawn to personal projects that have an interesting vision or that show something I have never seen before. In this thread, I’ll include a link to each personal project with the artist statement so you can see more of the project. Please note: This thread is not affiliated with any company; I’m just featuring projects that I find. Please DO NOT send me your work. I do not take submissions.
Suzanne Sease is a creative consultant and former ad-agency senior art buyer. She works with both emerging and established photographers and illustrators to create cohesive, persuasive presentations that clients can’t resist.
Suzanne offers something rare: an insider’s perspective on how client’s source creative talent. Her deep understanding of the industry is underscored by her impressive resume: 11 years as senior art buyer at The Martin Agency, seven years as an art producer for Capital One, and stints with the art-buying department at Kaplan-Thaler and the creative department at Best Buy, where she applied her expertise to reviewing bids to see which were most likely to come in on budget. Over the years, Suzanne has worked with a wildly diverse range of clients, including Seiko, Wrangler, Bank One, AFLAC, and Clairol Herbal Essence. Now, as a consultant, she is equipped to problem-solve for her clients from an unusually dynamic point of view.
As a longtime member of the photo community, Suzanne is also dedicated to giving back. Through her Art of the Personal Project column on the popular website aphotoeditor.com, she highlights notable personal projects by well-known and up-and-coming photographers. The column offers these artists excellent exposure while reflecting Suzanne’s passion for powerful imagery.
Watch the short video above, or keep reading if you prefer the written word.
Too many photographers look to the work they do with the camera as job one, which it is. But it’s not the only job. Your ability to edit down to your keepers, to process them in ways that are consistent with your voice, and to do something with those photographs, are as much a vital part of your craft as the camera work.
What about the edit?
The choice we make to select one final frame from among many is one of the most important choices we can make. It is part of what it means to make a great photograph. When we make a body of work, we have to choose a dozen or two dozen final photographs from what might be hundreds or thousands of sketch images or possible alternatives—the ability to do this is no less important than the ability to choose a shutter speed, aperture, or composition.
So how should we be thinking about these choices? And why are so few photographers talking about it when I know so many of them are overwhelmed by it? I wonder if it’s as simple as believing that it’s just not as important. Just pick something sharp and well-exposed and move on? Or do we just pick all the images that aren’t stinkers and call it done?
I think one of the most overlooked ways to improve your photography right now—without the need to upgrade your camera or get the latest version of your favourite lens—is to get pickier. To begin thinking about your choice of final frames more creatively. More intentionally.
Ansel Adams said that 12 images a year was a good crop. I don’t generally think of my photographs as plants, but I like his point. And I suspect your work would be better if you were more selective, more creative about the ways you looked at editing down to your keepers, and more intentional with what you did with your images. If we all did that we’d make better, stronger photographs.
So, I wonder:
When you edit or select your best work, what questions are you asking yourself?
What criteria do you have for making that selection?
How much do you trust that process?
Are you still deleting everything that doesn’t make the cut the first time around?
Are you looking for quantity or quality—and do you have a clear system for understanding what that means to you?
I’ve heard it said that photographers are their own worst editors, but I wonder if that’s only because we often don’t give the editing as much thought as we give to our gear or our camera work.
And—because I’ve been that guy—I wonder how many are just relying on the Un-Suck filter in Photoshop or Lightroom to “polish a turd” rather than choosing an image that’s, ahem, not a turd in the first place.
I have two points to this. The first is a plea. It’s more than the nudge I might normally give you. I’m practically begging you to ask yourself what it would take for you to be pickier with the images you choose as your final selects and which ones you relegate to the archives.
Could you be giving the whole process a little more time, or actually—because my approach to editing takes less time—could you be giving it more focus and attention?
Could you be clearer about your selection criteria and more intentional about what you’re choosing those images for in the first place? What would your accumulated work look like in a year if you didn’t settle on the 3-stars but chose only the ones that were an unqualified “Hell, yes!”?
Your work can be so much stronger simply by choosing stronger photographs, and you can learn to do this.
Earlier this week, I talked about three ways we could love our photographs more. This is the big one: desire more for them. Demand more from them. Hold out for the very best of them. Never settle. But how do we do that?
In a couple days I’ll be inviting you to join me for this year’s Beyond The Shutter course, which I created to help photographers get clearer about one big question and that’s this:
“I just shot a bunch of photographs. Now what?”
It’s about editing down to your best work, but more than that, it’s about how you think about editing, how you can make it less overwhelming, what criteria you can use to select your best work, and how you can use the tools in Adobe Lightroom to help with that?
It’s about doing something beautiful and meaningful with your photographs, like monographs, multi-media presentations, or web-galleries and using the tools you already have in Adobe Lightroom to do this much more easily than you might believe possible.
One of my most popular courses to date, Beyond The Shutter is a video course created to help you become the strongest photographer you can be. To be less intimidated, less overwhelmed by the stuff that needs to happen once you put the camera down, in order to make stronger choices. It’s about the neglected other half of our creative process, a part of our craft that—once I engaged with it myself and stopped being so ad hoc about it—has become one of the most rewarding parts of what I do, rather than a dreaded after-thought.
I want to help change your thinking about it. I want to show you my own process and how I make things like the monographs I send out, and so much more.
You’ll get all the details this Sunday. The ideas and techniques I want to share with you will change your enjoyment of this craft you love so much, and will help you take next steps toward being more creative and intentional in the work you do beyond the shutter, and be more satisfied with the final results.
Last year’s course was amazing and brought huge changes to the photographers who joined me. They said things like:
“I never imagined this course would so increase my joy in making photographs. This deeper understanding of the editing process makes my own camera work more creative, focused, and playful,”
“You’ve hit this one out of the ballpark! I am so impressed with this series. I’m picking up so much concrete advice.“
Keep an eye open for more details on Sunday and your invitation to join me for Beyond The Shutter.
In this review I discuss my experiences with the Canon EOS R5 in detail having owned it and used it as my primary camera for the last 5 years.
Appearance & Build Quality
The EOS R5 is a bit odd looking overall. It is rather small but has a lot of buttons on it. The smallness plus the buttons make it rather hard to hold on to and use effectively at first. It should be a bit larger with more room for people with X-Large hands. I personally wear XL sized gloves which actually isn’t that big. It’s not abnormal or anything, and I find the camera usable but I also find it very cramped. It could use some MAJOR improvements in the design and layout.
The little screen on top is pointless because it has too much information in it. They should put less information there and try to keep simplifiy that screen because as it is the fonts are way too small inside of that screen which makes glancing at it like trying to read the fine print in the bible at arms length, you know what I mean?
Now, one things I actually really hate is the stupid top screen backlight button… why is that even there? It’s a dumb inclusion and should be removed or changed into something else. Instead, why not make the screen touch sensitive so it can be touched and it turns on? Then, make it swipe sensitive so I can swipe left and right and see other settings on it with larger fonts?? Ok, does that help at all or am I just crazy?? *rollseyes*
The flash hot shoe is an old fashioned piece of junk that should be completely rethought. They gotta be kidding with these idiotic flash hotshoes in 2025. Guys, the current flash hot shoe, even the one on the R1, R3, and R5 mk II, is a low level piece of junk that isn’t worth putting on the camera. On my camera the flash hot shoe has come loose and no longer holds certain flashes securely. They really need to fix this flash hot shoe because it is making them look bad. The thing about these hotshoes is that they’re the same thing you’ll find welded to to the top of an ancient camera from the 1950’s. It’s just too old of a concept for modern lighting demands.
The rubberized grip on the R5 is cheap which is reminiscent of a 1960’s consumer camera manufactured in a sweatshop. It has started bubbling up all over on my camera. So, the grip is actually moving around on the camera which means it is doesn’t feel as secure in hand which is a bad thing.
All of the buttons are basically badly designed and are like pressing on mush. The clicky wheels are all bad. Every clicky wheel should have the same indentation spacing but they don’t. Some of them are oddly hard to control like the wheel for ISO which is oddly difficult to scroll just one click at a time. The other two wheels are easier to control.
The menu system is of the spray and pray variety. It is a mess of settings simply dumped onto screen with little or no logic. They need to come up with something new for the menus.
The overall build quality of the camera is middle of the road, it has good aspect and bad aspects, but, it is also a pretty cheap camera for what it offers so… it is what it is.
The R5’s exterior is mostly plastic but the top sections are magnesium. The internal frame is magnesium also which should mean that the camera might withstand some abuse.
Overall the build quality leaves a lot to be desired. Especially the flash hot shoe and the exterior grip which slowly comes loose. We’re past the days of just gluing a grip onto the exterior of the camera… why is my EOS 1N RS built like a tank compared to my R5? I don’t know, but it really is night and day.
Weather Sealing
It might be weather sealed it might not… they say it is. I have used it in mild rain by the fact is I don’t trust it very much. The CF card door is pretty weak and worn out at this point so I would assume water would make its way in there pretty quickly if it were in actual rain. The I/O port covers are also just those annoying little rubber covers. They are not going to protect the camera in an actual downpour. Over all the weather sealing is second rate. I’m sure that certain aspects of it or decent, but again, this isn’t something that will survive all day shooting in the rain with no protection on it. Now, it definitely won’t survive being dunked in river or something like that for more than an instant. Bottom line is I wouldn’t trust the weather sealing for more than momentary forays into mild to moderate rain. Best to treat it like its not weather sealed and hope that the weather sealing protects the camera if mistakes are made.
Battery Life
The battery on the R5 is one area where there is definitely some room for improvement. The battery grip, BG-R10 is absolutely essential if you actually intend to use this camera professionally. That is because it the batterly life is improved greatly with having two batteries in use rather than just one. You will also massively extend the life of your batteries by using them in the battery grip.
The bottom line here is that the R5’s battery behaviors are less than perfect but if you use the battery grip the batteries do tend to last.
Input/Output
The R5 has the typical inputs/outputs including the standard 3.5mm stereo mic input, stereo headphone out, USB-C port, micro HDMI port, and a flash sync port. The camera can also be charged via the USB-C port if you have a PD compatible USB-C charger to plug it into.
The issue with the I/O is the same as it ever was. They keep using those annoying little rubber doors to cover the plus. Well, that hardly seems weather resistant but it might be sneeze resistant, I don’t know… I’m starting to think I am living in an echo chamber and nobody will ever hear my words because this crap just never gets fixed. It just goes on and on and on. When will anyone listen to what I am saying to them about anything?
Dual Card Slots
The much requested feature of Dual Card Slots was finally added into the EOS R5. The R5 sports a UHS-III compatible SD card slot and a CFExpress type B card slot. Both card slots can deliver impressive performance which is necessary to handle the high bandwidth video this camera can generate in it’s 8k RAW setting.
Most camera’s in this price bracket have dual SD card slots so the fact that the R5 has a CFExpress type B slot at all is a bonus. CFExpress Type B cards are capable of higher speeds than SD cards currently are. This is because CFExpress Type B is essentially the NVME standard for SSD’s that are used in laptops and desktops. NVME drives have a memory controller built onto the drive which allow them to run at high speeds but also generate a lot of heat.
CFExpress Type B cards are great but they’re also expensive. I appreciate the dual card setup because it means I don’t have to rely solely on expensive CFExpress Type B cards. If worse comes to worst and I forget my cards (happened before), then being able to borrow an SD card from a fellow photographer is a lot more likely than borrowing a CFExpress Type B card. I have also stored cheap SD cards in bag pockets, cases, and gloveboxes just in case I forget to bring cards again. For most kinds of photography SD cards are perfectly usable. The main reason to use CFExpress Type B is for 4k and 8k video on the R5.
Video Capability
The R5 continues Canon’s penchant for putting video in their still camera’s and takes it up to whole new level. We’re now at 8k video! Wow. 8k video is a lot of pixels and the R5 can shoot 8k RAW. Just to give you an idea of what the R5 can do with regards to video here is a chart that lists the bandwidth generated at a few its available video settings:
8k DCI
RAW
29.97 fps
2600 Mbps
8k UHD
ALL-I
29.97 fps
1300 Mbps
4k DCI
ALL-I
119.88 fps
1880 Mbps
4k DCI
ALL-I
59.94 fps
940 Mbps
4k UHD
IPB
29.97 fps
120 Mbps
Full HD
ALL-I
59.94 fps
180 Mbps
Card Type
Maximum Sustained Write Speed
CFExpress Type B
Varies by type & brand: approximately 1,170 Mbps to 16,777 Mbps (bus speed maximum)
SD V-90
755 Mbps
SD V-60
503 Mbps
SD V-30
251 Mbps
The biggest issue with the video is quite simply the overheating! Yes, the camera overheats within 15 minutes when used outdoors in 90F weather. I almost always shoot in 4k 60fps so that is what you get with this camera, just about 15 minutes and then you’re done. Why it is so low I honestly don’t know. I see videos online of people walking around for hours with cameras and the video is shot at 4k 60fps. I guess they have a better camera than the R5.
Aside from that the video quality can be good if you know what you are doing. And that’s really the key thing here. Don’t expect the R5 to be the kind of camera that anybody can just pick up and use. Nope, whomever uses this camera will need to be well versed in all the technical details to make the best use of it for the purpose.
Still Photo Capability
The still photo capability of this camera is middle of the road in all honestly. While it is 45MP, and certainly is pretty good, and usually looks better than a cellphone, it is by no means great. The quality falls off by a LOT even at relatively low ISO’s. It depends on the lighting situation is what I have noticed. But, if you’re shooting in low light, the camera really struggles with absolute image quality. Basically you’ll want to avoid shooting in low light with high ISO’s if you want the best image quality. I don’t know why this is?? Maybe they’re trying to sell tripods, no idea, but the camera works best on a tripod and with longer shutterspeeds.
At lower ISO settings the image quality is better but still not great. What I’m seeing is that color fidelity falls off and gradient quality falls off substantially by about 800 ISO. I actually feel like the camera was better with earlier firmware versions and has gotten worse at the higher ISO settings with the most recent firmware releases.
The reality of the still photo capability is that it feels like there is something missing unless I shoot at 100 ISO. Even going to 200 ISO I see issues with the image that aren’t there at 100 ISO. It is just a little too obvious. Because of that, especially when I shoot landscapes, I feel very much trapped at 100 ISO. While the camera may be better than past iterations up to 400 ISO, it’s still not quite meeting expectations for image quality there.
AF Capability
Probably the one part of the camera I can say meets most expectations is the AF performance. Now, it’s good for what it is. It is not as a good as a cellphone which is kind of odds, but phones like the iPhone 16 Pro have crazy good tracking AF, even if they don’t focus super fast they track amazingly well.
On the other hand the EOS R5 tracks well but doesn’t match the iPhone’s tracking capability. The good news is that the R5 doesn’t need to track well for many kinds of photography such as landscape, architecture, or even most portraiture. However, if you’re working with a single person or a couple, the R5’s tracking behavior is probably good enough for professional use. Where the R5 isn’t as good is when there are groups of people, then the tracking AF is best turned off.
Overall AF accuracy is very good though and it is capable of getting very high focus precision. This is the one feature where I feel like maybe I’m getting a little bit more than I paid for in the R5’s price. Sure, it’s not quite as perfect as an iPhone at tracking but we have to take into account that the iPhone’s battery will be dead in about 1hr of constant use so it is barely worth considering as a professional photo or video tool for that one reason. The reason an iPhone kills its battery is simply because it has a powerful and power hungry CPU in it. On the other hand, the R5 is sipping power by comparison so, for what it is the R5 works pretty well.
At the end of the day it seems like they’ve kind of finally solved the AF accuracy problem with the latest RF series cameras. Most of the time the images are sharp and in focus and focus misses are usually explainable as slightly mispositioned focus points or something of that nature. Very rarely does the camera just miss focus on a static subject.
Stabilization
The performance of the stabilizer in the R5 is a mixed bag. For photo it definitely can help, but it also seems to hurt image quality at times. I can’t say that the R5’s stabilization system really impresses me but I think it does help just enough to make it worth having. Basically, you’ll generally get 3-4 stops of extra room for a lower shutterspeed with most native RF lenses attached to the R5. Some lenses are definitely better than others but I have found that it is tough to make predictions about the stabilization based on lens quality or whether it has IS or not. Regardless of lens, the absolute limit for hand held is about 1/2 a second, which is a pretty long exposure to be sure. But, what I have noticed is that at 1/2 a second the edges are often blurred, so, the center is sharp but the edges are blurred and that is true for almost any lens shot at 1/2 a second. For telephotos obviously 1/2 a second is way too long, the whole frame will just be badly blurred at that speed.
It’s important to realize that in the standard range, whether shoot at 50mm, or 35mm, or 24mm, or even 10mm, a 1/2 second seems to be about the limit for the stabilizer. I find that kind of odd and I would have thought the 10mm would manage a 1 second shutter speed but it really doesn’t work like that apparently.
For video the stabilization ranges from amazing to passable depending on the lens used. Lenses like the RF 10-20mm f/4 L seem very well stabilized for video. I also noticed that the RF 24-240mm had great video stabilization results on the R5. In fact, I’d say the RF 24-240mm is one of the best stabilized lenses I own. However, some other lenses like the RF 70-200mm f/2.8 L didn’t perform as well as I’d expected they would.
Again, I’m generalizing a lot so you may find that for your use case the R5’s stabilzation is exceptional. If all you’re doing is standing there and carefully holding the camera still for a video shot, the IBIS is very, very good. In fact, it’s good enough to be used with manual, unchipped lenses up to around 200mm. If you want stable footage for video the R5 is great if you shoot hand held and simply point the camera where you want to film without panning or moving too much.
Where we separate lenses with built in IS from those that don’t have it is if we try walking/panning and shooting hand held. Then the lenses like the RF 10-20mm f/4 L and the RF 24-240mm STM really separate out from the rest of the pack.
But, for the most part, the video stabilization of the R5 is very good if you use the camera within its parameters.
I don’t think it is fair to compare the R5 to a cellphone because the stabilization on a cellphone has so many advantages to the R5 that it’s basically a dumb comparision. However, with certain lenses like the RF 10-20mm f/4 L, the R5’s stabilization is very close to what a modern pro-level cellphone can do. That is pretty impressive considering how much bigger the moving parts are in the R5.
Example Gallery
Highlight/Shadow Recovery
The R5 is also really good about recovering shadows at 100-200 ISO. Beyond that it requires being very careful with the selected exposure as shadows get noisy at 400 ISO and beyond. Shadow noise is really grungy with the R5 beyond 1600 ISO. This is where the IBIS can be a benefit if the scene allows for a slow shutter speed. If you plan on recovering shadows in your scene, then you should learn to lean on the stabilization more to keep the ISO as low as possible.
This example below shows that at 100 ISO the shadow/highlight recovery is barely enough for cloudy shots.
All in all it has been a solid camera for me. It was a big improvement over the EOS R in terms of AF and stabilization. Overall image quality is similar between the two but I think the final edge goes to the R5. The R5 does seem to pick out more color and produce more distinct gradations of color than the R does. I wouldn’t fret too much about the R5’s image quality, just focus on taking good pictures if you’re lucky enough to have one!
Conclusion
The Canon EOS R5 is a good camera that is capable of performing many photography and videography tasks. It may not be the best choice for all, but it can do sports, wildlife, landscapes, low light, events, family, portraits, studio, product, and I doubt anyone would complain about the results.
Many of you who regularly read the pages of DPG may not have gotten this far… but even if you do see yourself as a “proper” shooter—with a “proper” camera—please hear us out. Nobody’s saying your smartphone is going to replace your fancy mirrorless any time soon, OK? This is a different kind of tool, you know? Great for a quick snap or two to send to your mom! Perfect for some sweet clips for Insta! Ideal for keeping the kids out of trouble when you go to Bali for the holidays!
Whatever you have in mind, dear reader, I think we can all agree that your precious smartphone (or perhaps your old model that’s currently at the bottom of the kitchen drawer) deserves the very best housing out there. All of which brings us neatly to Backscatter’s latest, and extremely timely, review, “Best Smartphone & iPhone Underwater Housings of 2025”—a very handy roundup that includes four of the seven smartphone housings currently available from Backscatter—the DIVEVOLK SeaTouch 4 MAX PLUS ($240), the Kraken KRH07 ($450), the Oceanic+ ($350), and the SeaLife SportDiver Ultra ($400).
As you’d expect, the Backscatter boys do an excellent job of comparing these housings side by side—both in their extensive article and the comprehensive accompanying video (starring newly minted Media Producer Thomas Anderson). For each housing, we get Backscatter’s considered opinion across five criteria—phone compatibility, ergonomics, setup, app performance, and accessories—and interestingly, it’s soon apparent that each one has its strengths and weaknesses, making the job of choosing between them considerably easier. As for the thorny question of whether a phone can replace a dedicated underwater camera? Well, Thomas rounds things off by tackling that, too.
To educate yourself on the pros and cons of the latest smartphone housings, watch the video below or check out the article on Backscatter, where you can, of course, also purchase a full range of accessories (including trays and arms, wet lenses, and filters) and video lights. Don’t forget that DIVEVOLK is a sponsor of this year’s DPG Masters Underwater Imaging Competition and there are no fewer than six SeaTouch 4 MAX PLUS housings up for grabs!
When purchasing underwater photography equipment like the products mentioned in this article, please support DPG by supporting our retail partner—Backscatter.com.
Watch the 7-minute video above, or keep reading if you prefer the written word.
Here’s a question that keeps me up at night:
Why do photographers get so intimidated by editing down to their best images and the “now what?” that comes once we put the camera down? And are we missing really important creative opportunities because of this?
For years, I’ve been signing my letters to you with the words “for the love of the photograph,” because I do. And so you do you. Nothing else explains the time and money we spend on making them. No doubt about it, this is a labour of love.
But I wonder if we love the photographs we are going to make—the next ones—way more than the ones we’ve just made. We so often move on to the next thing too quickly. The next project. You know the one: the one for which you need that new lens. Or tripod. Or flash. I’m the same way, and there’s nothing wrong with creative momentum or new gear.
But I think if we loved the photographs we’ve just made as much as the ones we’re about to make, we’d make stronger images and have a richer photographic life.
So, here are three ideas, or three ways, that we can carry the love of the photograph and the making of photographs, a little further and in the process, learn more, make stronger photographs, and find more joy in all of it.
Spend More Time With Them
In my last video, I suggested you consider doing smaller edits when you’re working on a project. I like daily edits when I’m photographing, but whatever “smaller edits” mean to you and your work, I think you’ll benefit from doing it. I also think multiple edits are important, and though I suggest spending more time, this multiple-edit approach is actually more effective and, in the end, takes less time—and is more enjoyable and effective than one big marathon edit session (that you may never get around to).
When it comes to choosing my keepers, I never completely trust my first instincts. We choose our best work by looking through all kinds of different filters. There’s no telling what I might have been looking for when I did my first edits—was I looking for colour images or vertical images or images that tell a certain story?—so it’s always worth giving my images another look, and doing so at least three times over a few months rather than doing one gigantic, mind-numbing edit session to find the best of my work.
One of the best reasons for doing this, especially if you’re doing smaller edits as the work progresses, is that what a project looks like at the end and what it looked like at the very beginning are usually very different. So going back to do another edit, once you’ve seen where the project is leading can be very effective in finding new images that work with that project.
Our work grows and changes, as does how we look at that work. I know we get excited by the next thing, but one of the best ways to make new photographs when you can’t be out there with the camera is to revisit older work. Do another pass. See what comes to the top now that you’re seeing it with fresh eyes months or even years later.
I think not being in such a hurry with finding the best of our photographs, of revisiting them and giving them a second or third chance after we’ve shot them, is a stronger way of editing than the way it’s often done: one big marathon edit session after which we call it done and never give the un-selected images another glance. That’s the first way we can give our photographs a little more love, and the result is stronger final images.
Do More With Them
I used to tell anyone who would listen to “print yer damn work!” Maybe you don’t make the prints yourself, that’s OK; I don’t anymore, either. But I do have it printed by someone who is really good at printing, and getting my work in print makes me a better photographer.
There’s also such joy in holding the work and sharing it in tangible ways. When’s the last time you made a book, a slideshow or a collection of prints to pore over? When’s the last time you submitted them to a magazine or swapped out the prints on your wall? When is the last time you did something with them?
If you want to love your photographs more, consider making something with them. The benefits are huge, and they’re practical. When we output our work, we spend more time with it.
When that output is larger than what we might put on Instagram, or we have to spend money to make it happen, I think we’re more critical of that work. We see the flaws and that keeps us honest and growing in our craft.
I’ve found knowing what I will make with my photographs gives me an end game of sorts. It makes the edits easier when I know what I’m choosing my best images for.
Protect Them
If we love something, we protect it. One way to do that is with an archive of prints, but let’s talk about back-ups for a moment.
It seems like every other week I hear another story of a photographer who lost all their images because a hard drive crashed. I’ve heard stories of theft and fire or water damage as well, and I can’t for the life of me understand why photographers will spend so much money on gear and balk at buying whatever sized hard drives they need to create a simple backup of the work they’ve invested so much in.
If your computer crashed right now or your main hard drive failed, how easy would it be to get back up and running without missing a beat or losing an image?
In case it’s been a while, this is just a reminder to consider giving your backup plan a second look. And if you aren’t current with your backups, maybe to take a moment a do that, you know, for the love of your photographs.
I’d love to hear from you on this. What do you do with your photographs once the camera goes back in the bag? You can be part of the conversation in the comments below.