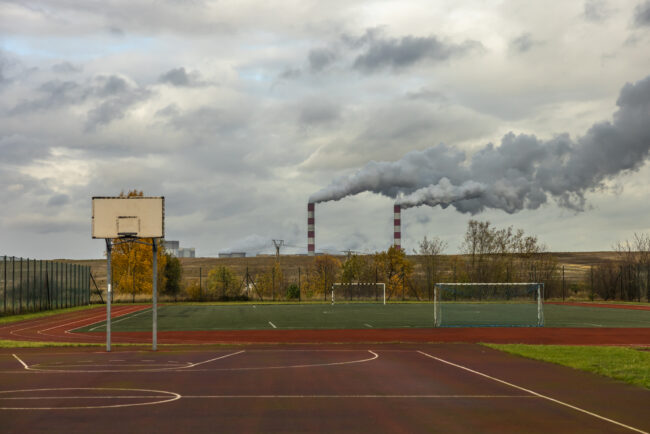
A school playground in the neighbourhood of the Belchatów coal-fired power plant. Kleszczow, Poland. November 14th 2023.
Heidi: Archival and historical records play an important visual role in the future of accountability – who did what, when, and with what impact? What type of photography are you looking for to support these themes?
Alastair: Absolutely, and photography can bring this kind of accountability to life in ways that words and data can’t. At Climate Visuals we are predominantly working with photojournalistic imagery, prioritising photography that tells real stories and engages, educates and informs audiences.
In the most obvious sense, photography can powerfully highlight what is going on, raising awareness and driving public concern. This could be in an immediate, more news focused context, or over a longer period of time. With the latter, the value really comes through in the power of images to show a change over time, to make clear what has happened, changed, been lost or damaged. Some of these changes may be visibly dramatic and obvious, but they could also be more discreet, happening at a scale or pace not immediately visible day to day. In both instances, photography can be a powerful tool in recording and archiving, and in highlighting and proving a reality.
To maximize this potential for engaging audiences we are often looking for images that distill wider issues into tangible, relatable human-focused stories – what was the effect on a community? How did that community adapt to the changes? We’re also looking for images that go beyond overly familiar visual stereotypes and tell stories in new, compelling ways. We are now all familiar with images of polar bears clinging to melting ice, forest fires sweeping across hillsides, and smokestacks pumping out pollution into the air – and there’s no doubt that these photographs have powerfully contributed to the public image of climate change. But it is our responsibility as photographers and picture editors to build on this and seek new ways of telling these stories and to continue to develop how we visualize these issues. Think about how complex, intersecting issues can be distilled into tangible stories, how your audience might approach an issue and what kind of imagery they are likely to respond to.
Photography has the potential to fulfill an evidentiary role and then go further, going beyond literal illustration to demonstrating to an audience why something matters. We are looking for photography that can do this – telling the stories of what is happening and then providing a compelling narrative for the viewer to engage with.

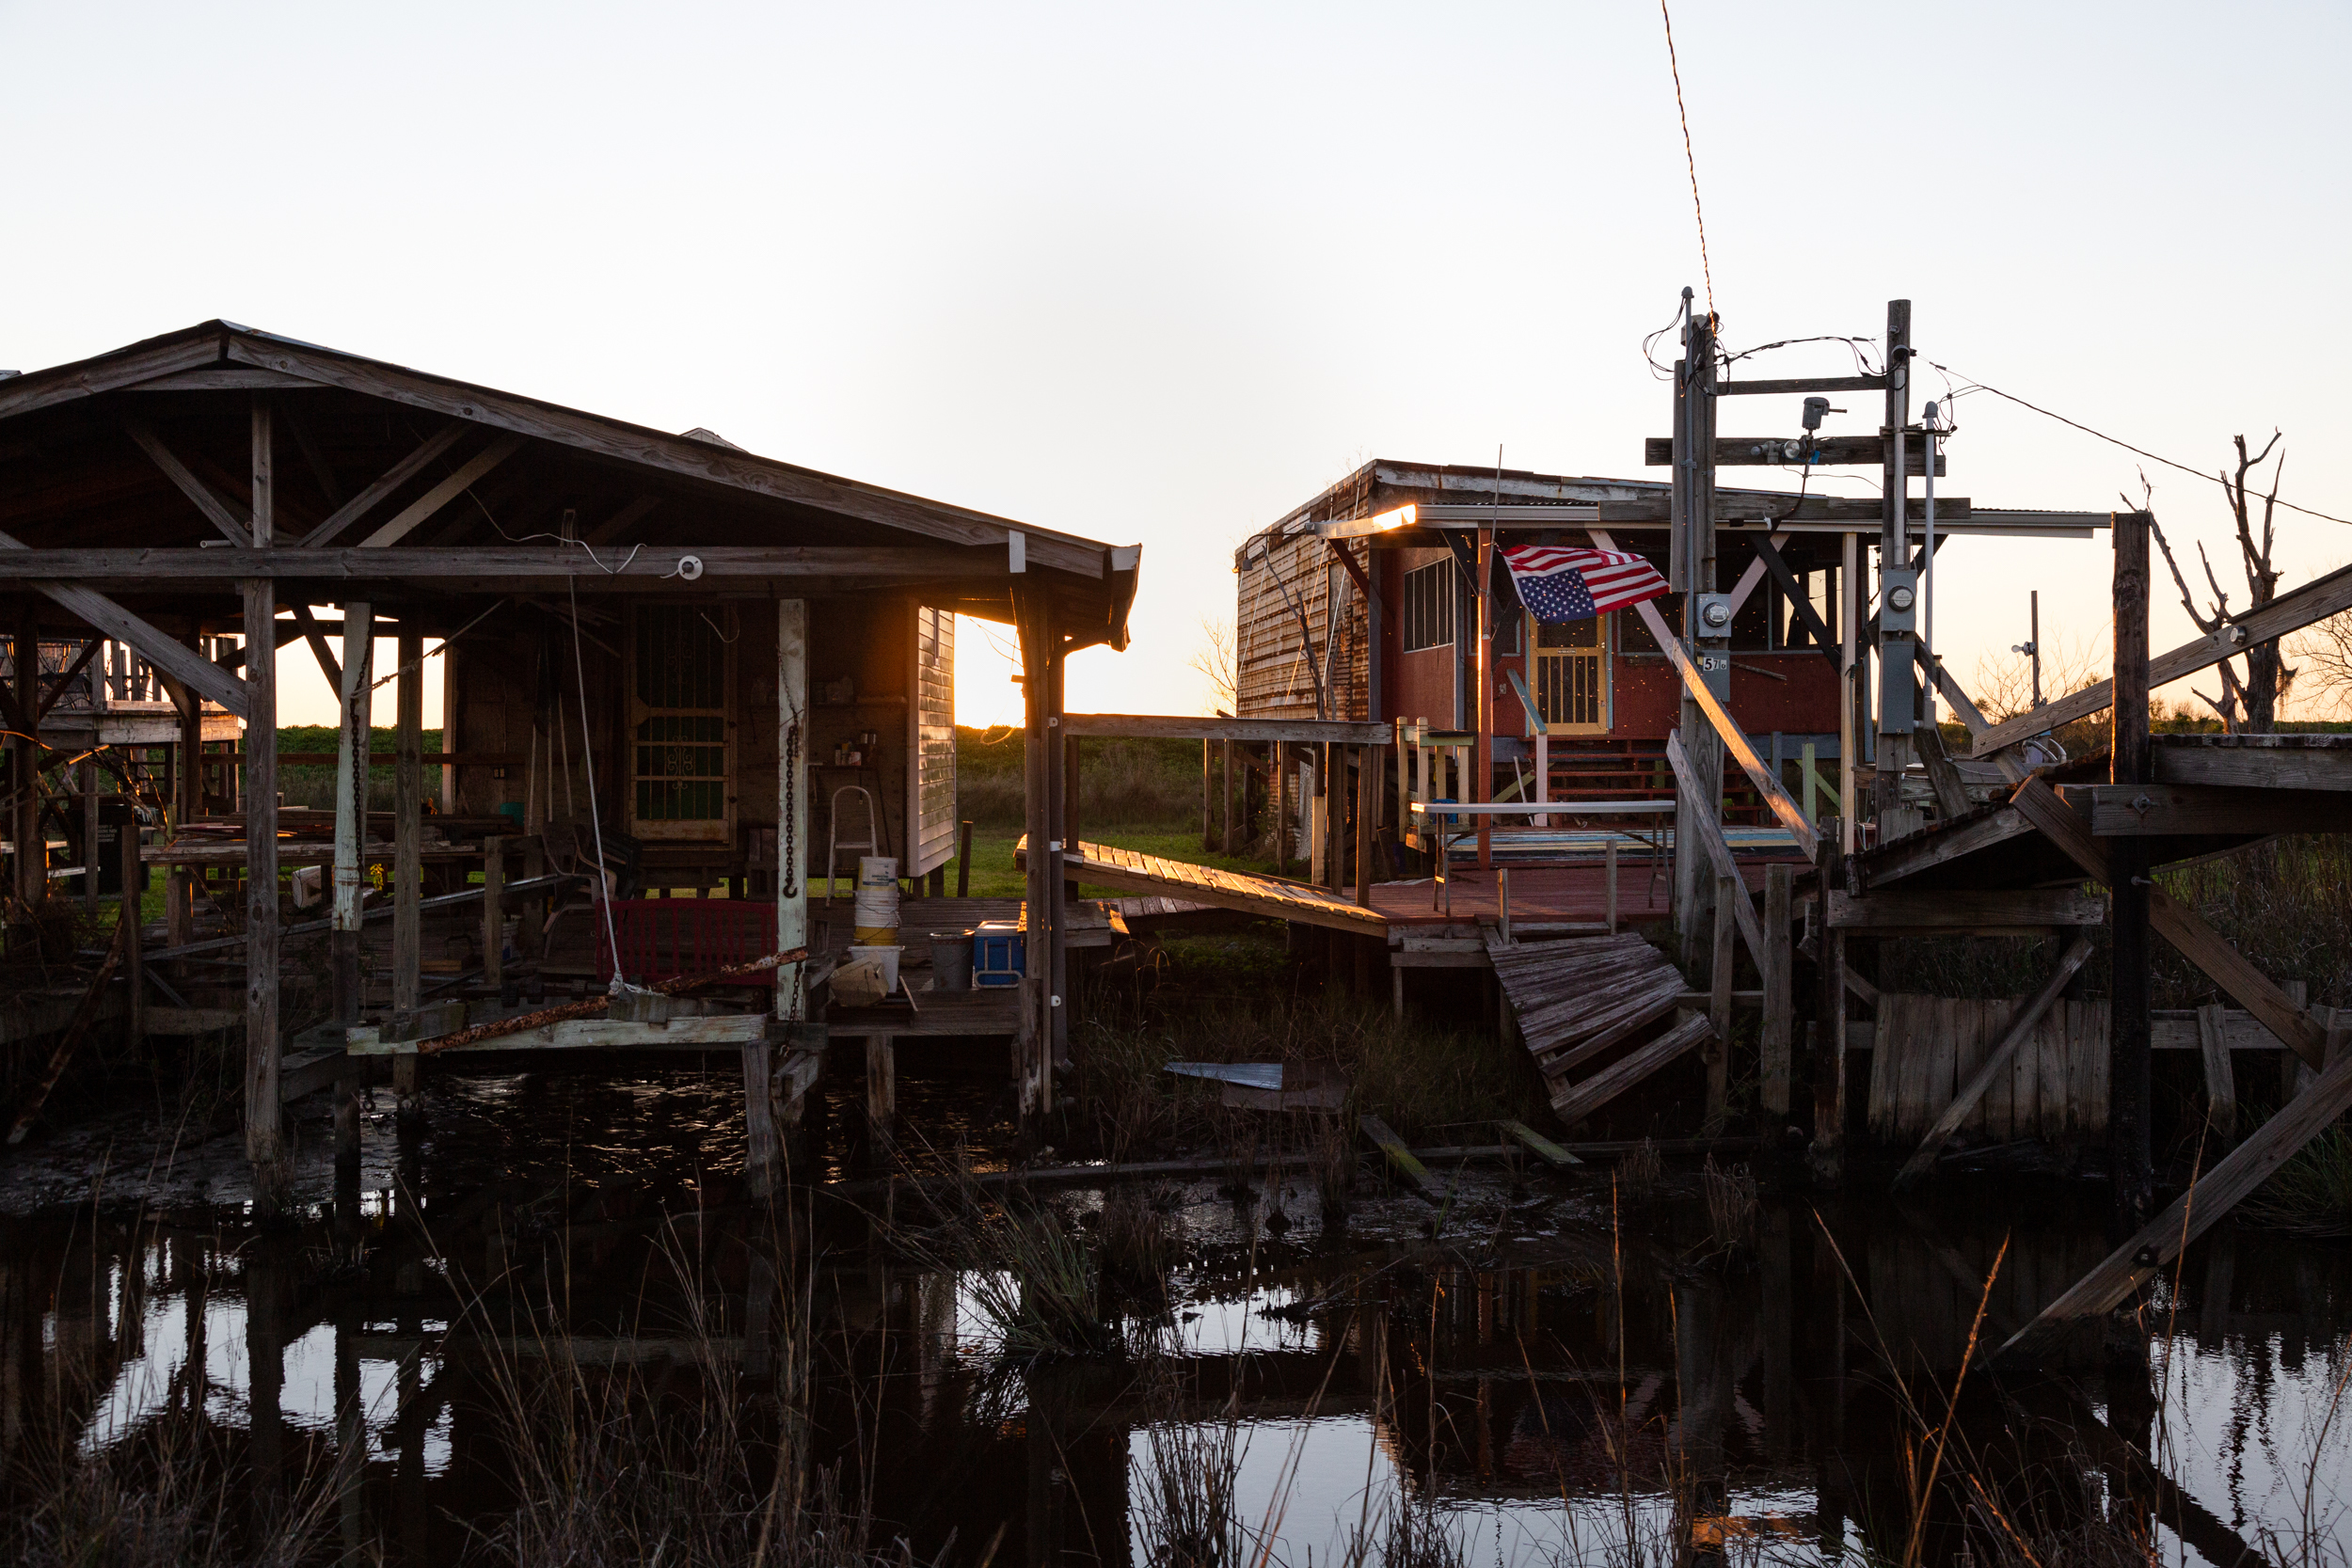
Abandoned homes along the only road traversing Isle de Jean Charles. Home to the Band of Biloxi-Chitimacha-Choctaw Indians that have inhabited this narrow island since the 1830s. Located in the Terrebonne Parish, LA, the island and its residents have been in direct threat from hurricanes and sea level rise, which has led to a controversial resettlement project for the community. The increased and consistent threat of climate related events for the island has resulted in a majority of residents moving away, with only 5 families remaining on the island. February 8, 2020. Photo credit: Juan Diego Reyes / Climate Visuals
Proof of degradation, before and after comparisons and human rights angles come to mind, what else?
All of those themes are very important. I’d add highlighting the impacts of climatic changes both locally and globally, the inequality of how impacts are felt, and foregrounding any systemic issues at the heart of a story.
I’d also say that connecting all of these angles into a compelling narrative is an essential role for photography. From an editorial perspective, photography presents a powerful opportunity to knit all of these elements together, again coming back to the idea of helping audiences to engage with what is going on, why a story matters, why they should stop scrolling and engage in more detail, and why this subject deserves their concern. In distilling complex issues into tangible stories, photography can play a vital role in taking climate storytelling out of the abstract, humanising technical details and building a compelling, relatable sense of why stories matter.
What examples came across your desk recently that felt powerful to you?
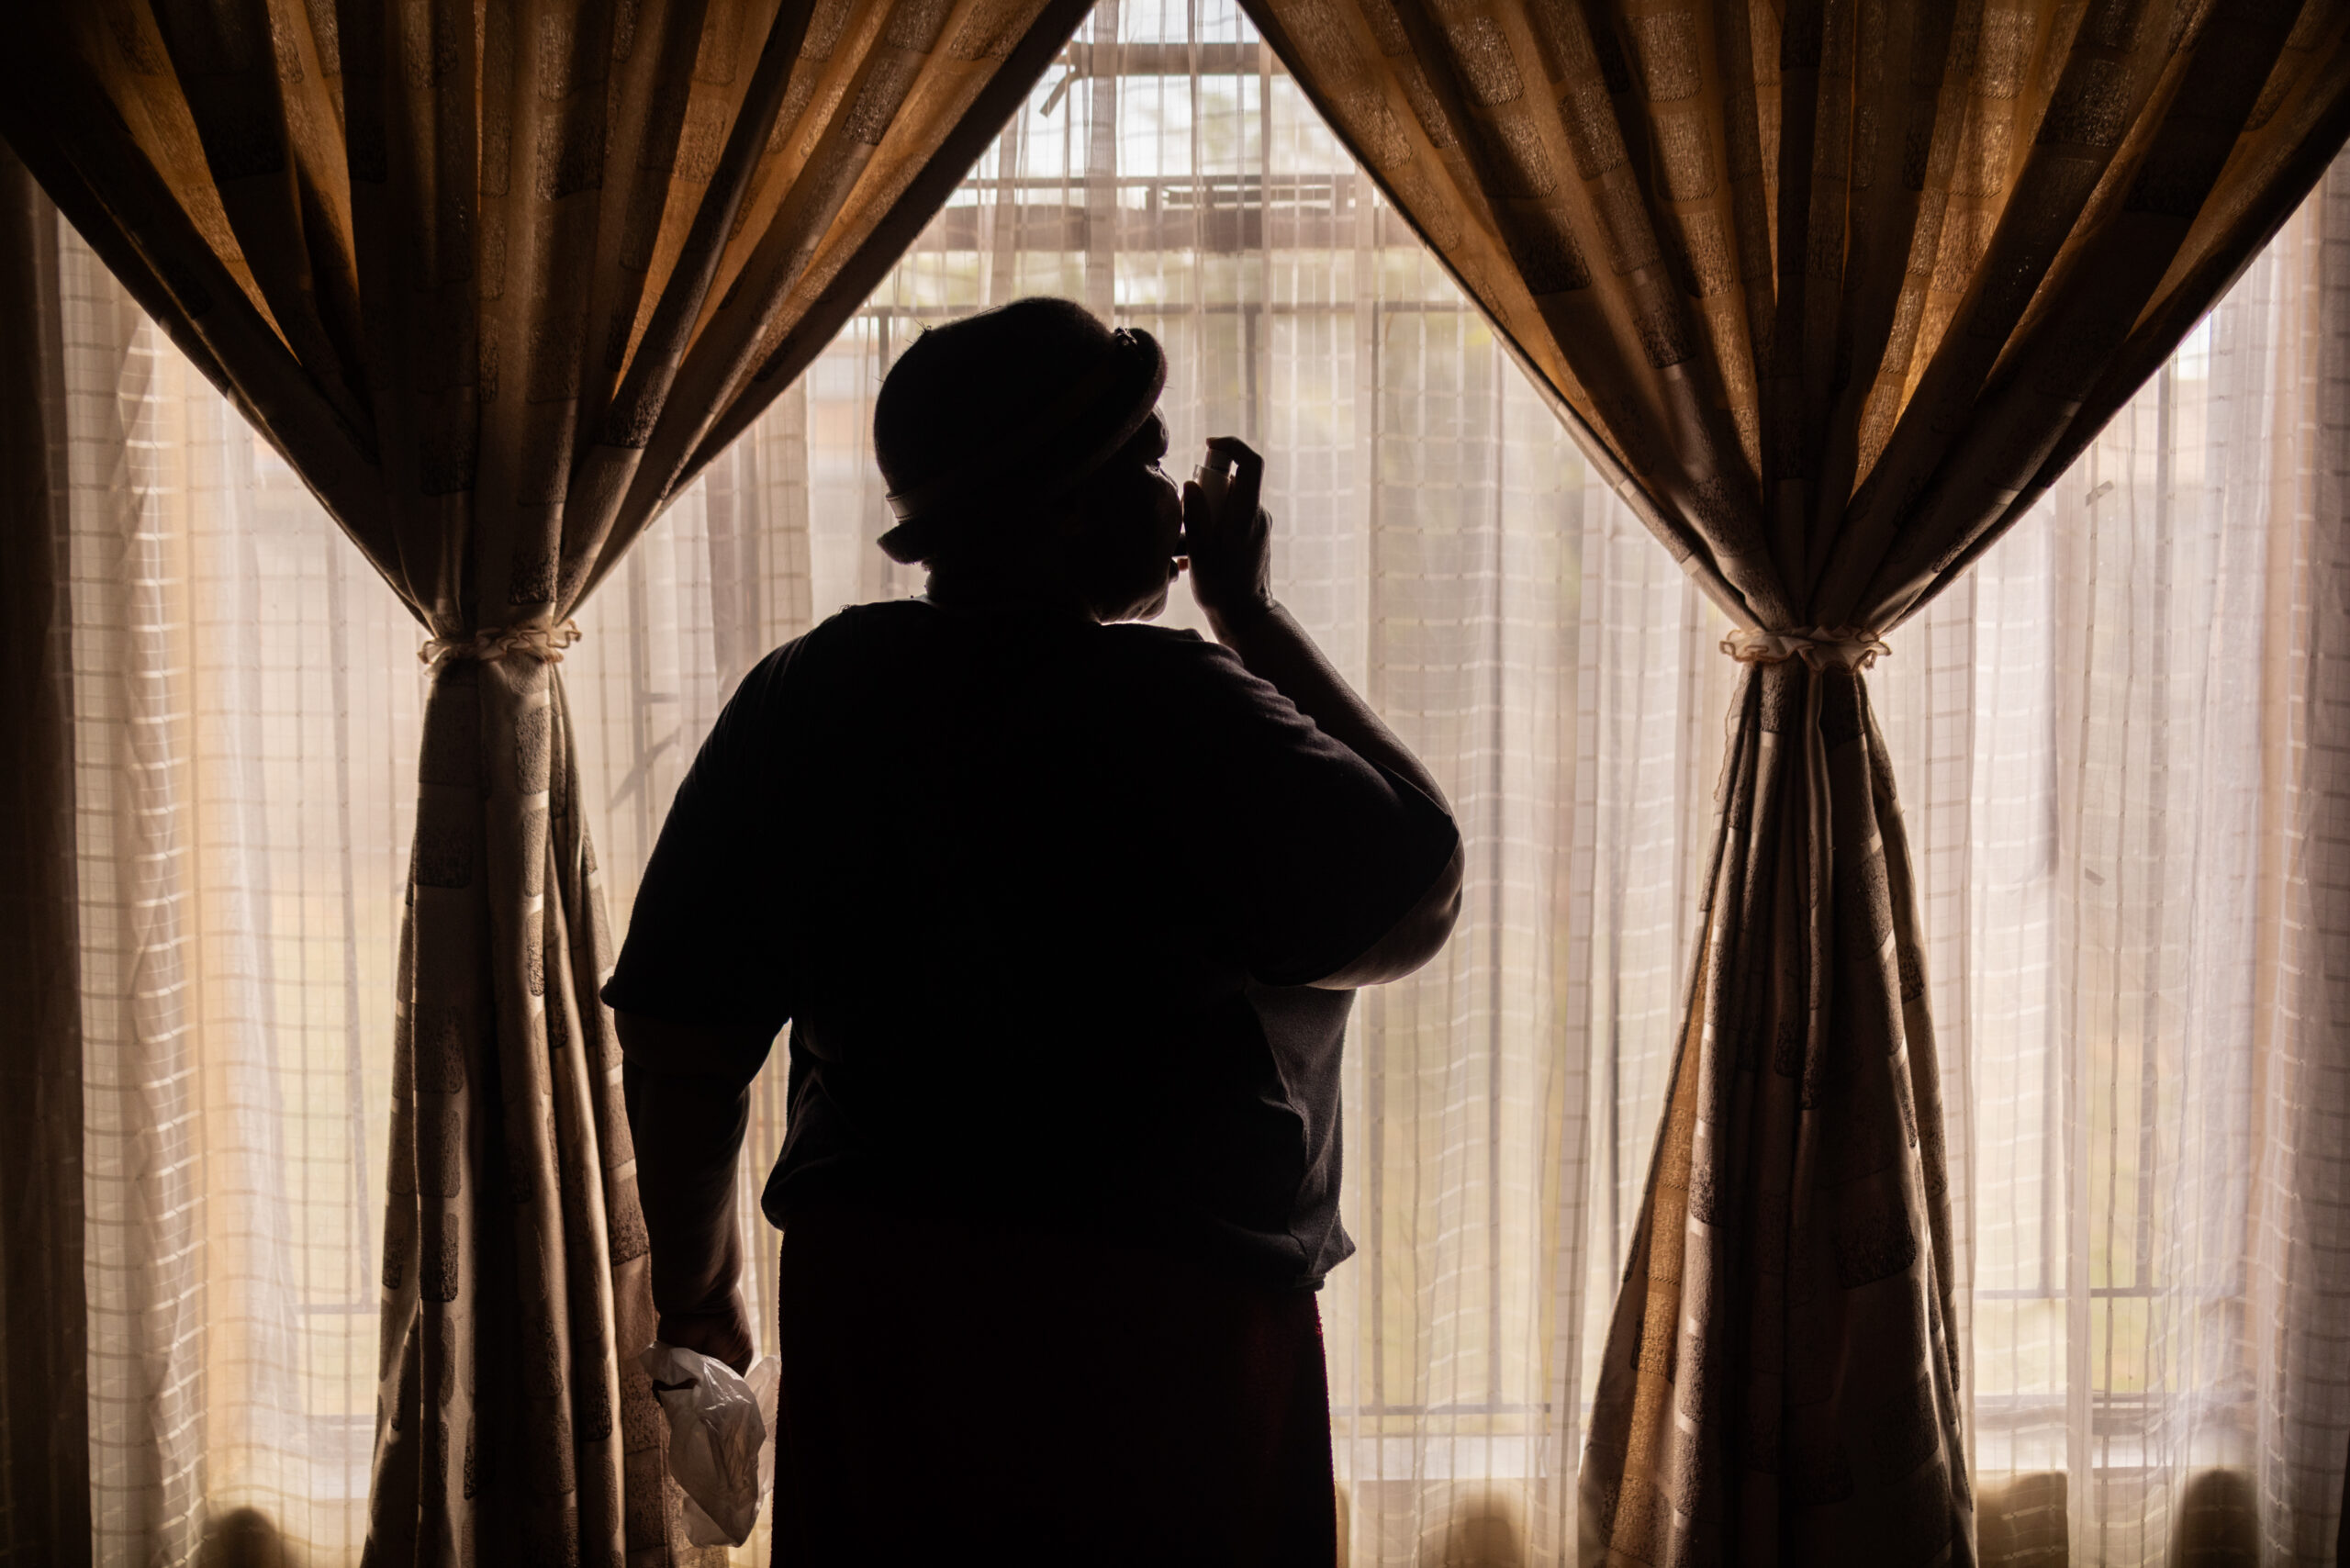
We recently worked on a project looking at the effects of air pollution on communities in Indonesia, Poland, South Africa and the UK. In South Africa, photographer Gulshan Khan made some great work with communities in the Highveld region, showing the serious health effects of air pollution in the area. These effects were part of the so-called Deadly Air Case, where the poor air quality over the Highveld Priority Area was deemed a breach of residents’ section 24(a) constitutional right to an environment that is not harmful to their health and well-being. These photographs, combining striking portraits of affected individuals with documentary images of daily life and compelling general views really tell the story of the effects on the local community.

Maria Nkosi* demonstrates how she uses a few times a week for her asthma at her home which is a street away from a mine in Clever, Witbank, Emalahleni, South Africa, on November 28, 2023. In 2021 the High Court in Pretoria confirmed a judgement in what was called the Deadly Air Case, that the poor air quality over the Highveld Priority Area is a breach of residents’ section 24(a) constitutional right to an environment that is not harmful to their health and well-being. *not her real name. Photo credit: Gulshan Khan/Climate Visuals
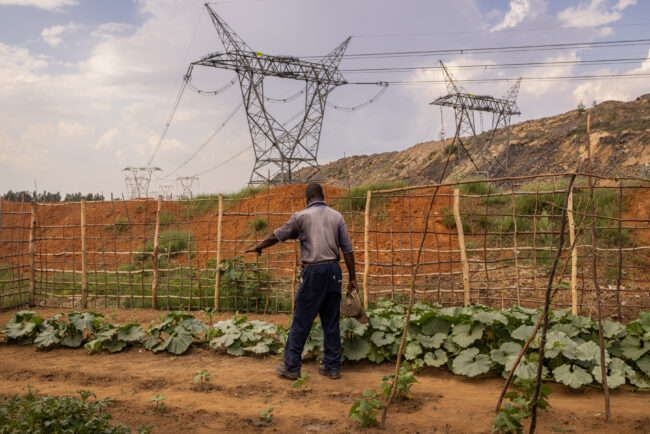
Samuel Nkosi* walks through a plot of land next to a mine where he farms vegetables which he donates to the church in Witbank, Emalahleni, South Africa, on November 28, 2023. *not his real name. Photo credit: Gulshan Khan/Climate Visuals
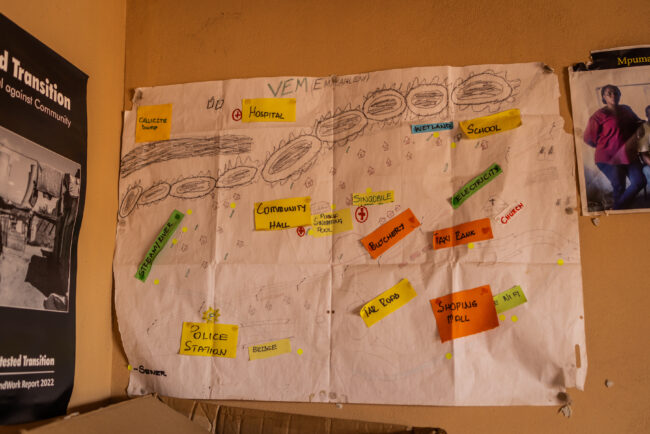
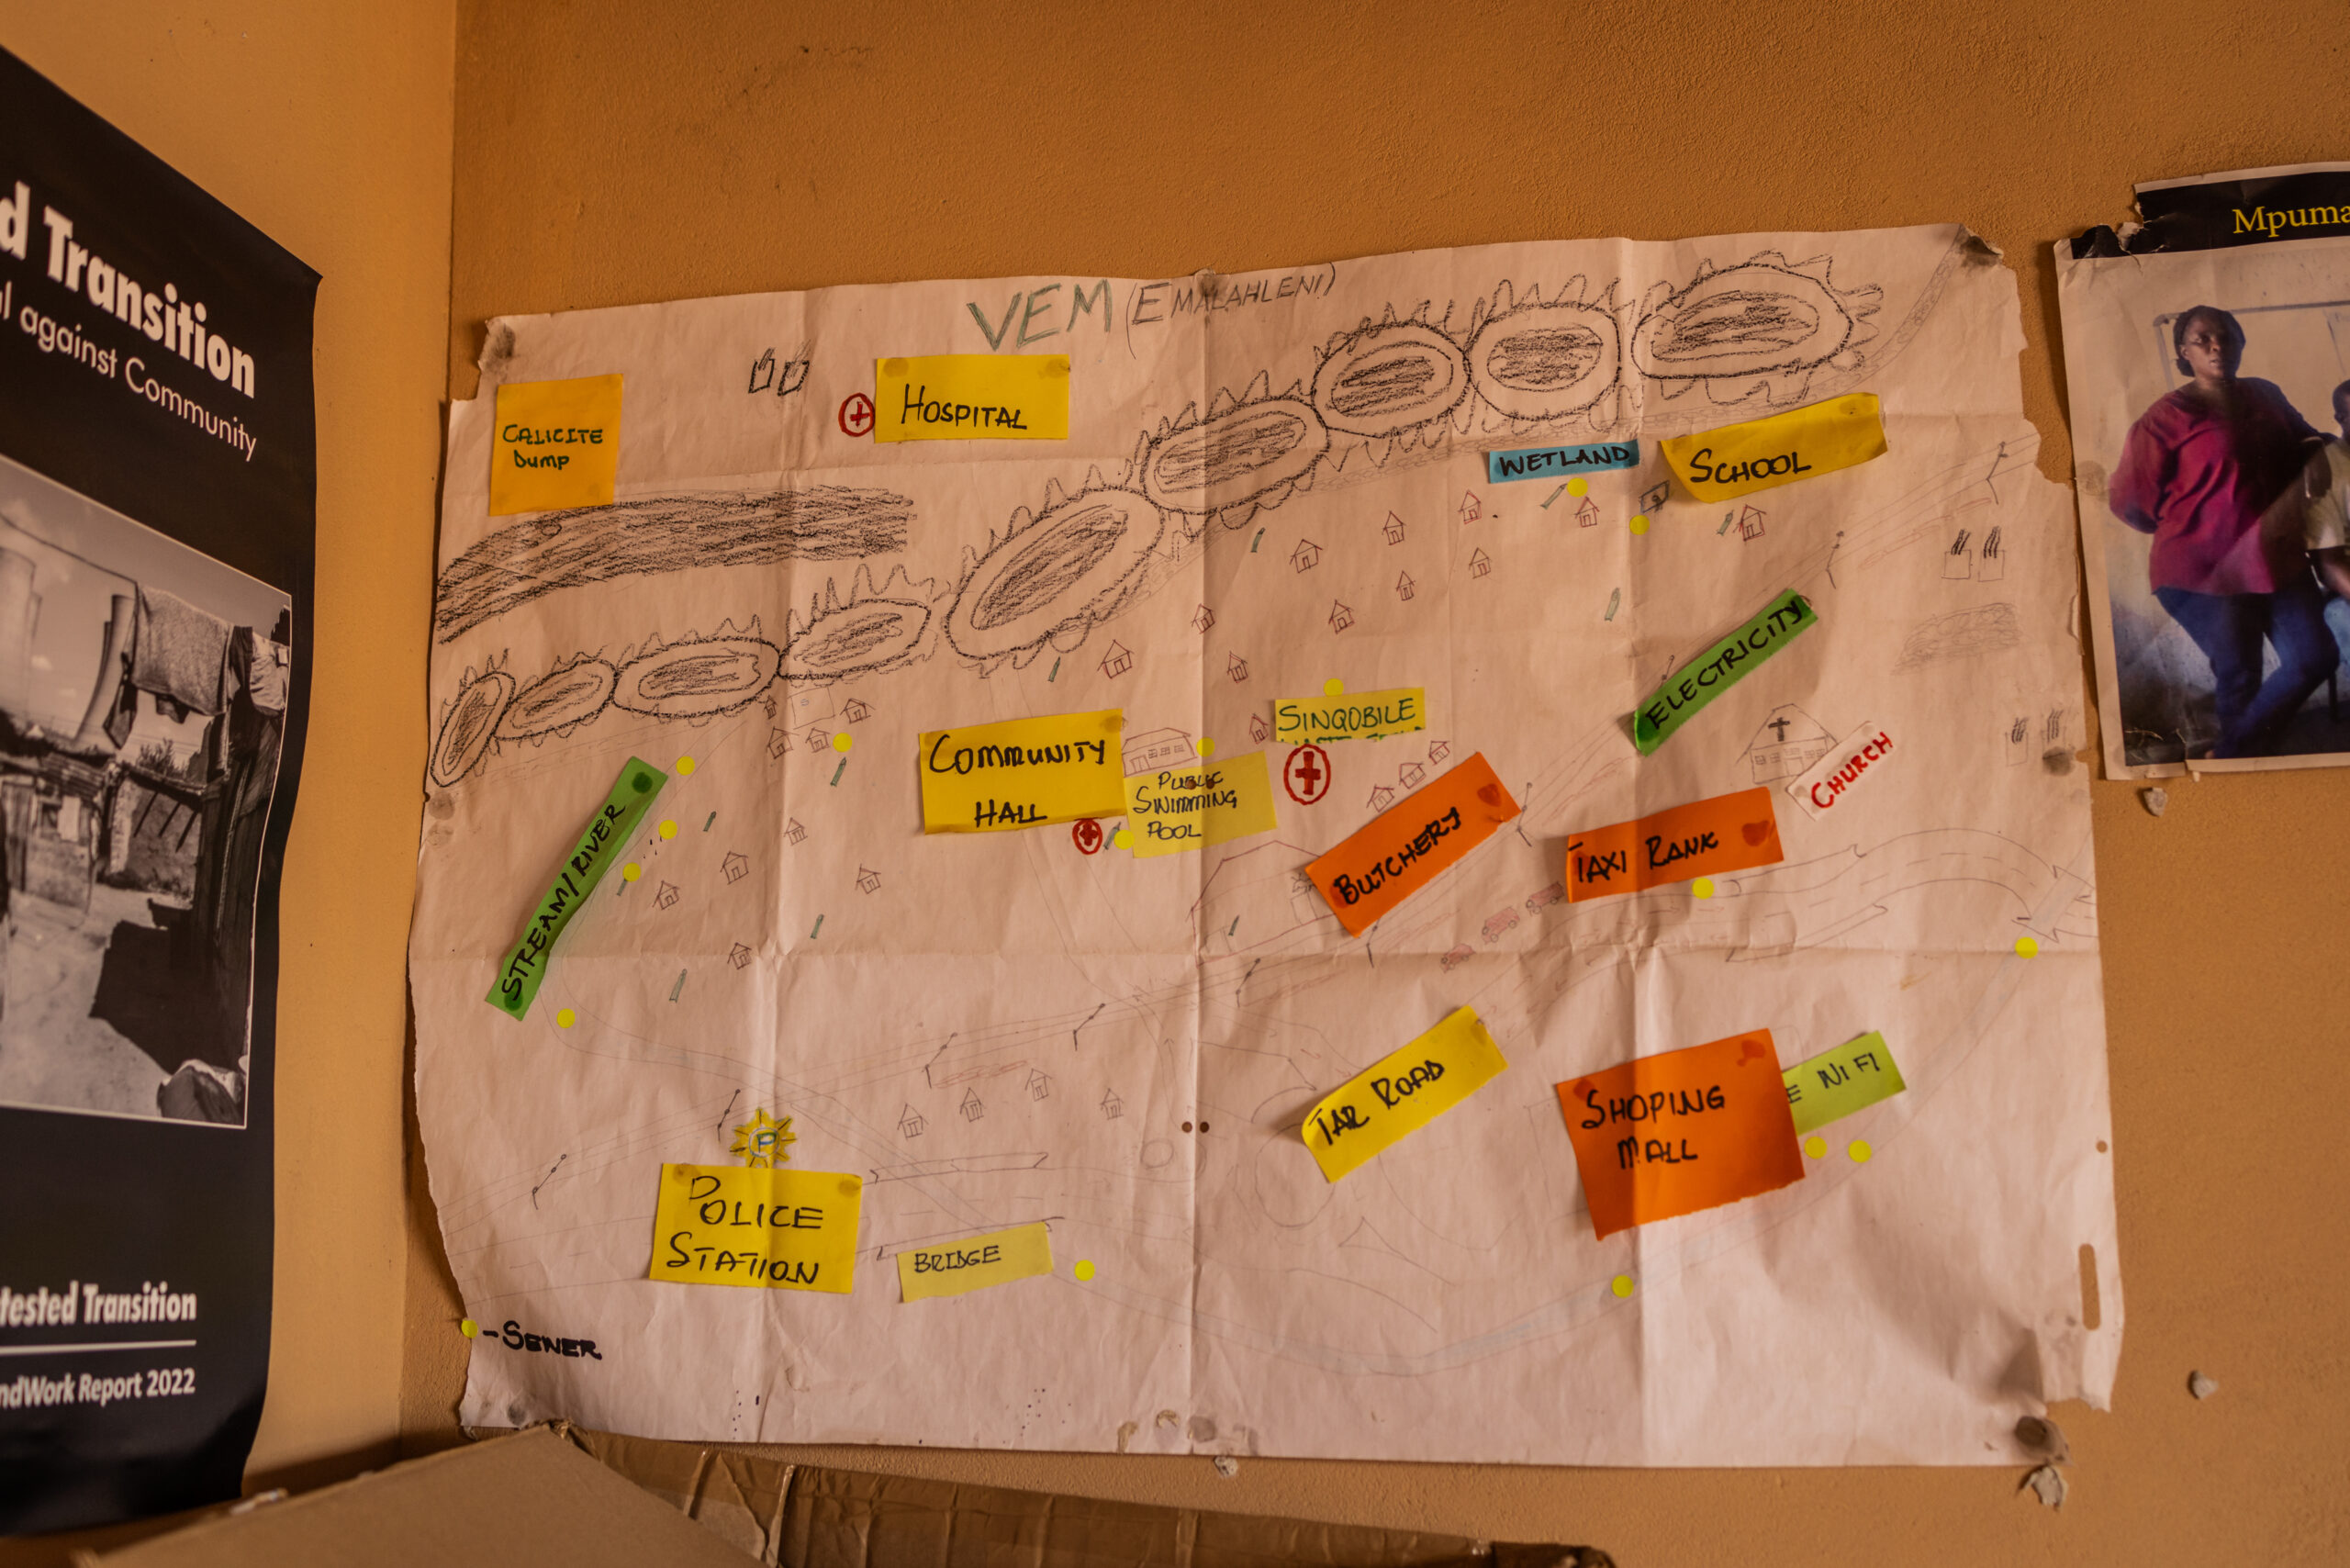
A map of the Vosman area drawn by founder Vusi Mabaso hangs on the wall of the offices of Vukani Evironmental Movement (VEM) discuss the issue of informal miners called Zama-Zamas at their offices in Witbank, Emalahleni on November 28, 2023. VEM is a non profit organisation that was established in 2016, focused on environmental justice issues like Air Pollution, Climate Change and Energy, Water and Sanitation. Photo credit: Gulshan Khan / Climate Visuals
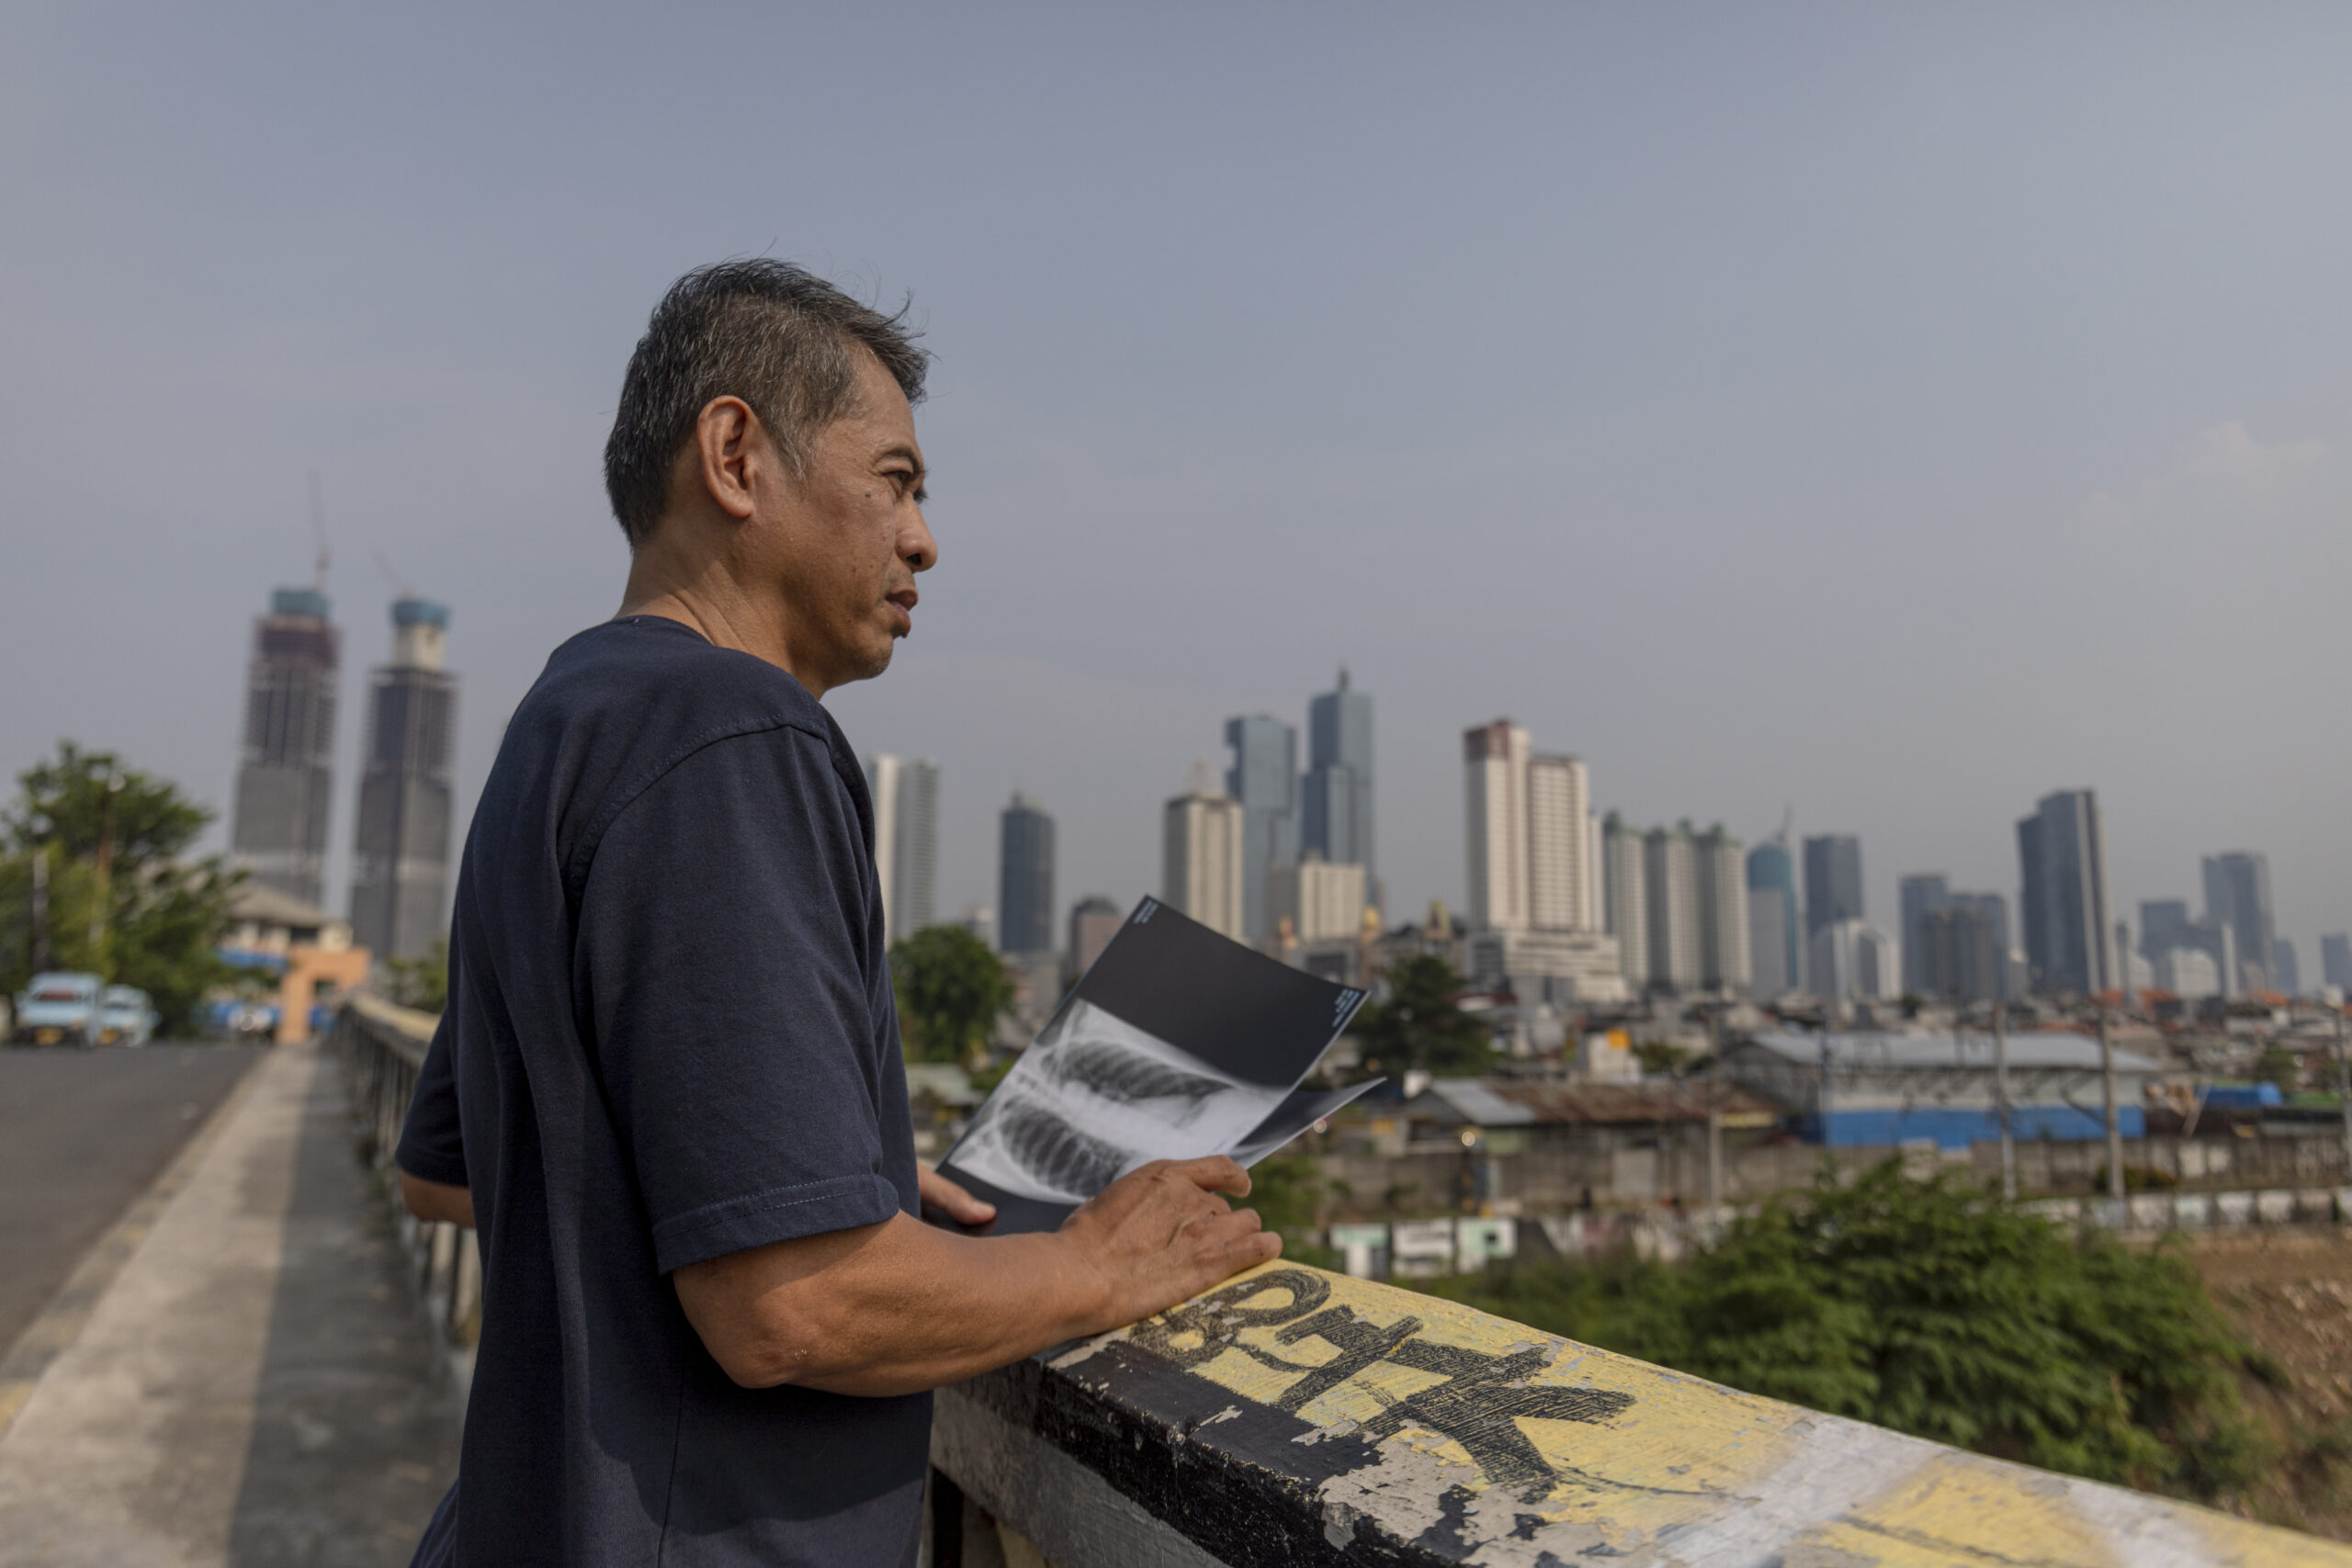
Similarly, in Indonesia, photographer Aji Styawan photographed taxi driver Istu Prayogi in Jakarta who was part of a group of residents of the city who filed a lawsuit relating to air pollution problems. In portraits and reportage of daily life, these images help to ground an expansive problem in real world, relatable stories.
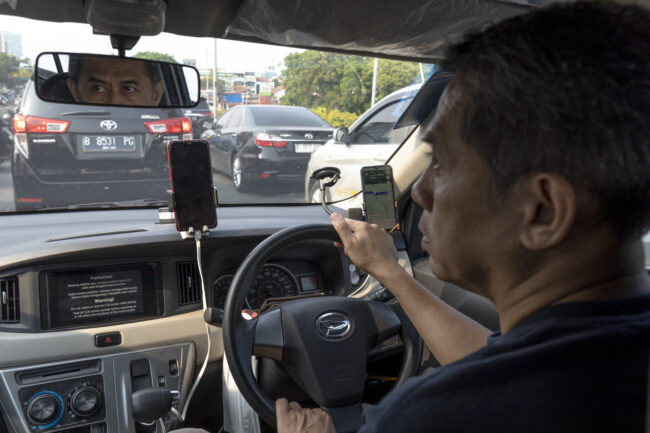
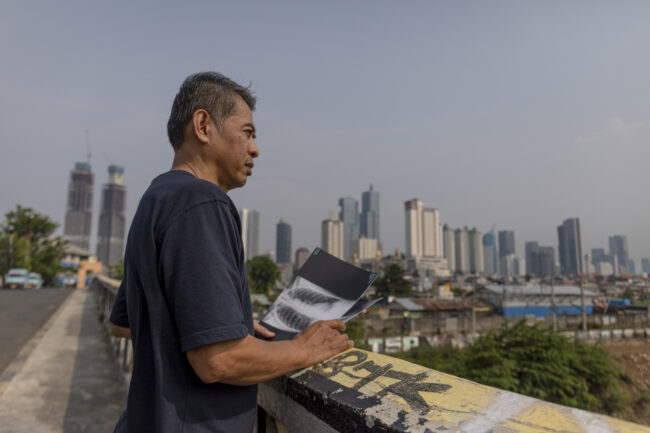
Istu Prayogi (58) working as an online taxi driver, looking for passengers amid the traffic in Jakarta, Indonesia, on November 16, 2023. Every morning he coughs and spits out ripples of thick blood, affected by the air pollution. In 2016, Istu was diagnosed with respiratory problems, referred to as Acute Respiratory Infections (ARI). In August 2019, Prayogi as part of a group of 31 residents who are members of IBUKOTA (Capital) Coalition filed a citizen lawsuit to the Central Jakarta district court related to air pollution problems. They sued the President of Indonesia, the Minister of Health, the Minister of Transportation, Minister of Environment and Forestry, Governor of Jakarta Capital Special Region, West Java and Banten Province. One of their demands is regarding improving regulations for handling air pollution in Jakarta and its surroundings. Photo credit: Aji Styawan/Climate Visuals
Away from our work, I thought that Chris Donovan’s photography of St. John, New Brunswick, recently featured in the New York Times, was a standout example of the power of deeply reported visual storytelling to communicate complex, intersecting stories to an audience and I was really pleased to see the work given the space to tell the story in this way.
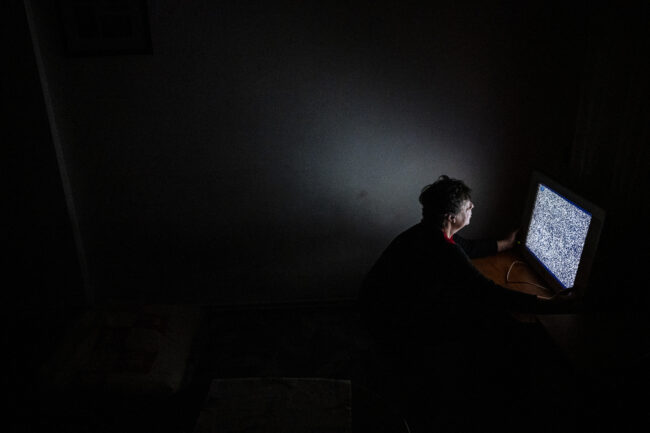
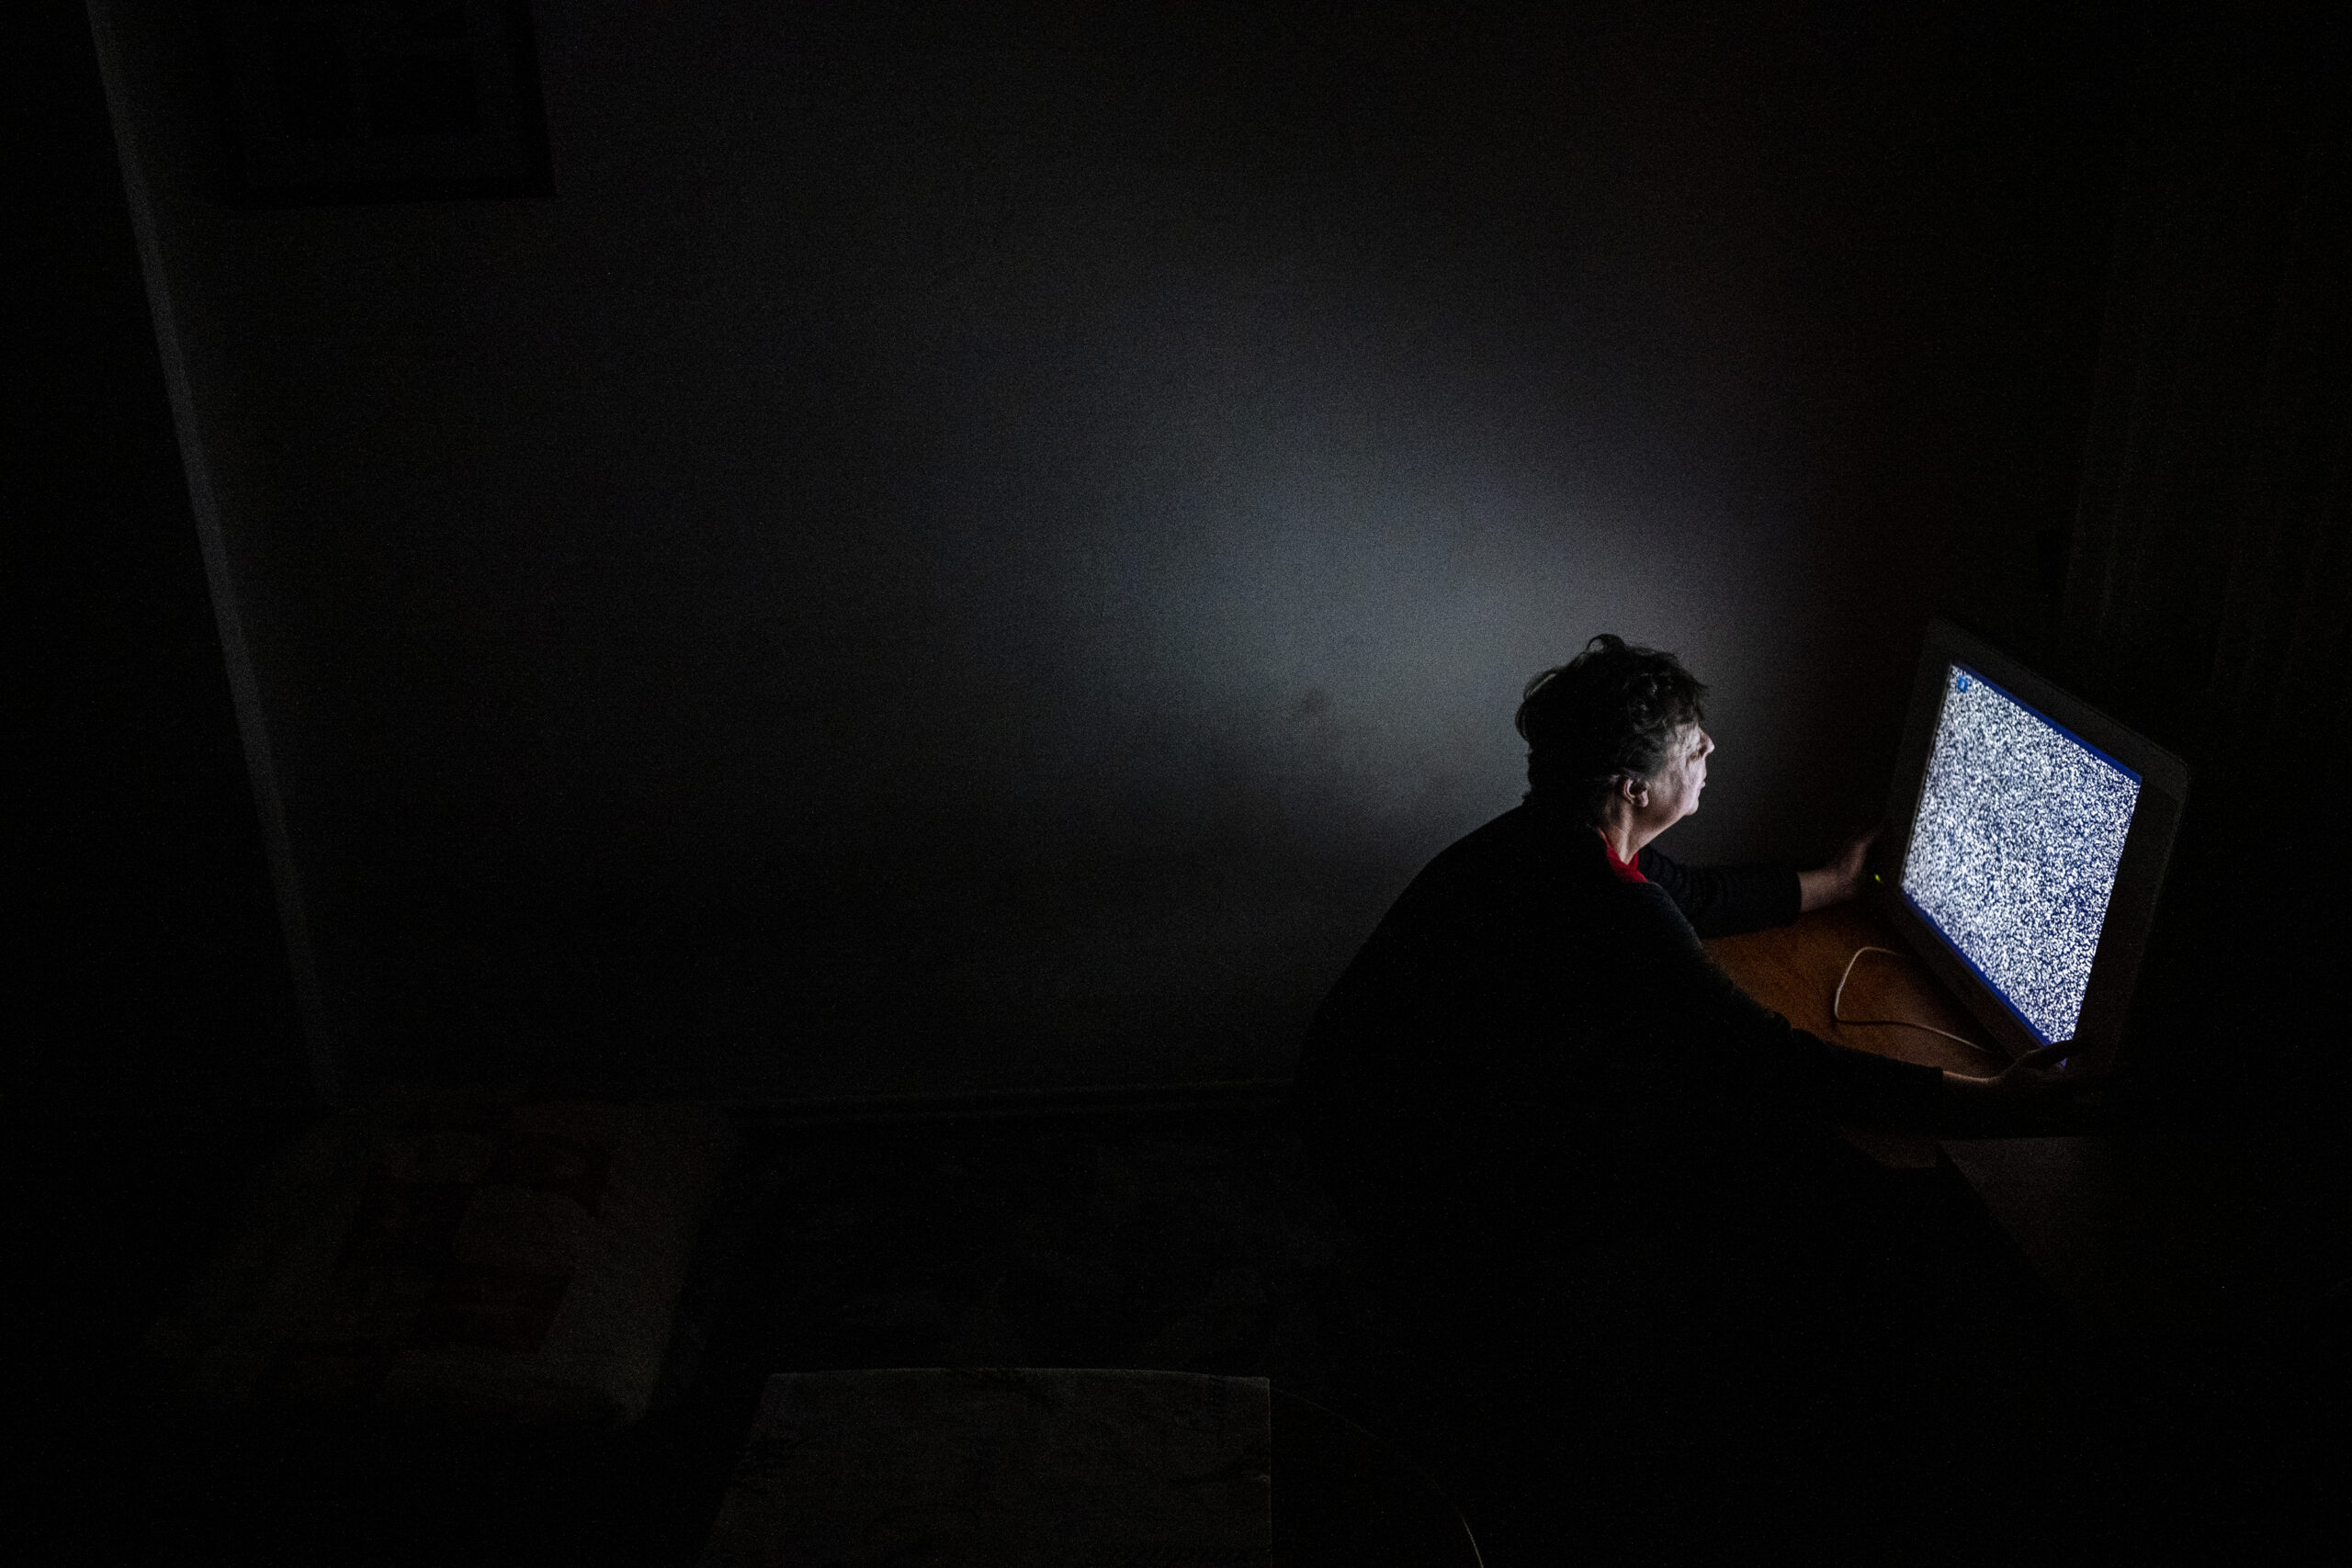
Ewa Pisarzowska worked for over 25 years in the coal mines and salt extraction industry in Rybnik. She lost work during the pandemic and so did her partner, they soon could no longer afford to rent an apartment and for a few months lived at their friend’s place. Recently they rented a studio apartment with central heating, but without furniture. They struggle to pay for food or electricity. Ewa sometimes helps at the “Wspolny Stol” center, she looks for food, still edible but not for sale, in dustbins near big grocery stores. To save money on electricity and still know what is happening in the world she often uses TV as the only source of light in the house. Rybnik, Silesia, Poland. December 14 2024. Photo credit: Kasia Strek / Climate Visuals
While photography could be a game-changer for climate litigation, there are real, structural, and even ethical barriers that prevent the kind of visual storytelling and documentation that would truly support justice-centered climate work. What do you see as the biggest barriers?
Firstly, time and money. Much of what Climate Visuals advocates for has detailed, in-depth, photographic storytelling at its heart, which as we all know is often expensive and time consuming to produce and all too often out of reach for many. Relatedly – display space. This kind of photojournalism needs to be afforded the space on publication to get into the detail and hold a narrative structure. Whilst there are outlets publishing fantastic, long-form and in-depth, visual reporting, the opportunities for this are only ever decreasing, whilst all the while the dominance of single-image distribution via social media grows. This is a challenging environment for the kind of imagery our evidence tells us audiences want to see.
Interlinked with these three challenges is the appetite for a less literal, limited and illustrative role for photography in the coverage of climate change. As above, much of what our evidence base encourages becomes more possible when photography’s role in storytelling is not restricted to place-holder, generic images at the top of web articles and in social media thumbnails. Whilst digital platforms provide near limitless opportunities for complex and in depth visual storytelling formats, all too often comprehensive reporting is accompanied by generic, familiar imagery and the potential for compelling and engaging photography is missed.
As a photography industry we need to continue to push for the expanded role that I’m sure we all believe images should fulfill. We need to seek evidence and rationale for this expanded role to build that justification – be it research evidence like at Climate Visuals, or case studies of high performing exemplary content through audience metrics. It is with these kinds of insights that you can build a case and achieve the necessary buy-in.
Beyond those structural barriers, I would highlight a couple of other key issues, firstly the safety of participants. This must be at the heart of any considerations about visual coverage of climate litigation and include the full spectrum of potential image uses into the future. Appearing in imagery and being linked to litigation could bring with it significant personal and community risks for participants. Truly informed consent and frank, detailed and empathetic conversations including all available information with any potential participants is essential. Added to this is the ethics of using individual stories to represent wider, more systemic issues. This needs to be carefully considered on a case by case basis, and individuals and their stories need to be appropriately protected, for example with clear limitations on how, where and when imagery can be used. Ensuring that a diverse range of perspectives contributes to the visual coverage is also key. As commissioners and photographers we must collaborate with communities in telling their stories, seek to work with photographers connected to the stories, locations and contexts they are photographing and prioritise expanding the diversity of perspectives seen by audiences. Only by doing this can the full potential for engaging, empathetic and ethical, justice-centered climate visual storytelling be realised.
Visual evidence-based imagery can serve as critical documentation in legal cases – how are you verifying these images are not manipulated?
Climate Visuals works to, and promotes, photojournalism industry best practice with regards to image manipulation. With commissioned work we are collaborating with trusted photographers who know, understand and actively represent the values and ethics that underpin our work. With submitted images we work with a set of submission guidelines that include standards for manipulation as well as ethical best practice. In addition to these safeguards we carry out verification checks on imagery through a mix of processes including OSINT analysis of content, scenes and locations, fact checking of details and caption information, and working with trusted local partners to confirm image and story details.
We also prioritise accompanying images with detailed caption information and encourage its inclusion when images are used to ensure that further detail, context and nuance accompany the images.

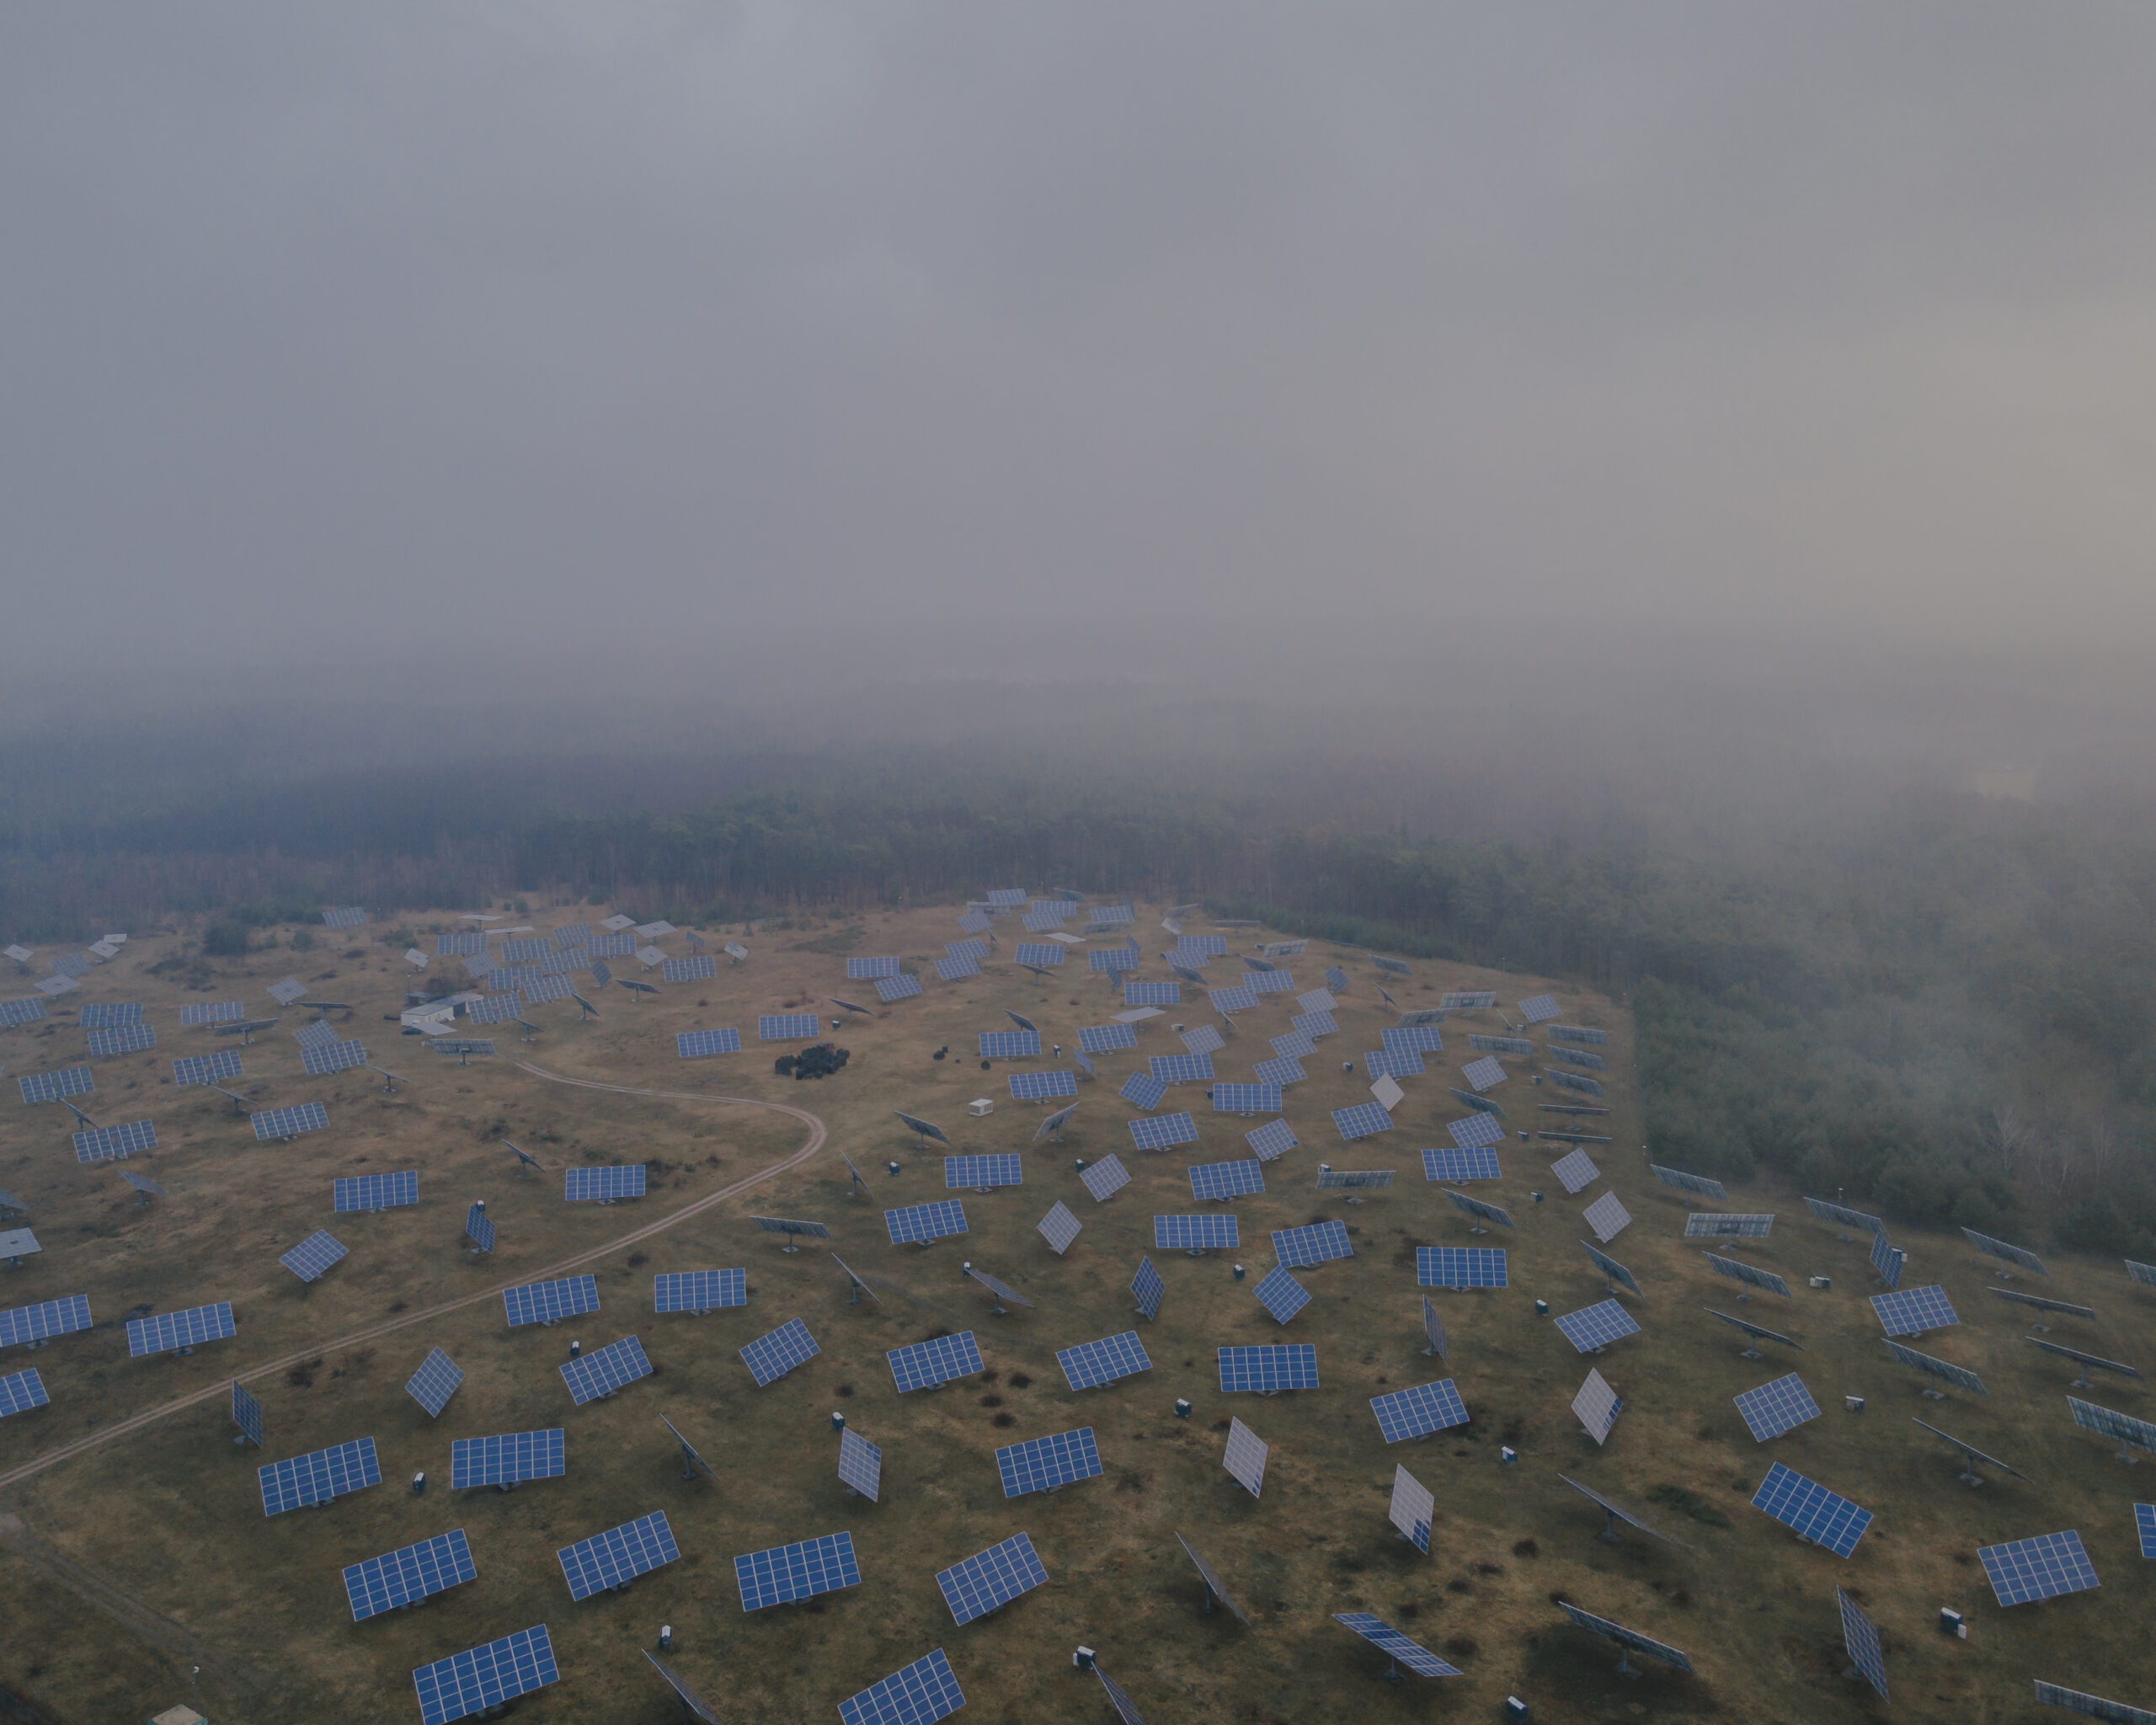
The solar park located outside the village of Feldheim, Germany on February 21, 2023. The park produces enough energy to meet the yearly electricity demands of approximately 600 households consisting of four individuals each. Feldheim is the first village in Germany to be completely self-sufficient in energy. With the help of wind energy, photovoltaics, biogas, biomass, a regulating power plant and a local heating network, the village covers its own needs. The large amounts of surplus energy generated in the process are fed into the public grid. Photo credit: Ingmar Björn Nolting / Climate Visuals
What role do you see photography playing within political activism to support the themes of climate change and justice?
Photography can play an important role in helping audiences understand and relate to complex issues. From performing an evidentiary role, recording and highlighting what is happening around our planet, to driving public concern and opinion, there’s a long history of photography playing a powerful role in the issues of climate change and justice. In our ever increasingly image-saturated world I still believe that photography has an essential role to play here, but I do think that the way in which it can play this has changed. I believe that the potential for single photojournalistic images to take on ‘iconic’ status and go on to represent whole issues is now greatly reduced, the volume of new imagery being produced and consumed, and the speed of its consumption, is just too great. Instead, photography’s power as a tool for in-depth, empathetic storytelling, across different platforms and use contexts, should be prioritised. In a highly competitive visual environment, compelling visual reporting presents an opportunity to capture audiences’ attention, inform and build understanding, concern and empathy. To do this however, photography’s role in telling stories of climate change and justice needs not to be restricted to pure illustration, but instead to have the scope and freedom to tell these stories in depth, from a diverse range of perspectives, and with adequate space on publication. Only then can photography fulfil its full potential to humanise complex issues and build empathy, ground stories in a reality that audiences can relate to, and build a weight of evidence behind concerns.
I also think photography can play an important role in helping audiences to visualise a future. It can show how a situation could be improved, how a community elsewhere came together and solved a similar problem, and what opportunities could come were a cause to be fought. Photojournalism’s role in telling constructive stories shouldn’t be overlooked – we know from our research that images of climate change impacts are very emotionally powerful, but they can also overwhelm audiences. One way to combat this is to pair them with images highlighting tangible, relatable actions that audiences can take, or visual reporting that shines the light on ‘what happened next’ – it’s vitally important to record and show the devastating impacts of climate change, but don’t stop there, seek ways to demonstrate future potential through imagery too.

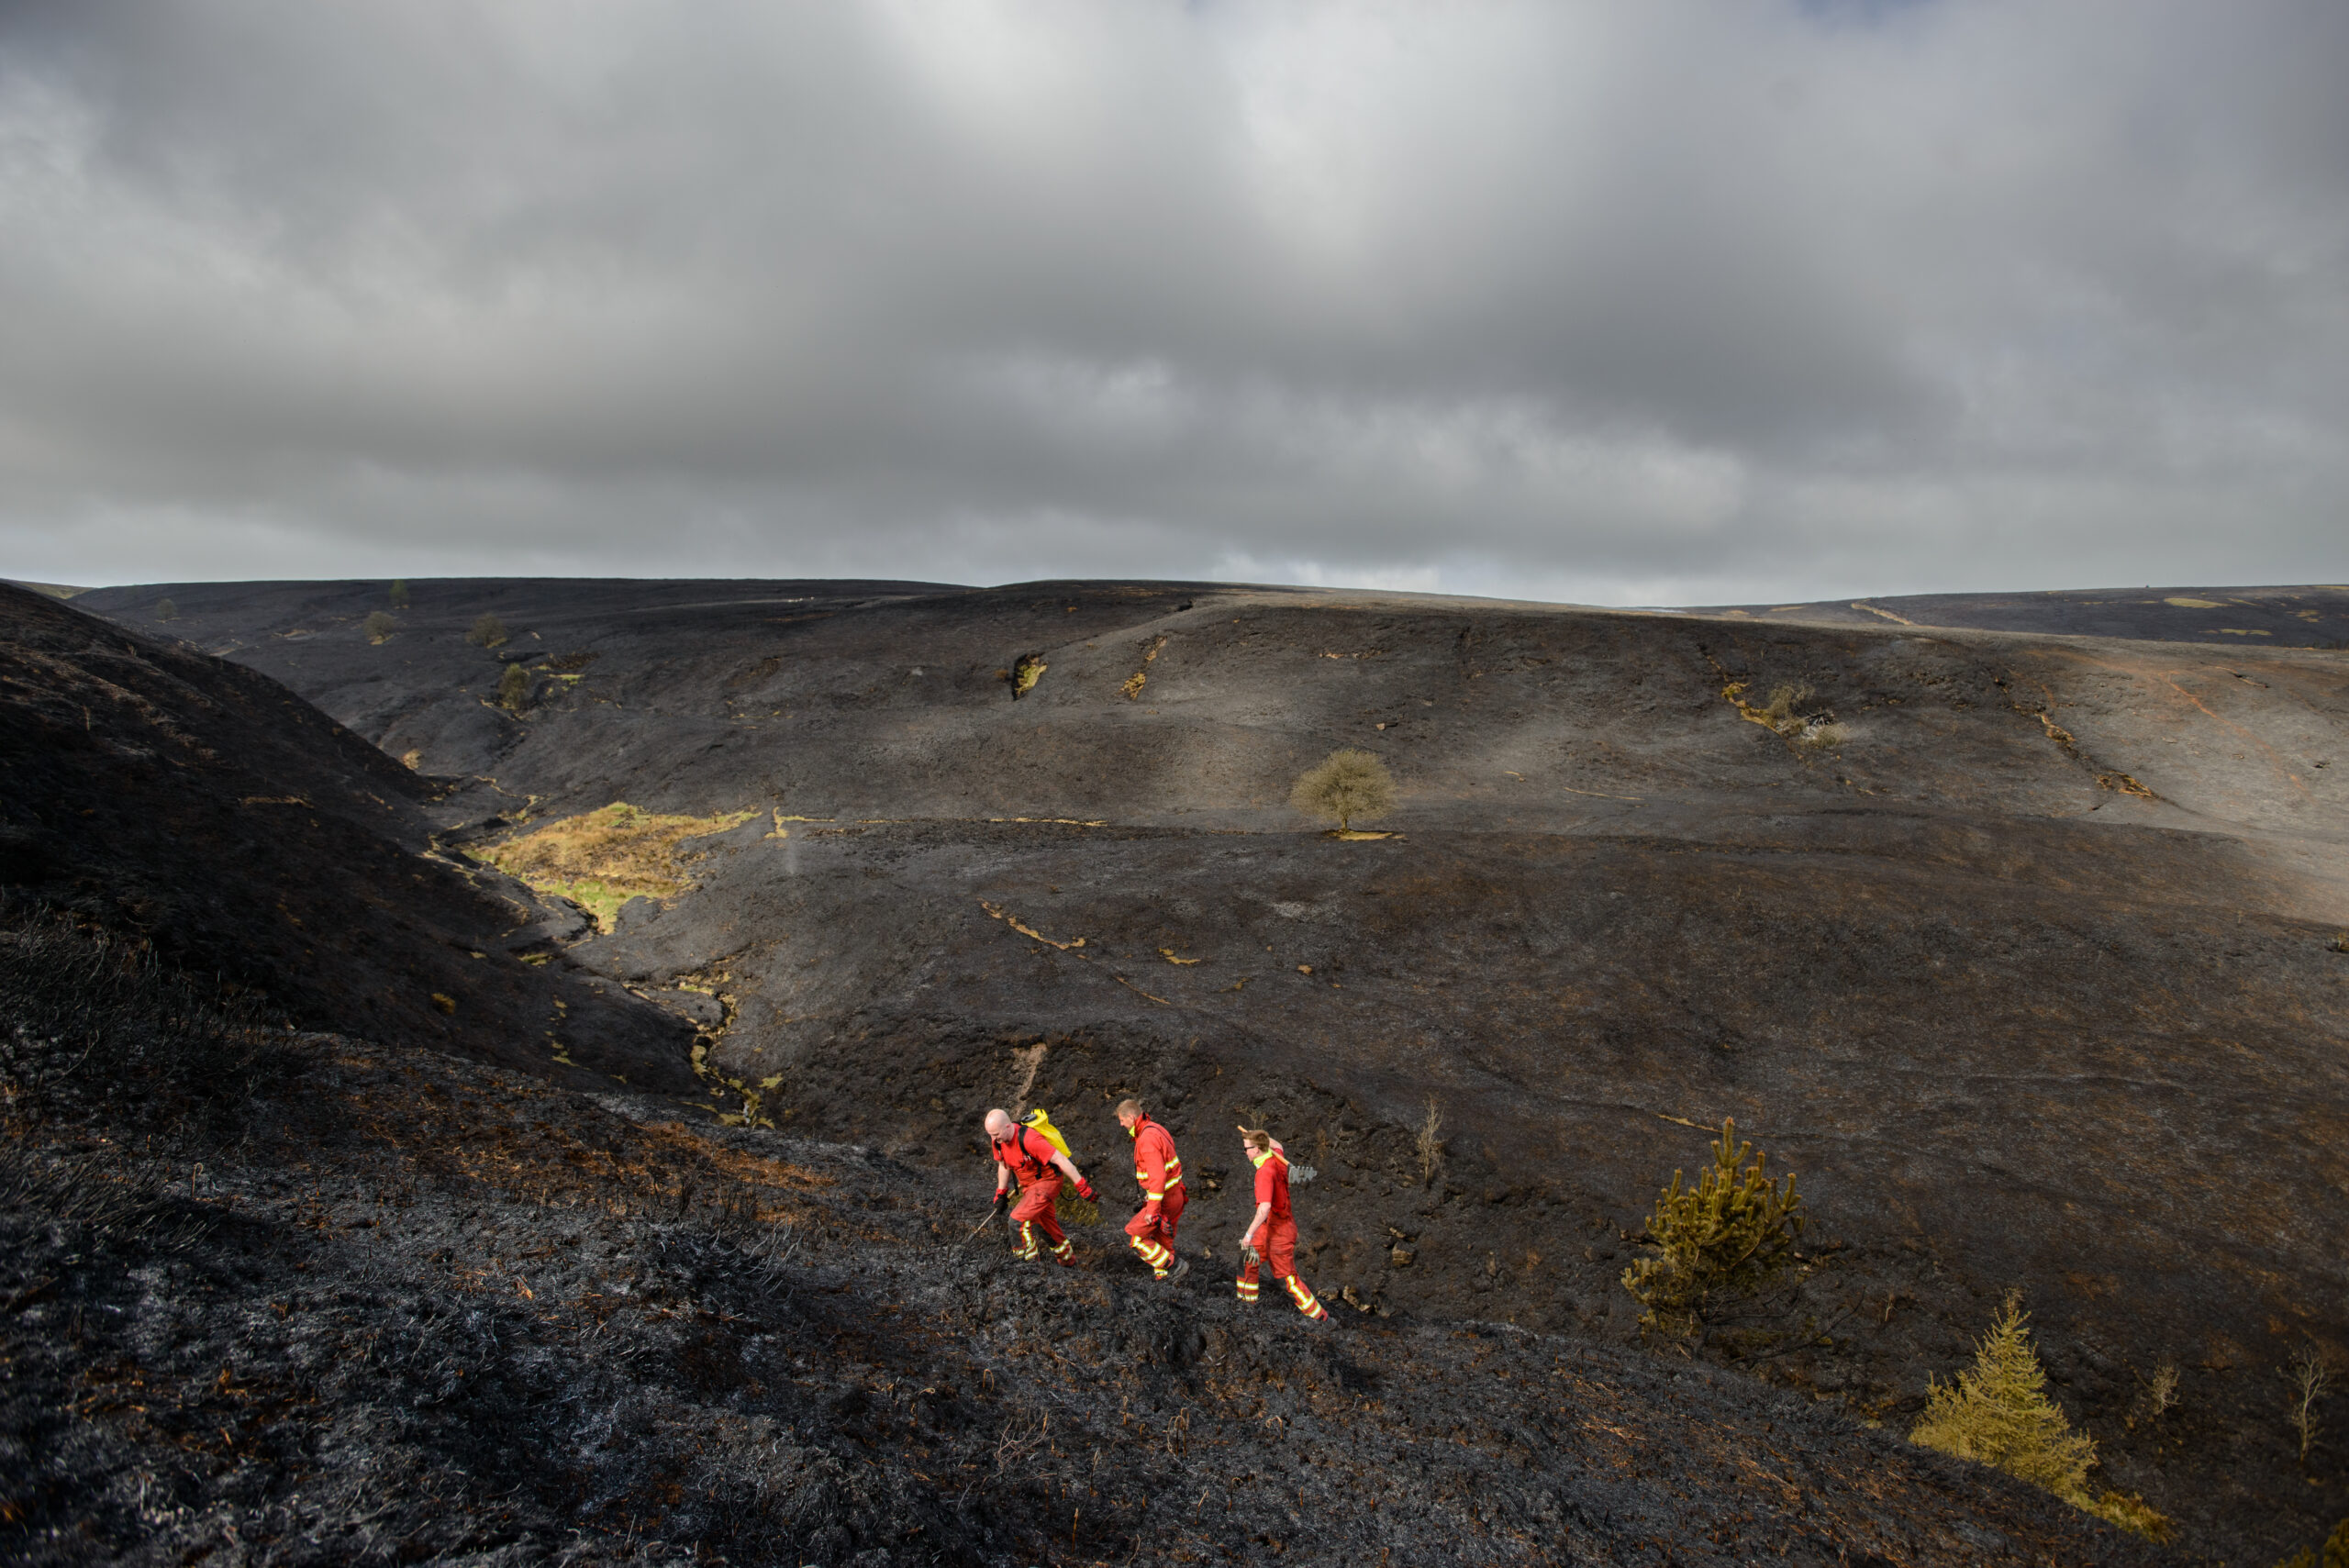
Firefighters are surrounded by a scorched landscape as they continue to work to tackle a large moorland wildfire in the Goyt Valley, near Buxton in the Peak District. Derbyshire, England. 3rd May 2025. The blaze caused extensive damage to vegetation in the area. Credit: Alastair Johnstone-Hack / Climate Visuals

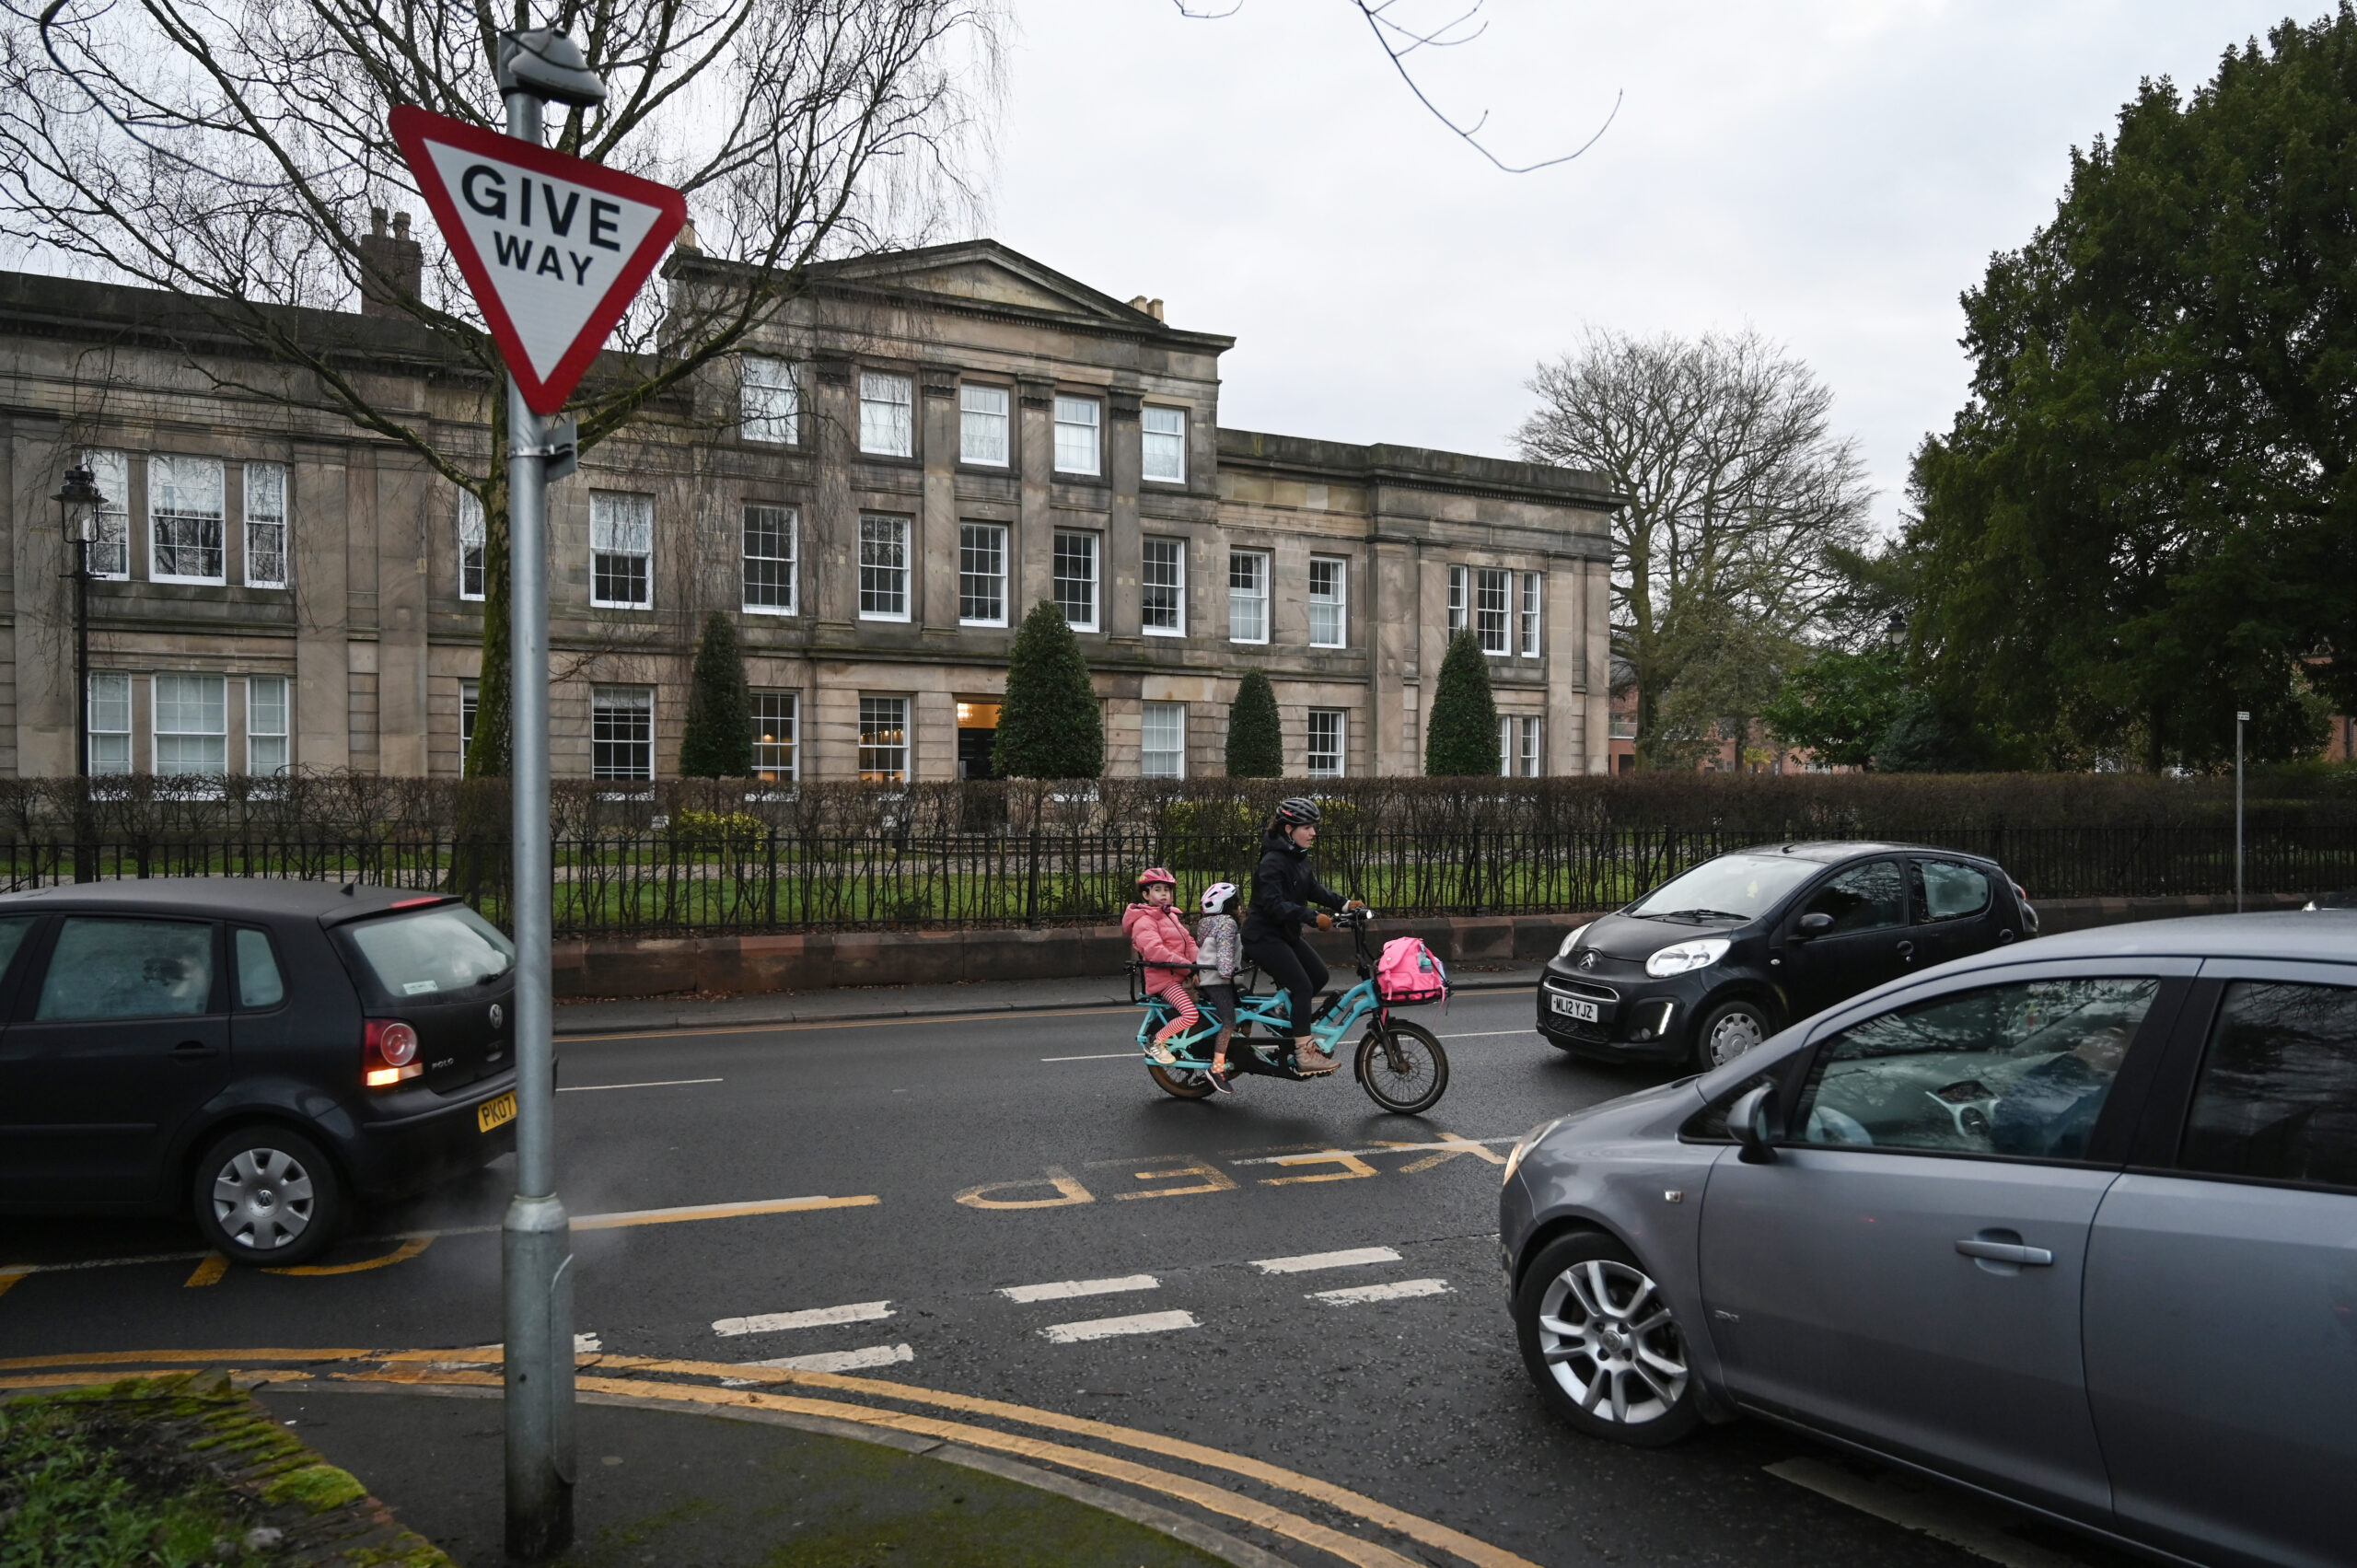
Rachel cycles her children to school on a cargo bike, through busy traffic, in Didsbury, Manchester, UK. 2nd February 2024. Photo credit: Mary Turner / Climate Visuals
How did you get involved in Climate Visuals and what are your core themes?
I came to Climate Visuals from my previous role as Deputy News Picture Editor of The Times and The Sunday Times newspapers in London. Before that I was an agency news photographer in south west England. I have long been a keen follower of the work Climate Visuals was doing to combine research insight with practical, usable guidance and resources, and jumped at the chance to get involved.
At the heart of what we do is our evidence base – this underpins our guidance and the resources that we provide users. It is founded in an original piece of research looking at audience responses to different climate images and led to our 7 Climate Visuals Principles. Since then, we have continued to expand our understanding through further projects, including ones focussed on photographing the ocean and climate link, diversity in images of England’s green and natural spaces, best visual practice for working with those with, or who are from, Indigenous and forest communities of Central and South America, and guidance for photographing extreme heat.
Alongside our guidance resources we run an image library which contains thousands of images that exemplify our findings. Many of these are available through licences that allow for free non-profit, editorial and educational use – making compelling and engaging images of climate change available for those who often find them out of reach. You can browse the library here.
If a photographer wanted to submit images, are you centered around specific themes?
I’m always interested to hear from photographers and see any work people think we might be interested in. Our thematic focus depends on the specific projects that we are working on, but broadly I’m always excited to see images and stories that fulfil our guiding principles/evidence and tell new, compelling environment and climate stories. Whilst we aren’t always able to accept submissions, I am always seeking to expand our network and awareness of photographers working on climate and environment stories in case the opportunity arises for collaboration.
How does the funding work and is there any assignments, or is this all submission based?
It depends on the project we’re working on – we work with a mix of commissioned assignments, such as with this project on air pollution, and submissions such as with our Ocean Visuals and Visualising Climate Change initiatives. For updates on what we are currently working on you can follow us on social media @climatevisuals.