Known for their high-end—but not especially compact—video lights, Keldan is addressing the demand for travel-friendly gear with the release of three significant products: the RC2, a diminutive version of their RC1 wireless remote control; and two handy remote-controllable lights, the Video 4XR and the Video 8XR.
Like its bigger sibling, the RC2 works wirelessly underwater but is shorter range: 2–3 meters (6.5–10 feet) as opposed to the 50-meter (165-feet) range of the RC1. As such, it is designed for lights mounted on the camera rig or placed within a short distance from the remote. Like the RC1, the new model has two independent brightness channels, each of which can address any number of lights simultaneously, and works with all lights in Keldan’s “XR” series.
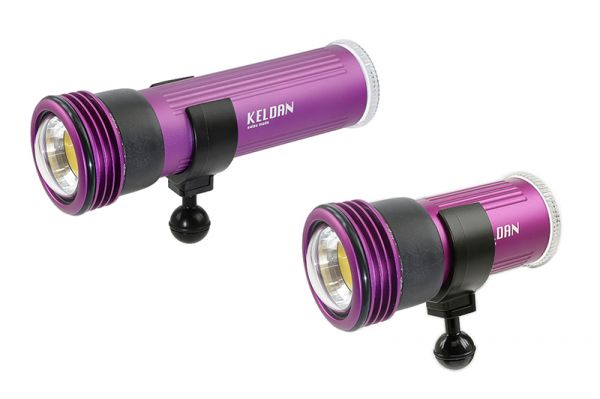
With the new Video 4XR, Keldan hasn’t just upgraded their popular Video 4X light with a remote receiver; the new version also has a higher lumen output—11,000 lumens rather than 10,000 lumens. While the 4XR replaces the 4X in Keldan’s lineup, the previous version of the 8XR—which boasts a 20,000-lumen output and a color rendering index (CRI) of 86—sits alongside the new 8XR, which has a slightly lower output of 17,000 lumens but a significantly higher CRI of 96. According to Keldan, the high CRI makes the new 8XR the perfect light for shooting macro.
Available soon from retailers such as Backscatter, the RC2, Video 4XR 11000lm CRI86, and Video 8XR 17000lm CRI96 are priced at $640, $1,970, and $2,650, respectively. There are also now various bundles available, such as dual Video 4XR and RC2 for $4,280, and dual Video 8XR 17000lm CRI96 and RC2 for $5,640.
When purchasing underwater photography equipment like the products mentioned in this article, please support DPG by supporting our retail partner—Backscatter.com.

PRESS RELEASE
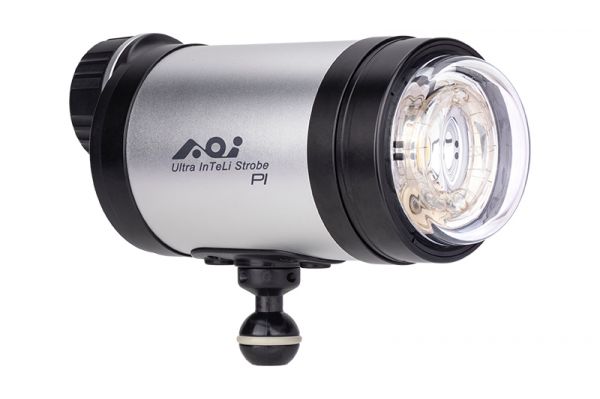
Remote Control RC2
Our pioneer Remote Control RC1 has now a little brother, called RC2. The RC2 is smaller, runs on a single button cell and it is designd for short range use (Lights mounted on the camera or in proximity to the camera).

Wireless remote control
The KELDAN RC2 is a wireless Remote Control based on ultrasonic technology. It is available for Video 4XR / 8XR /18XR / 24XR series lights.
Outstanding features
- Range of 2m
- Control brightness individually on 2 channels
- Each Channel can address an unlimited number of lights
- Each Channel has a separate ID to avoid interference when multiple controllers are used at the same dive site
- Remote Control works with all “XR” series lights
- Easy mounting with M4 screw holes or with an optional Ball adapter
Many advantages when using a remote control
- No more swimming back and forth to adjust lighting
- Fast and easy control of your lighting
- Place the lights wherever you want
- Allows for new and more creative ways of shooting
- Works around the corner and through walls
- Saves battery life

4XR 11000lm CRI86
The popular Video 4X is now available as a remote controllable Video 4XR 11000lm CRI86. Even more powerful, containing superb 11000lm with an enhanced color rendering index of CRI 86. This is the perfect light for small and handy rigs.

Ready for wireless Remote Control
The Video 4XR light is ready for our wireless Remote Control, either the RC1 or RC2.
USB-C charge adapter
With the 4XR light we include a very travel friendly, small and lightweight USB-C charge adapater which allows to charge the Li-Ion battery from an USB-C charger with min. 30Watt output. Attention: The light is supplied with the USB-C adapter only but not with the USB-C charger.
LED technology with outstanding efficiency
The Video 4XR 11000 lm CRI 86 is equiped with an LED of the latest generation with a color temperature of 5600 Kelvin. The spectral power distibution is very even, resulting a color rendering index of 86 CRI (Ra). A unique feature is the variable power with 9 settings with a brightness range of 1:50.
Soft 110° beam
The light has a very soft and speckle free beam of 110° in water (120° in air).

Self-contained
The self contained design makes this light very easy to use. There is no need for special mountings for the battery canister. The included bracket with ball mount allows easy mounting on standard arm systems.
Small and lightweight
The design is optimized for very small dimensions and light weight. The complete set ads only 0.63kg (0.20kg in water) to your gear.
Tough Design
The LED can not break and has almost unlimited lifetime. The integrated overtemperature protection allows safe use of the light in air. The protection circuit controls the housing temperature and the power will be limited to keep the temperature within a safe range.
Travel Safe Li-Ion Battery
The battery passed successfully the mandatory UN38.3 safety test as required by IATA and it is therefore certified for air transport. The capacity of this battery is below the maximum allowed capacity of 100Wh. It contains an integrated protection circuit against harmful conditions like over discharge, deep discharge, over current and short circuit.
Charge Display
The green charge level indicator displays the available relative charge. The two digit display shows the remaining time. While the battery is discharging, the display shows the remaining runtime in minutes (e.g.”18” = 18 minutes). When connected to the charger, the display shows the remaining charge time in units of 10 minutes (e.g.”18” = 180 minutes).

8XR 17000lm CRI96
We have added a high CRI version to our 8XR series lights. With its outstanding color rendering index of CRI 96, the Video 8XR 17000 Lumen is the perfect light for shooting macro. Of course it is ready for the RC1 and RC2 Remote Control.

Ready for wireless Remote Control
The Video 8XR light is ready for our wireless Remote Control RC1 + RC2.
LED technology with outstanding efficiency
The Video 8XR 17000 lm CRI 96 is equipped with a LED of the latest generation with a color temperature of 5600 Kelvin. The spectral power distribution is very even, resulting in a color rendering index of 96 CRI (Ra). A unique feature is the variable power with 9 settings with a brightness range of 1:80.
Soft 110° beam
The light has a very soft and speckle free beam of 110° in water (120° in air).

Self-contained
The self contained design makes this light very easy to use. There is no need for special mountings for the battery canister. The included bracket with ball mount allows easy mounting on standard arm systems.
Small and lightweight
The design is optimized for very small dimensions and light weight. The complete set ads only 0.87kg (0.30kg in water) to your gear.
Tough Design
The LED can not break and has almost unlimited lifetime. The integrated overtemperature protection allows safe use of the light in air. The protection circuit controls the housing temperature and the power will be limited to keep the temperature within a safe range.
Travel Safe Li-Ion Battery
The battery passed successfully the mandatory UN38.3 safety test as required by IATA and it is therefore certified for air transport. The capacity of this battery is below the maximum allowed capacity of 100Wh. It contains an integrated protection circuit against harmful conditions like over discharge, deep discharge, over current and short circuit.
Charge Display
The green charge level indicator displays the available relative charge. The two digit display shows the remaining time. While the battery is discharging, the display shows the remaining runtime in minutes (e.g.”18” = 18 minutes). When connected to the charger, the display shows the remaining charge time in units of 10 minutes (e.g.”18” = 180 minutes).

Bundles with RC2
With the 4XR and 8XR series, we are offering bundles including two lights and a RC2 remote control. KELDAN does not promote this bundles on the KELDAN website but they can be ordered from a KELDAN dealer.
USB-C Charger 16.8V/1A
Does it sometimes annoy you when you need to pack a whole lot of chargers on a trip? Certainly no more with this one. The travel friendly USB-C Charge adapter is just what you need to travel. It connects to an USB-C charger with 30W or higher. With a weight of only 63 grams, it provides an output of 16.8V/1A and can charge all batteries of the 4 and 8 series.
Travel friendly, super small and lightweight USB-C charge adapter
Can be connected to a USB-C charger with minimum 30Watt output. It provides an output of 16.8V/1A. This charger is suitable for the following Li-Ion batteries:
- Battery4 Li-Ion 49Wh (Art. 1212) used with the Video 4X/4XR series lights, Charge time approx. 4 hours
- Battery8 Li-Ion 99Wh (Art. 1211) used with the Video 8X/XR series lights, Charge time approx. 8 hours