[ad_1]
Cropping a headshot might seem simple—just trim the edges and call it a day, right? Not quite. The way you crop a headshot can make or break its impact. Whether it’s for LinkedIn, a company website, or a modeling portfolio, the right crop ensures the focus stays on the subject while maintaining a professional and polished look.
In this guide, learn best practices for cropping headshots, including aspect ratios, composition tips, and common mistakes to avoid. Whether you’re a photographer fine-tuning your work or someone trying to perfect their own profile picture, these tips will help you get the most out of your headshots.
Types of headshot crops
Let’s go over some of the most common types of headshot crops.
Tight crop
This is when you have close-up headshots that are tightly cropped. These headshots focus on the face, typically from the top of the head to just below the chin.
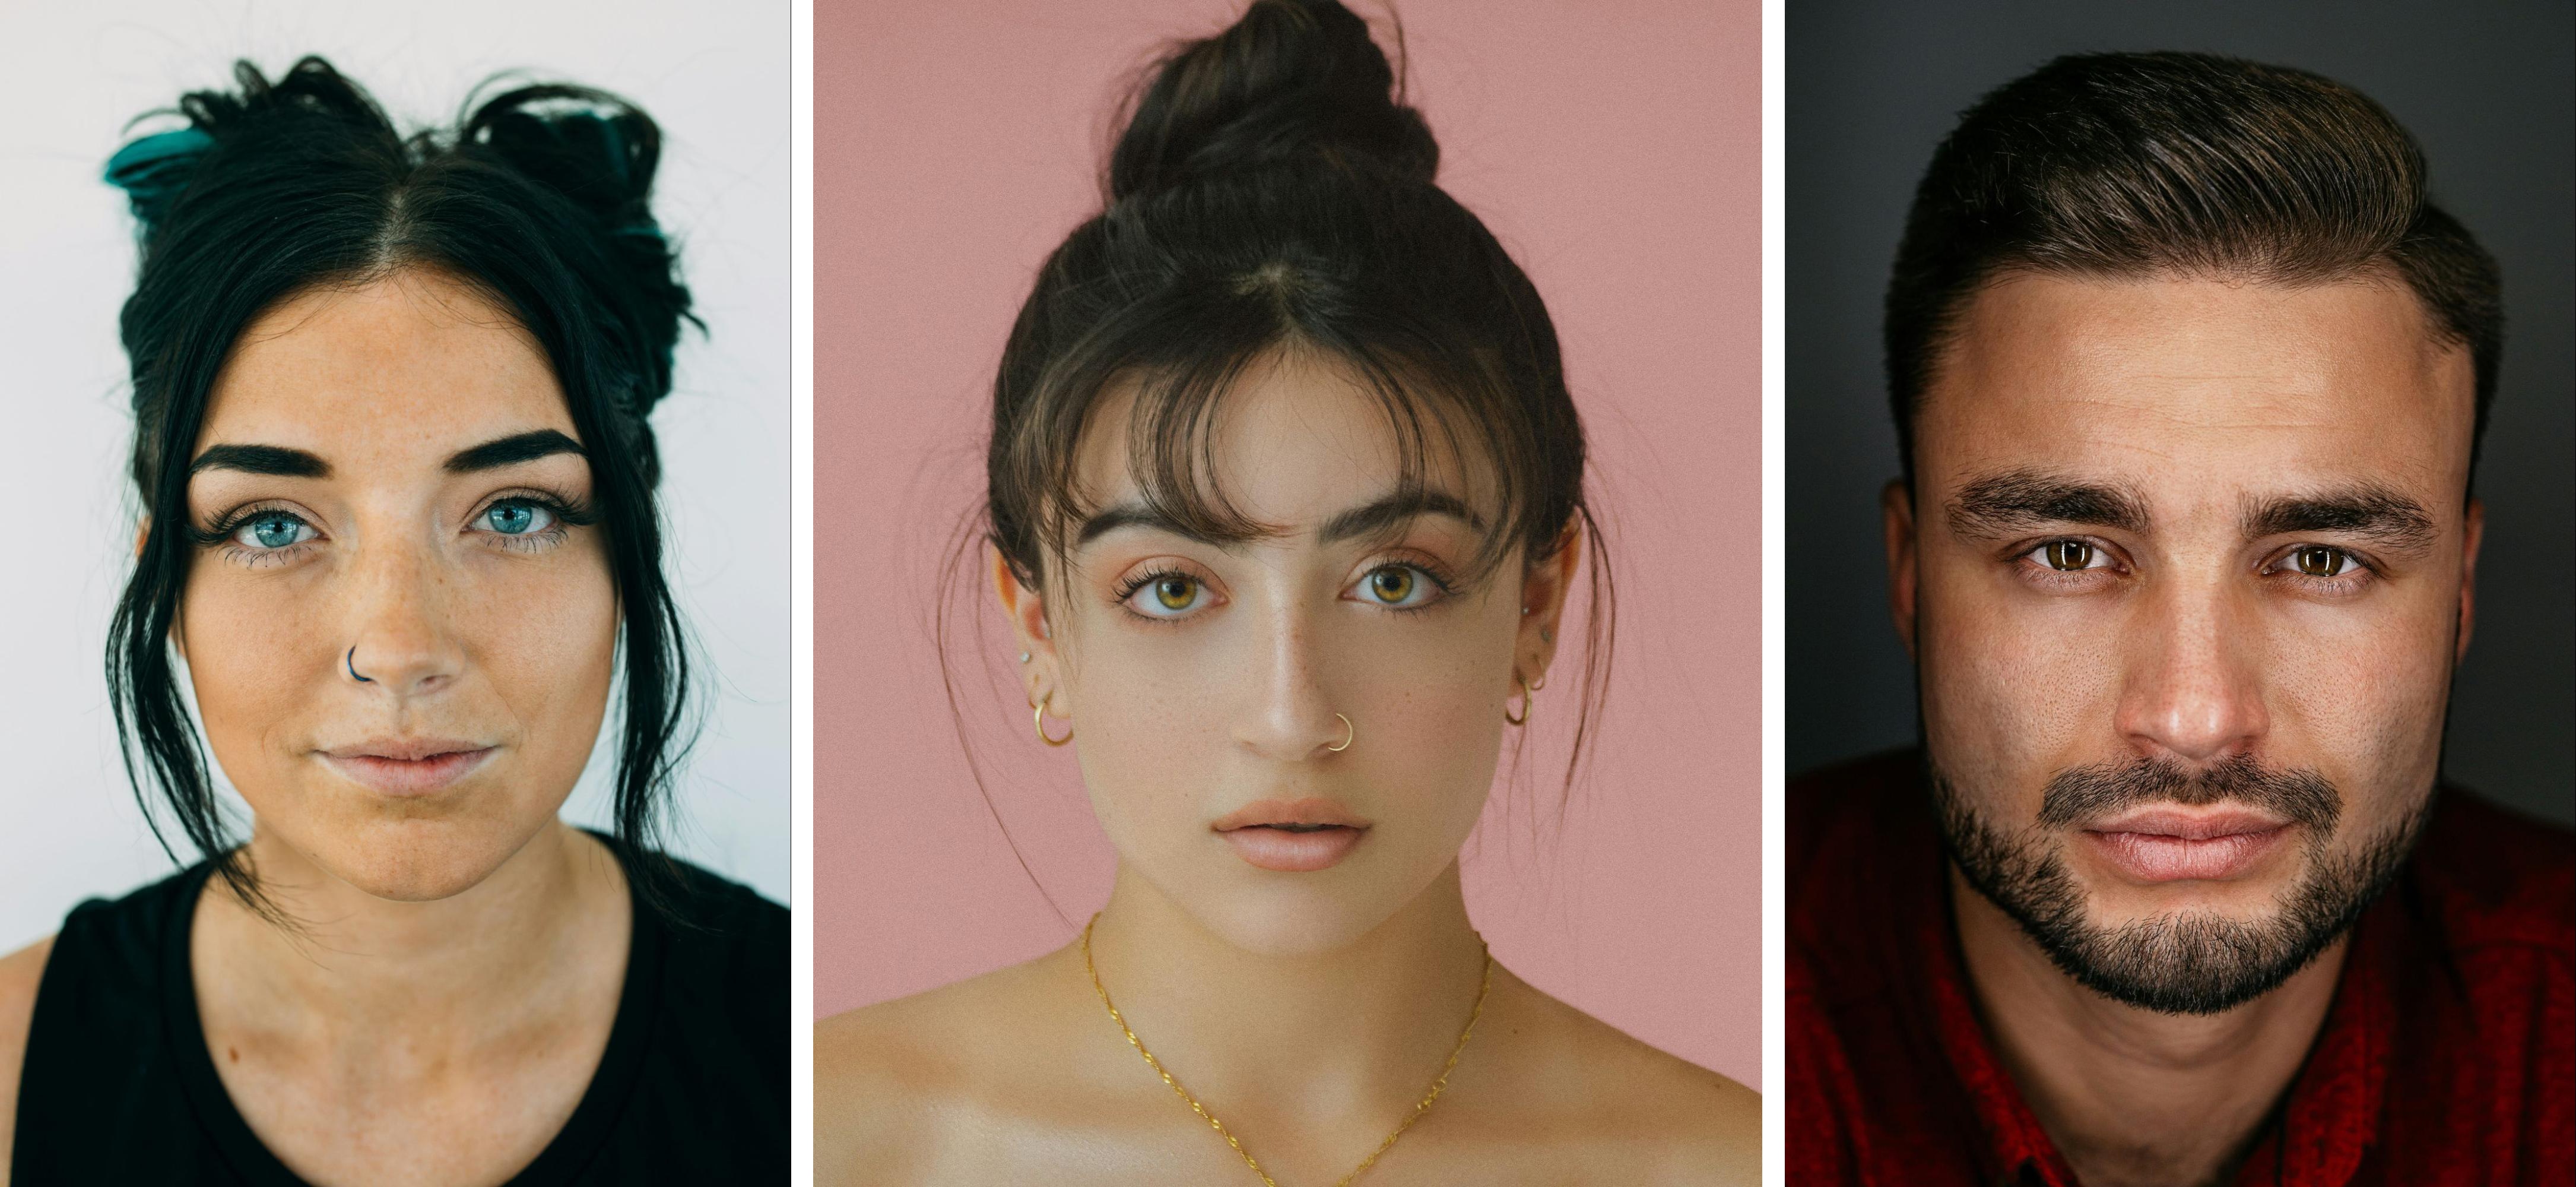
Actors, models, comedians, and performers who need to showcase their facial expressions often use this type of crop. You’ll also see tightly cropped headshots for corporate professionals who want a bold, direct look or in social media profile pictures where faces need to be clearly visible in small thumbnails.
Medium crop
A classic headshot features a “medium crop.” It’s the most traditional crop, including the head and shoulders, and sometimes part of the upper chest, while leaving some space above the head.

Medium cropped headshots are common for corporate professionals, LinkedIn profiles, ID badges, and business headshots.
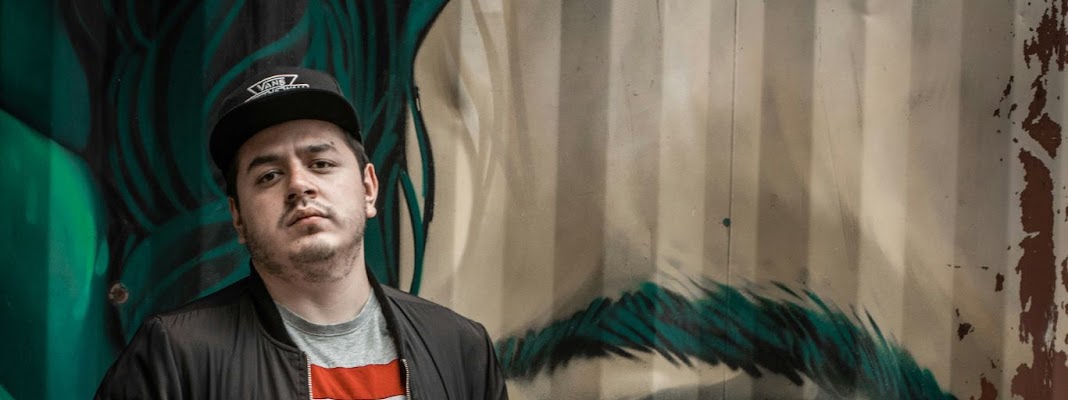
Body crop
A body crop in headshots typically shows three-quarters of the person’s body, often from the waist or mid-torso up to the head, allowing for more posture and body language. There are lots of use cases for a body crop, including corporate, creative, and more. You’ll see it often in executive portraits, branding photos, realtor headshots, and creative professionals.
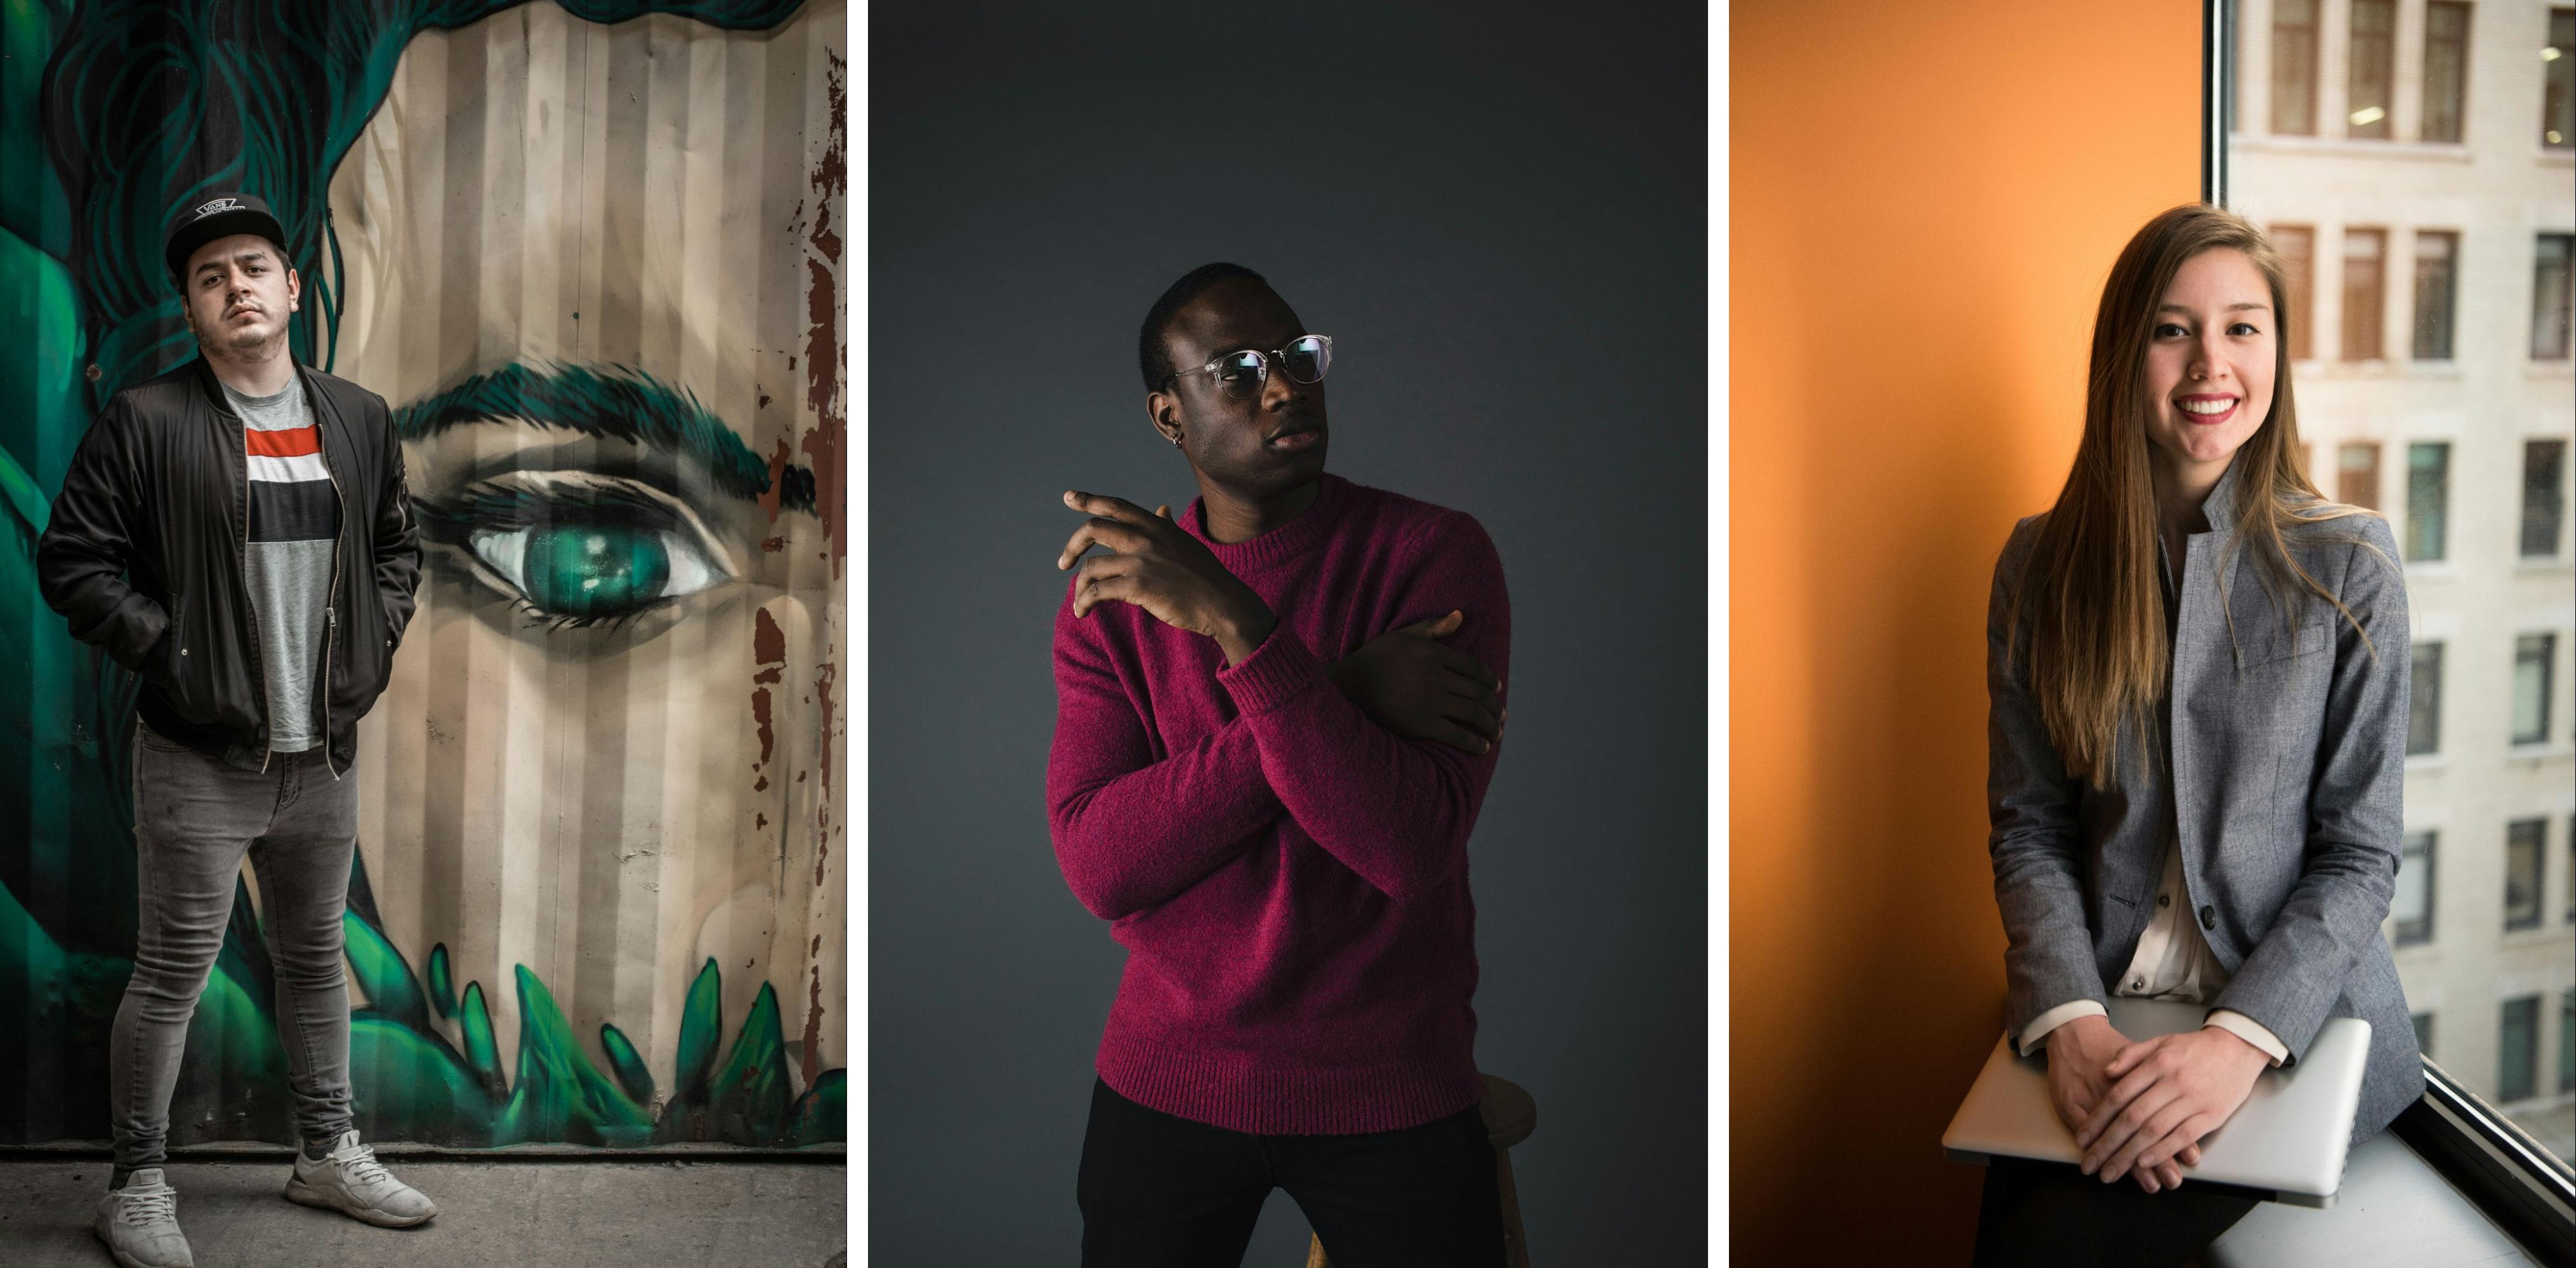
A body crop can be effective for executives and business leaders who want to convey authority and presence, as well as personal branding shoots for creative professionals, consultants, and coaches. They’re also appropriate for website and social media images where a more relaxed, natural look is preferred.
Panoramic crop
A panoramic crop is a wide, landscape-style crop that includes extra space around the subject, often used for web design or printed materials. These are best for website banners, email headers, printed marketing materials, social media cover photos, and team or group shots where multiple people need to be included.
You can often repurpose other crops into a panoramic crop, as seen in the examples below:
Choosing a headshot crop ratio: standard headshot and portrait photo sizes
When cropping a headshot, selecting the right aspect ratio ensures the photo looks professional and fits its intended use.
You can use any ratio you like, as long as it suits your purposes, but there are some standard ratios to help guide you. We’ll take a look at cropping photography examples using the same original photo so you can see the difference.

1:1 square crop

A 1:1 square crop works best for profile pictures on social media like Instagram, LinkedIn, and Facebook. This means the width and height of the headshot are exactly the same. Square crops keep the subject centered and visible in thumbnails—even if the thumbnail is a circle.
2:3 classic photo print crop

The 2:3 ratio is best known for 4”x6” prints. It’s a rectangular crop often used in traditional photography. As a widely recognized photo ratio, it can ensure consistency across prints and digital platforms.
3:4 mobile-friendly portrait crop

The 3:4 crop is slightly taller and wider than the 2:3 portrait crop. It’s commonly used in mobile photography. It works best for ID photos, mobile-optimized profile pictures, and some online applications. This ratio fits well within mobile screens and aligns with some passport and ID photo requirements. It’s one of the less common ratios to use when cropping headshots.
4:5 portrait crop

The 4:5 portrait crop is a rectangle that is slightly taller than it is wide, like the 3:4 crop. However, this one is slightly wider than the 3:4 crop. The 4:5 crop is commonly used for printed portraits and in digital and printed portfolios, especially for actors and models. This ratio closely aligns with the classic 8”x10” headshot print, a standard in the entertainment industry. It’s also the new ratio for standard Instagram feed posts.
5:7 professional photo print crop

5:7 is a commonly used ratio for 5”x7” photo prints. It’s a slightly elongated portrait format, best for printed headshots and framed portraits. Slightly taller than 4”x6”, this crop is often used for display prints and professional photo albums.
11:14 US visa & government crop

11:14 is a specific portrait ratio required for US visa applications and some government-issued ID photos, like passports, visas, and photo ID cards. This allows you to adhere to specific government regulations for travel and identification photos when required.
16:9 widescreen crop

16:9 is most known for your standard widescreen TV format. This wide, horizontal aspect ratio matches widescreen displays, like televisions. It’s also used when a web designer wants to fill an entire web page with a photo as the background for desktop viewing. The 16:9 crop is generally best for website banners, video thumbnails, and full-width web backgrounds, ideal for professionals who want their headshot integrated into website designs.
Why do you need to crop a headshot?
You might need to crop headshots or portraits for a few different reasons, including:
- You need to adhere to specific guidelines or requirements for the headshot’s use case.
- Cropping helps frame the subject’s face correctly, ensuring focus remains on their expression without unnecessary distractions.
- Different platforms (LinkedIn, Instagram, corporate directories, etc.) have specific dimension and aspect ratio requirements. Cropping ensures the image fits correctly without distortion.
- Cropping prevents distortion when resizing a photo for websites, social media, business cards, or printed portfolios—especially if the ratio or scale of the original photo is different than the platform you’re using.
- You can change the photo orientation—for example, converting a horizontal image into a vertical headshot or vice versa.
- Cropping can eliminate background distractions, unnecessary space, or other elements you don’t want in the shot, making the image cleaner and more professional.
- A tighter crop draws attention to the subject’s facial expressions, especially important for professional, acting, and modeling headshots.
- Applying compositional techniques like the rule of thirds or centering can enhance the overall visual appeal of the headshot.
Cropping headshot photography is easy with the right tools, whether you’re using professional software, mobile apps, or online editors.
The default Photos app on iPhone devices lets you crop images with preset aspect ratios (square, 4:5, 16:9, etc.), making it easy to adjust headshots for social media or business use. Similar to iPhone, Android’s and Google Photos’ built-in editing tools allow basic cropping with aspect ratio options.
You also have the following photo editing tools that offer the ability to crop headshots:
- Canva: A user-friendly design tool that includes cropping presets for social media, business, and personal use. Free and paid versions available.
- Fotor: A free, web-based photo editor with cropping tools for resizing and aspect ratio adjustments.
- Pixlr: A lightweight alternative to Photoshop that works directly in your browser.
- Kapwing: Useful for cropping images for specific platforms, like LinkedIn or Instagram.
- Apple Preview: The native Mac program, Preview, also offers the ability to crop images.
Tips for cropping headshots
Cropping a headshot is more than just resizing an image—it’s about framing the subject in the most flattering and effective way. Here are some tips to keep in mind to ensure your cropped headshot looks polished and professional.
Check for symmetry
Speaking of balance, you’ll want to keep both sides of the headshot as symmetric as possible. Slight misalignment can make a headshot look unbalanced. Generally, you’ll want to keep the subject’s head centered, unless using an intentional off-center composition for artistic purposes, and facial features aligned properly within the crop. You can make small adjustments to improve balance.
Consider the background
Cropping can shift the visual proportion of an image, sometimes presenting unwanted distractions in the background. After cropping, check for any elements that may detract from the subject, such as harsh lines, objects, or uneven lighting. If the background becomes too much, consider removing it for a cleaner look.
Want to know how much it costs to send your photo edits our way? Get instant pricing now.

Use high-resolution images
Cropping reduces the overall size of an image, which can lead to quality loss, especially when enlarging the cropped photo. It’s best to start with a high-resolution image so the final cropped version is sharp and clear. This is particularly important for printed headshots and high-resolution digital use.
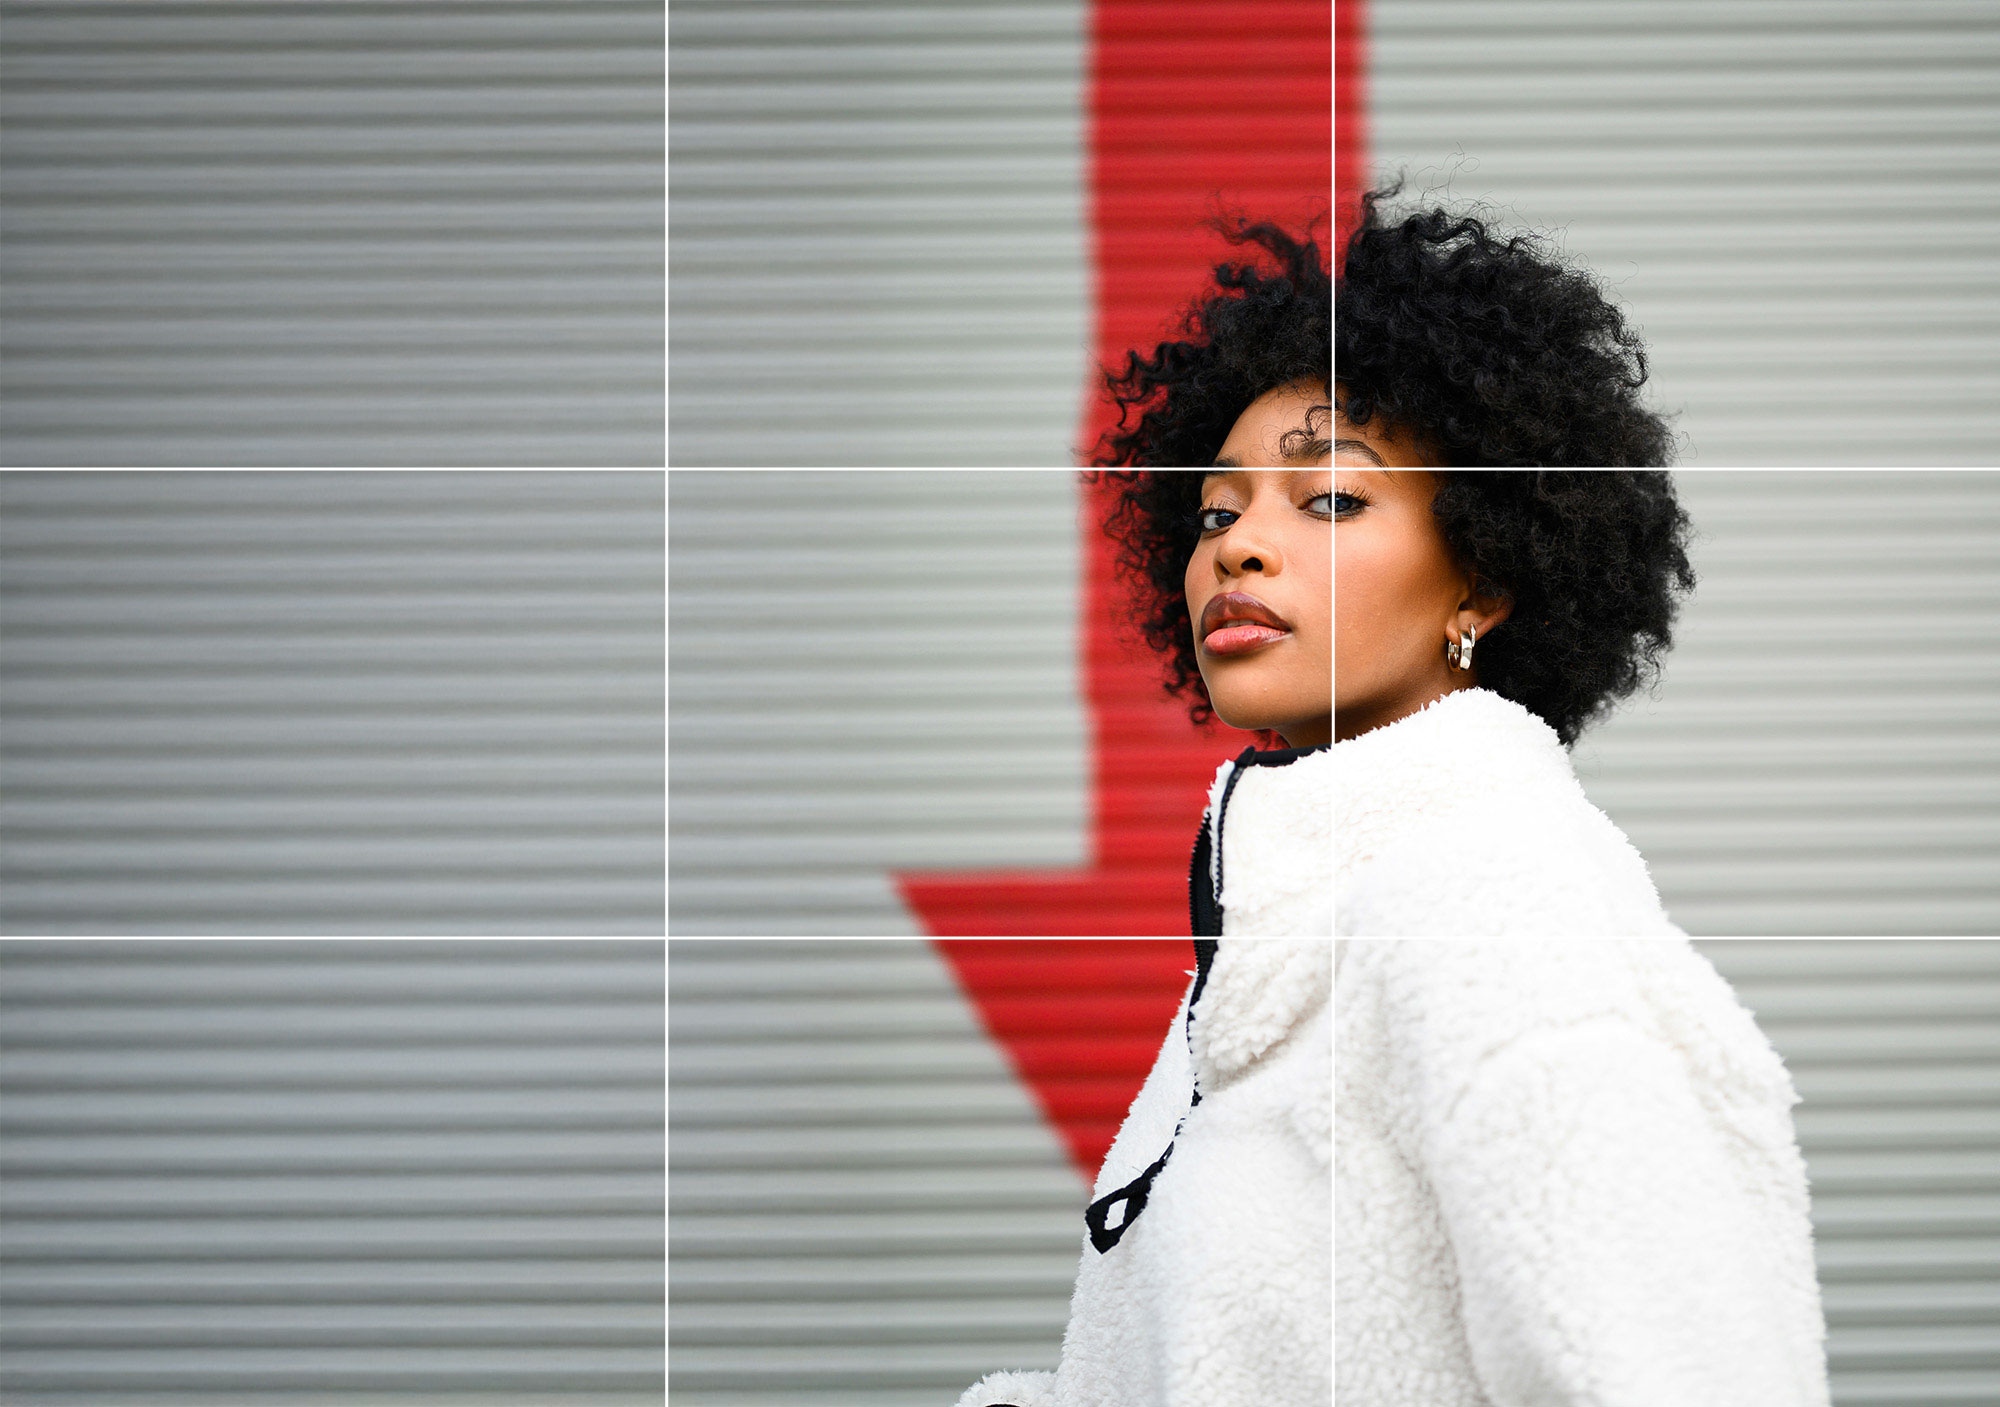
Consider the rule of thirds
The rule of thirds is a photography principle that helps create a balanced composition. When cropping, imagine dividing the image into a 3×3 grid and placing the subject’s eyes or face along one of the intersecting points. This creates a more visually appealing headshot than simply centering the face.
Mind the context
Different industries have different expectations for headshot styles. A corporate executive’s headshot may have a tighter crop, emphasizing professionalism, while a creative professional might prefer a looser crop that includes more body language and personal expression. Further, an athlete might prefer a body crop to show their physicality or context of their sport. Keep industry norms in mind when deciding on a crop.
Know the guidelines
Each platform has specific dimensions and aspect ratio requirements for profile photos. Always check the latest size guidelines for social media, corporate directories, and other platforms before cropping your headshot.
Here are some guidelines at the time of this writing:
| Channel | Size |
| 400×400 pixel square | |
| 1080×1080 pixel square or 4:5 portrait for feed posts | |
| 170×170 pixel square | |
| Print headshots | 5×7 inches or 8×10 inches, with corresponding aspect ratios like 4:5 or 5:7 |
| US Passports | 2″ x 2″ printed hard-copy, 72 dpi minimum resolution |
| Gmail | 180 x 180 pixel square minimum |
Don’t forget to test across different platforms. A crop that looks good on one channel may not work on another. Some sites automatically crop profile pictures into circles—so make sure no important parts of the face are cut off.
Mistakes to avoid
Even a well-lit, high-quality headshot can be ruined by improper cropping. Avoid these common mistakes to ensure your headshot remains professional, flattering, and platform-ready.
Cropping the head
Typically, you don’t want to crop out any part of the head. There may be creative exceptions, but this is a general rule of thumb when editing headshots. You’ll want to maintain eye level alignment, so the subject’s eyes are in the upper third of the frame. This creates a natural and engaging composition.
Don’t forget to also leave breathing room. Avoid cropping too tightly at the top of the head or too close to the chin, which can make the photo feel cramped.
If you’re going for an, a small crop at the very top can work—in some cases—but avoid cutting into the forehead or leaving too little space above the head, as it can feel unbalanced.
Cropping too tightly or too widely
Avoid cutting too close and making the composition feel cramped. On the other hand, leaving too much space will lose subject focus.
Cropping too tightly without considering platform-specific dimensions can also result in awkward framing or automatic cropping that cuts off key facial features. Always check recommended aspect ratios for LinkedIn, Instagram, and other platforms before finalizing the crop.
Cropping at awkward points
Cropping at the neck or shoulders can make the subject look awkwardly cut off if not done right. When cropping below the face, do so at a natural break, like mid-chest, rather than directly at the neck or shoulder line.
Cropped to perfection
A well-cropped headshot does more than just frame a face—it enhances professionalism, draws attention to key features, and ensures the image works across different platforms. By following best practices in aspect ratio, composition, and positioning, you can make sure every headshot looks polished and intentional.
Need help perfecting your images? At Path, we specialize in high-quality photo editing, including expert cropping, retouching, and background adjustments. Let us handle the details so you can present yourself or your clients in the best possible light. Try Path today and see the difference precision editing can make!
Explore Path services to take your headshots from “almost there” to pixel-perfect — cropping, retouching, background cleanup, and more, done by experts.
How to crop a headshot FAQ
How cropped should a headshot be?
A headshot should be cropped to keep the subject’s face as the main focal point while maintaining proper proportions. Typically, the crop should include the head and shoulders, leaving some space above the head and slightly below the shoulders. Avoid cropping too close to the top of the head or cutting off important parts of the face, like the chin.
What are the proportions for a headshot?
The most common aspect ratios for headshots are:
- 1:1 (square): Ideal for LinkedIn and profile pictures.
- 5:7 or 4:5: Standard portrait proportions often used for professional or corporate headshots.
- 16:9: A wider crop sometimes used for website banners or social media covers.
For most uses, a 4:5 or 5:7 ratio keeps the face well-balanced within the frame.
How do you crop a headshot on iPhone?
- Open the Photos app and select the headshot.
- Tap Edit in the top right corner.
- Choose the Crop & Rotate tool.
- Select a preset aspect ratio (like 1:1 or 4:5) or manually adjust the crop.
- Adjust the framing to keep the face centered, leaving a little space above the head.
- Tap Done to save your cropped headshot.
How to crop a headshot in Photoshop?
- Open the image in Adobe Photoshop.
- Select the Crop Tool (shortcut: C).
- In the top toolbar, set the aspect ratio (e.g., 4:5 or 1:1).
- Drag the crop box to position the face properly—centered with space above the head.
- Press enter (return) to apply the crop.
- Save the file in high resolution for the best quality.
[ad_2]
Source link
دیدگاهتان را بنویسید