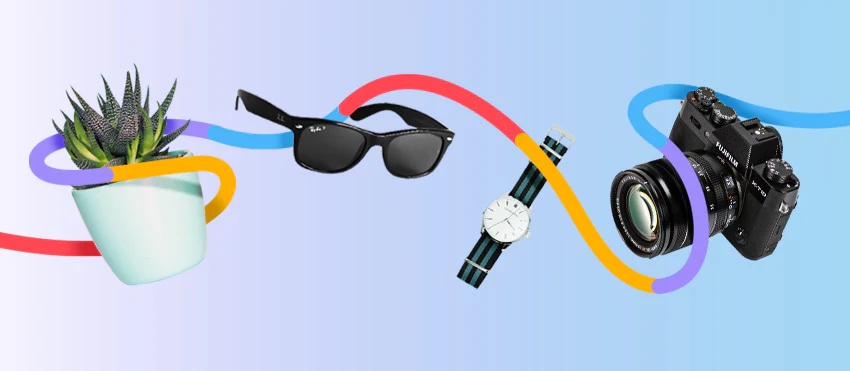
Product photography is always evolving, and it’s getting tougher to keep up with the latest trends. Your product images are doing more than showcasing an item—they’re selling it. High-quality product photography helps shoppers visualize, trust, and ultimately buy your products.
Below, look at the definition of product photography, as well as best practices and examples to inspire your own.
What is product photography?
Product photography is the art of capturing images of goods for sale. These images are used in ecommerce stores, ads, packaging, and catalogs to highlight product features and inspire confidence in buyers.
Also known as commercial product photography, it includes everything from simple white background shots to stylized lifestyle images. The goal is to help potential buyers understand, desire, and trust your product—visually.
While traditional product photography uses cameras, some brands also use 3D renderings that mimic real photos. These can be effective, though purists argue that only real-camera images count as true product photography.
Comprehensive Cranium Care, a brand of “hair” products for bald people, outsources its 3D renders.
Types of product photography
Product photography is a type of object photography and a type of advertising photography, but you can get even more granular:
White background
White background photos are the ones you see on ecommerce marketplaces like Amazon, AliExpress, and eBay. They may have individual product photos or white background shots that feature multiple images. This is arguably the most common product photo type you’ll see.
360-degree
360-degree photography captures a product from every angle, letting shoppers rotate and view it interactively—almost like holding it in their hands. These image sets are often stitched together with special software to create a seamless, scrollable experience on ecommerce sites.
This is what professional photographer Eric of CiReC 360° specializes in. He relies heavily on Path for outsourced photo edits because each “image” is actually a series of several images, and the edits must be perfect across all shots.
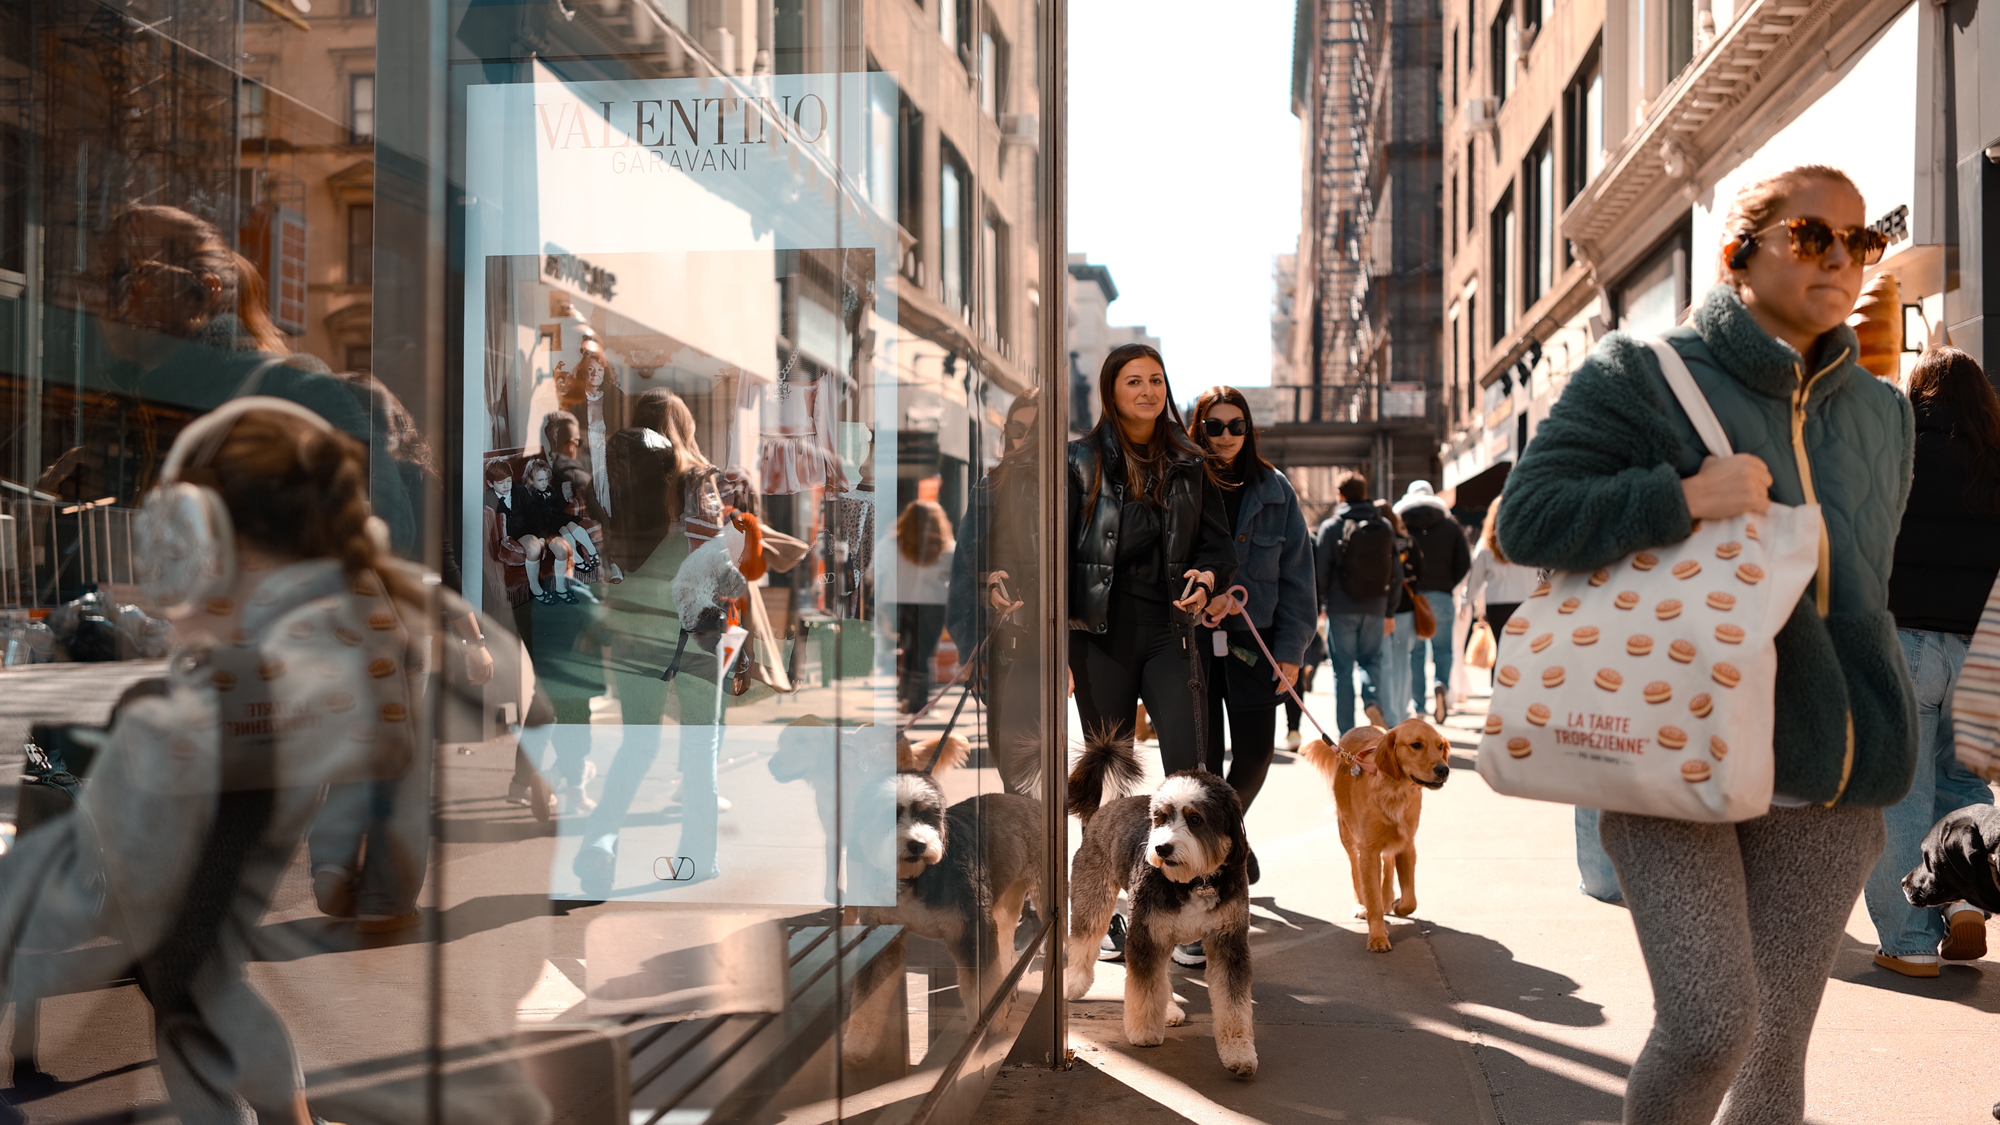
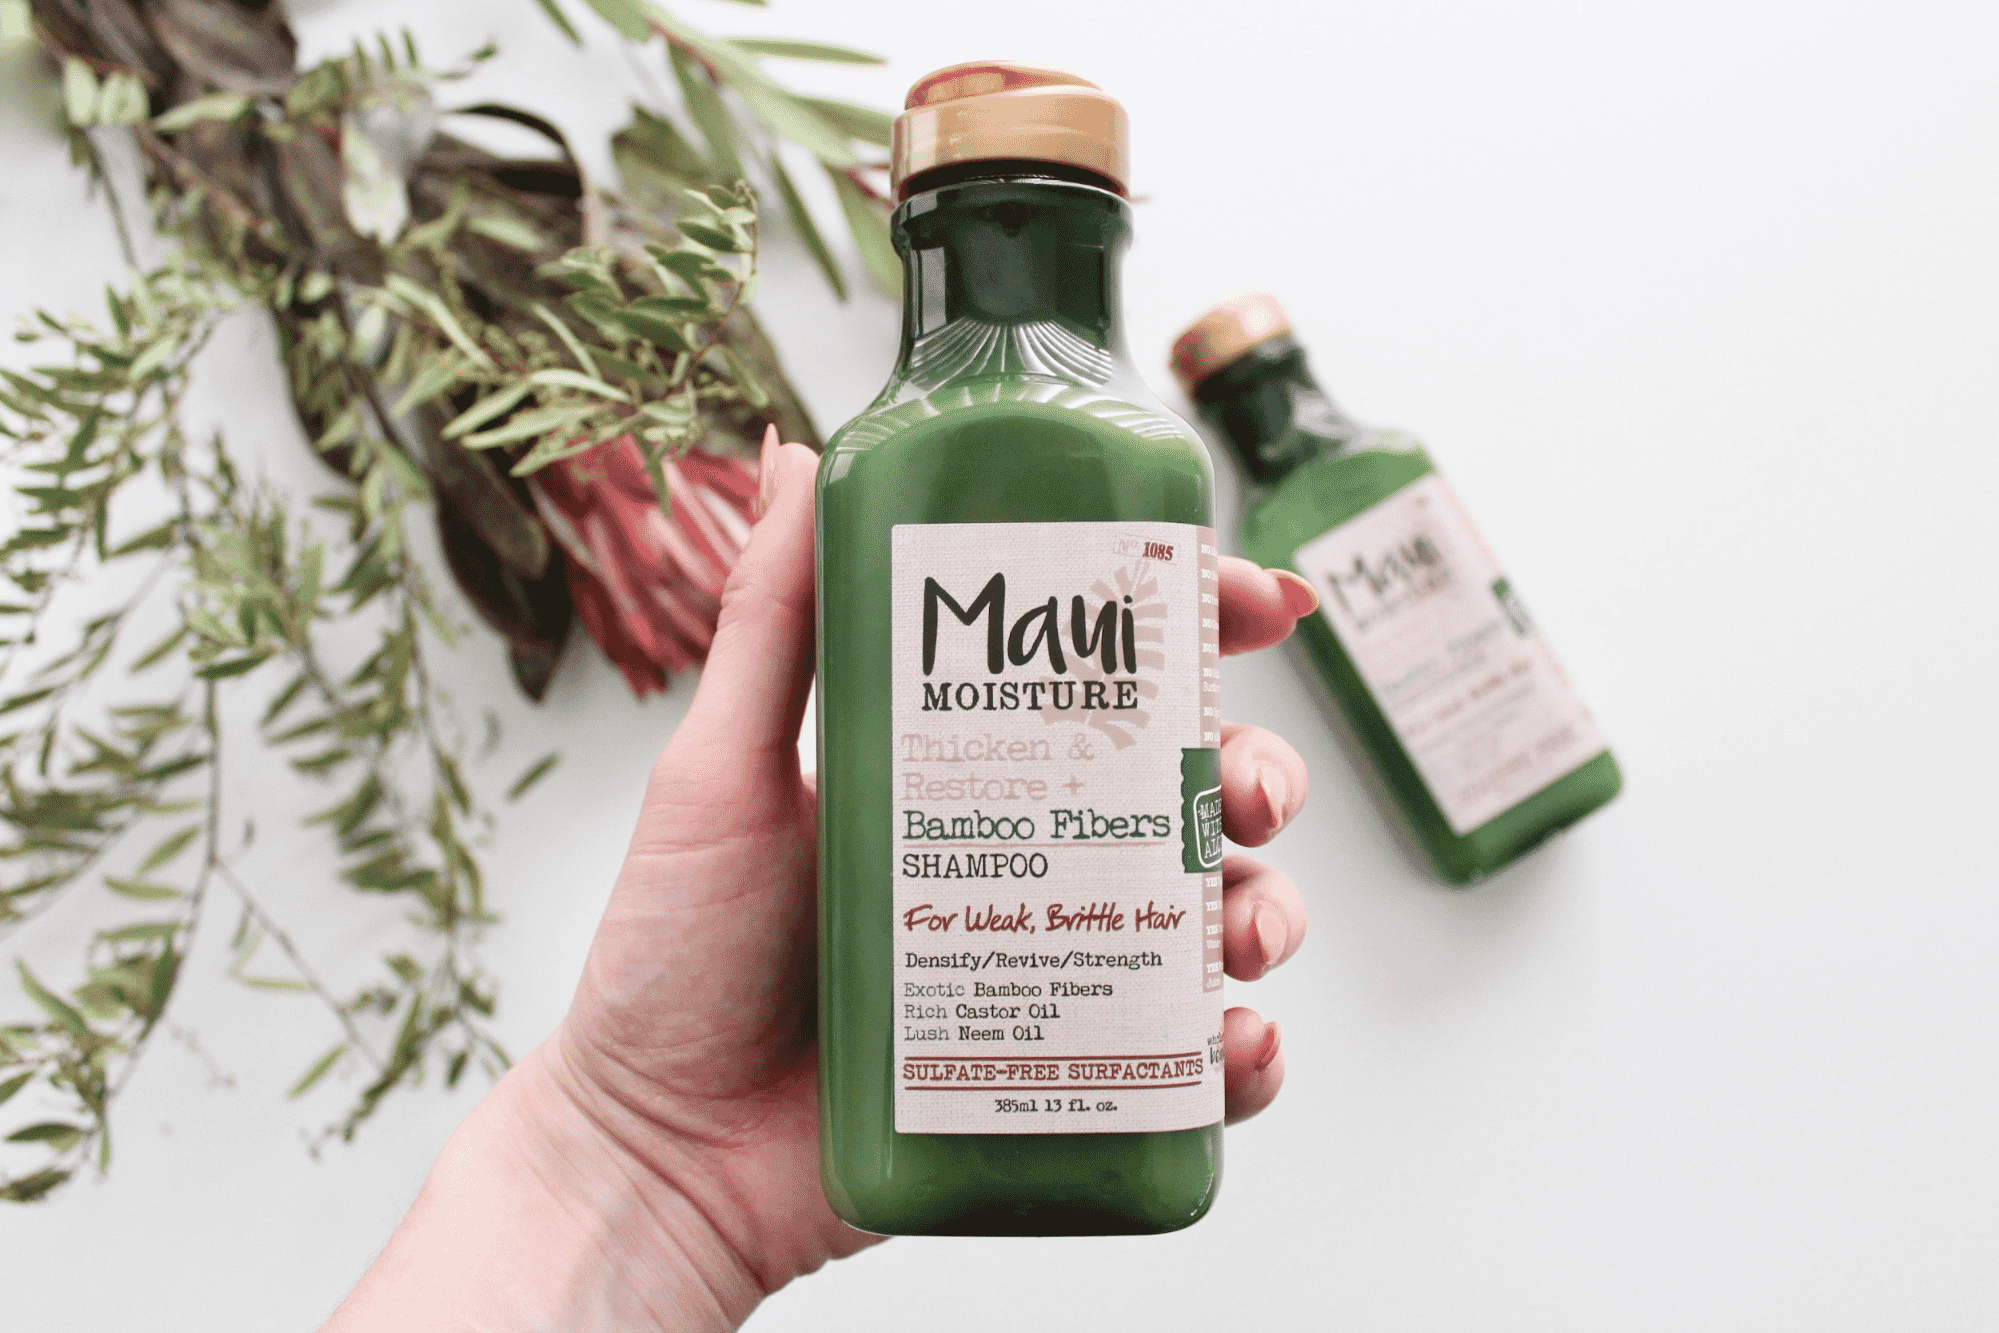
Lifestyle shots
Lifestyle shots are photos that feature people using the product in a real-world setting. These tell a story and help shoppers imagine themselves with your product.

Contextual
Contextual photos are similar to lifestyle photography, but they may not feature people. These show the product in its natural environment (e.g., barstools in a kitchen, a yoga mat in a studio).

Scale shots
Scale shots are product photos that give a frame of reference so people can envision how big the products are. While product specs and dimensions are descriptive, sometimes shoppers need an image to see how big or small it is in comparison to common objects.

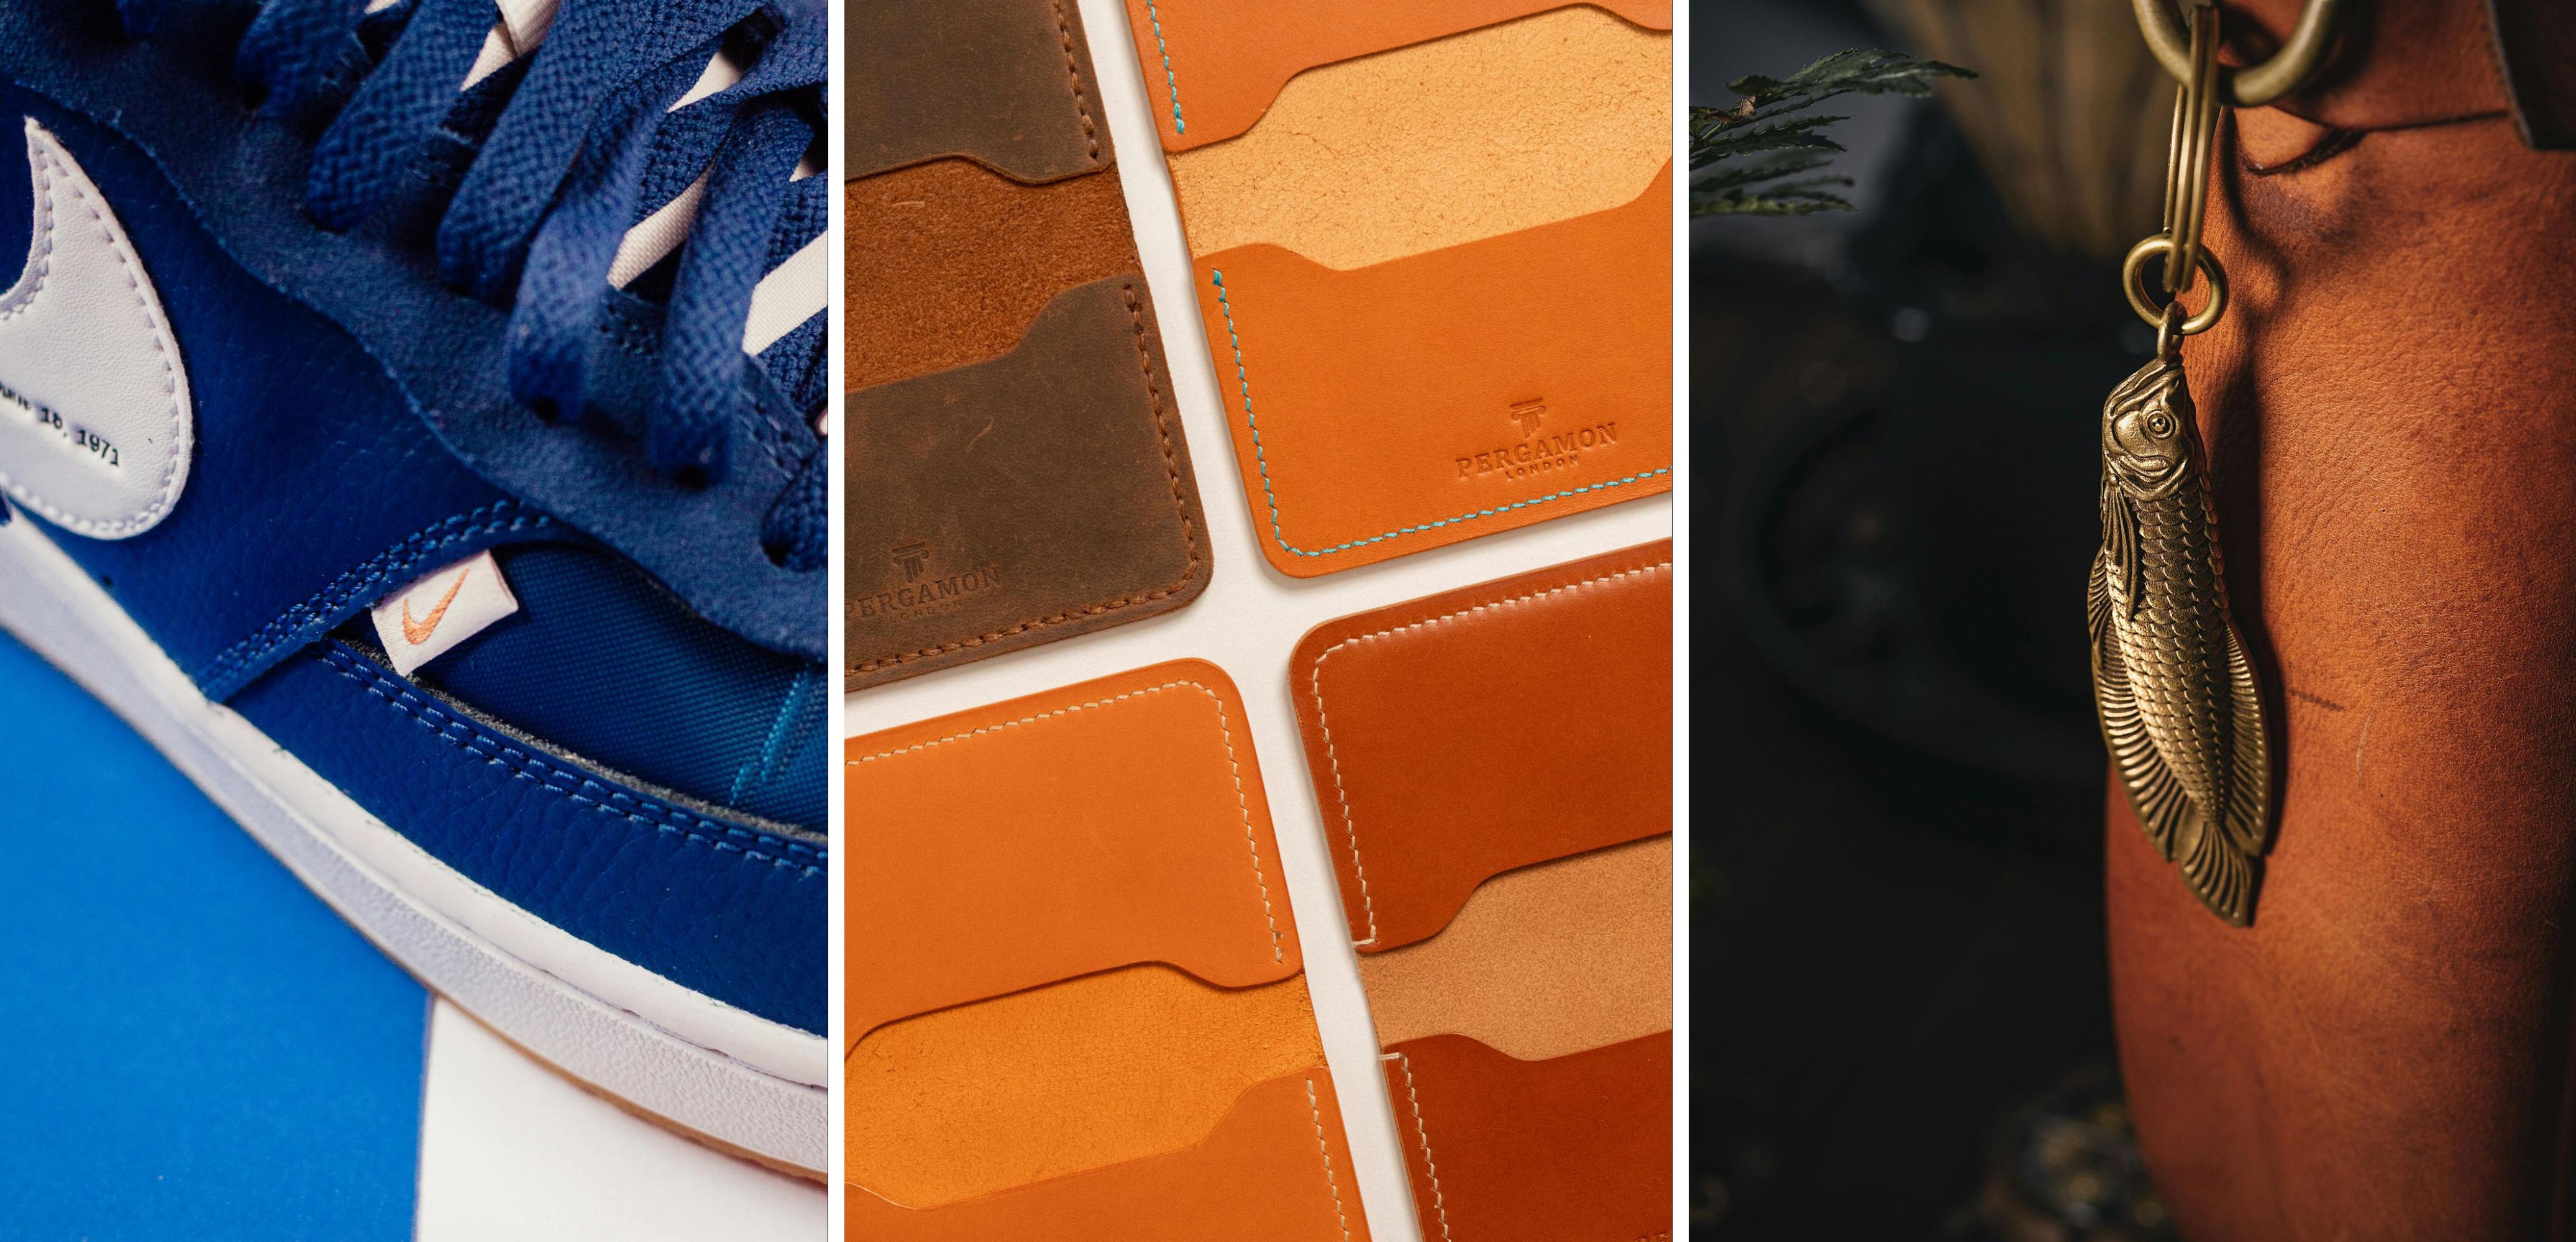
Detail
Detailed product shots are close-ups that highlight materials, textures, or small design elements. They’re crucial for luxury, beauty, apparel, or any product where touch and feel are important.
Group
Group product shots feature multiple items. Typically, these products are related in some way. You might bundle them together as a promotion, or feature the same item in different products.
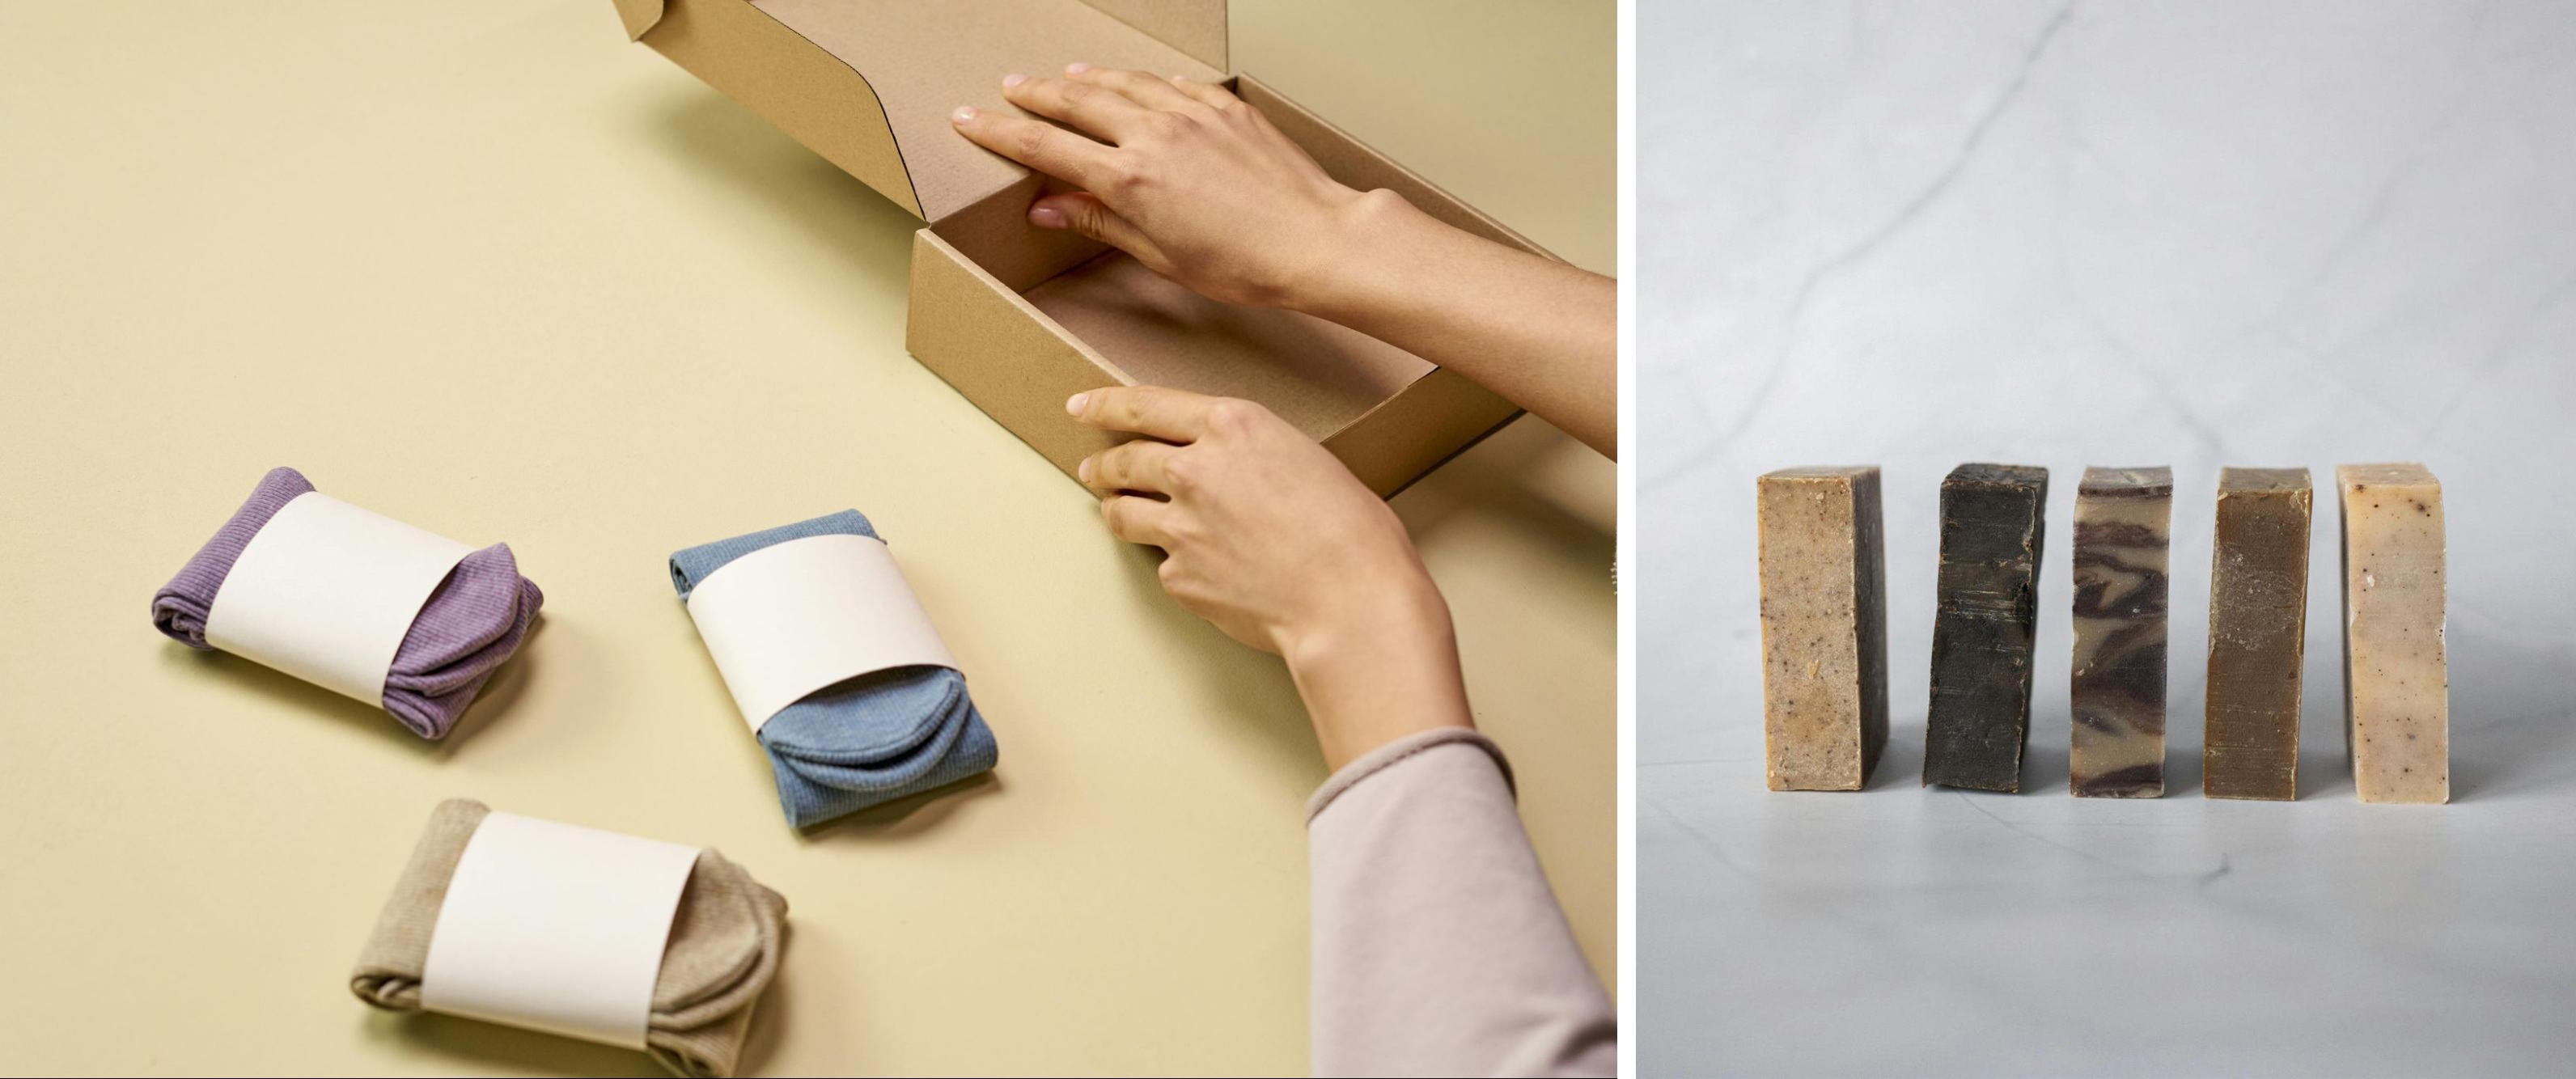
Flat lay
Flat lay photos are taken from a bird’s eye view. The bird’s-eye view photos show products arranged on a flat surface. These are perfect for social media and allow for creative storytelling through layout.

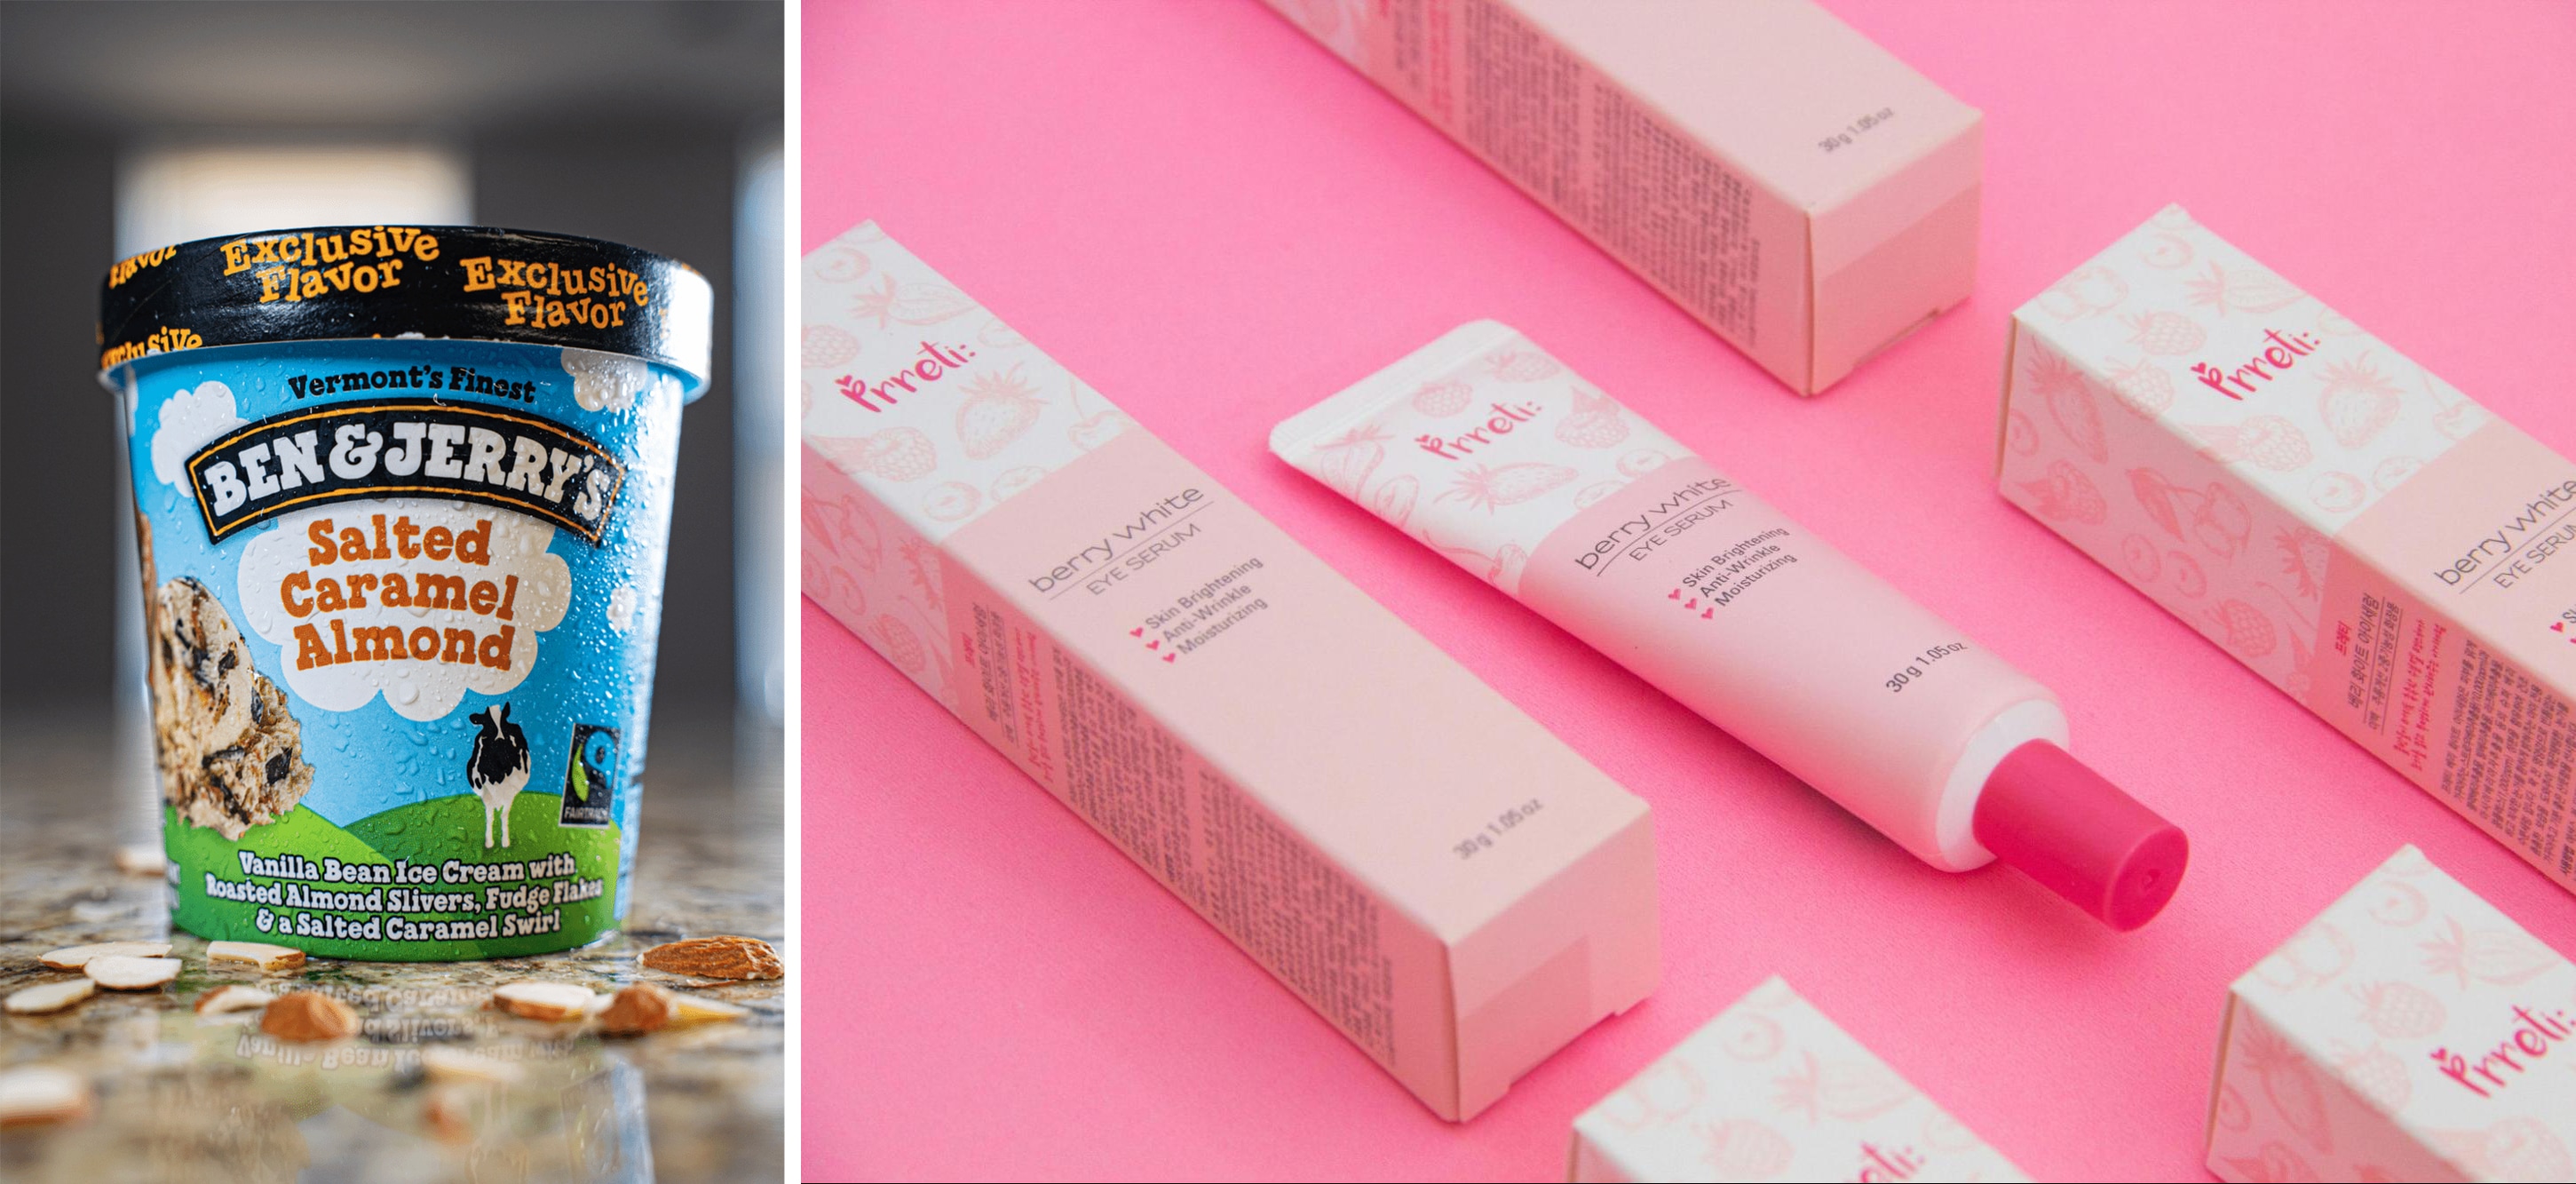
Packaging
Packaging product photos are the images that go on the box, bag, label, or whatever packaging holds your merchandise. These photos are important because they appeal to in-person shoppers. It’s especially important to consider this if the packaging hides the product, which you commonly see with food and beauty items.
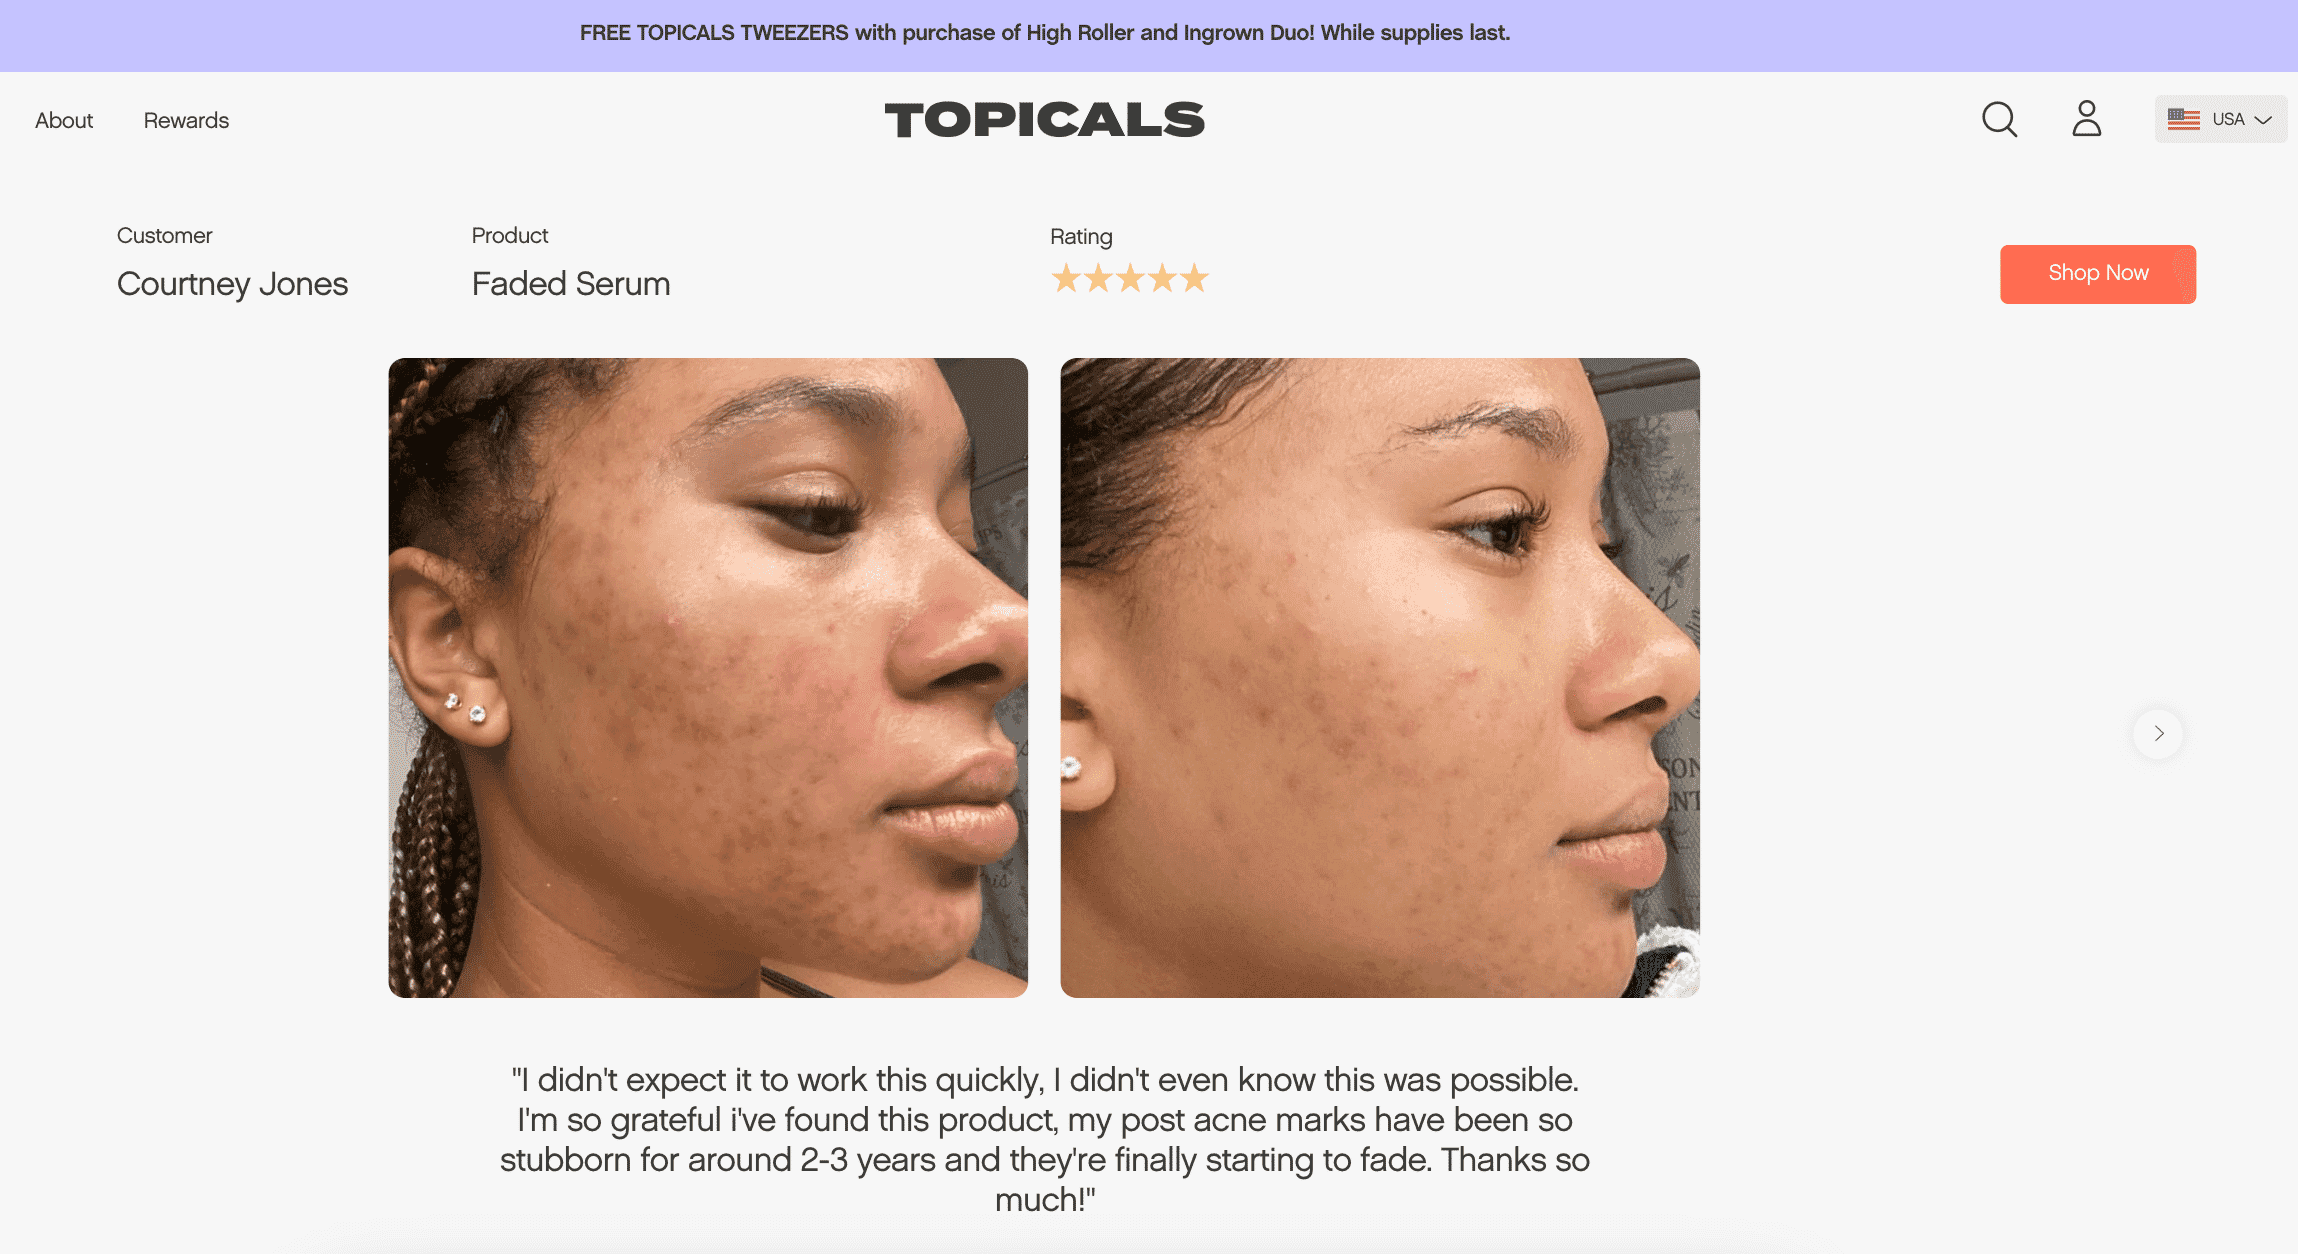
User-generated
User-generated content (UGC) includes product photos taken by anyone other than your brand or employees. These photos are typically shared on social media, so you can repost or feature the content on your own website as a form of social proof. UGC product photography isn’t ideal as your main photo, but it’s a great complement to your product pages.
Skincare brand Topicals has a carousel of UGC photos at the bottom of its website. It shows authenticity and social proof of its products.
How do you take product photos?
While the art of product photography requires much more than a single article (there are courses listed below!), the high level process is as follows:
1. Plan the shoot
Define your shot list, goals, locations, and props. Know what you’re capturing and why.
2. Set up your space
Use natural light when possible or invest in lighting kits and reflectors. Use a white backdrop for standard product shots.
3. Stabilize your camera
Use a tripod for sharp, consistent angles—especially for ecommerce listings.
4. Shoot multiple angles
Show your product from the front, back, side, top, and bottom. Include close-ups and contextual shots where applicable.
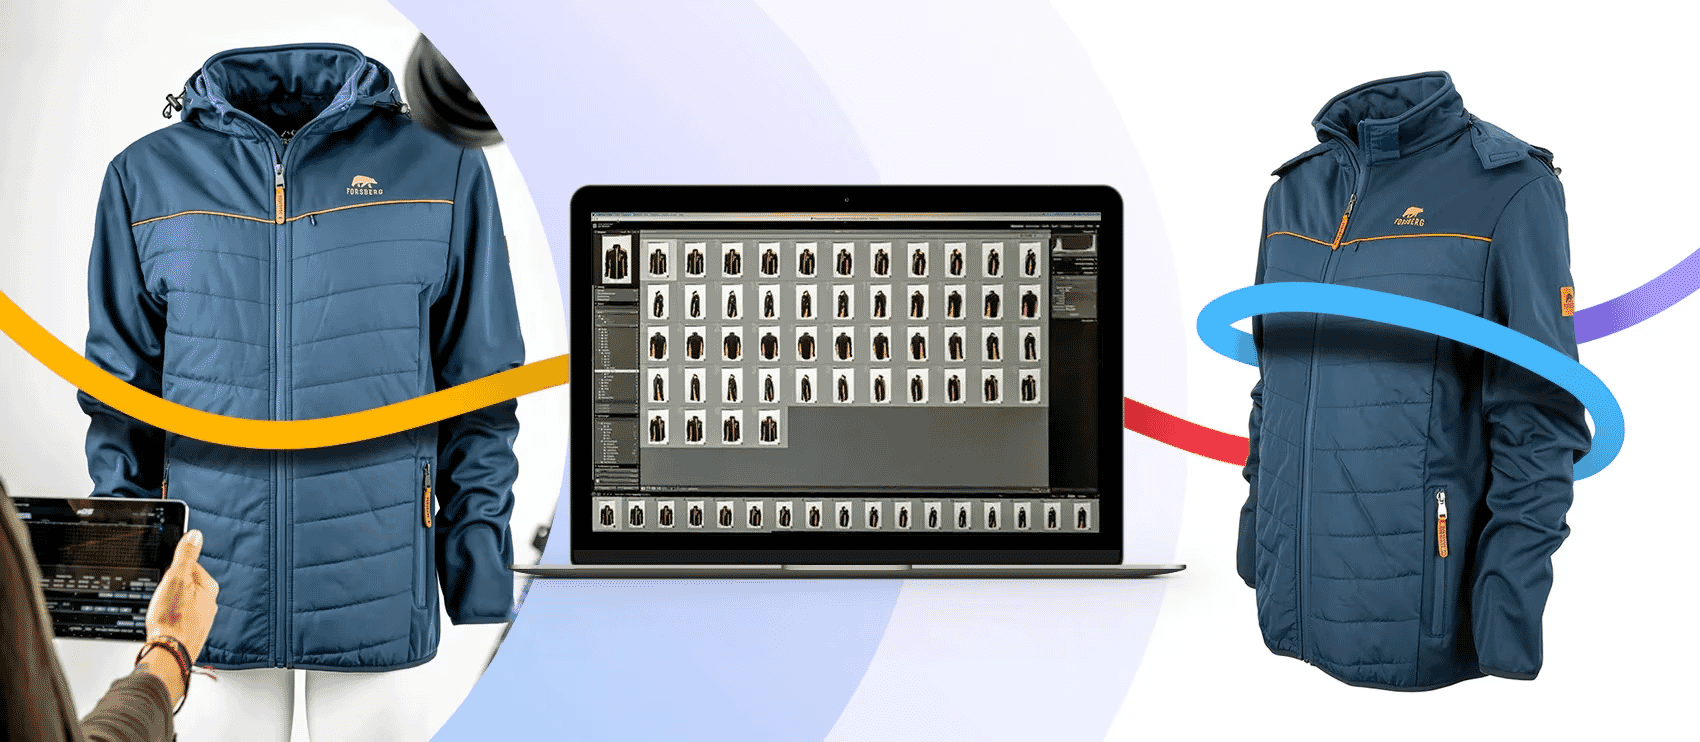
5. Edit your photos
Adjust lighting, color balance, and crop. Remove backgrounds or retouch imperfections. If you’re not a pro editor, outsource this step.
What equipment do you need for product photography?
For product photography, all you really need is a smartphone camera. But for high-quality shots that convert shoppers, you’ll want a dSLR or mirrorless camera and 50 mm lens as the bare minimum.
Here’s a general overview:
Beginner (DIY at home):
- Smartphone with high-res camera
- Natural lighting near a window
- White poster board or sweep background
- Free editing tools (Snapseed, Lightroom Mobile)
Intermediate:
- DSLR or mirrorless camera (50mm lens recommended)
- Tripod and remote shutter
- Lightbox or softbox lighting kit
- Reflectors and diffusers
Pro-level / studio setup:
- Macro or tilt-shift lenses
- Studio lighting with modifiers
- Professional backdrops or sweep tables
- Grip gear (c-stands, clamps)
- Pro editing software (Photoshop, Capture One)
Tips and best practices for better ecommerce photos
While your product photos should reflect your unique brand and appeal to your specific target audience, there are a few universal truths and best practices:
Get the gear
While smartphone photos may work for social posts or email, you want high-quality photos for main product pages. Invest in a high-quality camera and lens or hire a professional who has their own equipment to shoot your photos for you.
Choose your background wisely
Some ecommerce marketplaces require plain white backgrounds, and if you’re shooting for other channels you have more leeway. Whatever the background, it should reflect the aesthetic you’re after while keeping the focus on the product.
Think about the context
Consider the context for your products and for your shoppers. It’s important to show the product in use, using models and contextual backgrounds and props. But it’s also important to consider the context in which your shoppers are viewing the photos. If they’re on mobile (they likely are), offer zoomed-in shots and closeups of important product features.
Maximize your investment
Shoot with repurposing in mind. Professional product photos are a significant investment, and you want to make the most of it. Think about using your product photos on more than just ecommerce pages, but also in digital marketing and ad campaigns, on social media, in emails, and for labeling or packaging.
Leverage symmetry for a premium feel
Symmetry isn’t just pleasing to the eye—it can instantly elevate the perceived value of your product. For items with naturally balanced design elements (like cosmetics, shoes, tech, or jewelry), a symmetrical composition reinforces order, precision, and quality. Center the product, align key features, and shoot head-on for maximum effect. When used intentionally, symmetry creates a polished, editorial-style aesthetic that feels high-end and trustworthy.
Remember the details
It’s always important to edit your photos afterwards, no matter how great the original shot is. You may have to fix imperfections that have the potential to distract potential buyers and negatively impact conversions.
Outsource the tedious bits
Lots of photo edits, like background removal and color changes, are so detail-oriented and time-consuming. It can take an entire day just to edit a small batch of photos. If you find your time is bogged down with post-processing, consider outsourcing the edits. Be wary of any providers that use automation and AI, as they run the risk of imperfections the human eye won’t miss.
Enjoy it
At the end of the day, it’s important to have fun. Even though you have constraints on what you can do with the images, you can still get creative with it. Use outsourcing and other ways to take some of the stress out of your day to day so you can find your passion and get back to the work you love.
Enlist your dedicated virtual photo-editing team of designers who complete every edit by hand
Enlist your dedicated virtual photo-editing team of designers who complete every edit by hand
3 product photography examples
Looking for some inspiration from real-world brands with compelling product photos that can inspire your own visuals? Here are three examples:
1. Grounded Plants
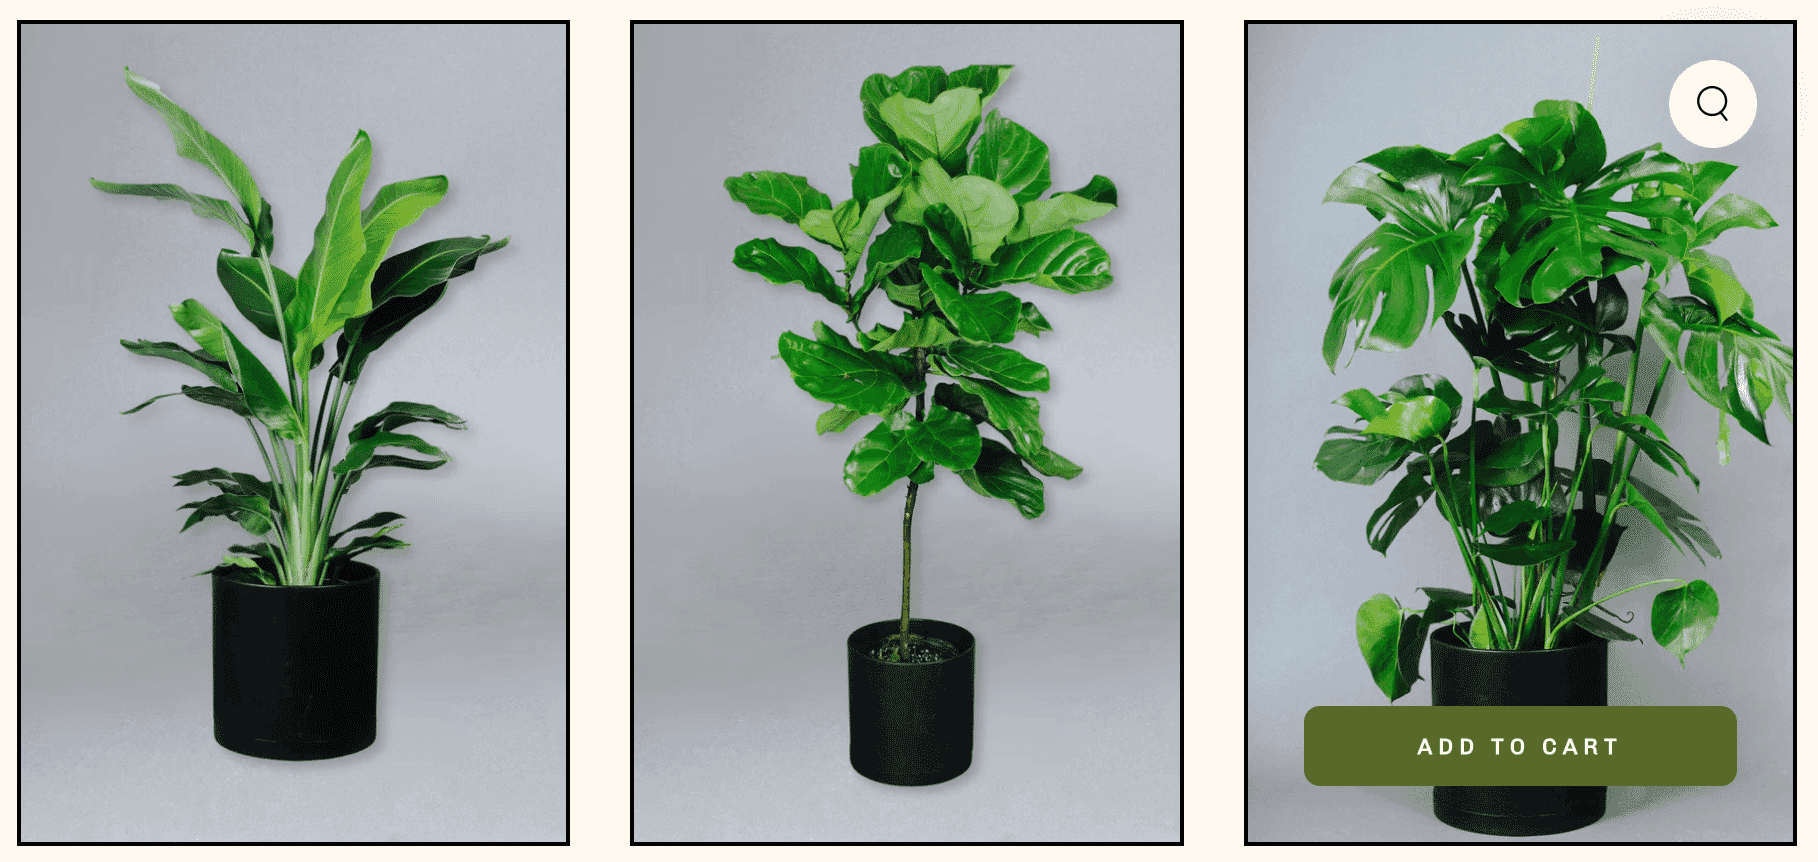
The Grounded Plants brand has such a distinct look and feel, and the product photos are a continuation of that. The backgrounds are plain so not distracting but interesting enough to fit with its overall aesthetic. Plus, variety breaks up the monotony of a single hue.
2. Otherland
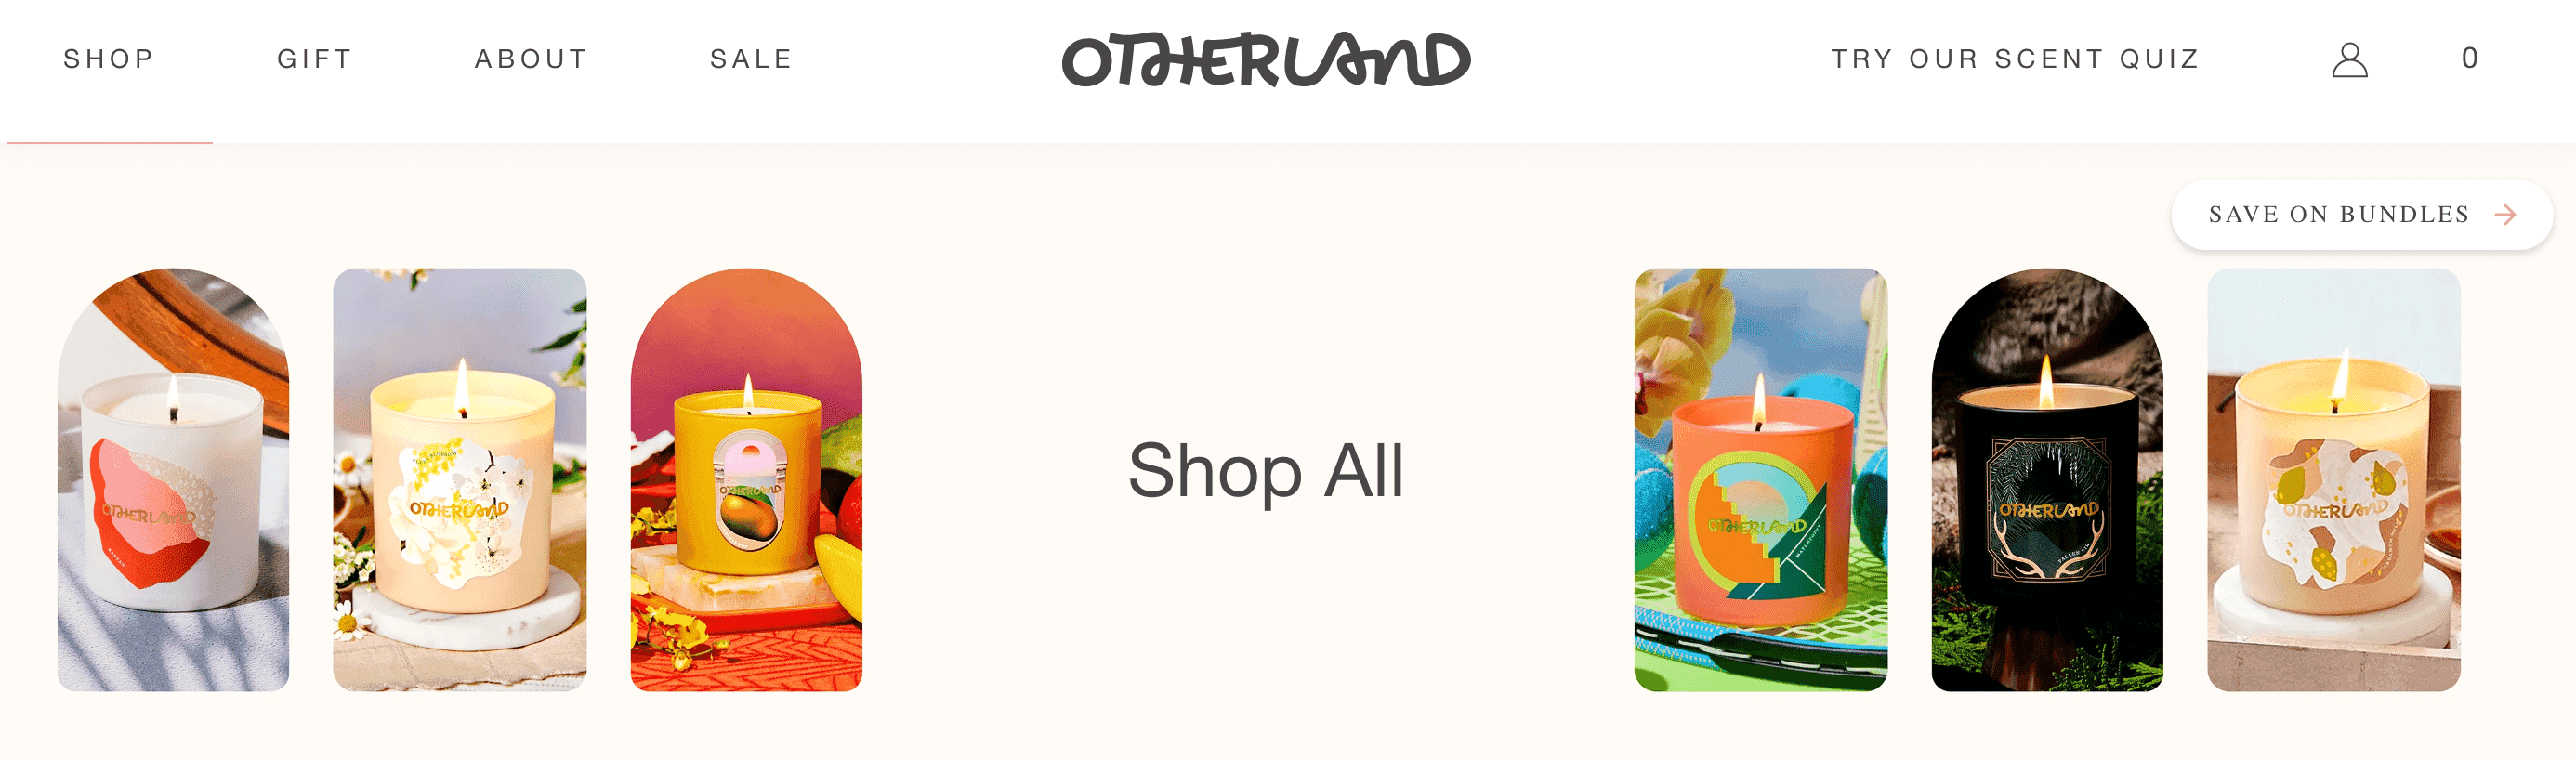
Candle brand Otherland has a creative touch to its product photo backgrounds. It stages shots of its candles with fun props and backgrounds to evoke different moods for each candle.
3. SOKO
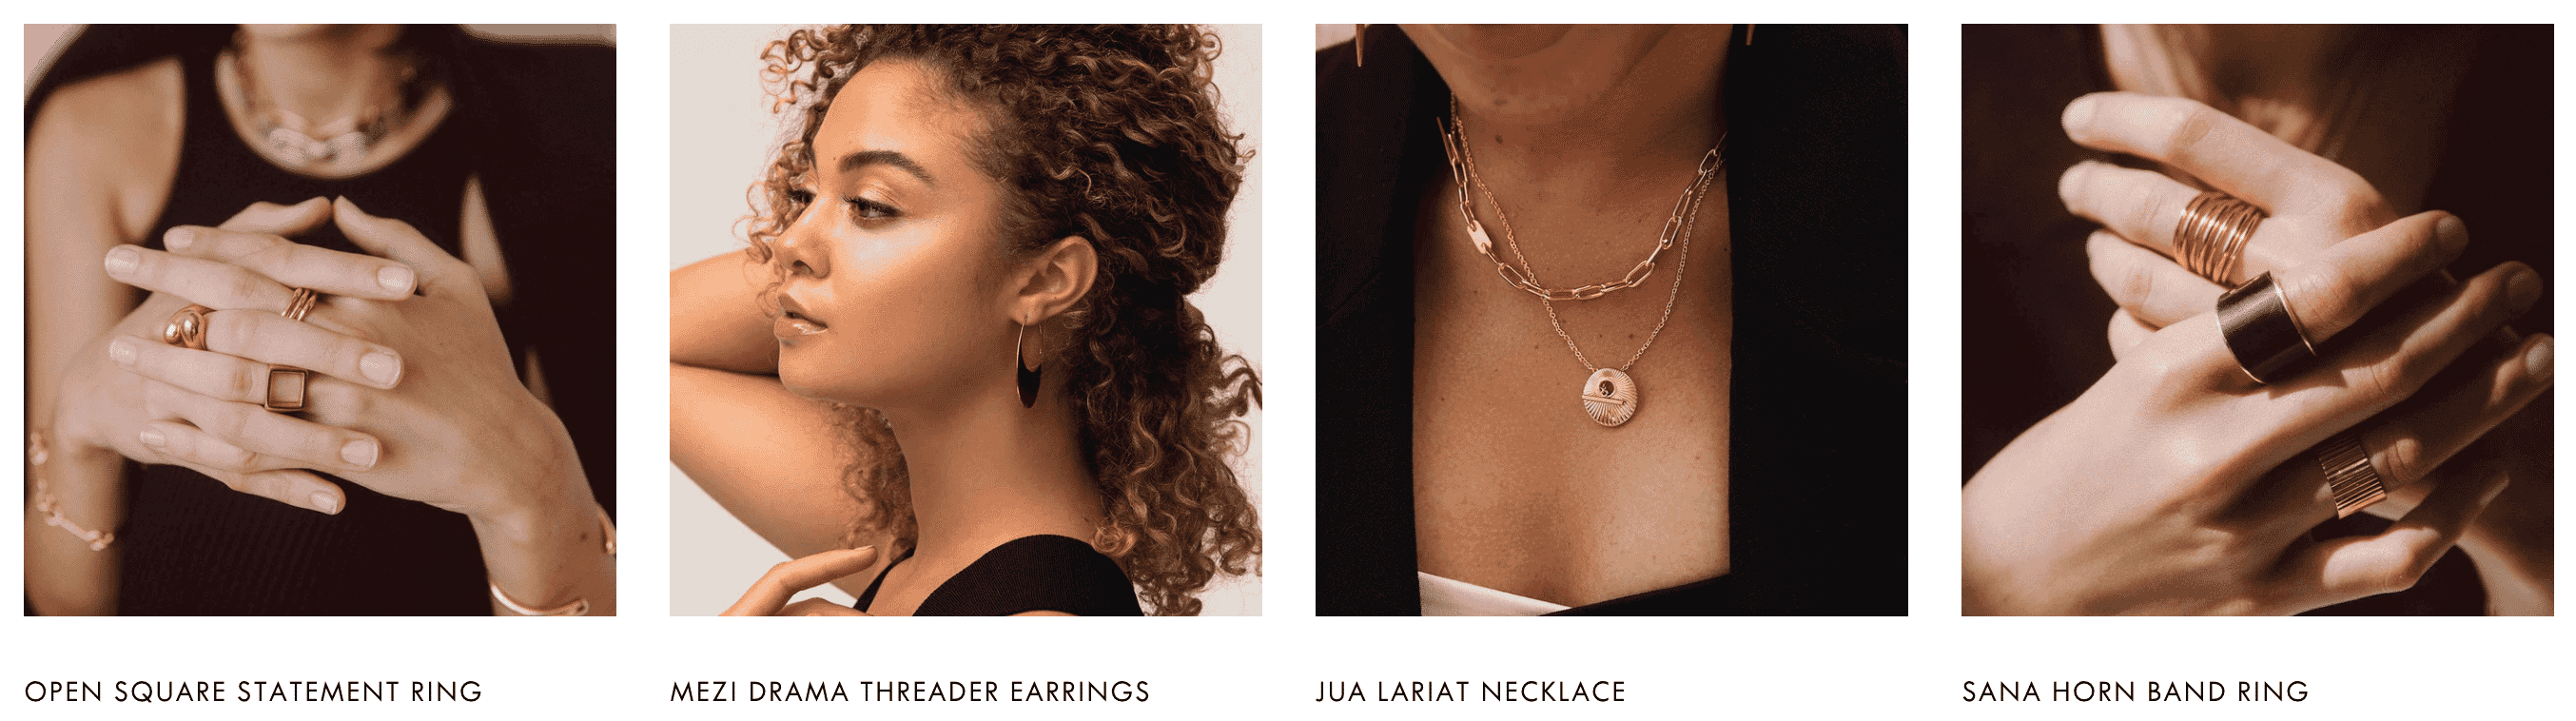
SOKO sells jewelry that was handcrafted with sustainable materials in Nairobi, Kenya, so the magic is in the details. And the details aren’t lost when it comes to its product photos. The perfect mix of white background, detailed, and lifestyle shots, SOKO’s photos are as beautiful as the designs themselves.
Product photography courses
There are tons of product photography courses out there—ranging from beginners to advanced, and many specializing in specific niches.
Here are some product photography courses worth checking out:
- Product Photography for Ecommerce, Shopify Academy (free): Learn how to take product photos to sell online, including white background shots, home studio setup, and step-by-step process to outsourcing.
- Product Photography at Home, Craftsy ($29.99): Professional photographer and small-business owner Jessica Marquez leads the course. You’ll learn how to create tabletop setups for product shoots, including lighting, backgrounds, working with models, and post-production.
- Shoot Products Like a Pro, Phil Stills (£197): 13 short modules take you through everything from lighting and studio setup to white backgrounds and cut-outs. You can try the first two modules for free.
- Mobile Product Photography Class, Weebly (free): This product photography course shows you how to capture shots with your smartphone. The course is from 2017, so while some of the tactics may be outdated, a lot of the principles still apply.
- Still Life Photography, UCLA Extension (?): Learn lighting and camera techniques, food and product photography, and basic Photoshop edits. This course is only available at certain times, so check back for enrollment information and updates.
- Rachel Kimberley, virtual: This professional photographer has various photography courses on her website, including courses for flat lays, makers, lifestyle, and product styling.
13 product photography statistics
Below are some recent product photography statistics, studies, and surveys to keep your finger on the pulse:
1. The ecommerce photography market is worth $1 billion
Globally, the ecommerce product photography market is estimated to be worth $1 billion in 2024. It’s predicted to grow to $2 billion by 2033, with an annual growth rate of about 8%.
2. People process images in just 13 milliseconds
One MIT University study found that the human brain can process images after viewing them for just 13 milliseconds. That means they can process a product image just as quickly. Your product photos play a huge role in the first impression, so it’s important they’re high-quality.
3. People can recall 2,000+ images with 90% accuracy
One 2013 study showed people 2,560 photographs for a period of just 1 second. After viewing all the images, they tested the participants’ memory recognition. The participants were able to recall more than 2,000 images with at least 90% accuracy, even after a period of three days.
4. On a scale of 1 to 10 for difficulty, marketers rate producing visual content a 7
In one survey from Venngage, marketers were given the option to rank the difficulty of consistently producing visual brand content, with 1 being the least difficult and 10 being the most difficult. On average, marketers ranked this task a 7.
5. Nearly half of marketers put 20–50% of their budget into visual content creation
In that same Venngage survey, marketers were asked about their marketing budgets. Nearly half (45.7%) said they put anywhere between 20% and 50% of their budget towards creating visual content. This is likely to increase—there was a 9.5% increase in marketers planning to put at least half of their budget towards visual content production by the end of 2024.
6. The photo printing market is worth more than $15 billion
Globally, the photo printing and merchandise market is worth more than $15 billion. It’s forecasted to grow at a CAGR of more than 5%. By 2027, it’s estimated to be worth more than $20 billion.
7. Photo prints and frames are the most popular types of photo products.
The following list shows the most-ordered printed photo products in 2023, from most to least:
- Prints
- Frames for wall decor
- Frames for table/desk
- Mugs
- Photo Cards
- Calendar
- Clock
- Albums
- Puzzle
- Notebooks
- Canvas, banners, and signs
8. 9 camera companies dominate the global market
The Global Digital Cameras Market Recent Trends, In-depth Analysis, Size and Forecast To 2027 notes nine top camera companies in the world:
- Canon
- Nikon
- Sony
- Pentax
- Olympus
- Fujifilm
- Casio
- Panasonic
- Samsung
9. 53% of businesses want to try AI image generators
AI product photography and editing is a trending topic. While the technology is far from perfect, more than half of businesses would like to experiment with using AI image generators, according to a survey from Semrush.
10. Ice Cream Castles shortened their photo-editing workflow from 7 days to 1 day
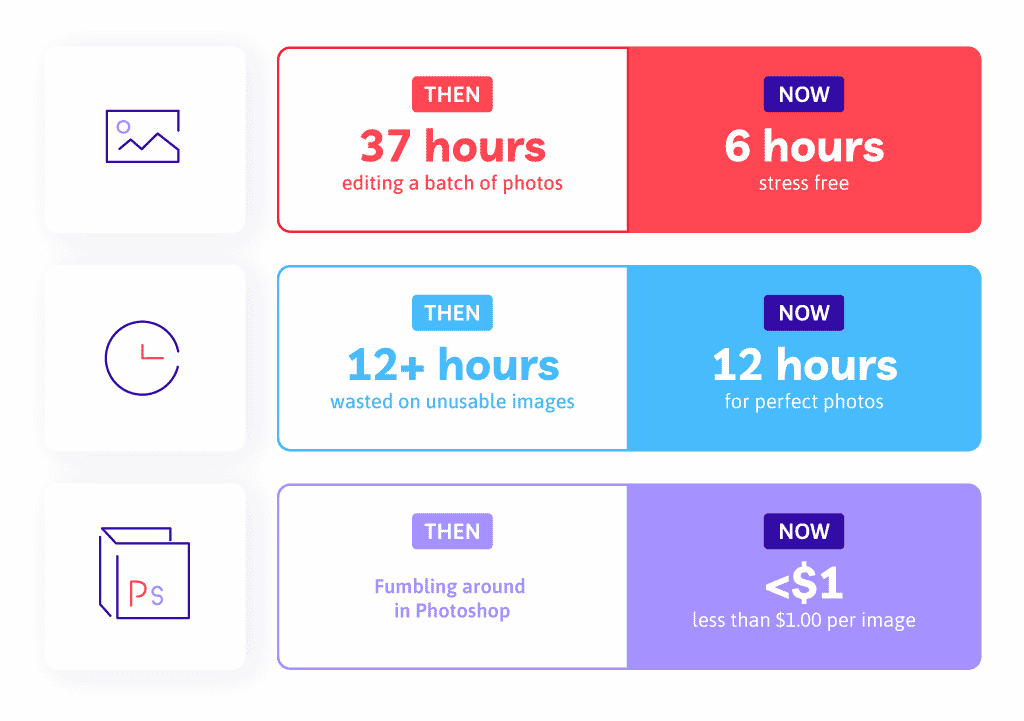
Children’s clothing brand Ice Cream Castles used to take an entire week to edit product photos before they were ready to use them. This took too much time they could’ve spent growing and improving the business—doing the things they love. They started outsourcing their edits and shortened photo edit turnaround time from 7 days to just 1 day.
Photography Prodoto shot product images for Formkraft’s new website that sells a range of merchandise and consumables. The shoot took five days and shot initial concepts for 18 Master Category images and four additional website banner images. It takes time to get high-quality shots!
12. Medalia paintings convert at 17% when they feature artist photos
A/B testing tool VWO’s customer Medalia sells Cuban and Haitian art online. They ran an experiment to see if featuring artist photos as well as product photos would boost conversions. It did. Products that featured artists converted 17.2% of the time compared to 8.8% without.
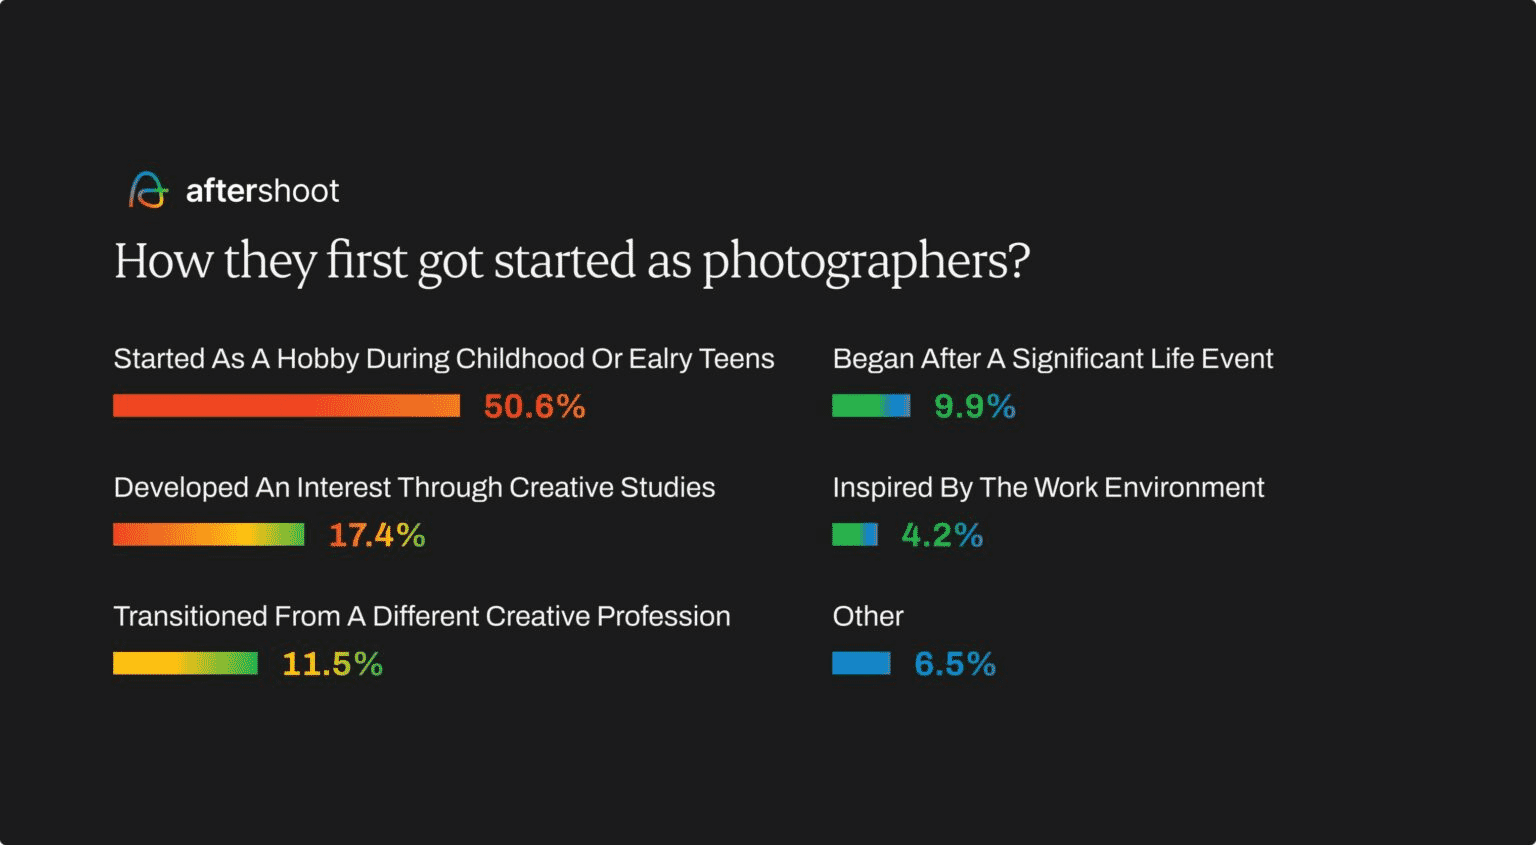
13. More than half of photographers start out as hobbyists
According to one survey, slightly more than 50% of photographers get their start with photography as a hobby.
Now it’s time to edit your product photography
You don’t have to do it all yourself. Outsourcing your edits can help you launch faster, stay consistent, and focus on the big picture.
Path gives you a team of expert retouchers who complete every photo edit by hand—no AI, no cut corners. Just pixel-perfect images that convert.
Wish you could just hand this over to a pro? Surprise, you can.
Product photography FAQs
What is needed for product photography?
- Camera
- Lenses
- Lighting
- Tripod
- Background
- Reflectors and diffusers
- Editing software
- Props
What is the meaning of product photography?
Product photography is a subcategory of commercial photography that focuses on capturing high-quality images of products for marketing and promotional purposes. The images are used in advertisements, websites, catalogs, and other marketing materials to showcase the product in the best possible light.
What is the idea of product photography?
The idea of product photography is to give potential buyers a full impression of a product. In ecommerce, it essentially replaces the in-person product experience a shopper would have in-store.
What is the role of product photography?
The role of product photography is to help shoppers better understand the products they intend to purchase. It should showcase the product, build trust, enhance the brand image, boost sales, and ultimately reduce returns.
What is object photography?
Object photography is when you take a photo of an inanimate item. As such, product photography is technically a form of object photography—unless the product is living, like a succulent. In object photography, items are typically non-moving, or still.