برچسب: photography

  • The 10 Must-See Banff National Park Photography Spots

    The 10 Must-See Banff National Park Photography Spots

    [ad_1]

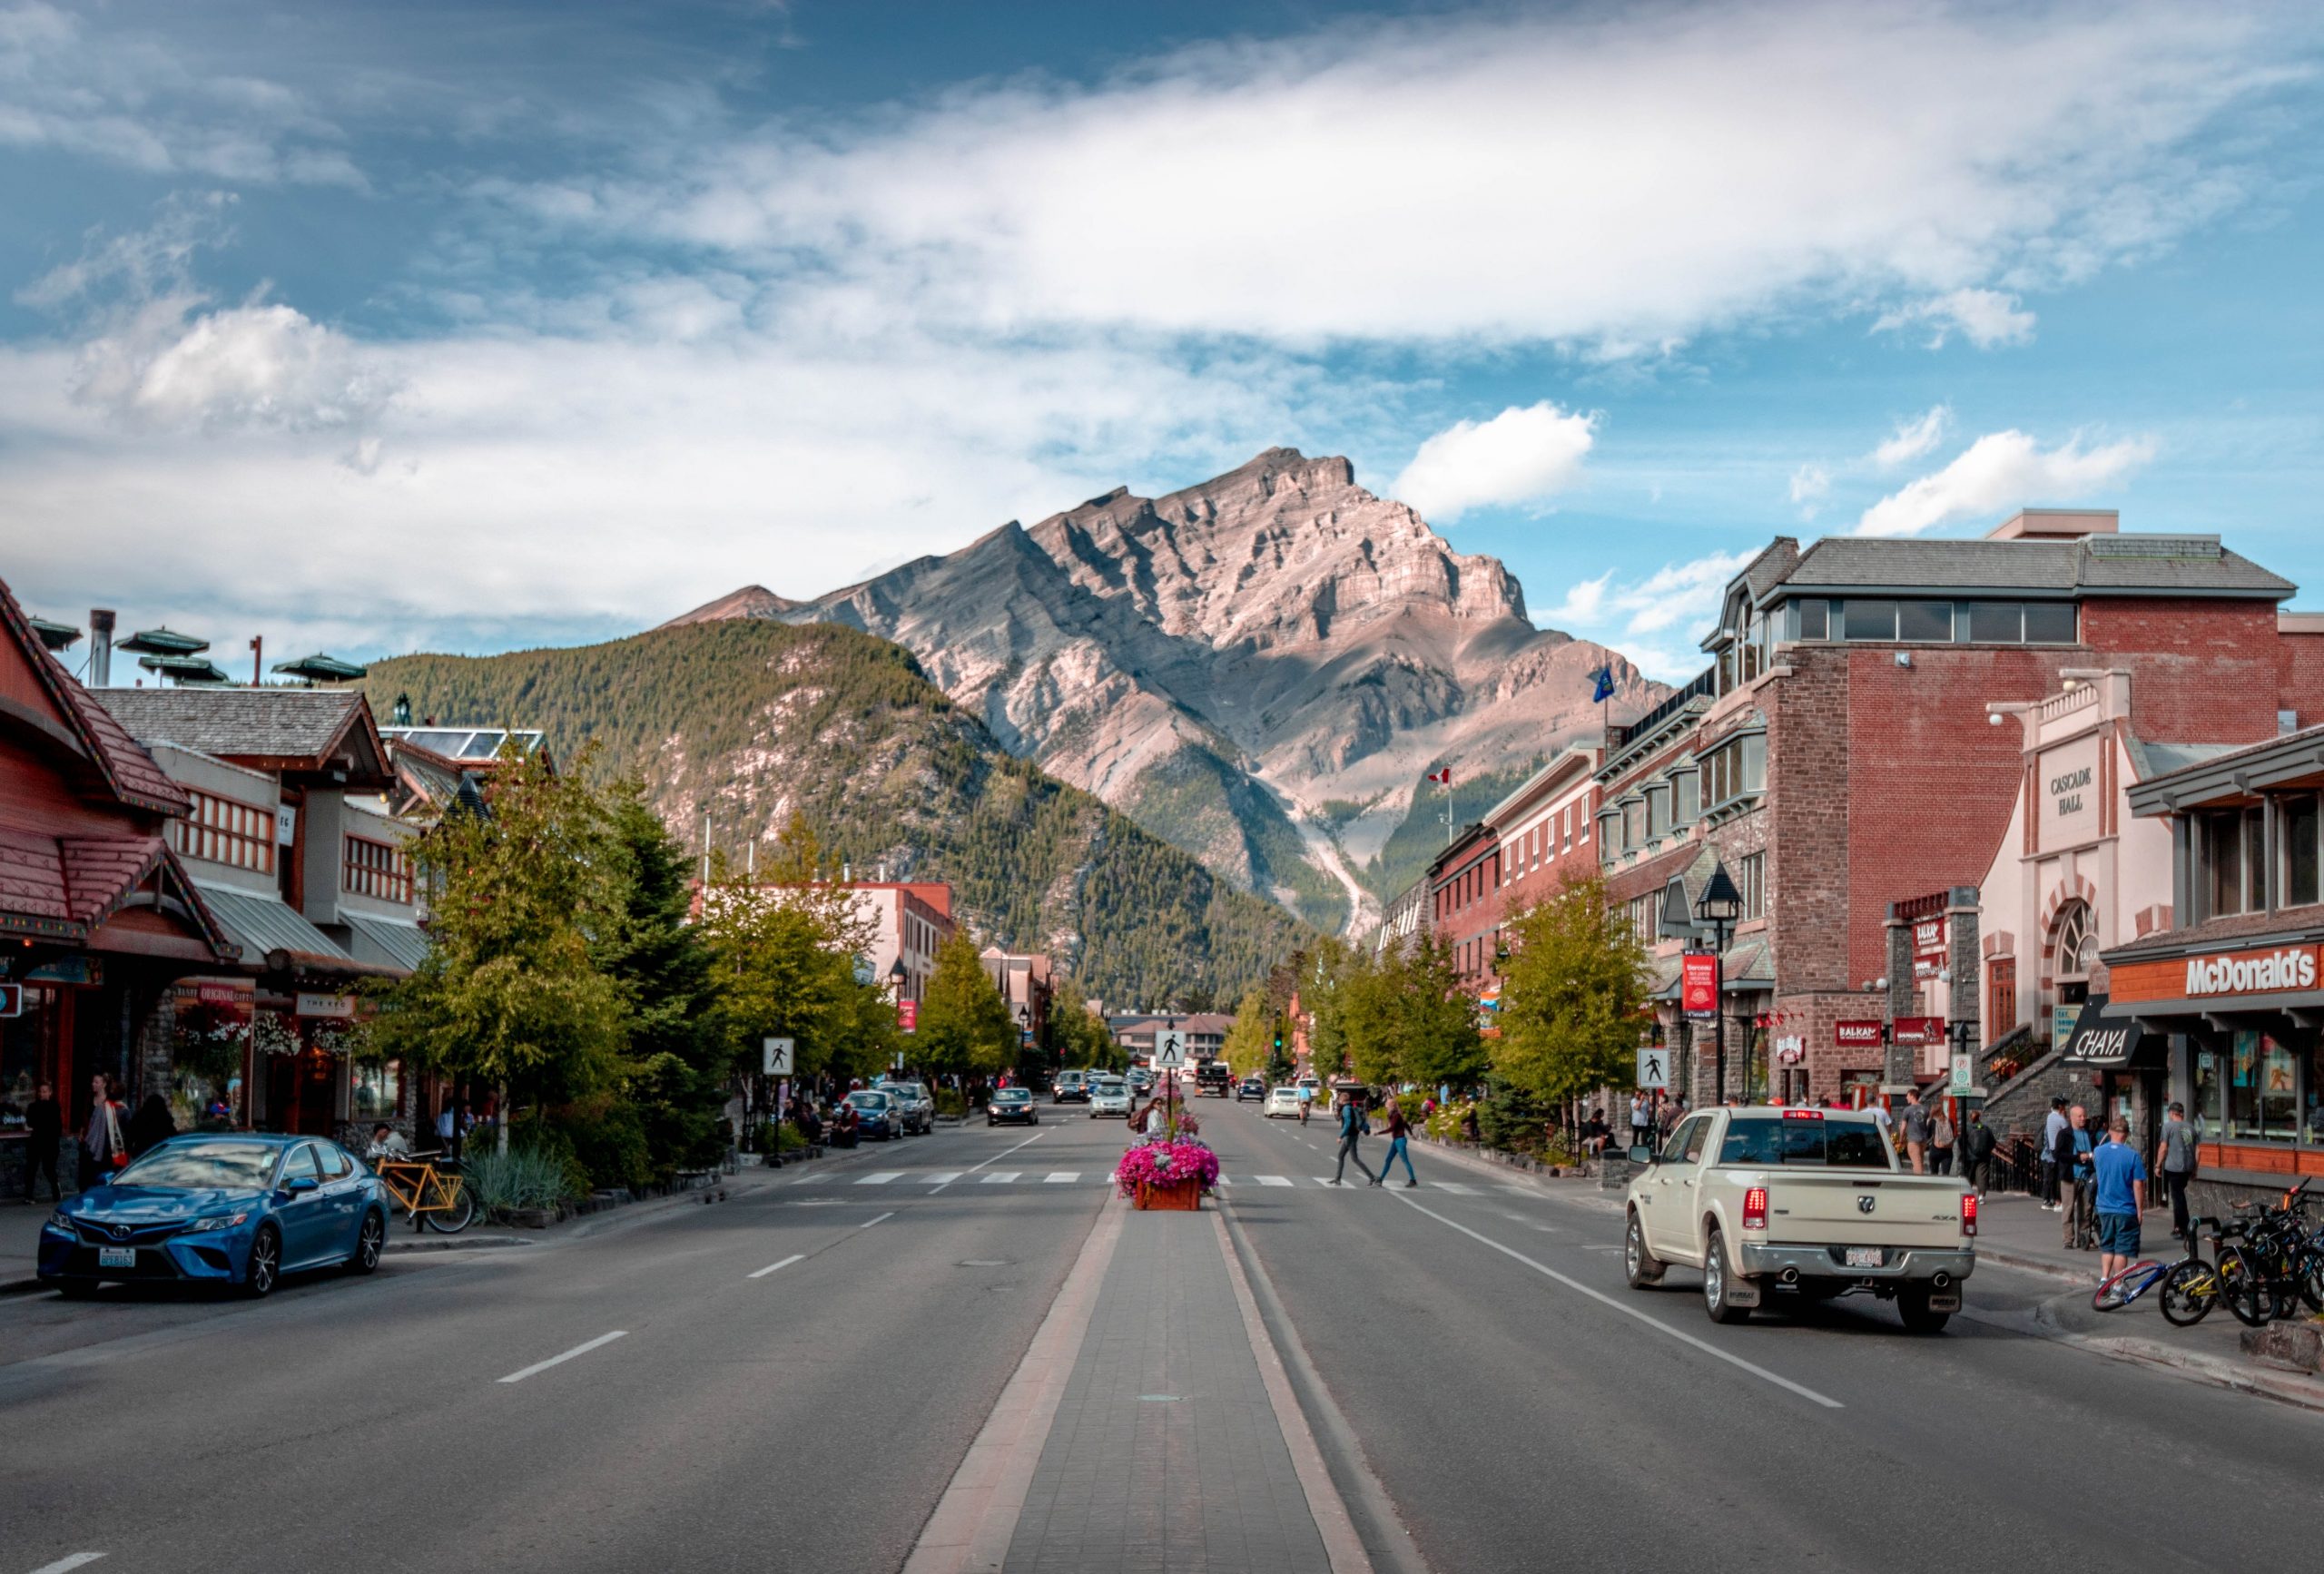
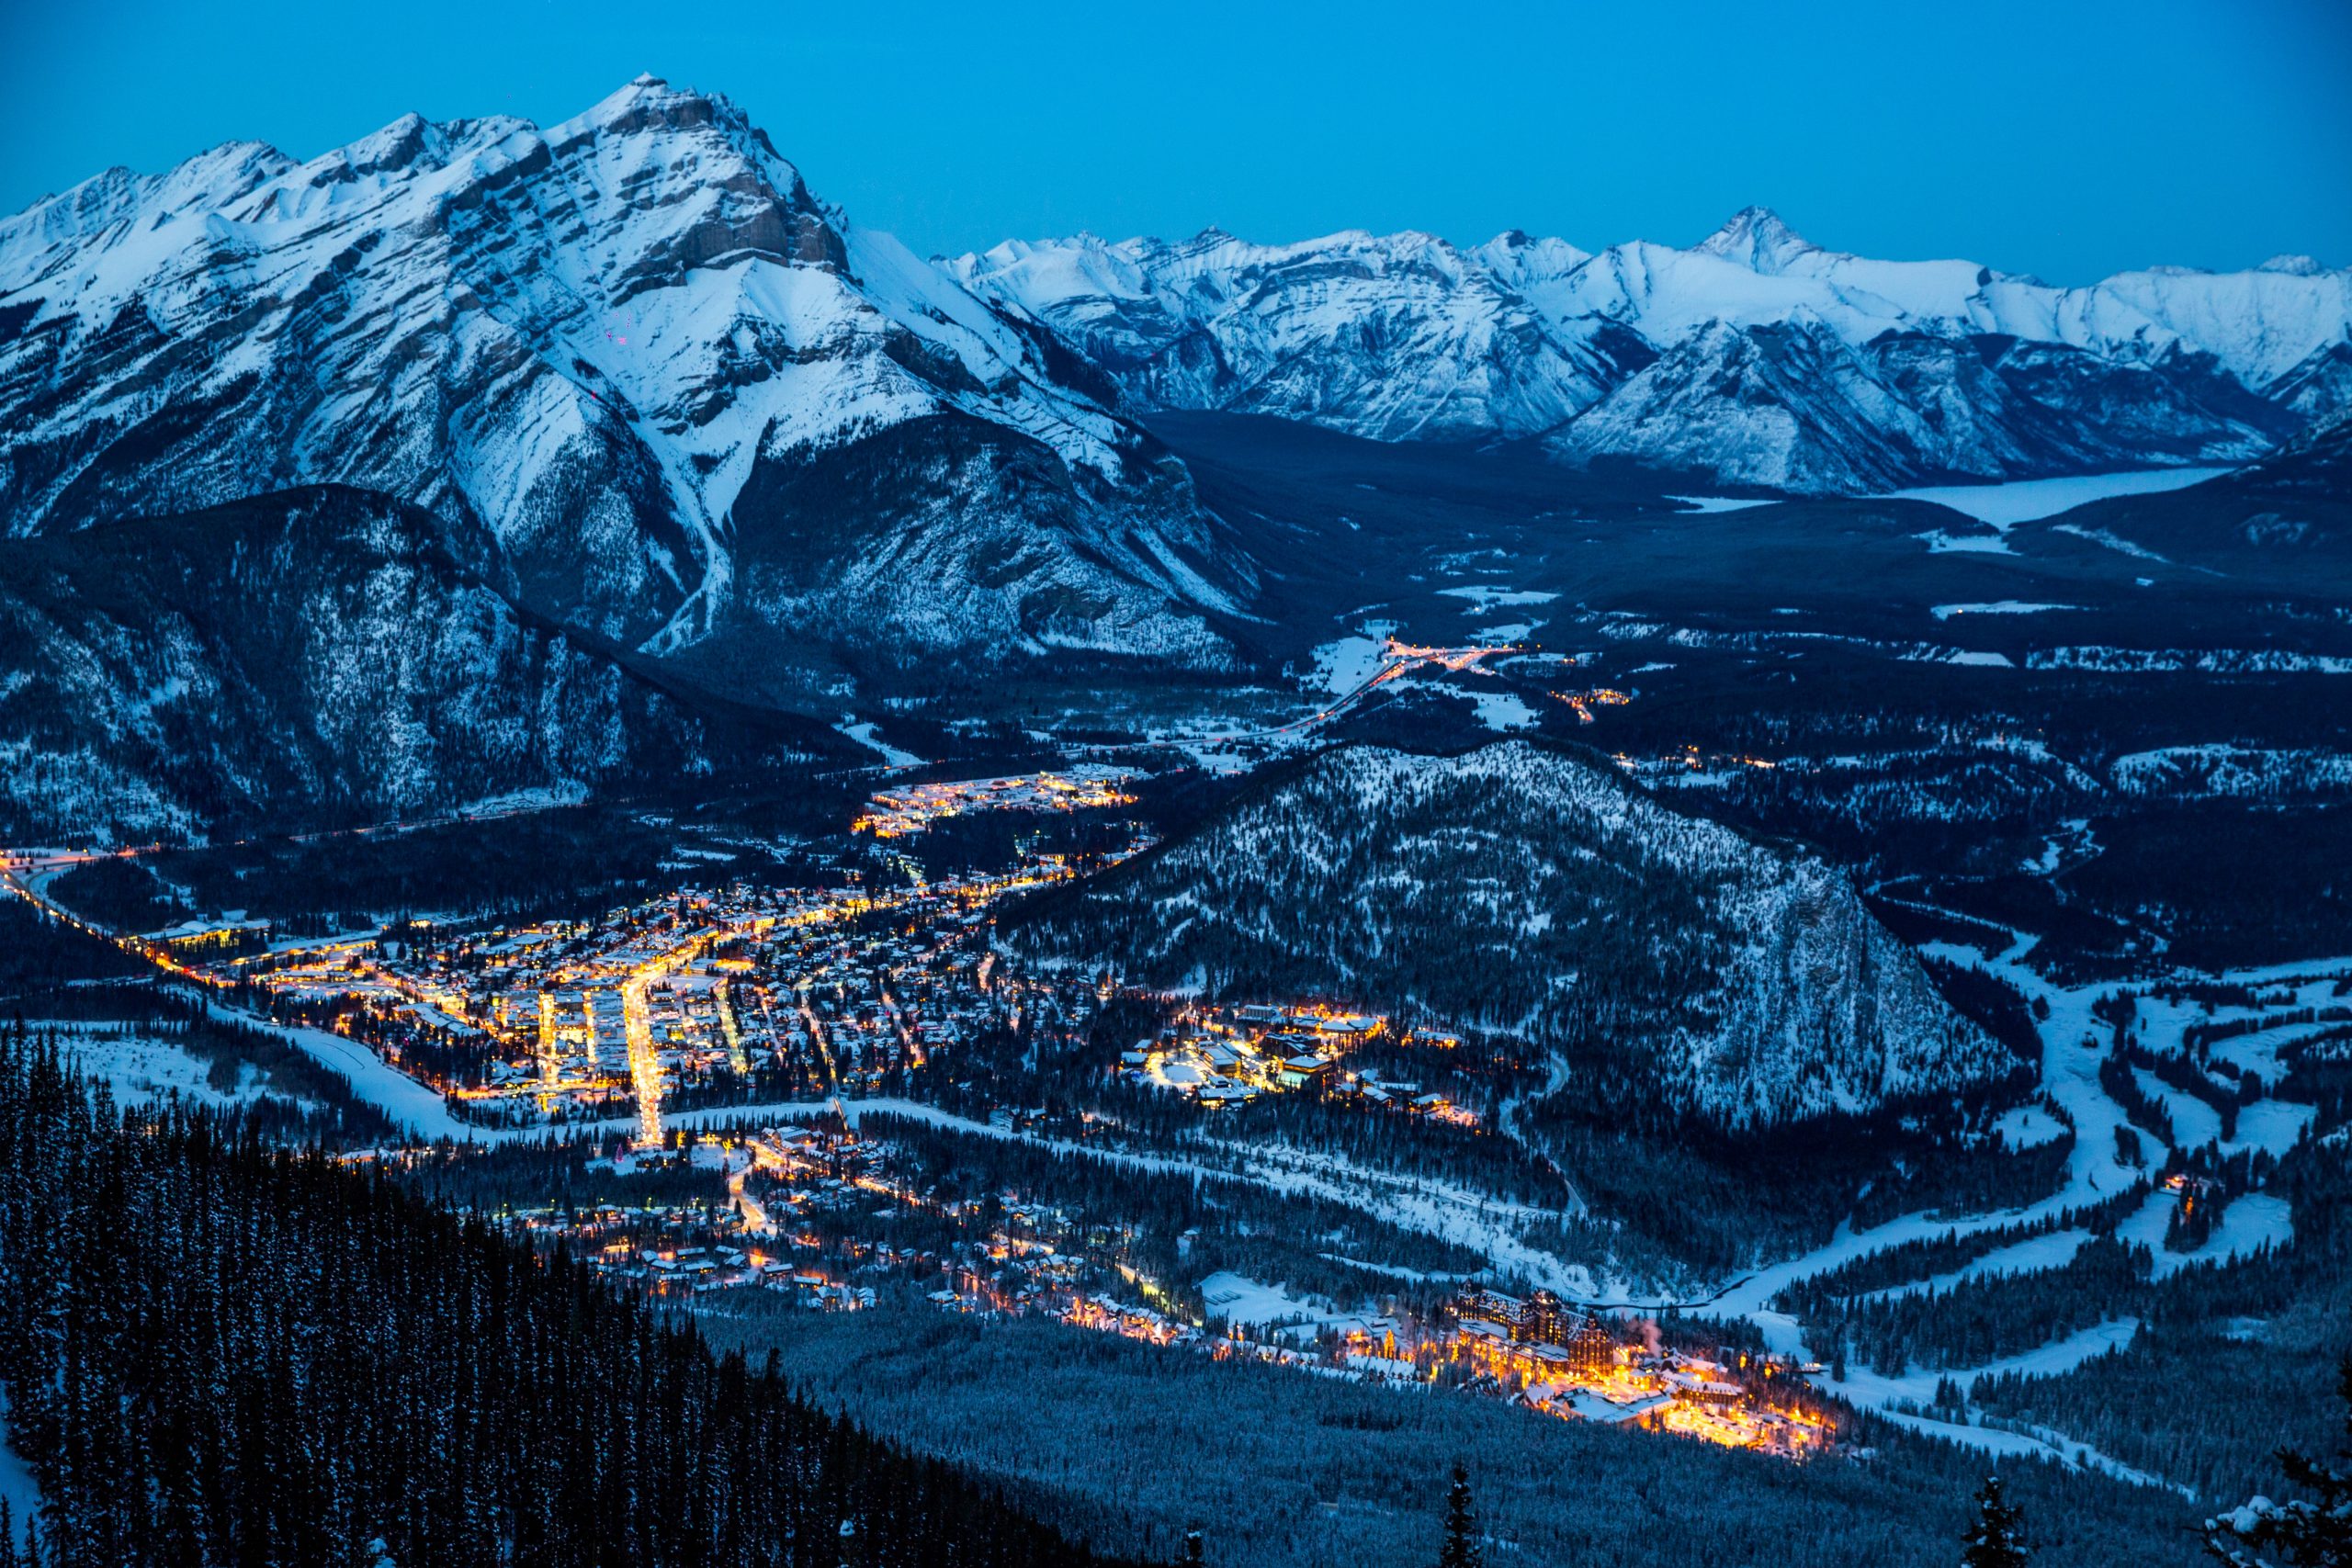
    Being the country’s first national park and UNESCO World Heritage Site, Banff has a lot in store for visitors. Rocky alpine peaks, azure glacial lakes, a picture-perfect mountain town and village, and picturesque drives- you won’t run out of things to see in the area.

    With so many spots to admire, it’s not enough to just visit the park. You have to take home the best Banff National Park photos after your adventure to immortalize the experience.

    So, let us start with a cheat sheet on capturing the park’s beauty, particularly its mountains and lakes. 

    Niv Rozenberg

    [table id=30 /]

    1. Two Jack Lake

    Two Jack Lake is just 15-minute away from Banff’s town center. Though this lake is not painted with shades of blue, it is still one of Banff’s must-visits. The lake itself is a reflection of what is up above. You will see clouds like feathers floating on the water and be in awe of how the lake changes with the season or weather.

    The best time to take a photo in Two Jack Lake is during sunrise and sunset when vibrant colors are at their peak. To capture these photos without being in a hurry, especially in the morning, you can get a Banff campsite at Two Jack Lake. You may get a cotton candy sky at the peak of Mountain Rundle.
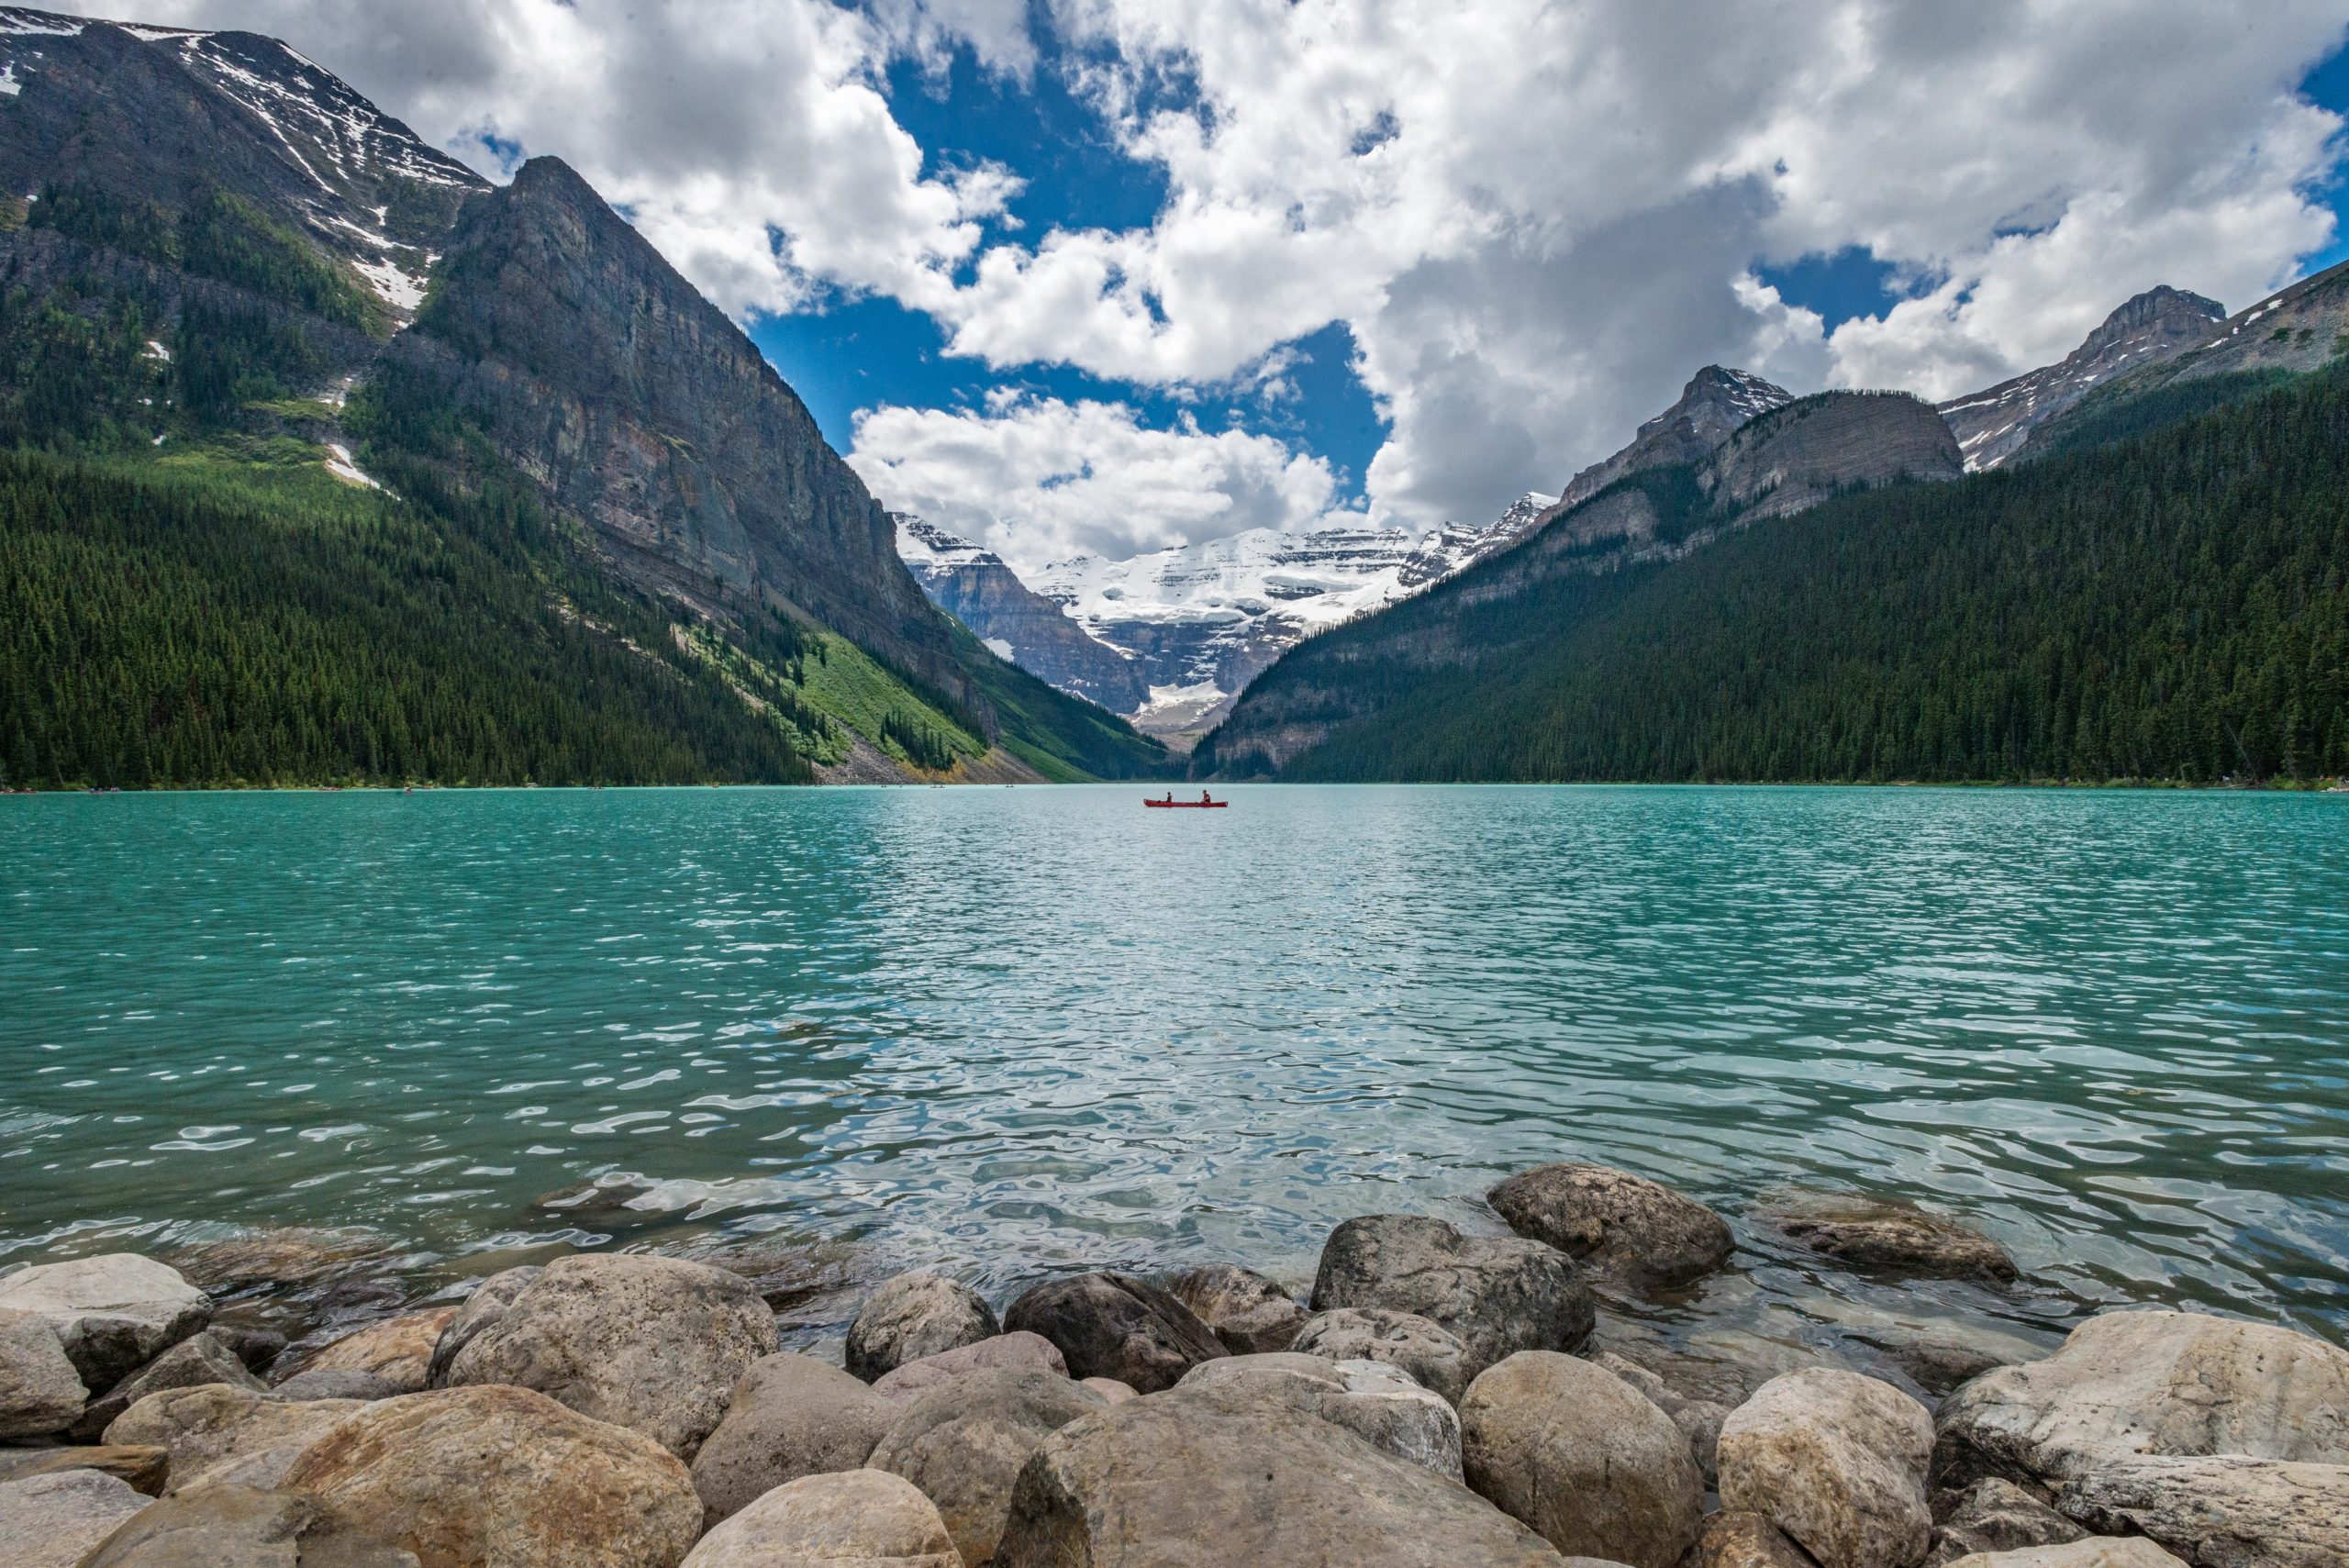
    2. Lake Louise

    Lake Louise is one of the famous spots, which is 61 kilometers away from the town of Banff. This place is jampacked with everything— from the Victoria Glacier, colossal mountain background, down to activities like skiing and hiking. The combination of blue and purple skies beaded with sparkling stars makes it feel like this spot is the closest you can get to outer space. 

    The months of June through September are ideal for taking photos here. You will be able to see the colors of the area and the thawed lake. If you like a snowy landscape, visit December and March. The most lovely time to explore the lake is from sunrise to midday.
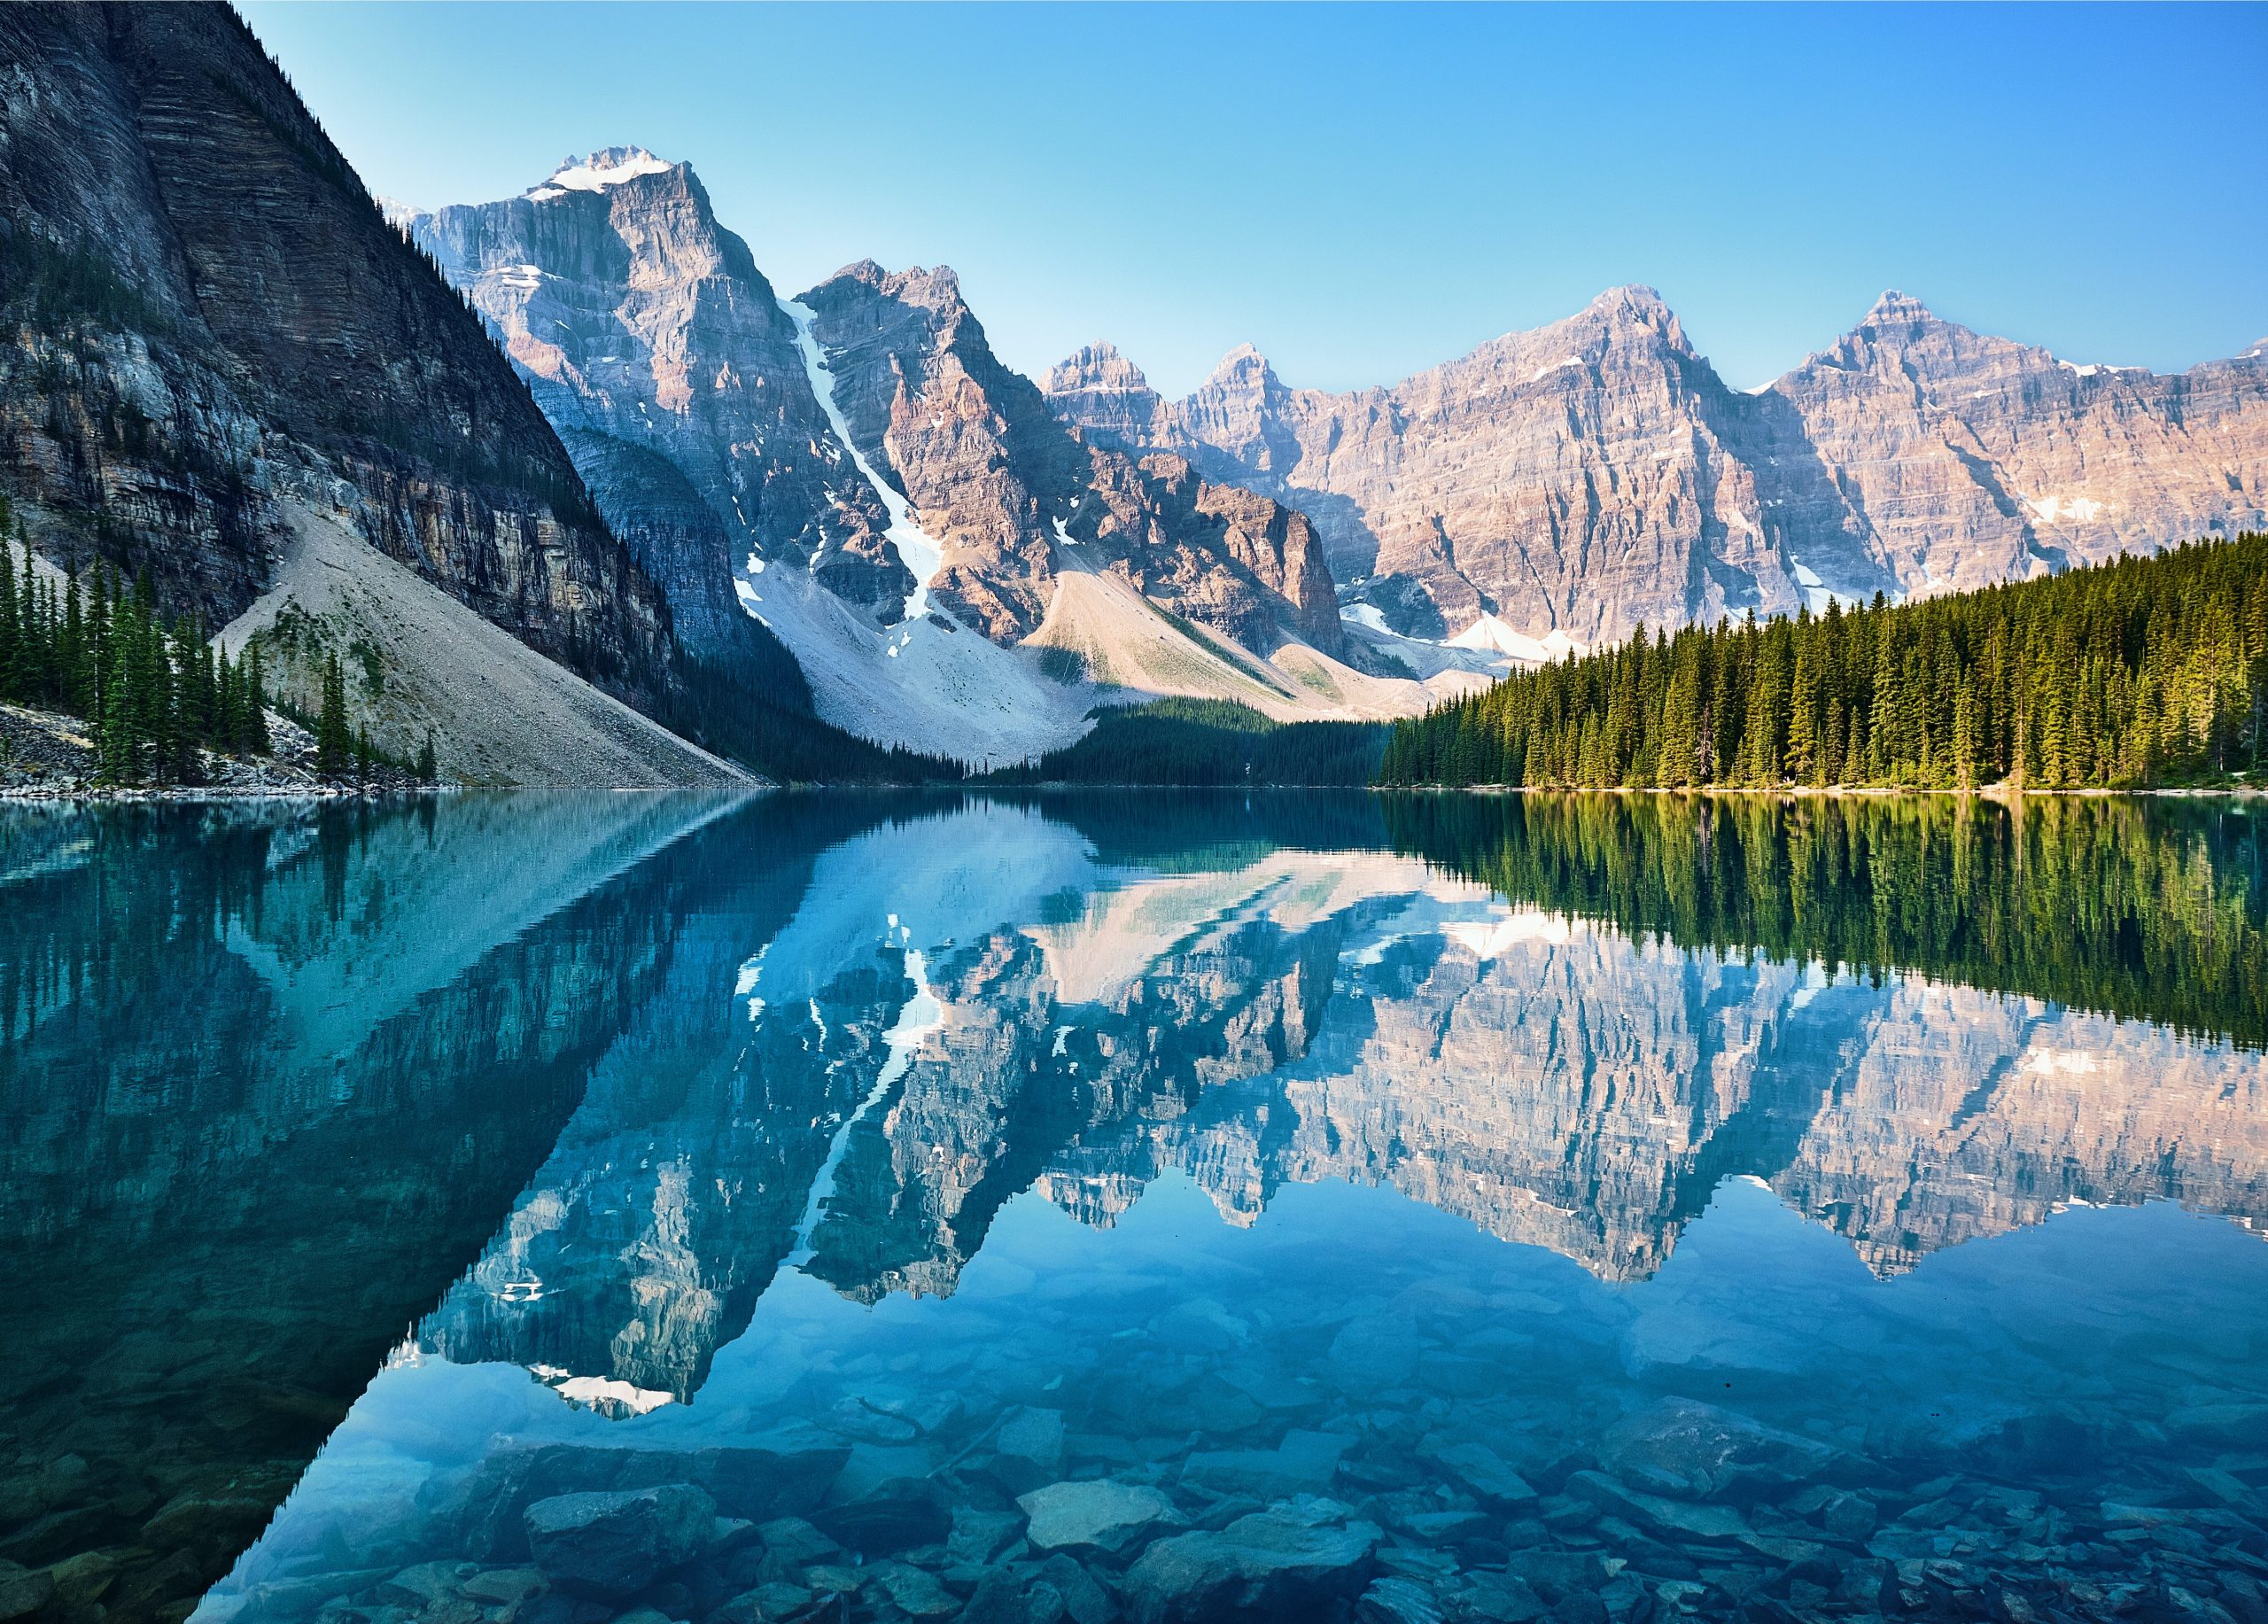
    John Lee

    3. Peyto Lake

    Forty kilometers north of Lake Louise, photographers’ favorite spot, Peyto Lake, is another breathtaking area in Banff National Park. It takes around 10 minutes to trek uphill to the Peyto Lake Lookout. Take note that the viewing platform can get crowded during midsummer. 

    To avoid getting people-filled photos, arrive in Peyto Lake early in the morning or during the evening of mid-November. Sunsets here are the best and can occur as late as 10 p.m. Another best time to have your camera ready is right after the first snowfall when the place is covered with ivory white ice as the blue lake glitters.

    Tip: The place’s name is pronounced as /peya-to/ not /pey-to/.
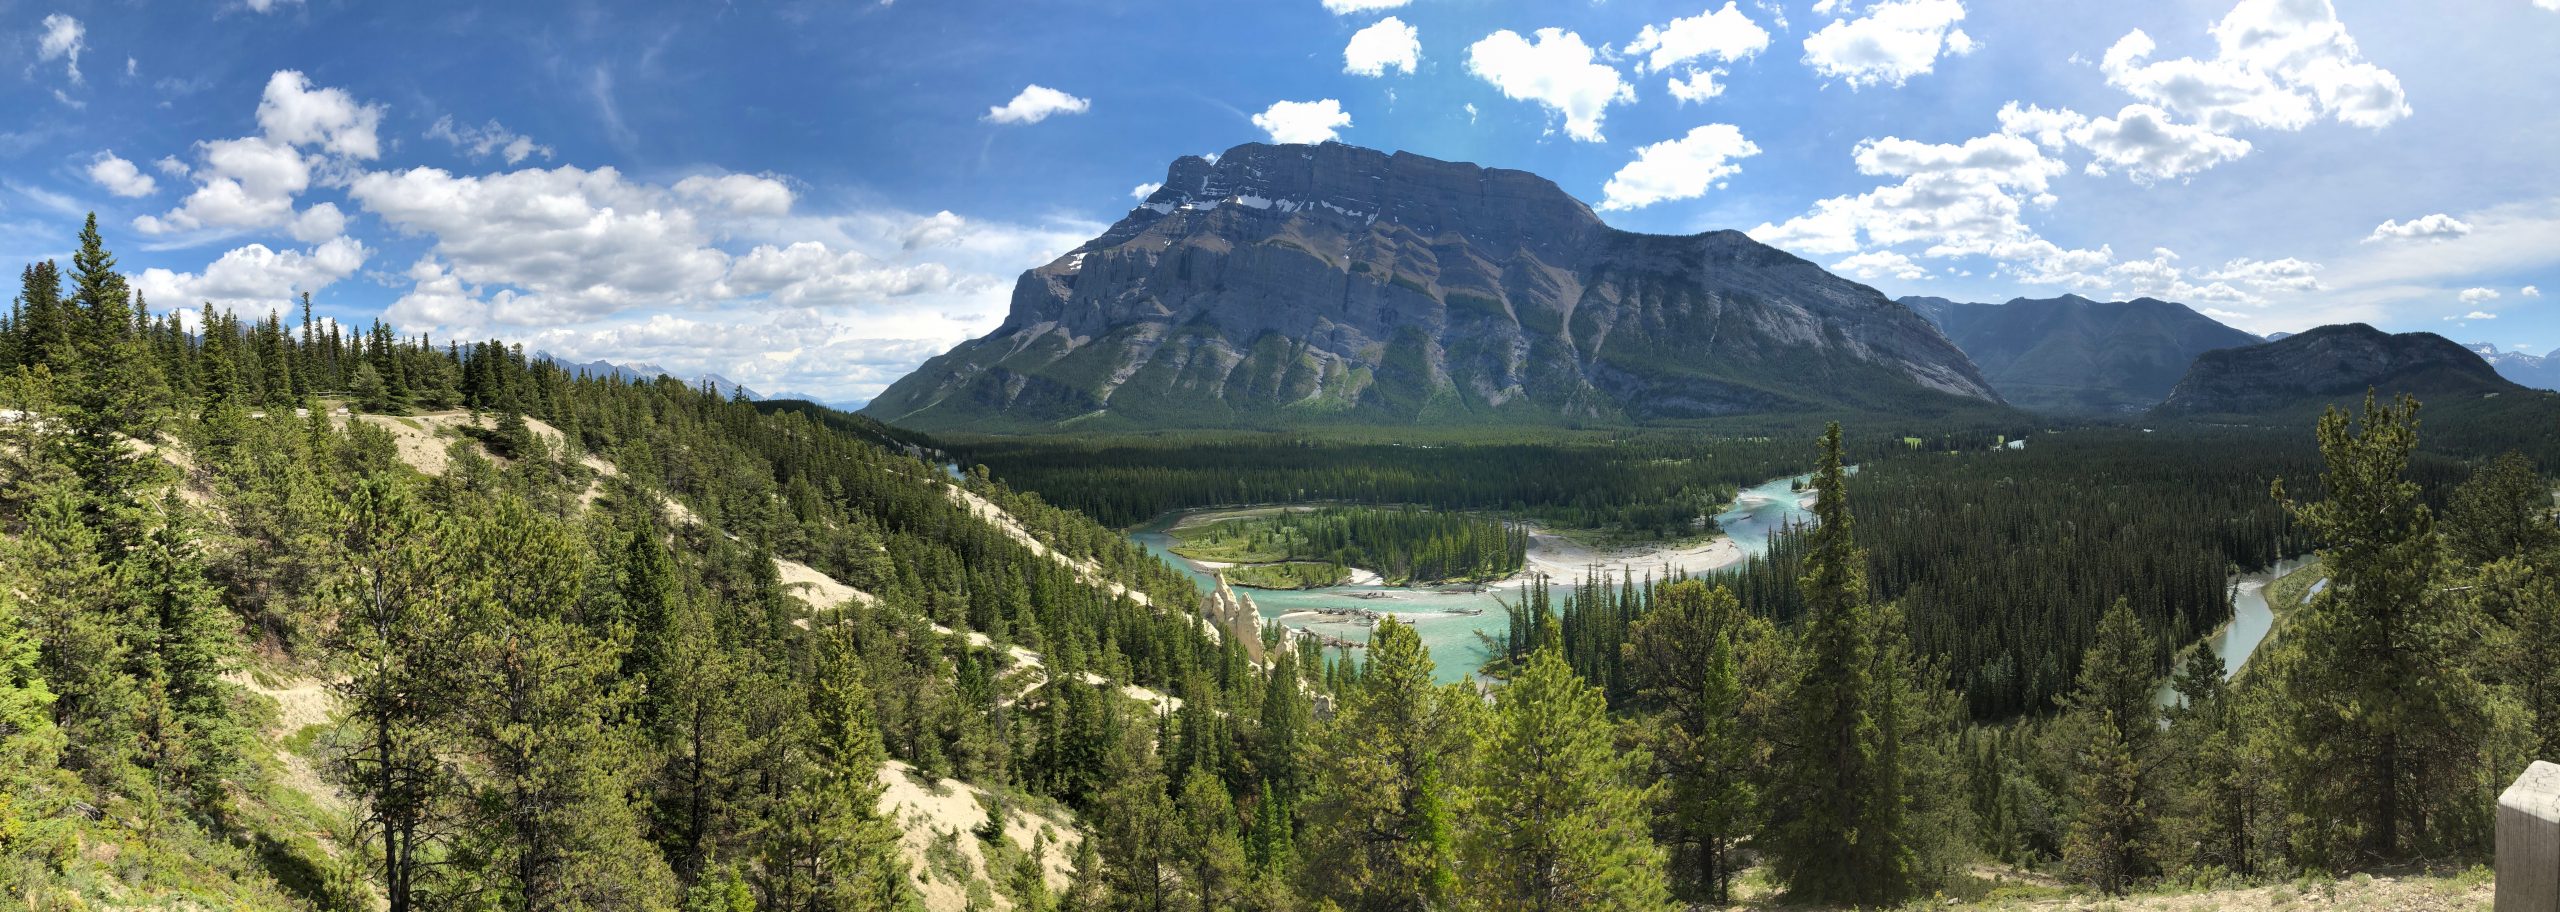
    4. Bow Lake

    If you are searching for a place where you and your family can take a family-friendly hike, then we recommend you visit Bow Lake. From June through September is the finest season to see Bow Lake in Banff. 

    As the lake melts, spring arrives around mid-year and is a fantastic time. The combination of numerous wildflowers and a brilliant blue lake will give you a photocard-worthy snap! In the winter, Bow Lake offers a terrific photo stop along the highway, with an excellent bridge that makes for picture-perfect images.

    Chong Wei

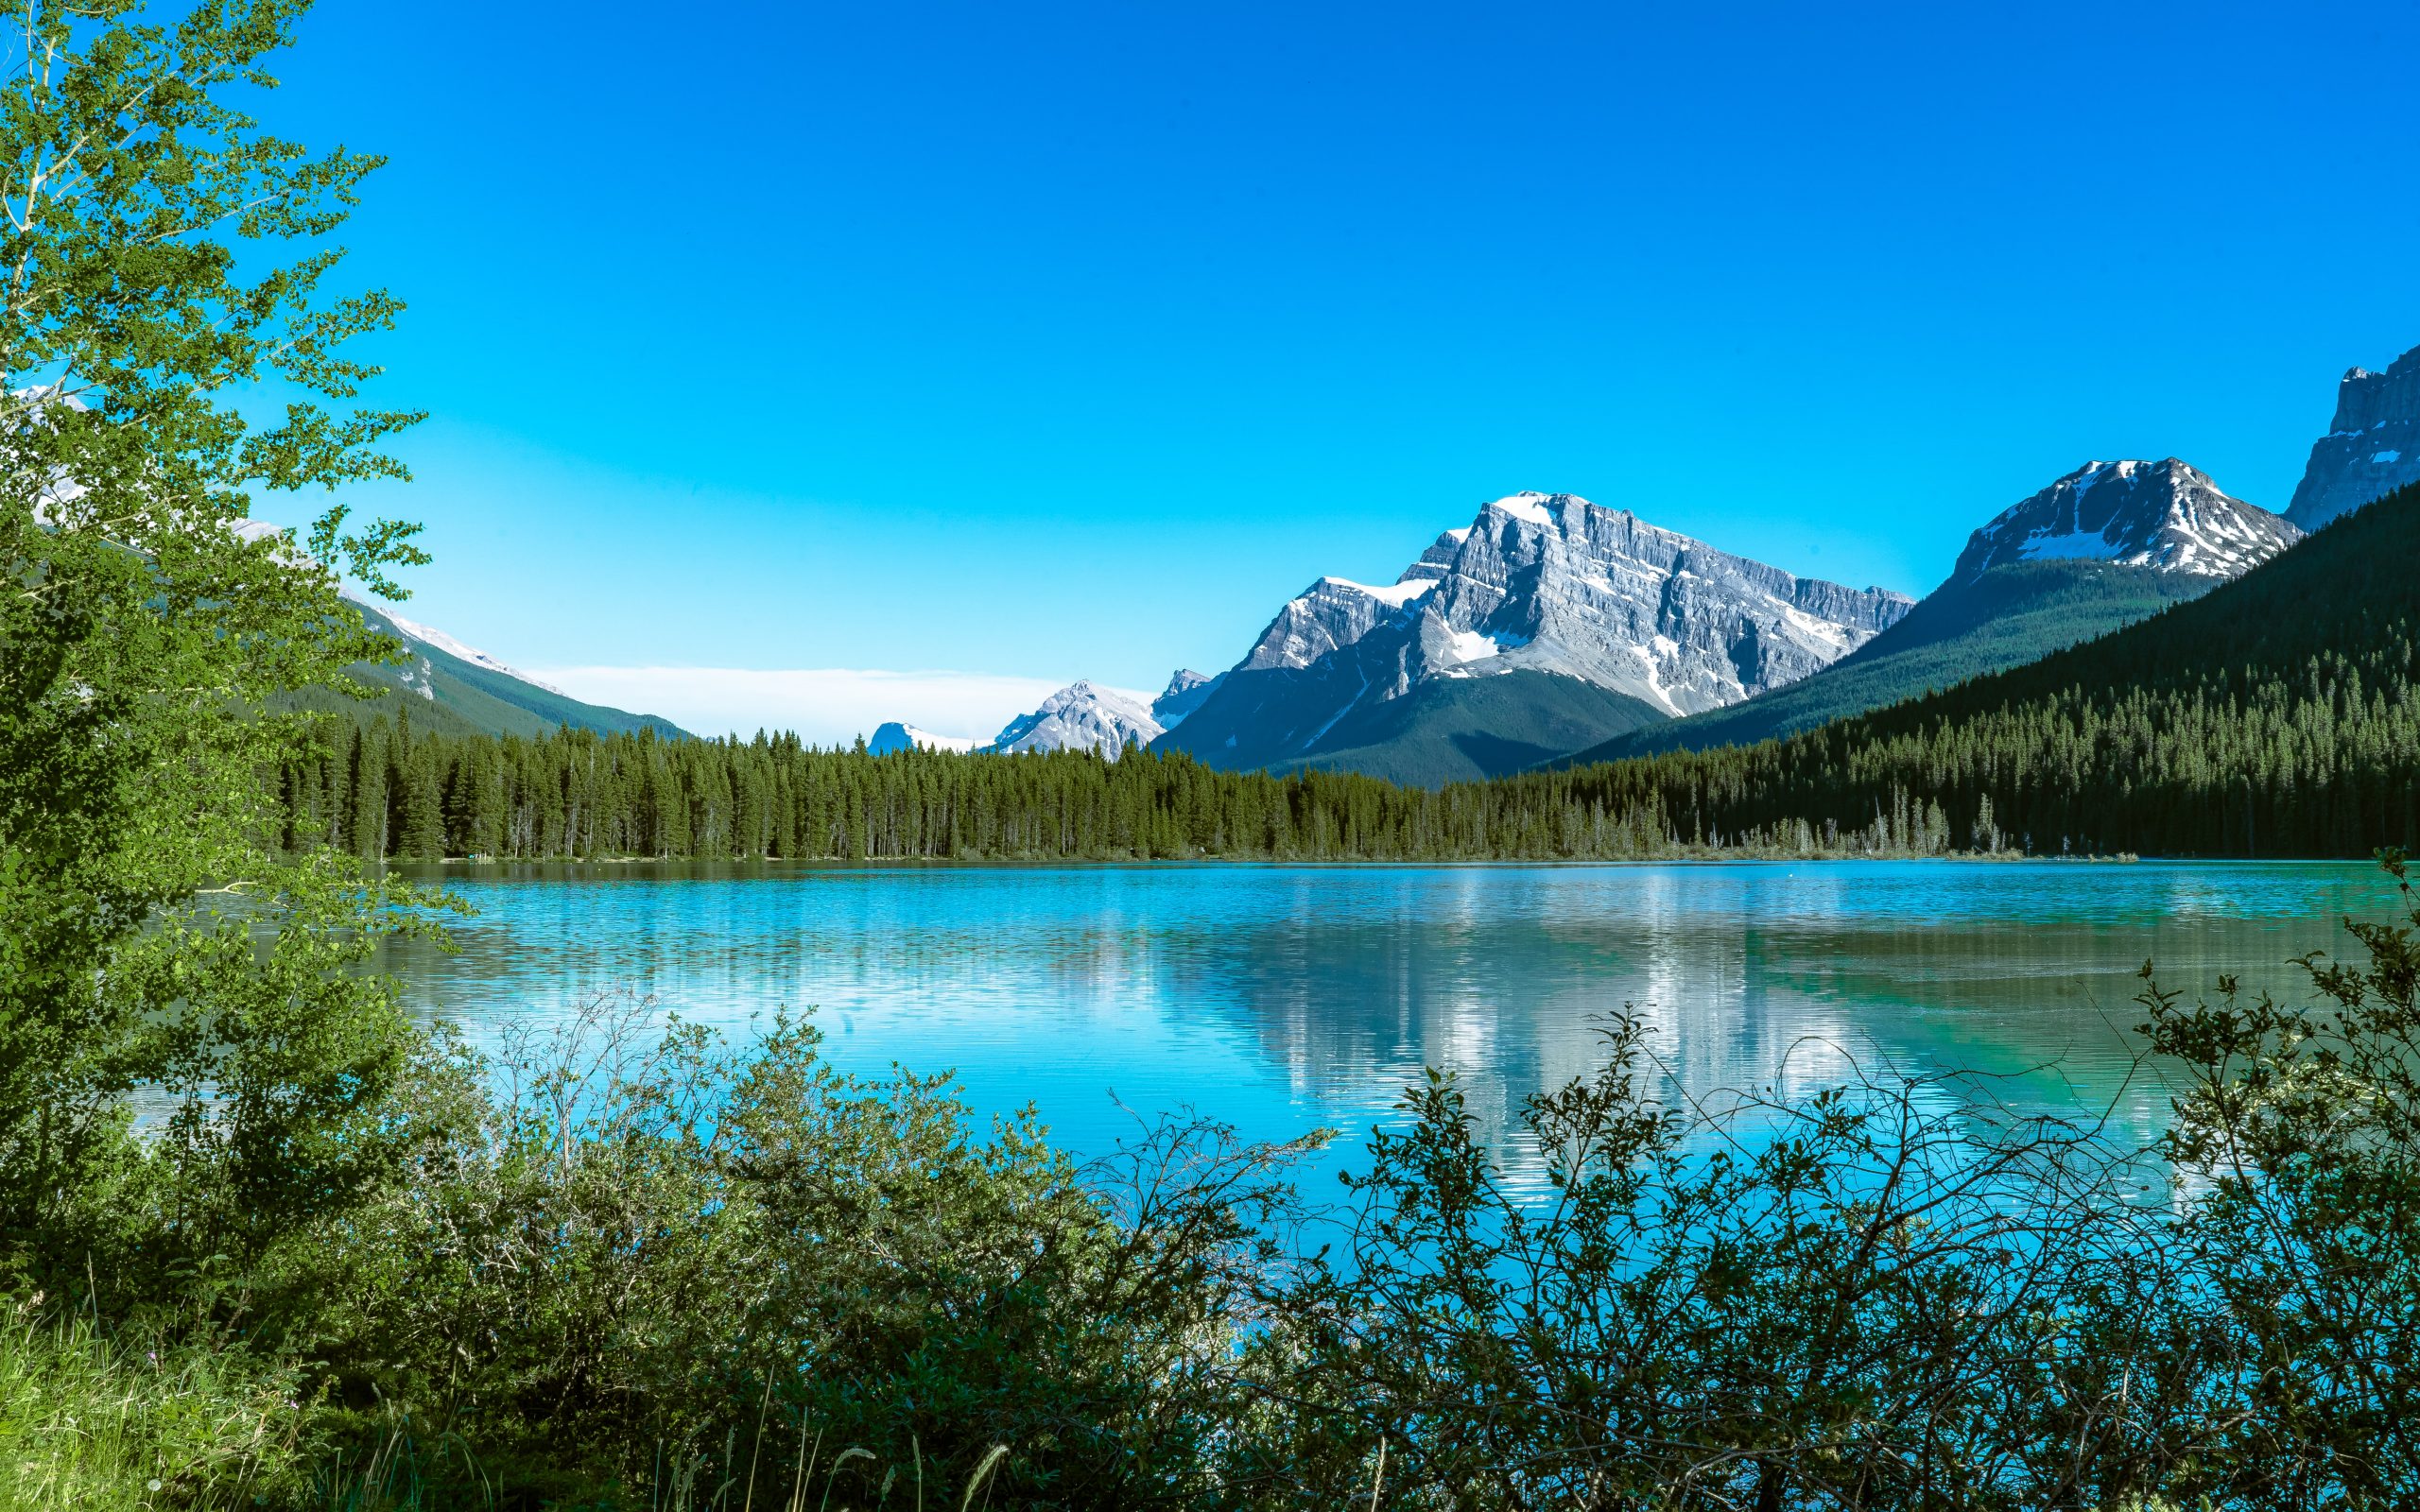
     Walk close to the small footbridges at the water’s edge, and you will get a glimpse of the stunning lake popping against the snow-covered mountain and orange-blue gradient background. It is better to plan your visit to see a sunset to achieve these for your photos. Also, we suggest you park near the Num Ti Jah lodge.

    5. Vermilion Lakes

    The Vermillion Lakes is one of the spots where the sun is its most refined. Its last light of the day, sunrise, and golden hour are the must-see moments in this place. It is better to score a space on one of the docks to have the best vantage point.

    Kevin Noble

    Another Instagrammable click you can get from Vermilion is when you opt for kayaking or canoeing. Try to angle the camera behind you (better if you have a companion to take the photo), grab the paddle, and look at the landscape in front of you. 

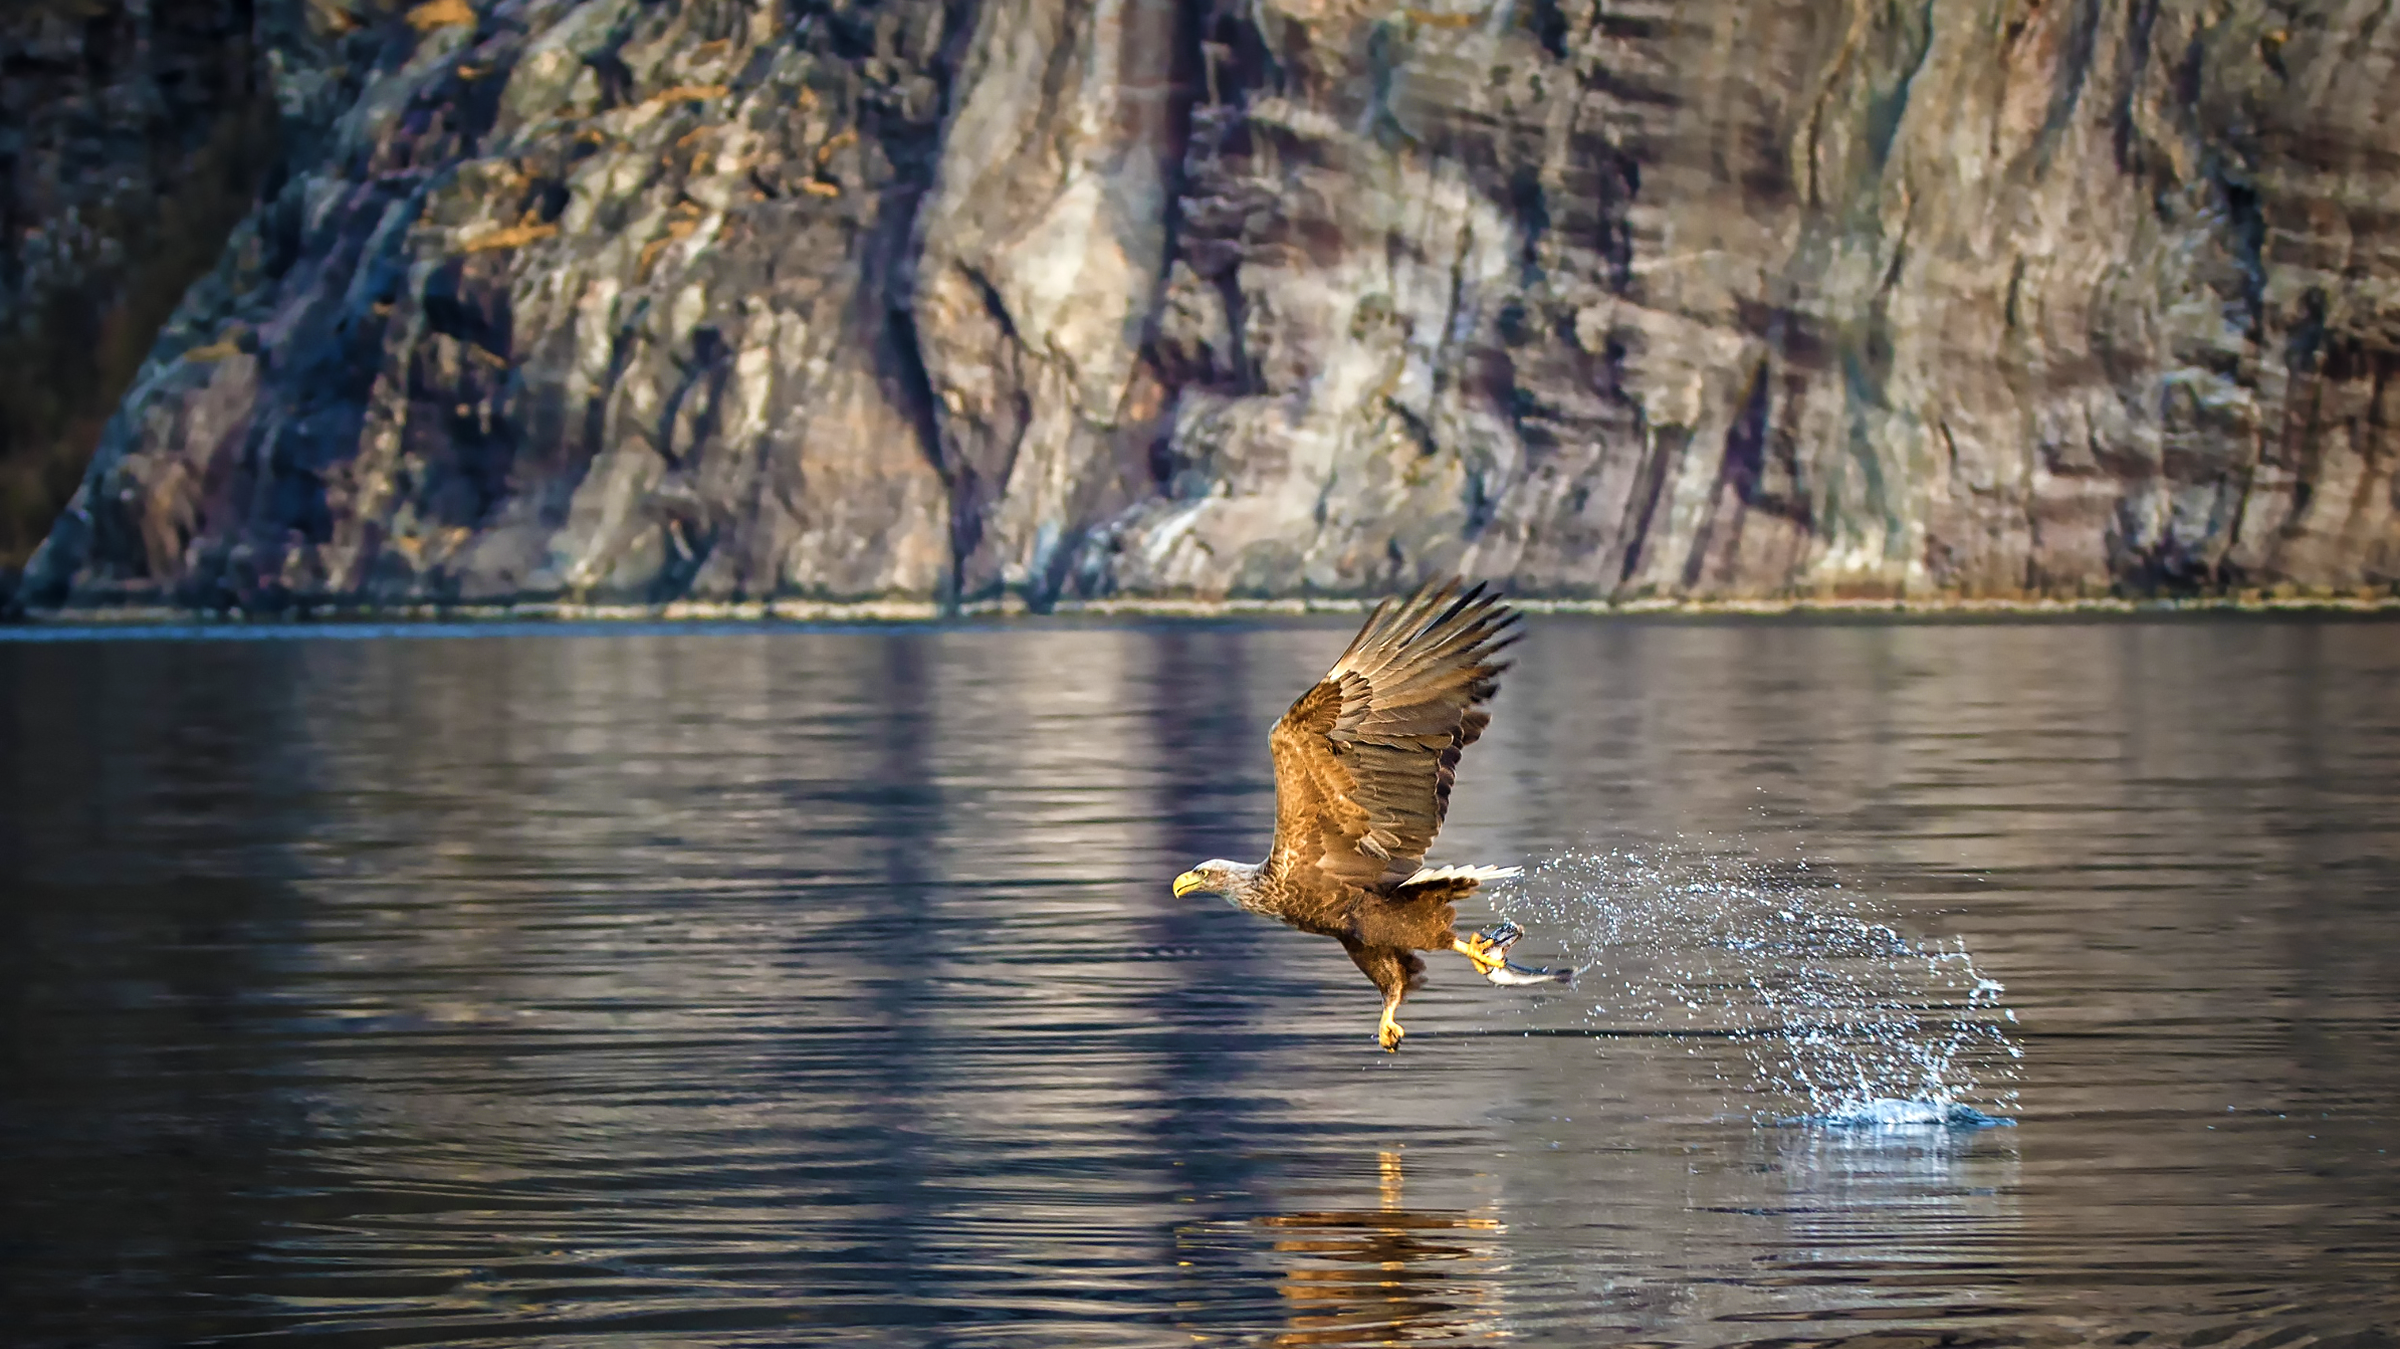
    Not only will you capture a beautiful combination of land and waterscapes but also you may capture the wildlife in the area, particularly muskrats, bald eagles, and beavers.

    6. Lake Minnewanka

    Lisa Bourgeault

    Lake Minnewanka, located near Two Jack Lake, has been used by First Nations Communities for 10,000 years. The lake is 142 meters deep and 21km long, making it one of the largest lakes in Alberta, Canada and the Canadian Rockies. It even provides Banff with hydroelectric power.

    Lake Minnewanka is unlike other lakes having their respective signature image spot. It’s a great spot to see and take a picture of the Aurora Borealis because it faces north. Just a pro tip: you need to roam around the place to acquire the best shot.

    But, the exciting part is you get to experience a photographic adventure. During winter, you can take a photo on top of the lake ice skating as it freezes. Yet, summer is also a lovely season to visit.

    7. Tunnel Mountain

    Steve Payne

    How could Banff’s tiniest mountain provide so many magnificent vistas of the valley and panoramas of the town? Upon standing on Tunnel Mountain, you will have a vantage point of Mount Rundle and Banff Springs golf course. Do not forget to take a photo of the view in landscape mode to cover, including the clouds hugging the mountain peaks.

    Along your hike to the top, do not forget to take a few snaps of the wildflowers along the trail and the trail itself. Remember to look up and capture the gnarly old trees on Tunnel Mountain.

    Fun Fact: Did you know Tunnel Mountain has no tunnel? When a projected path for the Canadian Pacific Railway was to be blasted in 1882, the moniker Tunnel Mountain was given. A cheaper alternative route was built around the mountain, but the title Tunnel Mountain stuck.

    8. Sulphur Mountain

    Sonya Brady

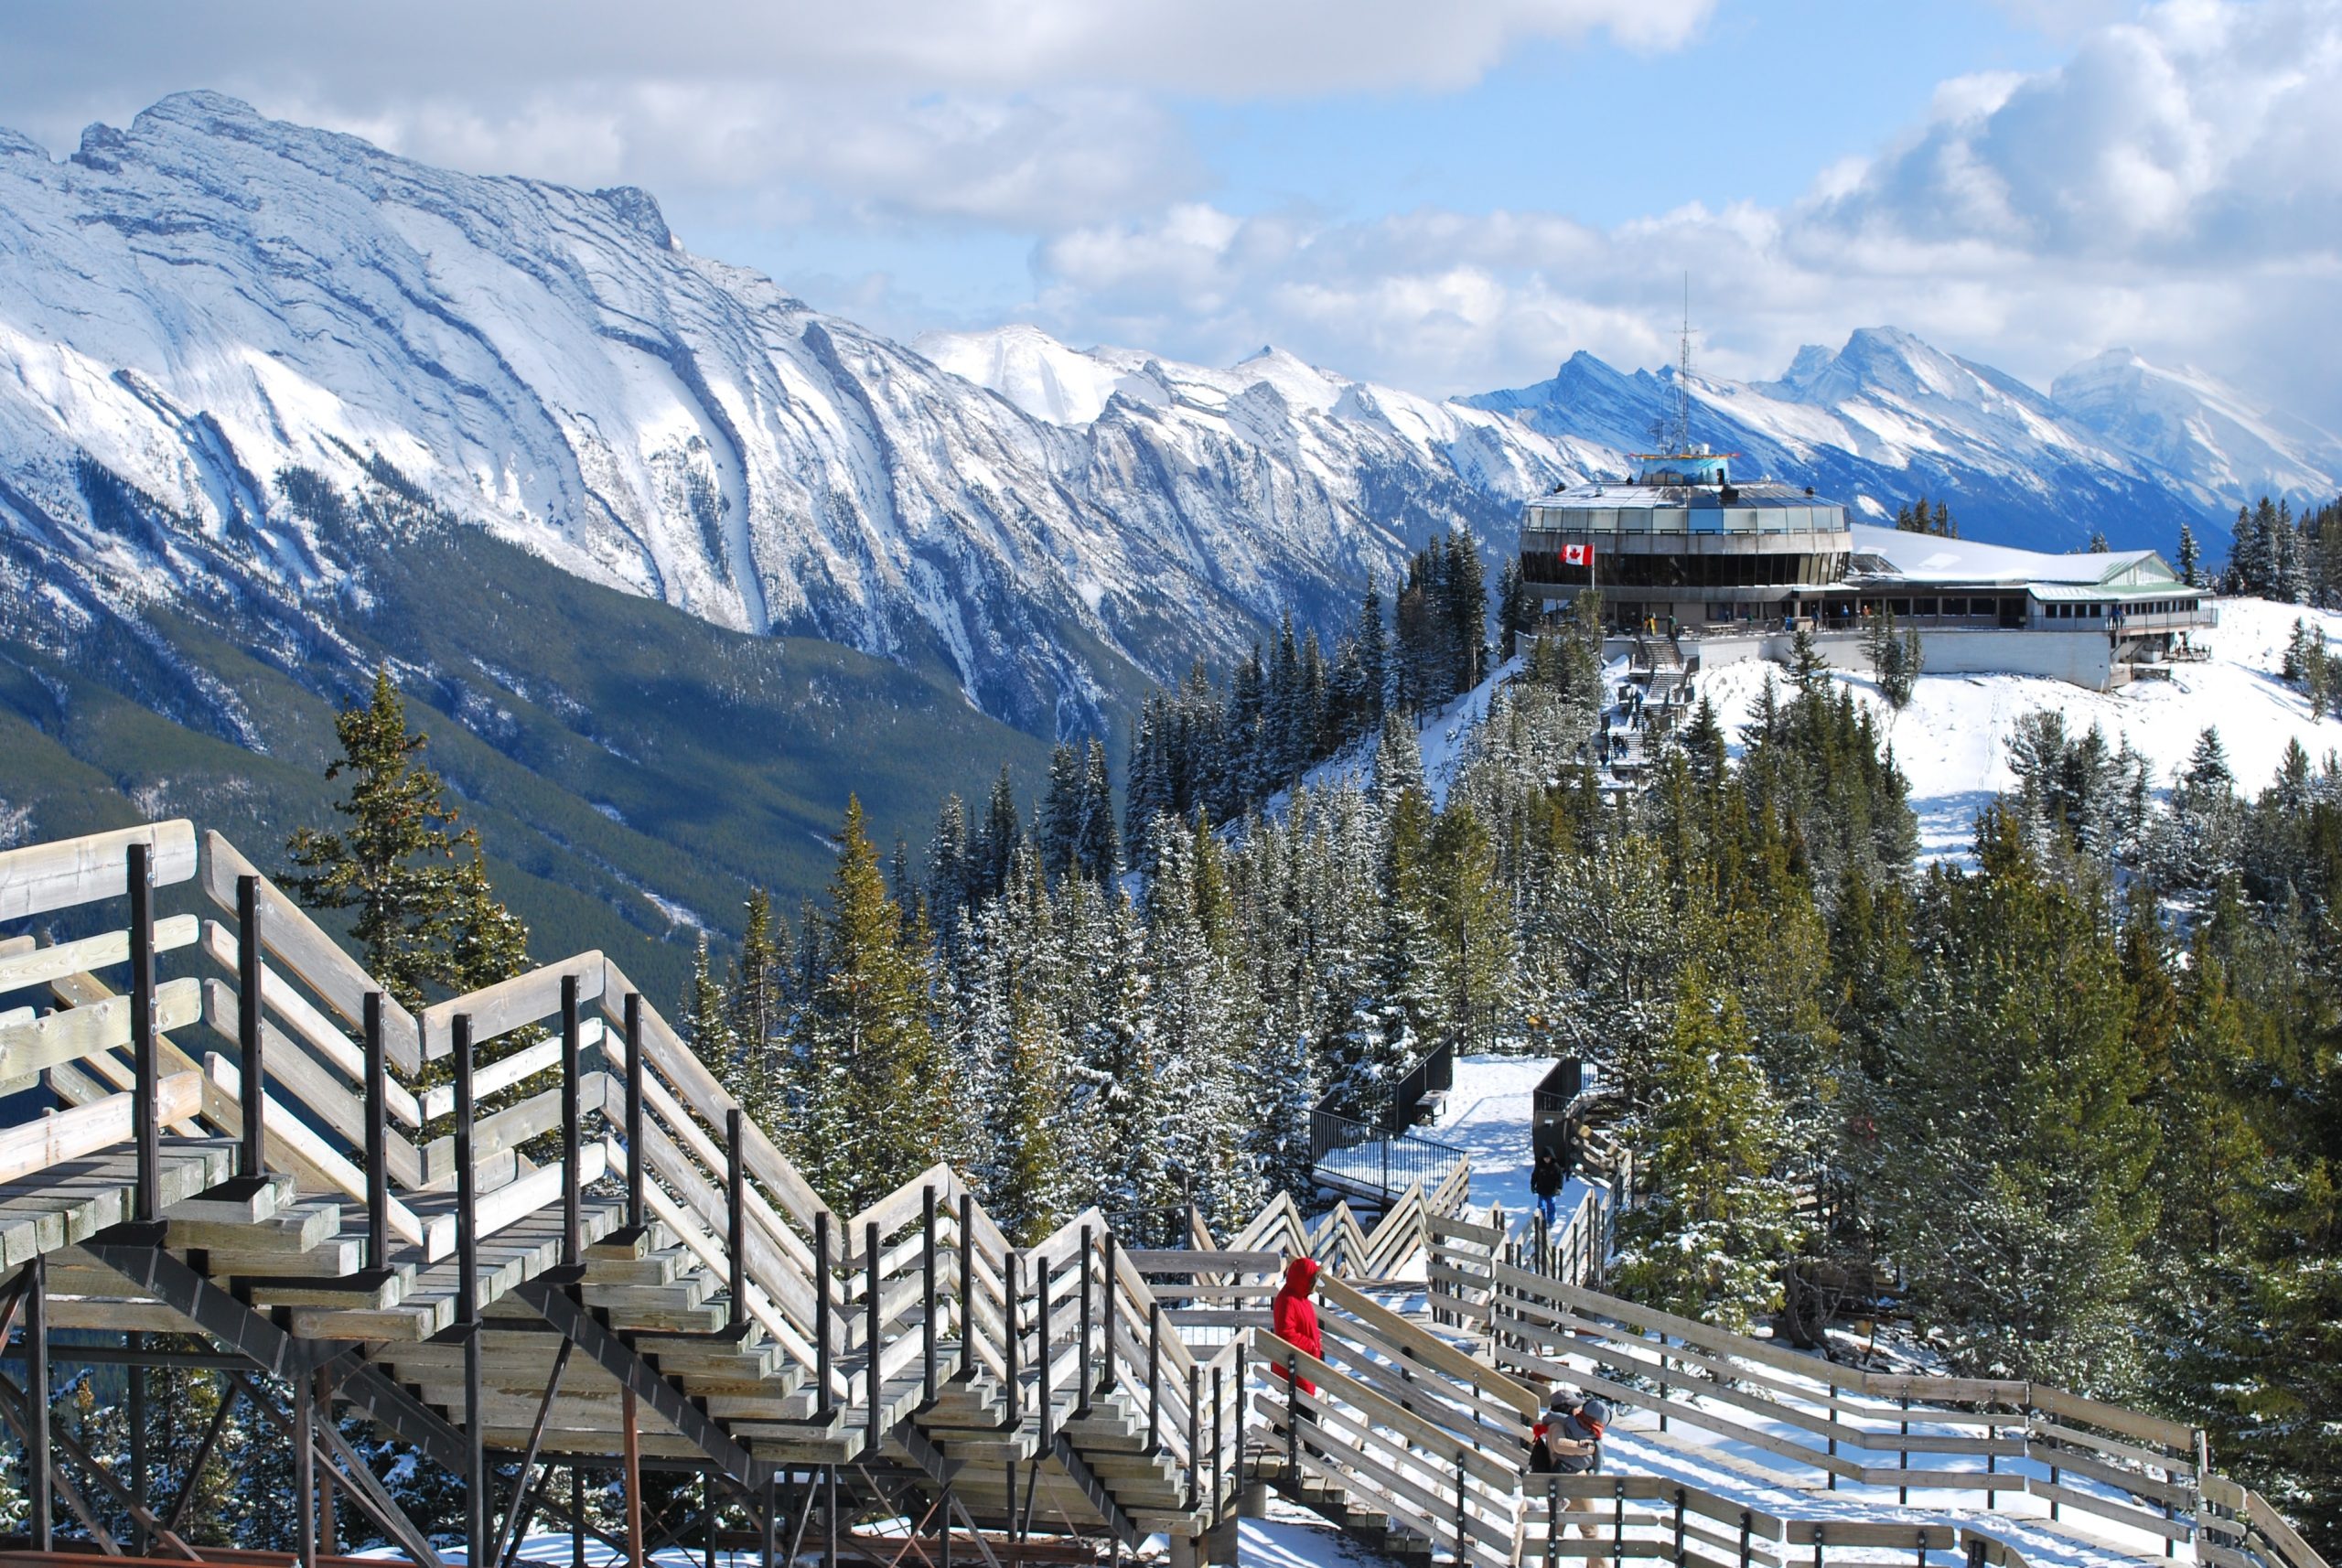
    Sulphur Mountain will give you some views you have never seen before. With six stunning mountain ranges and the sweep of the Bow Valley in front of you, your visit will undoubtedly be beautiful.

    On top of the Sulphur Mountain gondola, you can take pictures of Banff’s exemplary mountaintop sunsets. Aside from the view, you can also enjoy taking pictures of your scrumptious meal at the top of Sulphur Mountain. It is also lovely to give your Banff national park album a hint of vibrancy from the food. Do not forget to take pictures of the state-of-the-art Above Banff interpretive center.

    9. Castle Mountain

    Peter Law

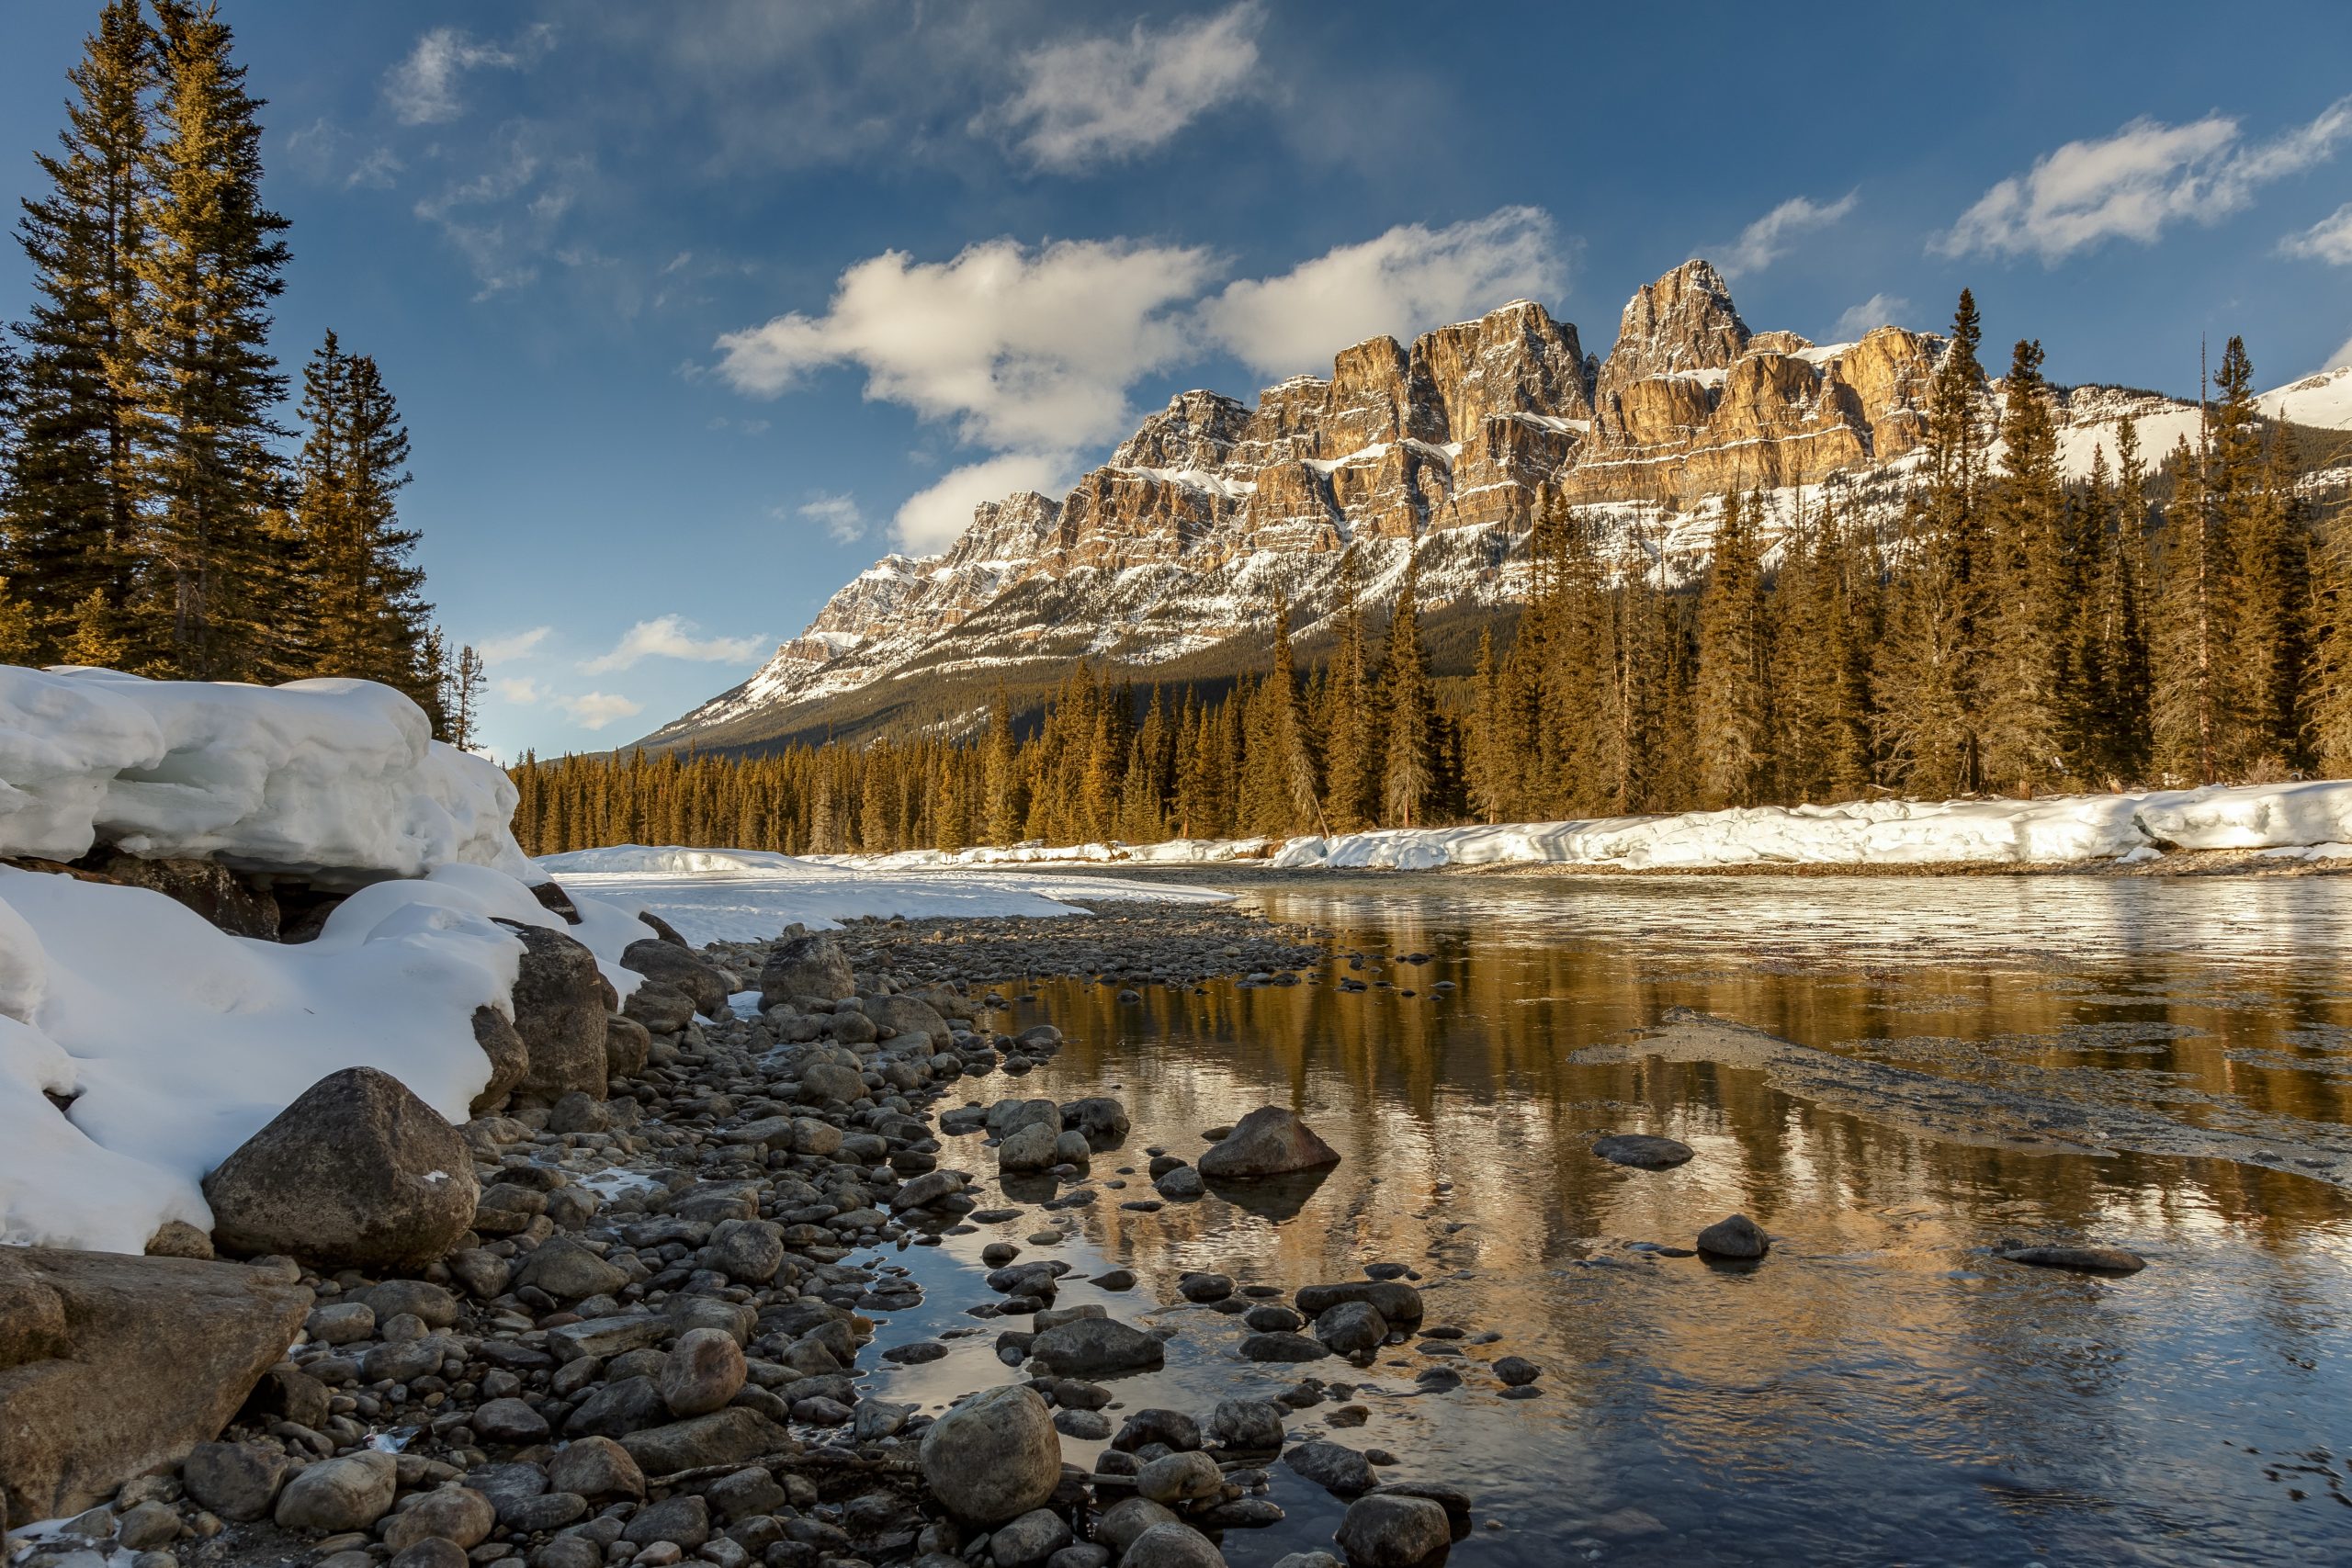
    Castle Mountain is hard to miss, especially when traveling to the Bow Valley Parkway. The mountain certainly lives up to its name, with its castle-like peaks and characteristics. For the past 30 years, Castle Mountain has been referred to as Mount Eisenhower.

    This location is excellently photographed at any time of year. I believe the angle there is excellent when you depart at Castle Junction. When driving from Banff, a highway rest stop right after passing the Redearth turn-off can provide some foreground mountain aspects for beautiful shots.

    10. The Three Sisters

    Igor Kyryliuk

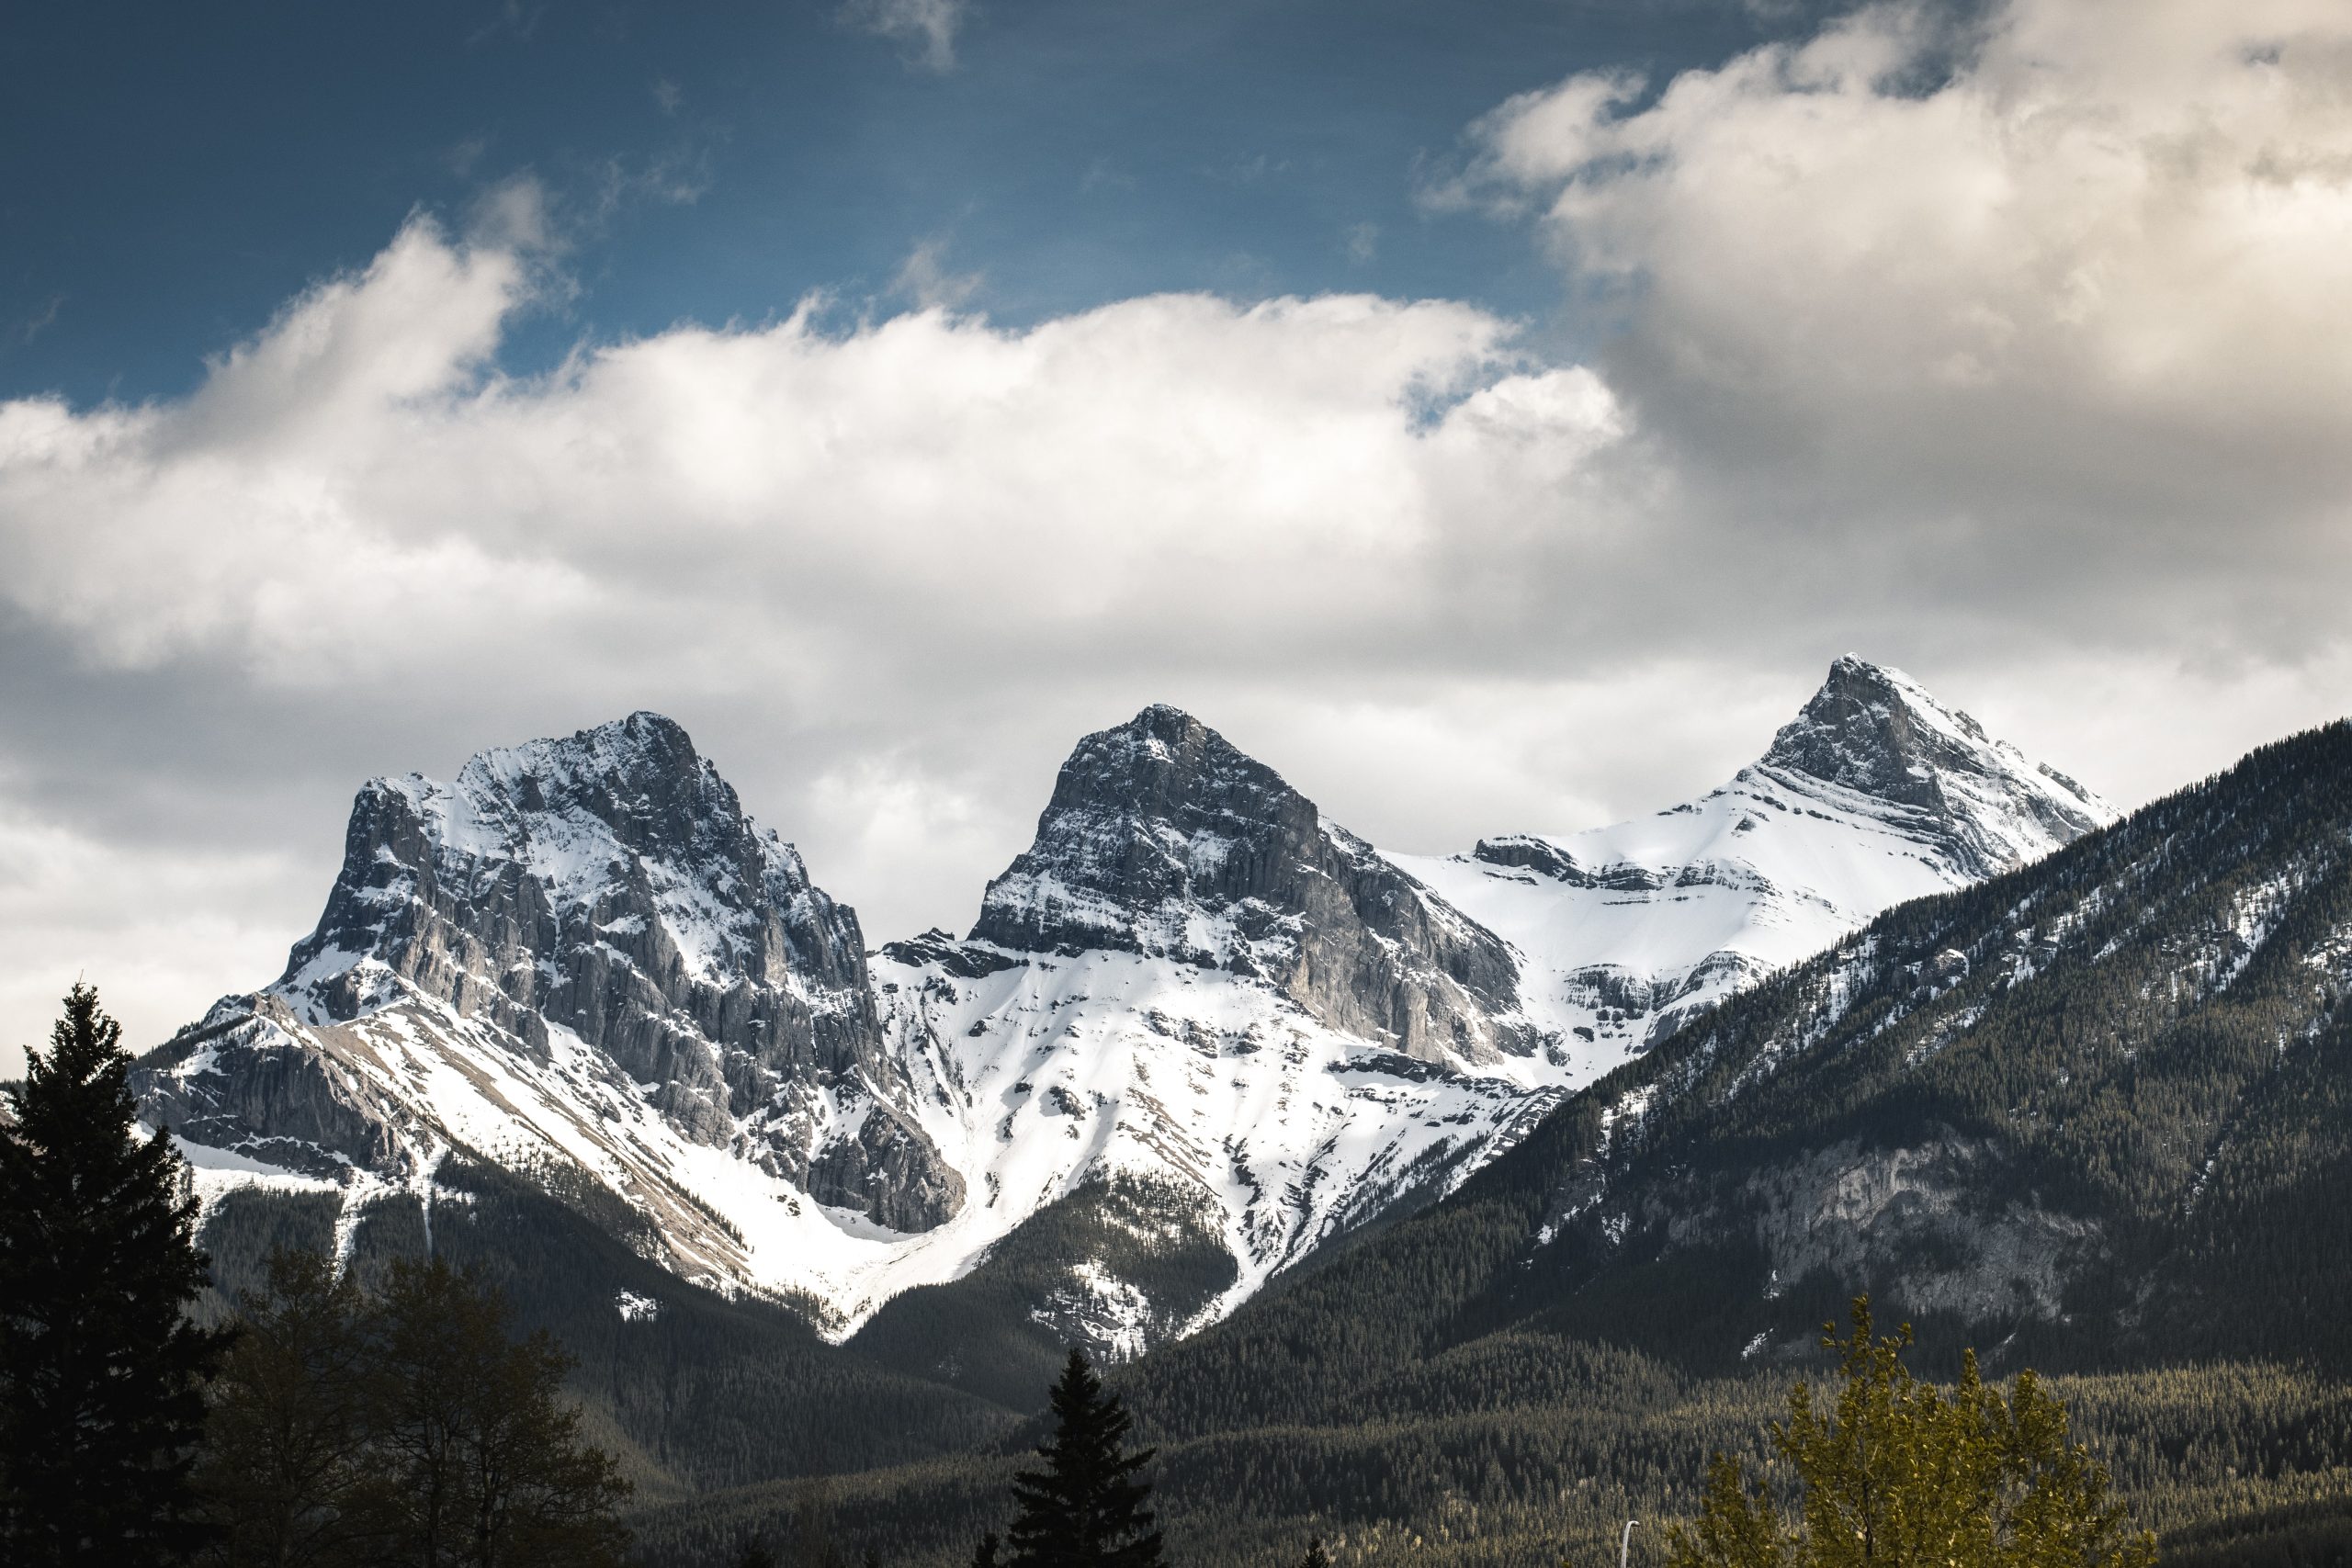
    After a blizzard left a heavy veil of snow on the northern face of all three summits, Albert Rogers named them the Three Nuns in 1883. However, George Dawson renamed them the Three Sisters in 1886, known as Big Sister, Middle Sister, and Little Sister, respectively.

    The Three Sisters may be seen from practically anywhere in Canmore. There are, however, specific locations where they are best photographed. The Canmore bridge, located near the public boat launch, is the first. You might be able to photograph some deer crossing the river if you’re lucky.

    The second vantage point is along the bike route that connects Canmore’s downtown with the Three Sisters Mountain Village. Another location is in Policemen’s Creek, known for being the photographer’s favorite.

    Plan your stay in Banff

    Braden Jarvis

    Planning your trip well is one significant variable to having the best Banff National park pictures. Having everything organized, especially your accommodation, will prevent you from making rushed visits to every spot. Also, take note of the following:

    • Banff is open year-round.
    • Summer is best for hiking, mountain biking, photography, and paddling.
    • Some mountain landscapes turn more beautiful in winter as the snow veils over their peaks.
    • Do not forget food and wildlife in your list of picture-worthy ideas aside from mountains and lakes.

    Lightroom Bundle Presets

    [ad_2]

    Source link

  • Safari Park Hotel Casino :: Kenya Wedding Photography Love-story

    Safari Park Hotel Casino :: Kenya Wedding Photography Love-story

    [ad_1]

    Safari Park Hotel Casino :: Kenya Wedding Photography Love-story

    Safari Park Hotel and Casino’s website says it is “the perfect setting for your perfect day”, and this was certainly true as Ibrahim & Esther’s wedding day arrived. The wedding was a joining of two very close families, and we were happy to be there to share in their joy. We had such a great time with this sweet couple who take such good care of each other. Congratulations to this great pair. We know lots of good things are in your future! We wish them both the happily ever after they deserve!

    Safari Park Hotel Casino :: Kenya Wedding Photography Love-story

    • “The great marriages are partnerships. It can’t be a great marriage without being a partnership.” – Helen Mirren
    • “In terms of my marriage, you know, falling in love with my husband was by far the best thing that’s ever happened to me.” – Caroline Kennedy
    • “My husband has made me laugh. Wiped my tears. Hugged me tight. Watched me succeed. Seen me fail. Kept me strong. My husband is a promise that I will have a friend forever.” – Unknown
    • “Husband and wife relationships are like the relationship of Tom and Jerry. Though they are teasing and fighting, but can’t live without each other.” – Unknown
    • “My husband is my best friend, my greatest support, my biggest comfort, my strongest motivation, my truest smile, my deepest love, my favorite, my forever. He has me. Entirely.” – Unknown
    • “A husband and wife may disagree on many things but they must absolutely agree on this: to never, ever give up.” – Unknown
    • “There is no such cozy combination as man and wife.” – Menander


    [ad_2]

    Source link

  • The Best Photography Locations in Senja Island

    The Best Photography Locations in Senja Island

    [ad_1]

    You may not have heard of Norway’s second largest island, Senja Island. This underrated must-visit travel destination spans 600 square miles of land area. It is situated above the Arctic Circle and is home to ragged mountains and fishing villages.

    With a population of fewer than 8,000 people along the eastern coast, the Senja municipality will most probably be excluded from your list of must-see places in Arctic Norway. There aren’t many tour groups covering this area. You can say that this island with its friendly southern coast is yet to be discovered. 

    If you are planning to explore the area, check out these photography locations in Senja Island you should definitely visit as a photographer.

    [table id=33 /]

    Senja National Scenic Route

    What better way to appreciate a new place is by seeing and experiencing it through a road trip? Visiting Senja Island and capturing amazing pictures is possible by taking a trip along Senja National Scenic Route or the National Tourist Route.

    There are 18 different routes that are portions of highways and railways. When taking this route you can take amazing pictures of Senja’s outer coastline. You should definitely watch out for the stunning views, picnic-worthy spots, and spectacular beaches that are picturesque.

    Tungeneset Viewpoint

    Kamchatka

    Traveling through the National Scenic Route, you can witness two picture-worthy viewpoints of Senja Island. One of which is the Tungeneset Viewpoint. Tungeneset is considered a photographer’s haven, and it’s considered Senja’s most photographed site.

    Here in the Tungeneset rest area, you can take snaps of the jagged Oksen Peaks or the Okshorn Peaks. You can also take snaps of the cliffs and the small pools on the rocky surfaces.

    You can also enjoy walking along the rocky edges and taking amazing pictures of the mountain that meets the sea. If you are lucky and it is low tide, you can take pictures of rock cauldrons that are filled with seawater.

    If you happen to visit Tungeneset Viewpoint during poor weather, you can still enjoy the famous Oksen Peaks and take amazing pictures. A tourist-friendly wooden walkway makes it easier for tourists to appreciate and marvel at the amazing view of so many mountains and the open sea.

    Bergsbotn Platform

    Inger Eriksen

    The other must-see site along the National Tourist Route is the Bergsbotn Platform. This platform is 44 meters long. Here you can capture the beauty of Bergsfjord town and its surroundings.

    If you like the thrill of heights, the view from the top is truly worth it to capture through your camera. The platform is made of wood but the view remains unbothered because the sides are made of see-through material.

    Ersfjord Beach

    Inger Eriksen

    Senja is home to the open sea and an enjoyable coastal stretch. The Ersfjordstranda Northern Norway hides several sandy beaches for both Norwegian hikers and foreign tourists. If you are looking for a white sand beach, you can get your treat by checking out Ersfjord Beach or Ersfjordstranda Beach.

    You can easily find photographers spending a lot of their time on this Arctic beach because of its clear skies, spectacular view, and chilling water. The Ersfjord Beach is a great spot for sightseeing, walking, relaxing, and having a photography break approximately halfway along your trip.

    Beach at Bøvær

    Claudio Beduschi

    The beach at Bøvær is another one of Senja’s must-see sights. Though, the road leading to Bøvær Beach can be extremely terrifying, narrow, and winding. But, reaching the spot can make the trip worthwhile because of the spectacular scenery.

    Bøvær is one of Senja’s amazing beaches. As a photographer, you can enjoy taking pictures of the beach’s long shoreline, as well as the white and sandy beach.

    After taking gorgeous pictures of Bøvær Beach, you can rest and relax at the Crow Caste. The Crow Castle or Kråkeslottet is a renovated wooden fisherman’s house located beside the lighthouse. You can enjoy and take pictures of the cultural programs while you are at it.

    Husøy at Fishing Sites

    Ernest Kung

    Husøy or “house island”  is Senja’s active fishing community. It is a small island found at the heart of Øyfjord. There is not much to do in this fishing village, but there is so much to see. You should get your camera ready when you plan to visit the picturesque fishing village, Husøy. 

    It doesn’t matter when you plan to visit Husøy because this small fishing village looks fantastic all year round. If you are planning to roam the site, be mindful that most stores close during mid-day which is an influence of the Spanish armada in 1588.

    With its remote location, you may think that this site is a living museum. However, it is home to a number of residents who make this village alive and beautiful.

    Red Cabins in Gryllefjord

    Perszing1982

    If you are looking for dramatic shots, you should visit Gryllefjord village. The fjord and the open ocean can give your pictures a dramatic feel. The red cabins in the fishing village Gryllefjord are found along the Norwegian coastline and are certainly a feast to behold.

    In the summertime, if you are considering a more extensive tour of Northern Norway, you should take a car ferry. A car ferry links Gryllefjord with the Andes at the northernmost tip of the Vesterålen archipelago.

    Sea Eagle Safari

    Jiri Hrebicek

    Aside from taking gorgeous scenic pictures, you may also be interested in taking pictures of wildlife while you are visiting Senja, Norway. You can join fishing trips by riding a small boat towards Hekkingen Island. This is the sure way you can capture amazing pictures of white-tailed sea eagles in action.

    Ånderdalen National Park in Senja’s Southern Coast

    Matze Friedrich

    If you fancy taking pictures of the outdoors with primeval forest and Norwegian coastal landscape, you will enjoy Anderdalen National Park. This wonderful place is 134 square kilometers in area. 

    The national park is accessible to hikers and bikers. Fishing is a fun activity during the summer. During wintertime, you can enjoy dog sledding and ski touring. 

    This small national park is home to different animals like the moose, reindeer, and red fox. You can take pictures of the amazing landscape, luscious forest filled with trees as old as 600 years old, and forest animals.

    Town of Finnsnes

    You can easily reach Senja, Norway by passing through Finnsnes. This town is found on the mainland. Shops, accommodations, and restaurants abound here. If you want to take pictures showing the busy side of Senja, you should stop over at the town of Finnsnes.

    If you are feeling nostalgic and you want to taste a bit of Senja history, you can visit the Lenvik Church which was built in 1130 in Bjorelvnes. Its architectural design and simplicity can make an amazing photographic composition.

    Hamn I Senja

    Lars Almeroth

    Hamn I Senja is a sheltered port in Senja, Norway. This place used to be a trading post and an old nickel mine. It is positioned south of Sugarloaf Mountain and the Atlantic Ocean to the west.

    You can capture amazing pictures of 98 islets of Bergsfjord that are clustered together up north of Hamn I Senja. The view is simply breathtaking and worth capturing through your camera’s lenses.

    Northern Lights and The Midnight Sun in Senja, Norway

    Winter is a great time to visit Senja, Norway. Seeing and taking pictures of the northern lights is a non-negotiable when visiting Northern Norway. The island of Senja experiences polar nights during winter which makes it the best place to chase some northern lights.

    Polar night can be experienced from the end of November until mid-January. Aside from witnessing the northern lights, it is also fun to go husky sledding and take amazing pictures with the white scenery and adorable huskies.

    Now, if you want to experience the midnight sun for once in your life, you should consider a visit around the months of May and July. It is when the sun never sets and Senja is also breathtaking during this time. 
    Hiking is a fun activity that you can do while still seeing the sun shine bright at any time of the day. While you are at it, you should bring your camera with you. If you spot an amazing landscape or intriguing wildlife, take that picture!

    Backdrop

    Activities and Photography in Senja, Norway

    There is no doubt that Senja, Norway has several spectacular views and must-experience adventures to keep its tourists entertained and enchanted. Aside from the view, Senja, Norway also offers amazing activities that any tourist would like to participate in.

    Senja challenging hikes are coupled with rewarding views on this small island. There are so many hikable mountains on the island. One of them is the Sukkertoppen Mountain which is a challenging and popular hike route for many.

    Nick Fox

    If you are looking for a gentler hike, then you may want to consider Husfjellet mountain. It is easy to climb and you can enjoy a fantastic view while you are on top. You can bring out your camera and take pictures of the spectacular view.

    Aside from hiking, you may also travel around the island on a bicycle. As a cyclist, you can take advantage of the Norwegian coastline. The route forms part of the European Cycle Route 1. Cycling on the road gives you a more advantageous way of taking excellent pictures. You can easily go to remote areas that offer equally picturesque villages.

    On Visiting Senja Island

    Dodi Sandradi

    Senja is famous among Norwegian tourists because of its gorgeous oceans and beaches, rugged mountain ranges, biking and hiking trails, and must-see fishing villages. This is Arctic Norway which is nestled between Tromsø Islands, Vesterålen Islands, and Lofoten Islands.

    As a photographer, you want to be able to manage your own time and enjoy the island at your own convenience. Thus, going around the island in your own car is best. Rentable cars are a good option. Bring your camera and gear so you won’t regret taking a trip to Senja, Norway.

    Lightroom Bundle Presets

    [ad_2]

    Source link

  • Backscatter Introduces Excitation Filters for Fluorescence Photography and Video

    Backscatter Introduces Excitation Filters for Fluorescence Photography and Video

    [ad_1]

    Backscatter is getting into the fluroresence photography and video game with the latest accessories for its Hybrid Flash and Macro Video 4300—the new Backscatter Hybrid Flash Fluorescence Excitation Filter and Backscatter Video Light Fluorescence Excitation Filter, respectively. The former attaches to the HF-1 using the diffuser bayonet mounting system, while the latter snaps onto the front of the MW-4300 the same way as Backscatter’s color filter holder, and both filters are carefully tuned to excite fluorescence optimally. (The latter is also compatible with the Backscatter Mini Flash, but since fluorescence is a weak effect, Backcatter says you’ll get more vibrant images by making use of the power of the Hybrid Flash instead.)

    The new blue excitation filters for the Hybrid Flash and Macro Video 4300 are used in conjunction with suitable yellow “barrier” filters that attach to ports, lenses, and filter mounting systems. The barrier filter removes the blue light in your image or video, ensuring your camera records only the colorful fluorescence that is left behind. Backscatter offers threaded barrier filters in various sizes (52mm, 55mm, 67mm) as well as a barrier filter for the company’s FLIP filter system for GoPro. Also available is the Backscatter Fluorescence Yellow Barrier Filter Dive Mask, which allows you to find suitably fluorescing subjects.

    To give you a better idea of the amazing results you can achieve with the new excitation filters, Backscatter has prepared a must-read article, “The Backscatter Underwater Fluorescence Strobe & Lighting System,” which tells you more about the fluroresence phenomenon, gives you recommended settings to get the best results, and, of course, offers lots of inspiring fluoro images to get your creative juices flowing. Available now, the Backscatter Hybrid Flash Fluorescence Excitation Filter and Backscatter Video Light Fluorescence Excitation Filter are each priced at $200. The barrier filters cost between $20 and $50.


    Left: Backscatter Hybrid Flash with Fluorescence Excitation Filter.

    Right: Backscatter Macro Wide 4300 with Fluorescence Excitation Filter


    Left: Fluorescence Excitation Filter for Backscatter Hybrid Flash.

    Right: Fluorescence Excitation Filter for Backscatter Macro Wide 4300


    Left: Threaded Fluorescence Barrier Filter (52mm, 55mm, 67mm).

    Right: FLIP Fluorescence Barrier Filter for GoPro


    When purchasing underwater photography equipment like the products mentioned in this article, please support DPG by supporting our retail partner—Backscatter.com.


    [ad_2]

    Source link

  • Editing Minimalistic Photography in Lightroom — Mikko Lagerstedt

    Editing Minimalistic Photography in Lightroom — Mikko Lagerstedt

    [ad_1]

    You can use multiple masks and make highly complex selections.

    You can also use the following manual masking tools:

    • Select the Graduated Filter tool from the toolbar on the right side of the screen. This tool allows you to apply a gradient effect to your photo, which can help draw the viewer’s attention to a specific area of the image.

    To use the graduated filter, click and drag on the part of the image where you want the effect to start. Then, release the mouse button where you want the effect to end. It will create a gradient effect that gradually changes the photo’s exposure, contrast, saturation, or other settings.

    • Next, you can use the Radial Filter tool to apply a circular gradient effect to your photo. It can help create a vignette effect or draw attention to a particular image area. To use the radial filter, click and drag on the part of the image where you want the center of the effect to be, and then release the mouse button to set the radius of the effect.

    • Finally, you can use the brush tool to apply effects to specific areas of the photo selectively. Select the brush tool from the toolbar on the right side of the screen and then adjust the brush settings to control the brush’s size, hardness, and other properties. Then, brush over the areas of the photo where you want the effect to be applied.

    Using these tools, you can create a more minimalistic photograph by selectively applying adjustments to specific areas of the image. It can help draw the viewer’s attention to the essential parts of the photo and create a more cohesive and balanced composition.

    4. REMOVING DISTRACTIONS

    One of the most helpful ways to make your photograph more minimalistic is to remove distracting elements. In Lightroom, the healing tool is the tool you can use to get rid of unnecessary elements. This tool allows you to selectively remove unwanted objects from your photo, which can help create a more minimalistic and cohesive composition.

    There are three different tools inside the healing panel in the Lightroom CC 2022 version. The Content-Aware Remove, Healing, and Clone tool.

    1. The Content-Aware Remove tool tries to automatically remove selected distractions without suggesting an area to apply with.

    2. The healing tool suggests a replacement for the spot you are trying to remove and uses an algorithm to match the color and light of the applied area.

    3. The clone tool clones an area you want to remove.

    Use the cropping and straightening tools to remove distractions and frame the photograph to emphasize the subject.


    [ad_2]

    Source link

  • The Art Of Capturing Winter Fog Photography — Mikko Lagerstedt

    The Art Of Capturing Winter Fog Photography — Mikko Lagerstedt

    [ad_1]

    My favorite thing about photography is that you don’t always have to travel far to capture unique photographs. In this week’s tutorial, I talk about capturing fog in winter and how it can add a sense of mystery and atmosphere to your photos. This is the ultimate guide to capturing winter fog photographs.

    Whether a thin layer of mist hovering over a frozen lake or a thick fog enveloping a forest, fog can transform a mundane scene into something magical. In this tutorial, I show you how to capture stunning winter landscapes with mist, from finding the right location to choosing the right time of day and experimenting with compositions.

    Find the right location

    Fog can be elusive, so it’s essential to find a place where it is likely to appear. Look for areas with low-lying valleys, rivers, or lakes. These areas are more prone to fog because the cool air tends to sink and settle in these areas. Look for locations where the fog is likely to accumulate, such as near water, valleys, or low-lying areas.

    1. Look for forecasts of foggy conditions, especially in the early morning or late evening when the air is cooler, and the humidity is higher. You can also check the humidity and dew point, as the fog is more likely to form when the air is saturated with moisture.

    2. Pay attention to the wind direction. Fog is more likely to form in areas with calm winds. Look for locations where the wind is calm or where the wind is blowing away from the area you want to photograph.

    3. Look for locations with interesting features that can add depth and interest to your photos, such as trees, buildings, or other landmarks. Consider using these elements to create leading lines or to add a sense of scale to your photos.

    4. Fog can be unpredictable, so it’s a good idea to visit your location at different times to see if the fog appears. This will also give you the opportunity to experiment with different lighting conditions and compositions.

    5. The seaside can be an excellent place to capture fog in the Winter. The warm seawater and temperature drop can create a massive cloudlike fog.


    [ad_2]

    Source link

  • Unlock Your Photography Potential — Mikko Lagerstedt

    Unlock Your Photography Potential — Mikko Lagerstedt

    [ad_1]

    4. Breaking down goals

    This is how you can achieve goals and track them in your journal. Write down each of these and be as thorough as you can.

    Specific Goal
    What do you want to improve? “I want to improve my Lightroom Color editing.”

    Specific Action
    What are your action steps? “Use the HSL panel in Lightroom and watch tutorials on how to use it.” 

    Timeframe
    How many hours does it take? “I will spend 1 hour per day editing in the HSL panel to improve my color editing.”

    Track your Actions
    How many hours have you spent this week? “I have spent learning 2 hours this week using the HSL Panel?”

    Results
    Write down what you learned. Be specific and acknowledge your improvement. “I understand the HSL panel easily and can identify how to improve the colors in my photography.”

    I believe these steps will help you improve your photography and make you continue to enjoy taking photographs.

    5. Goal ideas for Your Photography

    When you set inspiring goals, it’s easy to feel inspired to start creating and have fun in the process. Let your creativity flow and create what you desire!

    • Practice shooting in different lighting conditions, such as sunrise or sunset, to improve your skills in capturing the golden hour

    • Experiment with using filters, such as polarizers or neutral density filters, to enhance the colors and contrast in your photos

    • Work on composing your shots more effectively by learning about the rule of thirds or practicing leading lines

    • Practice shooting in different weather conditions, such as fog or rain, to capture unique and atmospheric images

    • Learn how to use a tripod effectively to capture sharp, blur-free photos, especially in low light

    • Experiment with different focal lengths and perspectives to create different effects in your photos

    • Practice shooting in manual mode to have more control over your camera settings and to create the desired exposure and depth of field in your photos

    • Experiment with different types of lenses or camera settings to create other effects in your photos

    • Shoot in a new location or visit a new destination specifically to photograph landscapes

    • Work on improving your post-processing skills, such as using software to enhance colors and composition

    • Collaborate with other photographers or participate in a photography workshop or retreat

    • Work on developing a personal style or theme in your landscape photography

    • Explore new local locations. Many beautiful locations are likely near your home, even if you cannot travel far. Aim to explore these new locations and try out different compositions, lighting conditions, and subject matter.

    If you want, you can do daily tasks, such as the one below. You can Download Your Free Photography Planner I made last year.


    [ad_2]

    Source link

  • Have You Lost Your Inspiration For Photography? A Toolkit to Find Your Inspiration Back. — Mikko Lagerstedt

    Have You Lost Your Inspiration For Photography? A Toolkit to Find Your Inspiration Back. — Mikko Lagerstedt

    [ad_1]

    It’s natural for us, as photographers and creatives, to lose our inspiration. While taking a break can initially be a great way to get your inspiration back, it can also harm your inspiration. Procrastination will sometimes sneak in when you are too comfortable.

    It can be easy to fall into a creative rut and feel like you need more ideas. I certainly have been there. However, finding new sources of inspiration is an essential part of any creative process, and there are many ways you can do this. In this article, I share a toolkit of ten tips for finding sources of inspiration.

    If you haven’t read my earlier posts about inspiration, here you can find them below.

    Get Out of Creative Rut
    How To Find Inspiration For Your Photography?
    Stay Inspired – Create a Catalog of Inspiration

    1. Be ready for inspiration

    Take your camera with you wherever you go, and be open to capturing unexpected moments and subjects. Visit new locations and try shooting at different times of day to see how the light and atmosphere changes. Explore new neighborhoods, towns, or even countries – sometimes, the most unexpected locations can yield the most inspiring photographs.

    2. Try new techniques or subjects

    Consider trying new editing techniques or using different lenses or cameras to change the look and feel of your images. Try shooting in black and white, trying long exposures, or experimenting with different compositions. The more you experiment, the more you’ll learn about what works for you and what doesn’t, and the more you’ll be able to develop your own style.

    3. Get out of your comfort zone

    Stepping outside your usual routine and trying something new can be a great source of inspiration, such as taking up a new hobby or visiting a new location. Taking a break from your routine can help you see things in a new light and spark new ideas.

    4. Find new subjects

    Keep your eyes open for inspiring subjects and moments in your everyday life. By staying attuned to your surroundings, you’ll be more likely to spot unexpected moments and topics that can inspire your photography. It could be a beautiful sunset, a stunning landscape, or an interesting street scene.

    5. Journal

    Consider keeping a journal of your photography ideas and inspiration; this can be a great way to keep track of your ideas and revisit them later. Having a place to capture your thoughts can help you stay organized and keep your creativity flowing. You could include sketches, notes, or even photographs that inspire you.

    6. Seek inspiration elsewhere

    Photography is just one art form, and many other art forms can inspire. Consider looking at paintings, sculptures, or even music for inspiration. Pay attention to the colors, compositions, and themes in these art forms, and think about how you could apply these ideas to your photography. For example, you might look at a painting with a strong color palette and try to recreate that same palette in your photographs. Or, you might be inspired by a sculpture’s texture and try incorporating texture into your compositions.

    7. Open your Mind

    Keep your eyes open for inspiration in the world around you. It could be the changing seasons, a city’s architecture, or the natural landscape’s beauty. Look for patterns, textures, and colors that catch your eye, and think about how you could capture these elements in your photographs.

    8. Plan a trip

    Planning a trip specifically for photography can be a great way to step outside your surroundings and find new sources of inspiration. Consider researching locations known for their photographic potentials, such as national parks, historic cities, or natural wonders. Look for places that offer a variety of landscapes and lighting conditions, as this will allow you to experiment with different techniques and subjects. Wander from the beaten path and explore off-the-beaten-track locations – sometimes, the most unexpected places can yield the most inspiring photographs.

    9. Collaborate with others

    Collaborating with other photographers on a project or photo shoot can be a great way to learn from others and find new sources of inspiration. Working with others can help you see things in a new light and inspire you to try new approaches to your photography. Consider reaching out to photographers whose work you admire and see if they would be interested in collaborating on a project. Alternatively, you could join a local photography group or participate in online forums or communities where you can connect with other photographers and discuss ideas and techniques.

    10. Seek new experiences

    One of the best ways to find new sources of inspiration is to seek new experiences. It could be trying new hobbies, traveling to new locations, or simply trying something new in your everyday life. By stepping outside your comfort zone and trying new things, you’ll be more likely to find new subjects and experiences that inspire your photography. For example, if you’re a landscape photographer, consider trying a new type of photography, such as portrait or still-life photography. It can help you see things in a new light and find new ways to approach your landscape photography.

    An additional source for inspiration: Create a theme or a goal.
    Consider setting yourself a personal photography project with a specific theme or goal. This could be a project where you photograph a particular location over the course of a year or a project where you focus on a specific type of landscape or subject. Having a specific project to work on can help you stay motivated and focused and can also provide new sources of inspiration.


    [ad_2]

    Source link

  • Conservation Photography with Shane Gross

    Conservation Photography with Shane Gross

    [ad_1]


    As underwater photographers, many of us have witnessed not just stunning reefs and awe-inspiring creatures, but also the gradual decline of our favorite dive sites—due to overtourism, destructive fishing practices, and steadily rising water temperatures. Equally, many of us want to use our images to help encourage efforts to protect the marine environments we care deeply about, but we may not know how best to go about it. If that describes you, you’ll want to make sure you catch the next event hosted by The Underwater Club (TUC), as founder Nicolas Remy talks to Canadian conservation photographer Shane Gross.

    During the two-hour webinar, Shane will be discussing some of the conservation stories he has shot, the impact those stories have had, and what he’s learned along the way. The 2024 Wildlife Photographer of the Year will also be offering insights into his award-winning photography, including techniques, post-processing, gear choices, and the business side—how he pitches stories, markets himself, gets published, and uses his work to support ocean and freshwater ecosystems.

    As usual, TUC members join for free, while non-members will need to purchase tickets to the event at AU$49 (approx. US$35). Note that this is also the price of monthly membership, so this is the perfect opportunity to join the club and take advantage of all of the membership benefits.

    Here are the event times:

    • April 25th, 4pm Los Angeles time (PDT)
    • April 25th, 6pm Dallas time (CDT)
    • April 25th, 7pm Miami time (EDT)
    • April 26th, 7am Singapore time (SGT)
    • April 26th, 9am Sydney time (AEST)
    • April 26th, 11am Auckland time (NZST)


    [ad_2]

    Source link

  • The Importance of a Beginner’s Mind in Photography — Mikko Lagerstedt

    The Importance of a Beginner’s Mind in Photography — Mikko Lagerstedt

    [ad_1]

    As a professional landscape photographer, I’ve had the pleasure of capturing breathtaking images of nature, traveling to some of the most stunning locations, and sharing my passion for the beauty surrounding us. However, my journey didn’t begin overnight. After graduating from a graphic design school in 2008, I decided to immerse myself in the world of photography. When I started, I focused on the technical aspects of photography. I photographed everything and anything. No constraints. I was testing out different settings and following my inspiration.

    Over time I realized that maintaining a beginner’s mind is one of the most essential factors in my growth as a photographer. And when I feel uninspired, it’s usually because I get caught up with doing the same things repeatedly. Then I remind myself to start again with a beginner’s mind, following my inspiration. Sometimes I might start it with either a new location or technique.

    While researching for this blog post, I came across the concept of “beginner’s mind,” an ancient Buddhist principle known as “Shoshin.” This way of thinking emphasizes the importance of approaching our experiences with an open, curious, and humble mindset, regardless of how advanced we may become in our chosen fields.

    In this post, I will share how embracing a beginner’s mind has shaped my photography journey and how it can benefit photographers, artists, and creatives of all levels.

    Maintain Curiosity

    One core principle of a beginner’s mind is maintaining a sense of curiosity. When I first started photography, I was eager to learn everything I could about the craft. Over time, I’ve found it essential to keep that curiosity alive, continuously exploring new techniques, subjects, and perspectives. This constant drive to learn has allowed me to grow and evolve as a photographer. It has not always been easy. And at times, I have lost that spark or inspiration. But then I know I need to focus on being a beginner again and find that curiosity.

    • How can you expand your creative horizons by exploring new subjects or techniques you haven’t tried before?

    • What resources or learning opportunities can you seek to deepen your understanding of your craft further?

    Embrace the Unknown

    Throughout my photography journey, I’ve found that embracing the unknown and stepping out of my comfort zone has led me to some of my most memorable experiences. One story comes to my mind: My initial idea was to capture some seascapes, but on my way to the coast, I saw a massive cloud of smoke. I started driving towards the smoke. Finally, I arrived near a field where I saw prescribed burning. While taking photographs, I saw a man standing amid it all, taking pictures of the area. I took a photo I still can’t believe is a single frame where birds were flying perfectly with the composition I chose.

    A beginner’s mind encourages us to take risks and experiment, leading to unexpected discoveries and growth. In those moments of uncertainty, like venturing into unfamiliar locations or trying a new technique, I’ve often found my most creative and unique ideas.

    • What fears or hesitations might discourage you from trying something new in your photography or creative work?

    • Can you identify a specific project or idea that pushes you outside your comfort zone? How might you approach it?


    [ad_2]

    Source link