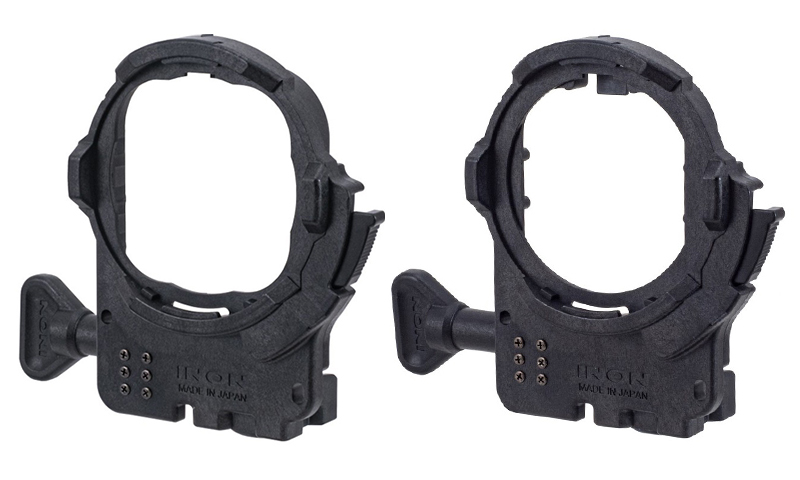
If you want to use your action camera with Inon’s latest wet lenses—the UFL-GR140 ZD/UFL-GR140 Pro ZD and UFL-G140 ZD semi-fisheye lenses, and the UCL-G55 ZD, UCL-G100 ZD and UCL-G165II ZD close-up lenses—you’ll need their latest ZD Front Mask, which attaches to your action cam’s waterproof case.
There’s already an ZD Front Mask for GoPro HERO9–13. Now, Inon has introduced ZD Front Masks for the Insta360 Ace Pro 2 and DJI Osmo Action 5 Pro. If you prefer a pistol grip, Inon will soon be releasing the 4D Light Grip, which can be used with the ZD Front Masks for GoPro, Insta360, and DJI action cameras.
The new ZD Front Masks are available now, while the 4D Light Grip is arriving in September. Consult your Inon dealer for pricing.
When purchasing underwater photography equipment like the products mentioned in this article, please support DPG by supporting our retail partner—Backscatter.com.
PRESS RELEASE
INON INC. releases two new ZD Front Mask on August 5, 2025: the ZD Front Mask for Ace Pro 2, designed to fit the official Dive Case for Insta360 Ace Pro 2, and the ZD Front Mask for Osmo Action 5 Pro, made specifically for the official Osmo Action 60m Waterproof Case.
Attaching the INON ZD Front Mask allows the use of the underwater semi-fisheye conversion lens UFL-GR140 ZD (*1) which can deliver wide and quality view with its large-aperture optics across more wide-angle FOV settings on Ace Pro 2 and Osmo Action 5 Pro, as well as the compact UFL-G140 ZD.*
Also, the wide variety of INON close-up lenses (UCL-G165ll ZD, UCL-G100 ZD, UCL-G55 ZD) (*2) now allows Ace Pro 2 and Osmo Action 5 Pro users to enjoy macro imaging that wouldn’t be possible with the camera alone.
INON also releases the 4D Light Grip in late September, which can be mounted onto the housings of various action cameras. This highly versatile grip allows users to attach both an action camera and a light at the same time.
(*1) Lens hoods included with UFL-GR140 ZD shipped before Augst 5, 2025 may be visible in footage. Please use the updated “Lens Hood II (for UFL-GR140)” which is available for separate purchase.
(*2) UCL-G100 and UCL-G55 shipped on or after August 5, 2025 will come with newly designed Focus Stick that helps prevent interference when used with Ace Pro 2 and Osmo Action 5 Pro. For existing UCL-G100/UCL-G55 users, updated Focus Stick II is available for purchase to replace the original Focus Stick.
Welcome to our weekly community wrapup. It’s been another cracker on the Light Stalking forums with some wonderful photography. Both discuss produced.
Let’s start with the photo of the week.
This one, judged by Federico, is a dip touch of some art by Patrick. you can read about Federico’s logic for his judgment decisions over here. And well done, Patrick.
Don’t forget to join in this Weekly Photography Challenge with the theme of nighttime reflections. You can join in here. Amazing to think that this is our 759th weekly photography challenge on the forums!
You also don’t want to miss out on the opportunity to submit one of your mobile photography shots to our ongoing Monday Mobile Challenge. The rules are that you must have taken the image and edited, all on a mobile device of any sort. This really stretches your creativity with a bit of restriction. Join in here.
There’s also the opportunity to join in the community photo story challenge, which is an ongoing callout for community members to tell a story with several of their photographs. This is more of a deep dive into a project scenario where you need to take several images at least. It’s great to see what people are coming up with, as it’s sparking a lot of creativity. join here.
And also, here are a few of the photos from this week that I just thought needed to be shared even more because I just thought they were great.
You know when Elin Laxdal starts a thread on Light Stalking, there is going to be some exceptional photography in it. This week was no exception, with Elin sharing some images of livestock that she had taken during the week. You can join in the conversation here.
One of the most photographed objects in the world is the famous Wanaka tree in New Zealand. And I think this shot by Rob Eyers is a very solid attempt at a very well-photographed image. Well done, Rob.
If any of you have been around the four of the very long, then you will almost certainly know Patrick and, by extension, Patrick’s puppy. I love seeing this little guy come across my feed, either on Light Stalking or even on Instagram, so I thought I’d include him in the collection here.
Member LightAndShadow has been experimenting with a bit of black-and-white treatment with his images, but I specifically thought this one stood out for the very obvious draw on the eye of those three flowers. I thought this one deserved to be called out. We are discussing it over in this thread. https://lightstalking.us/forums/topic/mallow-wood-and-stone/
I also thought this was a very interesting image – it looks like a pretty standard shot of a rough day at a Lighthouse until you spot the dark figure in the mid-ground going out into the surf, at which point I feel the image becomes quite terrifying. If emotional response to an image is the measure of a success, as many people say then I think this one achieved that quite well. Well done DavidC.
If you’d like to join in with the shenanigans, our members, feel free to come and join us on the forums. We’d love to see you there, and we are quite a friendly bunch.
Do you want to increase engagement and the amount of time visitors spend on your website? That’s where a WordPress video player can help. You can increase engagement by adding a video player plugin to your WordPress website. Not only does this reflect well on your brand, but it also helps your SEO ranking.
WordPress lets you add embedded video out of the box, but you can make the process easier and create a better user experience with a plugin.
Adding a stylish WordPress video player plugin lets visitors engage with the content on your website. Video plugins are full-featured, customizable, and easy to integrate into your website.
The Best WordPress Video Plugins and Players on CodeCanyon
Discover CodeCanyon’s extensive library of the best video WordPress plugins ever created. With a cheap one-time payment, you can purchase one of these high-quality WordPress plugins and give your website viewers a more interactive experience.
With the Essential Grid Gallery WordPress Plugin, you can add both photo galleries and video galleries. Include galleries built with other popular plugins, link to video sites such as YouTube and Vimeo, and create gorgeous grid-based galleries.
With The Grid, you can create endless layouts and grids for your videos. The plugin also includes a touch slider (also known as a carousel) for mobile, and WooCommerce support so you can use powerful, responsive video to help sell your products.
This plugin has over 400,000 sales! This is one of the most complete video gallery plugins on CodeCanyon. The main hero section is where this plugin shines. You can see in the image above just how visually appealing you can make your hero section. You are given full customization with this plugin.
Here are a few notable features for this video gallery plugin:
RoyalSlider will make your videos look great on your website. The plugin is mobile-friendly and will allow you to add custom slideshows and CSS3 banner rotators with images, videos, or HTML content. What sets this plugin apart from the rest are the 12 visually appealing transition effects. This plugin has over 30,000 sales!
Here are a few notable features for RoyalSlider:
touch swipe navigation support for iOS and Android
The Media Grid: WordPress Responsive Portfolio plugin lets you build bespoke, fully customisable grids of images, video, and other media using a simple drag-and-drop interface. It also has a dynamic grid mode, letting you create video grids in moments.
If you are going to be creating a portfolio, showcase, or teaser, then this is the plugin for you. You can create portfolios by creating new custom post types with images, audio, or video thumbnails. This plugin will give you numerous customization options for creating your portfolio.
The Ultimate Layouts plugin will help you create a layout for video and other media if you’re using the WPBakery page builder plugin.
It’s responsive, integrates with YouTube, and lets you build unlimited layouts using the WPBakery page builder, so you don’t have to switch to an unfamiliar interface. Display grids, lists, and carousels with ease.
The Elite Video Player plugin is a fully customisable advertising video player that supports advertising on the most popular video channels such as YouTube and Vimeo.
Import videos, channels, or playlists and play using the default YouTube player or add custom controls. As well as YouTube and Vimeo, you can play self-hosted video or video hosted on Dropbox or Amazon S3.
Features:
advertising pre-roll, mid-roll, or post-roll
Google Analytics: see which of your videos are most popular
If you want to enhance your videos with features such as subtitles in multiple languages, downloads, and adjustable playback speed, the Ultimate Video Player plugin is for you.
It boasts a wide range of features including advertising, cue points, live streaming, and more.
Features:
advertising pre-roll, mid-roll, post-roll, or via popups
Ever thought about including videos in a flipbook? The Diamond Flipbook plugin lets you do that. Create a dynamic flipbook from your content and media, and include video too. Videos will be overlaid on the flipbook in the background.
Features:
PDF support
multiple file upload
JavaScript-based and iOS-compatible
reverse flipbooks for right-to-left languages
insert flipbook via shortcode, template, or lightbox.
If you’re not happy with the default YouTube player, the HTML5 Video Player plugin will provide you with a customisable player that’s designed to display your video in high quality. It supports YouTube, Vimeo, and self-hosted video, and it’s fully responsive.
This HTML5 Video Player is ideal if you want a video player which will support YouTube, Vimeo, and self-hosted videos. The plugin can be used as a full-screen video background for your website. The video will cover the entire screen without any black stripes.
Other features of this player include:
lightweight JSON file of about 256KB
use the plugin as a fixed-width or full-width video player
use the parameters to set the border width and colour
ModuloBox is a beautiful, easy-to-use lightbox plugin that makes it simple to create a fully functional slideshow in a popup. Built with plain JavaScript, it offers the best performance and advanced features to show off your media.
Some features include:
create responsive galleries of HTML5 videos or embed videos from YouTube, Vimeo, Dailymotion, or Wistia
display external websites from a simple URL—for example a Google Map
supports gestures: drag and swipe to navigate through items, pinch to zoom, etc.
Revolution Lightbox is another plugin that lets you add video to a lightbox. It also supports images, Google Maps, and HTML content, giving you maximum flexibility. The lightbox is customizable, so you can adapt it to suit your theme.
Image Map Pro comes with many of the standard map features such as adding text and images to maps. However, this plugin offers so much more. The plugin has its own rich web app! This allows you to easily create a wide selection of custom image maps, pins, and shapes to use on your website.
Here are a few key features for this interactive video WordPress plugin:
Manually embedding videos into your site takes time. The WordPress Video Robot plugin automates this process for you. It’ll take the search terms you give it and automatically add relevant videos to your site. The videos don’t even need to be from your own channel.
If you have an online store and you want to display your products with full 360º animation, this plugin is ideal. Your customers will be able to see your products from all angles, with smooth animation all the way around.
This plugin will easily let you add YouTube videos, Vimeo videos, Dailymotion videos, and self-hosted videos on your WooCommerce site. The videos come with a full range of customization options. Included are even several embedding options such as playback volume, full-screen button, and video controls display.
Here are a few notable features for this plugin:
support for YouTube, Vimeo, Dailymotion, self-hosted, and MP4 videos
videos on single product and category pages
enable and disable video option in the shop or on a single product page
This video gallery plugin is feature-rich. You will be able to create professional-looking galleries within minutes with this plugin. It’s easy to install and even comes with a shortcode generator. If you are looking for a quick solution for your next video automation plugin, this is the right choice for you.
Here is what you can expect from the Video Gallery WordPress Plugin:
five skins + skin generator
iPhone/iPad compatible
extensive admin panel
subtitle support
shortcode generator
Discover Even More High-Quality WordPress Video Plugins
The plugins listed above all do something slightly different, or give a variation on a different functionality such as lightboxes or galleries. The best one for your site will depend on your needs: do you want to pull in videos automatically, for example? Are you hosting videos locally? Do you want enhanced video playback controls?
In this article, we covered many of the best video WordPress video plugins available on CodeCanyon. However, you may have very specific requirements for your video plugins, and the ones mentioned in this article may not be what you are looking for. To help you further with your search, we have even more top video WordPress plugins that you can check out in the articles below:
The various features and styling options allow you to integrate an eye-catching and fully functional player for your media that can fit your website’s theme.
Are you in need of a high-quality HTML5 video player plugin for your website? Are you having trouble finding a video player that delivers an exceptional user experience?
CodeCanyon offers a wide range of HTML5 and JavaScript video players that can easily be installed on your website.
Modern Video Player is one of the many high-quality HTML5 and JavaScript plugins available on CodeCanyon.
Much of today’s online content is consumed through video and images. This makes it incredibly important for you to offer your website content in video format through a high-quality video player. By purchasing one of the many affordable plugins available on CodeCanyon, you will get a modern-looking web player that works with many video formats and can even display your images in a slideshow.
The Best HTML5 and JavaScript Video Players on CodeCanyon
Discover the best HTML5 and JavaScript video plugins ever created on CodeCanyon. With a cheap one-time payment, you can purchase any of these high-quality video players.
Here are a few of the best HTML5 and JavaScript video players available on CodeCanyon for 2021:
Don’t miss out on some of the best-selling HTML5 and JavaScript video players on CodeCanyon.
These feature-rich HTML5 and JavaScript video players will give your website visitors the best viewing experience possible. With the premium video players offered on CodeCanyon, you can take advantage of:
advanced video player controls
fully responsive players
song and video statistics
social sharing
Head on over to CodeCanyon and find the right video player plugin for your website!
Top 15 HTML5 and JavaScript Video Players (From CodeCanyon for 2021)
Elite Video Player is a stellar HTML5 video player that can handle just about anything you throw its way:
self-hosted MP4
YouTube
Vimeo
Dropbox
Amazon S3
Google Drive
Show your videos with style—across all browsers and devices—with this fully customizable HTML5 video player.
Features also include:
lightbox, responsive, and fullscreen modes
YouTube channel and playlist support
select player and scrollbar effects
resizable height and width
and many more options
One of the more unique and appealing features the Elite Video Player brings to the screen is the ability to add pre-roll, mid-roll, and post-roll video and popup ads. A WordPress version is also available.
This video player supports a wide variety of embeddable media: from HTML5 video to YouTube playlists, Vimeo videos, and much more. This highly customizable video player has many features that make this a must-have if you need to display videos on your site.
Need a clean and simple JavaScript video background player that you can customize for your website? You can play a single video in a loop, loop multiple videos, or have a mixed playlist of videos and images.
Revolution Multimedia Gallery is a responsive gallery that runs on all major browsers and mobile devices. It uses object-oriented code and the latest CSS3 techniques, making this a very well-built JavaScript video player and gallery.
Here’s what you can expect from Revolution Multimedia Gallery:
responsive layout
responsive, fixed, fluid width, and fullscreen modes
This HTML5 video player includes all the basics you’ll need for a cutting-edge player—without losing those users that are using outdated browsers.
The Ultimate Video Player can play videos on the latest mobile browser or an old desktop computer using IE8 with its Flash fallback feature.
It’s also:
“Packed with a huge amount of features like responsive layout, multiple playlists, external API, optional deeplinking, flexible skin, embed & share, Facebook share etc…”—Ultimate Video Player
Ultimate Video Player is a powerful responsive video player with the right side or bottom gallery that supports most popular video platforms such as YouTube, Vimeo, and more. This player is compatible with all modern browsers.
Ultimate Video Player is the perfect player to build a platform with an intuitive user experience and mobile compatibility.
Fantastic and fast assistance. Problems solved in a short time. Absolutely recommended! — step54
Video Player Lite is a responsive and mobile-friendly player that supports all kinds of media and playback options. You have the ability to show panoramas, virtual reality, YouTube, and Vimeo videos. It also comes with lots of customization options.
Universal Video Player is another HTML5 video player that’s worth your attention.
Not only does it come with many features included in other video players, but it also includes a few extras that set it apart.
Stand-out features include:
Google Analytics tracking
playlist search
categories
shuffle mode
Like some other HTML5 video players, it includes YouTube, Vimeo, and self-hosted video support, a customizable color scheme, and an option to download videos.
The Universal Video Player is a nice solution, and can even automatically retrieve video thumbnails, titles, and descriptions from YouTube servers. A WordPress plugin version is available.
The HTML5 Video Player With Playlist & Multiple Skins (also available as a WordPress plugin) offers side and bottom playlists and six different skins to match your website.
Unlike many other HTML5 video players, this gem also supports .webm video files in addition to the standard .mp4 video format.
You’ll also find:
optional video descriptions with HTML and CSS support
This HTML5 video player has a simple and sleek design. You can place the playlist menu anywhere around the video player, giving you the flexibility to choose how it will look on your website.
Here are a few notable features for this video player:
Stellar Video Player is a premium, multi-purpose video player that supports YouTube videos, Vimeo videos, self-hosted MP4 videos, Google Drive videos, and much more!
Here is what you can expect from this video player:
fully customizable and responsive
lightbox mode
sticky mode
social sharing
Here is what users are saying about the Stellar Video Player
Html5 Video Player With Multiple Skins is a lightweight and responsive player that will only take a small amount of space on the server. This player allows you to embed .mp4 video files and .webm for browsers which don’t have MP4 support.
Revolution Video Player with Bottom Playlist is a powerful and responsive player which you can use to play YouTube, Vimeo, and Self-Hosted video files. You only need the video ID for YouTube and Vimeo. You can also share your video player on Facebook and Twitter.
It is also a highly customizable player that allows users to change appearance as per their own choice.
wide range of parameters for customizing the player
360 Video Player is perfect for responsive web designs, and it also looks good on retina displays. The player allows full-screen view and is compatible with all major browsers, including IE EDGE.
Other notable features include:
iPhone / iPad compatible
CSS powered skins
ads support
video gallery API
5 Free HTML5 & JavaScript Video Player Plugins for Download in 2021
The premium HTML5 and JavaScript video players available on CodeCanyon will certainly give you the most up-to-date and advanced features available, which will greatly improve the user experience.
However, you may be on a budget and still need to add a high-quality video player to your website. To help you with your video player needs, I’ve collected five of the best HTML5 and JavaScript video players you can download for free.
This JavaScript video player is a simple, accessible, and customizable player for video and audio. The player comes with a minimal and responsive design and can work for all types of websites.
jPlayer is an open-source media library written in JavaScript. The plugin is completely customizable and skinnable using HTML and CSS and is very lightweight.
MediaElement.js is a simple and easy-to-install plugin that can display today’s standard video formats. All the basic video player controls come with this JavaScript video player.
This HTML5 video player supports both HTML5 and Flash with the same configuration. The player is fully responsive and can be viewed on tablets and mobile devices.
Discover More Great HTML5 & JavaScript Video Players for 2021
The HTML5 & JavaScript video players mentioned above are some of the best options that you can implement on your website in 2021.
However, these video players may not have the exact functions or design that you are looking for. If none of the premium HTML5 and JavaScript video players mentioned in this article seem to work for your website, then be sure to check out our other articles, which contain many more high-quality HTML5 and JavaScript video players for you to download:
Add a Premium HTML5 and JavaScript Video Player to Your Website Now!
If you are in need of a video player that has a sleek design and is fully functional, then head on over to CodeCanyon.
The video players available will give you complete control over the design and features offered in your web players on your website. Ultimately, this will lead to a better user experience for your particular audience.
In addition to all the high-quality HTML5 and JavaScript video players on CodeCanyon, you can browse through thousands of other high-quality plugins and scripts for your website. You’ll find everything from social media to marketing plugins and scripts in CodeCanyon’s massive premium library.
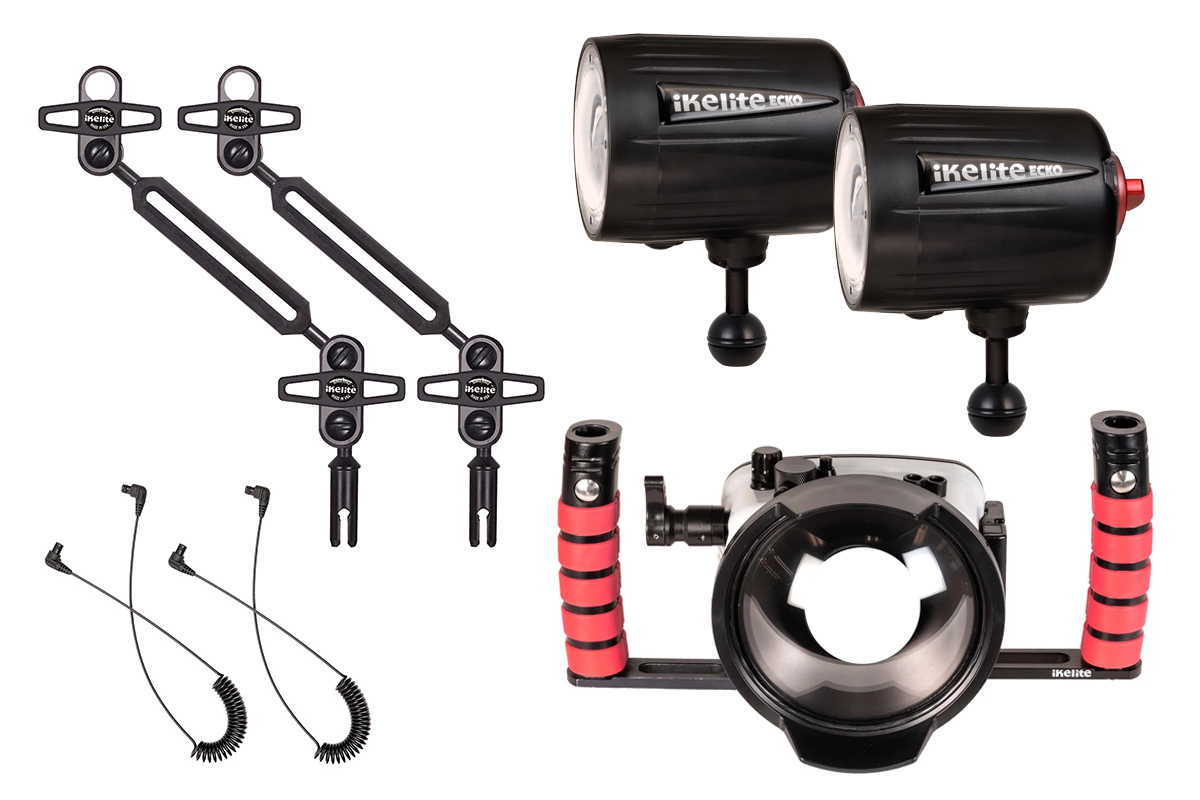
The kits are perfect for shooters starting out with nothing, since the camera itself is included, but for owners of the OM System TG-7 or the Olympus TG-5 or Olympus TG-6 (all of which have the same basic functionality), Ikelite has introduced two new kits that bundle the Ecko Fiber with just housing and accessories.
The first kit, the “Wide Angle Kit” (above), comprises the housing with six-inch dome port, tray with dual handles, two Ecko Fiber strobes, strobe arms, and fiber-optic cords. The camera is not included and neither is the Olympus FCON-T02 fisheye lens for which this setup is specifically designed. Note that you’ll still get the benefits of the dome port even without the fisheye lens, but it’s highly recommended for a proper wide-angle perspective.
The second kit, the “Deluxe Kit” (below), comprises housing, tray with single handle, single Ecko Fiber strobe, strobe arm, and fiber-optic cord. The camera itself isn’t included. With this housing, you still have the option of adding the FCON-T02 lens and dome port later—and, of course, a second strobe if you want.
Available from Ikelite, the new “Wide Angle Kit” is retailing for $2,020, while the new “Deluxe Kit” costs $1,145.
Underwater Housing for OM System Tough TG-7, Olympus TG-6 Camera and Ecko Strobe Deluxe Kit
When purchasing underwater photography equipment like the products mentioned in this article, please support DPG by supporting our retail partner—Backscatter.com.
We’re happy to announce the winner of June’s competition “June 2025 Photo Contest Winners: Minimalism and Simplicity.”
For those who don’t know, the Light Stalking Monthly Photography Competition carries a $100 People’s Choice Award and a $100 Overall Winner Award. The People’s Choice Winner is selected by a vote of the community, whereas our guest judge selects the overall winner.
The “Minimalism and Simplicity” Photo Contest
Minimalism in photography is about reducing the number of elements, minimising or even eliminating patterns and textures to capture a simple image with a strong composition that is visually appealing and can keep the viewer engaged. As you gain experience in photography composition, looking at a scene will give you ideas on whether it will work for minimal photographs, but sometimes you can also just focus on a part of a grand scene and capture minimal photographs.
Less is more in minimalist photography and the concept for this type of composition is simplicity. Just eliminate unnecessary elements and focus on a single element or subject in the frame and it will be a great start to minimalism and simplicity in photography. Using negative space can be a powerful compositional tool in this case and converting images to black and white can emphasise minimalism further and add a timeless and classic touch to the photos.
The contest theme for June was, “Minimalism and Simplicity” and participants submitted their interpretations of this theme through interesting and visually striking photographs. Landscapes, wildlife, portraits, nature, still life, macros of flowers, bugs, objects, and many other subjects were captured and submitted for June’s contest.
When choosing the winning photos, we wanted to make sure that the decision process was based on a good interpretation of the theme, followed by other factors like light, composition, story, details, creative vision and thought, etc. The results are entirely subjective and there are no losers in any competition as we all know.
Here are June’s winners:
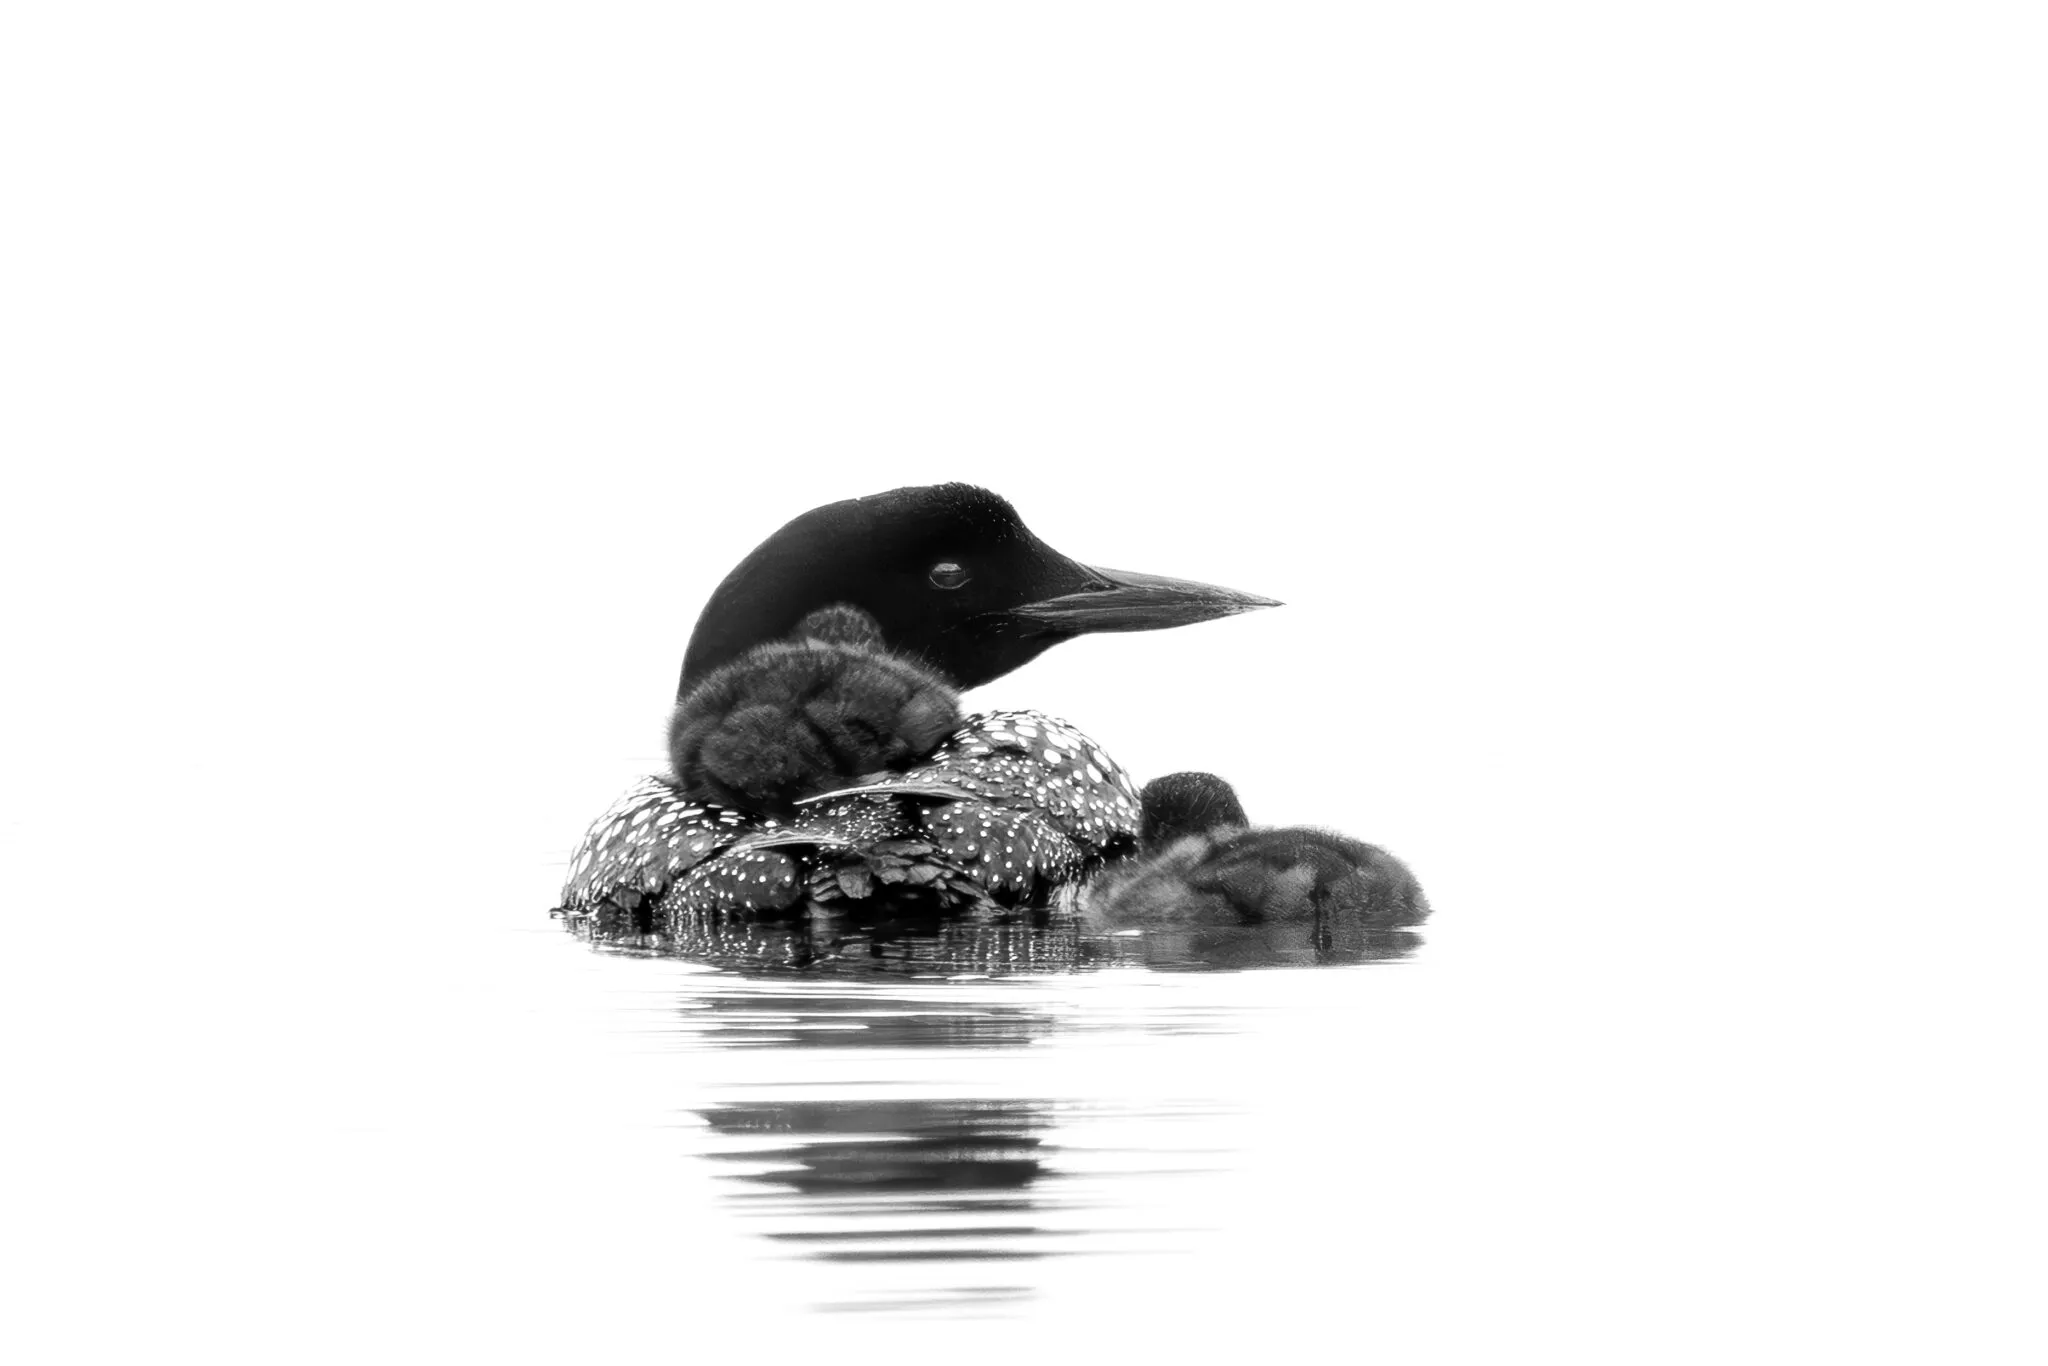
First Place: “Family” by Elin Laxdal
Common loon – Copyright Elin Laxdal
Elin submitted a beautiful photo of a common loon with her babies, titled “Family.” The composition in this photo is minimal with the focus on just the bird and the chicks. The photo also portrays a sweet story – the bond between the parent and the babies.
Elin also used the reflection of the loon in water to her advantage, as a leading line which is a powerful compositional tool. Also, her choice to convert the image to black and white has eliminated anything distracting in terms of colours, that may have taken away some attention from the subject. The image is perfectly exposed with details in both the dark and bright areas and the eye of the bird is also perfectly in focus.
Congratulations on the win Elin, this is a brilliant shot that portraits minimalism and simplicity in photography.
Second Place: “Mantid” by Tersha
Mantid – Copyright Tersha
Tersha’s take on the photo of a mantid is very clever and the way the photo is composed is unique. Not many photographers would think about cropping off an insect’s head in the image, but Tersha’s choice to keep the abdomen and just a pair of legs in the frame arouses curiosity, while also being visually interesting.
The image is even more simplified with a monochrome theme which is green. The textures in the background are soft and minimal and hence not distracting. The legs of the mantid serve as leading line and also as a frame to bring focus on the mantid’s abdomen. The abdomen itself is interesting, with patterns that are of visual interest. The soft side lighting technique has added depth to make the image even more interesting.
Congratulations on this creatively framed and captured image Tersha.
Third Place: “Serenity Floats” by Pat Garrett
Serenity Floats – Copyright Pat Garrett
Pat shared this very minimal photo of a leaf floating on water, titled “Serenity Floats.” The scene indeed looks very serene with the waters looking calm and the leaf floating still on the surface. The golden hour has beautifully backlit the leaf, revealing some of its textures and emphasizing the warm colours. Also the reflection of the golden sky in the water adds visual interest and a perfectly warm atmosphere for this serene shot.
Pat has chosen to eliminate any other distraction in the scene in terms of colours, objects and other elements. The serene atmosphere itself is a minimal concept in the frame, and the colours, light are soft allowing the viewer to focus on the subject. Pat has also exposed the image perfectly to capture details on all parts of the leaf including the underside.
Congratulations on this beautifully captured image Pat.
People’s Choice Award Winner
Our monthly photo contests also come with a People’s Choice Award. The winner of this part of the contest receives $100 worth of store credit on Lightstalking which they can spend as they please on our blueprints, drills, courses or Presets.
Mechanized Symmetry – Copyright Frogdaily
The most popular photo for June, voted by the contestants was “Mechanized Symmetry” by Frogdaily, which has won the people’s choice award. Frogdaily has made use of simple subjects and composition to capture this beautiful photo.
The light illuminating the subject, the beautiful reflection and the soft bokeh, make this image visually appealing. This image is also an example of how still life can also be captured with minimal elements and a simple composition. Congratulations Frogdaily on the win.
We are about two weeks into this month’s photo contest and still have a few days left to submit photos to our July’s monthly contest. It has already seen some interesting submissions. This month, our theme is “Textures and Layers.”
Welcome to another wrap-up of the wonderful Light Stalking photography community for this week. It’s been another epic week of our members capturing incredible photographs and displaying their creativity. Let’s jump straight in and look at some of the highlights.
The theme for the weekly photography challenge to now has been “Faces of Depth” – and as usual, giving people artistic license on a particular theme has produced some wonderful results.
As usual, Patrick managed to freak us all out with his creativity but this time in a bit of a spooky way.
Pat Garrett had a more conventional approach to the same theme and came up with this lovely portrait.
Robert Apple decided to pull out the macro lens — and I think you’ll agree, the results were well worth the effort.
Elin Laxdal always keeps the quality of her images extremely high, and her approach to the theme this week continues that same spirit and quality.
And we can’t not mention Patrick’s new little friend — who got quite a lot of love on the forum this week too.
Photo of the Week
Coincidentally, Michael submitted this image to the weekly photography challenge and managed to snag the Photograph of the Week. This one was judged by Federico, who has shown a real affection for pushing visual boundaries through artistic creativity lately — and I think this image is a perfect example of that. Well done to Michael.
There were also a few other non-challenge related images that are worth a callout.
Daniel Kreuger gave us this great attempt at bug macro photography that I thought was well worth another look.
Another one that needed to be called out was by Light and Shadow, who has been experimenting with his black-and-white work lately.
What are your thoughts on AI and photography?
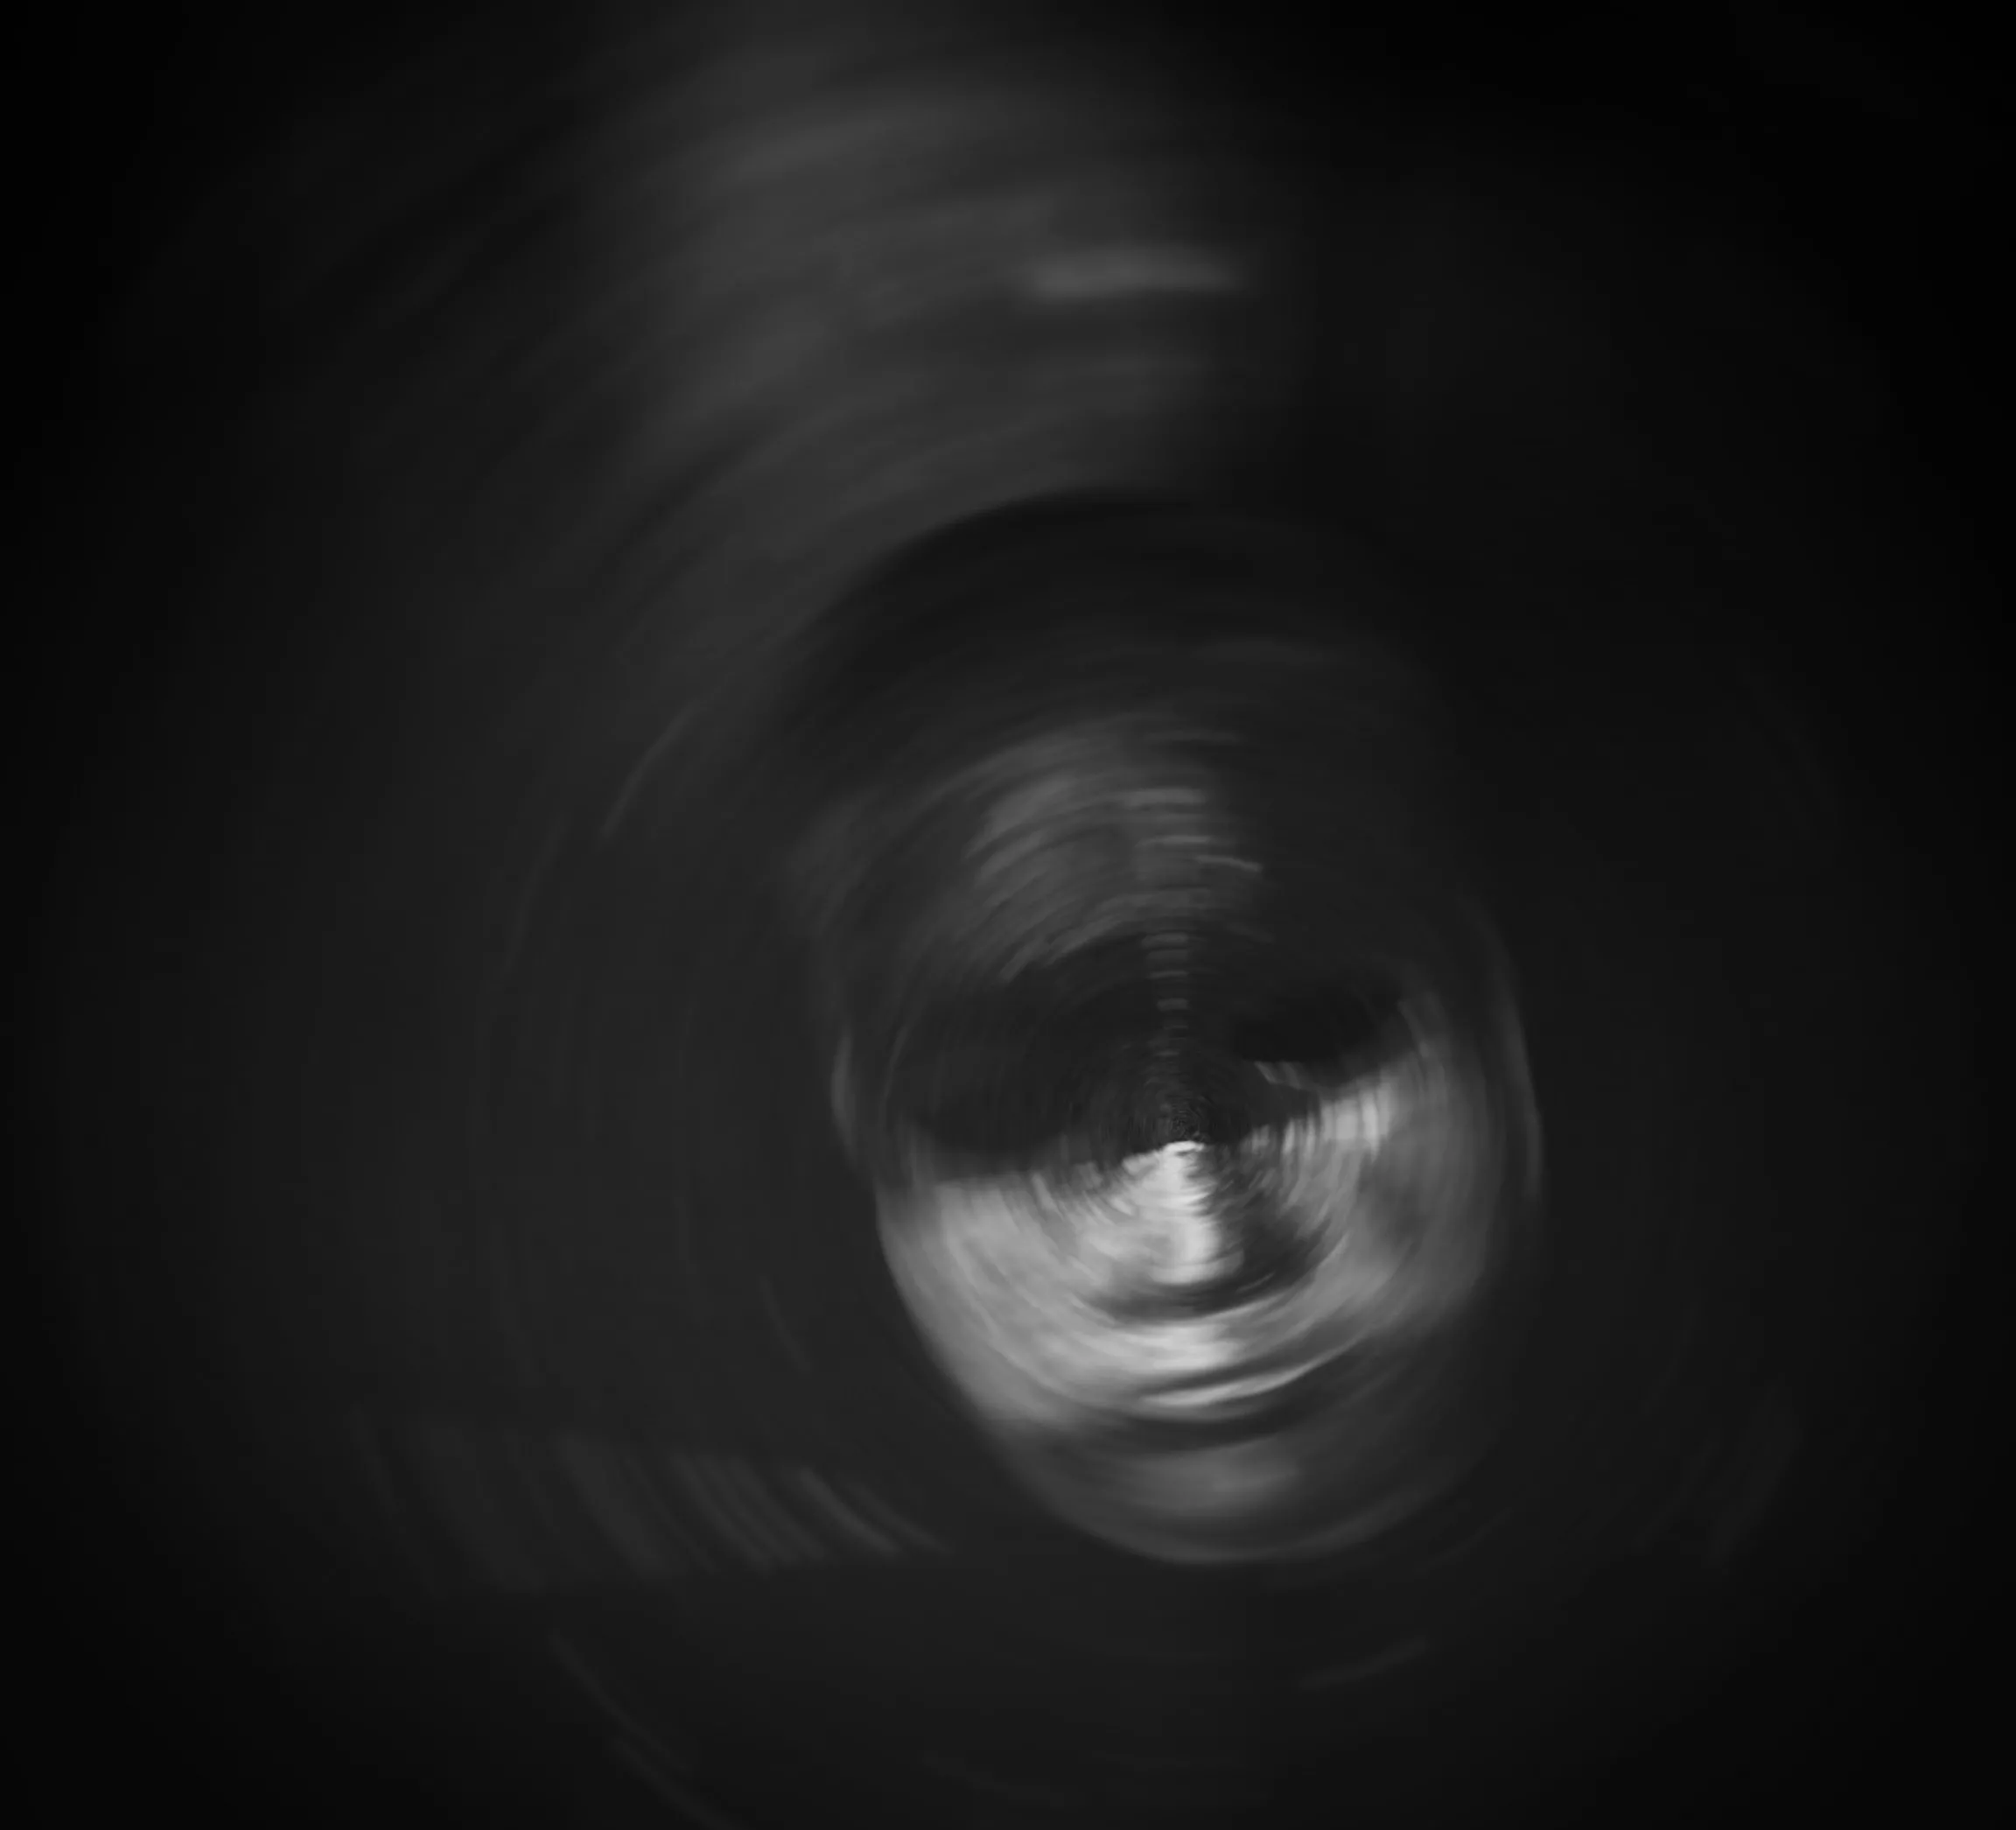
Personally, I’m starting to get a little bit freaked out. I did an experiment after reading somebody else’s attempt at AI photography on TikTok and immediately shot a selfie with no setup whatsoever. I simply took it where I stood and uploaded it with a detailed prompt to ChatGPT. Here are the before and after:
Don’t get me wrong — it’s not perfect — but wow, that is an incredible outcome and has me a little bit worried for some elements of our craft.
If you’d like to join our daily conversations about photography in our private forum and you’re not a member yet, just email us and we’ll set you up with an account. The email is in the footer of this website.
Synology has unveiled two additions to its DiskStation lineup—the DS725+ and DS1825+—which offer two and eight drive bays, respectively. The new 25 Plus series models offer 2.5GbE networking, support SATA SSDs and HDDs (both 2.5″ and 3.5″), and feature M.2 NVMe slots for use as cache.
Like the DS925+ and DS1525+, the new models can be upgraded with the company’s DX525 expansion unit. You can add a single expansion unit to the DS725+ or two expansion units to the DS1825+. Calculated using 20TB drives, you get up to 40TB of storage with the DS725+ or 140TB with added expansion; and up to 160TB with the DS1825+ or an impressive 360TB with the added expansion. That’s a serious number of photos and videos!
One caveat to consider when investing in these new 25 Plus series models is that Synology says complete functionality will only be available with Synology-branded drives—a proviso that the company says ensures the most reliable performance. This isn’t a huge deal if you’re using HDD drives, since Synology’s drives are competitively priced, but if you want to go the solid-state route, Synology SDDs are rather expensive compared to those of its competitors. (Non-certified drives can technically be used in the new NAS systems, but users that choose to do so will lose certain software- and firmware-related functionality.)
The Synology DS725+ and DS1825+ will retail for $520 and $1,150, respectively—yes, that’s without any storage drives!
Synology’s DiskStation 25-series includes the DS425+, DS725+, DS925+, DS1825+, and DS1525+
This week we have been talking about black and white photography but since the early days, there have been many articles shared about black and white photography, by almost all writers here at Light Stalking. At some point, we all get into this genre and sometimes struggle to get the best out of a scene or situation, or get stuck during the post-processing part.
Today we thought that we will put together some very useful tutorials on black and white photography, so you can refer to the ones that are really important or useful for you.
Many photographers may have a questions as to why one should shoot black and white, when there is colour photography. There are a dozen reasons why one might honour black and white photography and four of those are discussed in this article.
Photo by Reuben Mcfeeters
Black and white photos look surreal, they are emotive and they evoke a lot of emotions that sometimes a colour photo cannot. Shooting black and white photos can be quite tricky and the photographer needs to know when shooting the image, if a scene, subject or scenario will work well as a black and white photo. So, here are some ways to tell if a scene will make a great black and white photo.
Photo by Alex
Black and white photographs are beautiful and it makes many of us wonder how someone could have captured and post-processed such a stunning but simple photograph in black and white. This article discusses a few tips on how to capture and edit stunning fine art black and white photographs.
Photo by Etienne Delorieux
Some photographers convert an image to black and white, in order to hide the imperfections in their colour version. It may be fine to do this occasionally, but making it a habit is not the way to creating black and white images because creating great black and white photographs is an art. So, here are some things to think about when getting into black and white photography.
Before capturing a shot, or after you have captured one, have you ever been caught up in a dilemma if the shot should be in colour or black and white? In the early days, photographers made the choice to shot either in colour or black and white film, but in the days of digital photography, we have the luxury to capture raw files and work on them the way we wish to later. So read to find out how you can make this decision between colour and black and white for a particular shot.
Photographers think that it is easier to shoot images for black and white but the problem arises when we try to convert an image to black and white. Most photographers think that removing the colours by bringing the saturation slider to the negative, or clicking on the black and white setting or applying a preset when post processing will help. The truth is, you need to capture images using a black and white film mindset.
Photo by Archie Binamira
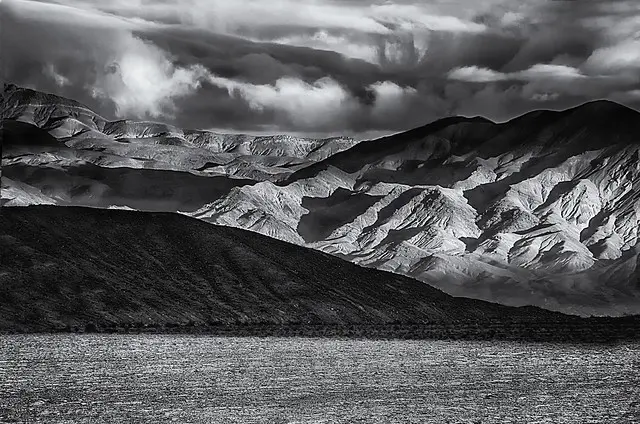
We all would have seen the famous landscape photographs of Ansel Adams that are shot in black and white. Although we can see in colour and in these days photograph in colour too, we still feel the emotions better sometimes in a black and white photograph, especially landscapes that are vast and colourful. So, if you want to shoot black and white landscapes, here are five keys to improve your shots.
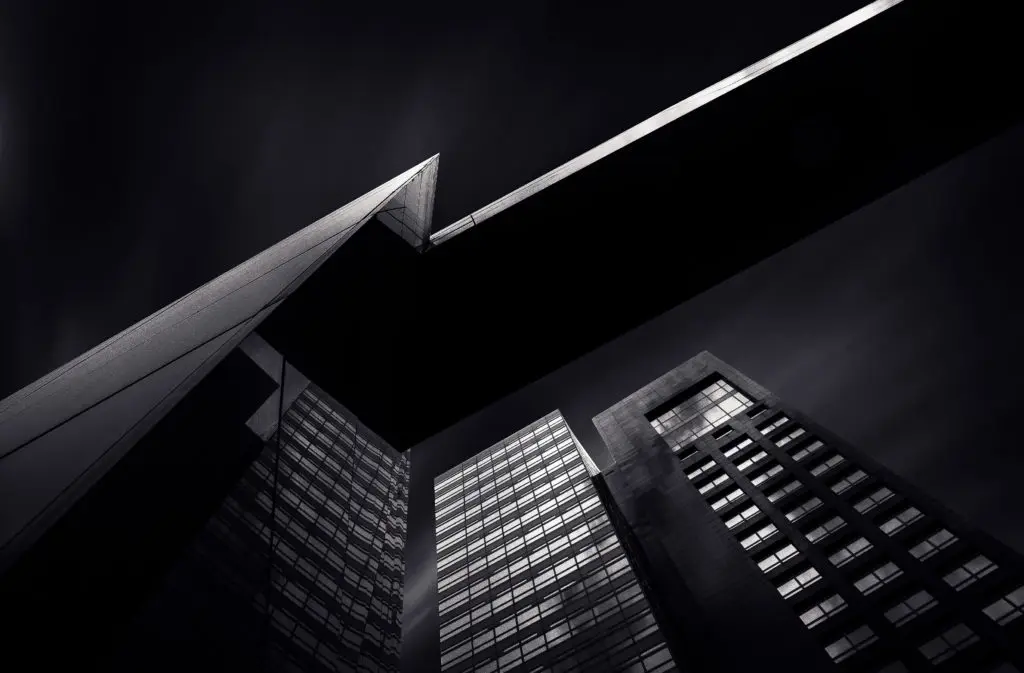
Photo by tombabich24
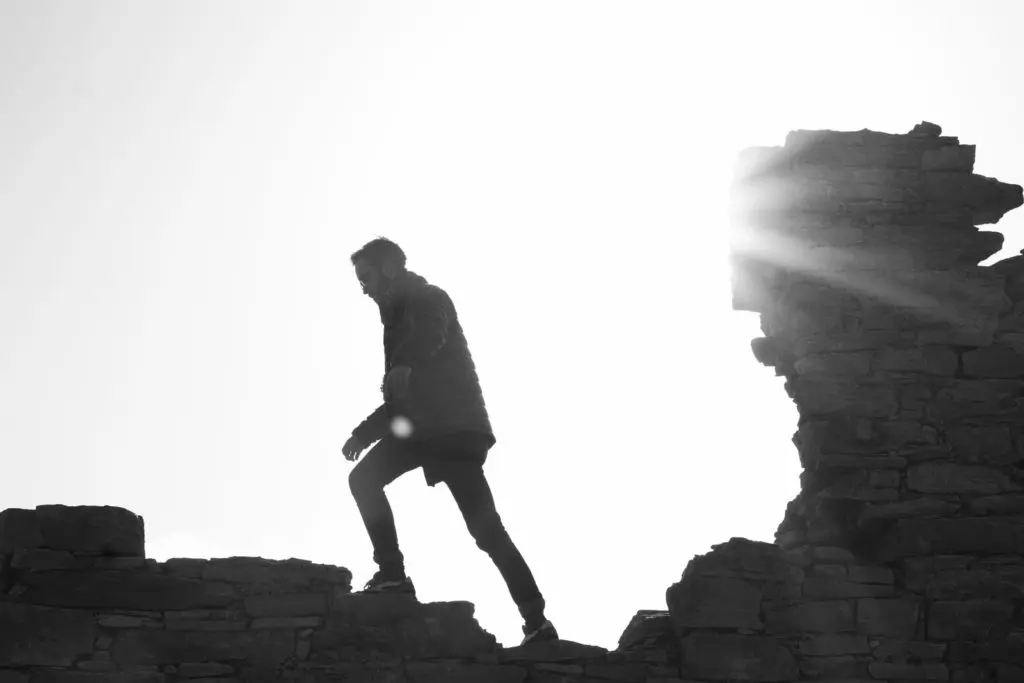
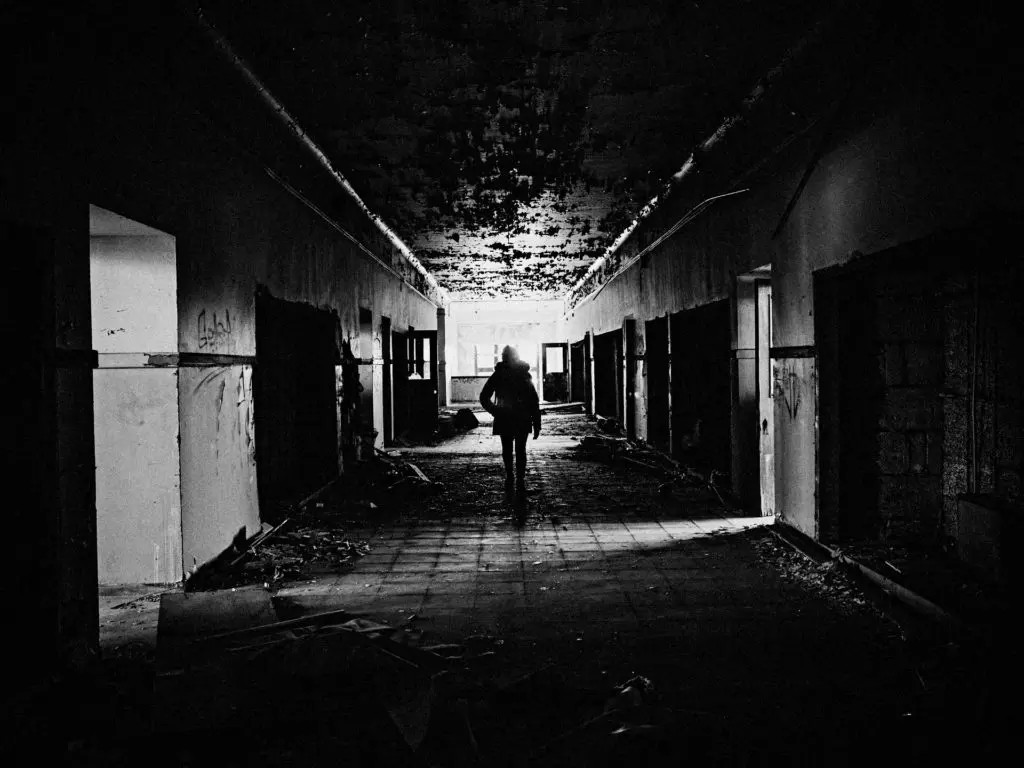
If you are someone who is interested in shooting dark scenes, then film noir photography is a genre that you can explore. These types of photos can be used to portray dramatic, mysterious scenes and it suits only particular types of situations, light and stories. Here are some tips and techniques to capture interesting film noir photographs.
Photo by Andrew Amistad
Not only do street photos or landscapes work well for black and white photography, even portraits become more beautiful when converted to black and white. It lets you focus on the subject and their characteristics, without any distraction. So here are some tips to convert a portrait onto black and white.
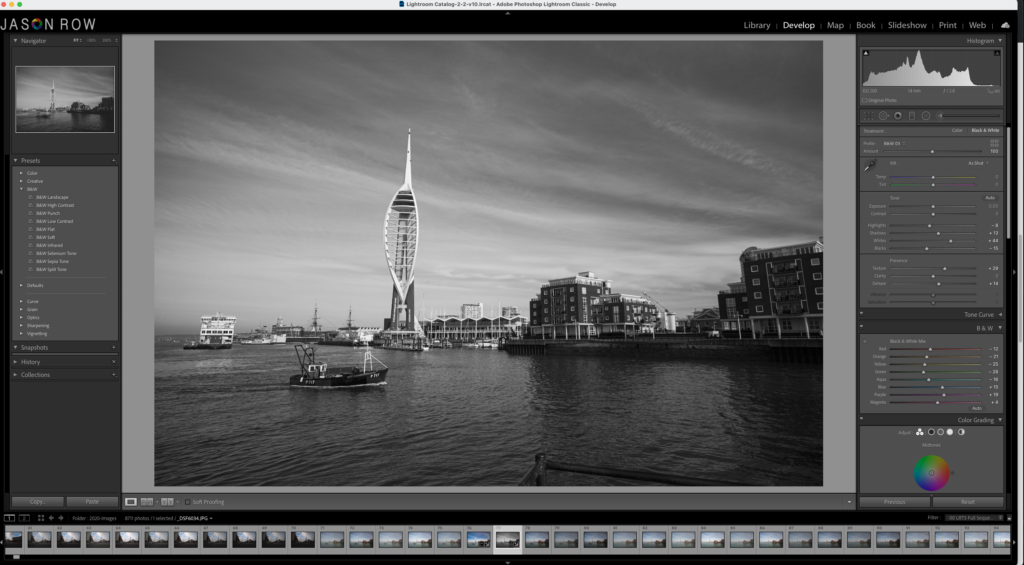
Once you capture the images for black and white conversion, you need to make some important adjustments when post processing your image for black and white. This article discusses the best monochrome practices for photographers in both Lightroom and Photoshop.
Photo by Jason Row
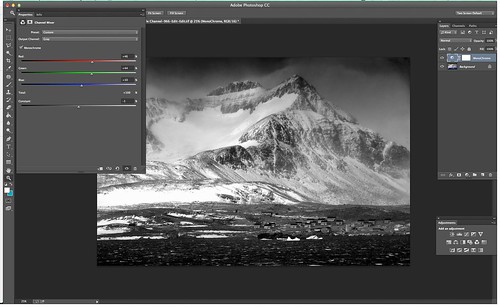
If you just shoot in black and white or convert an image to black and white by the click of a button or by desaturating it, you will nowhere be near to those images of olden days that were shot in film. The images will mostly look flat with not much contrast or tonality. Black and white film photographers used colour filters to give a punch to certain elements in their shots and these days, it can be achieved in Photoshop using the channel mixer tool. Read to find how to use it.
Photo by Jason Row
A lot of street photographers shoot in black and white and it is a very common thing for decades now. Most photographers really do not shoot in black and white, but instead shoot in colour and then convert their images to black and white and they think street photographs should be in black and white. Read to find why photographers make this decision.
Photo by Federico Alegría
And of course, street photographs also need some amount of post production, because we always advise to shoot in raw in order to get the best results in the final photo. A lot of street photographers also believe that the colours in the streets may not be always visually appealing to have the street photograph in colour. Here are some tips to convert a street photograph to black and white.
Image by Federico Alegría
If you would like some inspiration to shoot black and white photographs, here are links to dozens of quotes and images that you can refer to:
Black and white photography is timelessly beautiful. It lets the viewer focus on the story without getting distracted by any colours that may be too dominant and shadow the subject or the story.
Shooting in black and white is not so easy as it seems – it is not just about removing the colours from the image, but about having a range of tones that will make the subject stand out and make the image very compelling or effective.
“With black and white, what you have to say counts more than the way you say it.” – Gian Marco Marano
Photo by Vincent van Zalinge
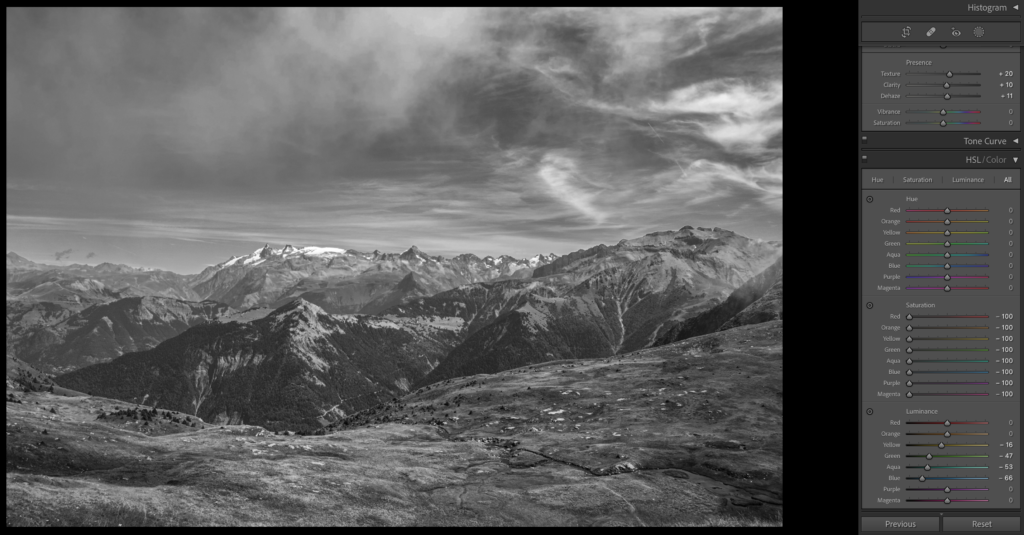
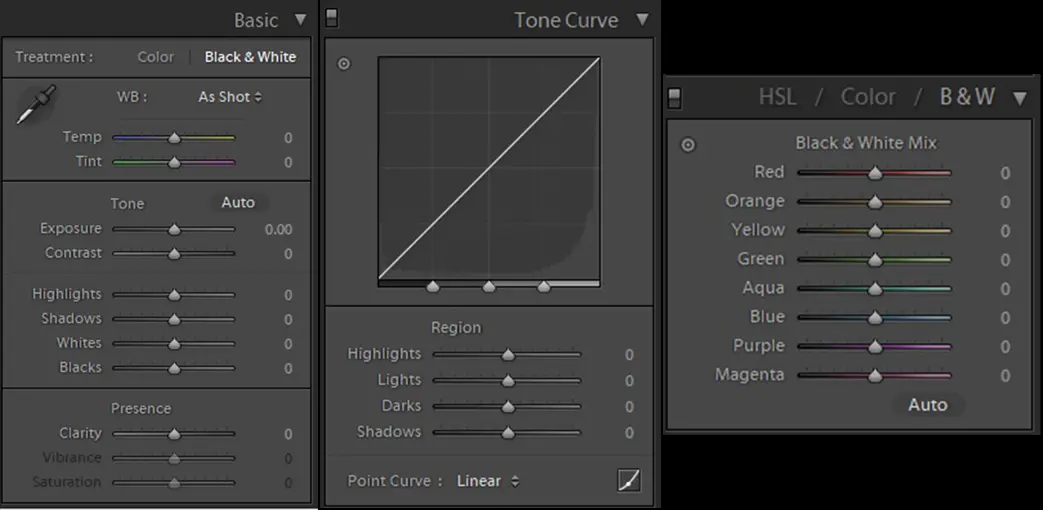
When shooting black and white images, it is always good to shoot in colour and then convert the image to black and white, but for that, one should learn to see in black and white. In order to create a great black and white image, there need to be contrasts between the lights and darks and the photographer needs to have a good understanding of tonality.
Note that distinct colours do not always convert to distinct tones when converted to black and white, but tweaking the luminance values may help.
An example is in the illustrations below, which are discussed in articles in the “Further Reading” section below.
Basic conversion in Lightroom. Tweaking the luminance may help. Illustration by Dahlia
A slight variation of the above colors gives some tonal range. Illustration by Dahlia
Here are 25 black and white images that seem surreal and emotive and these images will inspire you to shoot black and white if you do not do that already.
If you have shot black and white photos before or converted your colour images to black and white, but were disappointed with the results, we would recommend you to check out this useful eBook, “Better Black And White” by Photzy. It is a complete step-by-step guide to convert your images to beautiful black and whites.
Photo by felipepelaquim
Photo by Esteban Amaro
Photo by David Werbrouck
Photo by Ehud Neuhaus
Photo by Damien Schnorhk
Photo by Asher Ward
Photo by Tai’s Captures
Photo by Mukul Kumar
Experienced photographers will look at a photo or a scene and will know if it will work well in black and white. Learning to see a scene in black and white is important in order to capture the right images and get stunning results. If you want to quickly dive into black and white photography, this simple easy-to-follow eBook, “Better Black And White” by Photzy covers everything you need to know about producing your own powerful share-worthy black and white images.
Photo by Vincent NICOLAS
Photo by Dave Hoefler
Photo by andreas kretschmer
Photo by Guillaume Issaly
Photo by Sergi Ferrete
Photo by Vincent van Zalinge
Photo by Ales Krivec
Photo by Metin Ozer
Black and white photography is an art, but some photographers often think that converting an image to black and white often happens at the click of a button or by just bringing the saturation slider to the lowest value. That is not true and some tweaking is required to get the best results. Whether you are using Lightroom, Photoshop, Elements or any other software, this eBook “Better Black And White” by Photzy has enough information to help you achieve the great results with the software you already have.