It is almost rainy season in most of the tropical and sub-tropical countries and it is one of those seasons that brings in respite from the summer heat, especially in the tropics. Some photographers worry about shooting in the rain, because they are concerned about their gears’ safety and also getting wet in the rain.
Rain photography is magical and sometimes dramatic, and can be very rewarding of you take a few precautions when shooting in the rain. There are a lot of subjects and scenes that can be beautifully shot during the rain if one embraces the elements, understands light and focuses on the details.
If you would love to understand the secrets of recognizing the right light, control it and manipulate it according to the situation you are shooting, we highly recommend you to check out the eBook “Understanding Light” by Photzy. This guide will uncover the secrets behind controlling the available light and will leave others wondering how you did it.
Here are 18 photographs of the rainy season that can help you with some inspiration to shoot in the rain.
Photo by Gil Ribeiro
Photo by Jusdevoyage
Photo by Todd Diemer
Photo by Jack Finnigan
Photo by Makoto Tsuka
Photo by Matteo Catanese
There are many ways in which rain can be photographed. You can capture the stormy sky, reflections, puddles, even stay indoors and capture the falling rain. During this time, the light can be quite tricky but shooting from the right angle and perspective while also using the right camera settings can help you to capture better photos. We recommend you to check out this eBook “Understanding Light” by Photzy that has 155 pages of fast and easy learning, packed with illustrations, case studies and assignments to verify your knowledge.
Photo by Urban Vintage
Photo by Imthiyas Iqbal
Photo by Hannah Domsic
Photo by Jack Finnigan
Photo by Luca Bravo
Photo by Michael Podger
When out to photograph the rain, besides the grand scene in front of you, it is also good to focus on the details for some macro photography, patterns and textures. Also look for actions in the outdoors, like vehicles speeding, children splashing in the puddles, or dramatic skies. The colours can be rich, so if you work with the light, you are sure to come home with some great photographs. Check out “Understanding Light” by Photzy if you need to learn more about using light to your advantage in tricky situations.
For those who haven’t been following the major rift in the world of photojournalism a quick summary of what is going on: A film called “The Stringer” directed by Bao Nguyen (previously directed The Greatest Night In Pop) and produced/starring Gary Knight (VII Agency co-founder and ED) premiered at The Sundance Film Festival on January 25 claiming and attempting to prove that 53 years ago Nguyễn Thành Nghệ actually took “The Terror of War” (AKA Napalm Girl) image and not Nick Ut. AP photo editor Carl Robinson claims his boss, Horst Fass, told him to switch the credit from Nguyễn, a stringer, to Nick, an AP photographer. The filmmakers find Nguyễn, and he says, yes, he took the picture.
Prior to the film’s premiere, the AP released a preliminary report disputing the claims of the film. At the premiere, the AP watched the film and followed up (May 16) with a 100-page report saying that there’s not enough evidence to remove Nick Ut’s credit.
Then, on May 16, World Press Photo released a statement saying they investigated (David disputes the characterization that they investigated and rather they simply got a private screening of the film and agreed with the conclusion) and are suspending Nick Ut’s credit on his 1973 Photo of the Year award.
This sparked outrage on social media with posts from what appears to me to be the VII camp (Ashley Gilbertson, Ed Kashi, Sara Terry) and the Nick Ut camp (David Burnett, Pete Souza, David Kennerly).
And the real zinger in the whole dust-up is that David Burnett was there! He’s an eyewitness to the events at Trang Bang, where the famous image was made.
Ok, one final note: besides the premiere at Sundance and private screenings, the film cannot be watched until a distributor is lined up. I’m aware of a screening in DC next month, but most people, including David and myself, have not seen the film.
I talked with David over the phone, and here’s a condensed and edited version of our conversation.
Screenshot from AP Report: Investigating claims around ‘The Terror of War’ photographScreenshot from AP Report: Investigating claims around ‘The Terror of War’ photographScreenshot from AP Report: Investigating claims around ‘The Terror of War’ photographScreenshot from AP Report: Investigating claims around ‘The Terror of War’ photograph
Rob Haggart: I want to start by asking if it’s really difficult for you to go back and rehash all this stuff.
David Burnett: No, I mean, I have these moments from not just Vietnam, but the jobs that I worked my whole life, French elections, Ethiopia, Chile, and it’s not really something that causes me great pain. There are so many of these things that I’ve lived through that the memories of them and what I was doing in them as a photographer is very, very clear in my head. And Trang Bang is really no different than almost anything else.
The first time I was under fire and had the crap scared out of me, it’s one of those things where you don’t just think, will I ever get over it? Because you don’t, they become part of what your life is about.
The running joke about Trang Bang and me was that, well, I missed the shot because I was changing film in my old screw mount knob wind Leica which is kind of a slow, kludgy film camera. It was not an easy camera to operate.
And yet, Cartier-Bresson shot with them for something like 20 years before the M2 and the M3 came along and made some pretty great pictures, so I mean, I think part of why I even bothered shooting with that camera instead of getting another M2 for 200 bucks, was kind of a historical thing with the old Contax and Leicas, you felt a little more attached to some kind history if you’re shooting with this kludgy old camera and um you know, and I was trying to reload it and anybody had ever owned one of the cameras knows that if you take a 35-millimeter film where you have the little cut-down tongue that you really need to cut an extra inch or inch and a half away from that one side that’s cut so that when you drop the film in the camera, it will seat itself perfectly.
I never bothered doing that, so I was always stumbling, trying to get the camera reloaded. So I was reloading it when the plane came in to drop the napalm. I was holding the open camera in my left hand and shooting with a 105 in the other hand. When the napalm hit right next to the pagoda, there was this Gigundo fucking fireball, Nick has that picture, and I kind of have it a few seconds later. But it was the in the days when you didn’t shoot with three motor drives, you know, you weren’t going out there to shoot 25 rolls of film. I think I shot maybe three or four rolls that day, and it was a fairly long period of time we were there because we were kind of hanging out waiting to see what was going on.
You could hear firing and shooting coming from the village. Then the planes came in, and there was that fireball, and then like three minutes later, the kids started running out of the field and onto the road toward us, and that is the moment, more than anything in my mind, where Nick was the one guy who was in a position to shoot the picture, and nobody else was. There was this line of journalists, and we were all within a few feet of each other lined up across the road. As soon as we could tell that, there were people on the road racing out toward us, and the kids were running as fast as they could run. Nick and this guy Alex Shimkin, who was killed a few weeks later up north, took off running towards them, and no one else did.
RH: When did you first hear a film was being made about this event and that there were questions about the author of the famous image?
I was sitting at a Walgreens parking lot in Florida 3 years ago going in to go get some stuff, and Gary Knight called me and said tell me everything you know about Trang Bang, so I spent a couple hours on the phone and told him everything I know and then said you know there’s this guy and he’s kind of a horses ass, ex AP guy and he says that Nick didn’t shoot the picture and I kind of think he’s full of crap as does everyone else but along the way you’re gonna run into Carl Robinson.
Carl had this real chip on his shoulder about AP, and he was never afraid to let people know how he felt like he’d been screwed over by the AP.
RH: So you’re telling me this rumor has been around for a while?
Yep, a long time. It’s not new. The last time I saw Horst Faas was in 2008. There was a gathering for a memorial wall at the news museum in Washington, and if you lived near the East Coast and worked as a journalist in Vietnam, you pretty much were there that day. Somebody at that point could have said, hey, Horst, let me talk to you about this thing that Carl’s been telling everybody that you told him to put Nick’s name on the image, and it was really some stringer’s film.
And no one ever, no one ever asked Horst.
No one ever just asked him point blank.
I guess Carl makes a pretty reasonable case for trying to talk about how the guilt of 50 years and being able to unburden his guilt when he finally met this guy. But you know, every crackpot theory that ever was has at least a 2% chance that it happened.
Could Horst have said it? I suppose he could have. But it would have been very out of line with what always happened.
If you talk to Neal Ulevich, who was in the AP bureau as a staff photographer for, I don’t know, six or seven years in Asia and was in the bureau the whole time, he will tell you about the sacrosanct policy of never allowing anyone’s film to have any name on it other than the actual photographer that shot it.
He said, “All the time I was in Asia, never once did I see anybody do anything like that.”
It just didn’t happen.
I was in that group of people who were looking at the first print of Napalm Girl when it came out of the darkroom, and I did what every photographer in the history of photography would have done, which is I look at this picture and I try and think to myself without having seen my own film, hm, I wonder if I have anything better. I’m thinking, yeah, that’s pretty good. That’s probably better than anything I have.
There were 3 or 4 of us looking at this little 5 x 7 print that was still wet, and Horst, without making a big deal out of it, just turned to Nick and said, “You do good work today, Nick Ut.”
I still have the memo I wrote when I went back to my office at the Time-Life Bureau. I said there was this accidental bombing in this village called Trang Bang, and I said, Nick from AP got a pretty good picture, and they tell me they’re shipping the negative to New York on what’ll be the same flight that my negatives are gonna be on, so you’ll be able to get an original print made in the lab rather than rely on a wire service photo.
So that’s what they ended up doing. It was in the front section of the magazine called the Beat of Life; there were always 3 or 4 of these big picture spreads.
Usually one picture, sometimes two or even three, and they ran one of mine of the grandma with the burned baby and Nick’s picture side by side, and when you look in the photo credits, it says page four and five, David Burnett, AP. I mean, it was the wire services in the 70s. They weren’t going to put a photographer’s name on it. It’s kind of funny that way.
RH: What are the chances, if you’re Nick, that you don’t know beforehand you made that picture?
There’s no way that either of those guys would not know they took that picture. It was such an enpassant moment, and I’m sure there was just one frame that was the one.
For sure, there are times when you’re surprised by something you’ve done when you move from wherever you shot it, and now, you know, we’ve kind of shut out the middle man, and you go right to the computer and see if what’s on there is anything like what you remember, but in the film days I would find it really hard to not know that you had something.
I can’t imagine that the camera wasn’t up at the eye; it’s not like a chest-high Hail Mary, although technically, it was never great, but maybe at the same time, some of the imperfections add to the raw reality of that moment.
RH: That leads me to this talking point I see from the film’s defenders saying that this is not a critique of Nick, but that would mean that Nick didn’t know he took the photo. But you think there’s no way he didn’t know he took the photo, so the film is saying he’s been lying for 53 years about this.
He’s a 21-year-old kid with a camera, and I think incapable of that. Yes, it was a good picture, but there were a lot of good pictures out there.
And, you know, some people have said, oh, but Horst knew right away that that was gonna be a great picture, and he wanted AP to have the copyright on it instead of a stringer. But the thing is, you’ve got all these little sub-arguments if you accept a certain premise, and you can walk yourself right off a cliff of trying to figure out what it is you believe or don’t believe.
Gary called me back at one point, and he said, you know, I think there’s really something to Carl’s statement here, but you know, once you get the first bit of the Kool-Aid, you just gotta drink the whole pitcher, and I just don’t see it.
I mean, like I said, it’s possible.
Everything’s possible, you know?
I mean, you know, once you start to believe part of it, you kind of end up believing the whole thing, or you believe none of it.
To me, it looks like Gary’s trying to make himself into a big documentary producer, and this is his launch pad.
Gary said you ought to be in the film, and I just said, Gary, I don’t wanna do a goddam Mike Wallace interview where I have no control over how you cut it or anything else. I’ve watched 60 minutes too many times where Mike managed to hammer somebody, and I had no confidence that it would be a fair representation.
Fox Butterfield was the reporter I was with that day working for The New York Times, and he got a call from Gary’s wife, a producer on the film, he started to tell her his version of what took place, and she told him everything you’ve said is wrong. That’s not a really good way to coax people into a discussion. She said he would have to sign a non-disclosure agreement, and he said, what the hell for? I’m the one telling you stuff; you haven’t told me anything.
Gary said to me last time I talked to him like six weeks ago, he said, well, you know, we’ve done all this forensic stuff, and we’ve proven that he couldn’t be down there to take the picture.
And I said to him, in my mind, because I remember the way he ran out on the road ahead of everybody else when the kids were coming down the road, he’s the only one who could have taken that picture because it was in the very first moments that the kids were coming down toward where the journalists were lined up, and it was after that everybody else started wandering around, but that was another five or ten or 15 minutes later.
And I just don’t see how anybody else was out there in front, and to me, that picture was taken out in front. It wasn’t taken right next to the press people.
It was out there away, maybe, I don’t know, 20 yards, 40 yards. 50 yards.
RH: How do you think the filmmakers should have handled this? What should they have done with the information they got from Carl?
You don’t ever want to get to a place where people are afraid to posit things, but I don’t know what the answer is, but you know, unlike a lot of people who don’t shut up about it, I’m not sure I have an answer to what the most perplexing question is.
And I never said I was right behind him when he shot that.
I saw him, I was changing my film, and it was a minute or two minutes later, and in those moments, that could be a long time. I offer it strictly as a witness to what happened that day and nothing more.
I find one of the most curious things of all, aware of the fact that Nguyễn probably had to leave Saigon with almost nothing, that he left everything behind, andI totally get that.
But apparently, he never sold another picture to anybody, and in the last 50 years, no one has even seen one picture that he’s taken.
Other than the most famous picture of the Vietnam War.
I had the pleasure of serving on the 2025 Communication Arts Photography Competition jury—a fantastic opportunity to step outside my usual discipline and review photography alongside my esteemed peers. One standout moment was discovering Sacha Stej Sacha, an Auckland-based photographer represented by Image Driven Content.Her accolades include being named one of the top 200 advertising photographers globally by Lürzer’s Archive and being recognized as one of the 23 World’s Best Sport Photographers by The Agents Club in 2023. I recently had the pleasure of catching up with Sacha to discuss her award-winning image.
Your photography is known for its cinematic and powerful portrayal of women—what are the key elements you look for when capturing intensity and resilience in your subjects? When I’m gearing up to capture my subjects, there are a few key elements I always keep in mind. First and foremost, getting to know my subjects is essential. I want to know what shapes who they are. Before the shoot and even during it, I dive into conversations that reveal what makes them tick.
Once I have a sense of them, I try matching their emotional tone; if they’re fiery and passionate, I want that to jump off the frame. I aim to include a piece of who they are in every shot, whether it’s a glimmer in their eye or the way they hold themselves. I strive to create an image they can recognize, one that resonates with their energy. It’s all about connection, and that’s what I love most about photography: being able to freeze a slice of someone’s narrative, a moment of resilience and intensity, in time.
In your “Girls in Sports” campaign for 2 Degrees, you highlighted both strength and vulnerability in your subject. Can you talk about how the casting went and what direction you gave? This campaign was shot alongside a TVC, and the fantastic Director Taylor Ferguson did the casting. When I met these young women I could see that they radiated talent and spirit. For this brief, I wanted to capture that passion and grit. They don’t just play the game—they own it. I love the dichotomy between their sweet appearances and the fierce determination they display on the field – there is nothing more badass than seeing these girls in their element. Take the rugby girl, for instance. I asked her to sprint full speed towards the camera, like she was dodging the opposing team. In that moment, she transformed into a powerhouse charging at me like a freight train, the fire in her belly blazing as she zoomed closer. It was exactly the energy we were after.
How do you balance storytelling with advocacy in your visual work, particularly around gender representation? Women in sports face a harsh reality—they often get overshadowed, and it’s disheartening to see that women’s sports internationally don’t get the same spotlight as men’s. That’s why campaigns like this are so crucial; encouraging fans—especially from a young age—to rally behind these amazing athletes.
In my visual work, I find that storytelling and advocacy naturally go hand in hand—probably without me even realizing it. As a woman photographer, I’m drawn to capturing fierce, strong women because I know just how powerful we can be. In a society that often tries to box us in or undermine our strength, it’s crucial to keep that fire alive. That passion burns even brighter as a mother to a spirited young daughter. I want her to see women as capable and unafraid, sensitive and kind, just like the women I photograph.
How do you ensure your images challenge traditional portrayals, particularly of femininity and athleticism, while still maintaining authenticity and emotional depth? I’m usually guided by how I want the image to feel, especially when it comes to capturing femininity and athleticism. My images become a deep dive into an energy that connects the viewer to the subject. I want to create an atmosphere where the audience feels confronted, pulled into the frame, and unable to look away.
I find authenticity through genuine human connections, digging beyond the surface, whether I’m photographing a seasoned athlete or someone new to the sport. There’s something superhuman about athletes; they possess more than just physical strength; they embody resilience and discipline. There’s a profound sacrifice that comes with striving for excellence, and that narrative fascinates me. Each image I capture is a testament to that journey—an exploration of what it truly means to balance vulnerability and power.
Can you talk about the role visual media plays in shifting public perception and promoting equity, especially in underrepresented communities and activist movements? Photography holds a unique power in shaping public perception and promoting equity. As a visual person myself, I’ve always felt that a single image can convey emotions and stories far more effectively than words ever could. It’s the raw authenticity of a photograph that can resonate with someone’s heart, breaking down barriers and connecting us all on a fundamental level.
Through the lens of a camera, we can reveal the complexities of human nature and amplify voices that often go unheard. In this visual storytelling landscape, images become tools for change, not just documenting reality but actively reshaping how we view each other. Ultimately, photography fosters a shared humanity that can inspire action and fight against injustice. They remind us that, at our core, we are all just humans with similar desires for love, acceptance, and dignity.
Last in our thrilling “Storytelling in a Single Frame” monthly theme, Diane tossed a particular request. In order to close this rich theme on visual narratives, she asked our members for images capable of depicting the unspoken tales surrounding our everyday lives.
But “how can that even be possible?” you might be wondering. In order to capture such an elusive thing, Diane left us with a couple of hints about how to tame the untold. All of them can be crunched down to the following premise, do not think in a literal sense.
After surpassing the creative limitation imposed by reasoning, we can continue our journey into the visual depths of the ignored and left-behind. Street photography —especially candid frames— offer a vast field of stories worthy of being unveiled. Also, she suggested thinking about location, inspiration, timing, subtly, awareness, patience, anticipation and composition.
Let’s dive a bit further into these wise principles:
Location: consider scouting for adequate backgrounds — they are fundamental when attempting to tell a story with a single frame.
Inspiration: ditch social media and stalk your favourite photographers online; you’ll be amazed of how nurturing the slow-paced visual consumption can get.
Timing: practice your shooting skills so you can react even before the moment occurs.
Subtly: always go for the stealth-mode approach; and if you want to take your unconsciousness to the next level, get a small and lightweight camera!
Awareness: mind everything around you, never let your guard down and be prepared with your camera in hand.
Patience: wait for moments to occur, not everything happening all-at-once is worthy of your frames.
Anticipation: different from timing, this one should be understood as being capable of positioning ourselves in the most adequate spot we can find before the moment occurs.
Composition: last but not least, never take composition for granted; even when your camera allows heavy cropping without losing detail, it is preferable to get things right or at least decent on camera.
I know — it’s a big list indeed, but once you start walking and thinking in photography-mode, you’ll start digesting these principles. And while apprehending them, having fun is absolutely guaranteed. Now, let’s dive into some unspoken tales!
Photo of the Week
Achieving interesting images on the street is a massive challenge by itself. Now imagine such a task being coated with layers of complexity as colour and composition. This shot is a bold reminder that street imagery exists beyond the monochromatic look.
Also important in this visual lesson given by Click, we don’t have to always capture the facial expressions of our subjects to get a strong and even storytelling frame.
copyright – Click
That will buff out
Congrats Click, thanks for sharing such a high quality photograph with us!
Weekly Photography Challenge Digest
Thanks again to Diane and Dahlia for pushing our creative boundaries one step forward every week!
copyright – Timothy S. Allencopyright – Timothy S. Allen
Royal Funeral – Bali
copyright – davidc
Her unread story
copyright – Wendy P
She doesn’t like colored slime after all!
copyright – Michaelcopyright – Patrickcopyright – Patrickcopyright – Pat Garrett
For contributing, check out the original challenge post!
A Highlight on the Latest Activity at our Community
Rob Eyers shared a super sharp high-definition image. Behold the power of focus stacking:
copyright – Rob Eyers
Steve shared something about his photographic journey after being “greatly aided by visiting my in-laws who lived at the beach. When we visited, I hardly ever missed the opportunity to ‘do’ sunrise. This picture, from January 2013, was one of numerous pictures from that mostly clear morning. There was some color in the sky but I was in a b&w mood”:
copyright – Lightandshadow
He also shared this shot after several days of heavy rains:
copyright – Lightandshadow
the power company’s opening of the flood gates to release high water produced minor flooding and fast flow. The water fowl know how to cope. iPhone 14 Pro, DNG format, cropping and a fair number of local exposure edits.
Don’t forget to check the photo contest winners for the Essence of Movement; and remember, this month’s photo contest is now open for entries. The theme revolves on “Storytelling in a Single Frame“. Submit your photos for a chance to win $250 and please don’t forget voting as well. Last but not least, keep an eye out for the Members Picks — the instructions are pretty straightforward:
Members reference what you might consider a five star photo. Give a call out to the photographer and share their photo even if it lies in the Shark Tank and feel free to give a Critique on why it trips your Trigger. Be sure to mention the photographer and the Thread you saw it in.
And if you want to make out the most of your LightStalking user account, make sure to check the latest posts. Also, don’t forget to swim the Mobile Monday Challenge! Last but not least, Check out the current reading throwdown, it has some nice insights and recommendations!
We’d Love To Hear Your Thoughts
Our Feedback Forum is a fine place for all those people wanting to grow fast as photographers. Here, you’ll get your work reviewed by well-intended photographers, but you’ll also have the chance to comment on the work of others. We believe in the power of feedback, and here are the latest shots shared in the pool:
The Shark Tank is a great place to learn and to discuss, but please read the instructions in order to get a better experience. Share your comments, opinions and doubts on any or all of the images above. We also will be delighted to see some of your own images. Remember all comments are given to the photographs; not the photographers. Also, don’t forget to participate in our upcoming challenge!
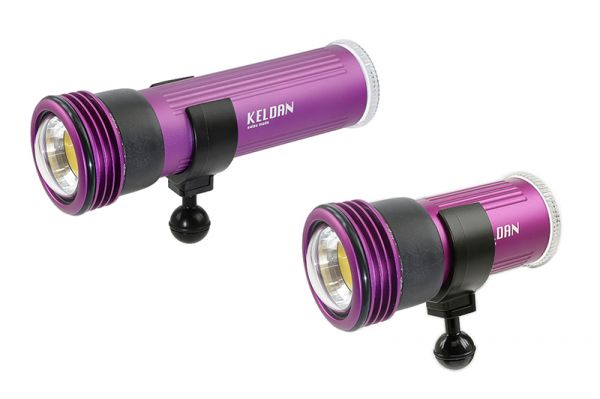
Known for their high-end—but not especially compact—video lights, Keldan is addressing the demand for travel-friendly gear with the release of three significant products: the RC2, a diminutive version of their RC1 wireless remote control; and two handy remote-controllable lights, the Video 4XR and the Video 8XR.
Like its bigger sibling, the RC2 works wirelessly underwater but is shorter range: 2–3 meters (6.5–10 feet) as opposed to the 50-meter (165-feet) range of the RC1. As such, it is designed for lights mounted on the camera rig or placed within a short distance from the remote. Like the RC1, the new model has two independent brightness channels, each of which can address any number of lights simultaneously, and works with all lights in Keldan’s “XR” series.
With the new Video 4XR, Keldan hasn’t just upgraded their popular Video 4X light with a remote receiver; the new version also has a higher lumen output—11,000 lumens rather than 10,000 lumens. While the 4XR replaces the 4X in Keldan’s lineup, the previous version of the 8XR—which boasts a 20,000-lumen output and a color rendering index (CRI) of 86—sits alongside the new 8XR, which has a slightly lower output of 17,000 lumens but a significantly higher CRI of 96. According to Keldan, the high CRI makes the new 8XR the perfect light for shooting macro.
When purchasing underwater photography equipment like the products mentioned in this article, please support DPG by supporting our retail partner—Backscatter.com.
PRESS RELEASE
Remote Control RC2
Our pioneer Remote Control RC1 has now a little brother, called RC2. The RC2 is smaller, runs on a single button cell and it is designd for short range use (Lights mounted on the camera or in proximity to the camera).
Wireless remote control
The KELDAN RC2 is a wireless Remote Control based on ultrasonic technology. It is available for Video 4XR / 8XR /18XR / 24XR series lights.
Outstanding features
Range of 2m
Control brightness individually on 2 channels
Each Channel can address an unlimited number of lights
Each Channel has a separate ID to avoid interference when multiple controllers are used at the same dive site
Remote Control works with all “XR” series lights
Easy mounting with M4 screw holes or with an optional Ball adapter
Many advantages when using a remote control
No more swimming back and forth to adjust lighting
Fast and easy control of your lighting
Place the lights wherever you want
Allows for new and more creative ways of shooting
Works around the corner and through walls
Saves battery life
4XR 11000lm CRI86
The popular Video 4X is now available as a remote controllable Video 4XR 11000lm CRI86. Even more powerful, containing superb 11000lm with an enhanced color rendering index of CRI 86. This is the perfect light for small and handy rigs.
Ready for wireless Remote Control
The Video 4XR light is ready for our wireless Remote Control, either the RC1 or RC2.
USB-C charge adapter
With the 4XR light we include a very travel friendly, small and lightweight USB-C charge adapater which allows to charge the Li-Ion battery from an USB-C charger with min. 30Watt output. Attention: The light is supplied with the USB-C adapter only but not with the USB-C charger.
LED technology with outstanding efficiency
The Video 4XR 11000 lm CRI 86 is equiped with an LED of the latest generation with a color temperature of 5600 Kelvin. The spectral power distibution is very even, resulting a color rendering index of 86 CRI (Ra). A unique feature is the variable power with 9 settings with a brightness range of 1:50.
Soft 110° beam
The light has a very soft and speckle free beam of 110° in water (120° in air).
Self-contained
The self contained design makes this light very easy to use. There is no need for special mountings for the battery canister. The included bracket with ball mount allows easy mounting on standard arm systems.
Small and lightweight
The design is optimized for very small dimensions and light weight. The complete set ads only 0.63kg (0.20kg in water) to your gear.
Tough Design
The LED can not break and has almost unlimited lifetime. The integrated overtemperature protection allows safe use of the light in air. The protection circuit controls the housing temperature and the power will be limited to keep the temperature within a safe range.
Travel Safe Li-Ion Battery
The battery passed successfully the mandatory UN38.3 safety test as required by IATA and it is therefore certified for air transport. The capacity of this battery is below the maximum allowed capacity of 100Wh. It contains an integrated protection circuit against harmful conditions like over discharge, deep discharge, over current and short circuit.
Charge Display
The green charge level indicator displays the available relative charge. The two digit display shows the remaining time. While the battery is discharging, the display shows the remaining runtime in minutes (e.g.”18” = 18 minutes). When connected to the charger, the display shows the remaining charge time in units of 10 minutes (e.g.”18” = 180 minutes).
8XR 17000lm CRI96
We have added a high CRI version to our 8XR series lights. With its outstanding color rendering index of CRI 96, the Video 8XR 17000 Lumen is the perfect light for shooting macro. Of course it is ready for the RC1 and RC2 Remote Control.
Ready for wireless Remote Control
The Video 8XR light is ready for our wireless Remote Control RC1 + RC2.
LED technology with outstanding efficiency
The Video 8XR 17000 lm CRI 96 is equipped with a LED of the latest generation with a color temperature of 5600 Kelvin. The spectral power distribution is very even, resulting in a color rendering index of 96 CRI (Ra). A unique feature is the variable power with 9 settings with a brightness range of 1:80.
Soft 110° beam
The light has a very soft and speckle free beam of 110° in water (120° in air).
Self-contained
The self contained design makes this light very easy to use. There is no need for special mountings for the battery canister. The included bracket with ball mount allows easy mounting on standard arm systems.
Small and lightweight
The design is optimized for very small dimensions and light weight. The complete set ads only 0.87kg (0.30kg in water) to your gear.
Tough Design
The LED can not break and has almost unlimited lifetime. The integrated overtemperature protection allows safe use of the light in air. The protection circuit controls the housing temperature and the power will be limited to keep the temperature within a safe range.
Travel Safe Li-Ion Battery
The battery passed successfully the mandatory UN38.3 safety test as required by IATA and it is therefore certified for air transport. The capacity of this battery is below the maximum allowed capacity of 100Wh. It contains an integrated protection circuit against harmful conditions like over discharge, deep discharge, over current and short circuit.
Charge Display
The green charge level indicator displays the available relative charge. The two digit display shows the remaining time. While the battery is discharging, the display shows the remaining runtime in minutes (e.g.”18” = 18 minutes). When connected to the charger, the display shows the remaining charge time in units of 10 minutes (e.g.”18” = 180 minutes).
Bundles with RC2
With the 4XR and 8XR series, we are offering bundles including two lights and a RC2 remote control. KELDAN does not promote this bundles on the KELDAN website but they can be ordered from a KELDAN dealer.
USB-C Charger 16.8V/1A
Does it sometimes annoy you when you need to pack a whole lot of chargers on a trip? Certainly no more with this one. The travel friendly USB-C Charge adapter is just what you need to travel. It connects to an USB-C charger with 30W or higher. With a weight of only 63 grams, it provides an output of 16.8V/1A and can charge all batteries of the 4 and 8 series.
Travel friendly, super small and lightweight USB-C charge adapter
Can be connected to a USB-C charger with minimum 30Watt output. It provides an output of 16.8V/1A. This charger is suitable for the following Li-Ion batteries:
Battery4 Li-Ion 49Wh (Art. 1212) used with the Video 4X/4XR series lights, Charge time approx. 4 hours
Battery8 Li-Ion 99Wh (Art. 1211) used with the Video 8X/XR series lights, Charge time approx. 8 hours
Throughout the years, landscapes have vastly presented themselves as splendid opportunities to be missed by me; yet, I indulge my eyes with a dollop of landscape imagery once in a while. For this week’s visual treat, Diane took the long-shot and asked for emotion in landscape!
And as you’ll notice right away while scrolling down, landscapes aren’t fixed to wide-angle crispy clean images. Using fixed telephoto lenses from 50mm and beyond triggers the photographic imagination into looking for unexpected angles and frames. Consider such tight compositions in the wild as ready-made abstract images to be grabbed as you roam.
Now, for the other way around; wide-angle views require extreme levels of control. From sturdy support —achieved via tripod, monopod or others to scouting, generous compositions demand meticulous planning before they occur. Do mind that if you feel inspired and who knows, even triggered to share some of your takes on emotion in landscapes with us.
Before diving in, remember this is part of a series on storytelling in a single frame; but is also part of an even larger effort to make this world a more literate place in terms of visual data and language.
Photo of the Week
This beautiful shot was posted on the emotion in landscape challenge. True, it qualifies better as a street image rather than something related with landscape, but there’s a huge difference between “emotion in landscape” and “emotional landscapes”. Because one can find emotion within a given context, this visual piece works both-ways.
Congrats Patrick, thanks for sharing such a high quality photograph with us!
copyright – Patrick
Belfast city hall Lawns
Black and white are the colors of photography. To me, they symbolize the alternatives of hope and despair to which mankind is forever subjected – Robert Frank
Weekly Photography Challenge Digest
Thanks again to Diane and Dahlia for pushing our creative boundaries one step forward every week!
copyright – Wendy P
BLIZZARD
copyright – Robert Apple
Lost in the windswept sand dunes!
copyright – Wendy Pcopyright – Wendy P
Sadness
copyright – davidc
The road less traveled
copyright – Deidra White
Abandoned
copyright – Deidra White
Sunset at Saguaro National Park, Tucson, Arizona.
copyright – Michaelcopyright – Robert Applecopyright – Frogdaily
For contributing, check out the original challenge post!
A Highlight on the Latest Activity at our Community
Patrick went full minimal and captured one of the most innovative takes on street photography I’ve seen in a while!
copyright – Patrick
Stripped Back To The Essentials
And speaking of you mate, don’t forget checking out the mono edits started by the master himself:
copyright – Patrickcopyright – Patrick
Steve enjoys the quiet moments before the action, and took these right-on-spot storytelling frames!
And last but definitely not least, have you met David Clare? Swing by and say hi, thanks Dahlia for retaking this series focused on our talented community!
Don’t forget to check the photo contest winners for the Essence of Movement which will be published soon; and remember, this month’s photo contest is now open for entries. The theme revolves on “Storytelling in a Single Frame“. Submit your photos for a chance to win $250 and please don’t forget voting as well. Last but not least, keep an eye out for the Members Picks — the instructions are pretty straightforward:
Members reference what you might consider a five star photo. Give a call out to the photographer and share their photo even if it lies in the Shark Tank and feel free to give a Critique on why it trips your Trigger. Be sure to mention the photographer and the Thread you saw it in.
And if you want to make out the most of your Light Stalking user account, make sure to check the latest posts. Also, don’t forget to swim the Mobile Monday Challenge! Last but not least, Check out the current reading throwdown, it has some nice insights and recommendations!
We’d Love To Hear Your Thoughts
Our Feedback Forum is a fine place for all those people wanting to grow fast as photographers. Here, you’ll get your work reviewed by well-intended photographers, but you’ll also have the chance of commenting on the work of others. We believe in the power of feedback, and here are the latest shots shared in the pool:
The Shark Tank is a great place to learn and to discuss, but please read the instructions in order to get a better experience. Share your comments, opinions and doubts on any or all of the images above. We also will be delighted to see some of your own images. Remember all comments are given to the photographs; not the photographers. Also, don’t forget to participate in our upcoming challenge!
Photographer, Filmmaker, and Conservationist: Florian Schulz
Heidi: We are a culture distracted by screen and cell service – is your photography and film work partially an act of resistance? Floiran: As a photographer and filmmaker, I often find myself at the intersection of creativity and technology. While social media platforms like Facebook and Instagram are undeniably powerful tools for sharing work and connecting with others, I have a complex relationship with them. On one hand, they provide valuable insights into the work of colleagues and friends, as well as access to news and thought-provoking statements. However, I also see them as significant sources of misinformation, where quantity often trumps quality, and the loudest voices can overshadow meaningful content.
In my personal life, my wife and I have made a conscious decision to limit screen time for our children. Our 9- and 13-year-olds do not have cell phones, and screens are not used for entertainment. (We do watch nature documentaries on the TV) This choice has allowed them to develop remarkable creativity and a keen awareness of the world around them. They observe how excessive screen time affects their peers, and it’s heartening to see them thrive without the constant distraction of digital media.
In this sense, my photography and filmmaking can be seen as acts of resistance against the prevailing culture of distraction. By focusing on creating meaningful, high-quality content that encourages reflection and engagement, I aim to counterbalance the fast-paced, often superficial nature of social media. My work is about capturing moments that inspire, provoke thought, and foster connection on a deeper level.
Moreover, the process of creating art without the constant influence of social media allows me to tap into my own creative potential more authentically. It enables me to explore themes and ideas that might not fit into the algorithm-driven narratives that dominate online platforms. This approach not only enriches my work but also contributes to a broader cultural dialogue that values substance over spectacle.
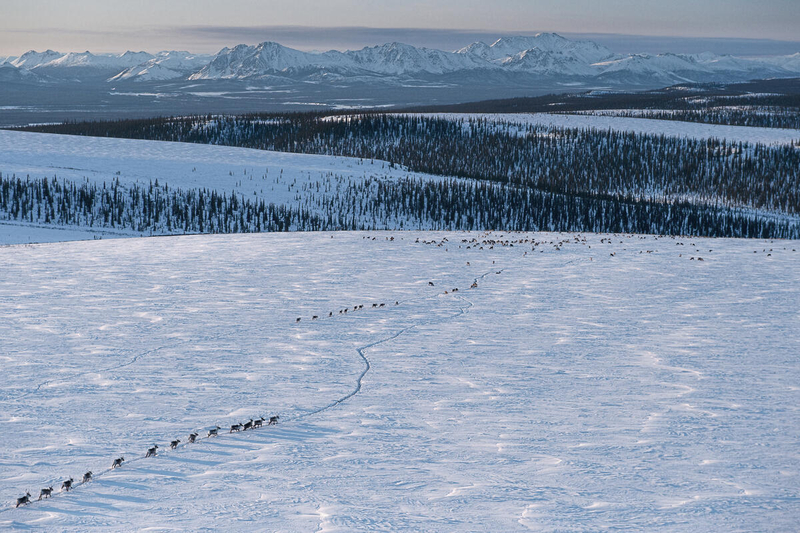
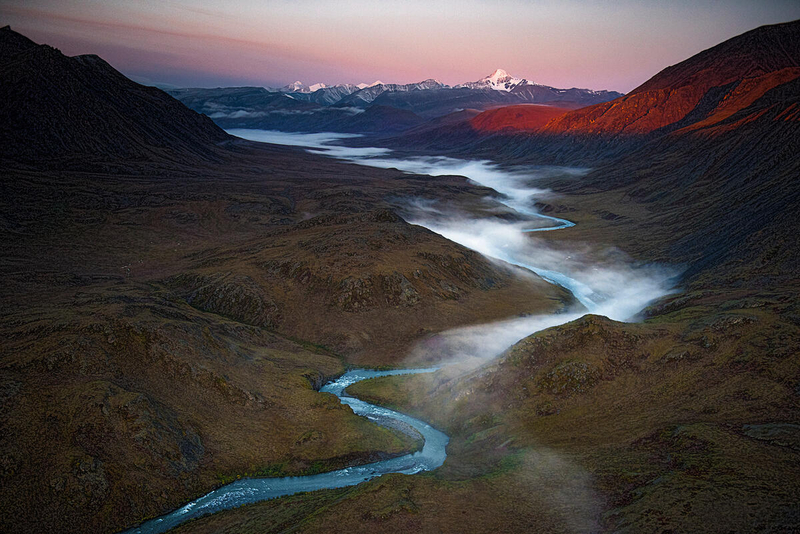
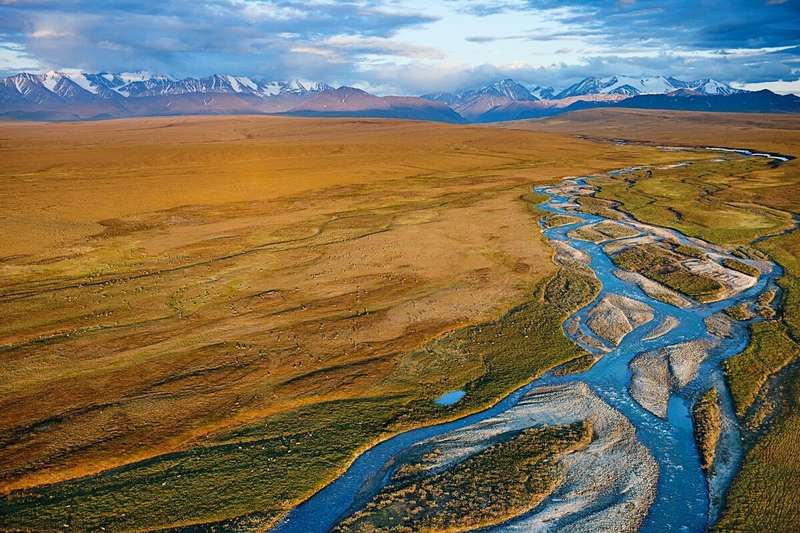
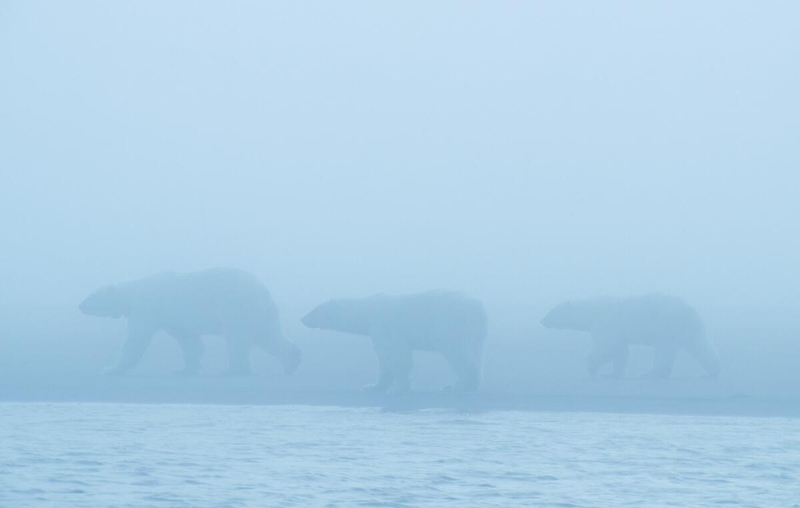
Ultimately, my goal is to inspire others to step back from the screens and engage with the world around them. By doing so, I hope to contribute to a shift in how we consume and interact with media, one that prioritizes depth, creativity, and genuine connection. Nature is wild and she works on her terms – how has this lack of control informed your creative work and life? Yes, nature is wild and unpredictable. That is exactly what I love about my work! This career that I have chosen is not such much of a simple job, work, a career, – it is rather the inevitable path I had to walk because of my passion for wild places, the adventure that comes with it and the desire to be in the presence of wild creatures. To do my work well, I need to be out in the wild for extended periods of times. This has always been my goal and accordingly I have chosen projects that allowed me to do this. What is beautiful about it is that one has to let go of control and especially when documenting wildlife I have to give in to a more organic approach. Sometimes when I am waiting for hours for an animal to appear or a certain behavior to show this work has a meditative element. I have to be here and now in the present. The sounds, sights, smells – the wind and weather conditions. All of it is important to take in or to capture in a series of photographs to document an ecosystem with its wildlife. I love the idea that moments and images have to “come to you”. The animals have to present themselves, that is when the good images get taken. After doing this for so many decades I also realize that it is not just the final image that counts for me – but the entire experience. As all of this takes a lot of time, we are just now at a particular crossroads. Even though I have always tried to have my family be a part of the adventure it was only possible at certain times. We are now embarking onto a new path where we are going to be exploring the wild as an entire family. We will start with some of the most exciting wild places across Alaska. From the fjords and forests of South East Alaska to the Arctic Tundra of the North or the bears coast along the Alaska peninsula.
Does all your work come with a call to action? If a photographer wanted to get started supporting a cause, what’s the best way to start? You are right that a lot of my work over the past decades has been mission driven and often included a call to action. The hope to help with the conservation of ecosystems comes across in the stories I tell through my images. As a conservation photographer, my goal is to inspire viewers to care about the natural world and its wildlife. Whether it’s documenting the majesty of wild places or highlighting the challenges faced by endangered species, my work aims to raise awareness and encourage action.
For photographers looking to support a cause, I would recommend starting by identifying what truly resonates with them. It might be a specific species, ecosystem, or environmental issue. Once you’ve found your passion, immerse yourself in learning about the topic. Collaborate with experts, such as scientists or conservationists, to gain a deeper understanding of the challenges and potential solutions.
Networking is also crucial. Join organizations like the International League of Conservation Photographers (ILCP), which I co-founded, to connect with like-minded photographers and learn from their experiences. Engage with conservation groups and consider partnering with them to amplify your message.
Lastly, use your platform to share your story. Whether through social media, exhibitions, or publications, make sure your work reaches the right audience. Remember, the power of photography lies not just in capturing stunning images but in inspiring change and motivating others to take action.
In my own journey, projects like “Freedom to Roam” or the effort to help with the permanent protection of the Arctic Refuge have shown me the impact that visual storytelling can have on conservation efforts. By sharing compelling narratives and images, photographers can play a vital role in shaping public awareness and influencing policy decisions.
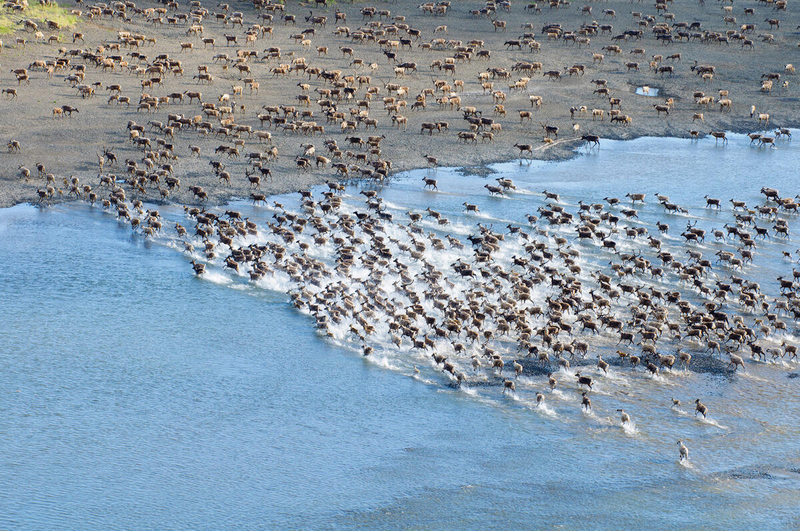
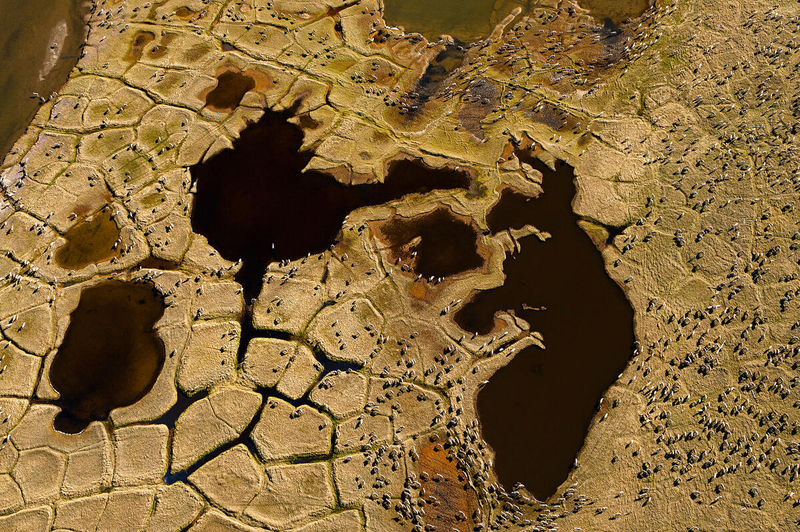
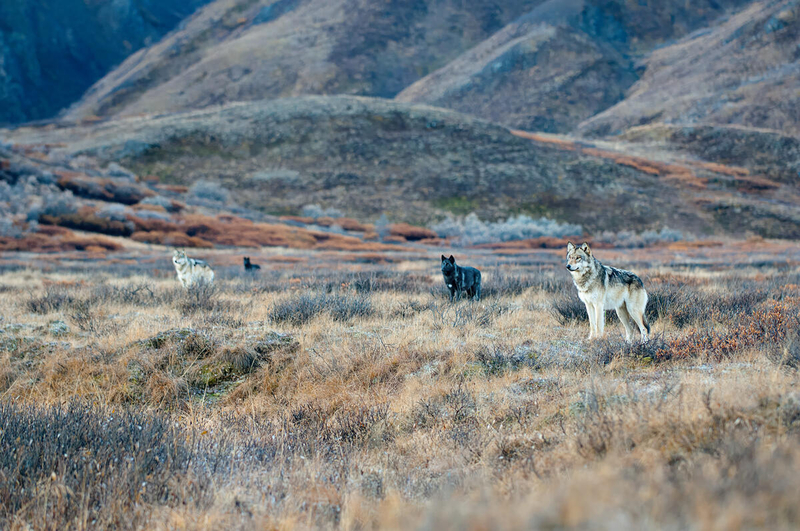
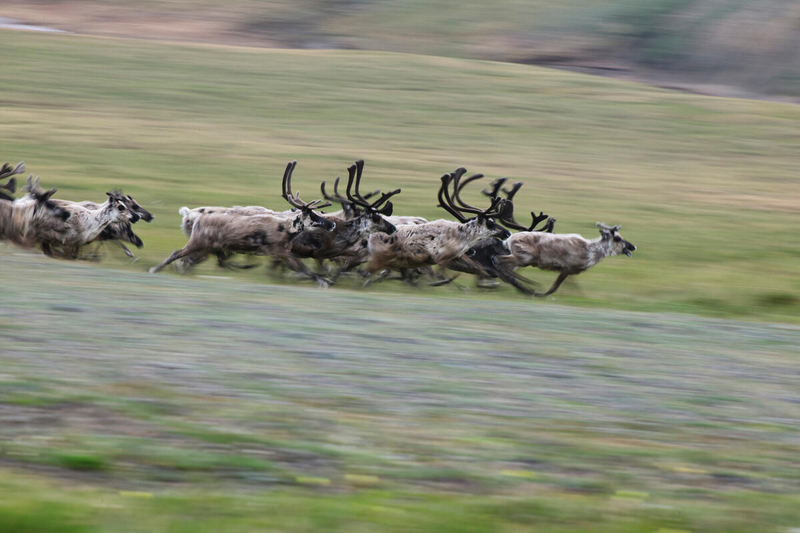
What cues do you recall when your first realized your photography/filmmaking gave agency to the biodiversity and landscape, presenting the Arctic as worth protecting rather than just a barren energy resource? I believe a big reason why conservation was such a big topic for myself from early on was me growing up in Germany. In Germany and across most European countries we had lost large interconnected wild ecosystems. While we have a 1000 year old castle around the corner from where I grow up, we had lost wild places. This feeling of loss, made me cherish the big wild places across North America. Whether it was the Greater Yellowstone Ecosystem where we would still find bears, bison, elk and wolves, or the wild coastlines or the Arctic where the ancient caribou herds would still roam. There was never a time where I could look at these great arctic landscapes as “barren wastelands”. The fight for the Arctic Refuge has been going on for many decades and I have been involved with the Refuge for the last 25 years. It has always been a collaborative effort to fight for the Arctic Refuge alongside the Gwich’in People and many conservation organizations. My images and film work have been a central part in a lot of these efforts and campaigns. From big live speaking tours, many magazine articles to massive signature campaigns, like during the #ProtectTheArctic campaign that inspire millions to take action. This campaign resulted in an unprecedented 6 million comments submitted to the U.S. Fish and Wildlife Service, effectively stopping seismic testing in the Arctic Refuge. Unfortunately, the battle the Arctic Refuge and other wild places is long lasting tug of war.
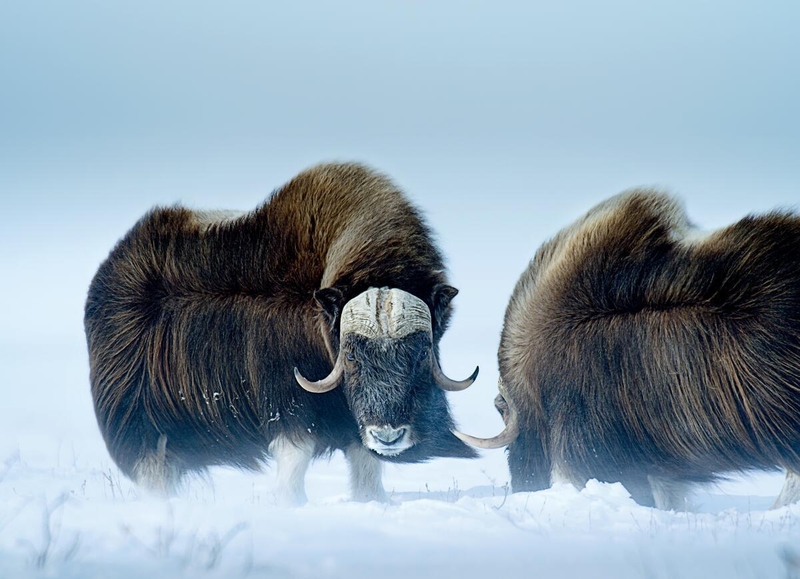
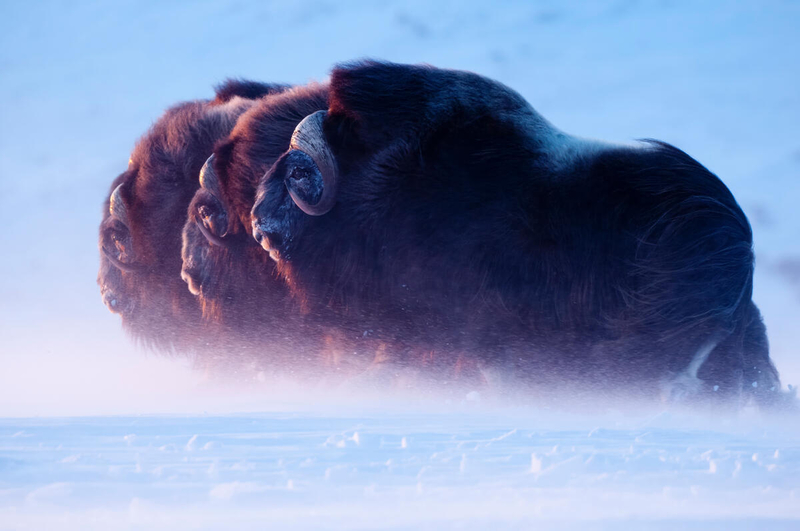
What can you share about this image from your coffee table book, To The Arctic? I near a group of muskox bulls and find myself wishing for a musk ox’s coat to protect me from the weather. Their long guard hair hangs from their bodies like beautiful overcoats. Underneath, their wool is eight times warmer than the highest-quality sheep wool. I feel the gripping cold, especially on my face, where the snow crystals lash my skin like grains of sand. But I am excited about this turn in the weather. It allows me to create photographs that show a true Arctic scene, with conditions these musk oxen have to withstand many times in the course of the year. The wind becomes so intense that the animals almost disappear behind a curtain of blowing snow, their long hair rippling around them like soft cloth. I try to get close enough to capture their image before the sun dips behind the ridgeline. Dropping to my knees, I frame the scene as the last rays cast pink light on the musk oxen’s fur. Then something magical happens. Three bulls take off from the group, heading directly toward the setting sun. For an instant they are in perfect formation. The blowing snow is so thick that it makes the three bulls seem to float magically above the ground. A photograph of a lifetime-and worth everything I had to endure to get it.
Patagonia celebrated your conservation work for ANWR in their Fall catalogs (2016 and 2024) both being election years, what feels different this second time around about impacts we can make as individuals and collectives? I’m honored to have been a part of Patagonia’s conservation efforts, including their campaigns highlighting the importance of protecting the Arctic National Wildlife Refuge (ANWR). The recent “Alaska Needs You” campaign underscores the urgency of our collective action. What is different today after the recent election: “ Alaska Needs You More Than Ever! “ However, it is not just about Alaska; many wild places are under threat due to a wholesale mentality of exploiting public lands and resources, which will ultimately rob future generations of their natural heritage.
The current landscape is complicated by attacks on democratic values, the environment, public lands, and marginalized communities. Misinformation is a significant obstacle, as it often misleads people into believing that exploiting public lands will benefit underprivileged Americans, when in reality, it primarily enriches corporations and billionaires.
However, I remain hopeful. There is a growing recognition of the need for collective action. By coming together as a community, we can fight against these challenges and protect our planet’s biodiversity. The power of collaboration, as seen in campaigns like “Alaska Needs You,” demonstrates that when individuals and organizations unite, we can inspire meaningful change and safeguard the future of our wild places.
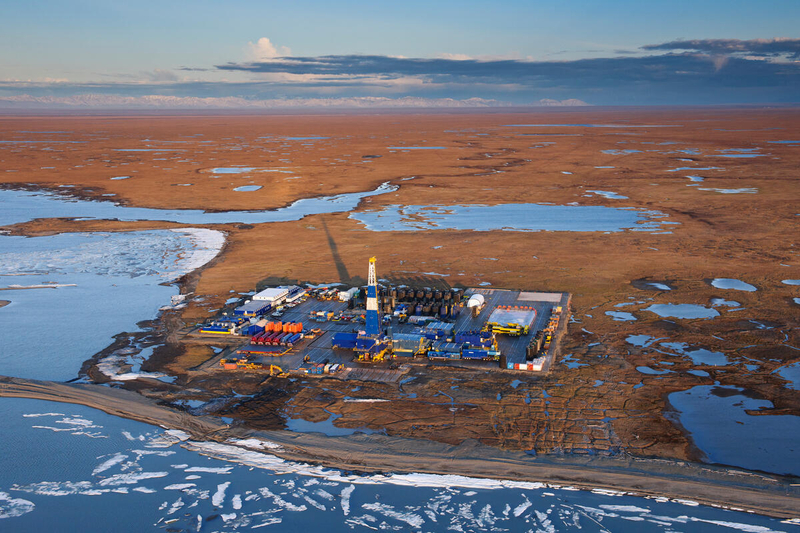
One of the oil drill pads at the edge of the Arctic Refuge just west of the Canning River delta. Oil companies have pushed for opening the Arctic Refuge to the east of the Canning River for oil development. Canning River Delta, Alaskan Arctic
You’ve called Alaska home for the past 15 years, a place where mining, drilling, and extraction remain real threats to land, biodiversity, how are you thinking about your work these days? Every day we are chipping away at the last open spaces and wild lands. The current administration is doing this at a massively accelerated pace. Unfortunately, it is the same old story that is repeating itself. The main difference is, that we have less and less wilderness around us and the speed of exploitation is ever faster. What I am planning to continue to do is fight the same old fight but with different stories and from different perspectives. I personally have to pace myself and also consider my children. If I will always bring up all the critical things I see it is hard for them to be joyful. All this consciousness weighs hard on myself and that gets passed on to them. I want to let my children go and see the beauty of this planet with their curious joyful eyes. So in the coming years, that might be part of the way I will tell stories for us to protect earth for future generations. What are you working on now? I am currently putting on the finishing touches on a presentation I will give at the Patagonia Soho Store in New York City on March 19th. At the same time we are in the middle of planning multiple expeditions across Alaska. This spring we are hoping to document bears coming out of their winter dens. We will also be working in areas across the vast coastal areas of Southeast Alaska and later in the summer across Arctic Alaska. My family will be part of many of the expeditions.
Welcome to the Light Stalking weekly community wrap-up!
Intuitively, one stumbles into the realm of visual language when thinking in photographic terms. However, the catch gets clearer when we attempt to justify our craft by elaborating on how images are capable of telling stories just like written text or verbose talking does. And that’s the thing we need to attend in order to fulfil our bound for narrating something through the means of a photograph.
Nowadays, photographs offer raw data and work as truthful statements of how prone to visual language we humans are. As a species, we are capable of digesting three types of visual entities. In a nutshell, these are signs that can be split into icons, indications and symbols.
Icons are signs that resemble an object, indications are signs that are causally related to their object and symbols are signs that have no inherent connection with their represented object. For example, this 🔥 emoji resembles fire; and smoke in the distance might indicate to us a fire somewhere far away. Curiously enough, the aforementioned word “FIRE”, is a symbol some of us English speakers understand as the physical phenomenon linked to combustion.
Now, photographs are hard to pinpoint just to one of these three, and are better understood as containers of signs which might work as icons, indications, or symbols. The trick here is to think beyond the myth that Western civilisation understands better images by reading them from left-to-right and the other-way around for those who grew up in the eastern hemisphere.
As the bearer of signs, photographs are, it feels cautious to distrust that unfounded tale about how we humans interpret such complex information. Photographs simply can’t work that way and therefore follow a distinct reading logic. However, such uncooked information needs some processing and that’s when the story comes into play; one needs to be certain about the message being shared with the world when posting something online.
The old saying about how an image is worth more than a thousand words, brings light amidst this ai-generated realm we are being pushed into. Thanks to Peirce and Barthes —who’s readings have enlightened my understanding on how photographs are capable of telling stories— I advocate for investing in visual literacy at all age levels.
Covered that, we can follow how our theme on single-frame storytelling developed for this past week!
For it, Diane turned the gears up and asked for visual narratives in a single frame. So expect some clear examples of symbolism and layered elements arranged to create a narrative. And remember, “symbolism refers to using visual cues to express a concept”.
Photo of the Week
Regularly, we expect storytelling in photography presenting itself right this way; in the shape of a single frame capable of pulling the scrolling-brakes — making us wonder. For this case in particular, Pat‘s shot is an invitation into the process of how music is made.
Achieving so much with a single image, is what makes photography stand-out from the crowd when it comes to the various means of communication we’ve developed through the years. It’s amazing how a single frame can open new possibilities and unveil new stories to be told.
Don’t forget to check the photo contest winners for the Essence of Movement; and remember, this month’s photo contest is now open for entries. The theme revolves on “Storytelling in a Single Frame“. Submit your photos for a chance to win $250 and please don’t forget voting as well. Last but not least, keep an eye out for the Members Picks — the instructions are pretty straightforward:
Members reference what you might consider a five star photo. Give a call out to the photographer and share their photo even if it lies in the Shark Tank and feel free to give a Critique on why it trips your Trigger. Be sure to mention the photographer and the Thread you saw it in.
And if you want to make out the most of your LightStalking user account, make sure to check the latest posts. Also, don’t forget to swim the Mobile Monday Challenge! Last but not least, Check out the current reading throwdown, it has some nice insights and recommendations!
We’d Love To Hear Your Thoughts
Our Feedback Forum is a fine place for all those people wanting to grow fast as photographers. Here, you’ll get your work reviewed by well-intended photographers, but you’ll also have the chance of commenting on the work of others. We believe in the power of feedback, and here are the latest shots shared in the pool:
The Shark Tank is a great place to learn and to discuss, but please read the instructions in order to get a better experience. Share your comments, opinions and doubts on any or all of the images above. We also will be delighted to see some of your own images. Remember all comments are given to the photographs; not the photographers. Also, don’t forget to participate in our upcoming challenge!
Concept: Portraiture and Still Life Images for Cosmetics Brand Licensing: Unlimited use of all images captured for one year Photographer: Beauty and Still Life specialist Client: Cosmetics brand
Summary
I recently worked with a photographer to help them develop an estimate for a campaign promoting a cosmetic brand’s new product. The brand wanted still life images as well as images of the product in use by professional talent in a studio setting. The creative brief called for a mix of minimal setups against a white background, along with a few scenarios that involved prop styling and set design.
Fees
The client initially presented a shot list that included eight main shots. One of the shots was identified as a key visual while the others were considered supplemental. Although they requested unlimited use of all images, they were willing to limit the duration to one year.
I felt the key visual was worth $5,000, images 2-3 were worth $2,500 each, and the others worth $1,000, totaling $15,000. I had wanted to include an additional few thousand dollars as a creative fee. We understood, however, that we might be pushing the limits on the fee as it was. Ultimately, my goal was to keep the bottom line in check and stay under $50k total.
The agency, surprisingly, asked us to include a licensing option specifically for 110% of the one-year rate to include a pre-negotiated rate for a second year. In most cases, when pre-negotiating a duration extension, I’m accustomed to a request for a reduced rate compared to the original fee. I clarified this request on a call with the agency art producer. Sure enough, they explained that they’d be willing to pay 110% for an additional year, so I included that cost for the licensing and for the talent.
In addition, the client requested we present a firm bid, rather than an estimate. I noted this at the top of the document. In this scenario, the photographer keeps any unused funds if the cost of the production is less than anticipated. This also means, however, that they would need to cover any overages if expenses were higher than anticipated. Overall, we were very confident in these fees/expenses based on the working relationships with the specific crew members, styling team, casting director, talent agents, and locations we anticipated working with.
Crew
Although the production was rather straightforward, we included a strong team to help quickly execute the vision. To that end, we added a producer, first assistant, second assistant, digital tech, and production assistant, all at rates appropriate for the specific market.
Styling
The creative brief definitively called for a prop stylist to create a few background elements and manage the products. The photographer already had a local stylist they wanted to work with. We included rates we received from them, which included their prep, shoot and wrap time. There was a need for very minor wardrobe styling, and this prop stylist was able to take on both roles. Separately, we detailed the anticipated prop and wardrobe costs, along with their kit fees and miscellaneous expenses potentially incurred in the process of acquiring all of the necessary items. We included a hair/makeup stylist and, as there were a few shots that involved close-ups of the talent’s hands holding the products, we also included a manicurist.
Casting and Talent
I included a rate received from a casting agent to help us find one subject based on the talent specs provided by the agency. The agency planned to pay the talent directly, but I discussed an appropriate talent fee with the agency producer. I noted this in the line item without having that line item impact our bottom line since the billings would go through the agency.
Locations
We included $2,500, which would allow us to afford a generously sized studio in this particular market.
Equipment
We included appropriate rates for the rentals the photographer would need in order to execute the creative vision. In addition, we also included fees for the digitech’s workstation as well as production supplies to make everyone comfortable on set.
Meals
I based this on $80 per person for 19 people, which included breakfast and lunch.
Misc.
I added $500 to cover any unforeseen expenses. We also noted a fee for insurance, which the agency specifically asked that we include. I often calculate insurance fees based on 1-2% of the bottom line.
Post-production
We just included a fee for the photographer to perform an initial edit of the photos and help make selects because the agency would handle retouching. As a separate fee, we included a line for hard drives, delivery, and archiving.
Results
The photographer won the project. Shortly after, however, the shoot was postponed, and then quickly brought back to life with an increased scope that included two talent. This increased the shot list in addition to production expenses. As a result, we increased the creative/licensing fees by 50%, added a producer pre-production day to handle the changes, increased wardrobe, added another manicurist, added a hair/makeup stylist assistant, and increased casting and talent. We also were asked to include some extra equipment to help facilitate remote viewing by a few clients who would be unable to attend the shoot in person. Here is the final estimate, which was approved:
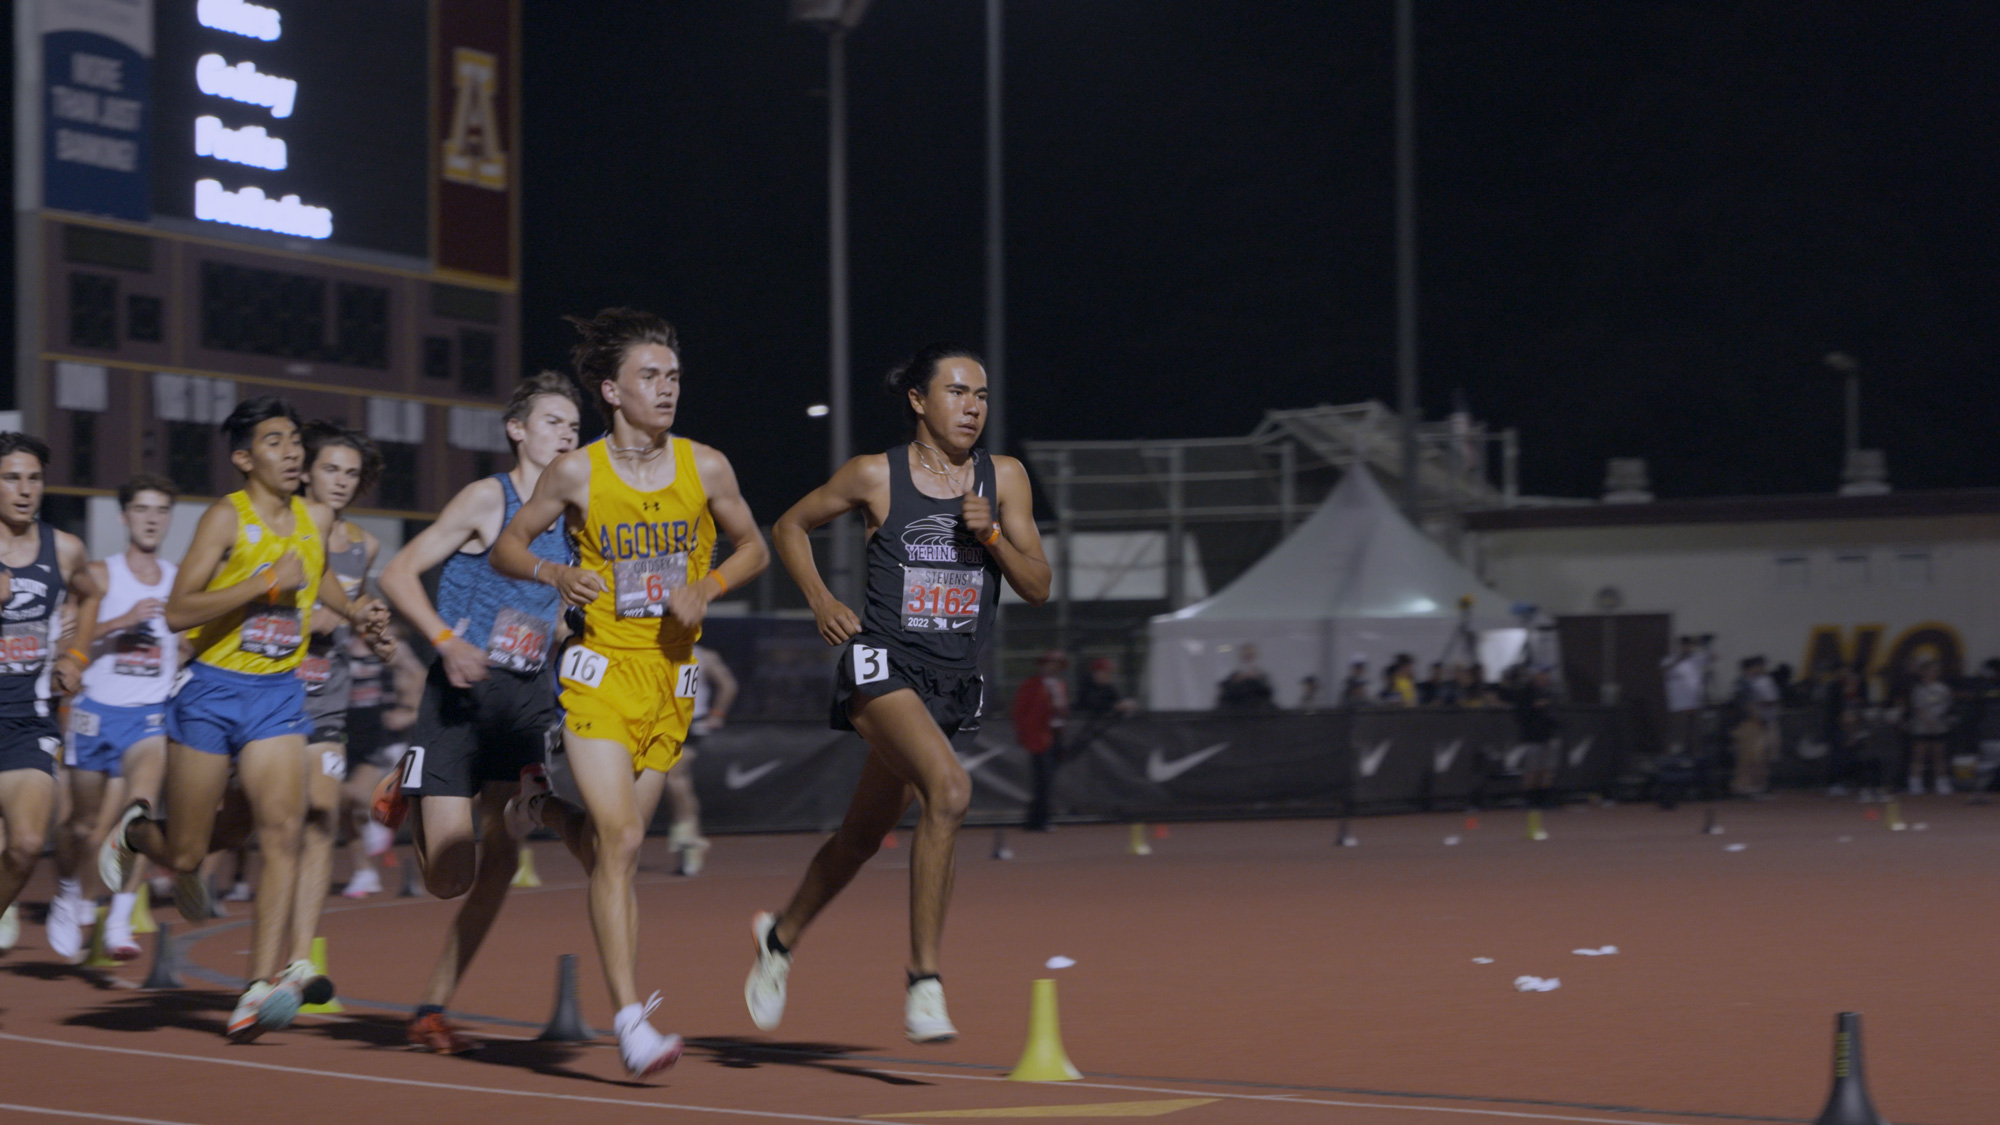
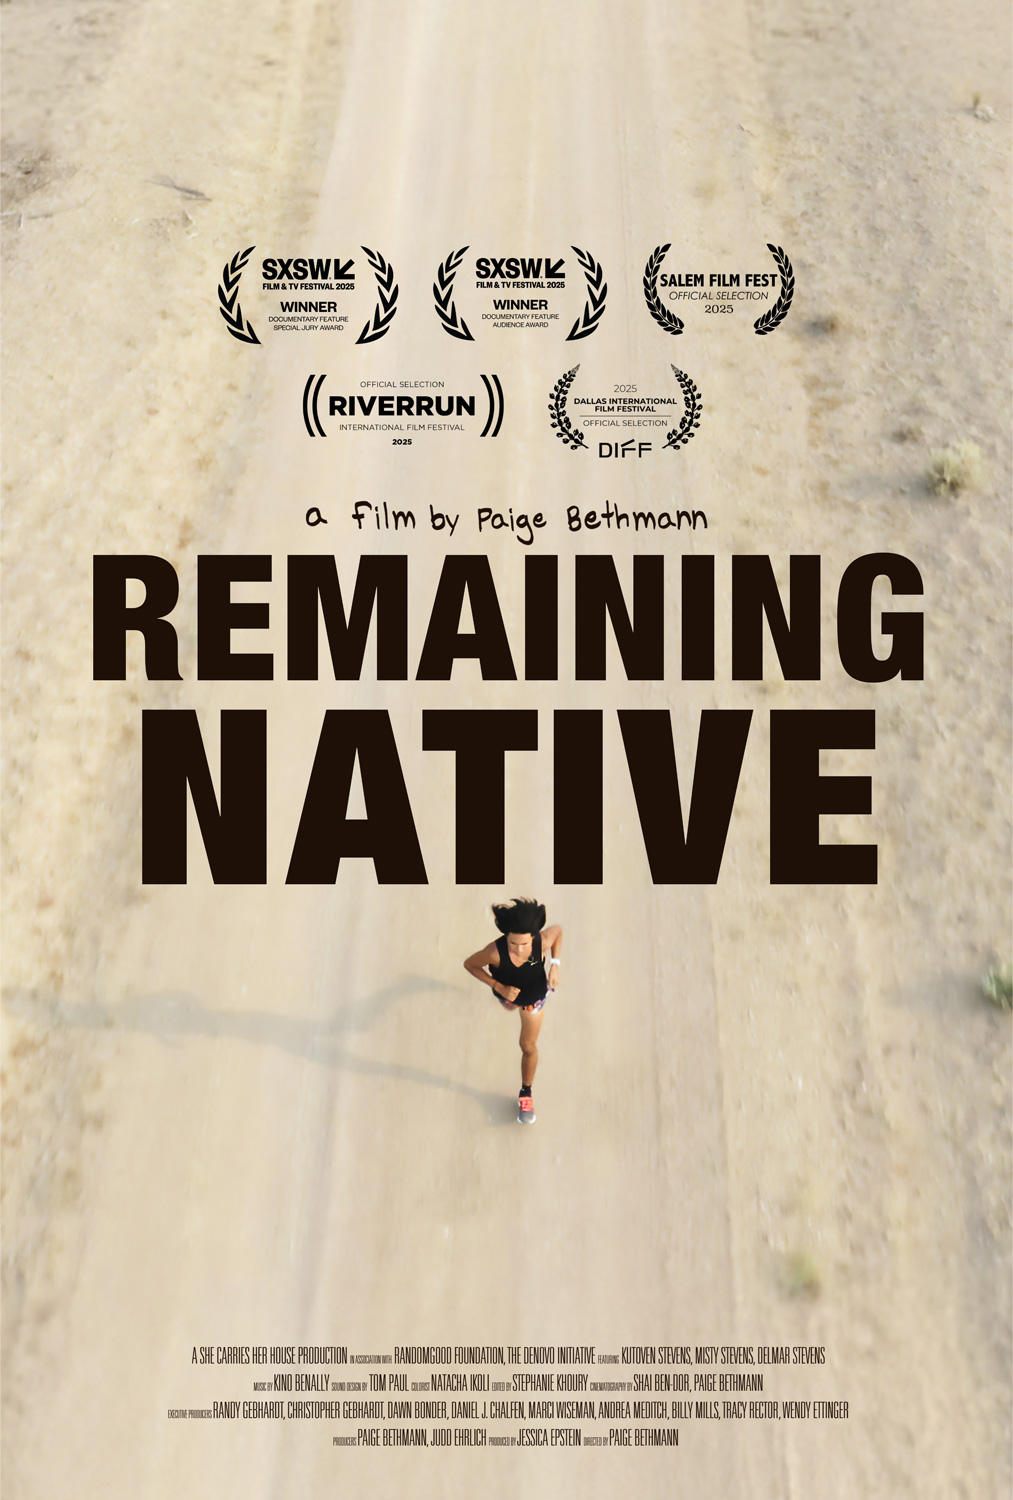
Remaining Native is a feature-length documentary which just had its world premiere at SXSW Film & TV Festival, where it was recognized with both the Special Jury Award and Audience Award for a documentary feature. Sigma is a sponsor of the film, which was shot exclusively on Sigma lenses, including Cine Primes, as well as Art, Sports and Contemporary lenses. We conducted the following interview via videoconference after its debut. The following interview has been edited for brevity, clarity and flow, and has been approved for release by all involved parties.
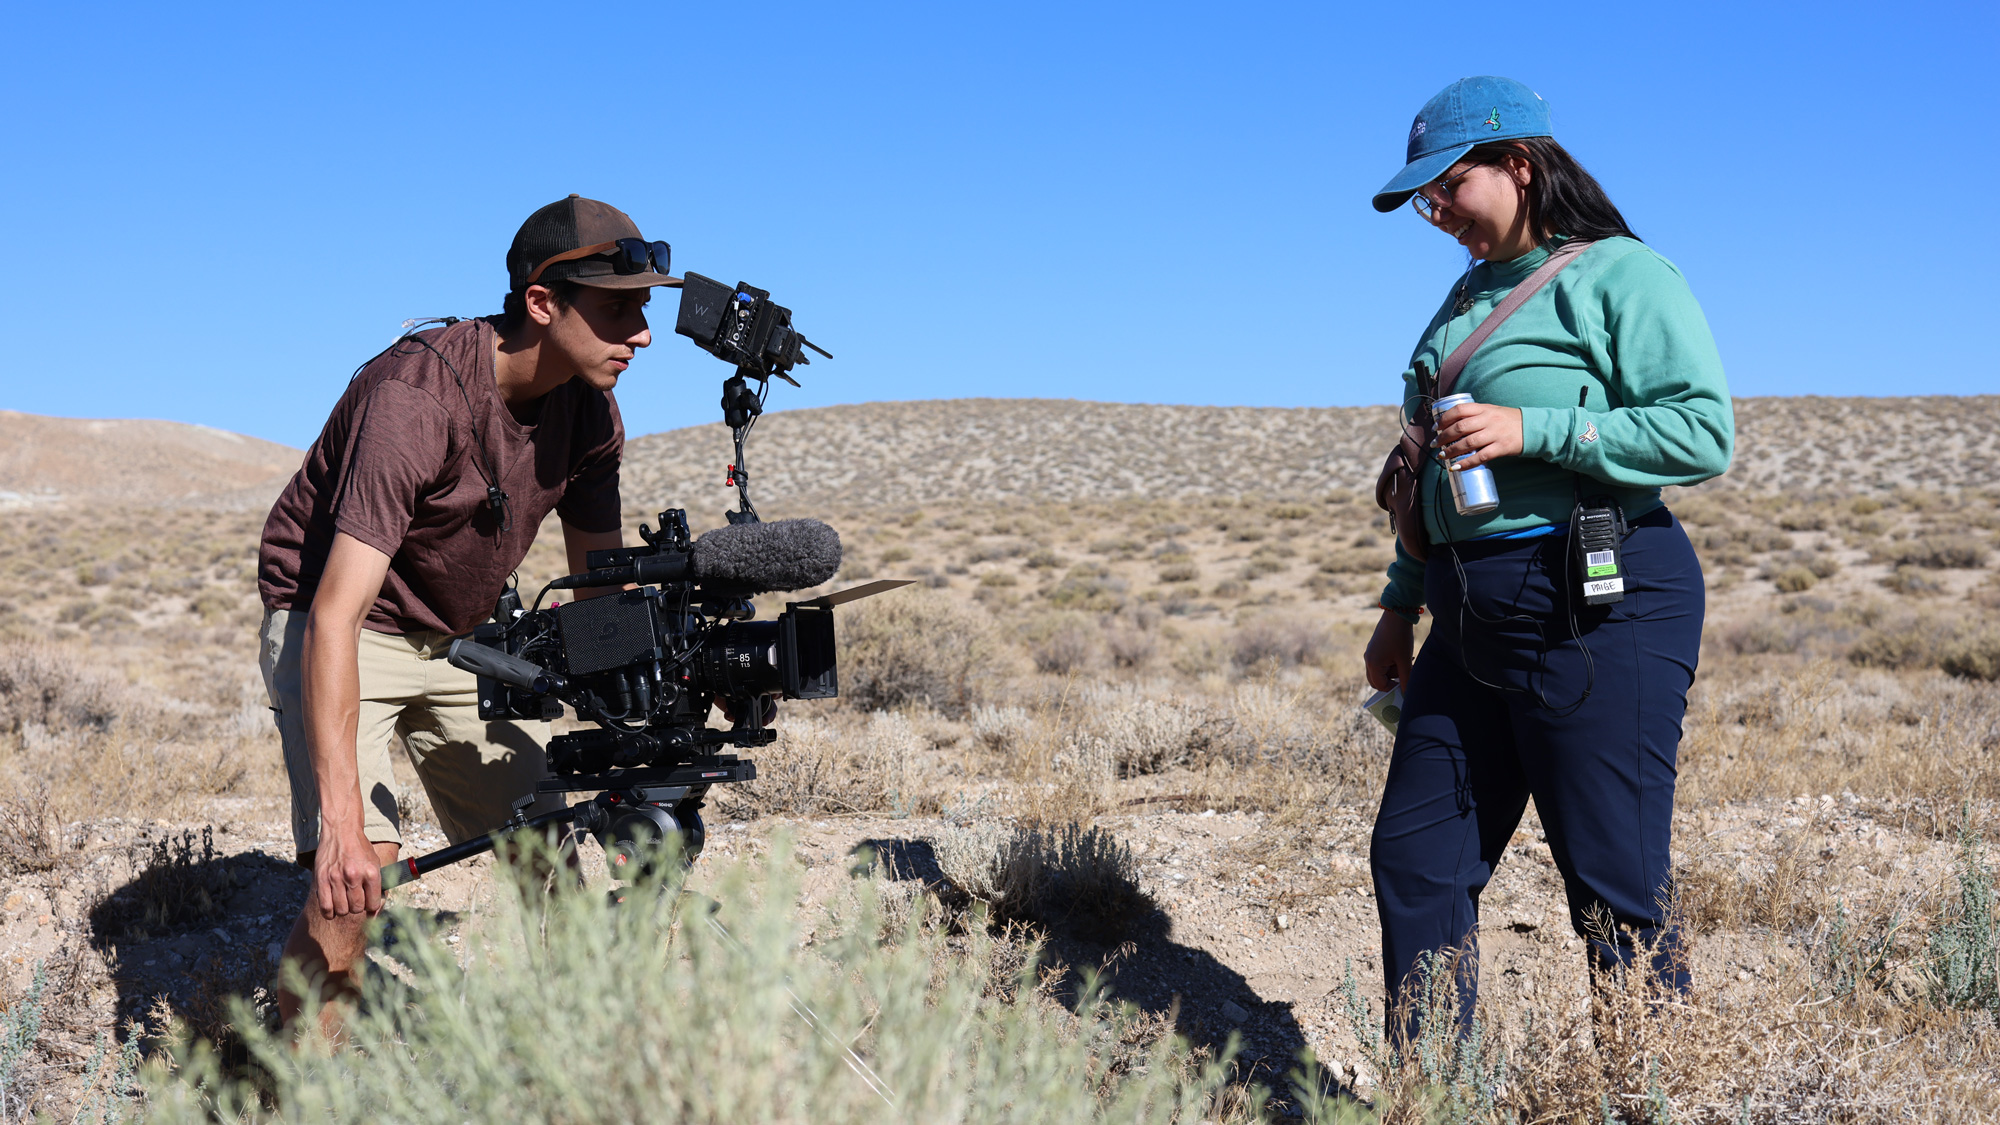
Introducing Paige Bethmann and her filmmaking journey
Paige Bethmann is a Haudenosaunee woman and first-time feature filmmaker. Originally from upstate New York, she relocated to Reno, Nevada to make Remaining Native where she currently resides. Paige has worked in non-fiction television for various digital and broadcast networks such as ESPN, PBS, Vox Media, YouTube Originals, USA, and NBC for over 10 years. Paige was recently named one of DOC NYC’s 40 under 40 Documentary filmmakers to watch and has been supported and recognized by the Sundance Edit & Story Lab (2023), The New America Fellowship (2024), and The DocLands DocPitch (2023) – just to name a few. She is a graduate of Ithaca College, with a bachelor’s degree in Film, Television, and Radio from the Park School of Communications.
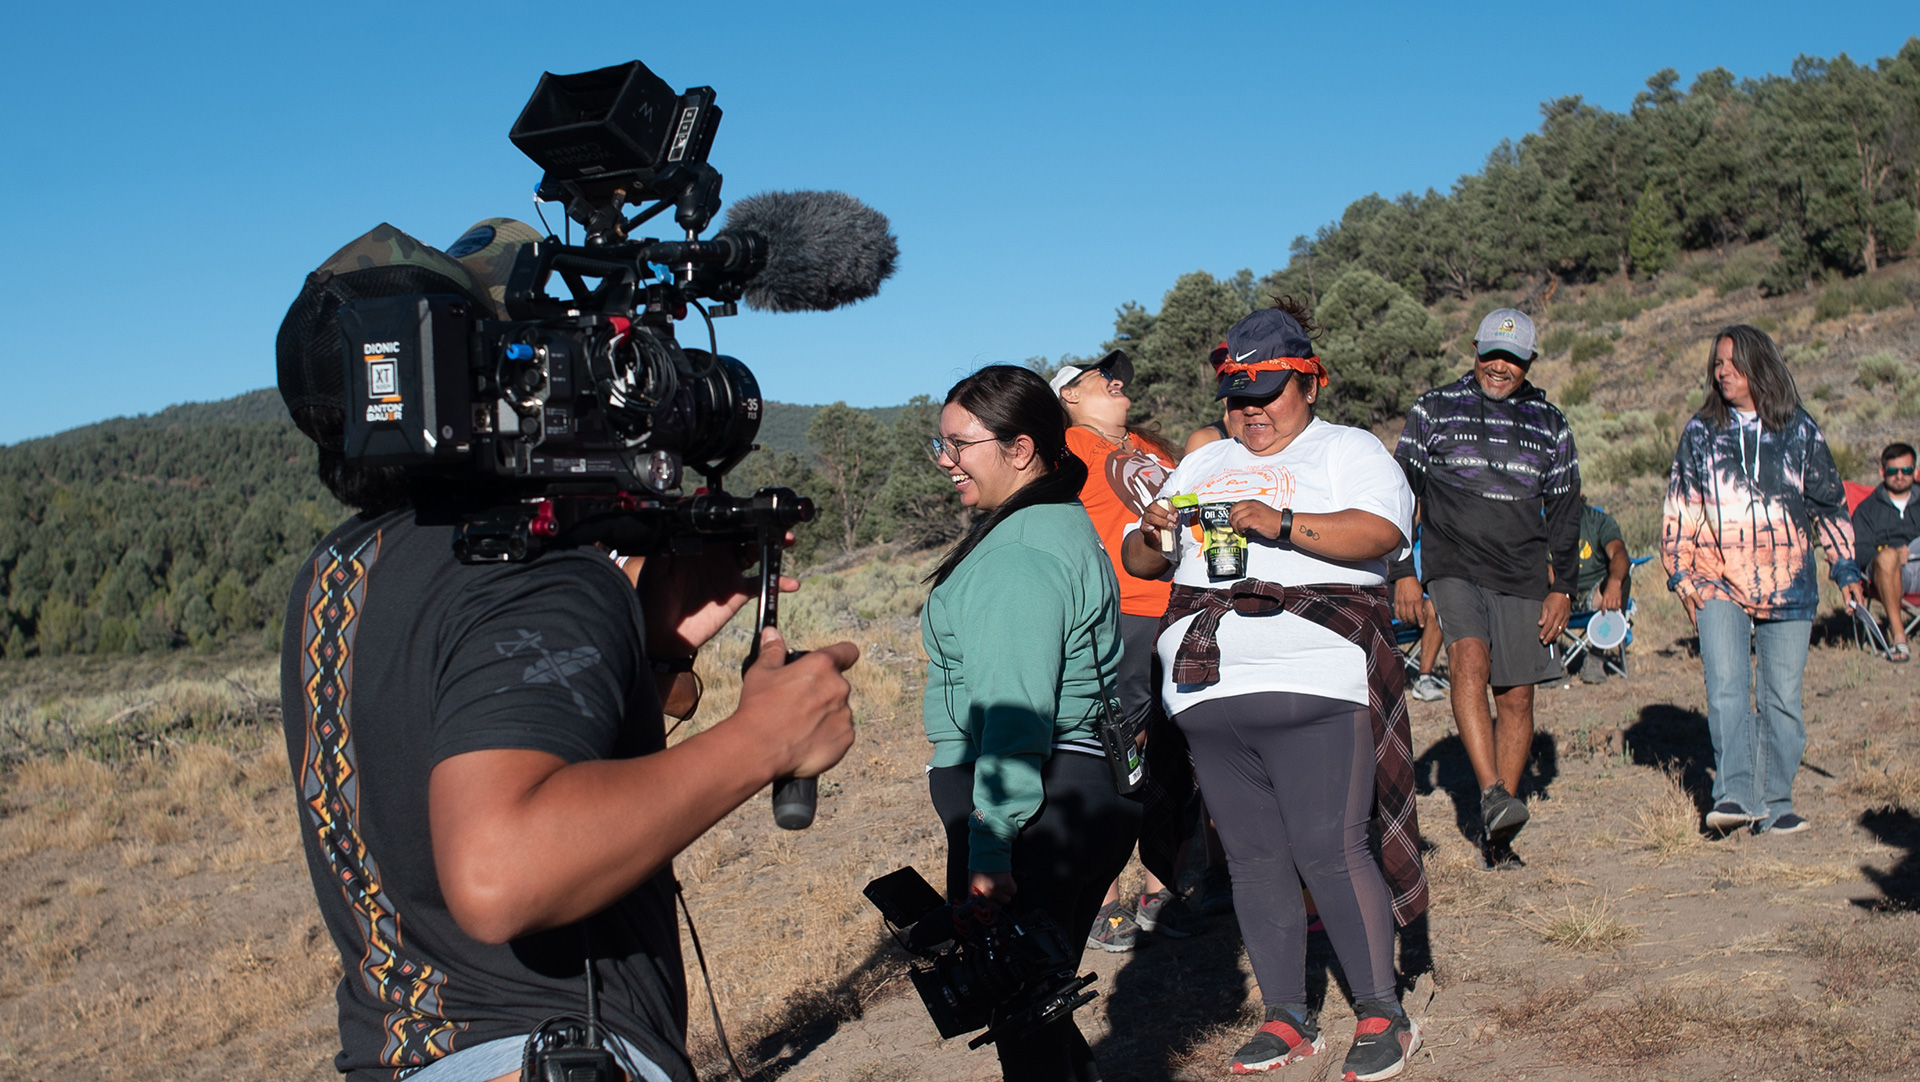
Bethmann during the filming of Remaining Native
Sigma:
Congratulations on your directorial debut, Remaining Native which has already gone on to win two major awards at SXSW – the Audience Choice Award AND the Documentary Feature Special Jury Award after several years in the making. Shortly, it will also go on to screen at the Salem Film Festival in MA at the end of March and the Riverrun Film Festival in NC, plus a few other selections we can’t quite announce but are equally prestigious. How does this all feel?
Bethmann:
It’s really surreal.
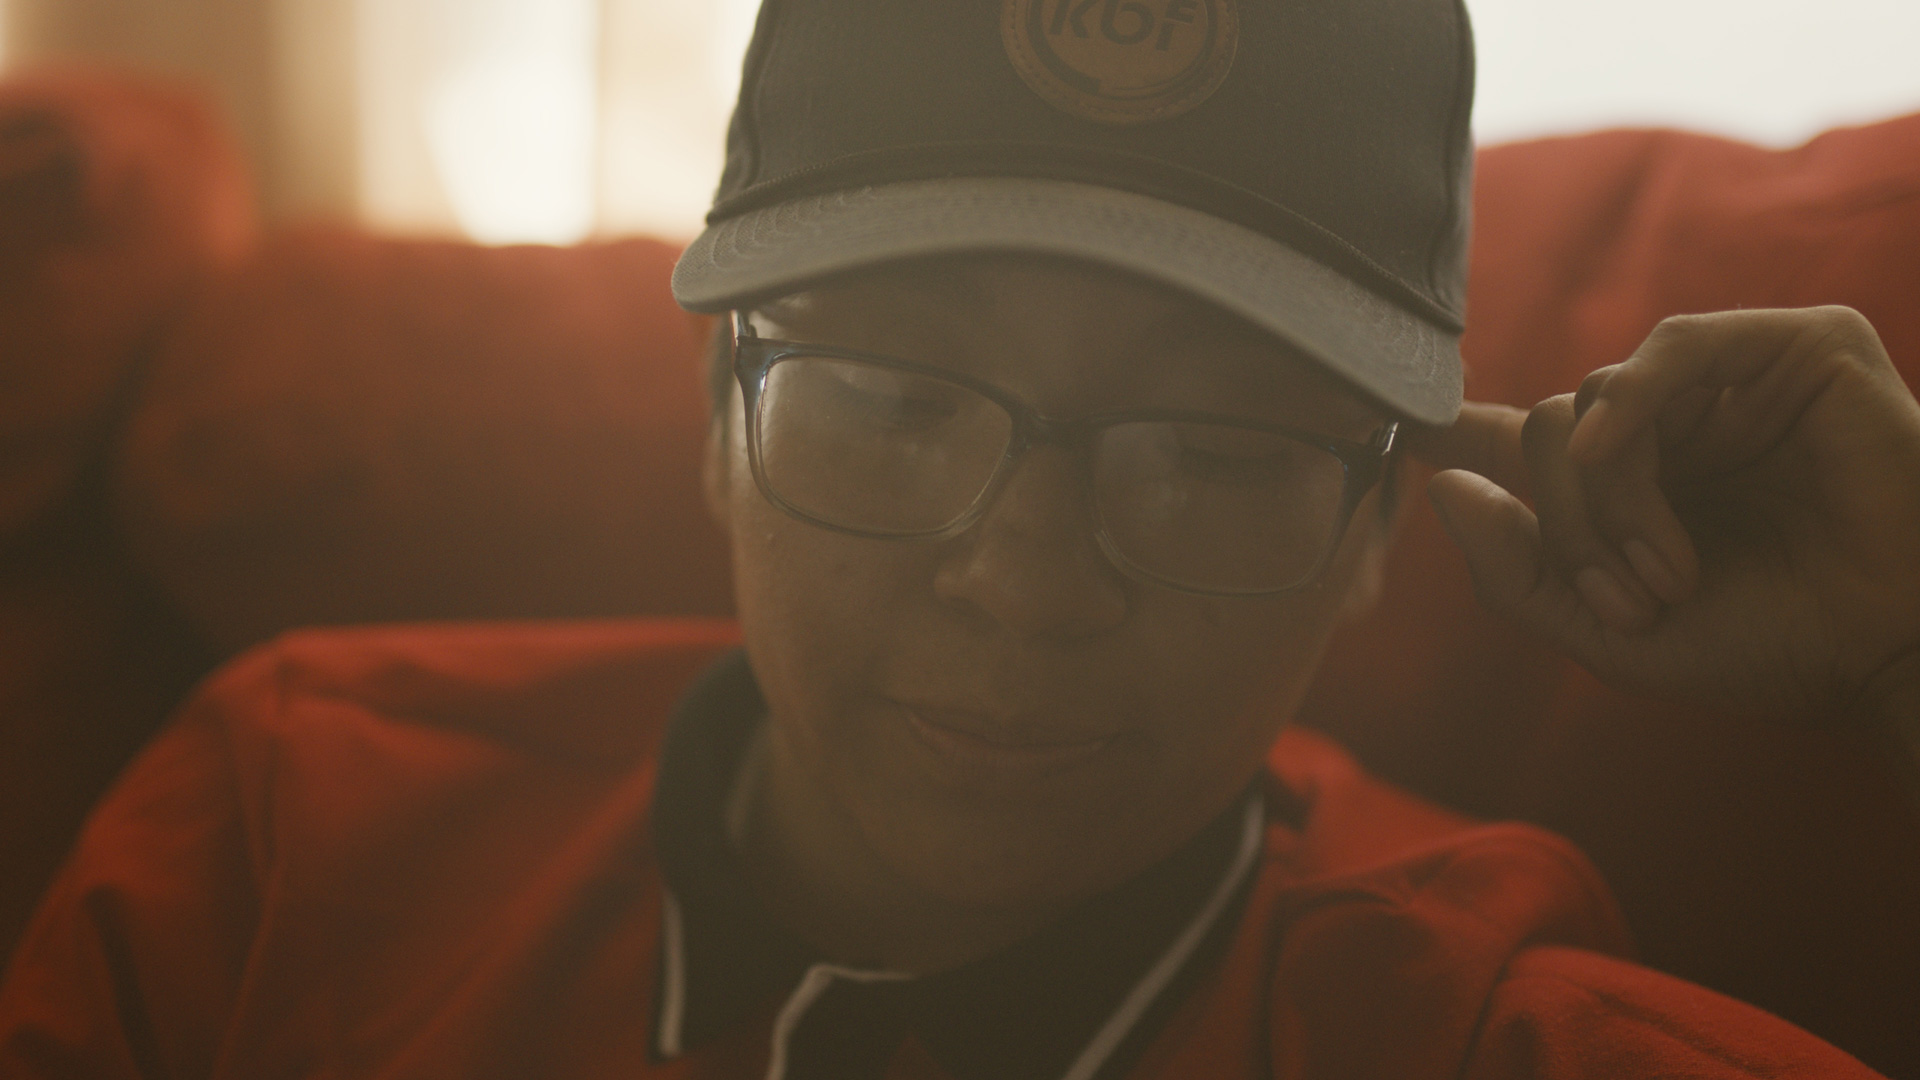
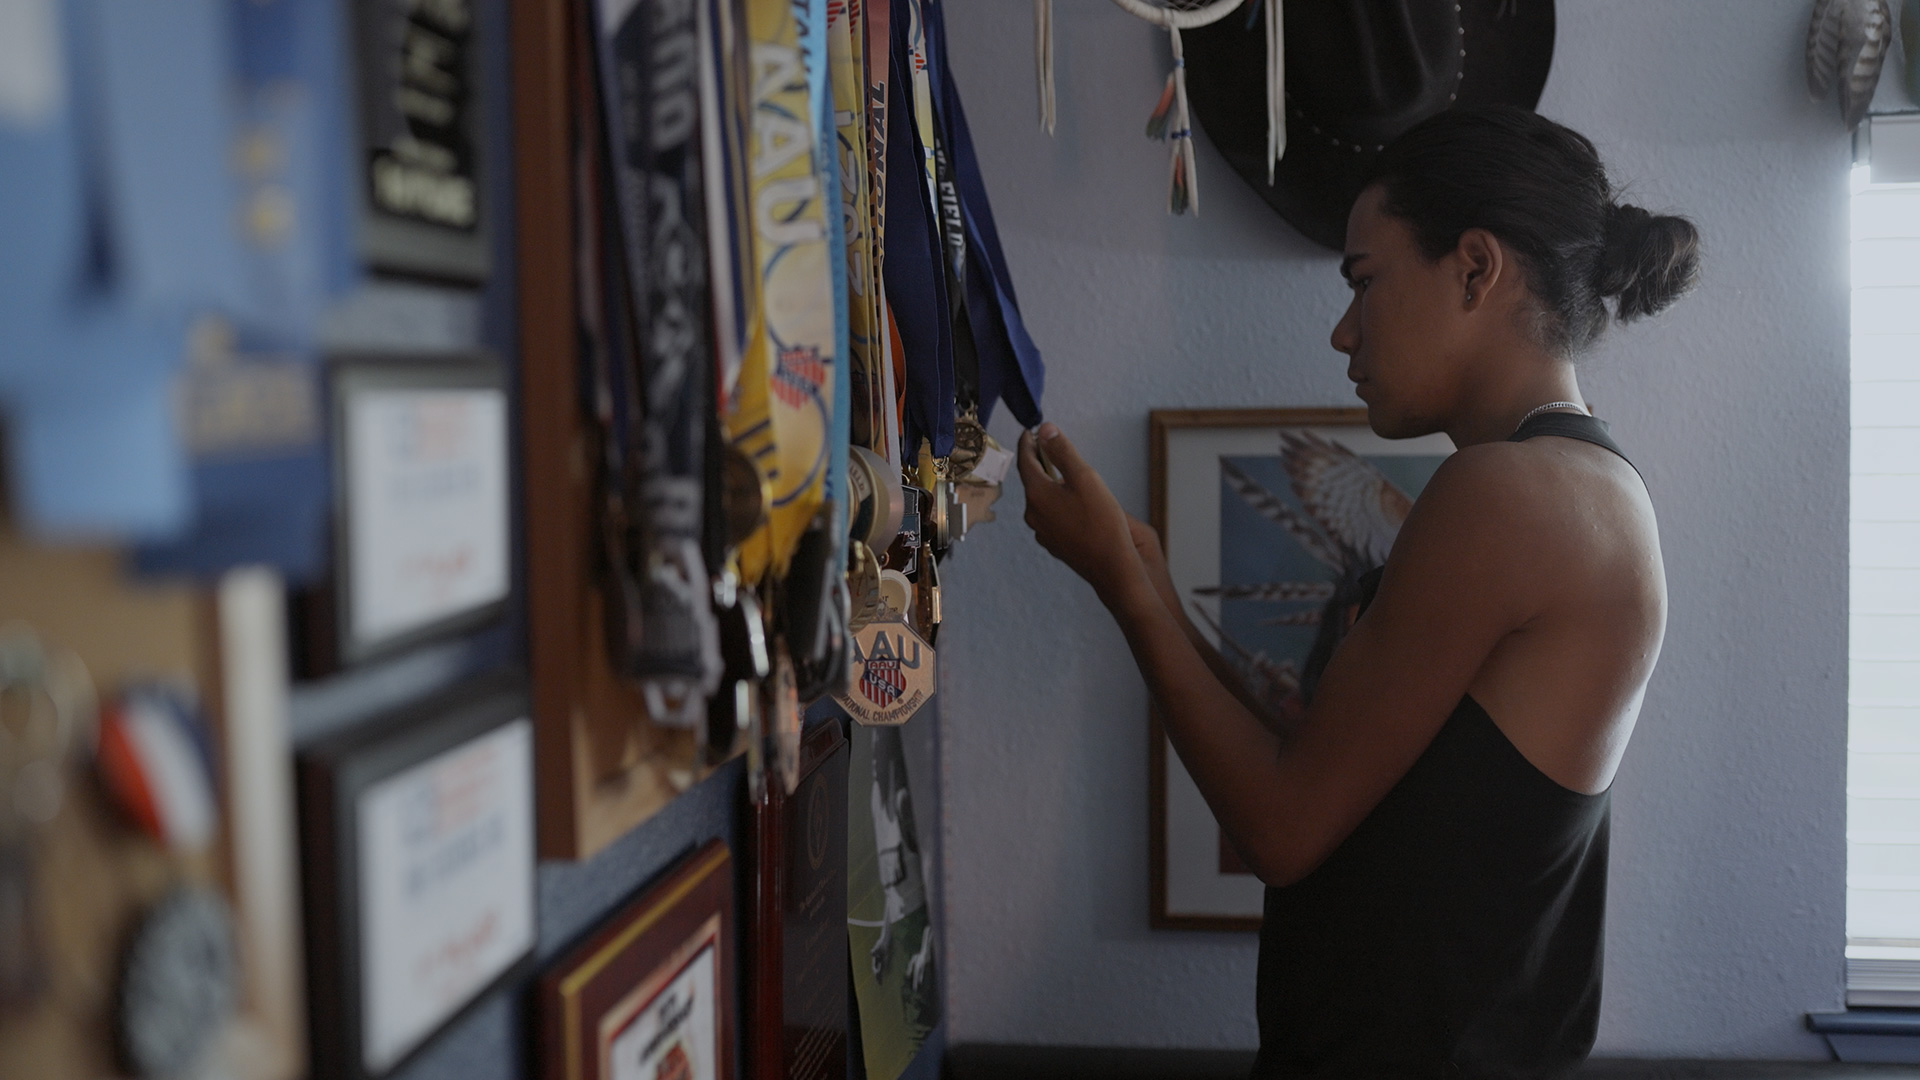
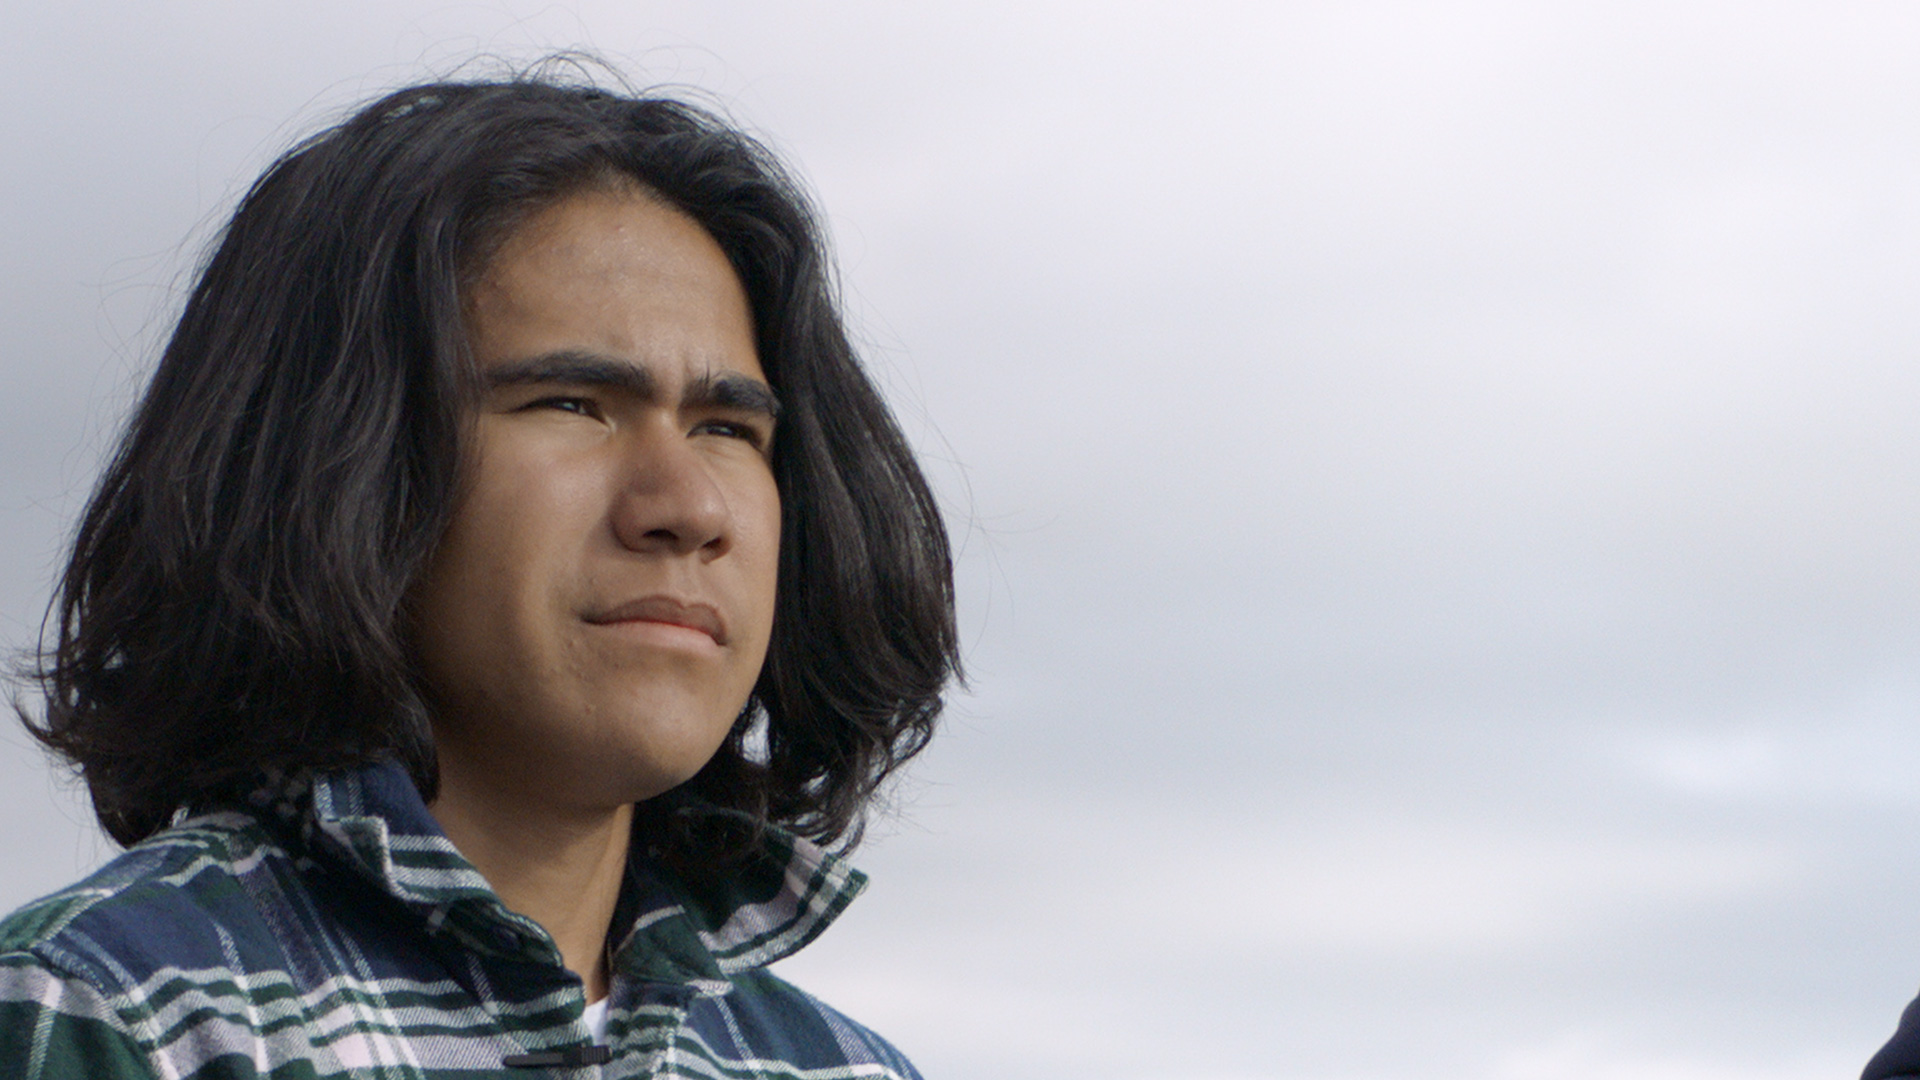
This project has been a long time in the making, and it’s been four years of trying to figure out how to tackle something as profound and big as Indian boarding schools—but in a way that is through the eyes of a 17-year-old kid and stays true to his family and his story.
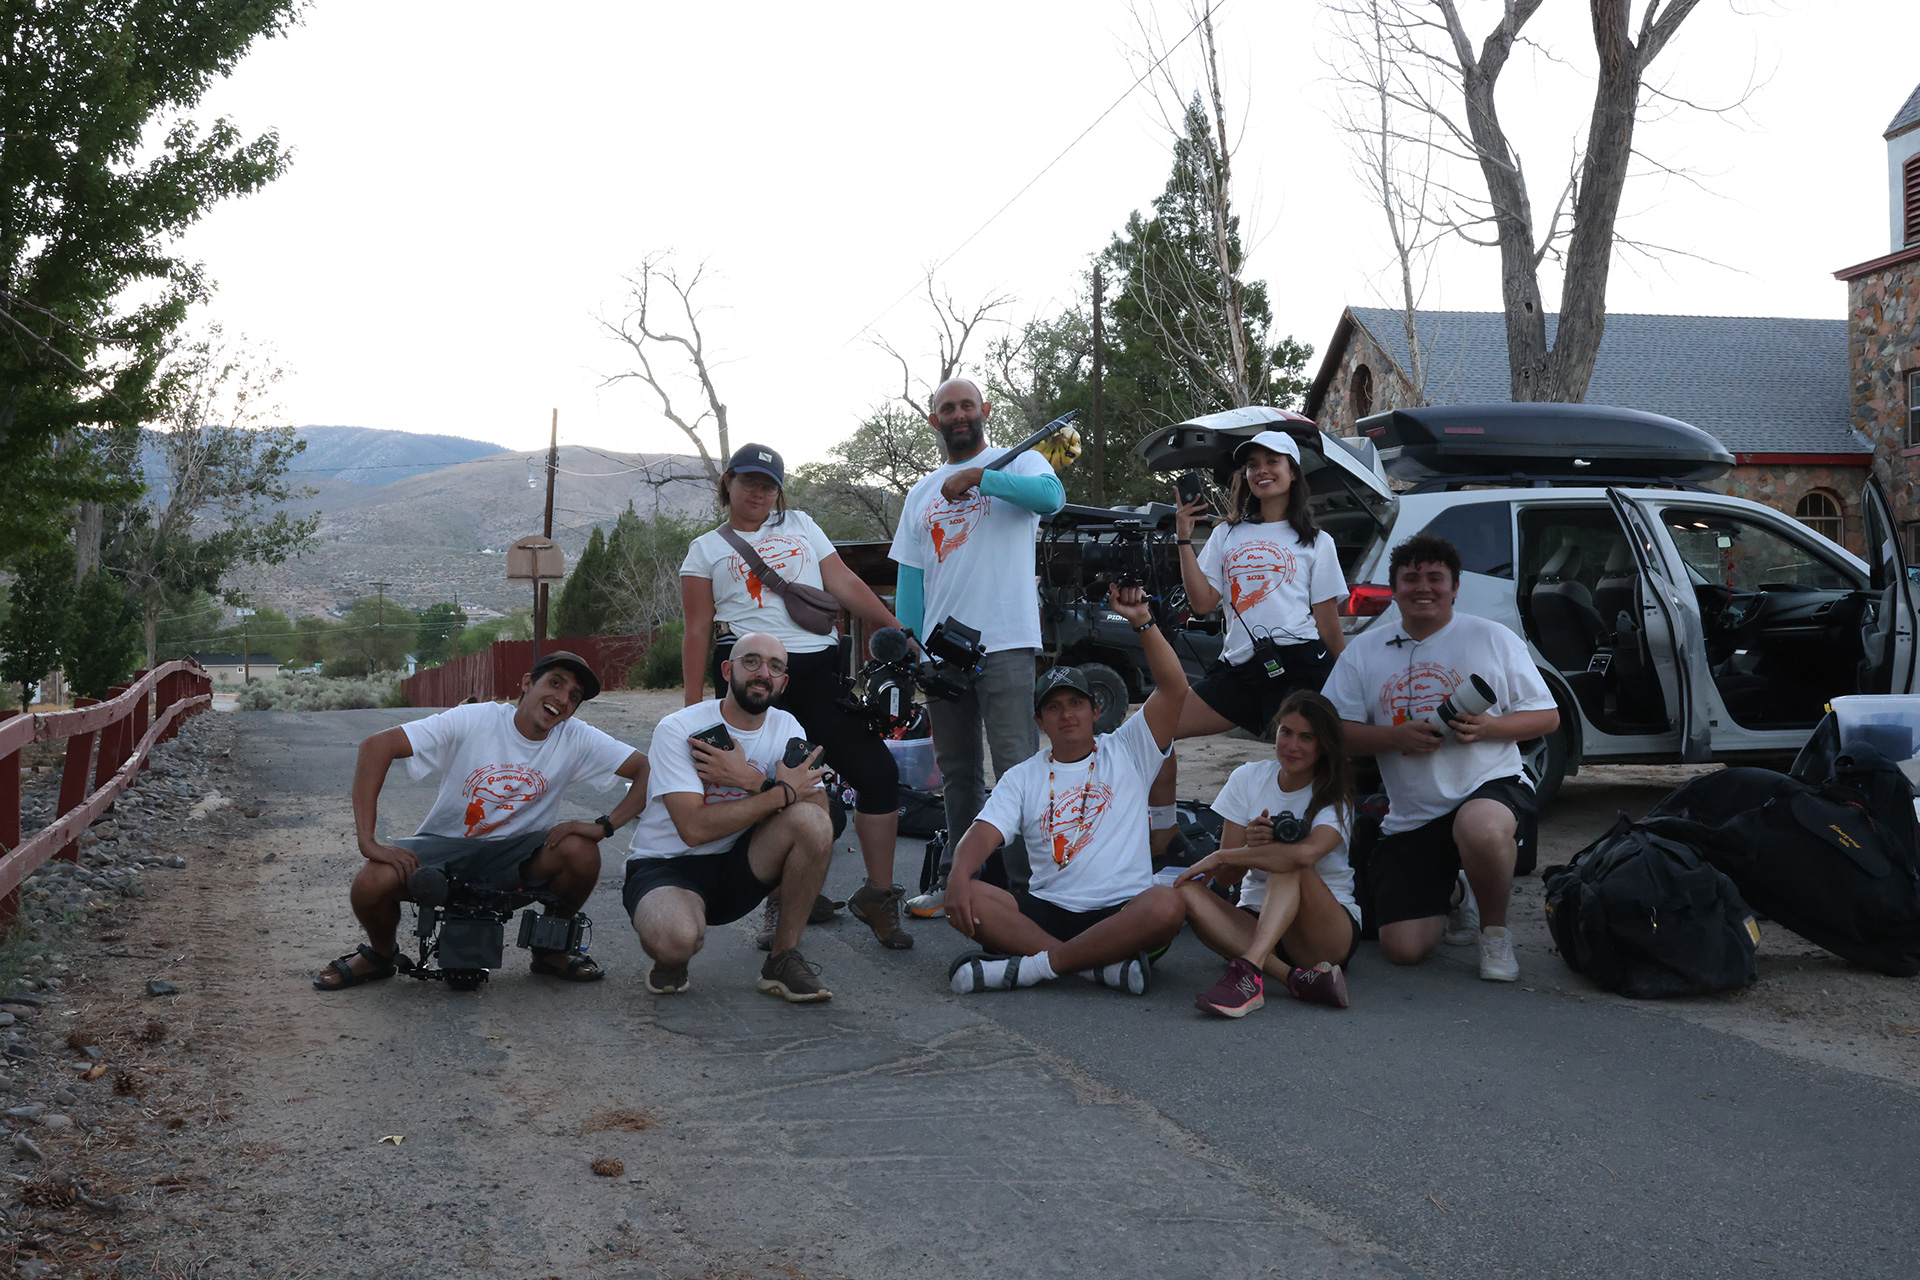
A lot of time and care has gone into this, and it feels amazing to have accomplished what we set out to do and to have everyone come together at SXSW. We had a crew of around 30 people come out to Austin to be there and support us, and it just felt magical to feel the responses from the audience—to have so many people connect with the film.
We also hosted a 5K run alongside Nike and had over 600 people sign up. So, you know, you don’t even have to be interested in the topic of the film to connect with it—if you’re a runner or interested in sports, there’s another way in.
We’re just excited to finally share it, to connect with so many different audience members, and to be validated—not just by the awards, which are nice, but also by the community we’ve been building along the way.
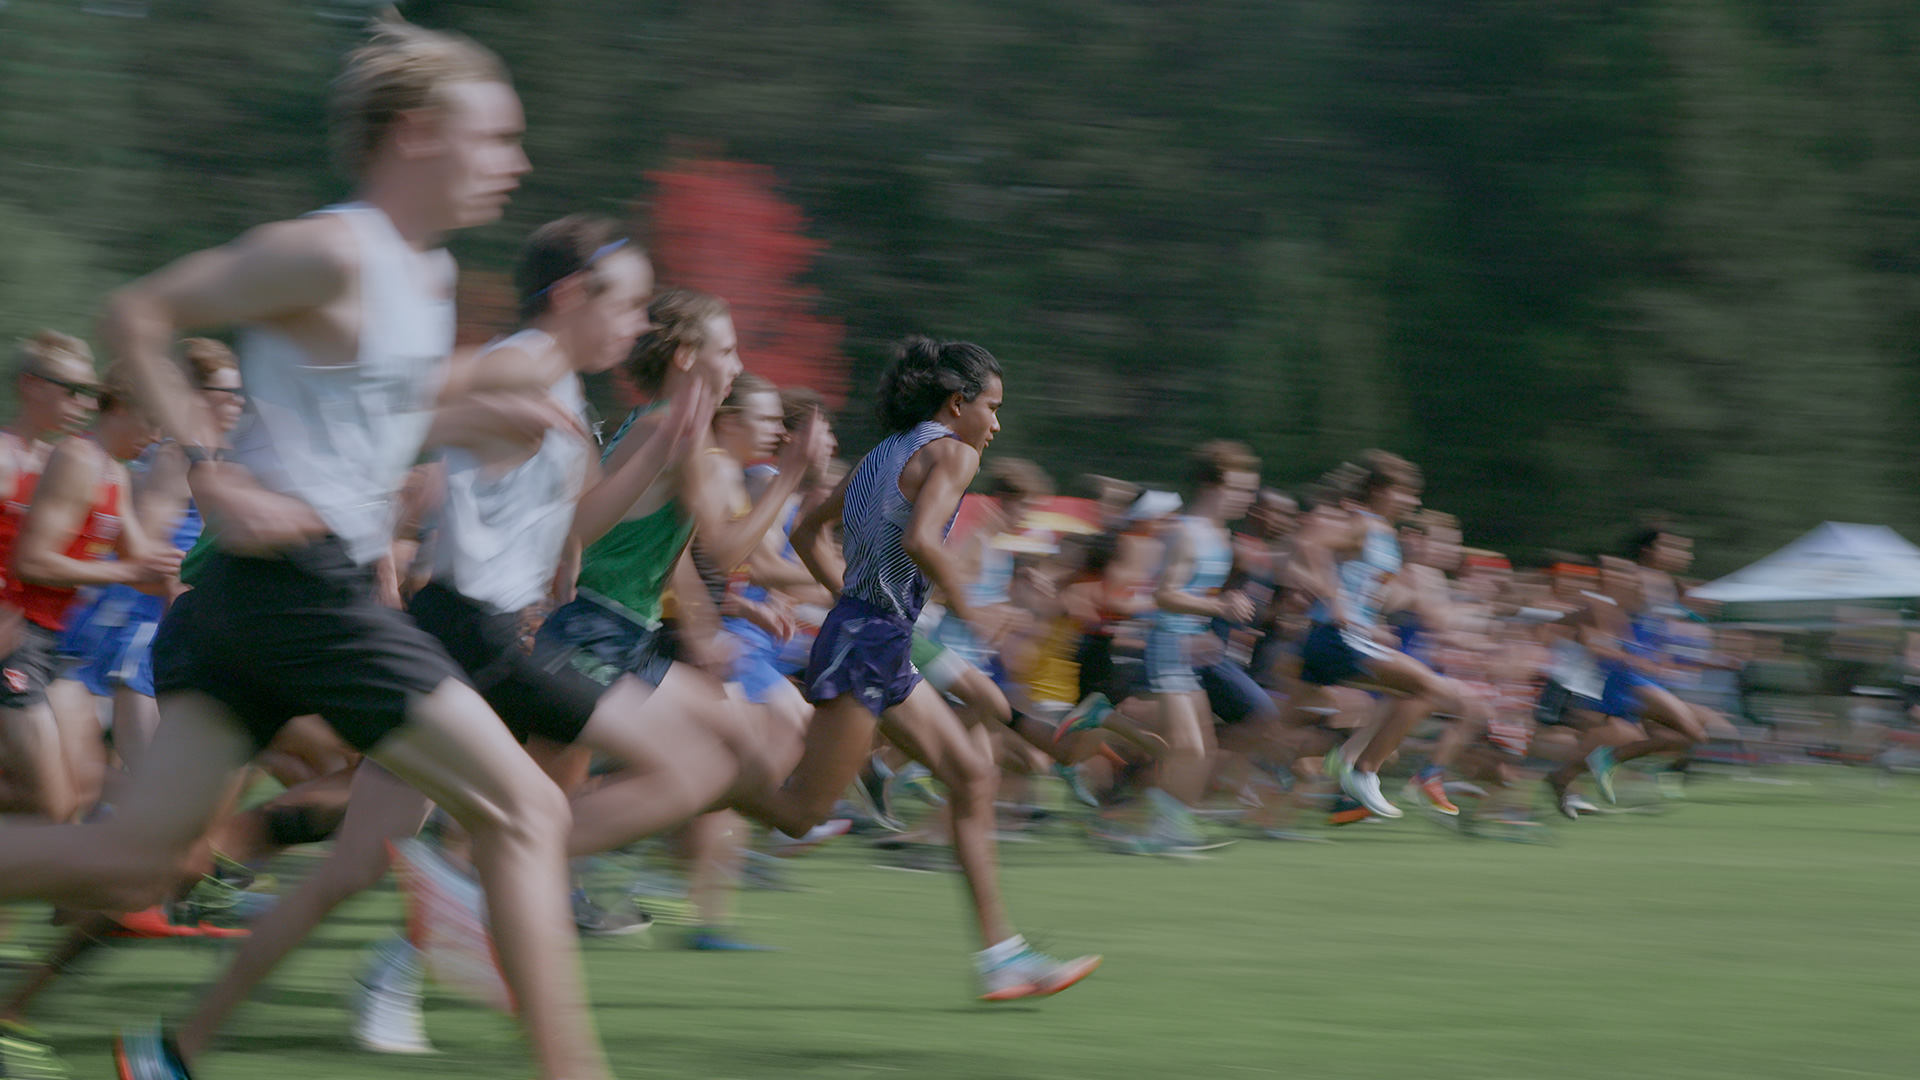
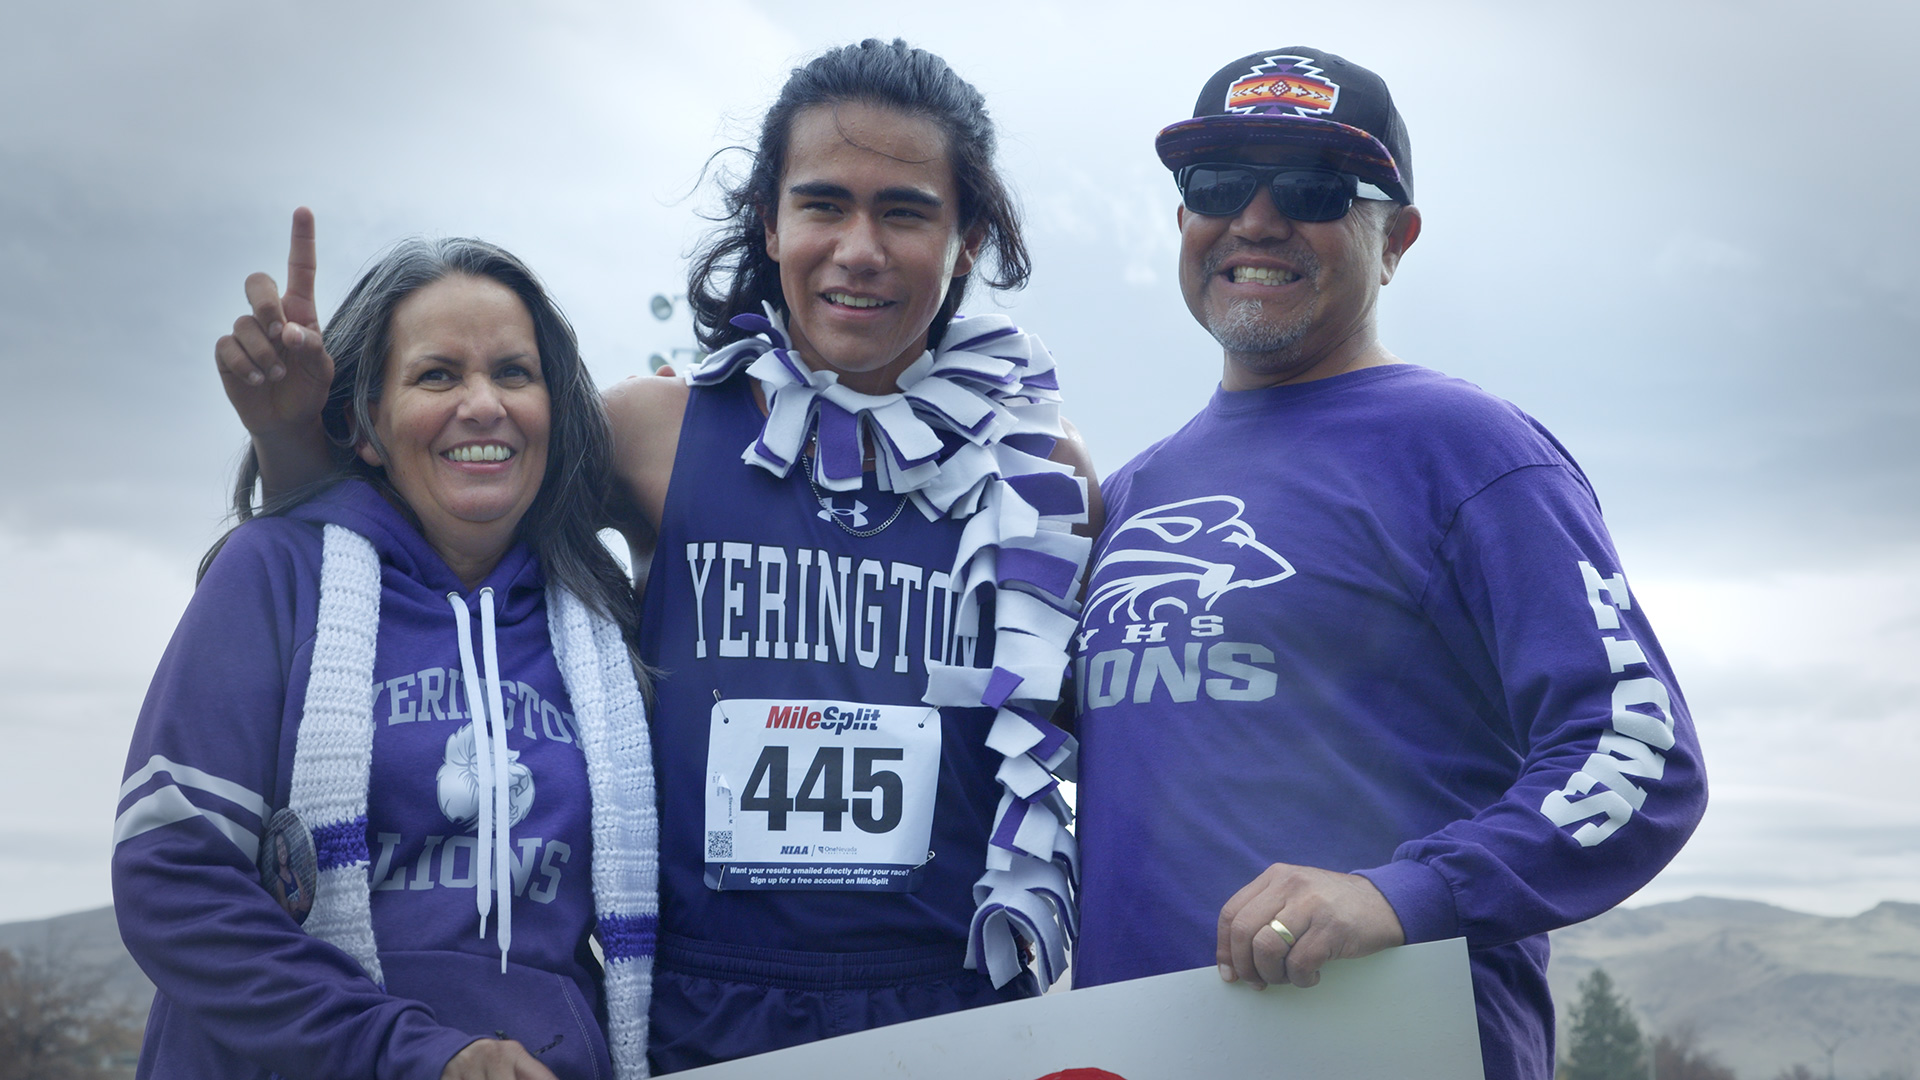
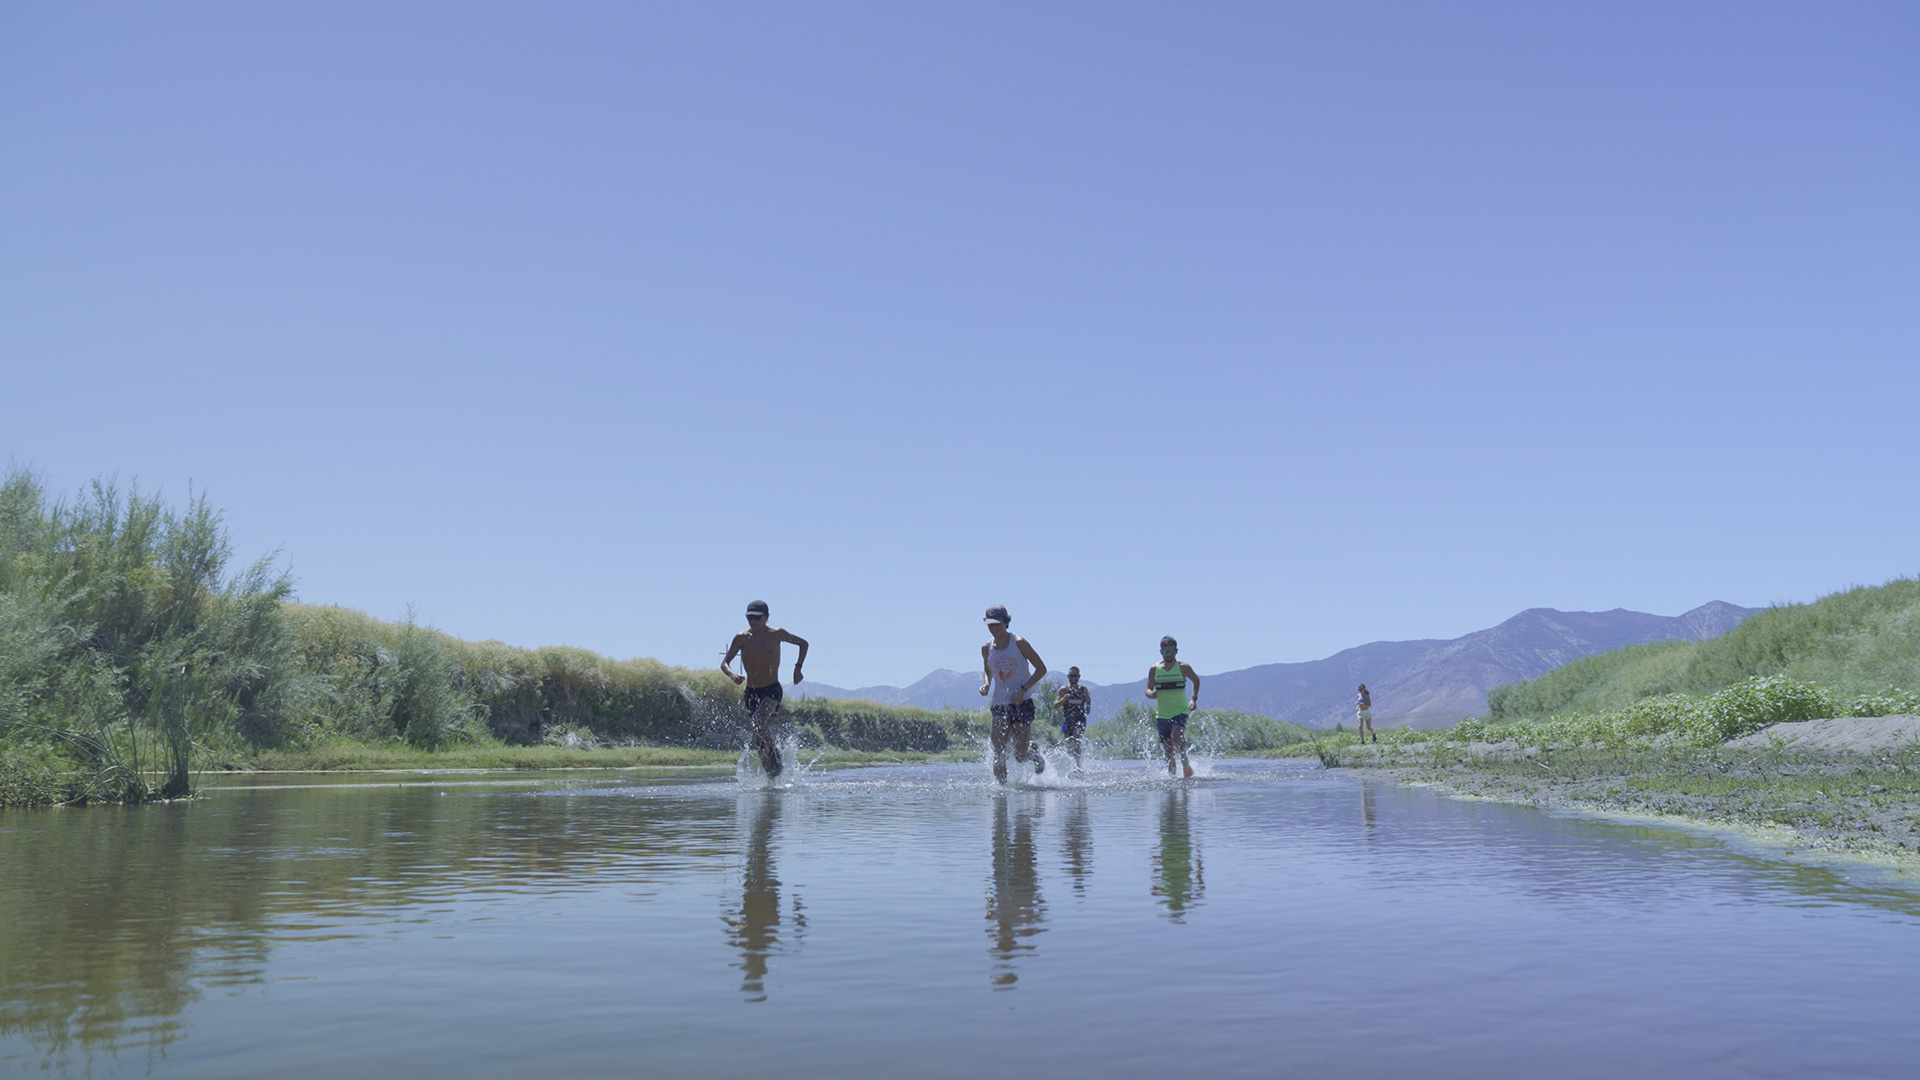
Scenes from Remaining Native
Sigma:
You quote your grandmother in the pitch deck of this film who told you, “Stories are spoken. Words fall off the tongue and onto the land to seep into the dirt. These stories root down and grow back sprouting as living beings to be cared for and harvested as memories to be passed down again and again…”
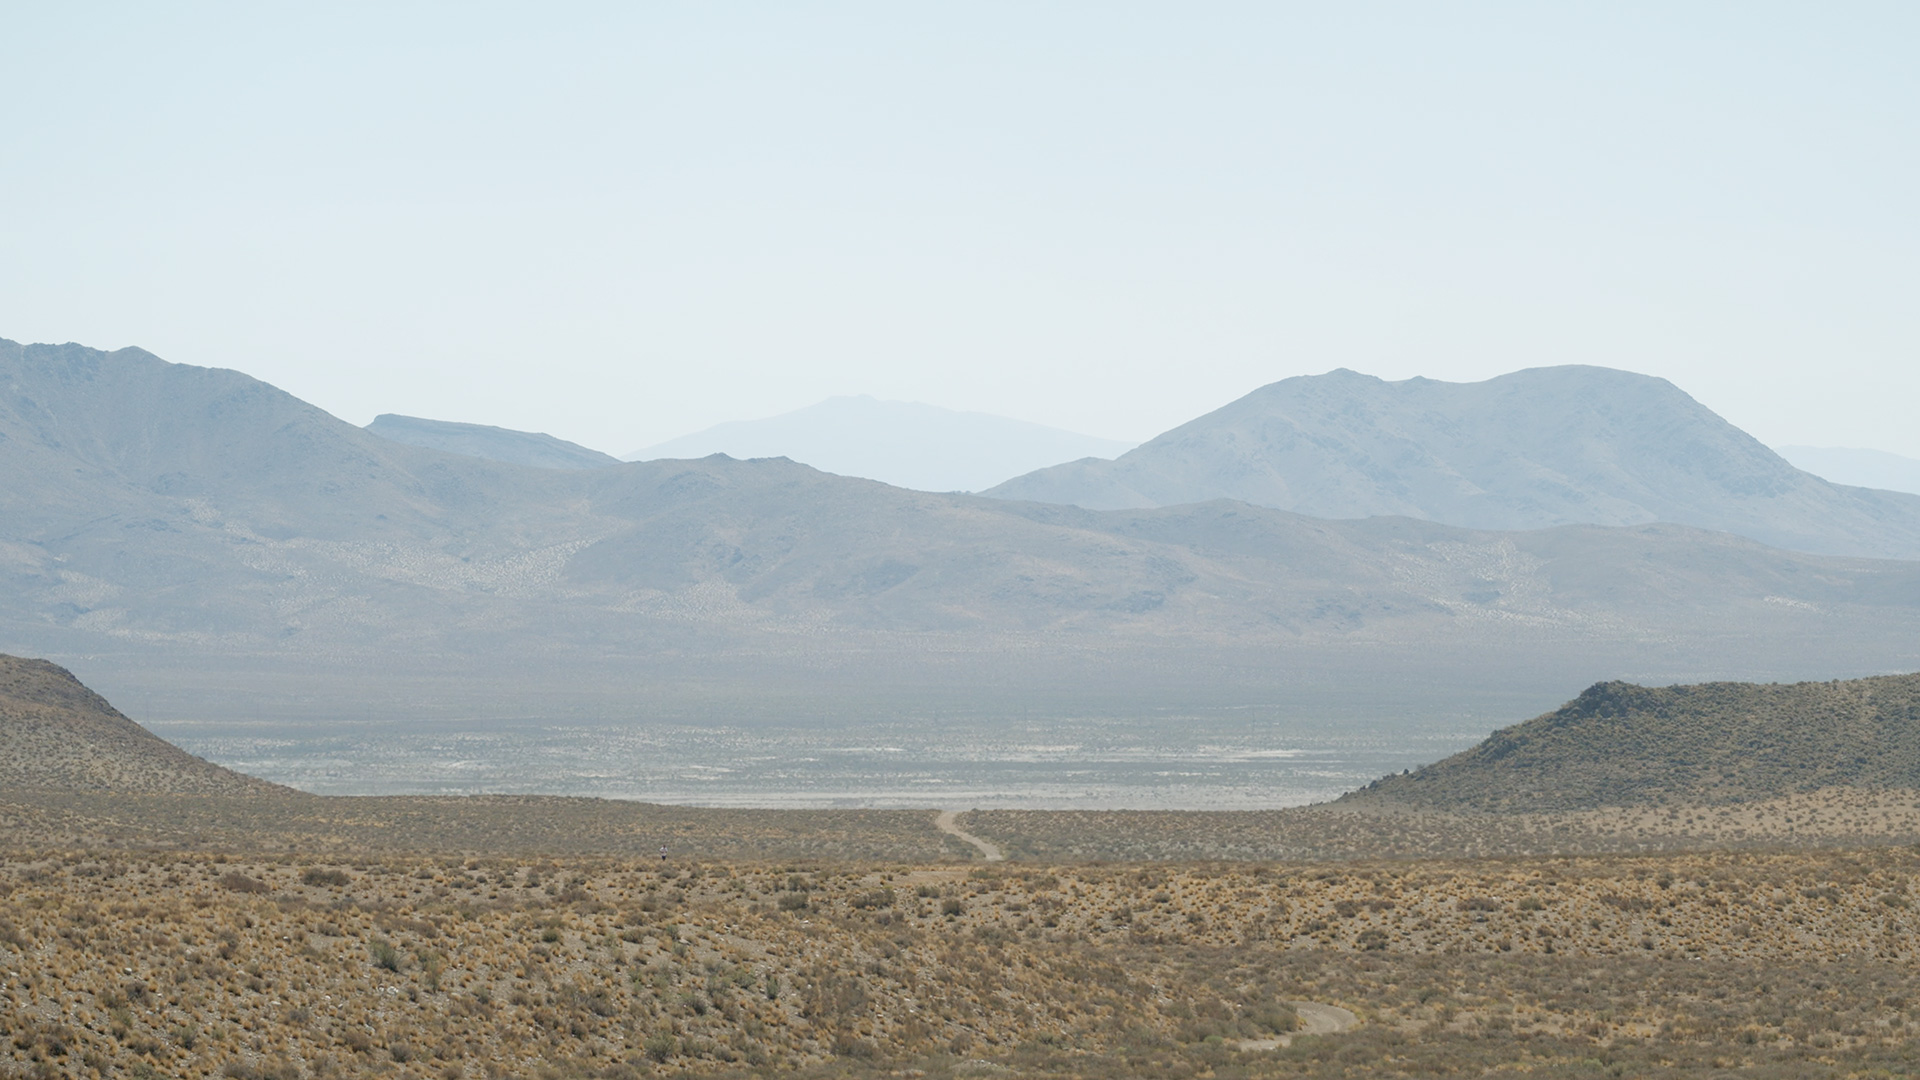
These are such resonant, evocative words and after watching and reflecting on Remaining Native, feel so appropriate both narratively and visually, taking place in the desert of America’s west. One of the most significant themes in the film deals with generational legacy, and visually, the land, the setting itself, plays a crucial role in that story. Did you find that any particular Sigma lenses helped capture the vastness of the desert landscapes, or conversely provided more intimacy in moments of reflection and storytelling?
Bethmann:
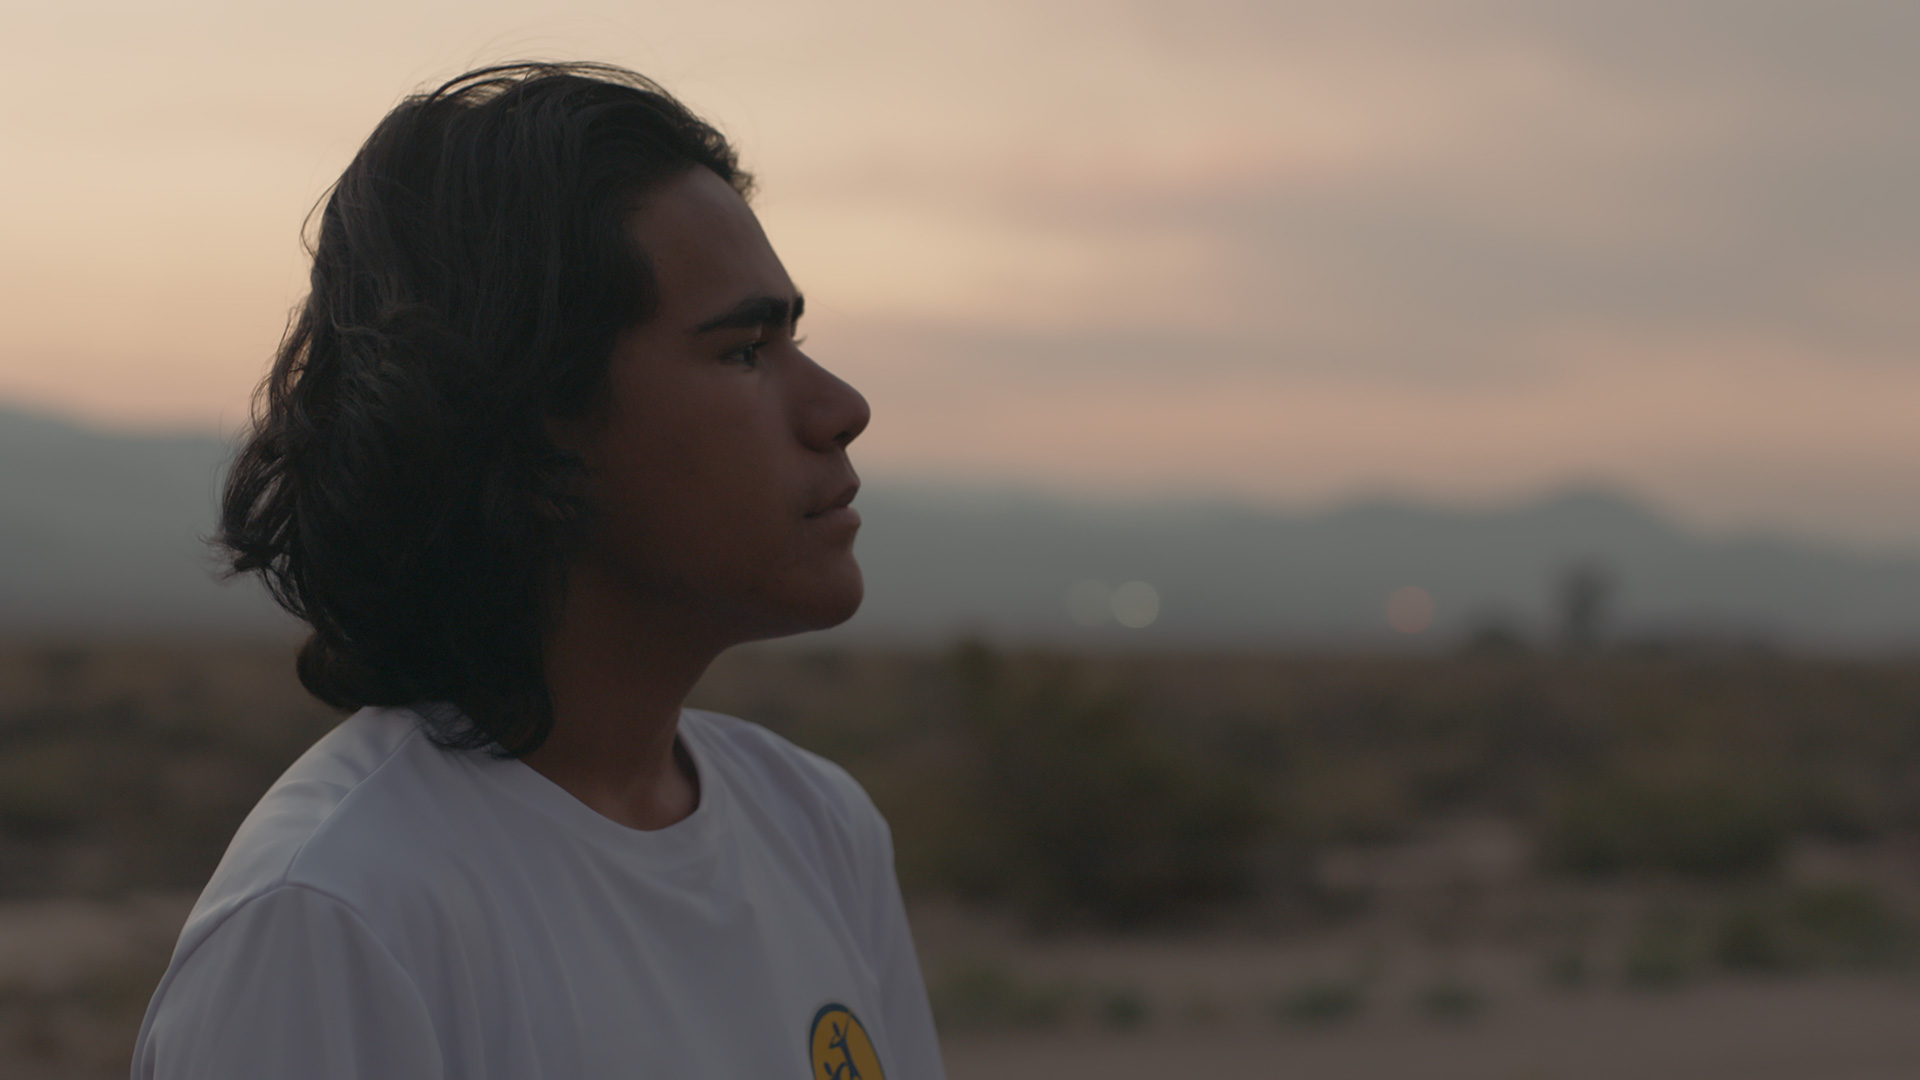
Yeah, I mean, great question. You know, the land plays essentially a character in the film, and it deserves the same sort of weight and craft as the rest of the characters. I think what we wanted to make sure of was that we were able to capture it in a way that was as dynamic and beautiful as the landscape itself.
The Sigma Cine lenses—we shot a lot on the prime lenses, a lot on the 24mm for those wide shots, and the 35mm to make sure we were able to capture the scope of the land and to have it just be profound.
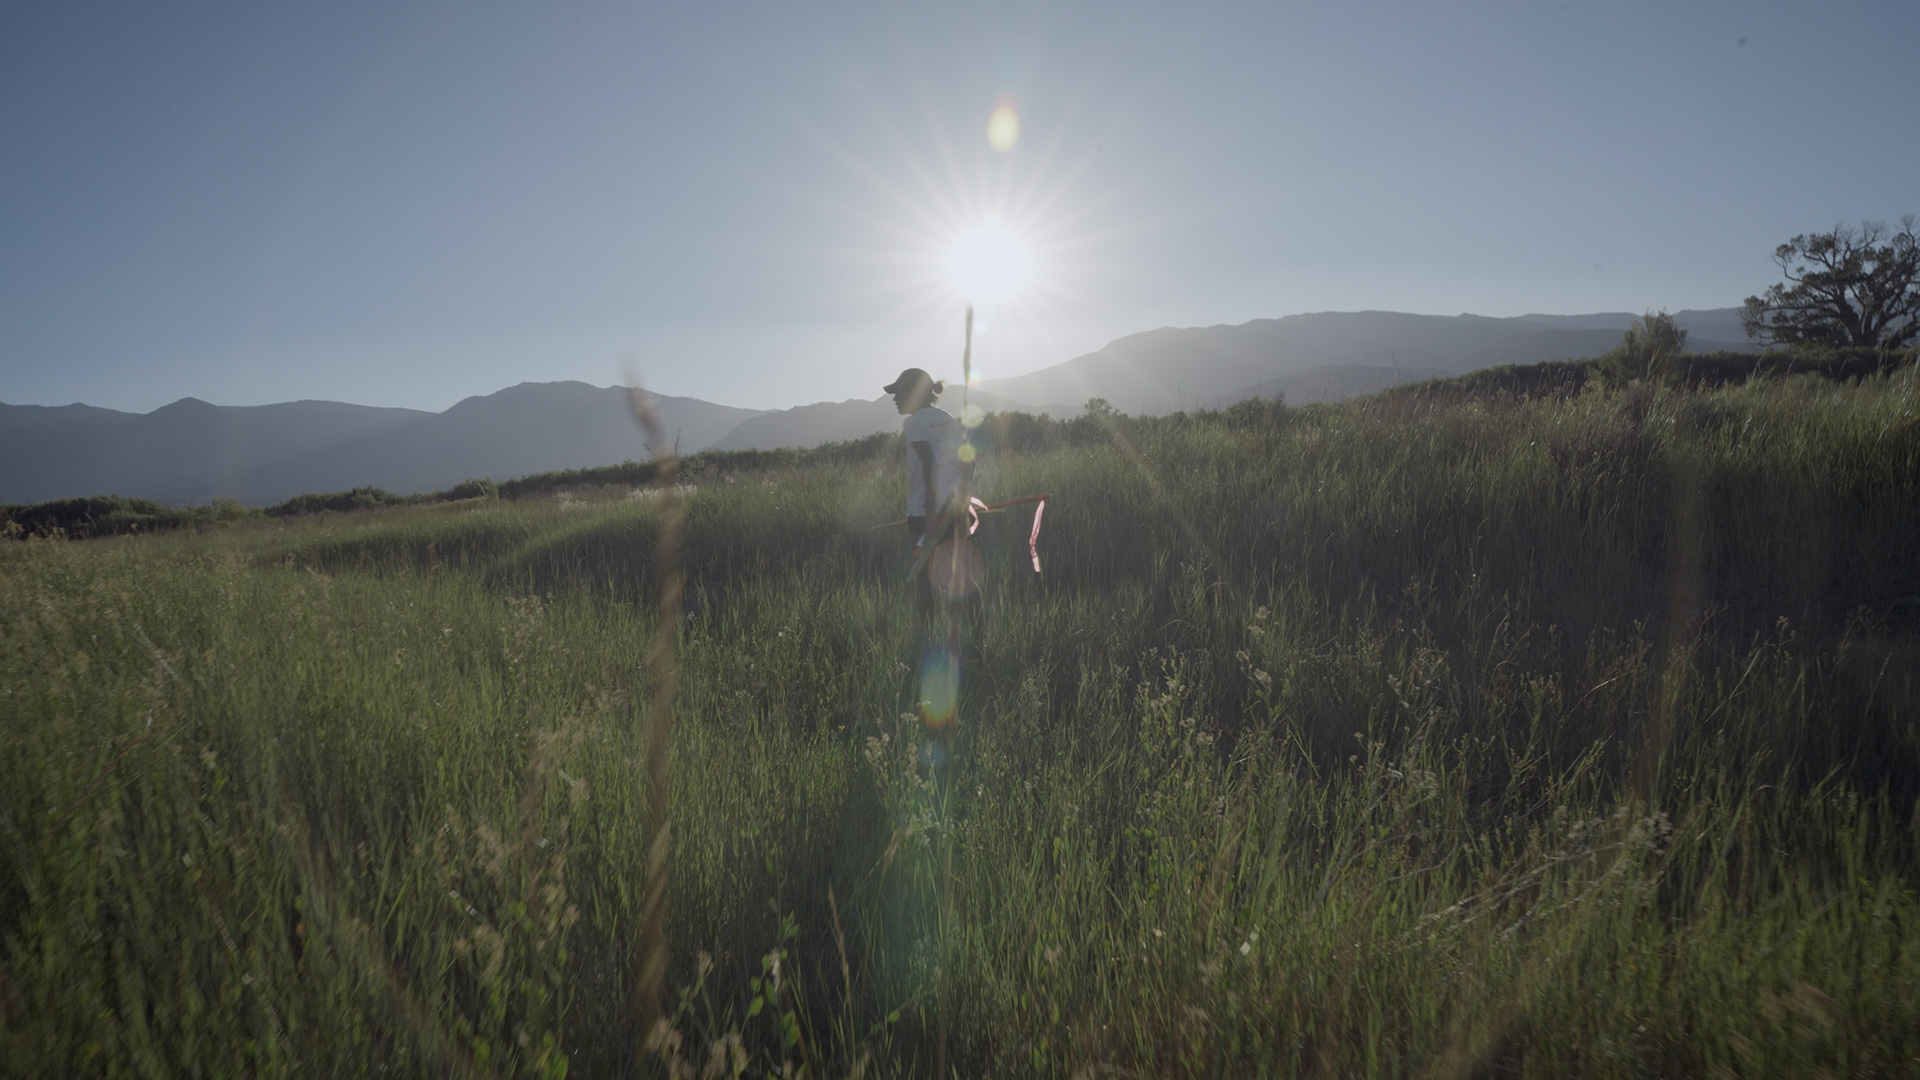
Scenes from Remaining Native
You know, our stories are held by the land. Like you quoted my Grandmother—those stories weren’t written down in books. They really are passed down through an oral tradition, and the place in which our stories are told is so important. So to be out there in the desert and to actually understand that we were walking on a memory of his great-grandfather and all of his (Ku’s) ancestors—we wanted to make sure we were paying respect to that place.
To be able to shoot really wide on those lenses—and then we actually went out again for a third year of the Remembrance Run and shot purely just texture. So we were actually using a lot more of the close 85mm lenses. We were trying to get really close to things like dirt and dust, looking for the sun flares, looking for texture. For example, the pine nuts—we had a shot in there of the crystallizing of the pine nuts, which are a traditional food of the Paiute people. We wanted to make sure we were able to get as many details as possible.
Scene from Remaining Native
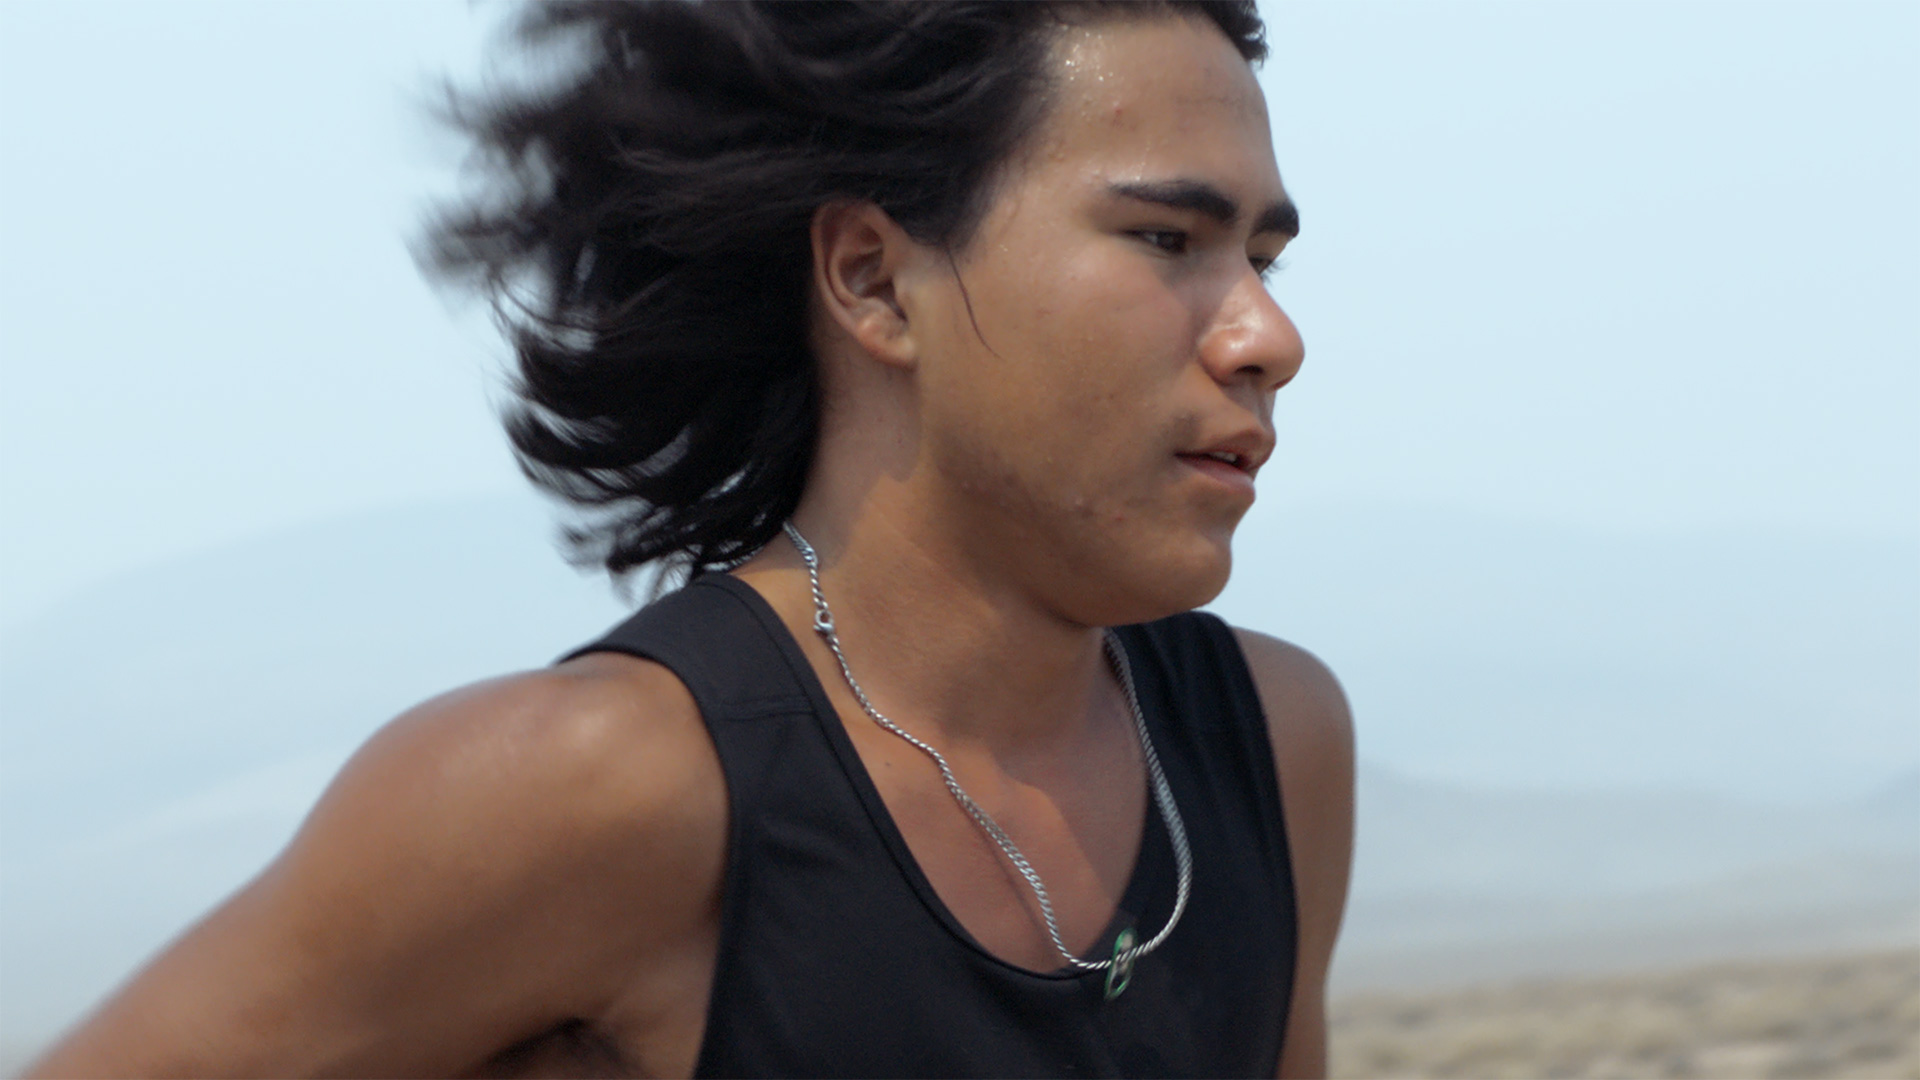
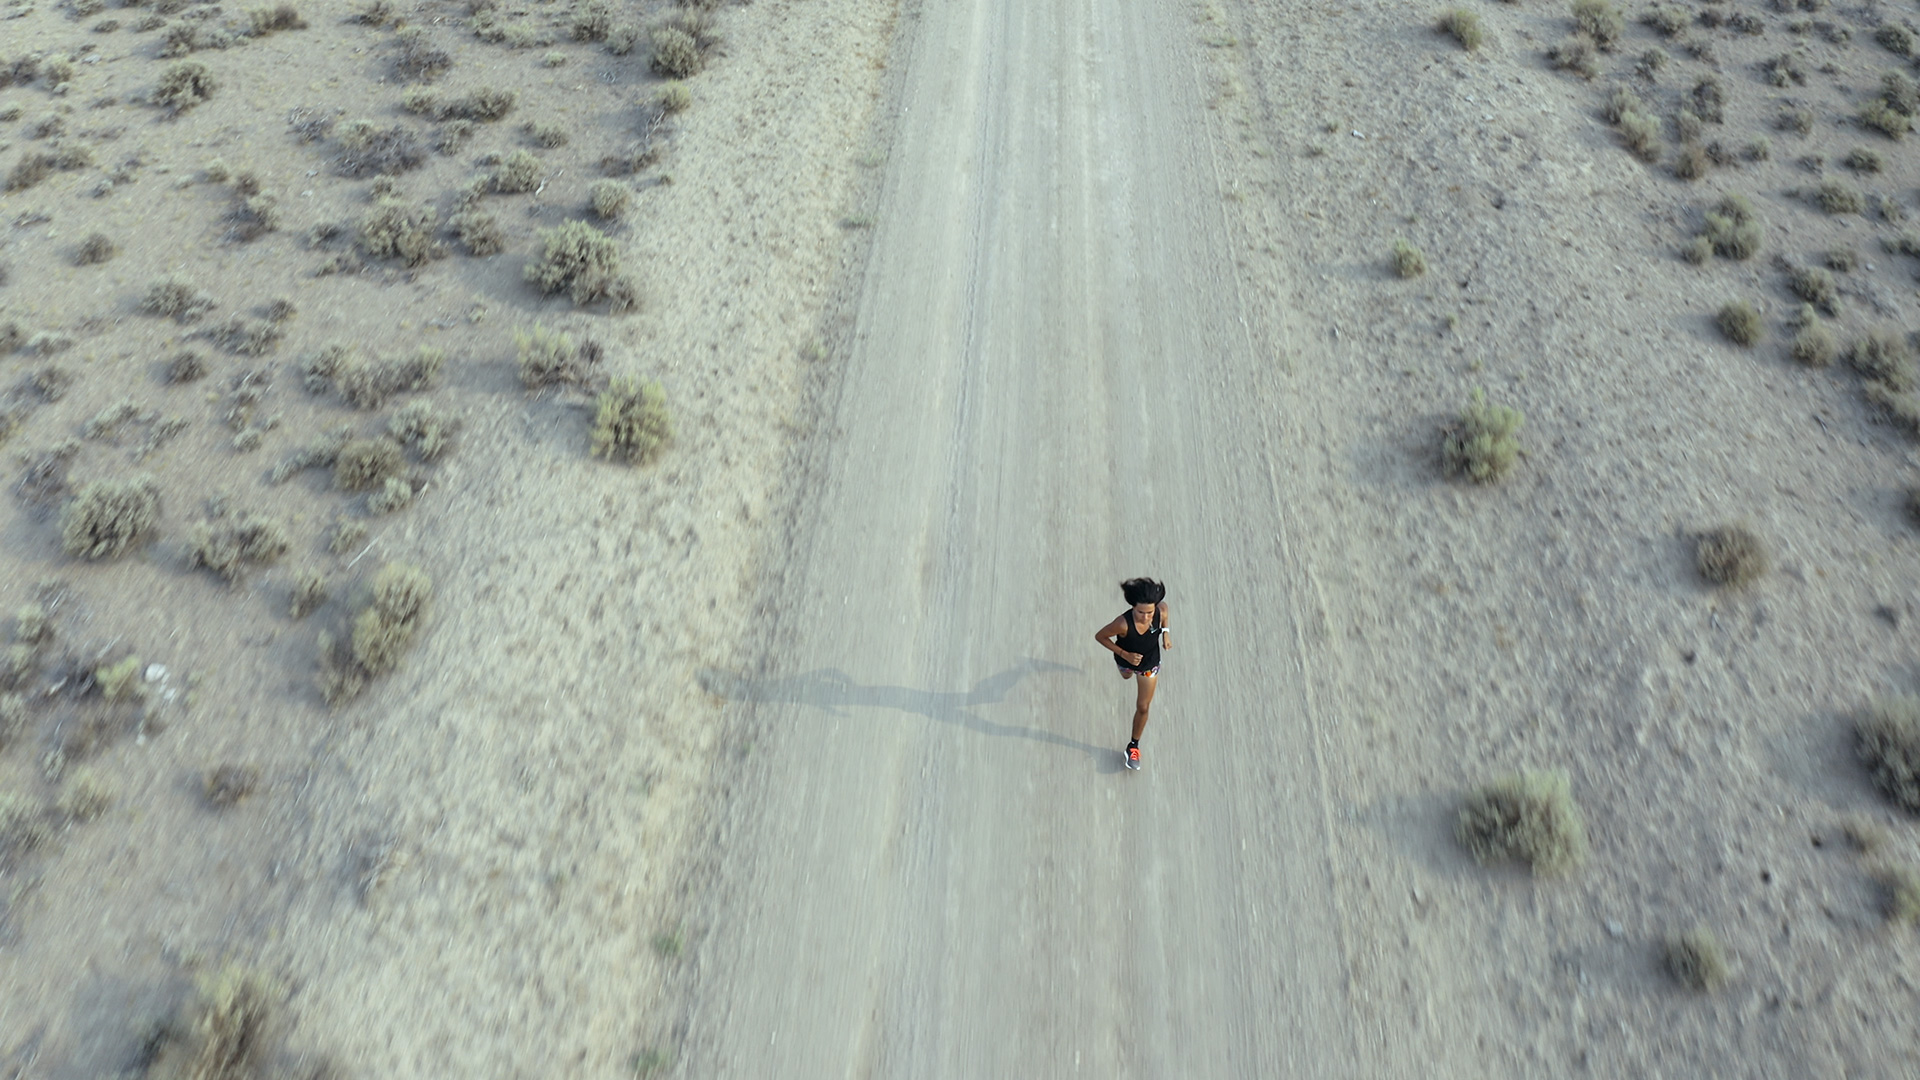
Also, we were shooting on some of the photo lenses as well. We shot a lot on the Sigma 100-400mm F5-6.3 DG DN OS | Contemporary, which came in handy when it came to these long, wide shots that were, you know, compressed—to be able to get the vastness of the desert and see how hot it was. I’m sure you saw the heat waves happening in the background of a lot of these shots.
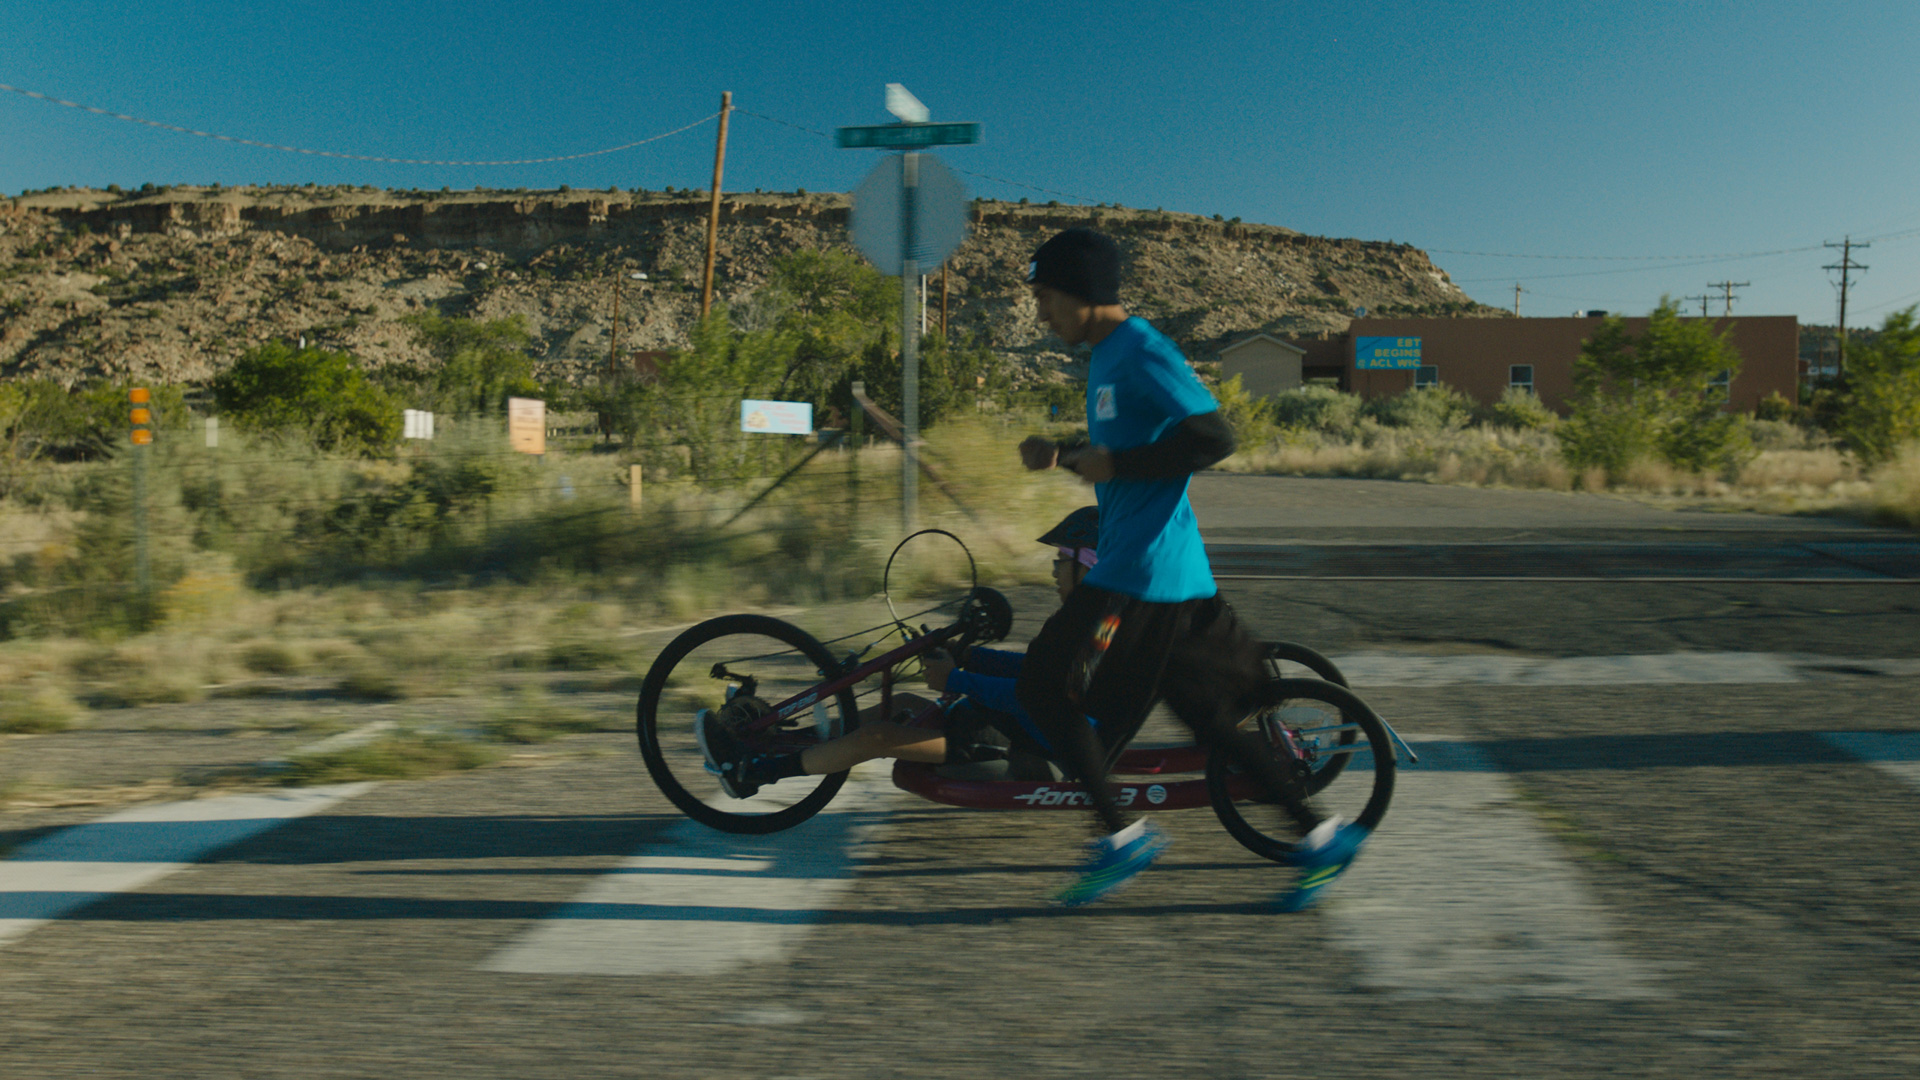
And also, keeping up with a runner—it’s very difficult to film running because you’re constantly chasing after them. We had to get really creative in how we wanted to shoot Ku, because he’s also so graceful as he runs. He’s so beautiful when he runs, and it’s hard to show the effort sometimes—to show how hard he’s actually working.
So, to be able to do that on the lenses, true to what was happening in real life—what we were seeing was a pure reflection in the lenses. We were able to capture his effort, to be right up close with him, as well as do things creatively—like filming shadows on the land and filming a silhouette shot of running alongside your ancestor.
So yeah, it was fun to play with such a wide range of lenses to be able to do all of it.
Scenes from Remaining Native
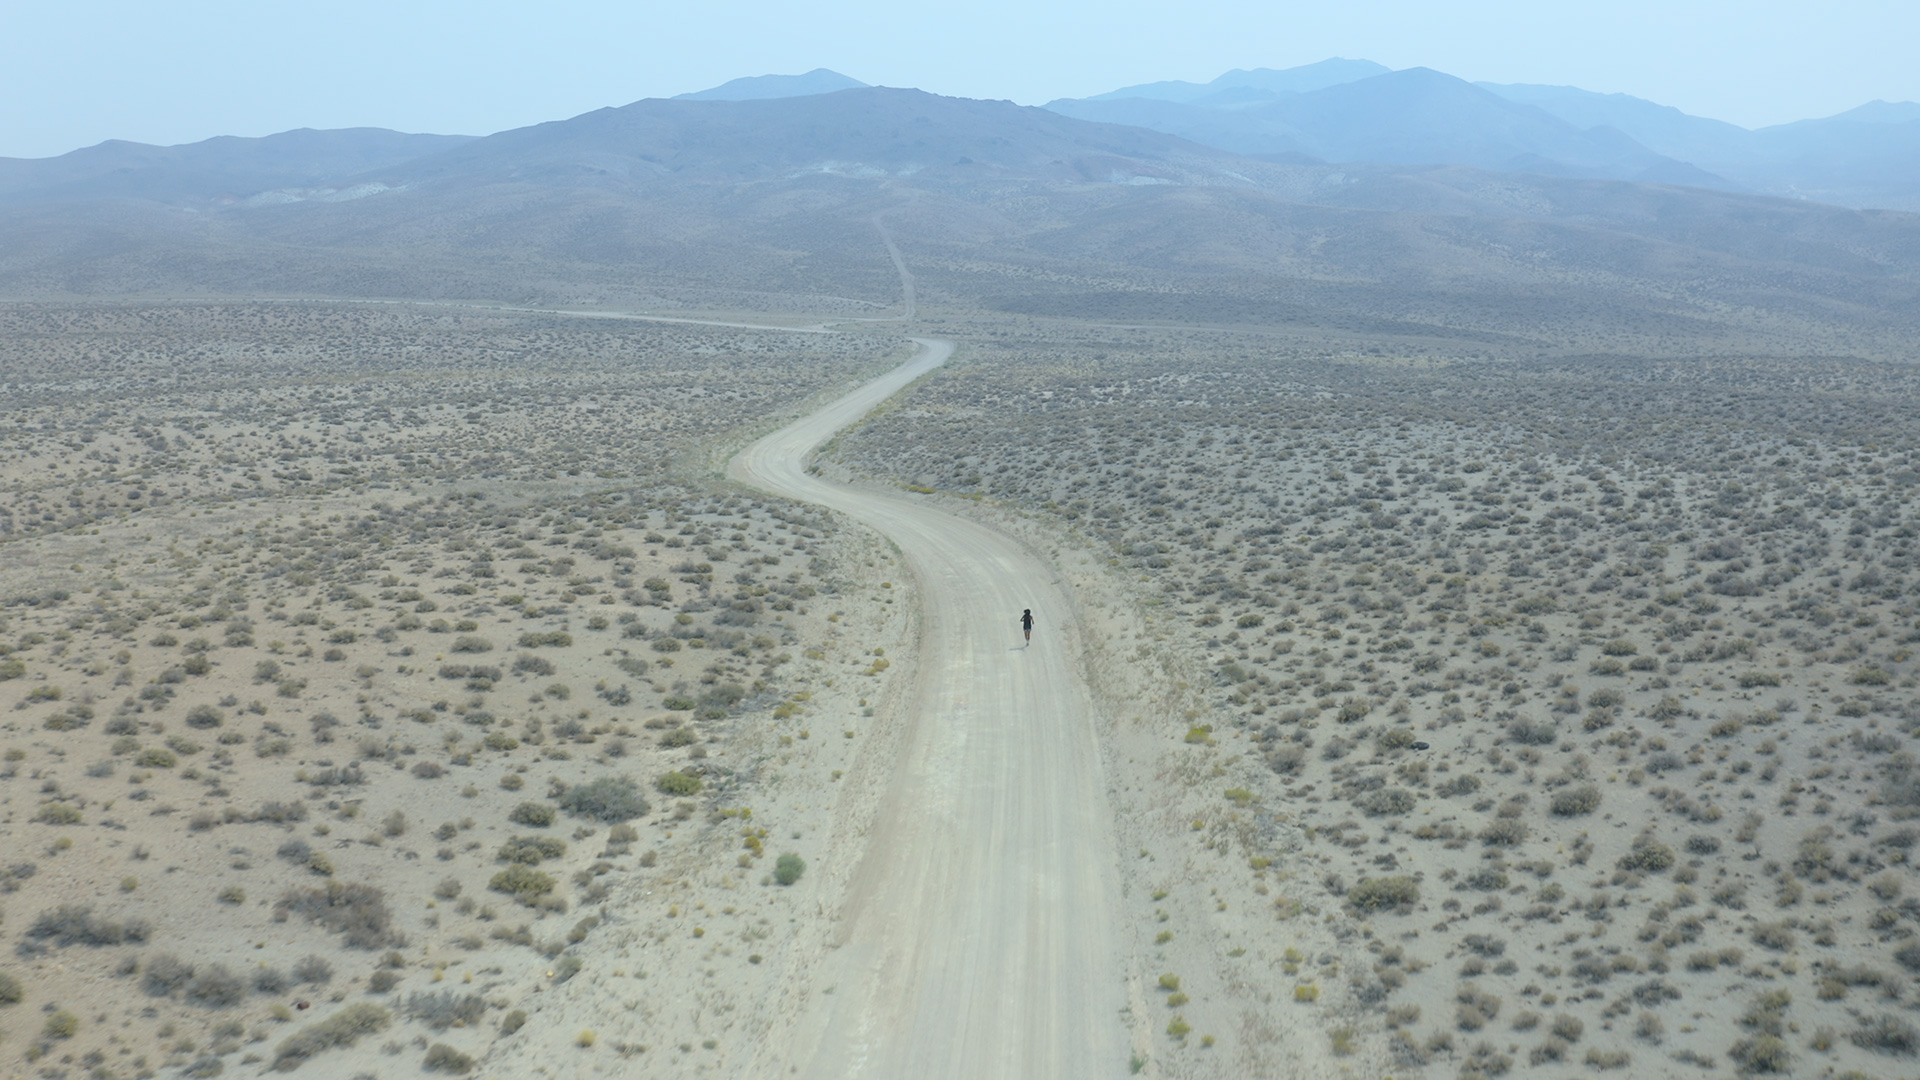
Sigma:
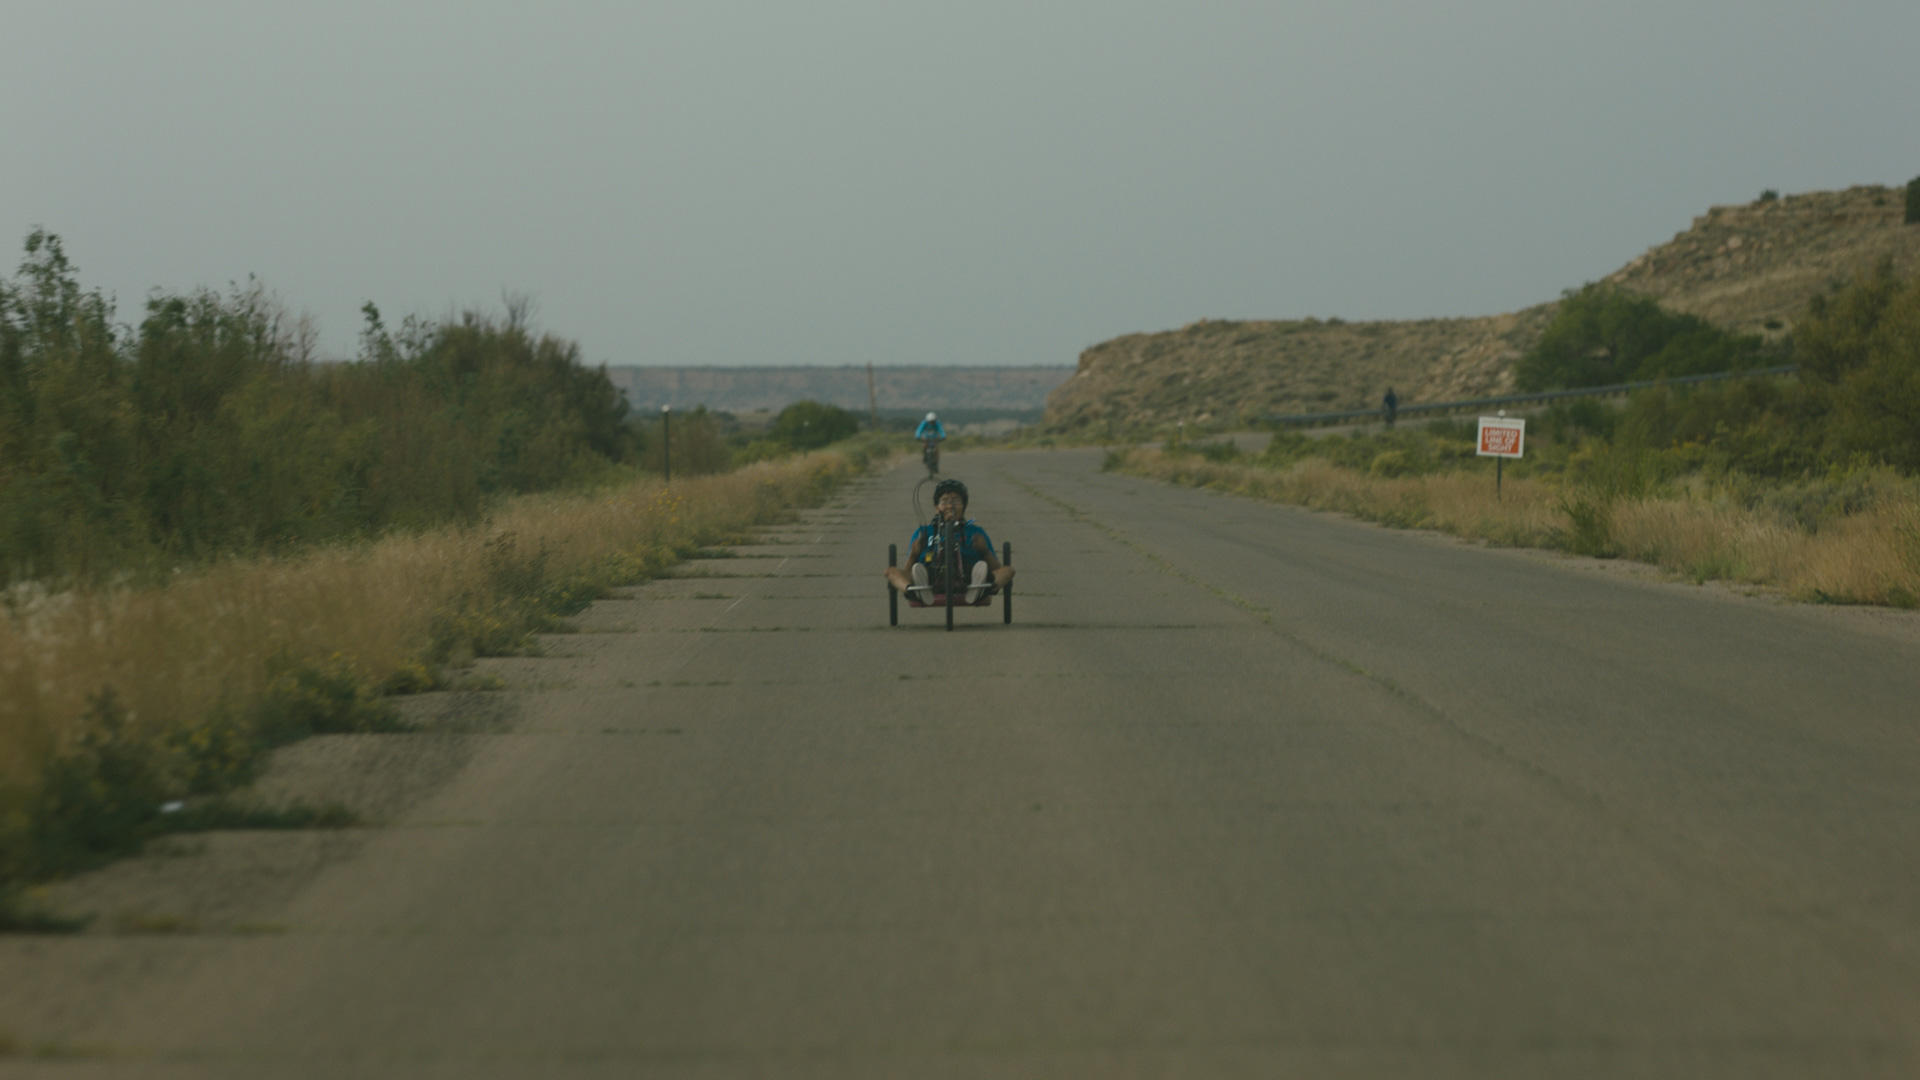
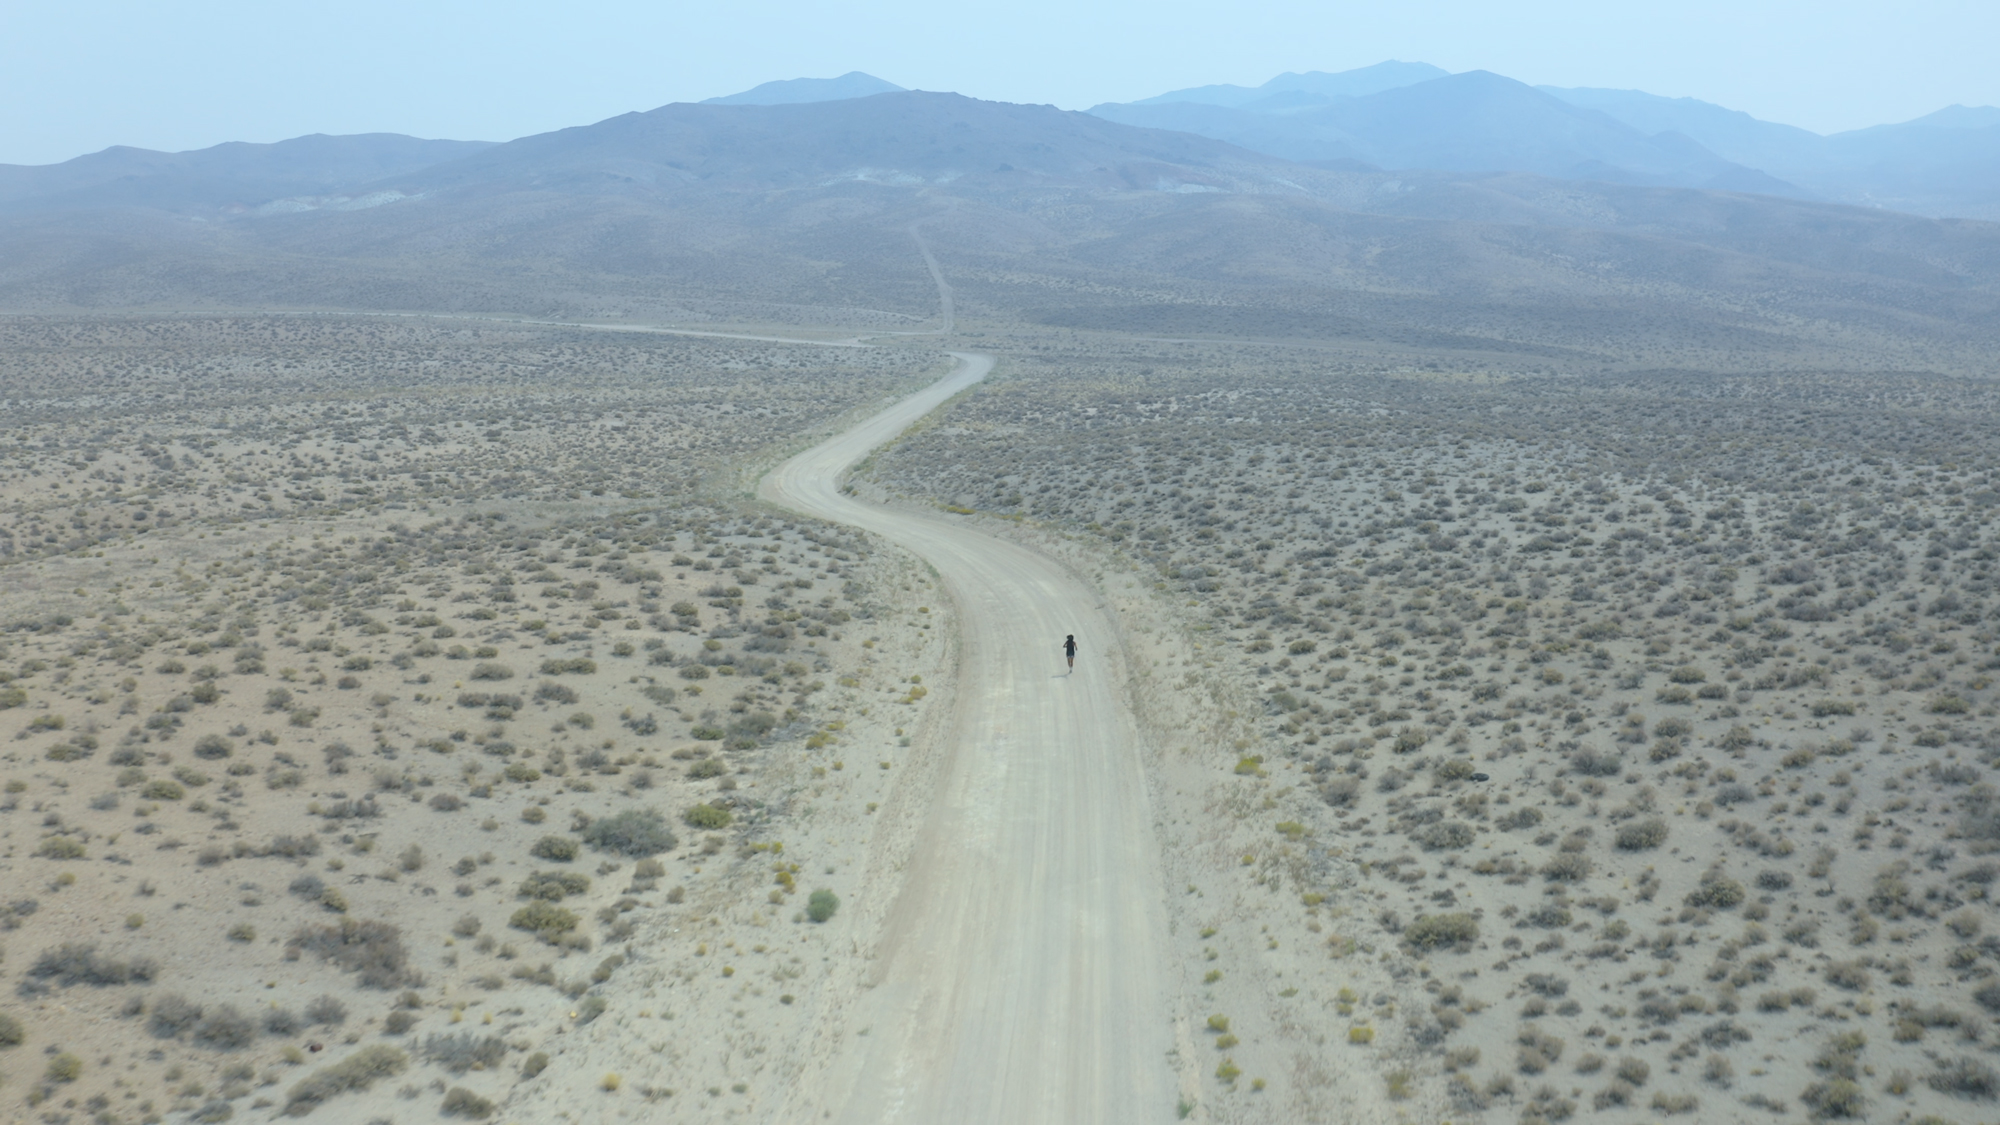
Continuing on this theme, as we’ve touched on briefly, the film beautifully uses the land as a character, and one striking example is a shot right around an hour into the film, where the vast foothills and meandering road create a powerful sense of scale—especially heat distortion blurred runners in the background. Can you talk about your approach to capturing the landscape in a way that connects past and present, particularly in relation to Ku’s great-grandfather’s journey?
Bethmann:
And I’m so glad you brought up that shot, because even when I watch it, I’m struck by it. When we were first selecting scenes to showcase the vastness of the desert, I remember looking at that shot and not even noticing the runner in the background at first. My editor had to point it out to me. The heat waves were so intense, and then suddenly, I saw him, and I thought, “Wow, that’s incredible.”
Scene from Remaining Native
Seeing that on the big screen in a theatrical setting is just breathtaking. The sound design plays a huge role too—the desert is so quiet, yet layered with sounds. You hear the runners breathing in the distance, the crunch of footsteps. That immersion really brings the scene to life.
The scale of it all is overwhelming. You go from these close, intimate shots of the land to these vast, sweeping views, and it’s a stark reminder of the enormity of the landscape. It’s also heartbreaking in a way—watching adults push through this grueling run is intense, but imagining it through the eyes of a child is almost unimaginable.
Cultural identity and representation
Sigma:
Let’s talk a little more about your other works while we’re on the topic of gear. To date, you have shot 4 mini documentaries for Running Strong for American Indian Youth, an organization that’s been working since 1986 and it sounds like you leaned on your great experience using Sigma Cine lenses for Remaining Native – i.e. you looked to Sigma glass again. Did these prior experiences influence your decision to use any specific Sigma lenses again for these projects?
Bethmann:
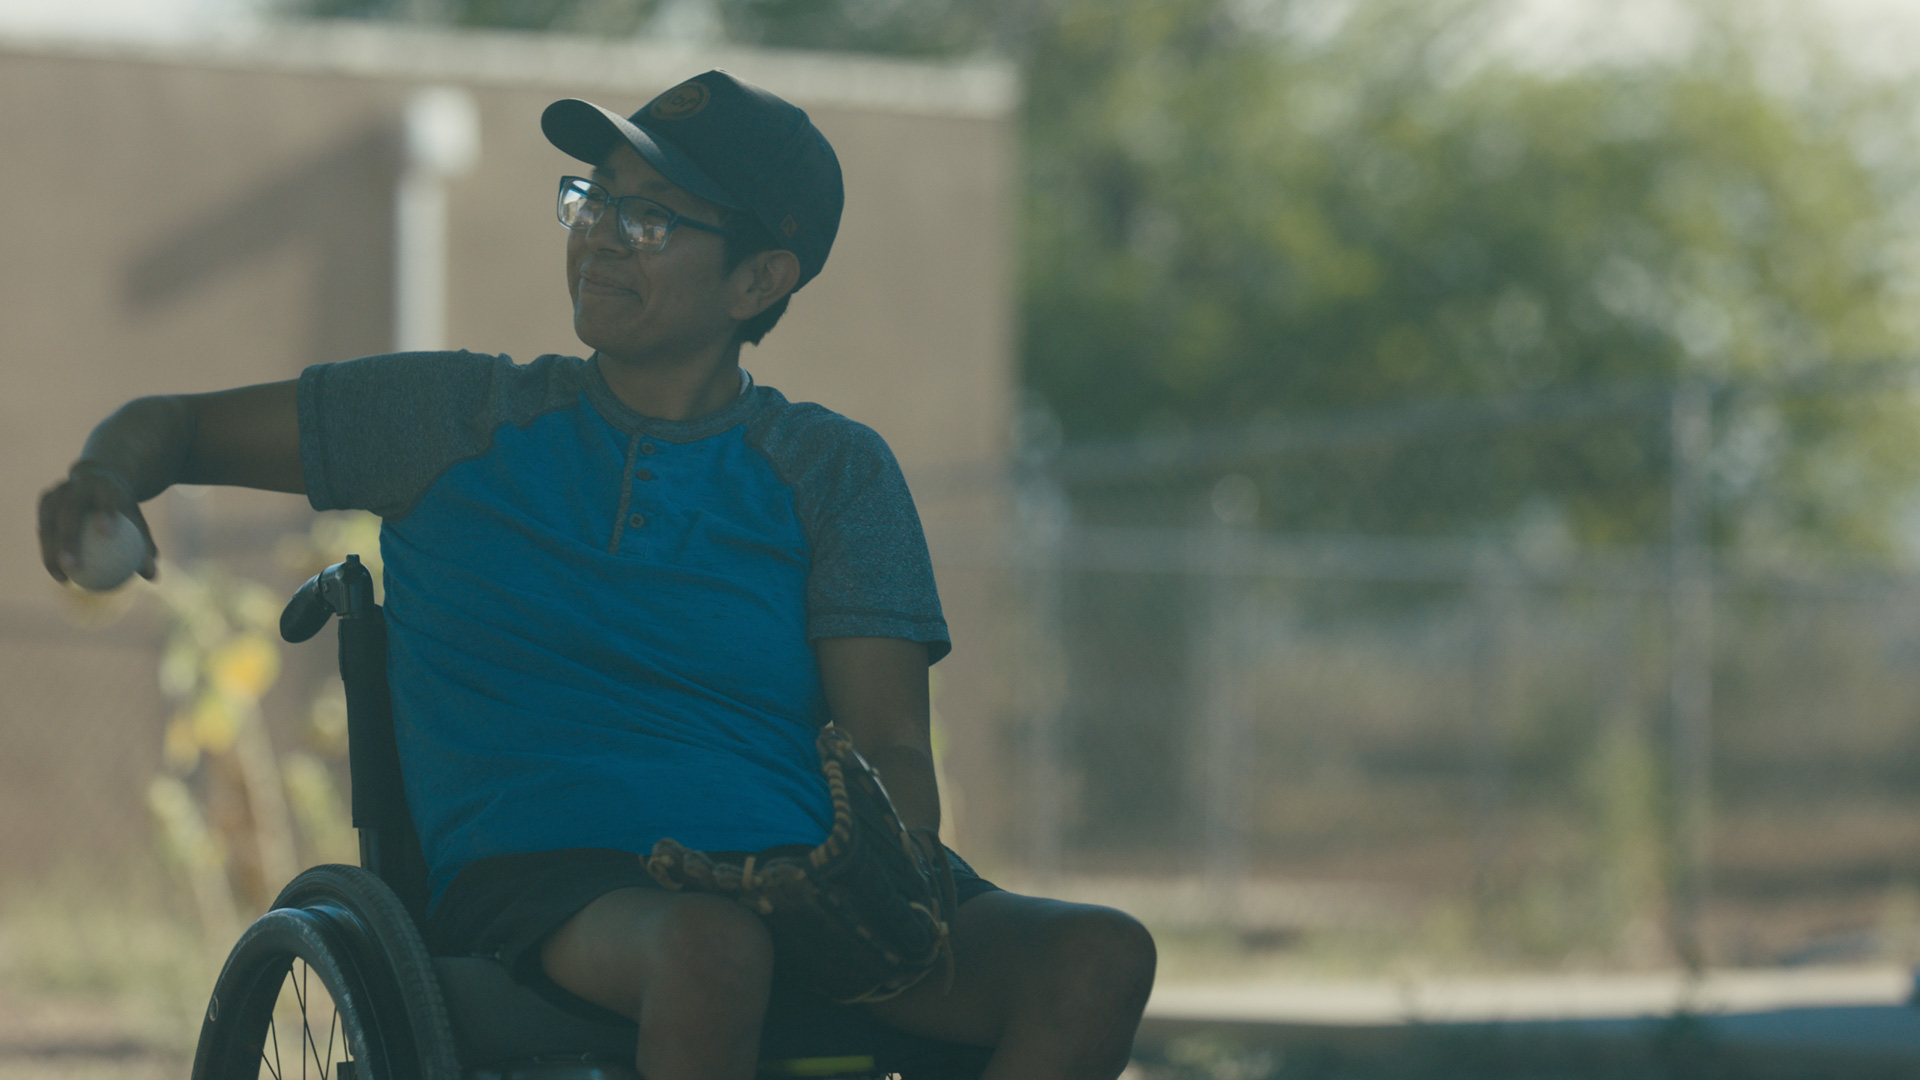
Yeah. Well, for one of the documentaries that we shot with Devyn Kazhe, which follows her journey as an adaptive athlete—you know, we shot on the Sigma FF Classic Primes, and those just blew me away. They are so beautiful. Stunning.
Sigma: They do have a lot of character.
Bethmann: Oh my gosh, so much character.
Devyn and I wanted to approach the story in a different way. Because it’s a short film, it’s told through her voice—almost like her poetry. I mean, she’s a very poetic speaker. She tells stories about her recovery and healing in a way that allowed us to craft more space in how we set up the shots, a lot more than we did in Remaining Native, which covered two years of literally chasing a teenager around—who’s a runner.
Scenes from a film featuring Devyn Kazhe, by Paige Bethmann, shot with Sigma Cine Classic lenses.
With Devyn’s film, we were able to bring a lot more intention. To say, you know, let’s set this shot up—and reset it again, get the tights and the wides, and slow things down a little bit, knowing that the lenses were going to play such a role in the artistic vision of the film. We really wanted it to feel warm and dreamy, and those lenses helped us achieve that.
With the other films, we mostly used the Art lenses that we have—so a lot of the 24-70mm, having more range. Those were also pretty fast shoots. They were very quick, so we wanted to be able to transition lenses incredibly fast and not miss moments while resetting a shot.
We also shot on different cameras. Remaining Native was shot mostly on the ALEXA and the FX9, whereas these shorts were shot with a much smaller FX3. We wanted that because a lot of the kids in the film weren’t used to being around production sets, and we didn’t want to feel so intrusive with a huge crew. So, it was just myself and Zack holding the camera, making it feel intimate, and not making people nervous by constantly switching gears, resetting, and reshooting—which can make people clam up.
The approach was a little different. Mostly, we spent a lot of time on the land, shooting on the 35mm and the 24mm, as well as the 85mm for more intimate close-ups.
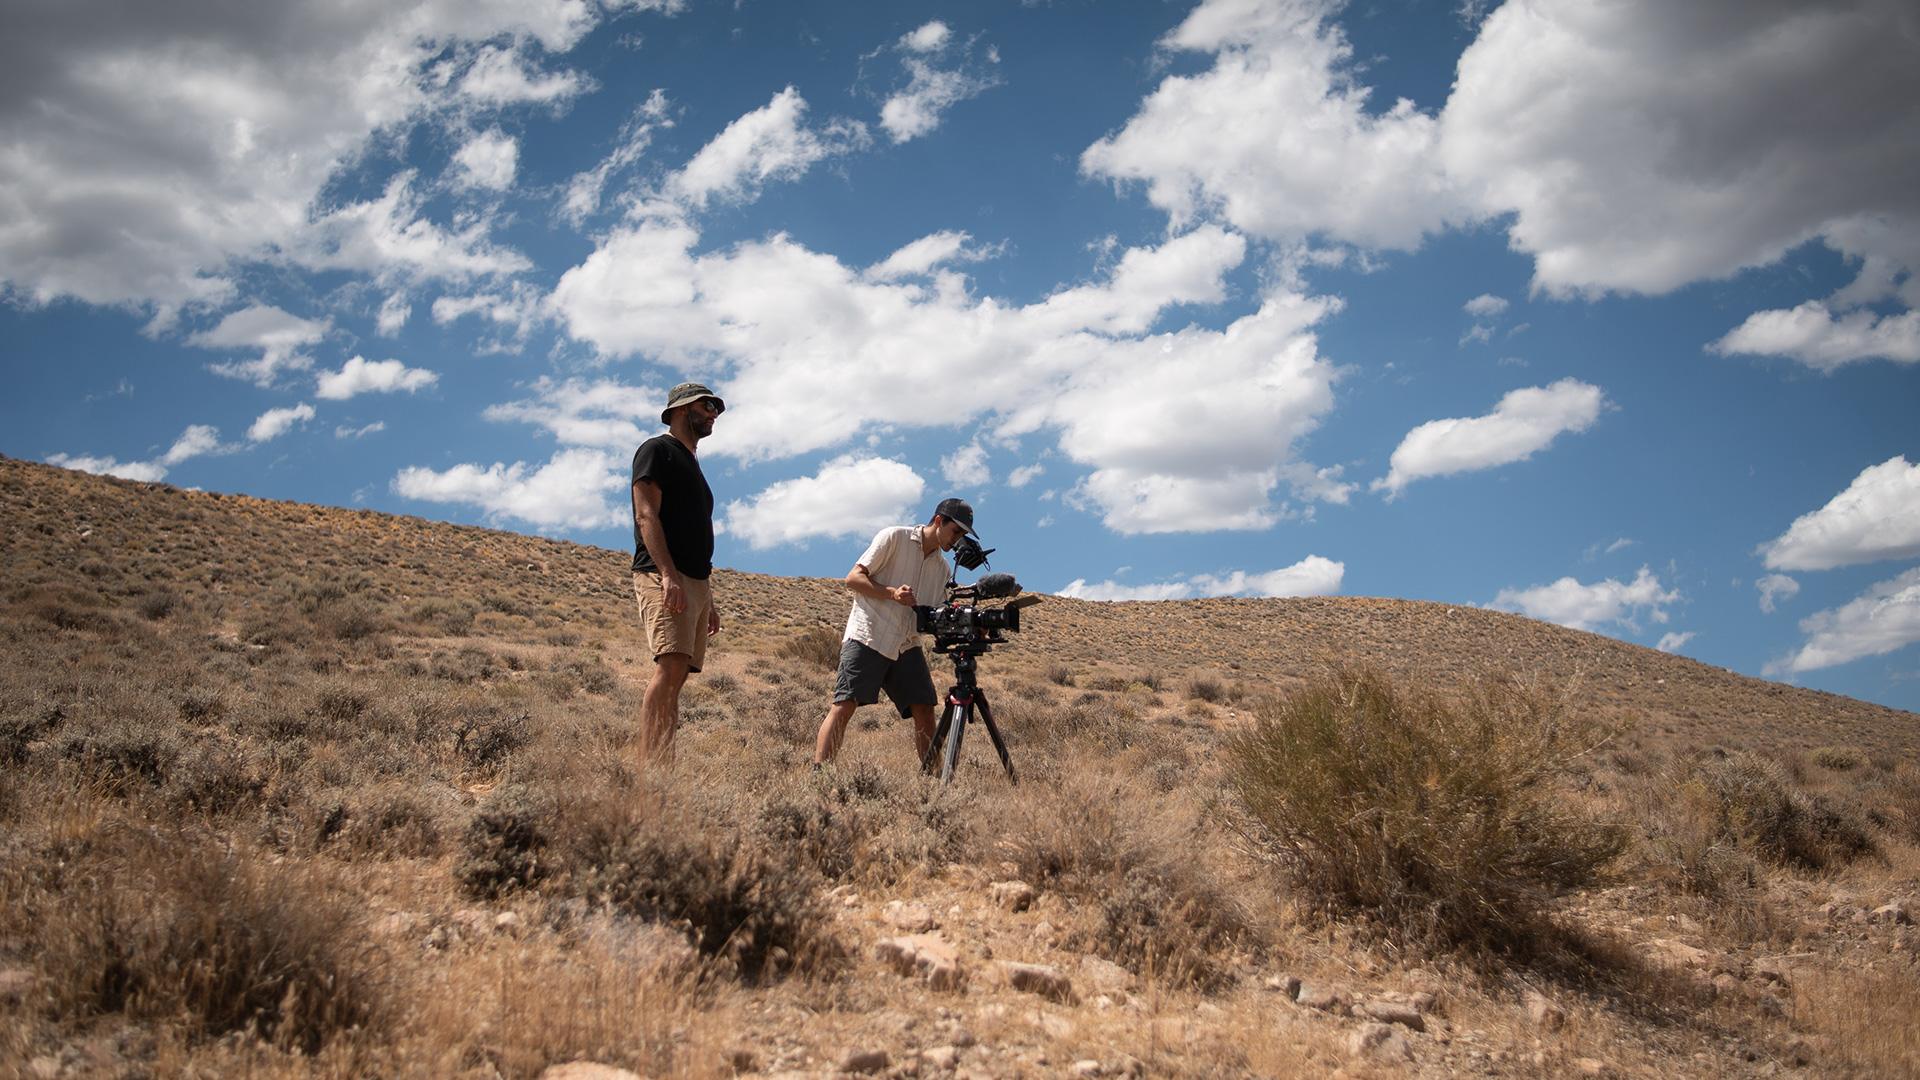
Behind the scenes from Remaining Native
I want to share one more story because it was very fun. Zack and I were out filming in Montana for one of the mini docs, and we were on the longest lens we had—I think it was the 100-400mm—but we were just kind of panning across, and then suddenly, I saw a swish of a tail, and there was a pack of wild horses right there. They were drinking water, and it was so cool to come across things like that, hidden in the landscape. Sometimes you don’t see it when you’re far away or distant from the land but having that closeness with a tight lens like that… it was magical to stumble across.
We had a team of about six people shooting the run because covering 50 miles is incredibly challenging. We had to spread out, position ourselves strategically, and communicate via walkies to capture everything. I believe this particular shot was filmed by either Shai or Adam Conti. We each had assigned locations, and we were stationed along the route to get different angles. I wish I could take credit for it!
Sigma:
Those are truly unexpected pieces of magic that make producing documentaries so exciting. And it leads me to the next question, which is a perfect segue. Shooting docs is often guerrilla filmmaking at its finest—low budgets, small crews, and shooting in real locations with or without permits—particularly for independent projects. You prepare and budget as best you can to try and predict what you’ll need in terms of focal lengths, speeds, even format—spherical / anamorphic—but often (and speaking from experience) this can change rapidly depending on opportunities that present themselves. Were there any Sigma lenses that stood out from the rest that the production leaned on more than the others in this regard? Any surprises?
Bethmann:
That’s a great question. Like you said, everything is extremely unpredictable. I would say that we took a lot of learnings from having to film over the course of two or three years.
I think one thing we used a lot that cinematographers sometimes, you know, scoff at is the idea of needing to use autofocus so much. You know, they spend time on craft and want to control everything. But when you’re trying to follow someone as quick as Ku, needing to be able to catch him using autofocus was something we relied so heavily on, especially with the Sigma photo lenses, to do that efficiently.
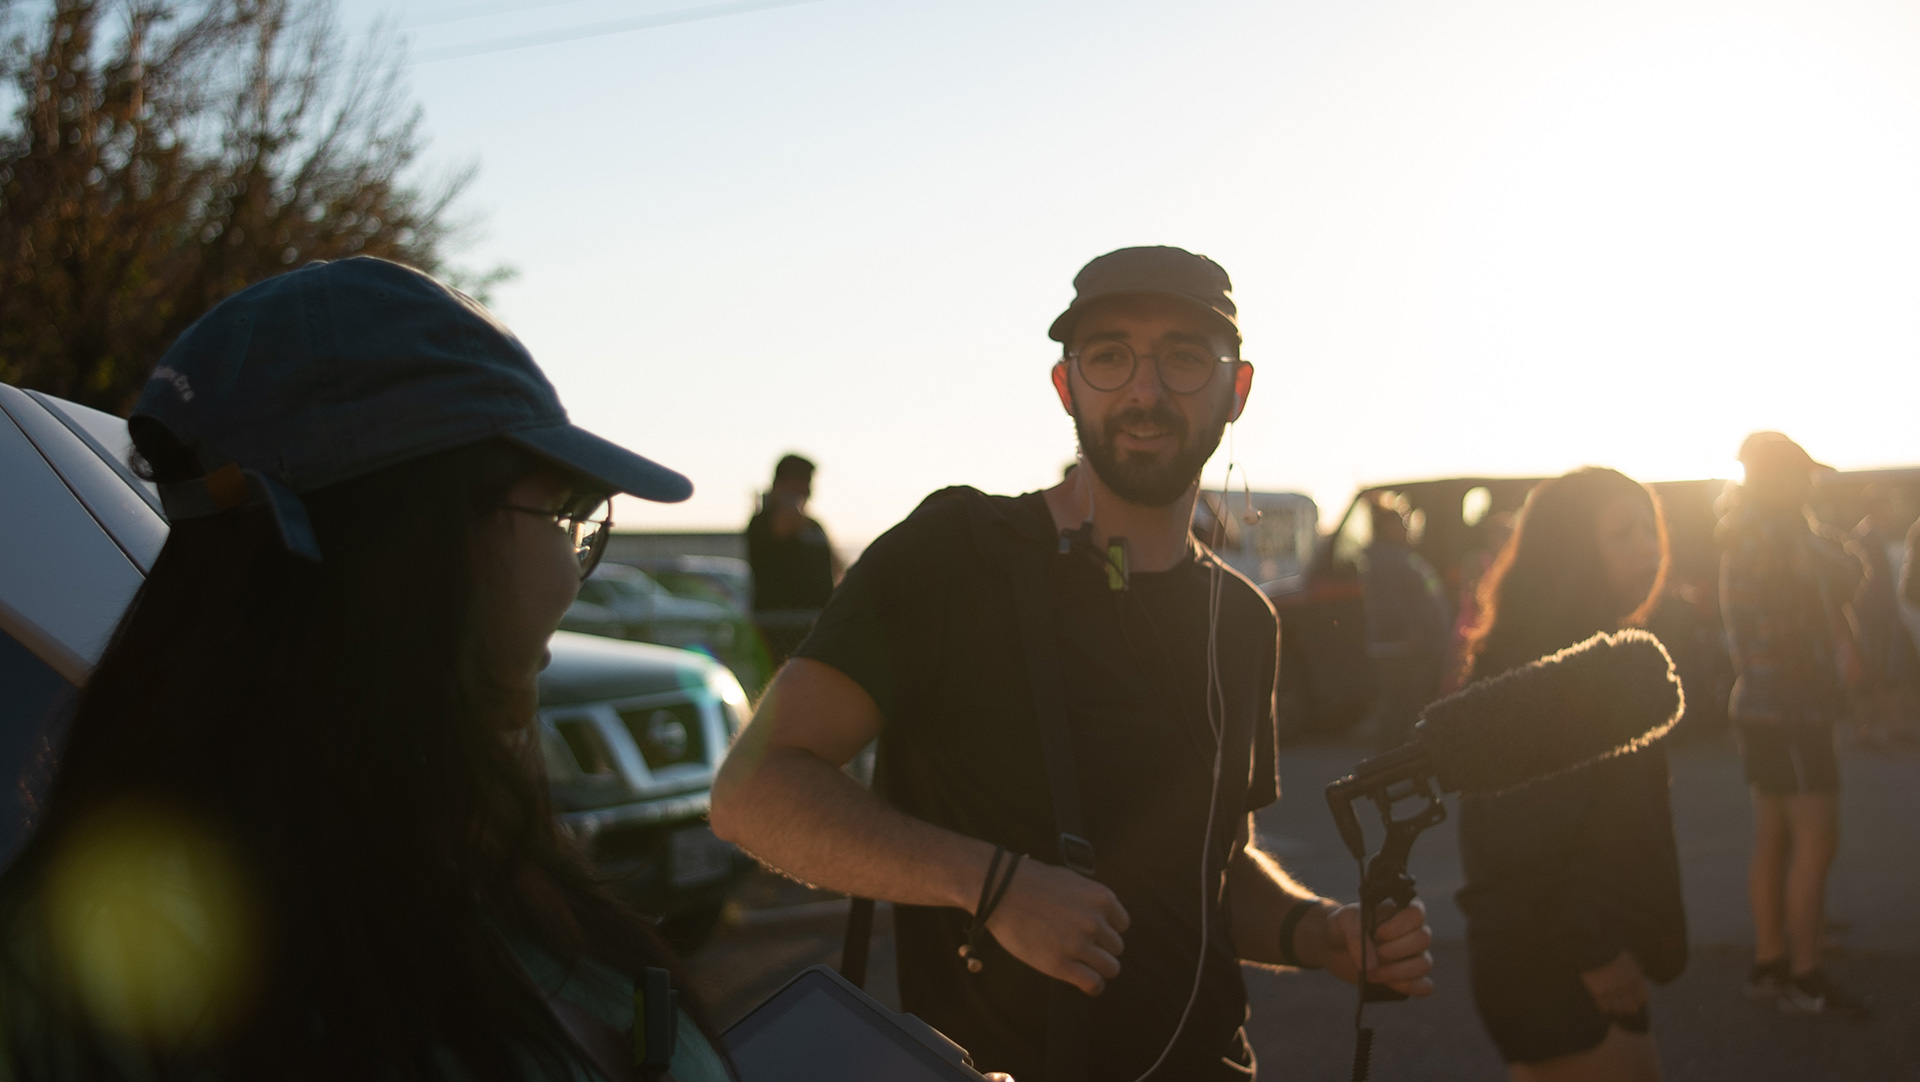
Behind the scenes from Remaining Native
So that was surprising—and not surprising—because as much as the craft is so important, it’s about capturing the story in the best way you can. That could be with a small camera that you just powered on quickly so you could catch a moment, or, you know, you could spend time waiting for the ALEXA to wake up for 30 seconds before you’re able to use it.
Figuring out what we needed at certain times—we had to adapt over the course of filming. As much as we loved using such an amazing camera like the ALEXA Mini, when you’re in the desert and must charge all the batteries, set up, and predict those things, it’s not always the best run-and-gun type of camera. So being able to adapt and interchange different lenses was good.
But primarily, we stuck to some of the Cine prime lenses, knowing that we were going to get exactly what we needed in those moments. Because we were spending so much time in the community—we weren’t just there for a quick interview or shoot. We were spending time with and without the camera. A lot of the time without the camera certainly helped us think about how we approached filming a scene—or even not knowing it was a scene until the edit.
You know, there are so many things we shot, like the fishing scene. We were actually fishing for the majority of that scene in the film, and then we picked up the camera for a little bit just to show what was going on. So it was nice to be able to take our time.
And then, Zack, didn’t we also have access to the 24… what was it? The really wide lens? Which one was that?
I was just going to add one thing, too, about something surprising—the PL mount of the cine lenses. We didn’t have PL for the whole shoot; we had different times when we had PL versus—other mounts. Having the PL was nice because we could adapt it to either our Sony mirrorless cameras, or if we had access to an ALEXA, we could mix and match as we saw fit. And those Sigma PL lenses are super light, too. But overall, an amazing thing about the Sigma lenses, across the Cine and the still lines, is the consistency between lenses.
Scene from Remaining Native
Sigma:
As expansively thematic as Remaining Native is about legacy, trauma, and the Native American experience, at its core, Remaining Native is rooted by a young runner. As such, the film features a lot of dynamic and physically intense moments, particularly during the running scenes and track meets. Tell us about the collaboration and challenges with your co-DP Shai Ben-Dor here. Was there a synergy between you two in terms of visual storytelling and the use of specific Sigma lenses to capture his craft on-the-fly? And tell us a bit about pre-production…
Bethmann:
We didn’t really have pre-production.
We got permission to go out and film once we decided that we wanted to try to capture the story, and then we were just kind of out there…doing it.
But the thing is, my cinematographer, Shai (DP Shai Ben-Dor) —you know, we had a relationship beforehand. We went to college together, and I had worked with him several times before. We had a shorthand with one another, and I think Shai is someone who is, well, he’s a runner. That was a no-brainer. He ran cross-country, so he was willing to get right up close with Ku. I trusted his decisions in wanting to really capture the more visceral aspects of the cinematography—to make it feel like running. He was the perfect fit to do that.
We were also using an electric skateboard. I can’t skateboard, but he used one to track Ku around. When Ku was on the track or the road, Shai was literally shooting on the skateboard, holding the control, pulling focus, and operating the camera at the same time. It was very impressive.
I think there was a lot of synergy and trust. I knew that if he was going to fall off the skateboard, the camera would be protected—he’d sacrifice himself first. Those things were really important, and I think we both had skills that complemented each other.
I wasn’t planning on shooting at all when I first started the doc because I didn’t particularly have a background in filming, other than small videos I would make myself. But Shai noticed that the people in the film—Ku’s family and community members—reacted very differently to me holding a camera than to him. He was the one who empowered me to say, “Here, pick up this camera. Why don’t you shoot?”
Scenes from Remaining Native
Because I was able to access more intimate moments with the family that he couldn’t, that gave me more confidence, and I started learning along the way—starting to make more decisions on how I wanted to shoot something. Shai’s cinematography has a lot of energy, whereas I’m a little more contemplative. I want to sit there, hold a shot longer, and focus on details—on landscapes and sitting in a moment—versus chasing the moment.
I think we actually had a great dynamic. He taught me so much—same as Zack. Zack really played the role of assistant camera, was flying the drone, and was in there doing all the sound. We all had to have a solid team dynamic to make it happen.
Impact and future work
Sigma:
Speaking of introspective moments and the difference between your approach to a scene compared to Shai’s… There’s an incredibly special, incredibly vulnerable sequence in the film on the eve of the race where Ku and other tribal members share stories about their familial ties to the Stewart Indian School and other boarding school experiences. As the stories unfold, day quickly slips into night, but the visual quality remains so striking and crisp. Can you tell us more about that sequence and how shooting in low light affected the approach? Did the high-speed capabilities of the Sigma lenses, for example, help capture those intimate moments as night fell, and were there any challenges shooting into the night that the lenses helped you overcome?
Scene from Remaining Native
Bethmann:
I think for the circle—when we first went to film the run, that circle moment was so powerful. By the second run, which is what’s featured in the film, we had a better idea of what to expect and anticipate.
The first year we tried to film it, no one was mic’ed, and we were completely unprepared—especially for the changing light. This time, we were able to plan better. We actually had three cameras running simultaneously, shooting on Sony FX9s, which handled low light much better.
We also stopped down to T2 in order to capture everything. And because the community was familiar with us—we had been filming with them for the past two years—they knew we were there and were comfortable with our crew. That allowed us to be more front and center for some of the close-up shots without being invasive. We didn’t want to take away from the healing happening in front of us, so we tried to stay in the background as much as possible. For that scene, we primarily used prime lenses.
Kiszka: We used little lanterns. That’s where all the artificial light was coming from—just lanterns.
Bethmann: The hardest part of the scene was the transition of light. It made editing difficult, but we ultimately let the scene play out in real time in the edit. The biggest challenge, though, was the audio.
Out of nowhere, these crickets appeared, and they were so loud. But it was also quite powerful to see people gathering intentionally—not because there was a fire to keep warm, but simply to be together.
I remember asking, “Where are they even coming from?” And when we worked with our sound designer, his first pass included a fire crackling sound. I had to tell him, “Actually, there was no fire there.” It was illegal to have one in northern Nevada during fire season. It was really about finding a different way to bring that sense of presence and gathering into the scene.
Behind the scenes from Remaining Native
Sigma:
Having your first feature film premiere at a major festival, let alone receiving awards, is a dream for most filmmakers. Can you tell us about your, and the Remaining Native team’s, overall experience at SXSW, in terms of the reaction to the film as well as the overall spirit of the festival?
Bethmann:
Yeah, we were excited to be at SXSW — not just because it’s a large festival with a big platform that would help launch our film, but because it’s Austin, Texas. A place historically responsible for much of the erasure of Indigenous people.
Bringing a Native presence there, along with the collaborations and partnerships we formed for the premiere, made it truly special. Before coming to South By, we reached out to the Austin Powwow Committee, and they came out to support our 5K run and attended the screenings. They were able to talk about what it means to be Indigenous in Austin on a platform like that. We also partnered with the Indigenous Cultures Institute and the UT Indigenous program. Having them as on-the-ground support helped us feel welcomed at the festival, ensuring we were using our platform to speak on real issues happening in that space. The film became a tool for education and a way to share Ku’s story—what it means to be a Native American teenager today.
Austin also has a huge running community, and being in a place where runners were excited to join us and attend the screenings was incredible. Each screening had a different energy—one had a strong runner presence, where the audience laughed at insider jokes about split times and reacted to Ku’s speed. Another had more Indigenous audience members, who connected deeply to their own family histories and stories. Hearing people share about their families was incredibly moving and powerful.
It was also significant for Ku himself. He’s grown so much since we started filming, and watching the film captured such a pivotal time in his life—his transition to college. Now that he’s about to be a senior, the film offers a space for him to reflect on that year. Seeing so many people come up to him, tell him how inspiring he is, and offer their support was deeply meaningful.
We were also grateful for the festival’s partnership. They were incredibly accommodating—when we asked for tickets to share with the community or help with promotions, they stepped up. We also had our own photographer with us to document everything, which was fun. And using the Sigma BF, we were able to capture our premiere in a special way, continuing our connection with the Sigma family.
Scenes from Remaining Native
Sigma:
It obviously seems as though you’ve had a positive experience working with Sigma lenses. And now seeing the continued success of Remaining Native on a festival tour, do you see them playing a part in any of your upcoming projects? What’s next on the horizon for you, Paige?
Bethmann:
If Sigma continues their partnership with me, then of course! I would absolutely love to continue that because I think what we achieved with this film was making it as beautiful as possible. Too often, Indigenous stories are shot in a way that focuses on trauma, what some call “tragedy porn.” I wanted to ensure we captured a lived-in experience—one that highlights the beauty in the lives of the people in the film. While the film acknowledges the historical struggles of Native people, its focus is not on tragedy. Ku’s family is incredibly supportive, with strong, healthy relationships—not just with each other, but with the land. We wanted to bring that to light, showing the beauty, hope, and resilience in Indigenous communities.
Knowing we could visually reflect that beauty was powerful. Even while working on Devyn’s film, we were able to be more intentional—thoughtful in composition, capturing details, and slowing down the visual flow. Moving forward, I can see myself taking that approach even further, focusing even more on intimate details.
Right now, especially in today’s world, Indigenous stories hold solutions—solutions for health, for relationships with the land. They help answer questions like: What does a healthy river look like? What does a thriving community look like? How do we return to the ways our ancestors cared for the earth? I want my work to bring these stories forward in a cinematic and deeply immersive way—something that allows people to connect with aspects of the world they might walk past every day without noticing.
Scene from Remaining Native
One idea I have is a film about maple syrup. I’d love to shoot it in a way that’s rich, slow, and immersive because maple syrup is part of our (Haudenosaunee) creation story. The process behind it is all about hard work—distilling something to perfection over time. To do that, you have to slow down and be patient. As a filmmaker, I want my craft to mirror that experience—to put in the same level of dedication, patience, and care to bring out the essence of the story.
Beyond filmmaking, we also have plans for community screenings. Impact is a huge part of our work—not just in how we share the film after its release but in how we make films. I truly appreciate having ongoing partnerships, like the one with Sigma, because cameras can be tools for storytelling and education. Ku himself became interested in filmmaking through this process. At one point, after being followed by cameras for so long, we handed him one and said, “Here, try it.” He started shooting his own footage and got really excited about it.
Encouraging younger storytellers to explore this technology—to experiment with it, get familiar, and create something of their own—is just as powerful as the finished film itself. That community-driven approach has been central to this whole process.
We have big plans for this film, and this is just the beginning.
Sigma:
Now that the film is out and Ku is beginning to see its impact—the stories being told around it, the conversations it’s sparking—does he feel like he’s growing into his name? Has he shared any reflections on that with you?
Bethmann:
Yeah, it’s funny because at the Q&A at South by, someone asked Ku that exact question. He said, “Maybe I’ve put a dent in it,” but he still doesn’t feel like he’s fully achieved his name. He knows there’s a lot more work to do, and he’s ready to put in that effort. Hopefully, one day he’ll feel like he’s lived up to it. That mindset is so reflective of who he is—not just as an athlete but as a person. He’s ambitious, determined, and humble, yet fiercely competitive and always striving for more. That relentless drive is what pushes him forward.
Ku’s father, Delmar Stevens, says Kutoven is a Paiute word that translates to “bring light from the darkness.”
“When you look at that name, and the responsibility that comes with it, it’s big,” Delmar Stevens said. “But I see Ku is up for that. He has been doing that already.” (this is a scene in the film and also referenced here:
Thank you so much. Paige, do you have any closing thoughts and can you tell us where can people go to watch Remaining Native, as well as the rest of your work?
Bethmann:
We’re really proud of the result, and it’s exciting to see what we were able to accomplish, especially given how expensive high-quality camera packages can be. Having support from partners made a huge difference, allowing us to achieve the level of quality we envisioned. It was truly a team effort, and we’re grateful to everyone who believed in the project. And thankfully, the lenses held up—even after all that time in the desert!
On our website we have been posting our screenings and there’s going to be more posted up there if anyone wants to buy the film, they can do that. And hopefully the film will get sold and distributed to be able to be seen widely.
Learn more about Remaining Native and find screenings