بلاگ

  • Nauticam Announces Housing for the Canon EOS C400 Cinema Camera

    Nauticam Announces Housing for the Canon EOS C400 Cinema Camera

    [ad_1]

    Nauticam has unveiled its housing for the Canon EOS C400. Sporting a cube-style design like that of the EOS C300 Mark III, the C400 features a full-frame 6K CMOS back-illuminated stacked image sensor with up to 16 stops of dynamic range. It can record 6K/60p full-frame footage in 12-bit Cinema RAW Light, as well as shoot 4K/120p and 2K/180p RAW video.

    Employing the company’s N120 port system, Nauticam’s NA-C400 housing features important controls within easy reach of the integrated ergonomic handles, including lens control dials, and exposure and capture controls. Making use of the camera’s remote functionality, the housing also features electronic controls at the rear and on the sides. The housing supports HDMI 2.0 and 1.4 for external monitors or recorders, while SDI output is also available for either surface monitoring or supported monitors. 

    Retailers such as Backscatter are now taking pre-orders for the NA-C400, which is priced at $11,000.


    When purchasing underwater photography equipment like the products mentioned in this article, please support DPG by supporting our retail partner—Backscatter.com.


    PRODUCT INFORMATION

    INTRODUCING NAUTICAM NA-C400

    The Canon EOS C400 Cinema Camera

    Canon’s EOS C-series Cinema Cameras have long been among the most versatile cinema cameras for underwater filmmakers and the C400 is no exception. Built around a 6K BSI full-frame sensor and the large RF-mount, the C-400 also features mechanical ND filters and Canon’s powerful Dual Pixel AF II.

    Key Camera Specifications:

    Canon EOS-C400

    • 6K Full Frame Back-Illuminated Sensor
    • 6K60, DCI 4K/2K, UHD 4K120
    • Full Frame, Super35 & Super16 Modes
    • Triple-Base ISO: 800, 3200, 12,800
    • Record Internal Cinema RAW Light, XF-AVC
    • Improved Dual-Pixel CMOS AF II


    The Nauticam NA-C400 Underwater Housing

    The Nauticam NA-C400 is a professional underwater aluminum housing that builds on Nauticam’s extensive cinema housing lineup. The NA-C400 features the large N120 port opening shared with other Canon RF and EF-mount cameras such as the R5II and R5C. This allows for the use of identical lens and port combinations when using a combination of RF-mount Canon cameras on a project with Nauticam housings.

    Mission Control

    Nauticam engineers obsess over placing essential controls where they are needed most so you never miss a shot looking for a button, dial or lever. Nauticam’s cinema lineup features large cinema-style lens control dials for precise control of focus and zoom. Exposure and capture controls are placed within easy reach of the ergonomic handles.

    In addition to mechanical controls for Power, Zoom, Focus and Lens Release, the NA-C400 features electronic controls at the rear, and both sides of the housing through the camera’s remote functionality. The left handle adjacent controls are for ‘Up’, ‘Down’, ‘ISO+’, and ‘ISO-‘. Right handle adjacent controls are for ‘Rec’, ‘Fn3’, ‘Fn4’, ‘IRIS+’ and ‘IRIS-‘. The main control board accesses ‘Left’, ‘Right’, ‘Up’, ‘Down’, ‘Set’, ‘1’, ‘2’, ‘Set’, ‘MENU/REC Review’.


    LCD Monitor Support

    The C400 features a detachable LCD screen that can be easily integrated into the NA-C400. The LCD monitor is supported inside the housing and is mounted at the rear of the camera with a supplied bracket that allows it to be easily viewed underwater through the shaded rear window making for a streamlined filming solution.


    HMDI/SDI

    The NA-C400 supports Nauticam’s optional HDMI 2.0 and 1.4 system that can accommodate external monitors or recorders in Nauticam housings. SDI output is also available for either surface monitoring or supported monitors. The NA-C400 has 1 M28 and 5 M16 bulkheads to accommodate a variety of configurations to suit mounted or remote setups.


    Battery

    The NA-C400 can accommodate either the BP-A30N or BP-A60N batteries or a combination of the BP-A30N and an FXLION NANO THREE 150Wh Micro V-Mount battery for extended runtimes.

    RESOURCES

    What’s In The Box:

    • NA-C400 Housing with vacuum valve pre-installed
    • Housing Cap
    • 2x Handles with mounting balls and 2x handle brackets
    • Panasonic CR-2450 Battery (pre-installed for moisture alarm)
    • Spare main O-ring, O-ring remover and lubricant  
    • Set of Allen Keys
    • Housing skids
    • Monitor Shade
    • Safety box

    Recommended Accessories:

    Housing Mount

    • 25221 M10 strobe mounting ball for housing
    • 25224 M10 strobe mounting ball for housing (with hole for using with lanyard)
    • 25228 M5 strobe mounting ball for housing
    • 16226 Mounting Bracket for Monitor Housing to use with Cinema Housings
    • 16701 Top Handle for E2/F/C70/BGH1/BMPCC
    • 17961 Swivel and Tilt Adjustable Monitor Mount System (To be release)

    Trim Weights

    • 16232 0.25kg Trim Weights for 16227 (4pcs)
    • 16233 0.5kg Trim Weights for 16227 (4pcs)

    Vacuum Valve

    • 25625 M16 Vacuum Valve II (Pushbutton Release)

    Handles

    • 28123 Pair of handles – size S (10mm closer to housing)

    DMI OUTPUT:

    Required accessories for HDMI 2.0 Cable System

    • 25089 M28 HDMI 2.0 Adapter
    • 25078 M28A1R225-M28A1R170 HDMI 2.0 Cable (for NA-BMPCCII/S1R/S1H to use with 17922/17909N)

    Compatible Monitor Options

    • 17922 Nauticam Atomos Ninja V Housing for Atomos Ninja V 5” 4Kp60 4:2:2 10-bit 

      Reorder/Monitor/Player (excl. HDMI 2.0 cable)
    • 17926 Nauticam NA-Ultra5 Housing for SmallHD Ultra 5 Camera Monitor

    Required accessories for HDMI 1.4 Cable System

    • 25033 Standard HDMI bulkhead with M16 thread (Mounted on the right side M16 of middle housing)
    • 25100 HDMI (D-A) 1.4 Cable in 200mm length for NA-a1 (for connection from HDMI bulkhead to camera)

    *25033 and 25100 is included in 17927 monitor housing

    Compatible Monitor Options

    • 17927 NA-Shinobi II Housing for Atomos Shinobi II 5.2″ Monitor with HDMI 1.4 input

    SDI OUTPUT:

    Required accessories for SDI Cable System

    • 17926S SDI Cable Set for use with NA-Ultra5/17922S  

    Compatible Monitor Options

    • 17922S Nauticam Atomos Ninja V-S Housing for Atomos Ninja V 5” 4Kp60 4:2:2 10-bit 

      Reorder/Monitor/Player (excl. HDMI 2.0 cable) with Atomos AtomX SDI Module
    • 17926 Nauticam NA-Ultra5 Housing for SmallHD Ultra 5 Camera Monitor

    Required accessories Surface Monitor

    • 25058 M16 SDI Bulkhead

      *Only support to be installed on the back door
    • 25060 SDI cable in 0.4m length (for connection from camera to underside of SDI Bulkhead)
    • 25064 SDI surface monitor cable in 15m length 

      (for connection from SDI Bulkhead to Surface Monitor on land)
    • 25065 SDI surface monitor cable in 45m length 

      (for connection from SDI Bulkhead to Surface Monitor on land)


    [ad_2]

    Source link

  • Mike Rogge – A Photo Editor

    [ad_1]

    Editor: Mike Rogge
    Art Director: John Coleman
    Copy Editor: Kim Stravers
    Managing editor: Doug Schnitzpahn
    Office Dog Boss: Quinn, Mike’s BF 

     Mountain Gazette has had multiple lives since its origins in the 1960s, including its most recent resurrection in 2020 under your lead. What drew you personally to this legacy publication, and how are you preserving its original spirit while modernizing it for a new audience?
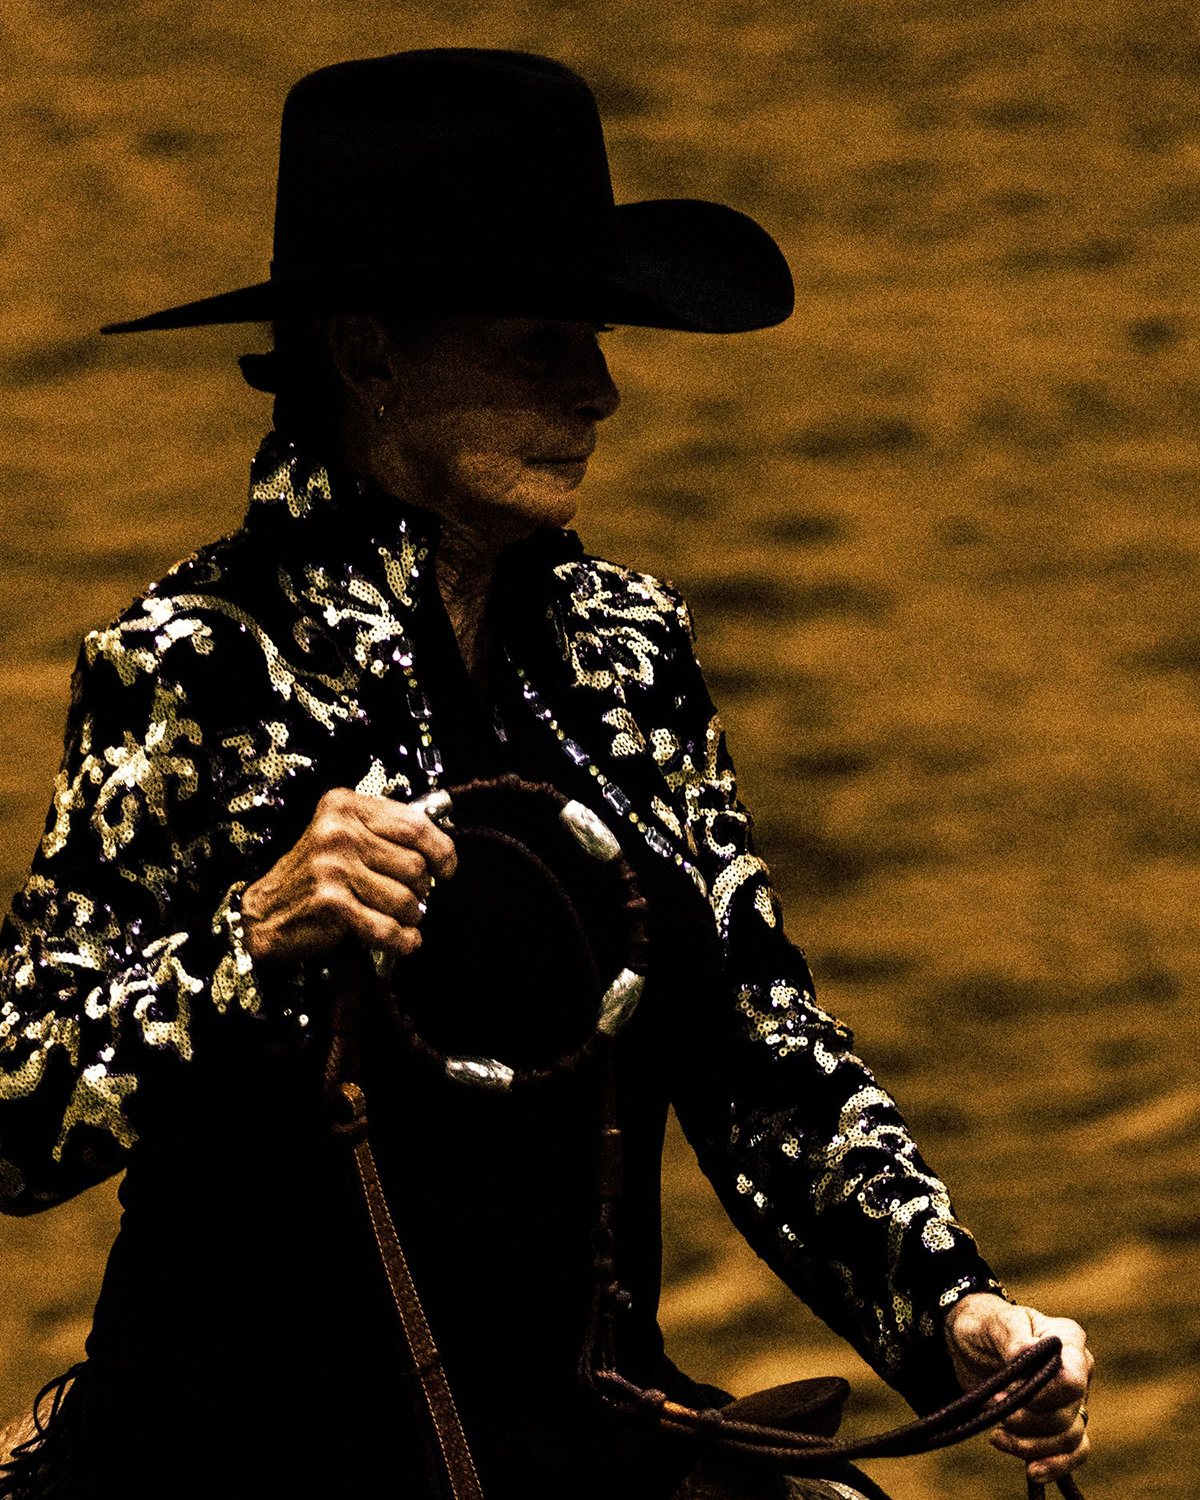
    I liked the alternative side of Mountain Gazette. I’m drawn to creative, outside-the-box thinkers and you would be hard pressed to find anyone more outside the norms than the 60s and 70s writers, photographers, and artists of those early issues of Mountain Gazette. The late-Tom Benton designed the second ever cover of MG. He also did the first ever Earth Day poster and much of Hunter S. Thompson’s Gonzo campaign for sheriff of Aspen. It would be wrong for me to try to find the next Hunter or John Fayhee. Rather, I search for writers, photographers, poets, artists, weirdos who carry that spirit of seeing the world differently than those writing the ins and outs of gear reviews, advetorials, and overblown everything-ness of modern outdoor writing.  I’m editing a Best of Anthology book to celebrate the sixtieth anniversary of Mountain Gazette’s founding. I have discovered the spirit of those early writers—embedding in a rodeo, following an obscure sport to obsession, writing about music and the outdoors—spans across generations. As far as modernizing it, we allow readers to subscribe with a credit card. It used to be a check or cash in the mail. Other than that, we try to keep it real. Keep it core. Keep it us.


    Your love and print and its revival run deep for you, can you share with our readers your POV on independent publishing?
    Independent publishing gets a bad rap sometimes. The image of ordering 1,000 books, selling none, and having boxes in a garage for eternity is not lost on me. The reality is without private equity backing you, independent publishing is a bootstrapper’s endeavor. And I like that. Sales not going well? Do something about it. Magazine sucks? Do something about it. As an independent publisher I’m free to work with whomever I’d like whether that’s Harry Bliss and Steve Martin or some young dirtbag journalist making a really good point in a Substack post. Independent publishing is freedom.  Recently I came to terms through my agent on a book deal with Penguin Randomhouse and their subsidiary Clarkson Potter. As a 20 year-plus ski writer, it’s a dream project, dream team over at Clarkson Potter, and dream scenario. Next week I will go to work just a few blocks south of Central Park. As an Adirondack born and raised kid, that feels like walking on the moon. I am greatly looking forward to learning how it all works in traditional publishing. I see the benefits of both indie and traditional publishing. I’m grateful I no longer have to choose which path to follow. “I can ski both lines” is how I’ve been thinking about it.  At Mountain Gazette, I’m the editor, owner, publisher, trash guy, HR, and what I’m getting at is I wear many hats. Our General Manager Austin Holt has taken a lot off my plate as has Meghan Rogge who is our VP. Conor Sendak our VP of Sales has taken excellent care of our advertising partners by setting realistic expectations and delivering.  We’re a small team and we’re constantly refining our way of doing things. We’re in the pursuit of making our title the gold standard when it comes to publishing, working with contributors, and taking care of our readers. We are not perfect. Far from it. The work is never done. There are a lot of indie titles, but there is only one Mountain GazetteWith this book I’m working on, I get to work with longtime contributors from the ski world who I consider family. I’m still meeting the team at Clarkson Potter, but they’ve been nothing but supportive. It’s nice to join a team. It’s nice to build one, too. 

    You famously bought the rights to Mountain Gazette for “a few hundred bucks and a Coors Banquet.” Beyond the romance of that moment, what were the biggest challenges you faced in relaunching a print-focused magazine in a digital era—and how did you build a passionate readership around it?
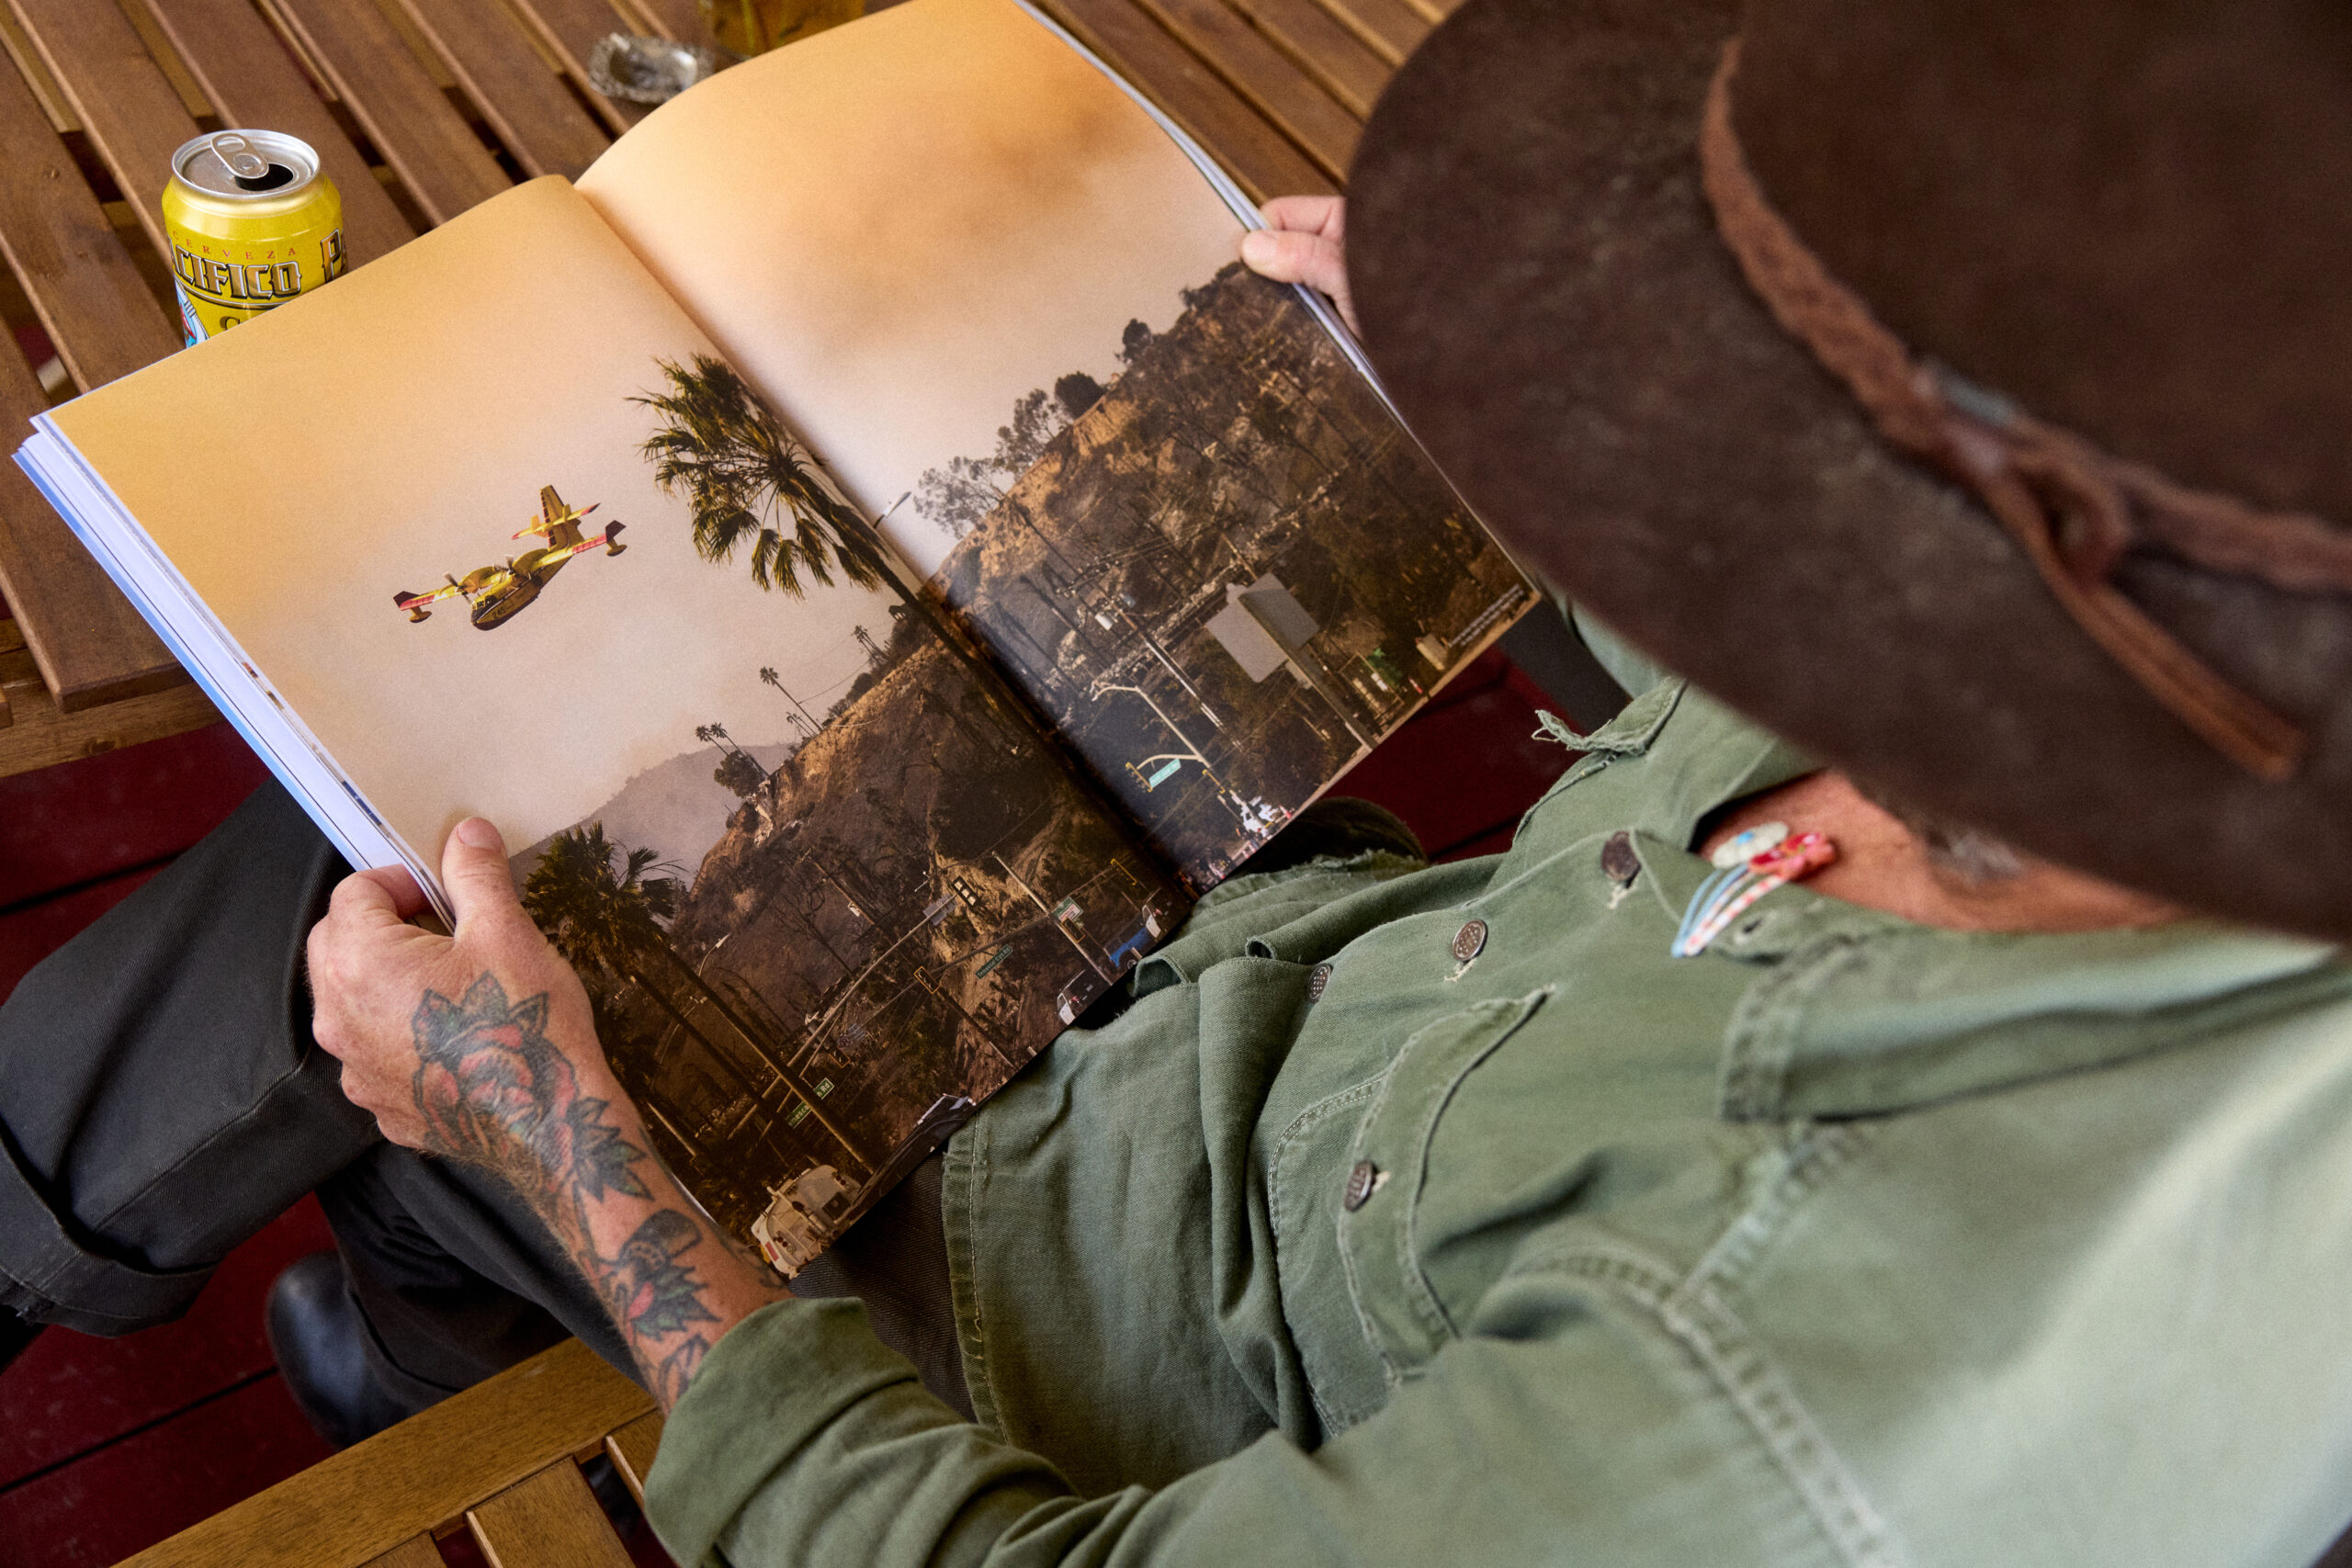
    I have been called a romantic person by more than one person in my life. I tend to get romantic about the small moments in life. The world was in the middle of the global pandemic, pre-vaccines, and I figured I should spend my time making something good for the world rather than freaking out about everything. My original intent was to grow the subscriber base to 1,000 people or so. A friend and former Mountain Gazette editor Peter Kray has always told me to write what I wanted to read. I wanted to make a magazine I couldn’t find anywhere else. I wanted it to be big, really big, pages, great writing, surprises, and just find things in the world that made me say, “Wow. That is fucking cool!” I haven’t gotten bored yet.  I’ve always believed if you focus entirely on the editorial the readers will find it. They did. My favorite stories from subscribers are when they have friends over for a dinner party or to have a drink and the magazine is on the table. Their guests stumble upon the magazine and say something to the effect of “What the heck is this?” I believe we get a lot of new readers that way. We hear a version of this story all the time.  We’re also print-focused, but in no way digital ludites. I’ve made what’s called “digital content” for two decades now. Print gave me a chance to focus. It gave me a page count. We could all use more page counts, some limits. Just because everything can be posted all of the time doesn’t mean it’s good. McDonald’s makes a quick meal, but it also gives you a stomach ache if you eat it all of the time. It’ll actually kill you. Digital media is fast food. It’s hard to find the good stuff online. The good stuff is in the real world. We should all try to remember that more.

    The NYT referred to Mountain Gazette as “gusty and wise” – You mentioned that “we went too far in the digital realm — and now we’re pulling it back.” How does Mountain Gazette intentionally design its print experience to provide that “lean back” feeling and stand apart from the overwhelming pace of digital media?
    John Branch did a great job with that piece. The first thing we, John Coleman, our art director, and I did was talk about how a magazine should be pieced together. The best way to do anything, in my opinion, is to talk a lot about what’s wrong with the way things are done. Start by not repeating someone else’s mistakes. Print magazines for a while now used crappy paper, too many poorly designed ads, not enough pages…it all reeked of desperation to do anything to keep the lights on. We pushed our advertisers to make ads that were above all beautiful. We also took a note out of podcast formatting and made it clear that ads would appear at the beginning of the book and at the end of the book. The feature well would be uninterrupted by ads for the benefit of the reader’s enjoyment. John and I determined we could do four-page features, but bigger ones would be better. The early Gazette had cartoons, so I reached out to my friend Cy Whitling and he’s had a cartoon in every single issue of the revival. Later, we found Mike Handzlik also known as The Dead Dirtbag. He pairs so well with the Jaded Local column. He and Hans are a good team. I brought on Harry Bliss and Steve Martin. Harry is one of the best artists I’ve had the privilege of working with. I like the way his mind works and how he dissects the world with a pen. Saying Steve Martin is funny is an obvious thing to say, but in our email interactions we can debate the funniness of a single word. He emailed Harry and I about the strip a few hours after he hosted the monologue of Saturday Night Live’s 50th anniversary show. Steve and Harry are dedicated to the strip and for that I am grateful. I feel this dedication to editorial cartoons is a major thing that separates us from others.  On our features, we get weird, we get soulful, we get rad, we get serious, but everything has to have heart and a perspective. We don’t phone a single page or line in. We try to publish what others would not. That’s not to be provocative. We don’t do anything for shock value in the magazine. That’s for the internet. We don’t need to get you with a headline. If you have the magazine, we already have you in the community. So we just lay it all out in a way that’ll make you put down the phone, pour a nice beverage, and take a deep breath. And to be honest with you, I don’t think any part of digital media does any of what I mentioned above. That’s what sets us apart. We don’t do silly dance videos. Maybe that sets us apart? Maybe we should do silly dance videos. I don’t know. I think I’d rather make two good magazines then go do literally anything else. 


    As part of a broader resurgence of high-end, niche outdoor journals, Mountain Gazette has embraced collectible large formats and minimal online presence. How do you balance being “unapologetically analog” with the need to grow a modern readership and engage digitally without diluting the print experience? What was your inspiration for the large format – or was it simply to represent vast and wild spaces?
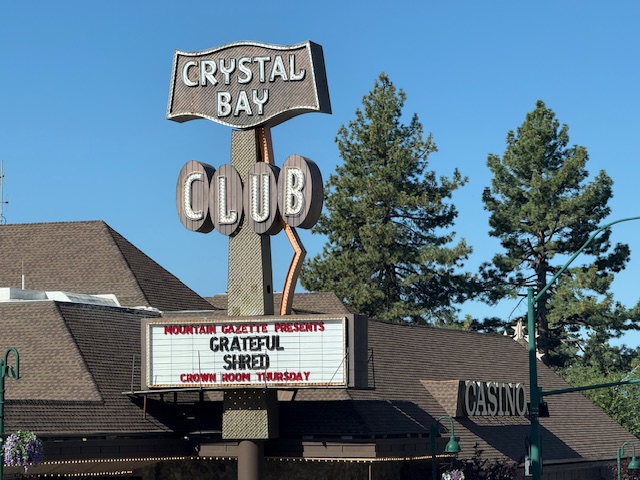
    We have never shared a single story in the magazine online. And we won’t. Our readers pay good money for the magazine. It’s their magazine. We owe it to them to not cheapen by giving it away for free. We can use the internet for what it was intended to be—a tool. We’re sitting with around 30,000 subscribers right now. I don’t believe there are other titles sitting at those numbers. It’s our job to communicate with our readers. We keep our magazine exclusive to print. Our online presence is mostly for advertising to get the title in front of more people, make a few jokes, sell a few t-shirts. I find the more our team engages online the less happy we are. Recently, we threw a show at the Crystal Bay Club here in North Lake Tahoe with the band Grateful Shred. We had over 300 people show up. I met local readers, but also a group of 9 people who drove up from Los Angeles to Tahoe to see the band and hang with other Mountain Gazette readers. It’s a community. No hashtags needed. The large format was inspired in large part by Victory Journal and coffee table books. I wanted to make a coffee table book twice per year. I don’t know what I was thinking but it’s worked out so far. 

    Congratulations on the reprint of issue 203 – what makes that issue so special in your mind, Drew Smith shot the powerful cover story. How did the story pitch unfold?
    Thank you. We have 6,000 additional copies coming off the press at the end of the month. We’re close to having our tenth sold out issue in a row. That makes me the single worst product forecaster in the industry. We typically slow down business-wise in June. School is ending. Summer is beginning. So I ordered a few thousand more copies than we needed, but when the world saw Drew’s cover…it just went nuts. We sold out in about three and a half weeks. We actually didn’t even use our marketing materials to promote the issue. They weren’t ready in time. The cover did all the work. That felt special and it’s really a testament to Jim Morrison, his vision for skiing the Great Trango Tower, and then pitching the story to me on the Granite Chief chairlift at Palisades Tahoe. He’s the only person to ever successfully pitch me on a chairlift. Another first for Jim.

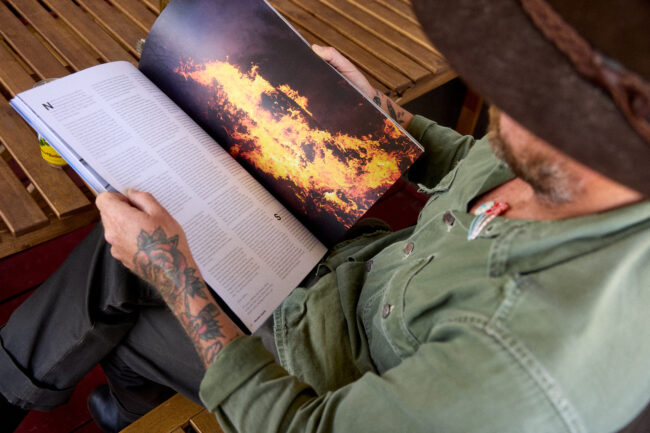
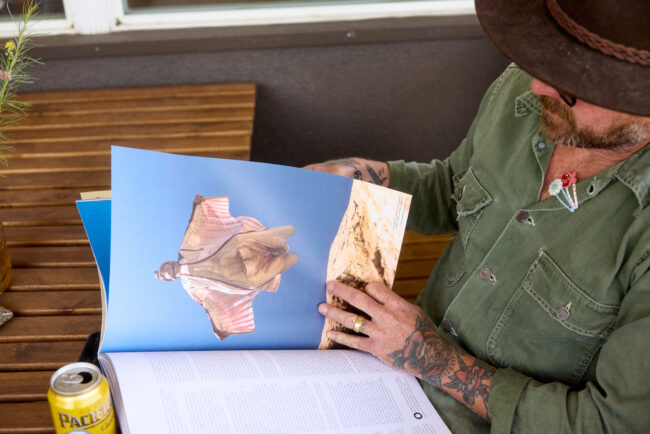
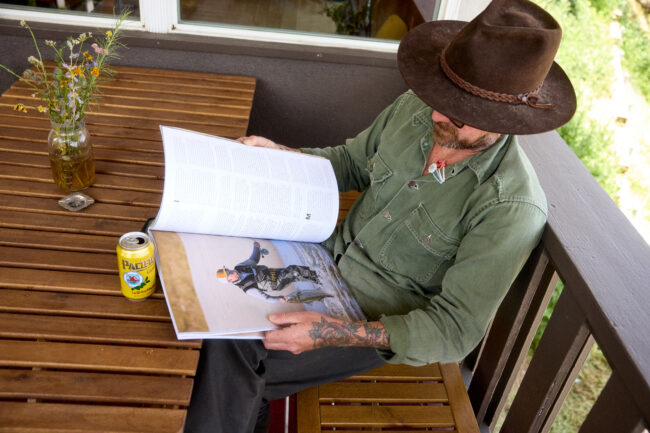
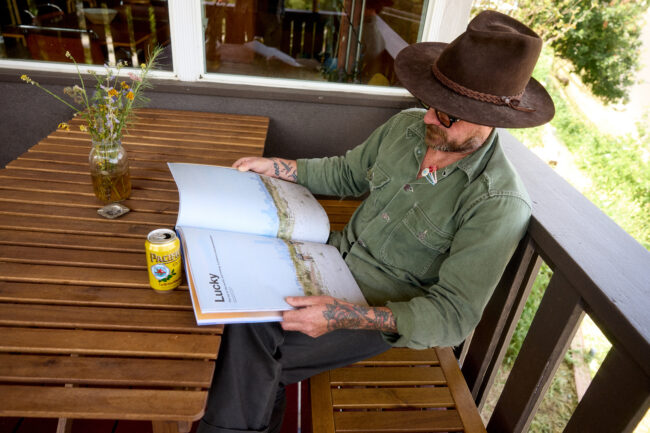
    Trango (TNF movie)  is set in one of the most dramatic alpine environments on Earth. What were the biggest challenges editing the 18 page spread story to show the scale and vertical exposure of the Great Trango Tower as well as the isolation for the reader?
    John and I did our best to edit down the selections, but ultimately we leaned on Jim over a Zoom session or two and a few phone calls to share with us the ins and outs of the journey. When Jim’s eyes lit up at parts in the story, we knew those were the images we needed to find a home for. Authenticity is important to our stories. There were plenty of rad shots Drew took that didn’t make the cut. That’s what happens when you work with insanely talented people in print. It can’t all get into the feature. The Trango film does an excellent job telling the story of the expedition. We wanted to tell the story of Jim’s experience, what his heart was telling him to do or not do, and the consequences of decisions in the mountains. For me, the film and the feature are entirely different and complimentary. For the design, we try to stick to singles and spreads for images. An 11×17 page lends itself to vertically oriented shots. The spreads can show the vastness and remoteness of the range. Drew has a great eye and the variety we had to work with was a ton of fun for John and me. 

    Mountain Gazette began as Skier’s Gazette in 1966 and evolved into a cultural touchstone by the 1970s, featuring icons like Hunter S. Thompson and Edward Abbey. Looking back, what do you think made the magazine resonate with readers during that era—
    and what lessons did you learn over the past few issues?
    Counter culture is needed in the world. We can’t let those in power tell us how to have fun, how to love, how to feel, or how to live a meaningful life. Skiers’ Gazette began with horror stories of the US Ski Team from former members. That’s just not something people wrote about in 1966. Powder wouldn’t come along until 1972. I like to think it was directly or indirectly influenced by that anti-establishment story in Skiers’ Gazette. I’ll have to ask the Moe Brothers one day. It’s not hard to see one story show folks that “this is not the way” and then another picks up the narrative and says “actually this way is kind of fun and funky.” That kind of speaking out is important. As storytellers we focus too much today on the intended outcome of a piece, but I believe the message and the medium are more important. We can pretend, as editors, that we can control outcomes, but we cannot. The best we can hope is we put something powerful into the world. We don’t build the fires. We can, however, create the spark. 

    Abbey and Thompson, they lit the match. The Jaded Local column by Hans Ludwig, today, he does the same thing. Cy Whitling does the same thing. Jason Roman, Megan Michelson, Amanda Monthei, Ari Schneider, George Sibley, Emily Leibert…they write and shoot and create art from their hearts. It’s never mailed in. That way of creating resonated then and it is what resonates now. We work with people who genuinely give a shit. 

    Over the last few issues I’ve learned a few things. Number one is that if our team at Mountain Gazette isn’t right, nothing can be right. Thankfully, I have the best team with me right now. Two is that there is no end to editorial. Just when I think I’ve figured out the formula, it needs to change. The world evolves and so does the magazine. What someone loved about MG 194 might not be what they love about MG 204 this fall. We have got to evolve our editorial as the world changes. We’re at our best when we reflect how the outdoor world actually is. That is an on-going job. I’ve been wrong about many things. I don’t enjoy running a business as much as I love making a magazine. We switched printers. That was unexpected, unfortunate, but the right move for the future of the magazine. Being wrong is just a chance to grow and learn. I’m grateful our readers allow me to do that. If I end up being more wrong than I am now, from an editorial standpoint, if I feel like I’m slipping or the readers let me know the edge is gone, I’ll step aside and allow the next editor of the magazine to take it down the next path. The goal here is to not die in this chair. The goal of this revival is that another one will never be necessary. 

    How do photographers get in touch for potential story ideas?
    We have a submissions page at MountainGazette.com. We receive over 6,000 story submissions per year for around 40-45 slots over two stories. It’s hard to get in our pages, but I promise when you do it’ll be worth it.


    Issue 200 marked a creative milestone for Mountain Gazette, with Tom Benton’s golden aspen leaf not just serving as cover art, but as a visual metaphor for the magazine’s deep Colorado roots, artistic, “soul ride” aesthetic
    What made that particular image—and Benton’s legacy—so essential to this moment in the Gazette’s history?
    I love Tom Benton and all of his work. He’s someone I wish I could have met. Powerful messaging through simplicity is the hardest creative act in the world. Benton was a master. I have one of his originals hanging in my living room. For the 200th issue, we felt it was deeply important to pay homage to the Colorado roots, specifically Aspen, Colorado, and the freak, gonzo, dirtbag, ski bum culture that inspired our magazine and generations of people.


    How big is your creative team?
    John Coleman is our art director. Kim Stravers is our copy editor. Doug Schnitzpahn is our managing editor. Quinn is my dog. I am the editor/Quinn’s best friend. We work with a handful of contractors on retainer.

    What’s something you want photographers to know about Mountain Gazette?
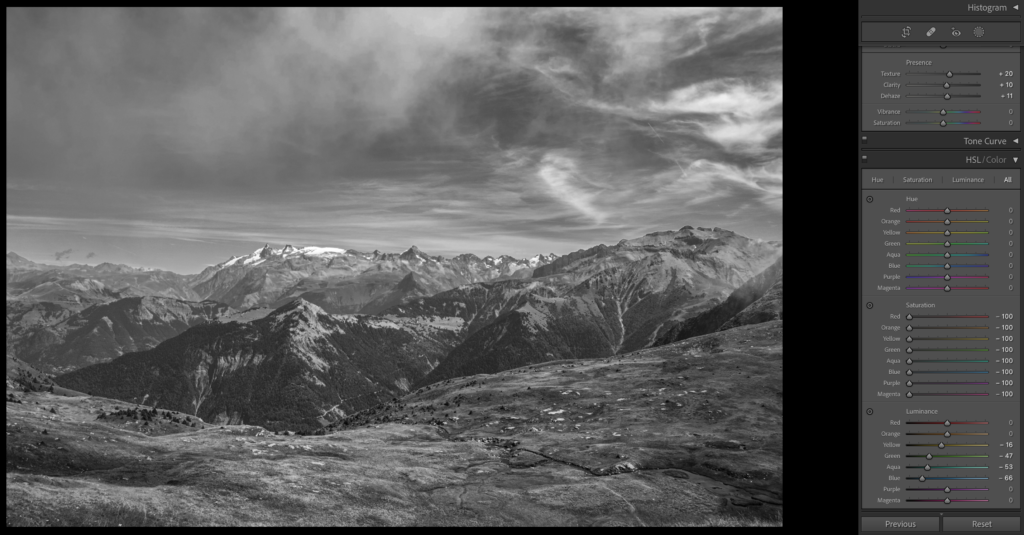
    Shooting with your subjects dead center works for Instagram, but not for magazines. Use the rule of thirds and quit putting all the rad stuff in the middle. It ends up in the gutter. Shoot for print. Shoot with a goal in mind. Intention is everything. Have fun. Be different.


    [ad_2]

    Source link

  • Issue 145 of Underwater Photography Magazine Available

    Issue 145 of Underwater Photography Magazine Available

    [ad_1]


    The latest edition of Underwater Photography magazine—Issue 145—is now available as a free download.

    The issue kicks off with a useful roundup of the latest industry news and the imaging products. New equipment highlights include the Nauticam housing for the Canon PowerShot V1, the dive case for the Insta 360 X5, new housings for the Canon EOS R5 II from Aquatica and from Marelux), and new strobes like the Marelux Apollo Y, Ikelite Ecko, and Isotta RED64. There’s also a lovely showcase of the winners of the recent UN World Oceans Day Photo Competition, hosted by DPG.

    That fabulous black-and-white cover shot, of course, belongs to the talented Mr Henley Spiers, and one of the issue’s must-read features is Publisher/Editor Peter Rowlands’ interview with Henley. Savor the inspiring collection of pictures therein! Among the other articles is Phil Rudin’s reviews of the Weefine 3000 CCW ring light and the Sony FE 16–25 mm f/2.8 G lens, a very handy read about floats and float arms by Kevin Palmer, and a couple of macro-focused travel stories—Nigel Marsh on Port Vila, Vanuatu, and David Fleetham and Jennifer Ross on Tulamben, Bali.

    Getting your free copy of the latest issue of Underwater Photography magazine is a breeze: Simply sign up with your email to get access. If you’ve already signed up (and you’re logged in), you can download your copy directly here.  


    [ad_2]

    Source link

  • 13 Incredible Tutorials To Improve Your Black And White Photography

    13 Incredible Tutorials To Improve Your Black And White Photography

    [ad_1]

    This week we have been talking about black and white photography but since the early days, there have been many articles shared about black and white photography, by almost all writers here at Light Stalking. At some point, we all get into this genre and sometimes struggle to get the best out of a scene or situation, or get stuck during the post-processing part.

    Today we thought that we will put together some very useful tutorials on black and white photography, so you can refer to the ones that are really important or useful for you.

    Many photographers may have a questions as to why one should shoot black and white, when there is colour photography. There are a dozen reasons why one might honour black and white photography and four of those are discussed in this article.

    Photo by Reuben Mcfeeters

    Black and white photos look surreal, they are emotive and they evoke a lot of emotions that sometimes a colour photo cannot. Shooting black and white photos can be quite tricky and the photographer needs to know when shooting the image, if a scene, subject or scenario will work well as a black and white photo. So, here are some ways to tell if a scene will make a great black and white photo.

    Photo by Alex

    Black and white photographs are beautiful and it makes many of us wonder how someone could have captured and post-processed such a stunning but simple photograph in black and white. This article discusses a few tips on how to capture and edit stunning fine art black and white photographs.

    Photo by Etienne Delorieux

    Some photographers convert an image to black and white, in order to hide the imperfections in their colour version. It may be fine to do this occasionally, but making it a habit is not the way to creating black and white images because creating great black and white photographs is an art. So, here are some things to think about when getting into black and white photography.

    Here is another article that touches on this issue – Do You Still Make These 2 Mistakes When Working In Black And White?

    Photo by Jason D. Little

    Before capturing a shot, or after you have captured one, have you ever been caught up in a dilemma if the shot should be in colour or black and white? In the early days, photographers made the choice to shot either in colour or black and white film, but in the days of digital photography, we have the luxury to capture raw files and work on them the way we wish to later. So read to find out how you can make this decision between colour and black and white for a particular shot.

    Also, for further reading – How to Use Your Eyes to Create Better Black and White Images

    Photo by Jason D. Little

    Photographers think that it is easier to shoot images for black and white but the problem arises when we try to convert an image to black and white. Most photographers think that removing the colours by bringing the saturation slider to the negative, or clicking on the black and white setting or applying a preset when post processing will help. The truth is, you need to capture images using a black and white film mindset.

    Photo by Archie Binamira

    We all would have seen the famous landscape photographs of Ansel Adams that are shot in black and white. Although we can see in colour and in these days photograph in colour too, we still feel the emotions better sometimes in a black and white photograph, especially landscapes that are vast and colourful. So, if you want to shoot black and white landscapes, here are five keys to improve your shots.

    Photo by tombabich24

    If you are someone who is interested in shooting dark scenes, then film noir photography is a genre that you can explore. These types of photos can be used to portray dramatic, mysterious scenes and it suits only particular types of situations, light and stories. Here are some tips and techniques to capture interesting film noir photographs.

    Photo by Andrew Amistad

    Not only do street photos or landscapes work well for black and white photography, even portraits become more beautiful when converted to black and white. It lets you focus on the subject and their characteristics, without any distraction. So here are some tips to convert a portrait onto black and white.

    And here are “The Secrets to Compelling Black and White Portraits

    Screenshot by Federico Alegria

    Once you capture the images for black and white conversion, you need to make some important adjustments when post processing your image for black and white. This article discusses the best monochrome practices for photographers in both Lightroom and Photoshop.

    Photo by Jason Row

    If you just shoot in black and white or convert an image to black and white by the click of a button or by desaturating it, you will nowhere be near to those images of olden days that were shot in film. The images will mostly look flat with not much contrast or tonality. Black and white film photographers used colour filters to give a punch to certain elements in their shots and these days, it can be achieved in Photoshop using the channel mixer tool. Read to find how to use it.

    Photo by Jason Row

    A lot of street photographers shoot in black and white and it is a very common thing for decades now. Most photographers really do not shoot in black and white, but instead shoot in colour and then convert their images to black and white and they think street photographs should be in black and white. Read to find why photographers make this decision.

    Photo by Federico Alegría

    And of course, street photographs also need some amount of post production, because we always advise to shoot in raw in order to get the best results in the final photo. A lot of street photographers also believe that the colours in the streets may not be always visually appealing to have the street photograph in colour. Here are some tips to convert a street photograph to black and white.

    Image by Federico Alegría

    If you would like some inspiration to shoot black and white photographs, here are links to dozens of quotes and images that you can refer to:


    [ad_2]

    Source link

  • Neil DaCosta – A Photo Editor

    [ad_1]

    The Art of the Personal Project is a crucial element to let potential buyers see how you think creatively on your own.  I am drawn to personal projects that have an interesting vision or that show something I have never seen before.  In this thread, I’ll include a link to each personal project with the artist statement so you can see more of the project. Please note: This thread is not affiliated with any company; I’m just featuring projects that I find.  Please DO NOT send me your work.  I do not take submissions.


    Today’s featured artist: Neil DaCosta

    While searching for interesting subjects around Truckee, CA (where I had recently relocated to), I saw that an Arabian Horse Show was happening at the Reno Spark Livestock Events Center. Previously, I had been to the venue to photograph a go-kart race and knew it had some lighting/background constraints. Based on this prior knowledge, I decided that I wanted to focus on the participants of the event and keep the space it was being held in nebulous.

    However, I had no idea what happens at an Arabian Horse Show and decided to wing it. Occasionally I like shooting personal projects with no prior research or understanding of the subject, forcing myself to be creative on the spot. This correlates to capturing unexpected images on paid assignments, which can be a nice added bonus.

    After looking at the packed schedule, I decided to go on a day that had interesting sounding classes (Native Dress, Side Saddle, and Carriage Pleasure Driving). Again, I had no idea what to expect, but my intuition paid off. Armed with a long zoom lens, I headed down to Reno for a fun day filled with Arabian horses.


    To see more of this project, click here

    Instagram

    Suzanne Sease is a creative consultant and former ad-agency senior art buyer. She works with both emerging and established photographers and illustrators to create cohesive, persuasive presentations that clients can’t resist.

    Suzanne offers something rare: an insider’s perspective on how client’s source creative talent. Her deep understanding of the industry is underscored by her impressive resume: 11 years as senior art buyer at The Martin Agency, seven years as an art producer for Capital One, and stints with the art-buying department at Kaplan-Thaler and the creative department at Best Buy, where she applied her expertise to reviewing bids to see which were most likely to come in on budget. Over the years, Suzanne has worked with a wildly diverse range of clients, including Seiko, Wrangler, Bank One, AFLAC, and Clairol Herbal Essence. Now, as a consultant, she is equipped to problem-solve for her clients from an unusually dynamic point of view.

    As a longtime member of the photo community, Suzanne is also dedicated to giving back. Through her Art of the Personal Project column on the popular website aphotoeditor.com, she highlights notable personal projects by well-known and up-and-coming photographers. The column offers these artists excellent exposure while reflecting Suzanne’s passion for powerful imagery.

    Instagram


    [ad_2]

    Source link

  • 25 Black And White Photos That Evoke Emotions

    25 Black And White Photos That Evoke Emotions

    [ad_1]

    Black and white photography is timelessly beautiful. It lets the viewer focus on the story without getting distracted by any colours that may be too dominant and shadow the subject or the story.

    Shooting in black and white is not so easy as it seems – it is not just about removing the colours from the image, but about having a range of tones that will make the subject stand out and make the image very compelling or effective.

    “With black and white, what you have to say counts more than the way you say it.” – Gian Marco Marano

    Photo by Vincent van Zalinge 

    When shooting black and white images, it is always good to shoot in colour and then convert the image to black and white, but for that, one should learn to see in black and white. In order to create a great black and white image, there need to be contrasts between the lights and darks and the photographer needs to have a good understanding of tonality.

    Note that distinct colours do not always convert to distinct tones when converted to black and white, but tweaking the luminance values may help.

    An example is in the illustrations below, which are discussed in articles in the “Further Reading” section below.

    Basic conversion in Lightroom. Tweaking the luminance may help. Illustration by Dahlia
    A slight variation of the above colors gives some tonal range. Illustration by Dahlia

    Here are 25 black and white images that seem surreal and emotive and these images will inspire you to shoot black and white if you do not do that already.

    If you have shot black and white photos before or converted your colour images to black and white, but were disappointed with the results, we would recommend you to check out this useful eBook, “Better Black And White” by Photzy. It is a complete step-by-step guide to convert your images to beautiful black and whites.

    Photo by felipepelaquim
    Photo by Esteban Amaro 
    Photo by David Werbrouck 
    Photo by Ehud Neuhaus
    Photo by Damien Schnorhk
    Photo by Asher Ward
    Photo by Tai’s Captures
    Photo by Mukul Kumar 

    Experienced photographers will look at a photo or a scene and will know if it will work well in black and white. Learning to see a scene in black and white is important in order to capture the right images and get stunning results. If you want to quickly dive into black and white photography, this simple easy-to-follow eBook, “Better Black And White” by Photzy covers everything you need to know about producing your own powerful share-worthy black and white images.

    Photo by Vincent NICOLAS 
    Photo by Dave Hoefler
    Photo by andreas kretschmer 
    Photo by Guillaume Issaly 
    Photo by Sergi Ferrete 
    Photo by Vincent van Zalinge 
    Photo by Ales Krivec
    Photo by Metin Ozer

    Black and white photography is an art, but some photographers often think that converting an image to black and white often happens at the click of a button or by just bringing the saturation slider to the lowest value. That is not true and some tweaking is required to get the best results. Whether you are using Lightroom, Photoshop, Elements or any other software, this eBook “Better Black And White” by Photzy has enough information to help you achieve the great results with the software you already have.

    Photo by Sarah Mae
    Photo by Arūnas Naujokas
    Photo by SERGIO KUUB 
    Photo by Kristina Delp
    Photo by Jongdae Park 
    Photo by Elliott Matthews
    Photo by Liquid Artiste 
    Photo by Victoria Wang

    Further Reading


    [ad_2]

    Source link

  • Evi Abeler & Hadley Sui – A Photo Editor

    [ad_1]

    The Art of the Personal Project is a crucial element to let potential buyers see how you think creatively on your own.  I am drawn to personal projects that have an interesting vision or that show something I have never seen before.  In this thread, I’ll include a link to each personal project with the artist statement so you can see more of the project. Please note: This thread is not affiliated with any company; I’m just featuring projects that I find.  Please DO NOT send me your work.  I do not take submissions.


    Today’s featured artists:  Evi Abeler photographer &  Hadley Sui food stylist

    PEACH FUZZ

    Food stylist and pastry chef Hadley Sui approached me with an exciting concept: capturing the essence of the Pantone Color of the Year 2024, affectionately named Peach Fuzz, through food photography.

    Following a lively brainstorming session, we decided to showcase Peach gummies, Meringue, Bellini, and fruit yogurts as our subjects. Collaboratively, we crafted a mood board and defined the art direction, laying the groundwork for our shoot. Fortunately, we were able to secure the talented hand model Danielle Iwata to join our creative endeavor. Here are the fabulous results of our collaborative efforts. 


    To see more of this project, click here

    Instagram  (Evi Abeler)

    Instagram  (Hadley Sui)


    Suzanne Sease is a creative consultant and former ad-agency senior art buyer. She works with both emerging and established photographers and illustrators to create cohesive, persuasive presentations that clients can’t resist.

    Suzanne offers something rare: an insider’s perspective on how client’s source creative talent. Her deep understanding of the industry is underscored by her impressive resume: 11 years as senior art buyer at The Martin Agency, seven years as an art producer for Capital One, and stints with the art-buying department at Kaplan-Thaler and the creative department at Best Buy, where she applied her expertise to reviewing bids to see which were most likely to come in on budget. Over the years, Suzanne has worked with a wildly diverse range of clients, including Seiko, Wrangler, Bank One, AFLAC, and Clairol Herbal Essence. Now, as a consultant, she is equipped to problem-solve for her clients from an unusually dynamic point of view.

    As a longtime member of the photo community, Suzanne is also dedicated to giving back. Through her Art of the Personal Project column on the popular website aphotoeditor.com, she highlights notable personal projects by well-known and up-and-coming photographers. The column offers these artists excellent exposure while reflecting Suzanne’s passion for powerful imagery.

    Instagram


    [ad_2]

    Source link

  • Fujifilm Announced The X-E5 With A New Film Simulation Dial

    Fujifilm Announced The X-E5 With A New Film Simulation Dial

    [ad_1]

    Fujifilm announced the launch of its new rangefinder style mirrorless camera in the X-E series, the Fujifilm-X-E5, that has a classic look and comes with an updated elegant design. One of the most interesting design features is the customizable “Film Simulation” (FS) dial that features an indicator window.

    Image via Fujifilm

    The Fujifilm-X-E5 allows you to navigate between Fujifilm’s own presets via the FS dial and also allows the user to save their own three customizable film simulation settings. Fujifilm has used the term “recipes” for the film simulation settings, much like the presets that users develop and save in some mobile photo apps as recipes.

    The X-E5 has a compact design and comes with a 40.2MP APS-C sensor. It features a five-axis in-body image stabilization, AI powered autofocus and many other interesting features for aadvanced image capture.

    Here are some of the most important features of the Fujifilm X-E5:

    • 40.2MP APS-C, X-Trans CMOS 5 HR sensor
    • X-Processor 5 imaging engine
    • Five-axis sensor-shift IBIS
    • 3″ touchscreen LCD with three-axis tilting
    • Single SD/SDHC/SDXC card slot
    • Captures videos up to 6.2K
    • Lower base ISO of 125, improving low light performance
    • Latest AF Algorithm, subject detection AF
    • Teleconverter with digital zoom settings of 1.4 and 2.0x
    • Continuous shooting for uncompressed Raw images – up to 20 fps
    • Long exposure up to 1 hour in bulb mode
    • 20 unique Film Simulation modes
    • Maximum frame rate of 29.97 fps in 6.2K, 59.94 fps in 4K, and 240 fps in Full HD
    • Weight approximately 445 g
    • Built-in Wi-Fi 5 and Bluetooth 4.2 
    • USB-C power input for charging

    More details about the Fujifilm X-E5 can be found here. Along with the announcement of the X-E5, Fujifilm has also announced the FUJIFILM XF 23mm f/2.8 R WR Lens that comes with a 11 blades round aperture, manual focus ring, autofocus motor and is a great lens for low light shooting. Both these products are available to pre-order and are estimated to ship by end of August, 2025.

    We have more news for you to read if you are interested at this link here.


    [ad_2]

    Source link

  • Photojournalism and coaching fosters resilience and empathy – A Photo Editor

    [ad_1]

    PHILADELPHIA – JUNE 14, 2025: An American flag extends across the steps of the Philadelphia Museum of Art as an estimated 80,000 participants joined the “No Kings” protest.

    Participants in Philadelphia join the national “No Kings” protest on the same day as a military parade in Washington, coinciding with the Army’s 250th anniversary and President Donald J. Trump’s birthday.

    Heidi: You studied journalism and political science at Temple University and transformed into a lecture adjunct. How did that academic foundation shape your approach to documentary and protest photography?

    Kriston: I think my choice to study both journalism and political science was more a function of who I am and what I want to see in the world, so in a sense, the same thing that drives my approach to photography is what led me to my academics. The two are intertwined, but a core part of who I am is that I like to understand people and I love to learn how things work. I do believe having that formal background allows me to think more deeply about the issues I cover and try, as much as possible, to see what’s unfolding without inserting my own emotions. Of course, as a visual journalist, I’m also trying to capture the feeling behind that, so I can build a connection with the audience. But it also lets me have much more nuanced conversations, which can help people feel at ease or even open doors that may otherwise remain closed.

    As noted in Diversify Photo’s “Solutions Photography” talks, trauma-informed long-form story creation is central. How do you ethically build trust with protest participants—especially in emotionally-charged environments?
    When you’re working in a crowd of people, whether it’s dozens or tens of thousands, I think the first, and hopefully easiest part, is to just be a genuine human being. I take the time to talk to people, I’ll answer questions about what I’m working on, or even make a portrait of someone just because they asked. You’re not there to participate in a protest, but that doesn’t mean you can’t have humanity. I think this is even more important when you’re working with people whose viewpoints may differ from your own. It’s the little things that I think go a long way, even non-verbal communication like a smile or a nod, that help people feel at ease. Authenticity is key.


    How do you maintain that journalistic neutrality when covering emotionally charged social justice issues, where public sentiment often runs high?

    I think there’s a misconception about what neutrality means and how we handle it as journalists. I mean, nearly everyone wants to believe that they’re neutral, that they’re completely unbiased, that they’re thinking with their head and not their heart. If that were true, politics would probably be a lot more boring and social media would be a much kinder space!

    But the fact is that we’re not robots. The important part of being a journalist isn’t that you exist without personal opinions or feelings, but that you don’t let those get in the way of your coverage. We all come with our own life experiences that shape who we are and how we see the world, but when you’re doing the work, it’s important to discern how those may affect your perceptions. I think good journalists learn to allow themselves to feel, without letting it override their reporting.

    There are a thousand tiny moments where decisions are made as a photographer – the stories we pitch, where you choose to point our camera, what we leave out of the frame, what makes our final edit. Things like gender, ethnicity, orientation, religion, economic background – all of these qualities shape our world view, giving us unique knowledge and insight. But it’s important to acknowledge these, especially in cases where they may lead to privilege, so we can minimize blind spots.


    In high-pressure work, how do you stay flexible—able to fully feel intense moments and then bounce back—and what small habit helps you reset?

    Something you and I talked about is this idea of “emotional elasticity” – being flexible with your experiences, your life, your emotions. When talking to my colleagues and friends who work in the industry, a lot of people are feeling the toll of working in a field that’s often driven by high pressure moments, while capturing intense emotions that you’re deeply embedded in. It can be a lot to manage, but it’s important to stay healthy through that. Whether you’re seeing a therapist or journaling on your own, talking it through with someone else or just doing mental check-ins with yourself. For me, I try not to center my entire being around the work, but have outside interests. I rock climb, I coach and overall practice cultivating a positive mindset. I think trying to push things down without recognizing your own experience is a good way to burn out. That’s where the ability to remain flexible and resilient becomes important, so that you can experience everything in the moment, but still come back to who you are.

    How do you, as a coach, foster resilience and empathy in your athletes—helping them face failure, handle negative thoughts during long runs, and grow not just as runners, but as people?
    I coach high school track and cross country, predominantly working with distance athletes. This is something I do simply because I enjoy being there for them, but it’s a lot less about the athletics than I think most people think. When you have to run a distance event, there can be a lot of time in your head for negativity to creep in and take over. What we try to teach is resiliency, the ability to overcome, how to come back after failure. It’s not about never having those negative thoughts, but how you deal with those emotions. These are the lessons we’re really working on and sport kind of just comes out of it. I hope the thing they’ve learned after graduating isn’t how to be a better runner, but how to be a better version of themselves.

    There really is a tremendous amount of pressure on young people today. I think we’re suffering as a society from a lack of empathy and willingness to actually listen to one another. This has us pushing further and further in opposite directions, looking for confirmation more than critical understanding. Combine that with the internet and social media that allows us to see what we want – this has us in a very challenging position right now. Bringing it back around, I hope that my work helps us build a more resilient society, that helps us grow closer together, to see the tough things and understand more about what the other is feeling.

    You were embedded in the flagship Philadelphia action, among an estimated 80,000 protesters on June 14. How did you ensure your images reflected both the collective voice and the individual stories within such a massive crowd?
    Scale is always impressive and often provides a sense of how important or urgent an issue may be. It’s the big picture. However, it’s also crucial to take viewers into the ground level and create images that capture emotion (something I seem to be talking about a lot). I’m constantly looking through a crowd and trying to find a variety of emotions and moments that tell us how people are feeling. There’s always something that stands out to me. And in addition to that, I’m always trying to find something that may subvert expectations. I’m not always successful, but It’s definitely something I’m keeping an eye out for.

    Crowd density and police presence bring unique risks. How do you assess and manage personal risk while on assignment—especially in fast-moving situations?
    I want to preface my answer by saying I’m not a HEFAT (Hostile Environment First Aid Training) instructor and anyone looking to learn more about how to stay safe in potentially hostile environments should definitely look into taking a course. That said, there are a lot of steps you can take to keep yourself safe, but the first thing to know is your level of risk tolerance. You have to be honest with yourself about how much you can handle, depending on your training and experience, and to not exceed that. Then you have to have a risk assessment. Who might be working against you, what threats do they pose and how do you mitigate that. In regard to physical safety, having eye protection, head protection and respiratory protection are all things you should have on hand.

    What are two key things to consider for anyone covering fast moving situations?
    I think the two most important things are 1. Good communication and 2. Having a field buddy.

    To the first part, always talk to your editors about your plan, then remain in communication with them throughout the day. And if you’re going into something alone, make sure you have someone at home to keep updated. This could be a partner, friend or family member. Before the protest, I reached out to several other freelance colleagues that were going to be covering the protest and got us all in a chat with one another. While we were all working for different publications, I wanted us to all be able to rely on one another on the ground. This was all in addition to remaining in contact with my editors and security team.

    To the second part, having someone in the field with you that you can rely on really does increase your safety level. During the protest, my colleagues and I checked in with one another throughout the day and later in the evening, many of us traveled together, so no one was alone. Things can get more unpredictable when it starts getting dark. A group of protestors separate from the “No Kings” event gathered outside the Federal Detention Center and marched through the city, leading to some conflict with law enforcement. Having someone that can see the things you miss, especially in situations like these, could be the difference between going home and taking a trip to the hospital.

    There’s a lot more that can be said about this, like maintaining situational awareness, deescalation (whether it’s with protestors, law enforcement or just someone on the street), when to blend in and when to stand out, but I would highly recommend taking a course for those interested in pursuing more of this type of work.

    At the end of the day, the number one thing to remember is to use good judgement and avoid risks beyond what you’re prepared for, because you’re more important than a photo.

    ###


    [ad_2]

    Source link

  • Check Your Composition

    [ad_1]

    I gotta tell you, I have no idea how any of us ever managed to learn this craft well enough to make the photographs we do. There’s just so much to learn! Exposure alone can be tricky at first, but these days, there are so many different modes and buttons and dials. With time, it becomes intuitive-feeling, but it’s a lot.

    And even then, we can master the camera without ever really mastering the skills needed to make a compelling photograph.

    Last week, I was going through the many resources I’ve created for you over the years, and I came across one that you might not have seen: The Composition Checklist.I’d like you to have a copy of that, together with a video I made with three suggestions on how to make the most of the checklist.

    When I first introduced these two resources, I made the mistake of advertising them on Facebook. Totally free resources—no catch, no strings attached—and they still drew out the haters and the critics! 😂 One of them berated me for the idea that composition could be reduced to a checklist, which, of course, it can’t (and I didn’t at all mean to imply that it could be). But there are ideas that are helpful to remember when you’re framing a photograph, and I thought an easy-to-reference guide might be useful to you.

    Composition is important; it’s the visual language photographers use to make their photographs compelling. And for some reason, it’s some of the last stuff we are taught (if we’re taught at all).

    A quick story. Years ago, before Covid wrecked everything, I did a series of workshops in places like Italy. We’d put some time aside in the middle of the day to look at images and discuss them. The assignment was (I thought) simple: look at the image and describe one decision the photographer made to make the image and what that decision contributed. You could talk about balance and how it was achieved. You could talk about how the vertical framing reinforced the vertical elements in the image. Perhaps you might talk about how the main subject was well isolated using depth of field or a longer lens. Or you could talk about what didn’t work. Maybe important elements were getting cut off by the edges of the frame. Maybe the chosen moment wasn’t strong enough to create a dynamic composition. I mean, the sky was the limit. Yet, the reply I most often got was just a blank stare and a mumbled, uncomfortable version of, “Well, I like it…”

    “That’s all? That’s all you can say about this photograph? That you like it??” I felt like I was taking crazy pills. I wanted to have a lively conversation about composition, and it always ended up feeling like an interrogation.

    It taught me an important lesson. I was asking photographers to think in ways they hadn’t yet been taught. I had ambushed them and expected them to have the same vocabulary that I did. Many of them knew cabalistic things about cameras that I still don’t understand, but when it came to photographs, they struggled. Ideas like balance and tension, or using contrast or juxtaposition (I talked about this in this recent post/article). Ideas like repeated elements or thinking about the energy of the photograph were all a bit foggy.

    So let me ask you: how’s your composition? Do you think about the way the elements in the frame relate to each other and what they accomplish in the image? Is it time to check in with some of those ideas? 

    Anyways, The Composition Checklist is a simple thing, but combined with the accompanying 10-minute video, I’m hoping it can give you a bit of a nudge and maybe help you ask some important questions as you shoot.

    You can get your copy of The Composition Checklist by clicking here. Still free, still no strings attached. Just click this link, tell me where to send it and I’ll send you both the PDF checklist and the video to download.

    Don’t be that photographer who knows more about camera design than visual design. And once you’ve checked out these two free resources, if you want to chat about composition or ask questions, I would love to have that conversation in the comments here on my blog.

    For the Love of the Photograph,
    David


    [ad_2]

    Source link