Light is the basis for photography and photographers are constantly looking for the best light possible to photograph their subjects. If you are a photographer who will only shoot under brilliant light situations, then you are missing out on a lot. Imagine you are on a safari or travelling and if you confine yourself to only shooting during the golden hour, you will be missing on the beauty and stories that unfold during the rest of the day.
The same applies to bird photography. Although bird photos turn out great when the light is soft or falling from the side at a lower angle, you can still use available light during any time of the day to get the best shots possible. Understanding light is of paramount importance and if you are struggling to use any light to your advantage, we recommend you to check out this eBook “Understanding Light” by Photzy, and discover how to produce amazing images.
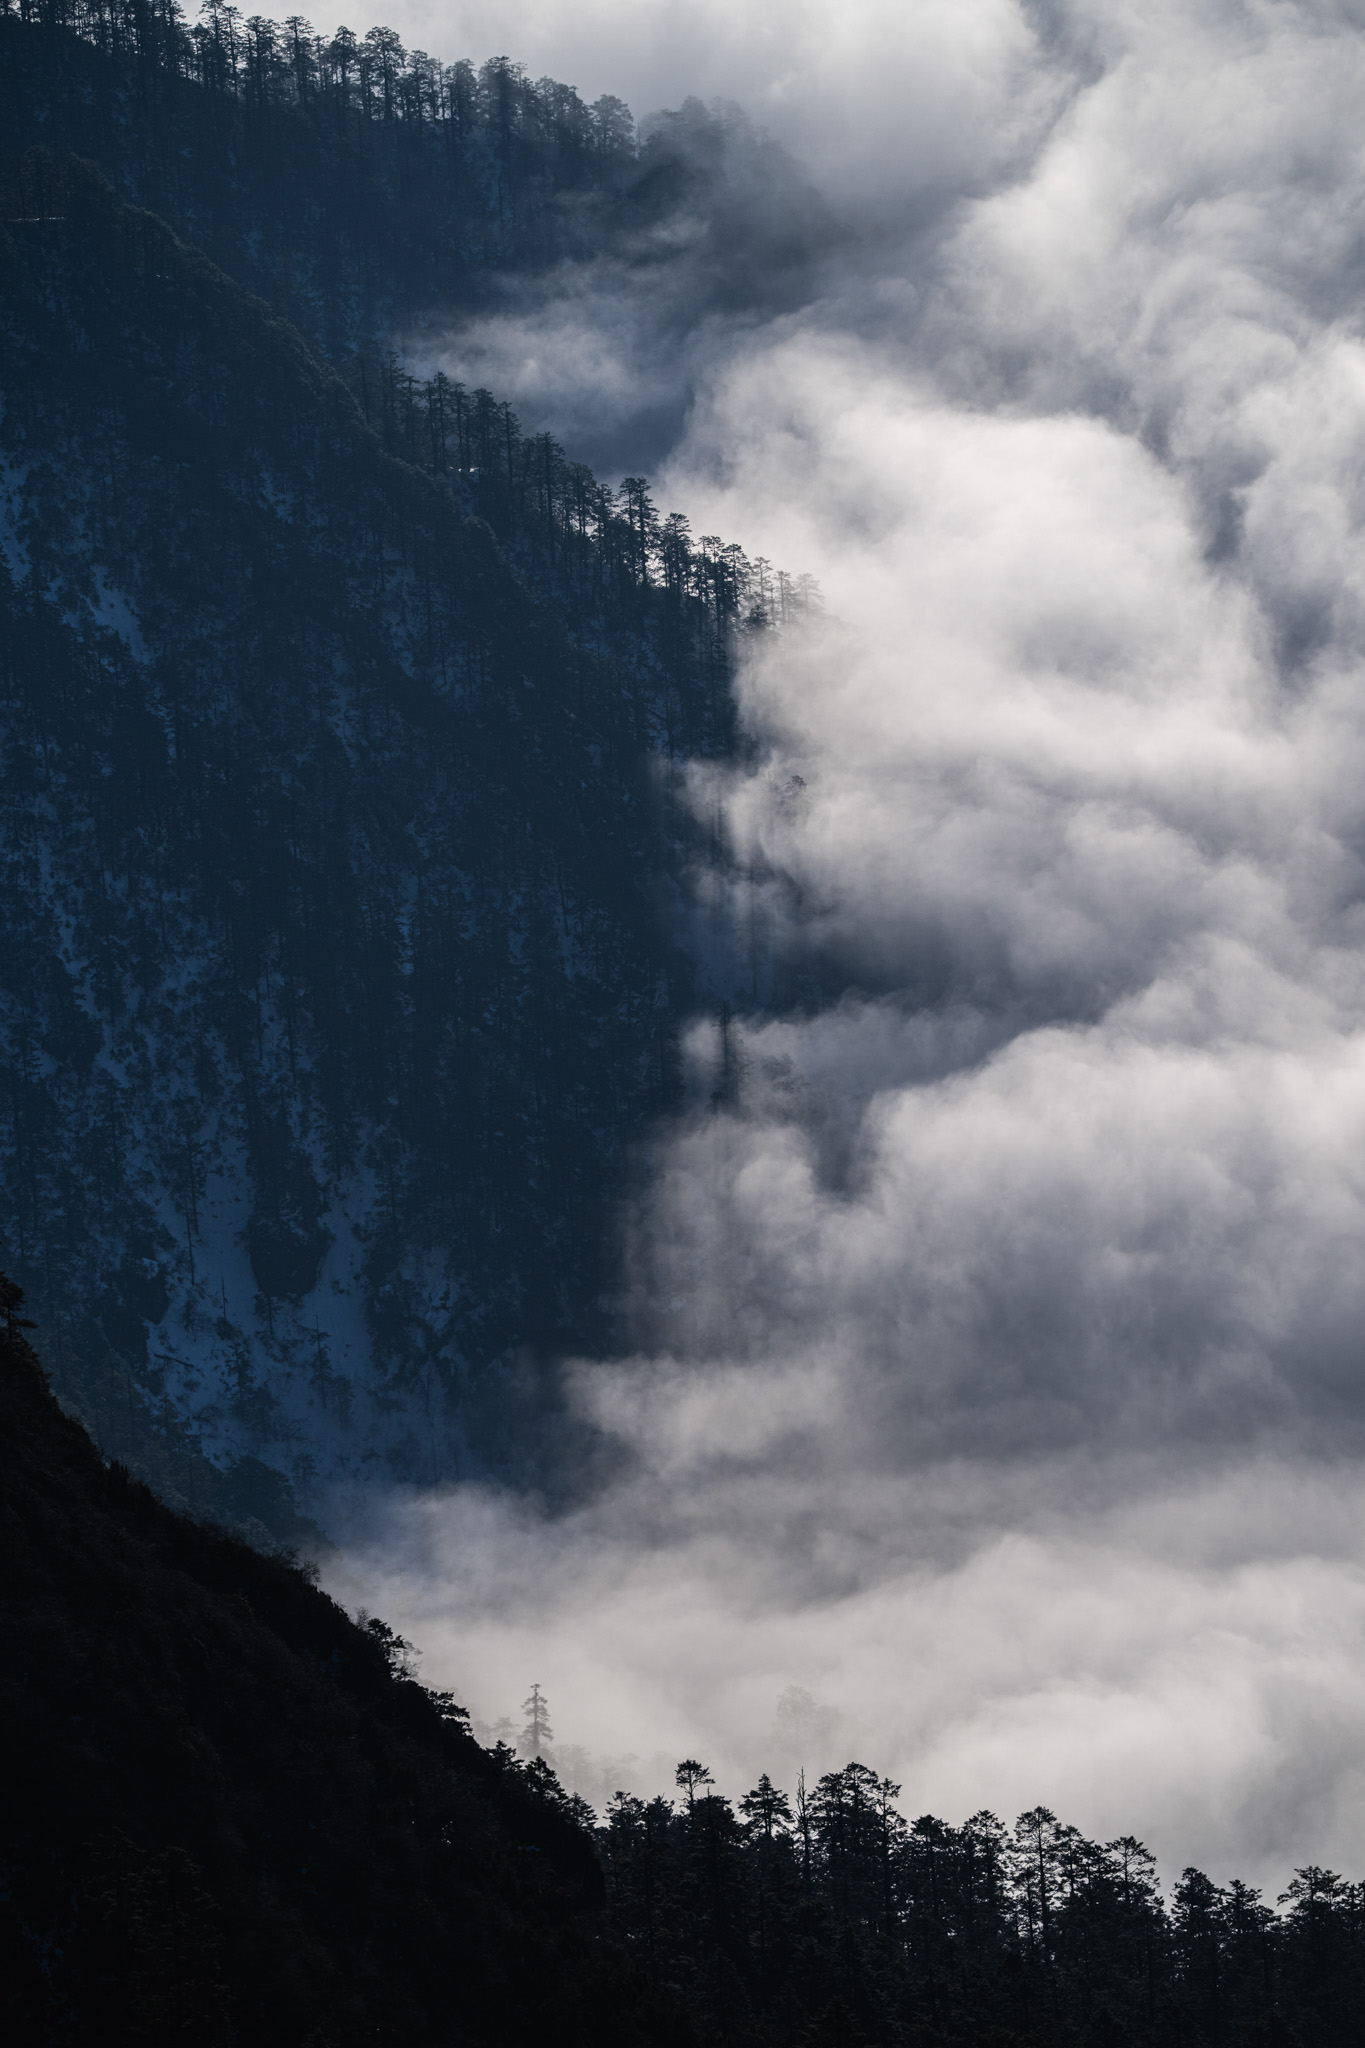
And for your inspiration, here are 23 bird photographs there are shot with a good understanding of light.
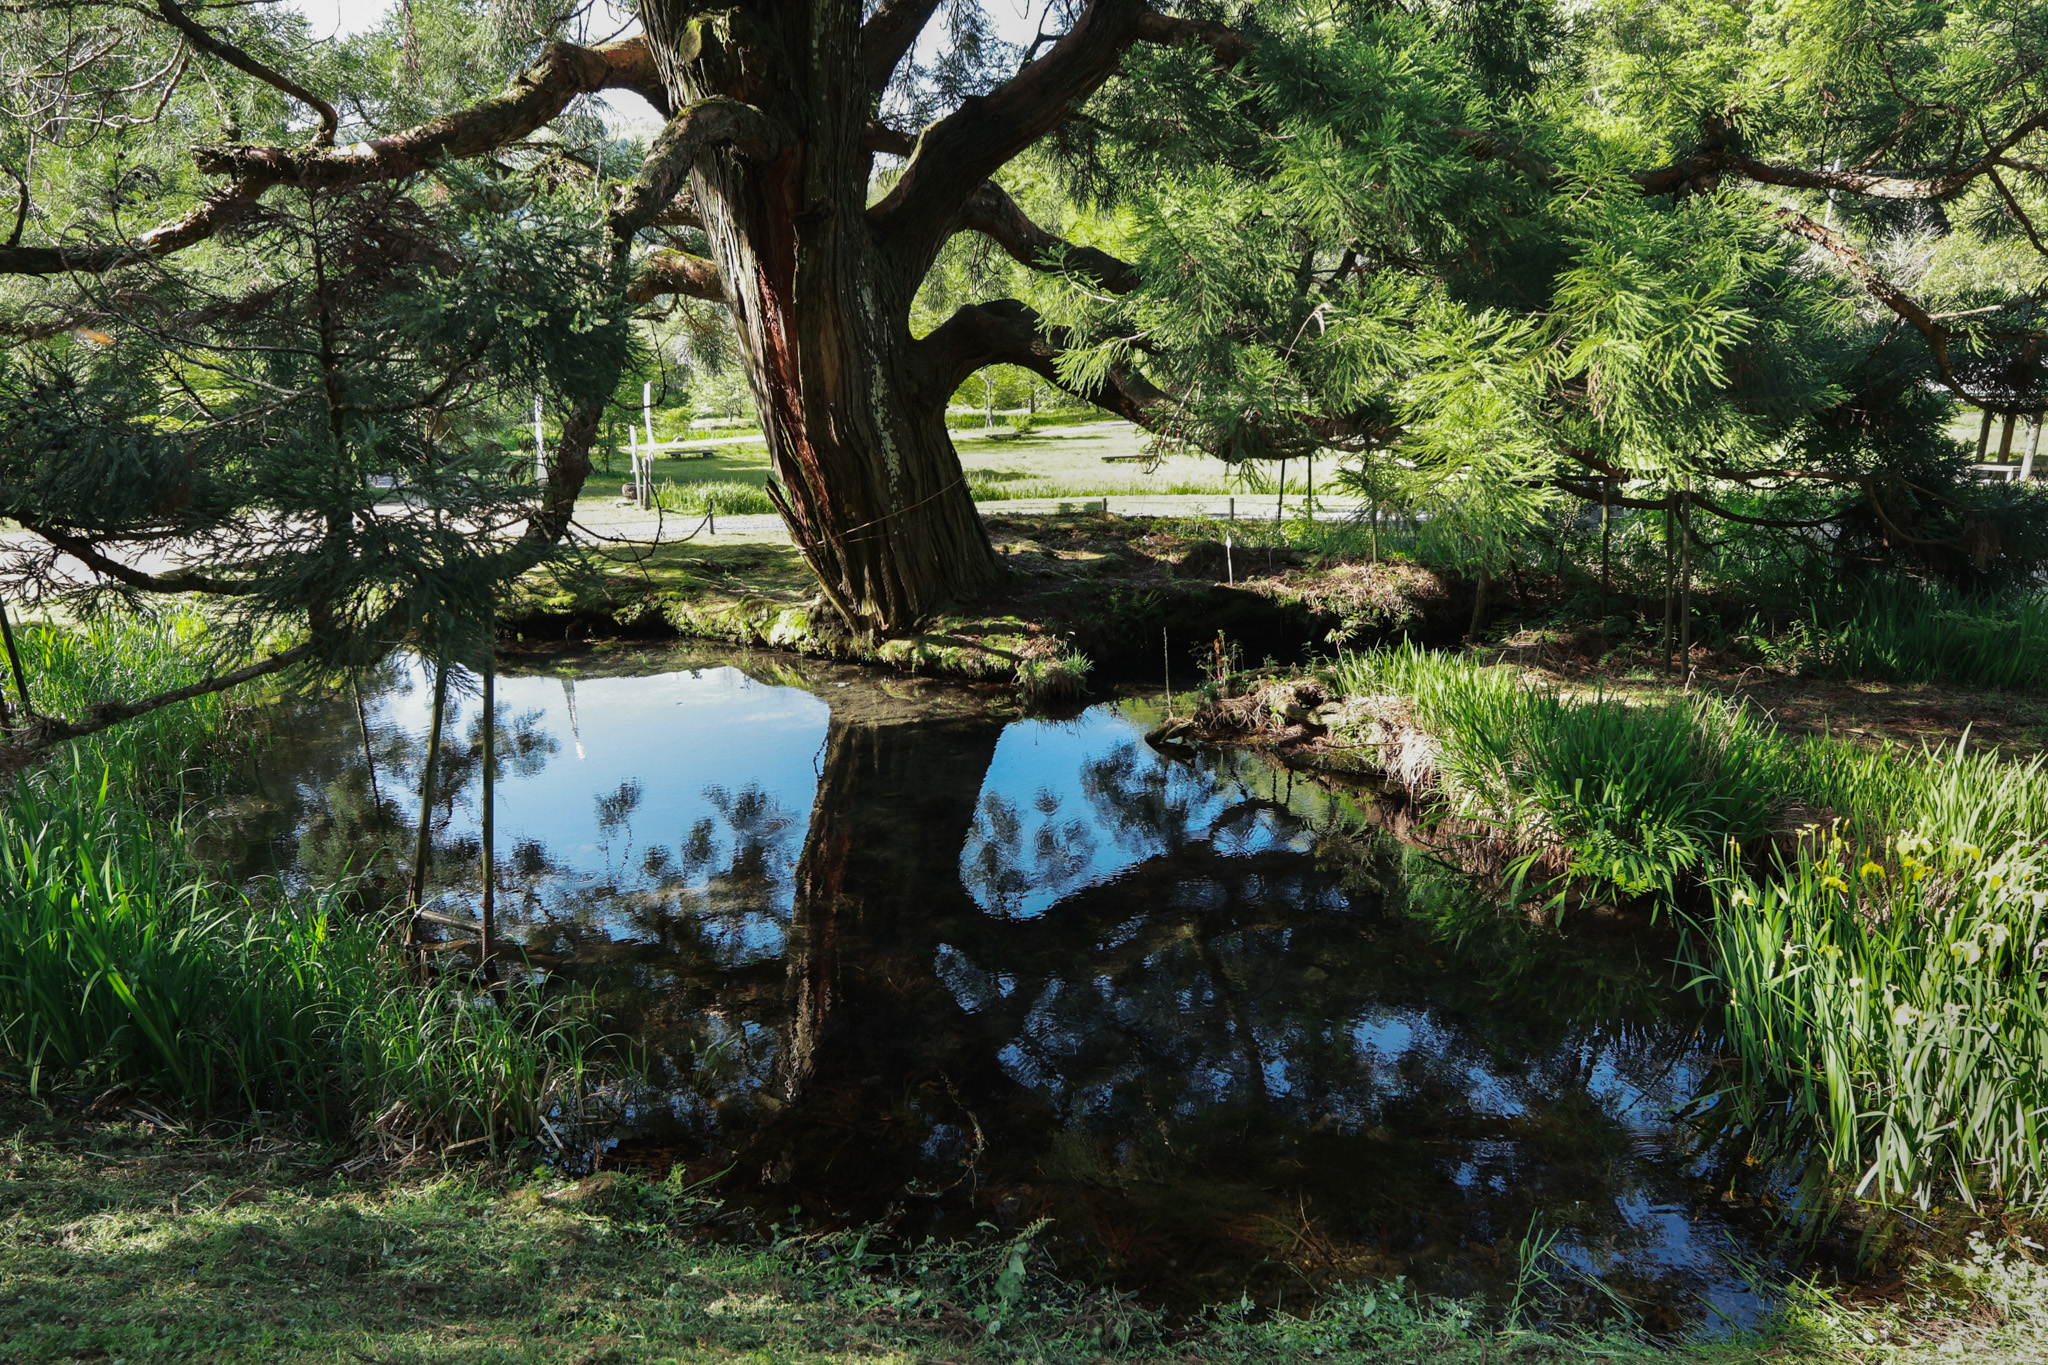
Photo by Nitty Ditty
Photo by Rob Potter
Photo by Jonny Gios
Photo by Harshit Suryawanshi
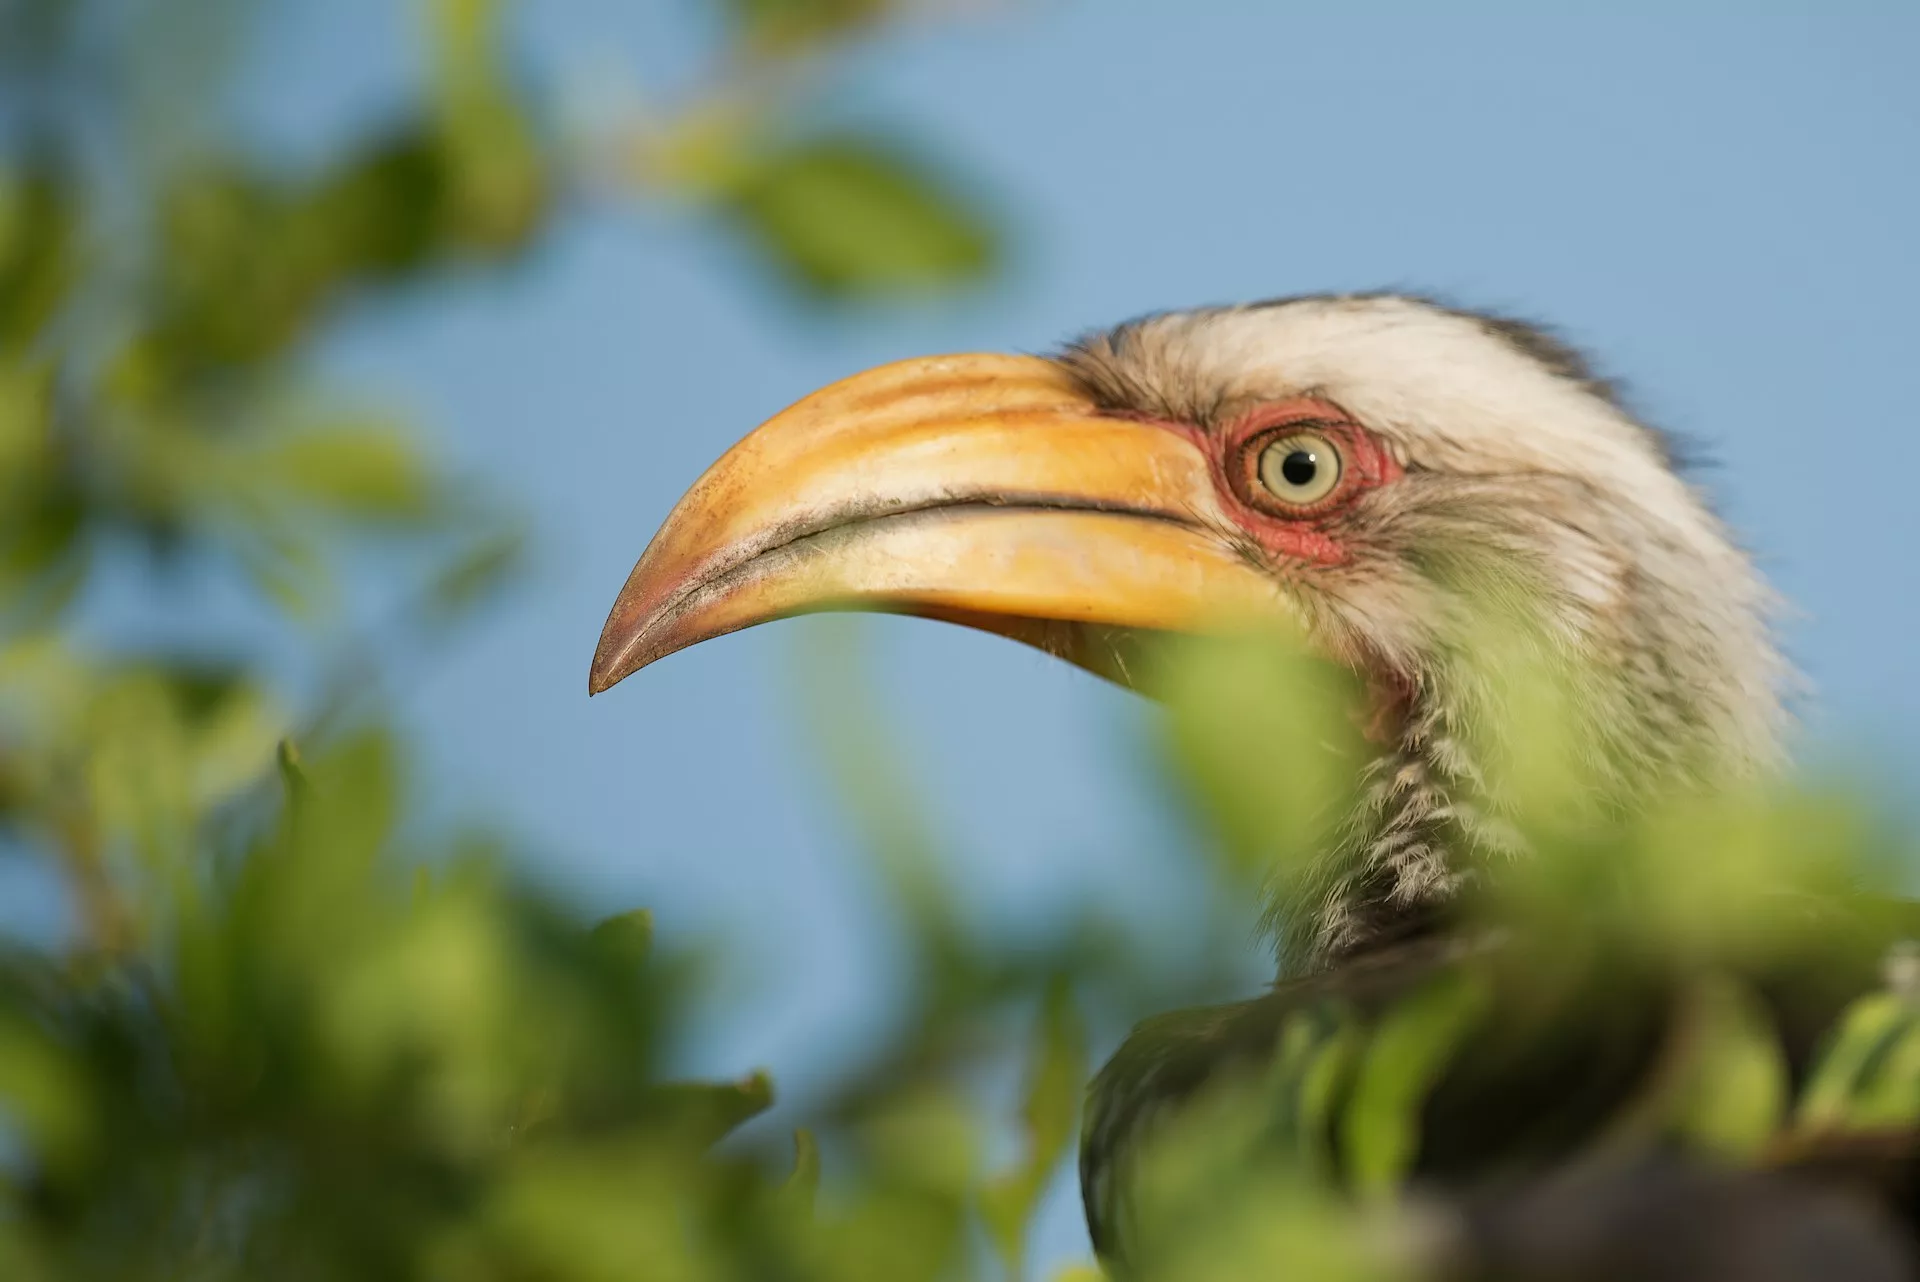
Photo by David Clode
Photo by Tristan chatagny
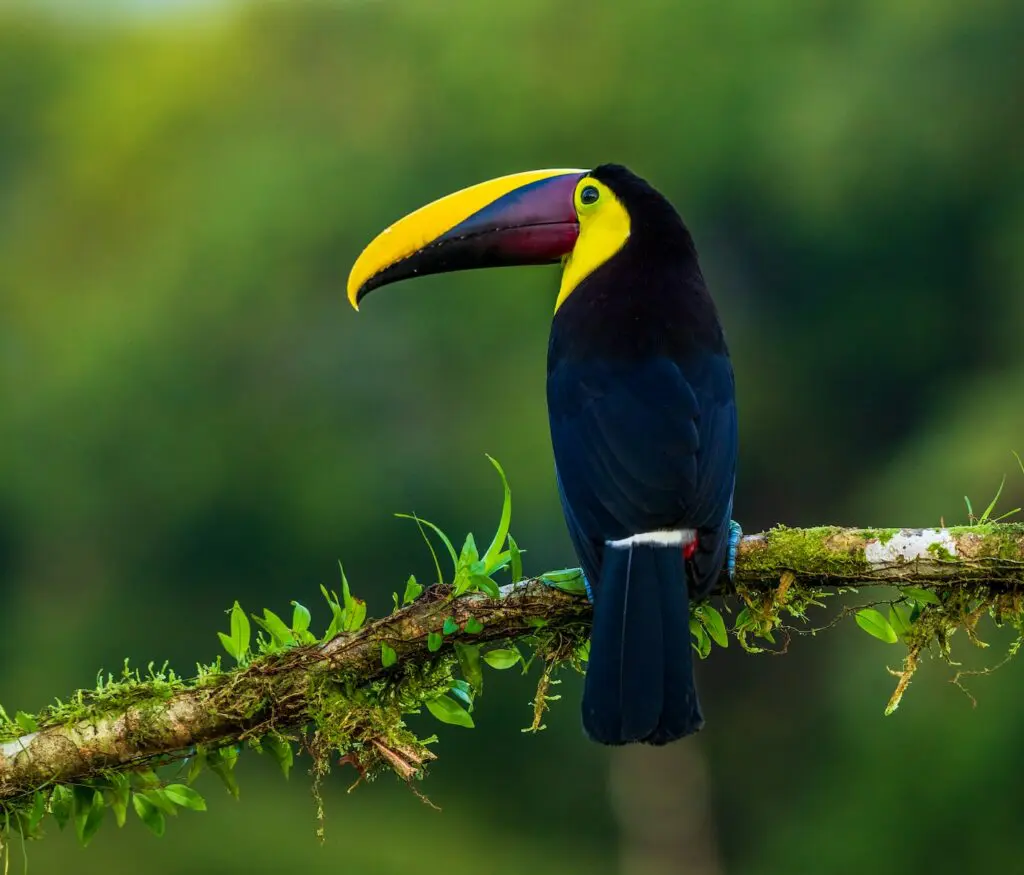
Photo by René Lehmkuhl
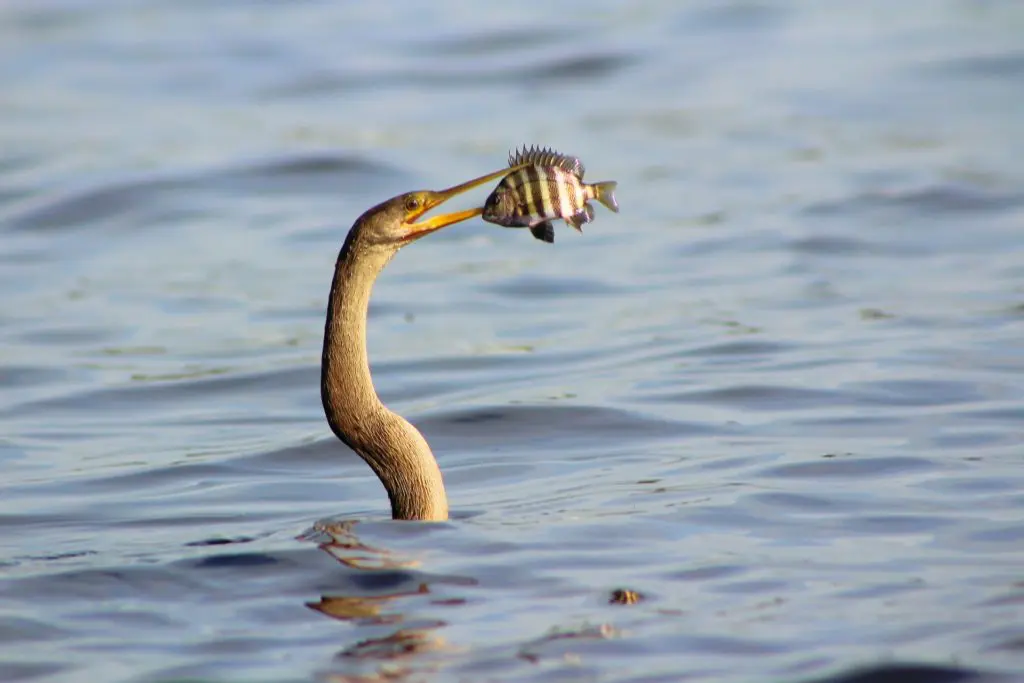
Photo by Huzeyfe Turan
Light changes constantly throughout the day and if you observe carefully. it alters the mood of a scene as it changes. So, when you understand light and start using it, you will be able to alter the mood in your images or use a particular type of light to bring in a certain mood to your images. This eBook, “Understanding Light” by Photzy has 88 easy-to-follow pages packed with training, illustrations and assignments.
Photo by Hansjörg Rath
Photo by Jeremy Hynes
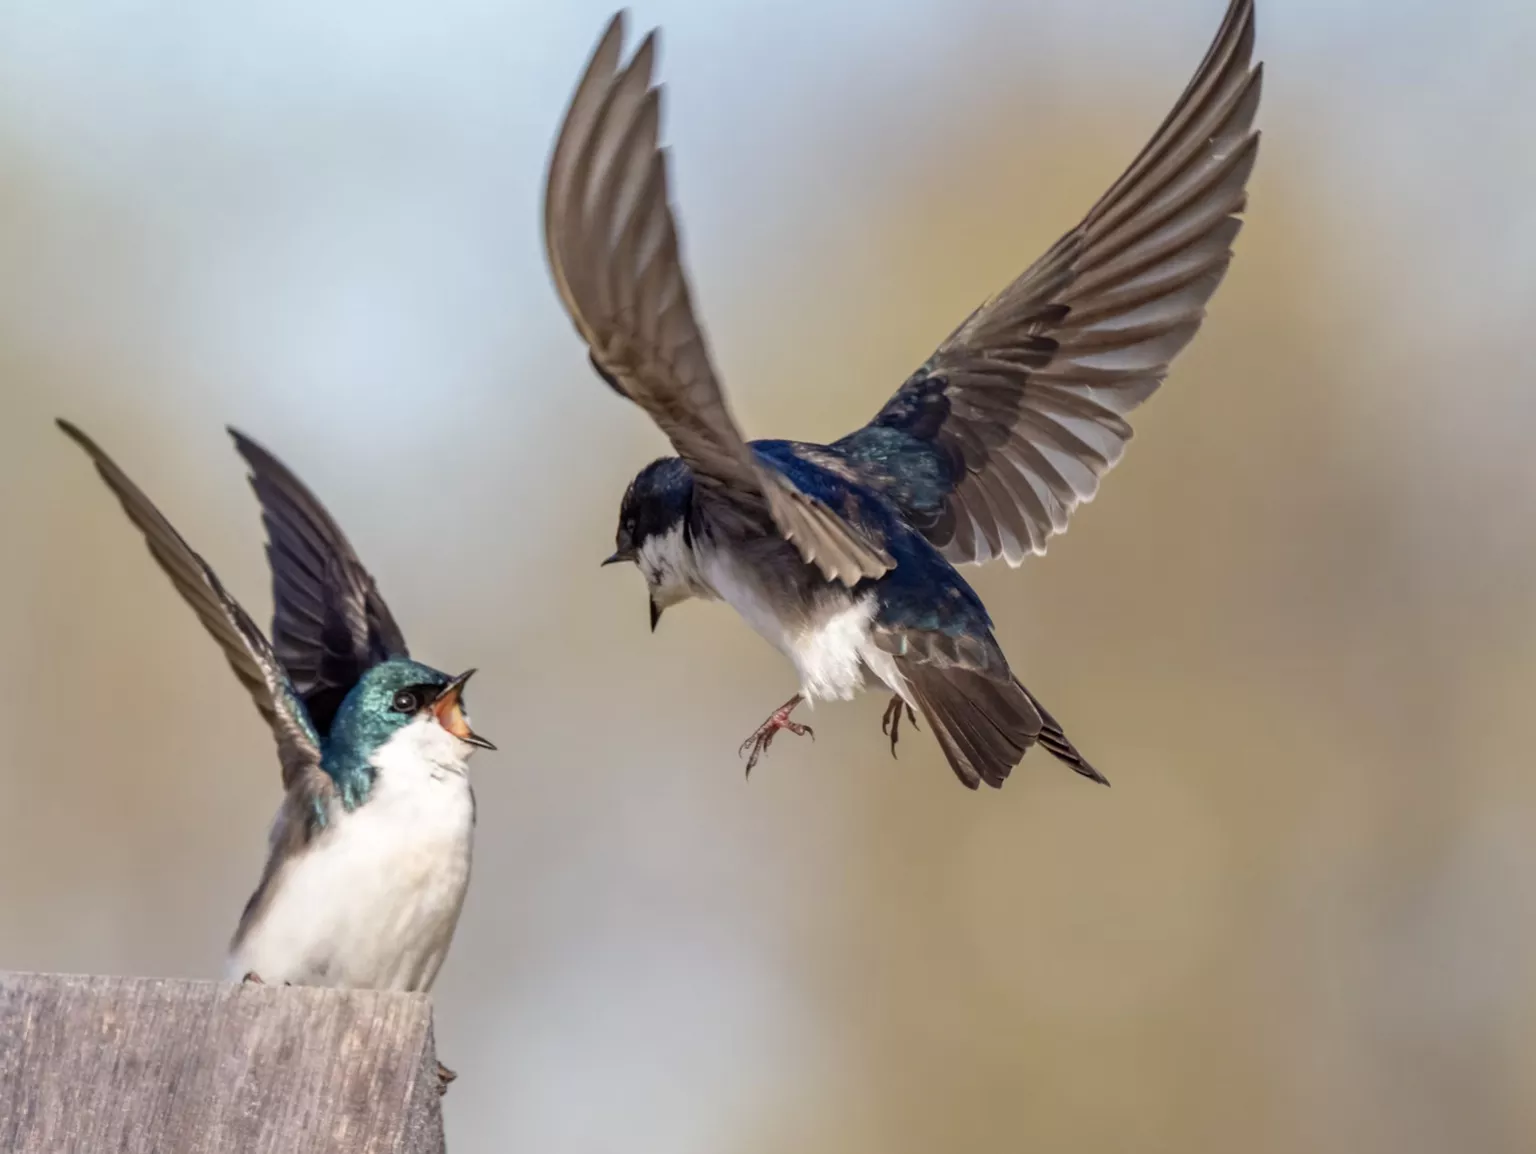
Photo by Rob Potter
Photo by Harshit Suryawanshi
Photo by Anna-Lena Helbrecht
Photo by René Lehmkuhl
Photo by Rohit Varma
Photo by Bob Brewer
When you understand light, you will be able to work around with the available light by either using reflectors or diffusers if necessary to change the intensity of light or to fill in areas where light is less. Understanding light is very interesting once you start to understand how it works and if you are worried where to start, check out this eBook “Understanding Light” by Photzy that will teach you about all the qualities of light and how to use them to your advantage.
When it comes to wildlife photography, birds, especially the smaller ones are the most difficult to photograph. In general, birds are the most difficult subjects as they are small, stay in between the foliage most of the time and are always moving or flying around. Bird photographers make it look easy and a lot of YouTube videos (not all) also make it look quite easy but practically being in the field, carrying a heavy lens, focusing through the natural obstacles and capturing the right moment, can all be quite a daunting experience.
Photo by Vincent van Zalinge
Besides the photography techniques part, learning about birds themselves can be very helpful in terms of photographing them at the right moment. Observe and study their behaviour and be very discreet when photographing them.
Wearing the right coloured clothing is also important for bird photography and wildlife in general. Most importantly, be patient and persistent – do not give up if you do not get good shots during your early days in bird photography.
In terms of camera settings, the one that has worked for me personally is, shooting in Aperture Priority mode using back button focusing technique and always shoot raw. Here are some valuable bird photography tutorials, that will help you get in the right direction.
Photo by Ingo Doerrie
When photographing birds, the images are more compelling and effective, if you capture their natural behaviour in the wild. Birds portray some very interesting behaviour and traits that if observed patiently, can be photographed as well. This article talks about bird photography basics followed by actions you can do in the field to create better photographic opportunities and a few tips on honing your skills.
Photo by Patrice Bouchard
Mastering bird photography is a long process that has a lot of factors that need taken care of. They are some of the most difficult and trickiest subjects to photograph and once you get the basics right, making use of the right settings is important for successful bird photography. This article discusses the best settings for bird photography.
Photo by Zdeněk Macháček
Birds can be photographed in many ways – capturing their actions, capturing their portraits up close or capturing an environmental shot that includes the environment they are living in, birds in flight, etc. Action photography can be quite difficult when compared to portraits, but again it depends on the type of bird and its behaviour. This article talks about two types of bird photographs that will help to improve your skills.
Photo by Jay Alexander
Wildlife photographs can boost any photographer’s portfolio because it is a genre admired the most by many photographers and non-photographers alike. In order to capture wildlife at its best, the photographer needs to have reasonable gear to start with. This article talks about the gear you need to pack when you go out for wildlife photography.
Photo by R. Mac Wheeler
Wildlife photography includes photographing birds, animals and other small critters in the wild. While bird photography may require slightly more skills with focusing and longer lenses, the techniques required are quite similar. This article discusses some quick beginner tips that will help you capture some stunning wildlife photographs.
Photo by Boris Smokrovic
Wildlife photography is not something that is commonly taken up by most photographers because they think that capturing wildlife is very difficult and that it needs very expensive gear. You can start off with the lens that you have in hand and then invest in a slightly bigger lens when you are confident enough in photographing wildlife. This article provides four tips that include emotion & attitude, nature’s frames & backdrops, unique features and taking advantage of the weather.
Photo by Rob Potter
Once you have come back from a bird photography session, you will need to check your images and make some edits before you can present them or even print them. Lightroom is a versatile tool that helps with culling images and also processing images easily and if you have a personal preset that you like to use for your wildlife photos, then that can cut down a lot of editing time. This article talks about editing your wildlife photos in Lightroom for magical impact.
It feels like the last couple of years the words artificial intelligence have dominated the photographic world. Camera companies, editing tools and stock agencies have rushed to embrace the AI revolution, often with a seemingly blatant disregard for the views of real world photographers.
However, whether we photographers love or loathe the rise of AI, there is no going back. That horse has bolted and we now have found ourselves in a position of how, when and why to embrace AI in our photography.
Not all AI is a force for bad in the photographic industry so today we are going to look at the good, the bad and the ugly. In order to end this article on a more positive note, I will start with the ugly.
The Ugly Aspects Of AI In Photography.
The obvious choice would be AI imaging, however I am going to put that into the bad, not the ugly. The real and most potentially damaging aspect of AI imaging is misrepresentation.
This can range from relatively harmless social media engagement farming all the way to the manipulation of politics using deep fakes. The latter can be blatantly obvious or it can be very subtle. An example of subtle manipulation is the use of deep faked old images of a country suggesting how things were so much better back in those days.
On Facebook the use of AI imagery to farm social media engagement has become rampant. Typical examples will be very obviously fake AI images of, for example, London in the snow. The images look beautiful to someone that knows little about London but to anyone who has ever been there, or to any photographer, they are blatantly AI. However there are huge numbers of people that believe these images and like, comment and then follow these pages.
Images like this are used to “farm”massive engagement on social media
All very innocent you might think, after all following a page of pretty pictures, is not harmful. However, the intent of these pages is often not that simple. Behind them are often companies or political groups that once they have enough followers, will change the name and tone of the page to suit their needs.
There are also deeper problems with the use of AI within the photographic community.
First and foremost is the homogenization of images. With stock agencies now licensing AI work, we are in danger of a world where websites and adverts are full of vaguely similar, faintly realistic images that actually have no relevance to real life. Of course the driving factor for this is cost, but by keeping the spending low, designers and advertisers risk losing the creativity that the photographic world brings to them.
An AI landscape that literally took second to create.
The Bad
I put AI imaging in general in the bad category. For this I am talking more about the use of AI within the general photographic community and industry rather than its worldwide use.
Whilst the use of AI images in social media and political campaigns is ugly, the general use of AI in photography I feel is bad but not surprising. The worst aspect of this is photographers, or indeed even non photographers passing off AI images as real photographs. Landscapes and wildlife seem to be particular favorites as they can appear a little more authentic than images of cities and towns.
Another concern is the potential loss of skill sets. Whilst enthusiast photography will continue, the demand for commercial, professional photography is at risk and with it the skills, talent and creativity of a large number of professional photographers.
There is also the issue of the use of AI within real imaging. Personally I differentiate between the use of AI to add elements that didn’t exist and the use of AI to aid editing. The former is bad, the latter is ok.
However, increasingly, some photographers are using AI to add elements to real photos that did not actually exist. One of the more obvious is the addition of light beams to twilight shots of lighthouses. However there are plenty more examples. Whilst I am not against this, I do feel photographers should be upfront about the use of AI to add to a shot.
There are also very real issues around copyright within AI imaging. Most non-photographers believe that an AI generated image is created entirely inside the CPUs of a vast computer. However, that’s not the case. AI has to be trained, and the only way it can be trained is by looking at real photographs by real photographers.
A significant number of the main AI companies have trawled the Internet, harvesting images without permission or recompense, throwing up also sorts of legal complications. It’s quite possible that you might see an AI image that looks startlingly similar to one of your own and not have any control over how it is used.
An AI stock image trained on real images, often without permission.
There Is Some Good News.
As I mentioned earlier, AI is here to stay. As photographers we can choose to ignore it (at our peril) or we can choose to embrace the more positive aspects of it.
At its simplest, we can use something like ChatGPT to inspire us when we are in the photographic doldrums. Simply tell AI what types of photography you like doing, and ask it to give you suggestions. This can be for a simple one hour shoot or for a year long project.
AI chat can also give us good answers to technical and even creative questions that we have about photography. Because photography is such a well trodden path online, the answers are often surprisingly comprehensive and accurate.
We will increasingly see the use of AI built into our cameras. My Sony a7Rv for example uses AI for focusing. It can determine the difference between multiple different subject types and predict their movement. AI will be incorporated into metering, white balance and quite possibly in the future, as a compositional aid.
Ai Chat can help solve problems and even inspire you
AI is increasingly being used in editing software. One of the most powerful tools I use is Lightroom’s AI denoise. I can now take 61mp images at 12800 ISO, run them through the denoise and get almost perfect, noiseless photos.
AI removal tools take a lot of the legwork out of cloning out blemishes or unwanted elements. We can automate tasks more easily, especially useful for photographers having to work on large batches of images. Selection tools have also become much easier to use with the advent of AI.
The use of AI in photography is a tricky and controversial subject. However, it is not going away and will only increase over time. As photographers it is our duty to define the way AI evolves, to be part of it rather than a victim to it. That is very much the challenge ahead for all of us.
Welcome to our weekly community wrap-up. It’s been another exciting and creative week on the Light Stalking forums with some stunning photography by the community.
Let us start with the Photo Of The Week that is judged by Federico every week. This week’s photo of the week is by Michael. You can read about what Federico had to say about this photo in the link here – Photo of the Week – August 29th
Copyright Michael
The weekend photography challenge from last week, had some very interesting and creative shots. Take a look at the submissions here – “Framed by Nature”
This week, we have a new challenge that has some very beautiful submissions already. Join the challenge here – “Cityscapes Framed“
If you are someone who captures images with your smartphone, we have a Mobile Photography Challenge where you can post your mobile photos and also check out the works by other photographers. The images must be captured and edited on a smartphone. Join to submit the photos over here.
There are also some members’ picks that are featured. These can be chosen by any of the members and are put in in a whole new thread of their own and called out as being a great addition and shot for the forums. Check out those stunning captures here.
Patrick started a thread late last year – “Community Inspired Photo Story Challenge” – capture a story in 3 to 6 photos that hold personal significance and post them with a brief description. While that thread was started to be completed within a week, it has been open with ongoing submissions for the past year and is till open where members can post their stories.
Here are some stunning shots from the past week that we thought were amazing and should be included here:
Marty captured some stunning photos of the Canadian geese taking flight from a lake in Michigan. Check out the remaining images here – Geese Taking Flight
Copyright Marty
Bug On A Bud by Robert Apple. The subjects boast of beautiful contrast and stand out against the beautiful complementary background.
Copyright Robert Apple
Mango Order, by Rob Eyers is a fun photo and Rob had a very interesting caption for this photo. You can head over to the forums to read and engage in the conversation.
Copyright Rob Eyers
Evening Skies Over The Big Horn Mountains by Robert Apple – See the rest of the images here. Some dramatic sunset sky photos there.
Copyright Robert Apple
Daniel shared a cute moment of these baby animals.
Copyright Daniel Kruger
Elin”s photo of the craters in Snæfellsnes, Iceland, are a treat to the eyes in terms of colours, light and atmosphere.
Snæfellsnes, Iceland – Copyright Elin Laxdal
Rhonda shared a beautiful reflection photo of a sunrise over Lake Louise.
Sunrise @ Lake Louise Copyright Rhonda E
Pat’s photo of a bog landscape with the sunlight shining over it, looks a bit dreamy with the colourful foreground adding more interest and textures.
Sunlight framed Bog – Copyright Pat Garrett
Max shared a beautifully composed photo of one of the faces in Mount Rushmore, framed through a crevice, looking on onto the mountain, from an interesting perspective.
Copyright Max
Elin has used beautiful light in the image below to frame her subject. The light and shadows cast on the pathway work great as a leading line.
Copyright Elin Laxdal
Marty’s photo from the Yosemite National Park looks great as if ready to be printed and hung on a wall.
Copyright Marty
Robert shared this black and white photo of a rocky terrain with so many layers of interesting textures, under beautiful light.
Beam ME Up Now Scotty – Copyright Robert Apple
Stylized Sunflower Edit by Patrick is a beautifully executed shot and is processed well. The film look adds more drama and atmosphere to the photo.
Copyright Patrick
Patrick also has a few threads in the forums where he posts his black and white images and other series. They’re very unique, creative and worth a look!
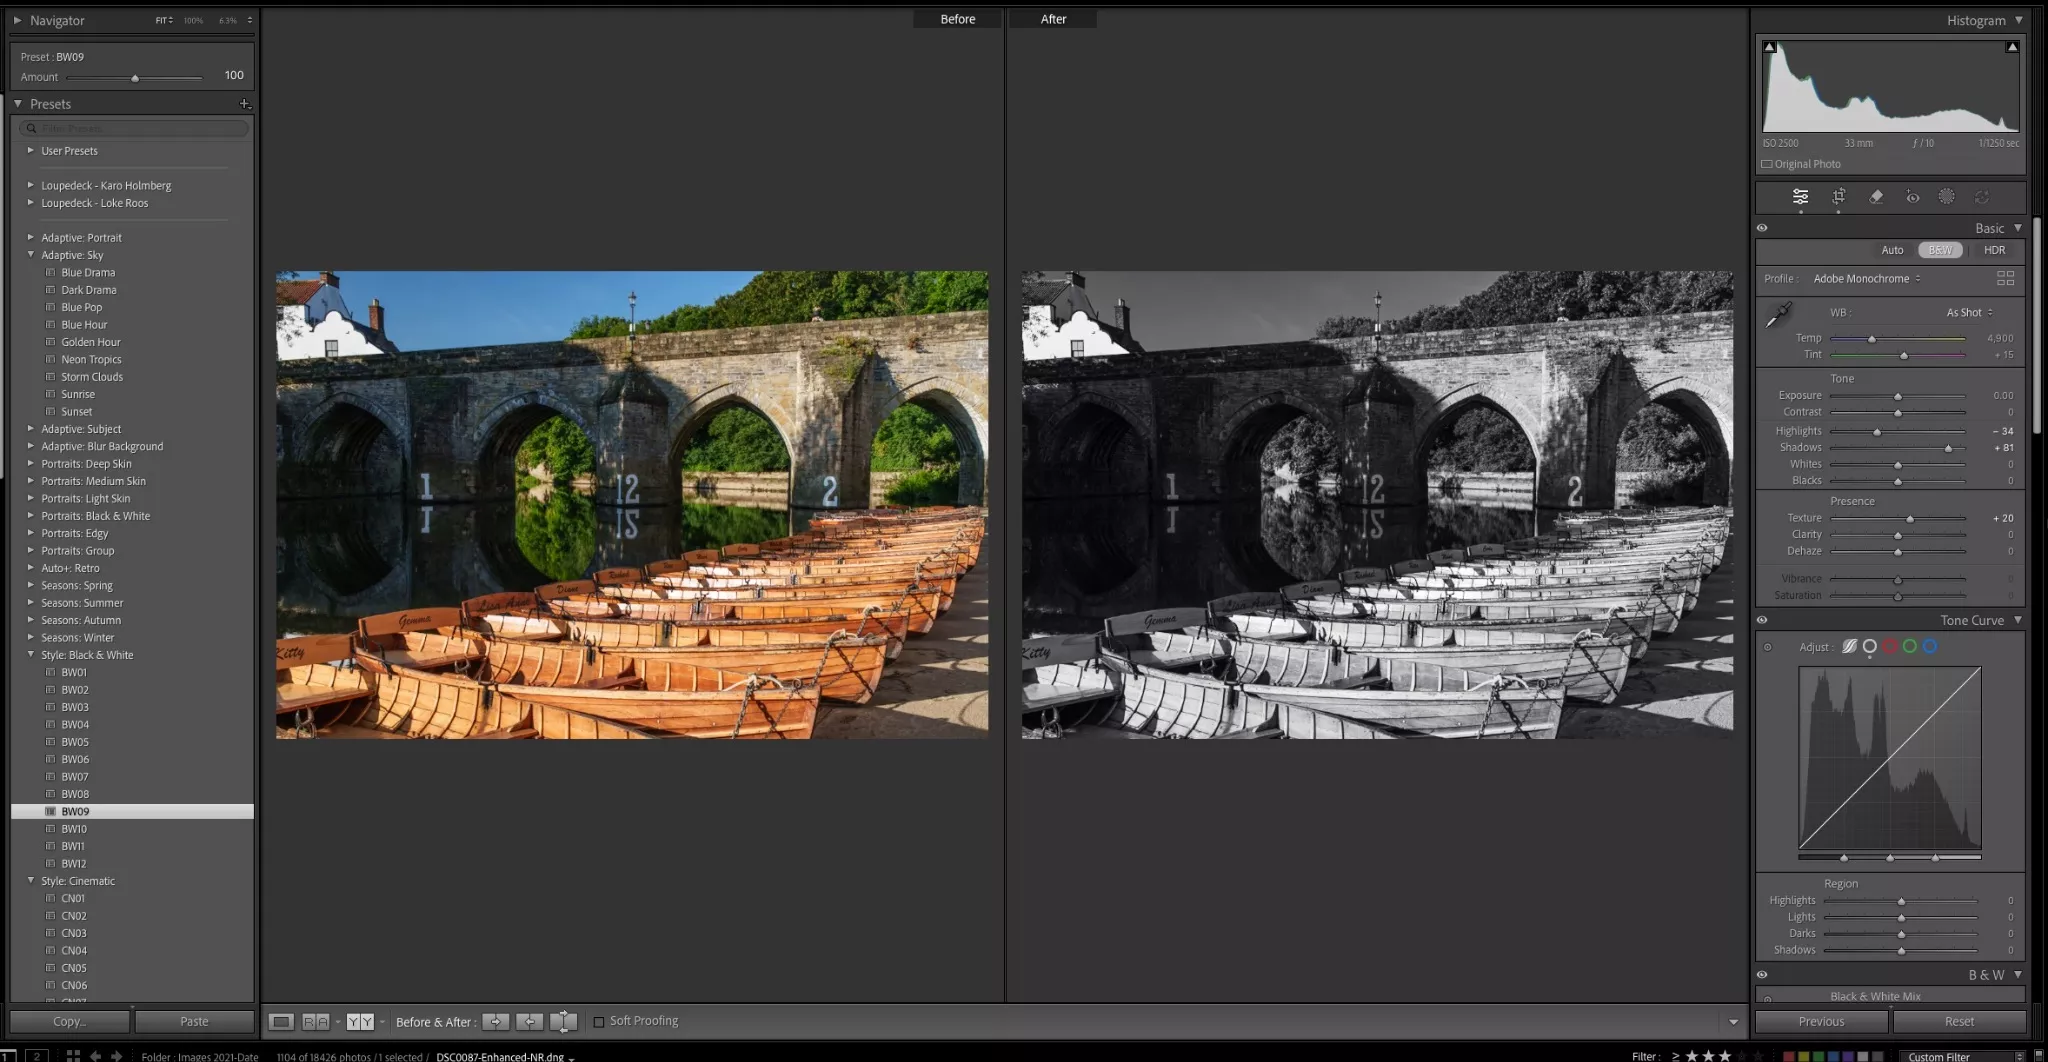
Lightroom is a versatile program that has evolved over the years and comes with amazing tools that makes it a one stop platform for most beginner and experienced photographers. Most professional photographers rely on Lightroom because of the efficiency in batch processing files, making it a great hit among many wedding and event photographers including others.
Besides, various features that help photographers organise their photos, sharing them as catalogs, using the creative cloud feature, etc., has made Lightroom a go to program for many photographers. If you are looking to improve your Lightroom skills or wish to learn more about the features that you do not use, here are a number of tutorials that will help you to understand Lightroom better.
Photography is about spending time capturing images with your camera and spending little amount of time post-processing the images. There are times when photographers may hate editing or maybe need a quick boost to their images without spending much time. Lightroom comes with tools that can make editing a breeze. Read to find more!
It doesn’t matter what program you use for editing, but it is important to have a specific workflow that can help you work faster and more efficiently to produce great results. Light room comes with rating systems, labels, tags, import settings, etc., that can make your work easier. This article shows how you can streamline your Lightroom workflow and save time.
Photographers have a huge collection of photos from each session most of the time and sometimes photos are also scattered across several hard drives. It would be great to organise the photos and find the ones we’re looking for easily, without having too much trouble. Here are some ways to organise your images using lightroom.
Lightroom comes with a lot of powerful tools, most of them packed in the “Develop” module and most of the time if the image is captured well in camera, there are only a few subtle edits one needs to do, to make an image presentable. Some tools like the clarity, texture, dehaze and sharpening, if not used well, can make the image look overprocessed or awkward. This article talks about five subtle tools you should learn to use in Lightroom.
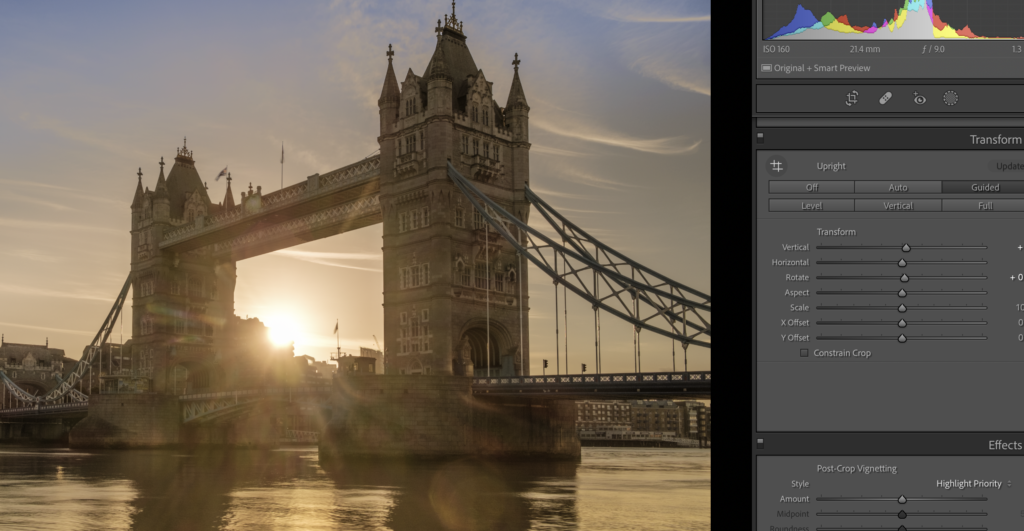
Using the vertical tool manually in Lightroom. By Jason Row Photography.
If you are someone who has interests in architectural photography, chances are that when post-processing, you will need to correct the verticals and remove lens distortions. This may also apply sometimes to other genre in photography. This article talks about the transform and lens correction tools in Lightroom and why you need to use them.
Lightroom provides a lot of tools to make a photographer’s workflow easier and faster. There are a lot of little things that photographers need to know in order to use this program efficiently. Who doesn’t love hacks in order to get editing jobs done easily? This article provides 10 hacks for Lightroom classic.
The recent updates over the past year use AI technology to reduce the amount of time required to work on certain tasks within Lightroom. Some of these tools were not available in older versions of Lightroom and they can come in handy if required. Here are some quick but useful Lightroom tools that you should know.
Lightroom as simple as it may seem, has some really powerful masking tools that make selective editing quite easier for photographers. Depending on what you need to mask, there are various masking options – using just a brush or select objects, subjects, sky, background, etc. Here is a quick guide on how to use the masking tool in Lightroom for the best results.
Besides the basic colour corrections and other important tools that Lightroom provides, there is a separate section to colour grade photos if you are someone who wishes to bring in a cinematic or another specific look to your images. Lightroom has three colour wheels, one each to control the colours in the shadows, mid-tones and highlights. Check out this article to find out how to use these wheels.
If you want to work faster in Lightroom, you need to get into your Lightroom settings and makes some changes to improve its performance. Many beginners may not be aware of these settings. Most of the issues arise when working in the develop module or even the simple process of scrolling across to the other images may be slower. Here are some ways to get better performance in Lightroom Classic.
Some users may not be aware of the fact that Lightroom can also be used to edit videos. Although it does not have any advanced tools for video editing, if you are someone who occasionally captures a couple of videos and wishes to make some basic edits, then Lightroom can be useful if you do not want to invest in other expensive video editing programs. Here are the pros and cons along with how to edit a video using Lightroom.
Lastly, if you are someone who likes to make edits on the go on your mobile device, Lightroom has a mobile app that can also sync your edits via creative cloud so you can continue from where you left, when working on this app from your computer. Here is a quick guide to using the Lightroom mobile app.
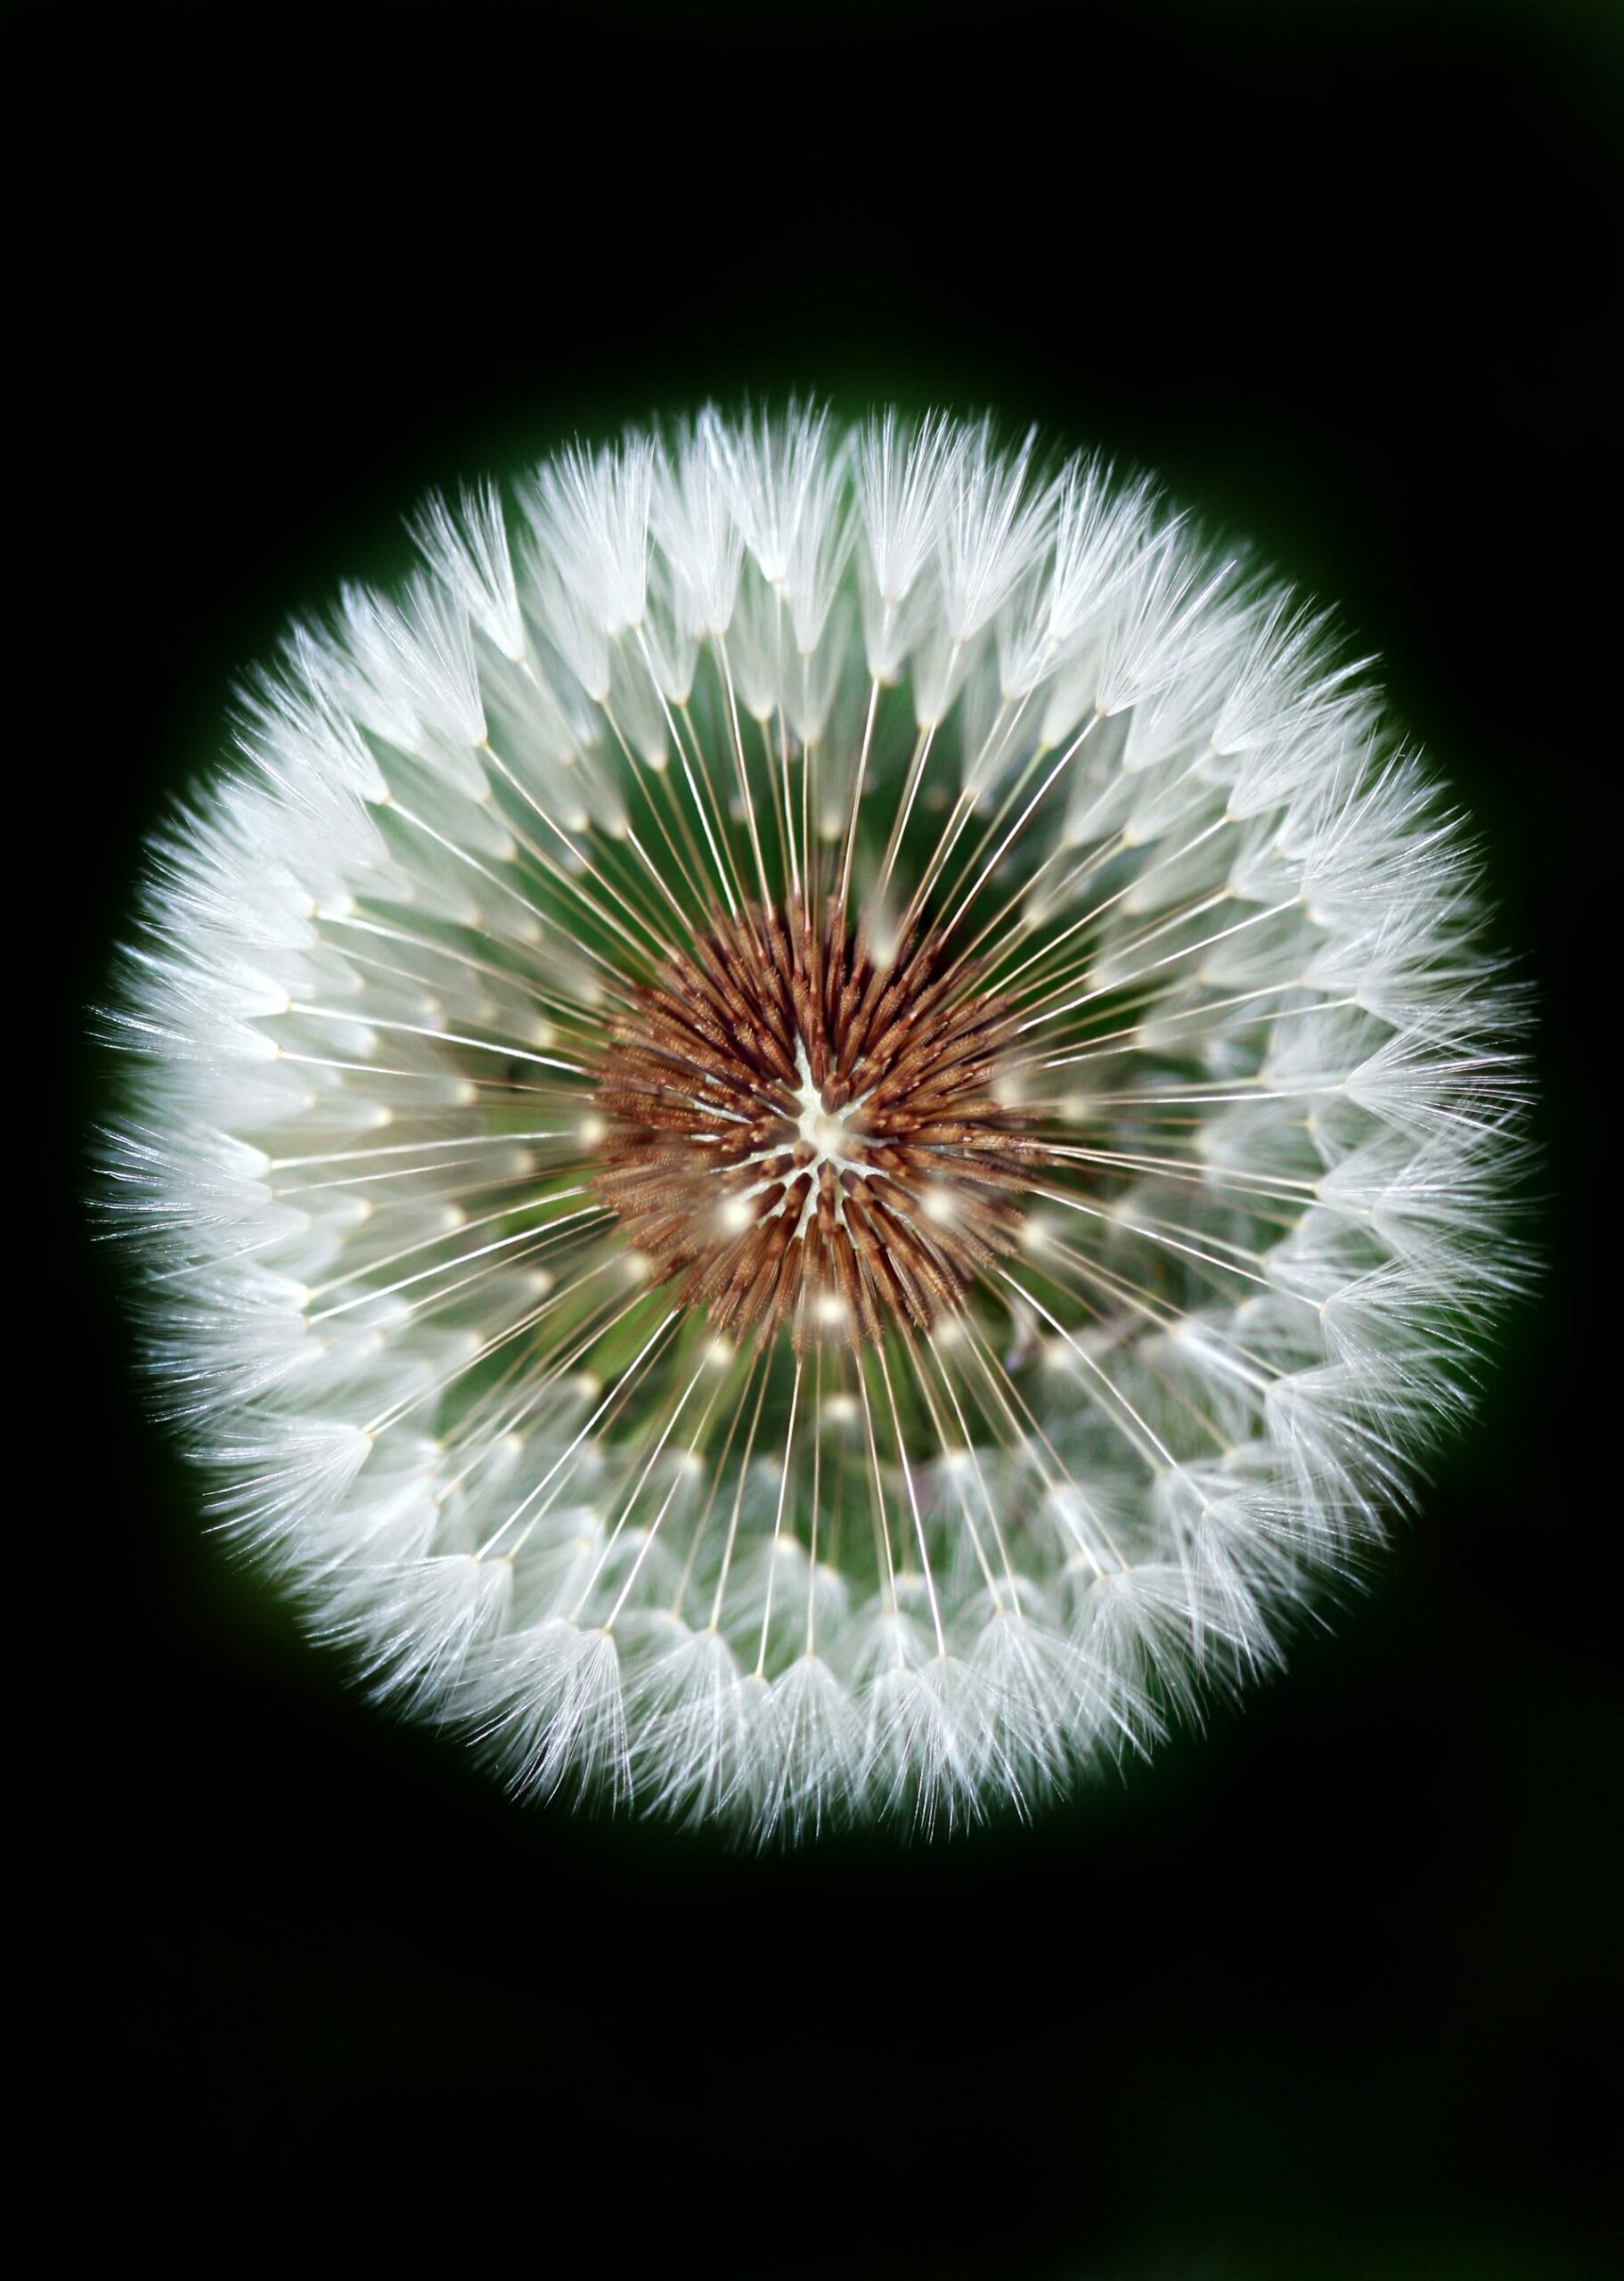
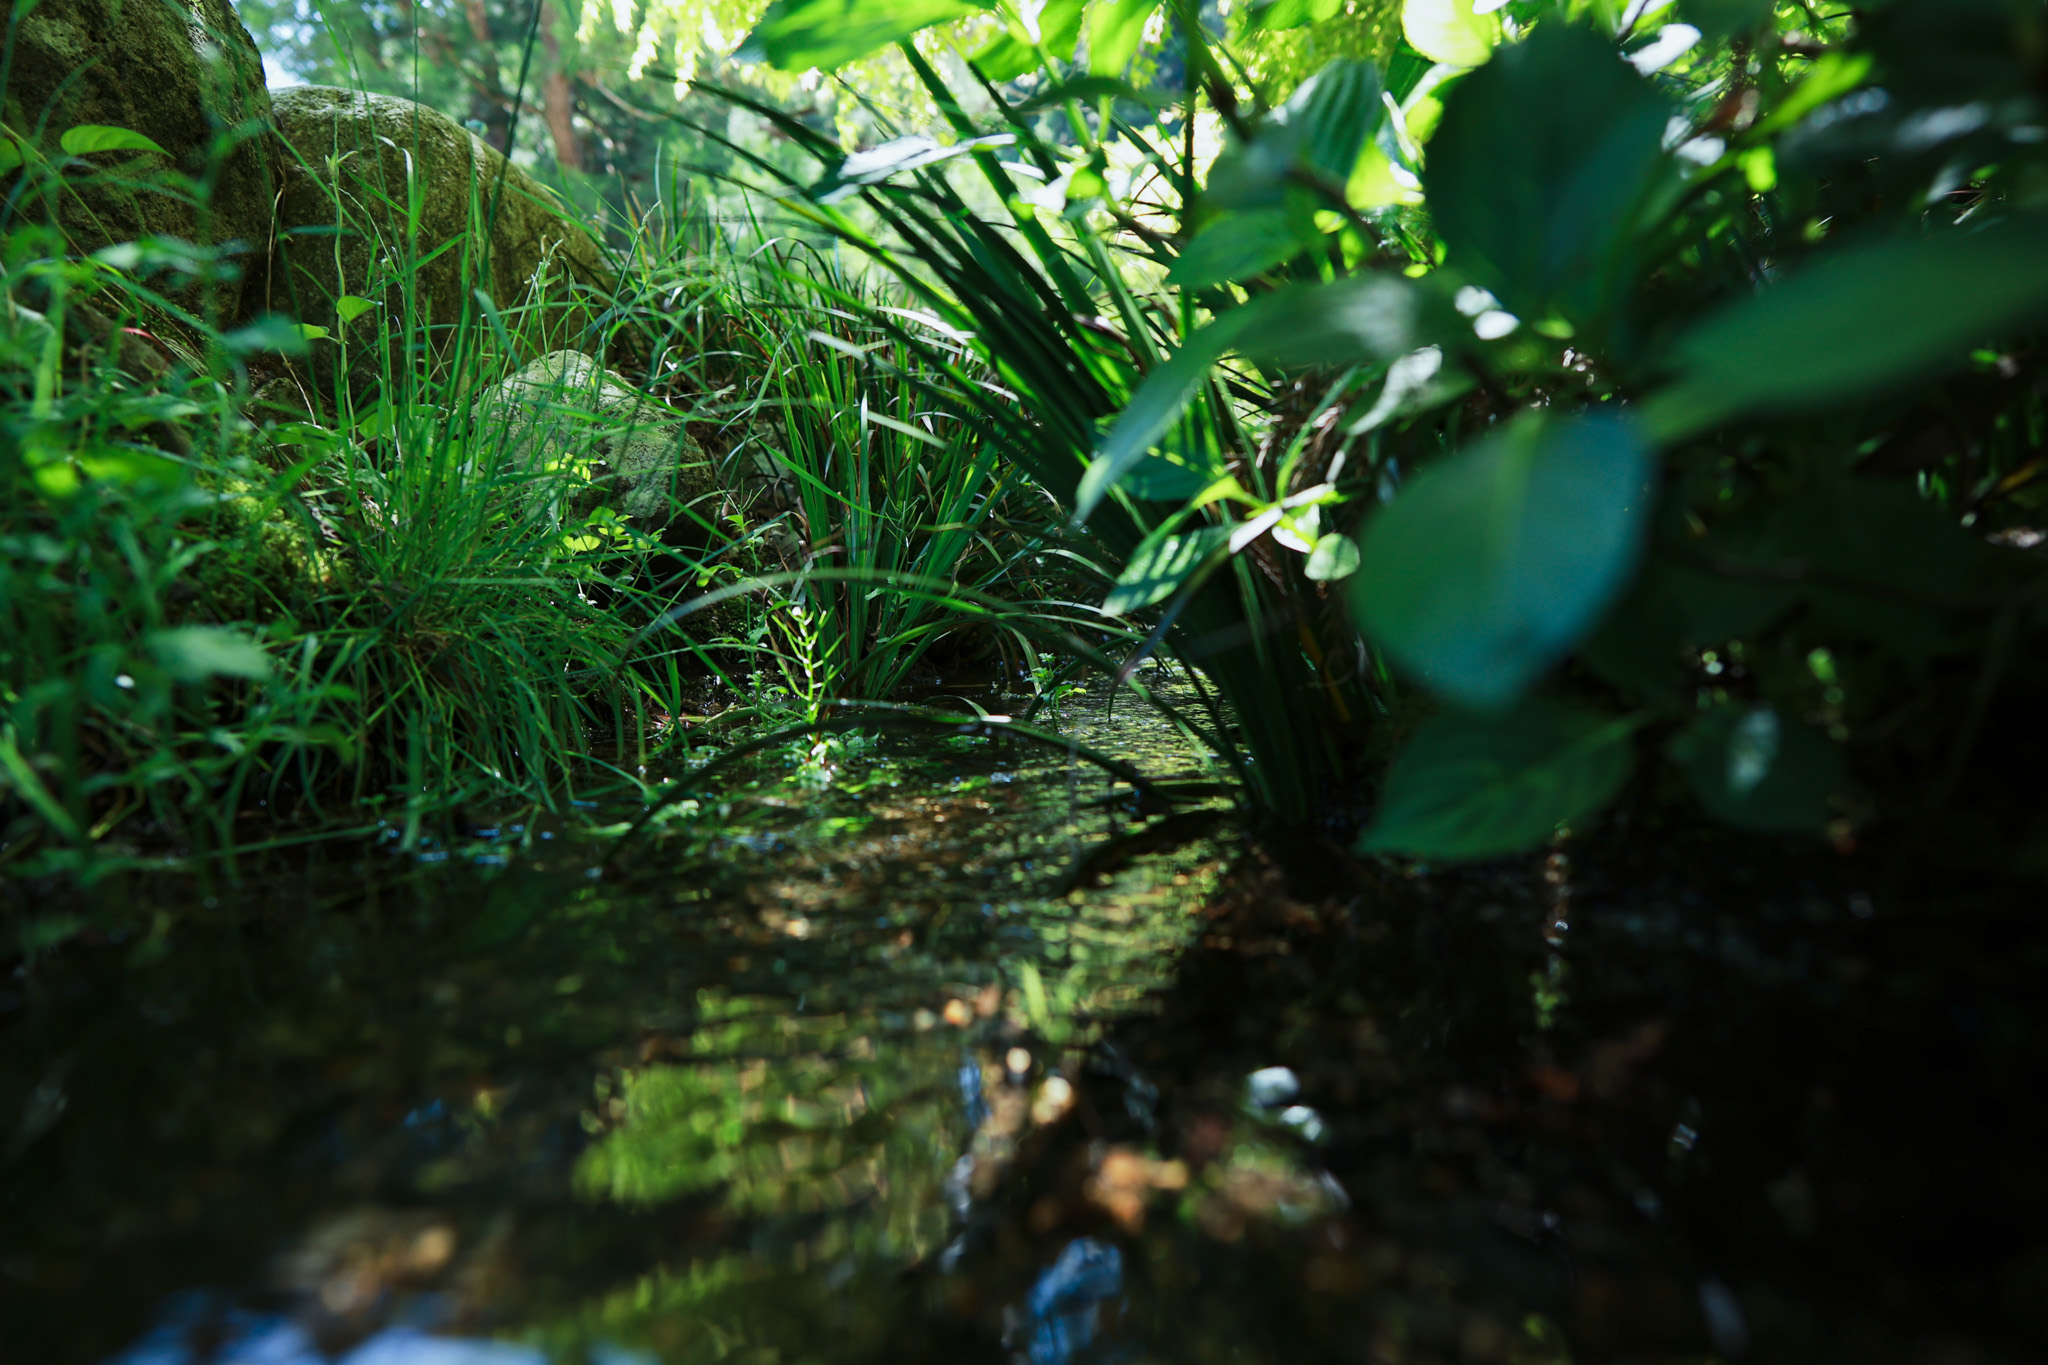
Macro photography is fascinating and it reveals a lot of hidden details of the natural world and of manmade objects, that wouldn’t be seen otherwise. When it comes to macro photography, lighting is very important. Although a lot of photographers make use of artificial lighting setups to capture macro images both indoors and outdoors, natural lighting is always the best option and will yield the most beautiful, natural looking images.
Photo by olena ivanova
When it comes to natural light, depending on the location and subject, the right light needs to be chosen. Soft light that illuminates the subject rom the side at an angle can be a great choice for macro photography. Learning how to use available natural light can go a long way in capturing stunning macro photographs. Here are 25 macro photos that are captured using natural light.
Artificial lighting is an investment and not many photographers want to invest in additional accessories or take the extra measures in setting up the scene with the desired lighting. Natural day light is always available and learning how to use it creatively, even under tricky light situations is a skill. If you are feeling stuck with using natural light all the time in your photography, we would recommend you to check out this course “Mastering Natural Light” by Photzy. It has over 3 hours of educational content that includes multimedia lessons, case-studies, diagrams, exercises and more that will help you to master natural light.
Photo by Mister Starman
Photo by Sjoukje Bos
Photo by Siegfried Poepperl
Photo by S N Pattenden
Photo by Aaron Burden
Photo by Skyler Ewing
Photo by Alexander Grey
Photo by Nick Fewings
When talking about natural light for photography, people often settle down for the most glorious golden hour and sometimes the diffused light on overcast days. This makes some photographers believe that other lighting situations are not ideal for photography, which is not true. Check out this course “Mastering Natural Light” by Photzy that talks about the role of light in photography and also where you will learn why there is “No’ bad light for photography.
Photo by Dominik Lückmann
Photo by Fanning Tseng
Photo by Richard K
Photo by Nat Weerawong
Photo by Jez Timms
Photo by Bozhin Karaivanov
Photo by Skyler Ewing
Photo by Nina Ha
When we hear about natural light for photography, we immediately think that shots need to be captured outdoors in order to use natural light. In fact, windows are great sources of natural light indoors and the light coming through it at different times of the day can help to capture varying moods. This course “Mastering Natural Light” by Photzy goes in depth into the fundamentals, understanding of natural light and working with it, important relationship between natural light and post-processing and a comprehensive guide to the different kinds of natural light.
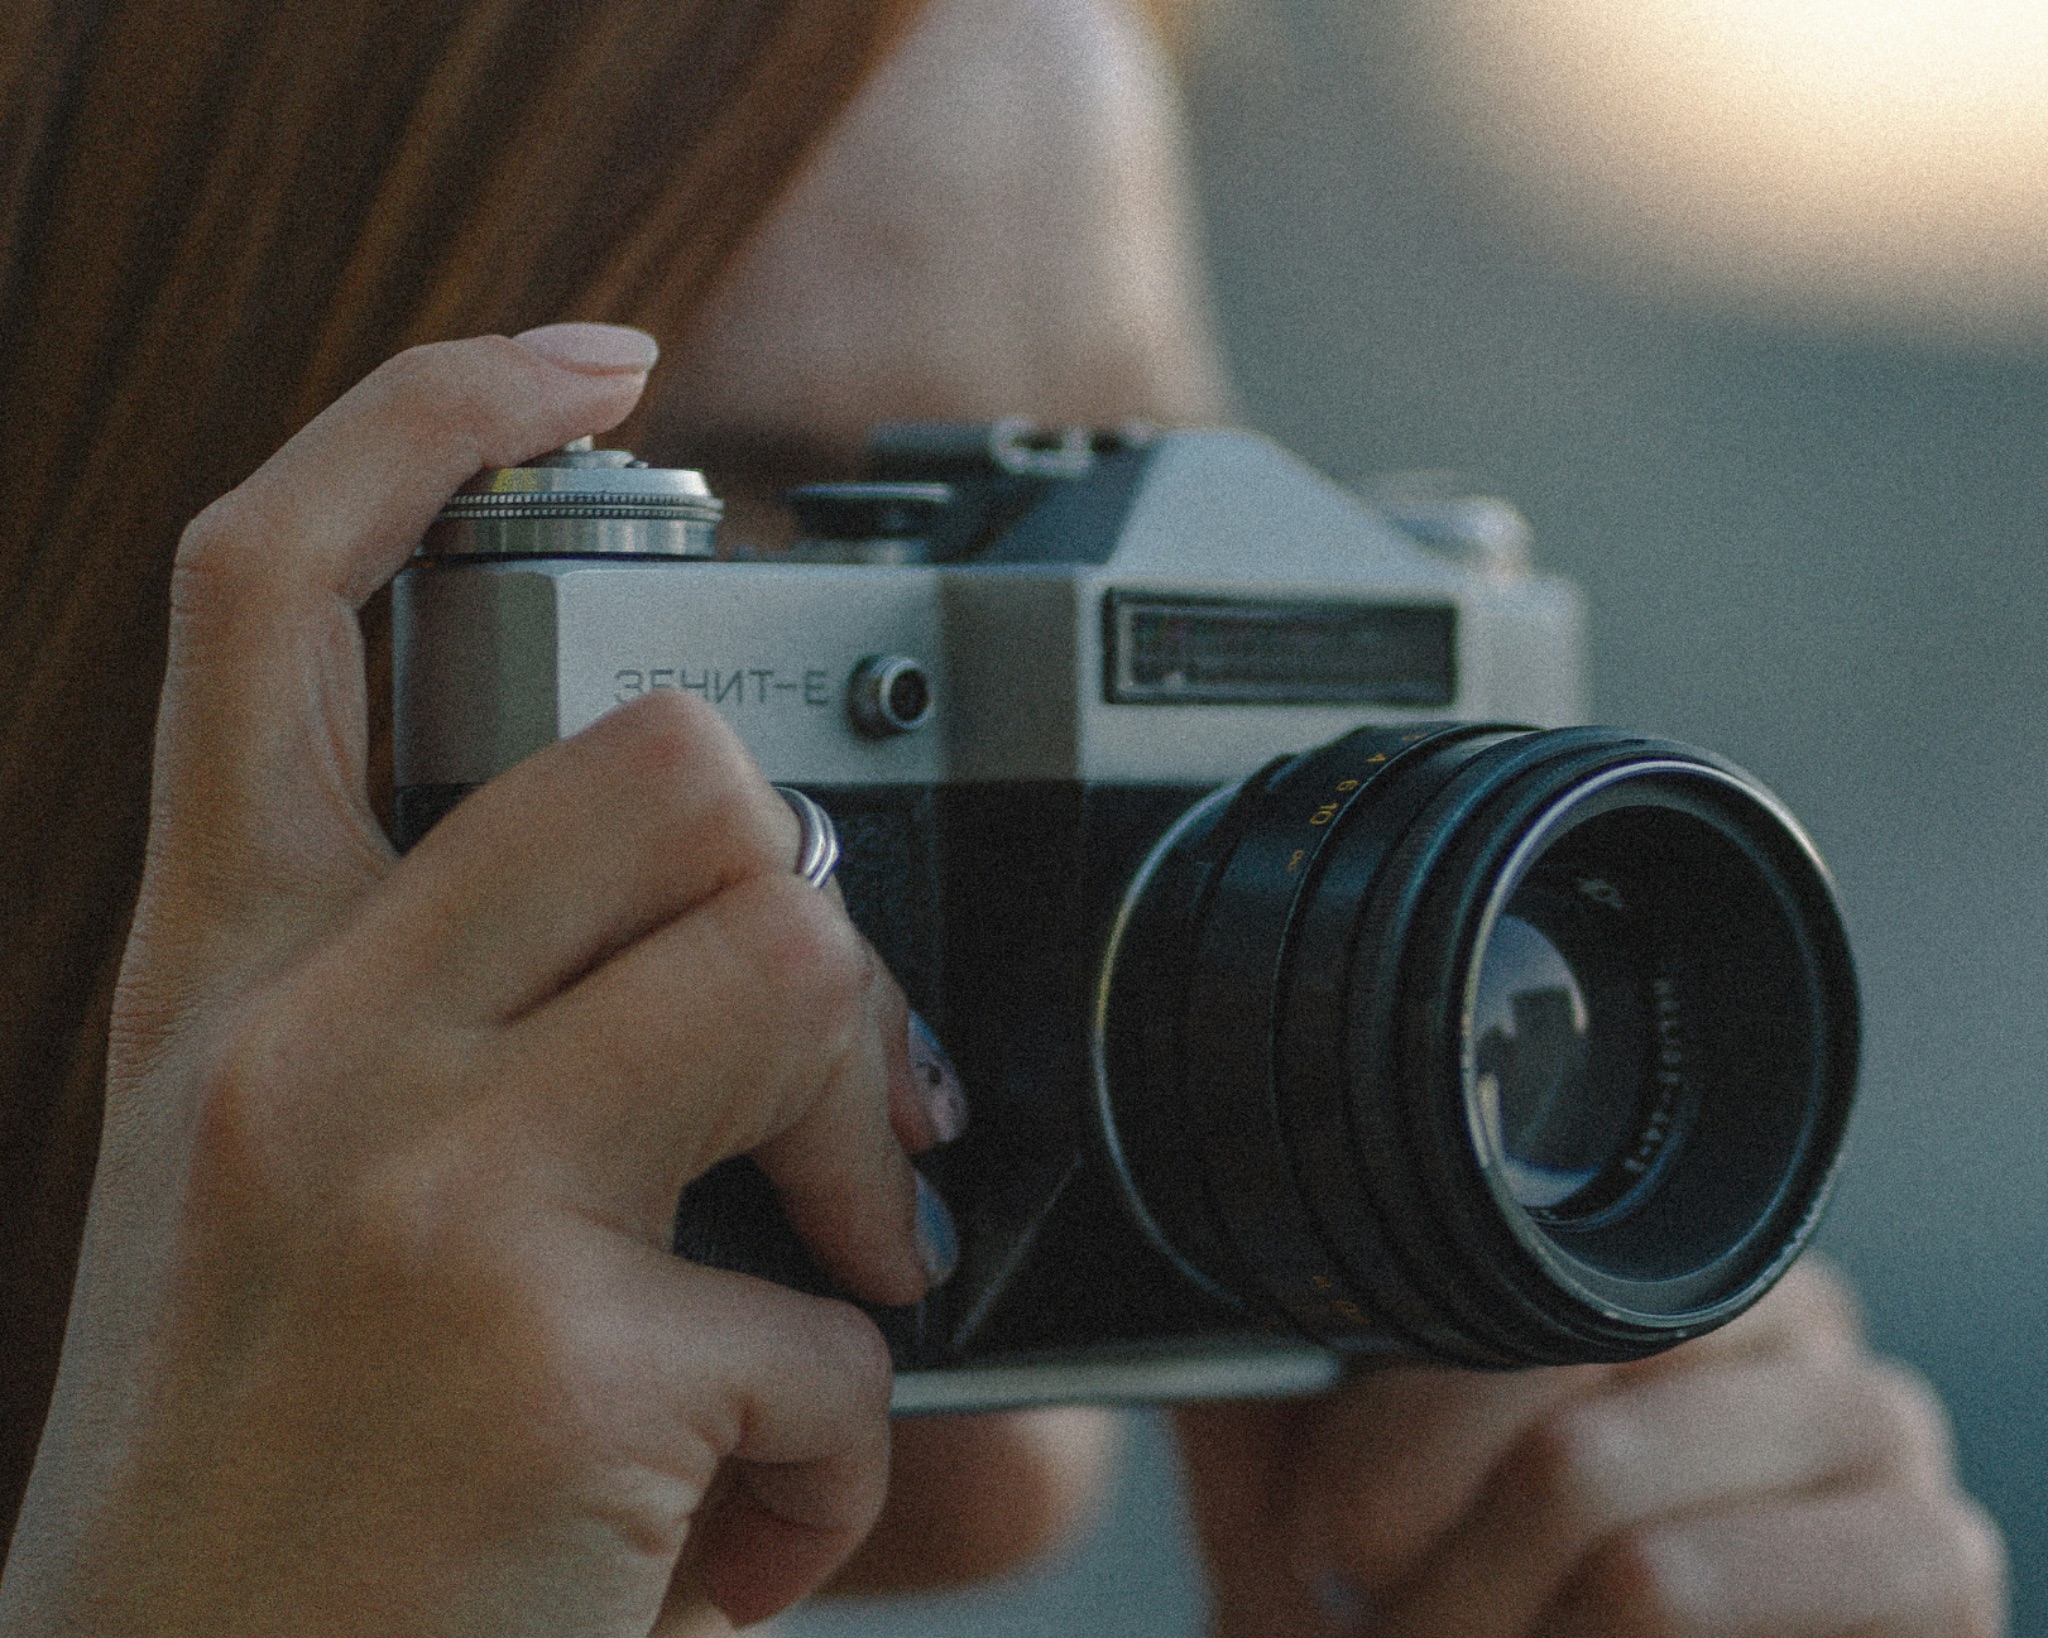
Do you remember your first camera? I certainly do. It was a Soviet built Zenit 11 and like most things Soviet, it was built like a tank. The thing is though, I can still clearly remember everything about my first days with that camera. As clear as day.
That’s even more remarkable when you know those days were coming on 42 years ago. There is virtually nothing else from that period of my life that I recall so clearly. So why did a hefty chunk of Soviet pig iron have such an effect on me? Today we are going to look at how your first camera will shape your photography.
First Impressions Count.
My first impressions of the Zenit 11 came in the local camera store. In front of me was the Zenit and an Olympus Trip, by far the most popular camera of its day. It was my 16th birthday and I could choose one of them. Both were similarly priced, but the Zenit looked like a “proper” camera. The type of camera Hollywood stars would use in spy movies.
The feeling I got from looking and picking up that Zenit was one of excitement mixed with bewilderment. The excitement of this shiny new gadget and the bewilderment of all the dials and buttons on it. The large logo emblazoned on the pentaprism hinted at an unknown. It added to the mystic of this shiny black box. Of course as experience built, I became to realise that logo, was not the pinnacle of camera technology, but that’s a whole other story.
The hefty lump of pig iron that was the Soviet Zenit. By Eugene Chystiakov on Unsplash
I am sure everyone of you, from relative newcomers to seasoned and experienced togs, will have experienced similar feelings. I don’t recall the camera even coming in a box, but many of you, at one stage, will have unboxed your cameras, casually thrown the manual to the other side of the room then spent twenty minutes trying to work out how to attach the lens to the body. If you are still passionate about photography today, it was those few minutes, months, years or decades ago that defined that passion.
Taking Those First Images.
When I got my Zenit home, I was eager to understand everything about it. But first I needed to shoot with it. Unlike today, I had no fail-safes, no automatic modes, no autofocus. I had literally no idea how to load a film let alone what the aperture and shutter speed dials did. There were strange numbers on the top plate, they might as well have been hieroglyphics for all I knew.
Like me, you will have experienced the same desire. The desire to skip any understanding of the controls just to get an image. How that image came out will also define how you go forward with photography.
For me, it was a picture of a friend’s dog. In an age when the Internet is defined by cat and dog pictures, it’s difficult to imagine the massive impact an image of a friend’s canine had on me. It’s also, perhaps, difficult to imagine the anticipation in waiting to see that picture. It was several days perhaps a week before I got the prints back. But what prints they were.
A black lab was my hook into photography. ByEinar Johnsson on Unsplash
The dog, a beautiful black lab whose name long escapes me but whose image is burned onto my retinas. The photos were so clear, so colourful, deep blue sky, rich green grass and the deep blacks of the aforementioned lab. Despite the fact that I had no idea how I had created these images, I was utterly hooked. And here’s the most salient point to this. That very first role of film helped define my photographic style, one that I have subconsciously honed over the following 40 years.
Your first images will be very much the same. Go back to the first shots you took with your first “proper” camera and I wager you will see elements of your own photographic style as it is today.
Beyond those first creative flourishes, your first camera will completely define your approach to photographic technique. The Zenit, as I have already mentioned, was entirely manual. There wasn’t even a built in meter per se. It was a selenium cell on the front of the pentaprism, just below the iconic Zenit logo. It worked in much the same way as handheld light meters of the day. You lined up a needle and read off the exposure.
Your first camera will define your entire photographic journey. By Nancy Hughes on Unsplash
To do that, I had to understand exposure. I had to learn the relationship between shutter speed and aperture. I had to know what ASA (ISO) my film was and how that would affect my image quality. In short, it taught me the essential basics of photography.
Many of you reading this will have picked up your first camera in the digital age. To be honest, the need to understand exposure (at first) is not essential when starting photography these days. Modern cameras have that sorted for you. However, you will need to know the differences between JPEG and RAW, the effect of white balance, and the way to use different autofocus modes. Those modern functions are essential to digital photography and will define the way you think and shoot way into the future.
When I meet up with new photographers, produce YouTube videos, make training courses or write even in my articles here on Light Stalking, I am bringing my 40 years of experience to those newcomers to photography. That experience is very much built on my early days in the craft and as such I am able to impart my understanding of exposure, shooting manually and manual focus to newer photographers.
In the same way, people starting now, will pass on the concept of JPEG and RAW et al to photographers kicking off their journey in 5-10 years time. The technology will have changed, the priorities in getting a good photo will have changed but the fundamental building blocks to getting that good photo will always be with us.
So think back to those halcyon days with your first camera, channel the thoughts and experiences that you gained with that camera and bring them forward into the future. The good photographers of the future will be building their abilities on your own experiences.
Sigma 200mm F2 DG OS | Sports Sony a1 ISO 100, F5.6, 1/25s
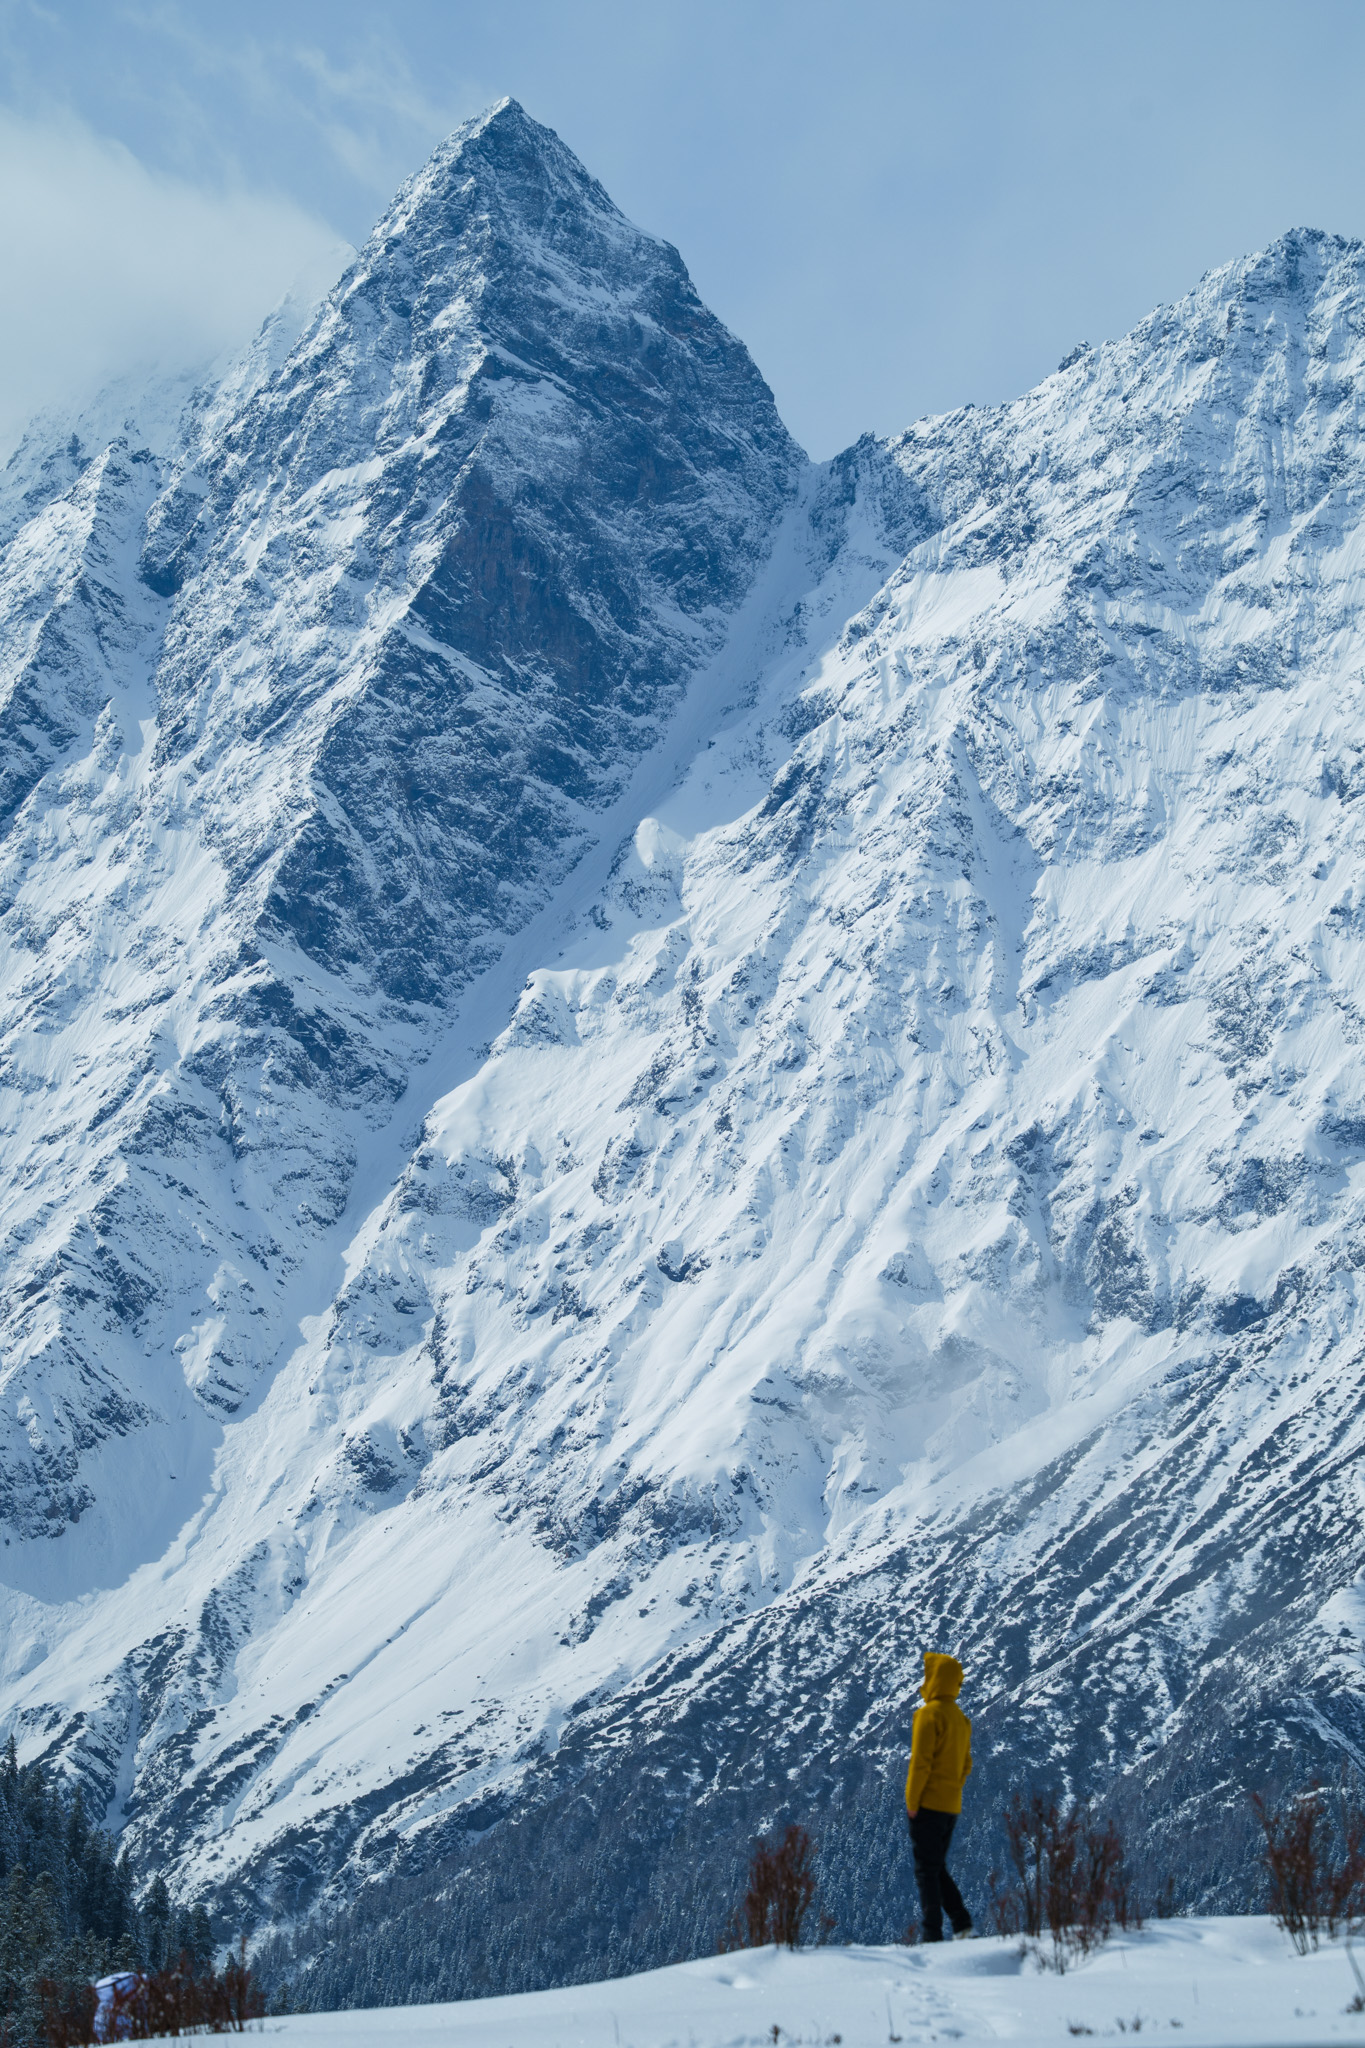
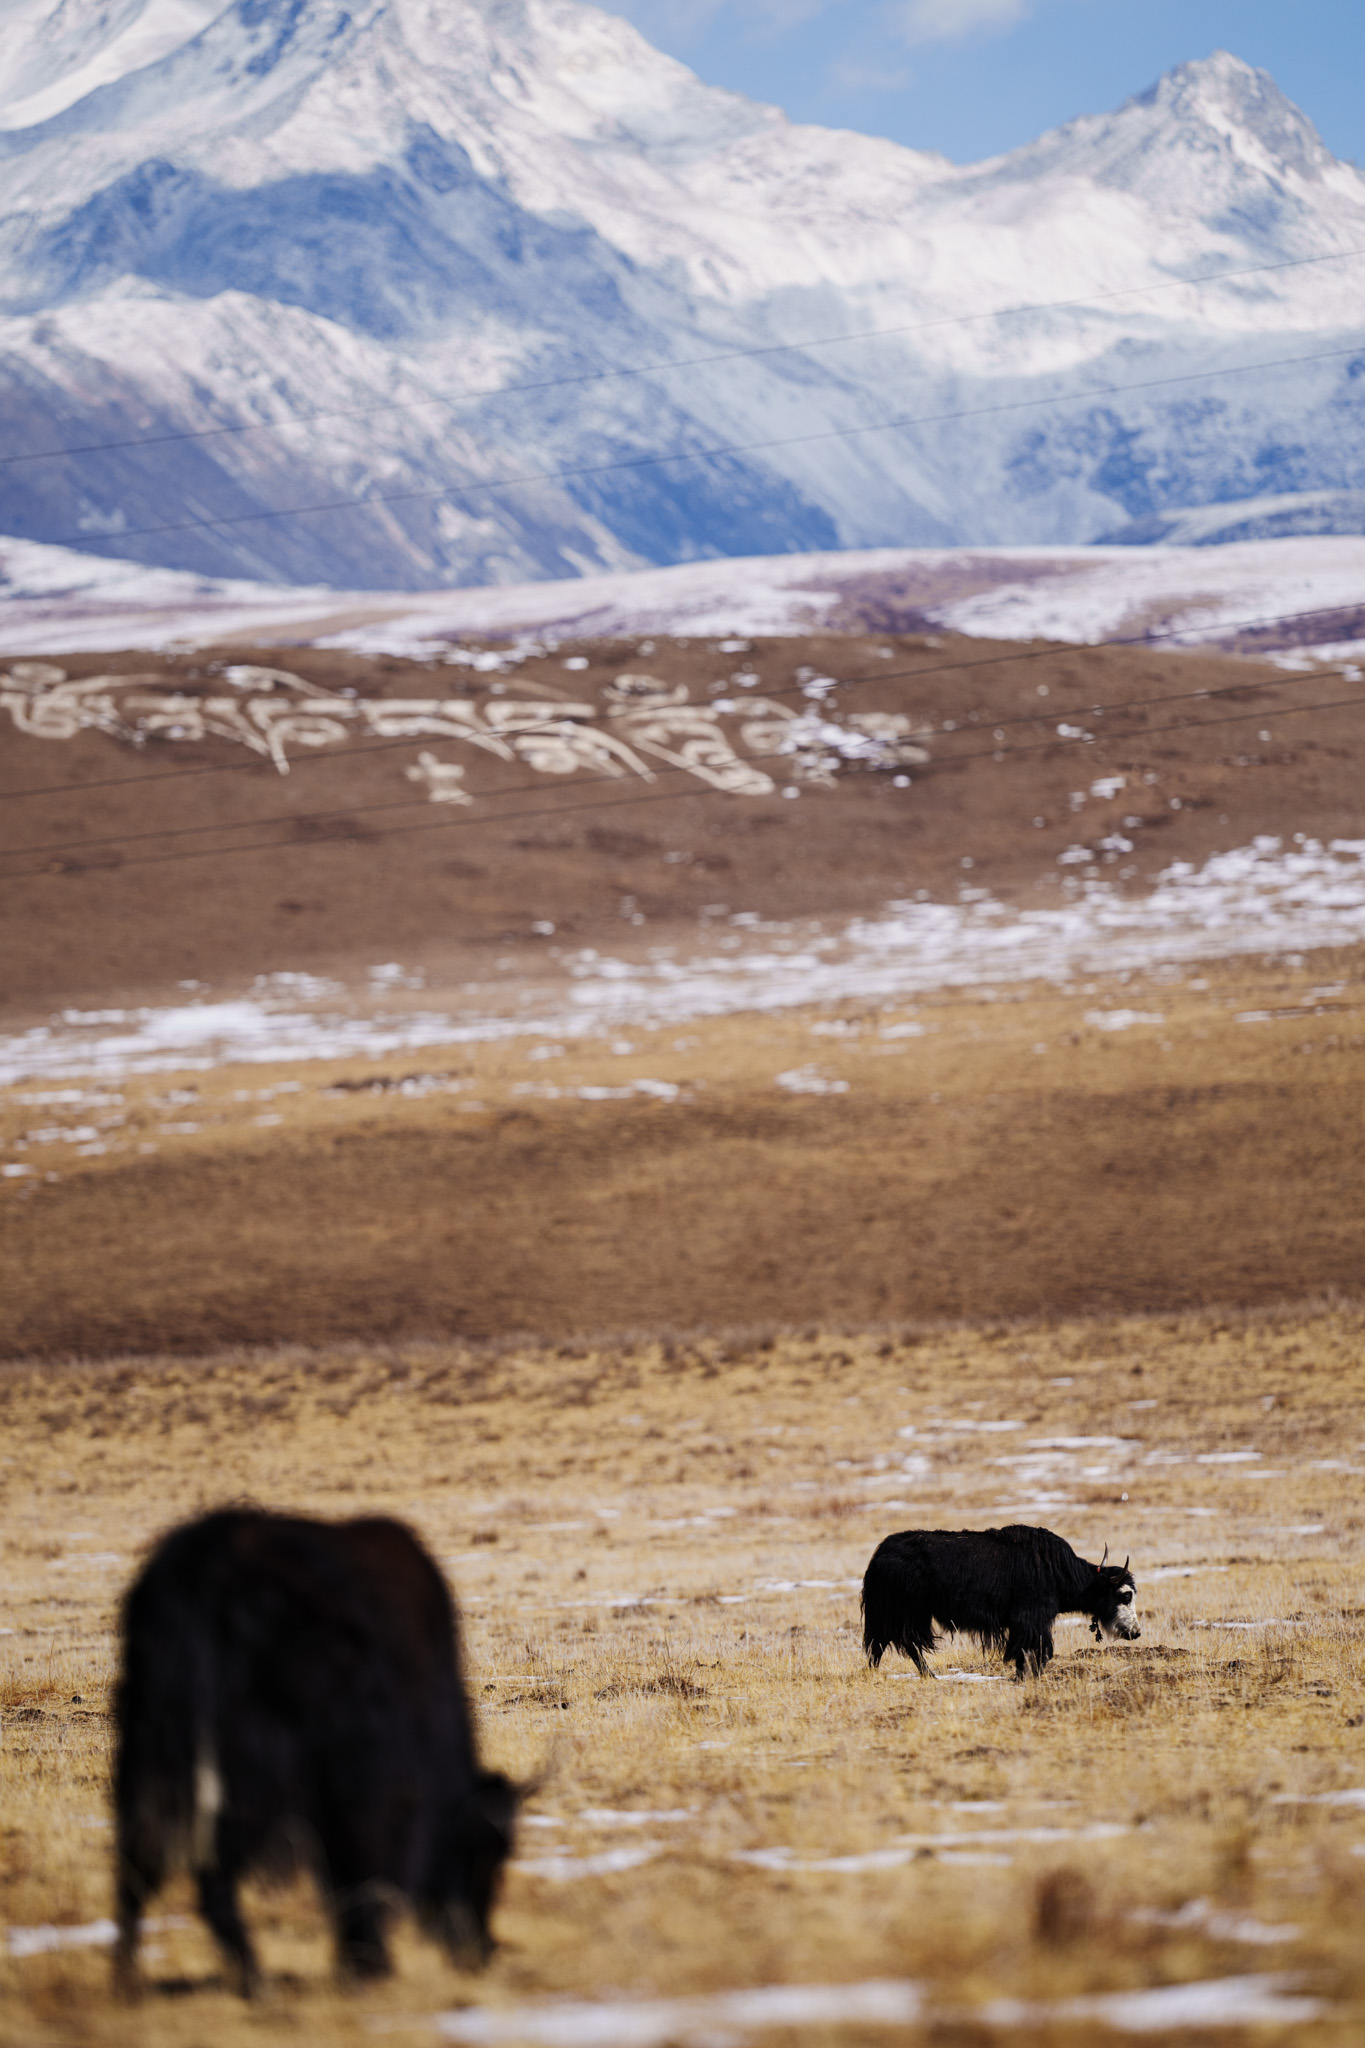
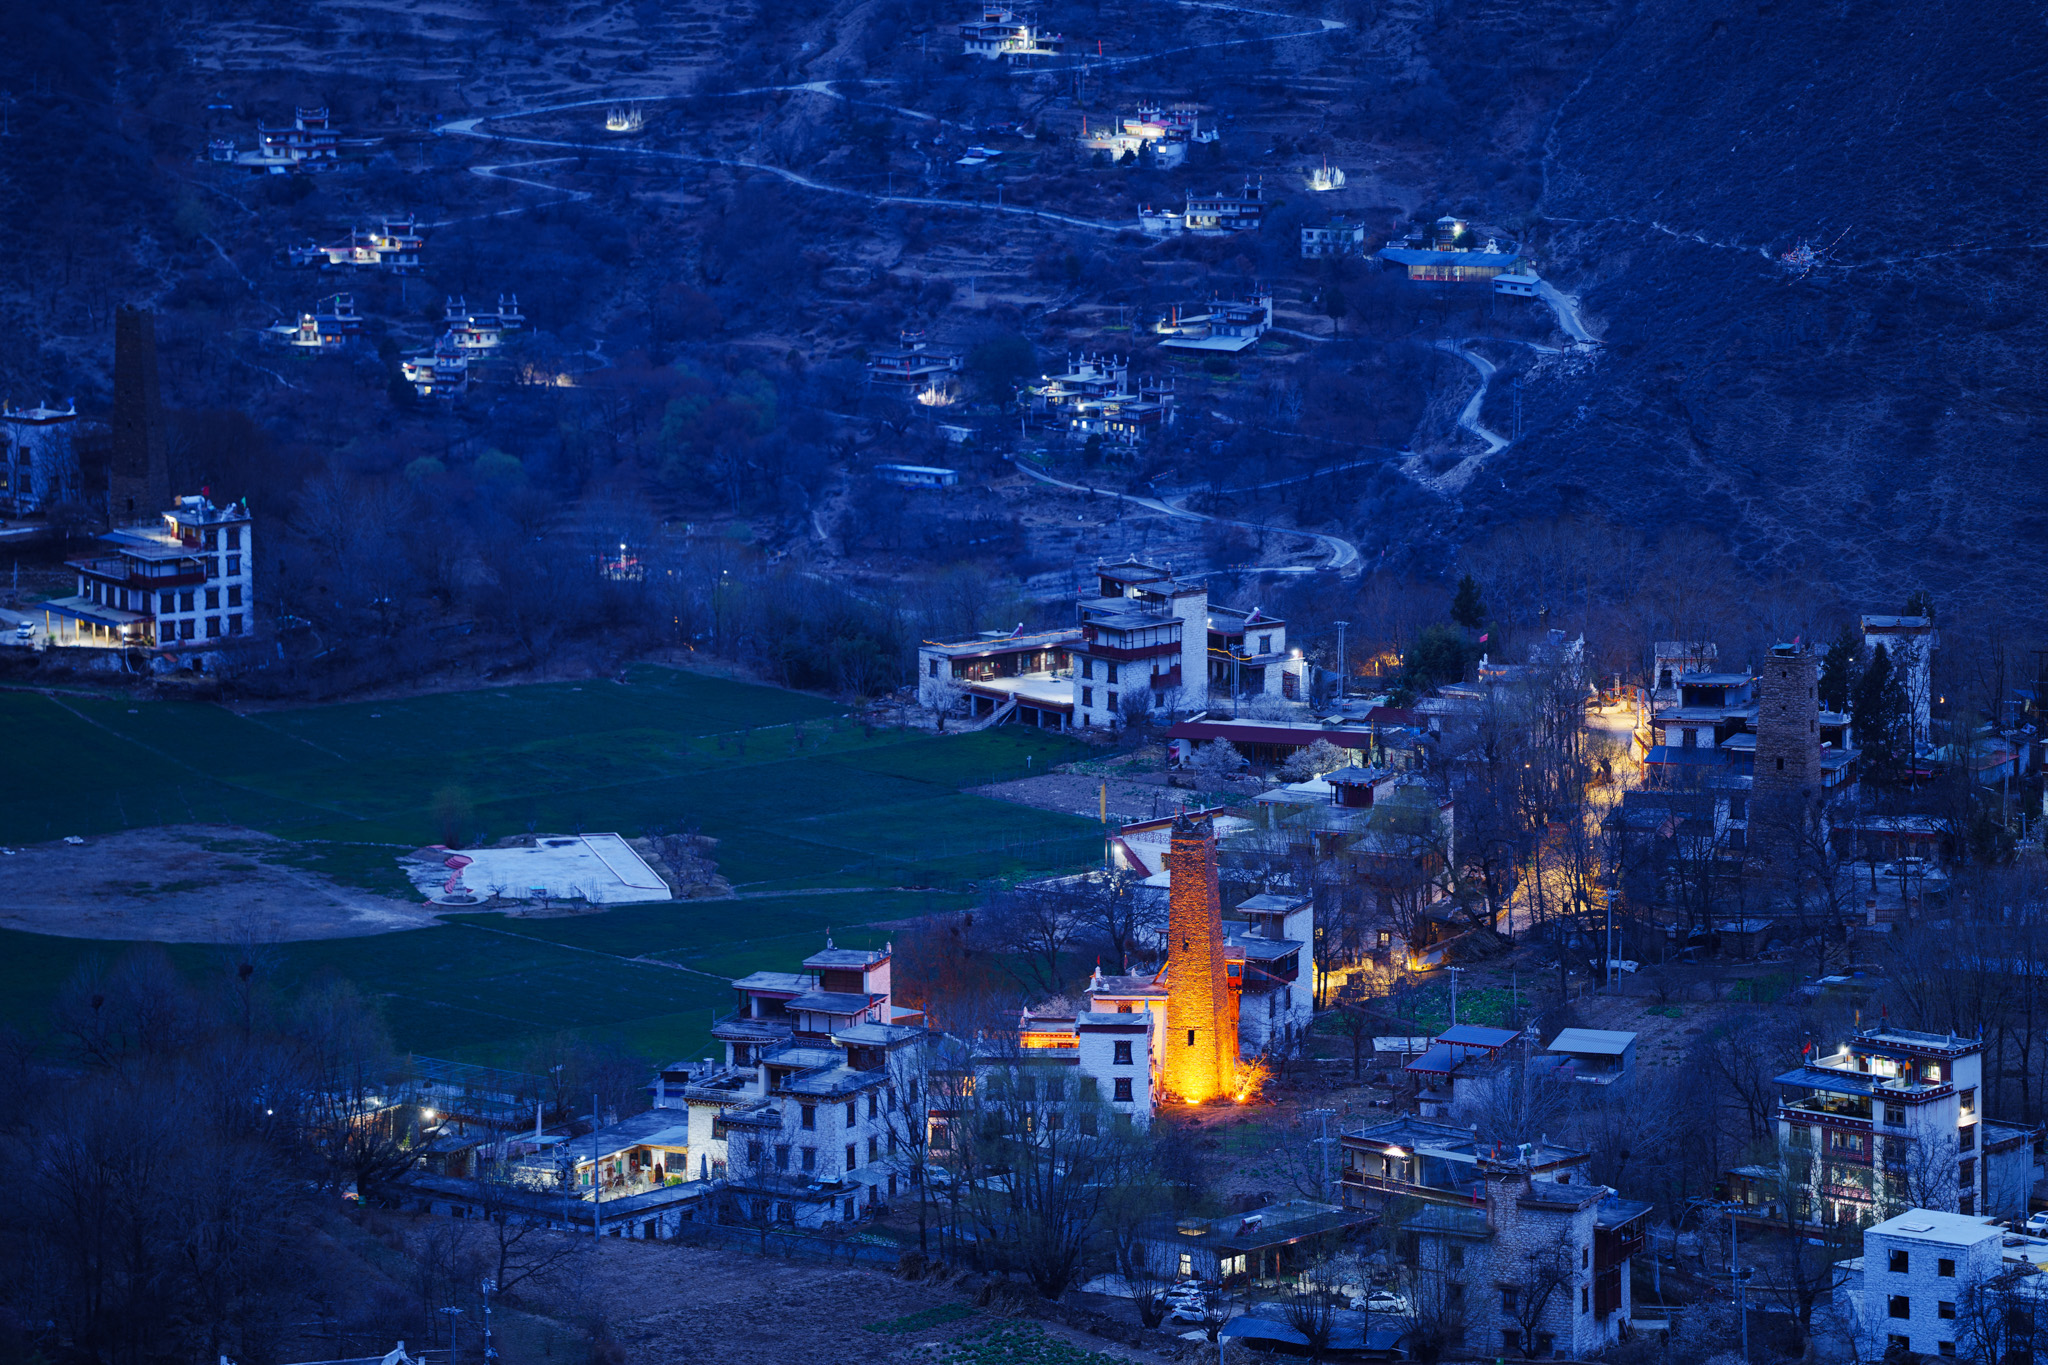
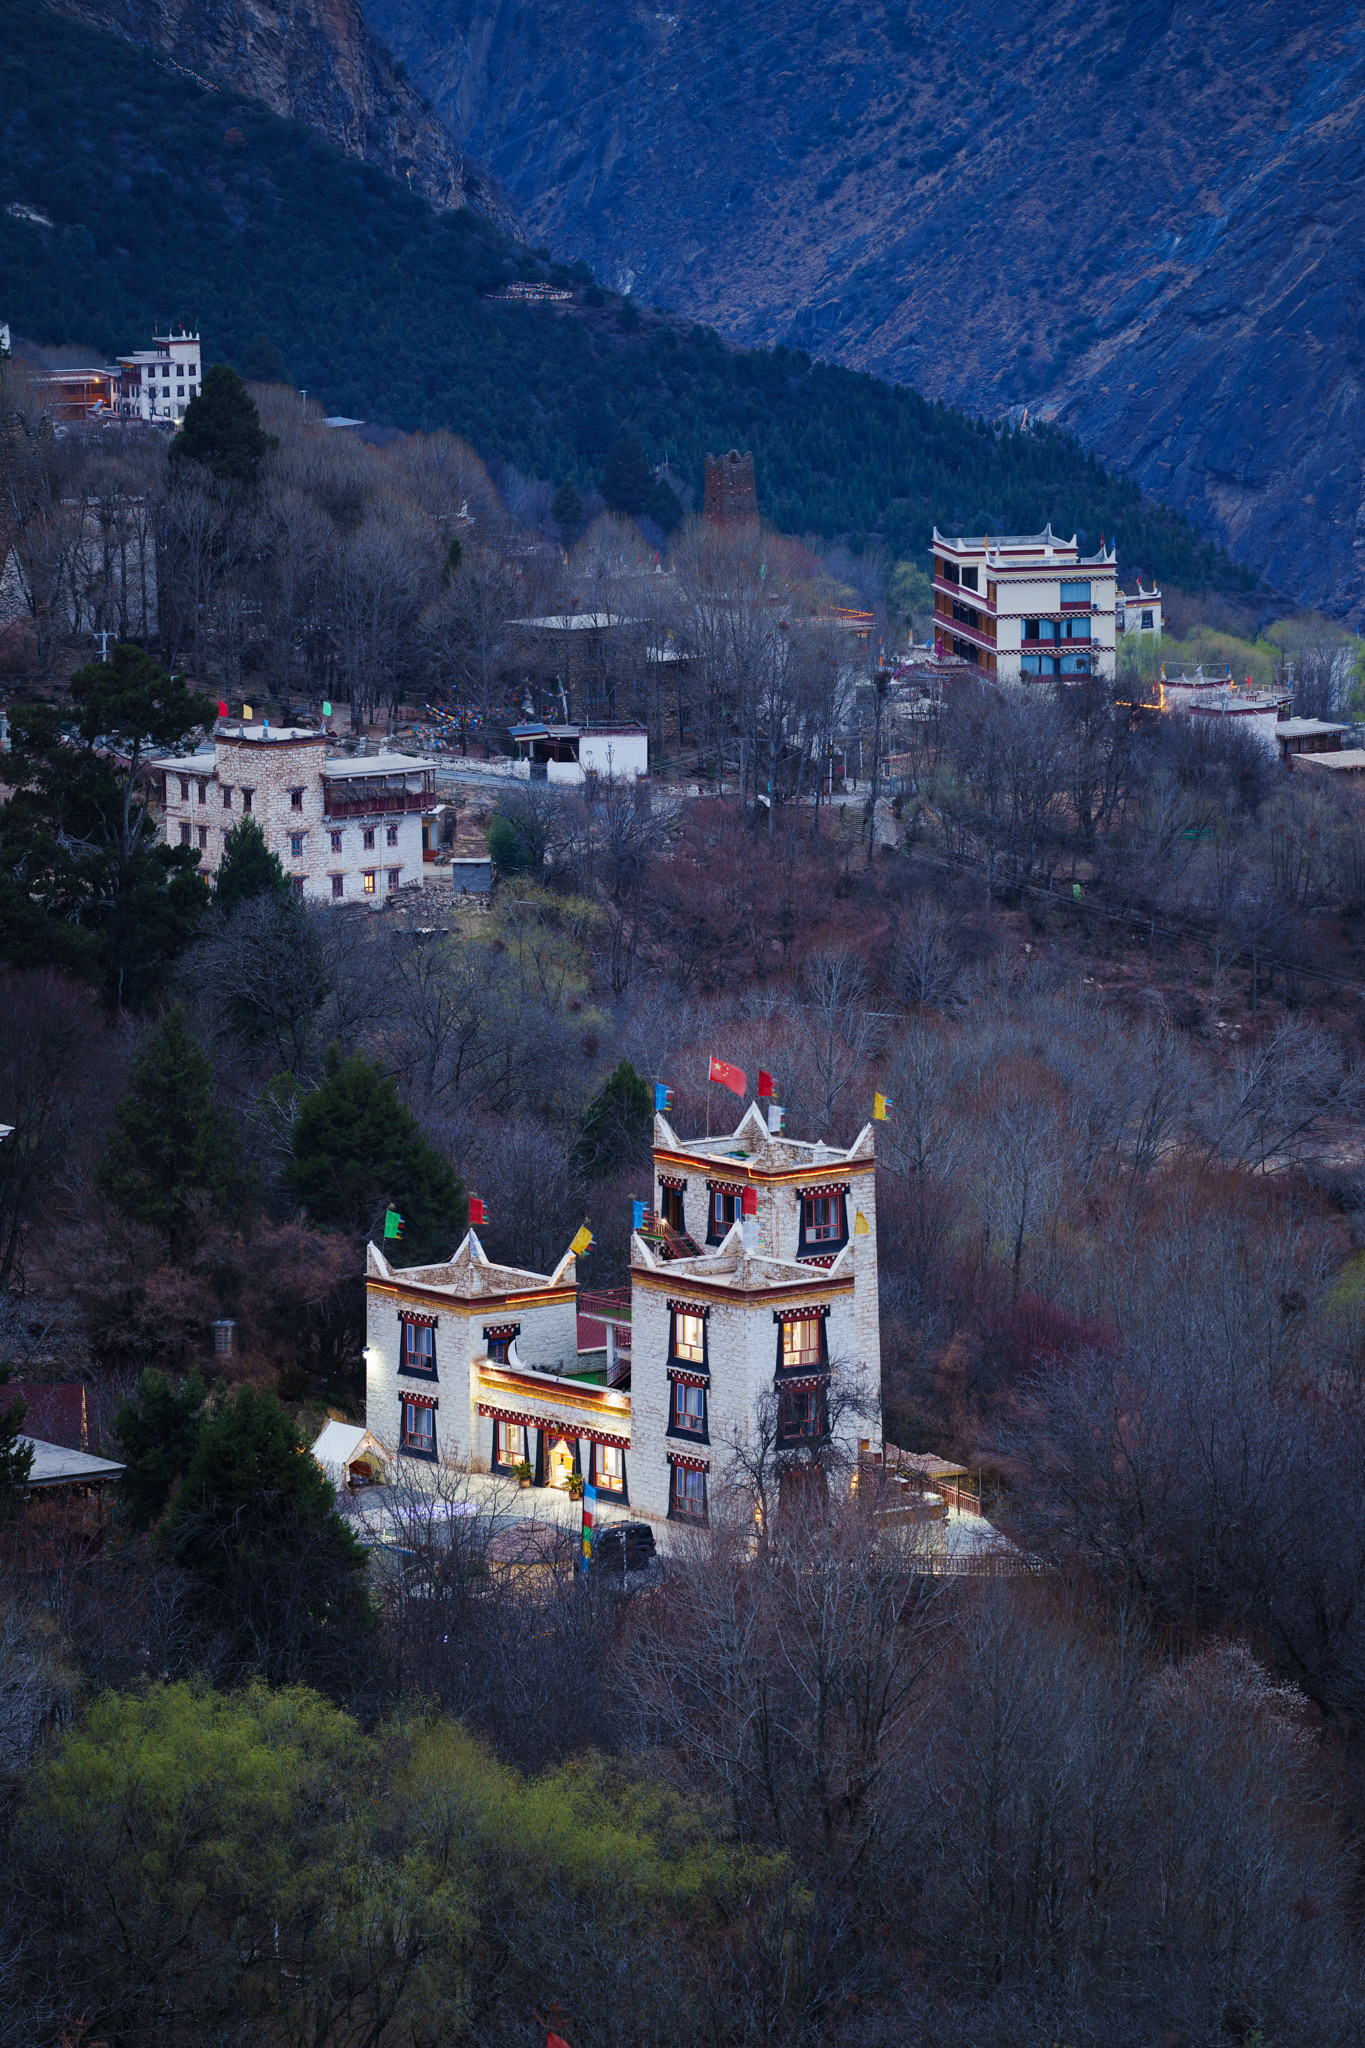
My hometown is Chengdu, situated in the vast Sichuan Basin of China. Just over 200 kilometers away from this flat expanse lies a series of parallel mountain ranges stretching east to west, spanning thousands of kilometers. This region has countless snow-capped peaks, pristine lakes, deep gorges, and winding rivers.
It also boasts extraordinary biodiversity, including globally renowned species such as the giant panda and golden monkey.
Additionally, the area is rich in cultural diversity, with multiple ethnic groups coexisting and blending their unique traditions. Collectively, we refer to this region as the Grand Hengduan Mountains.
Sigma 200mm F2 DG OS | Sports Sony a1 ISO 100, F8, 1/800sSigma 200mm F2 DG OS | Sports Sony a1 ISO 100, F2, 1/1000s
Since I first picked up a camera, the Grand Hengduan Mountains have remained my most frequently photographed subject.
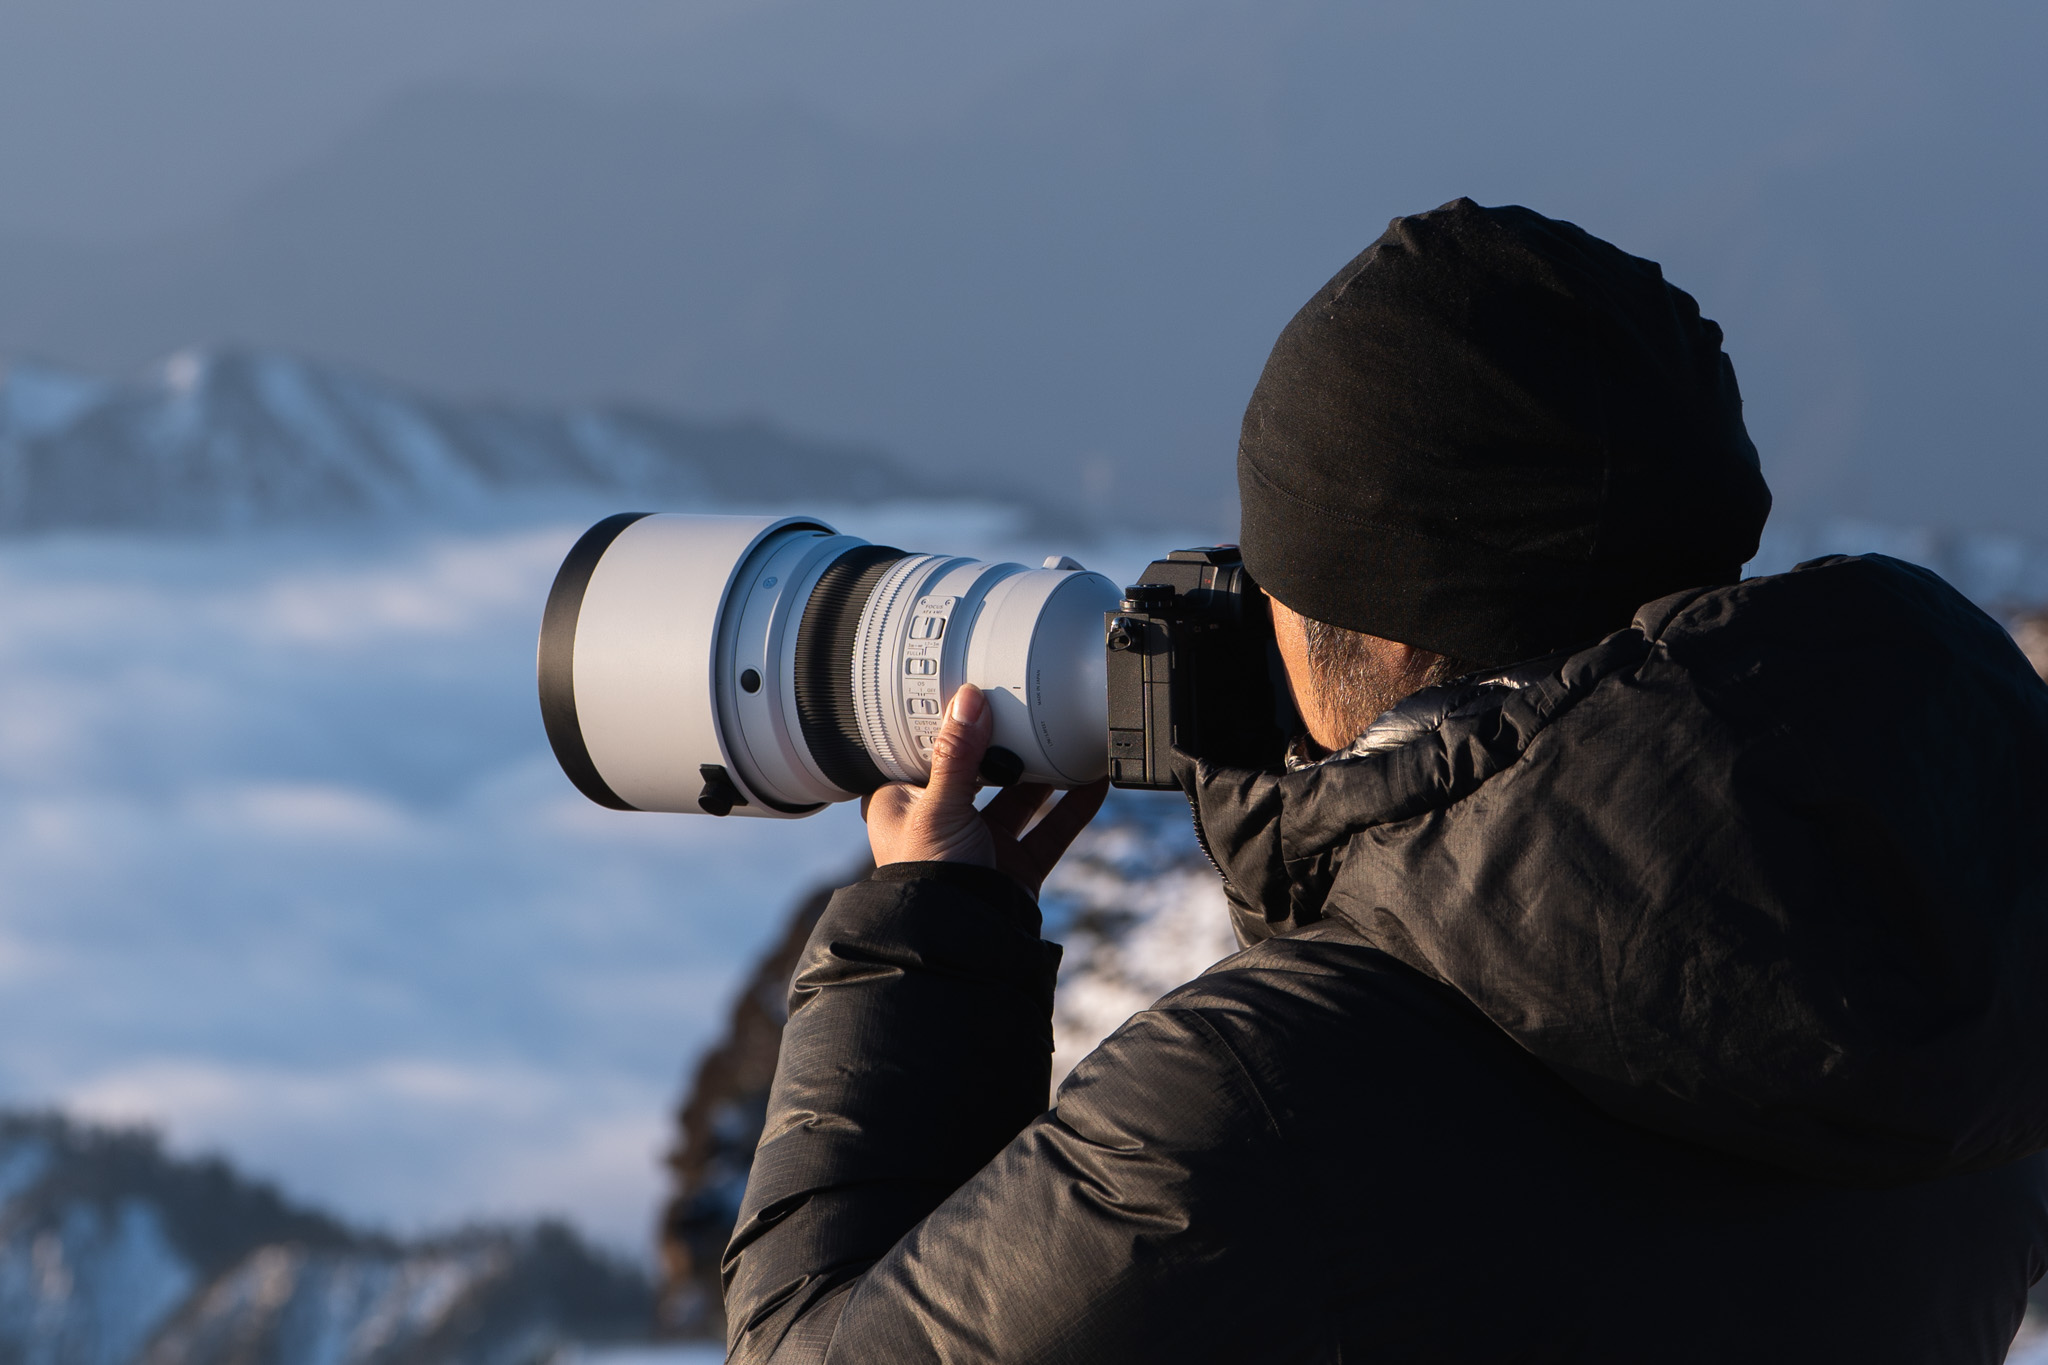
In my earlier photographic endeavors, I often relied on wide-angle lenses to capture the region’s grandeur and majestic landscapes. However, for this particular project, I challenged myself to shoot exclusively with the Sigma 200mm F2 DG OS | Sports lens.
This choice not only pushed me out of my comfort zone but also allowed me to explore this familiar terrain with a fresh perspective, unveiling an entirely new dimension of beauty.
Sigma 200mm F2 DG OS | Sports Sony a1 ISO 100, F2, 1/6400sSigma 200mm F2 DG OS | Sports Sony a1 ISO 100, F2, 1/10000s
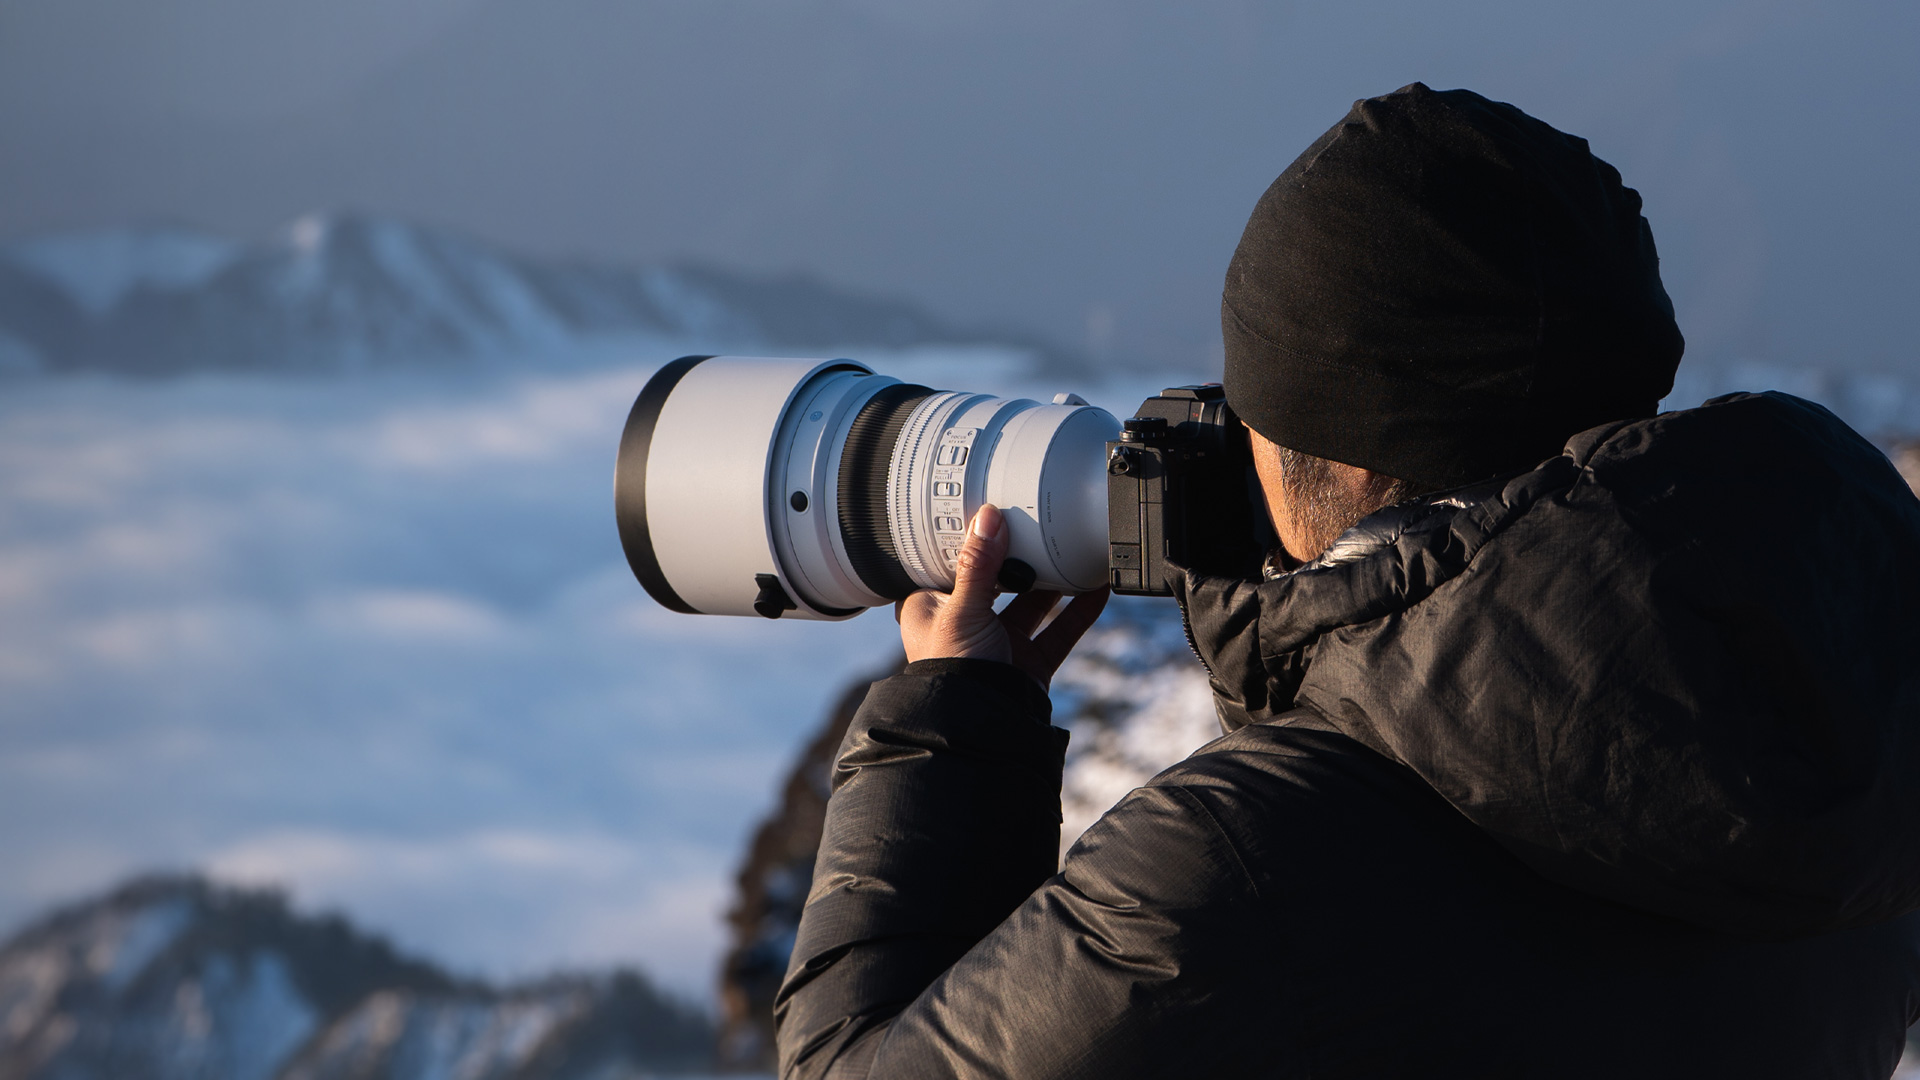
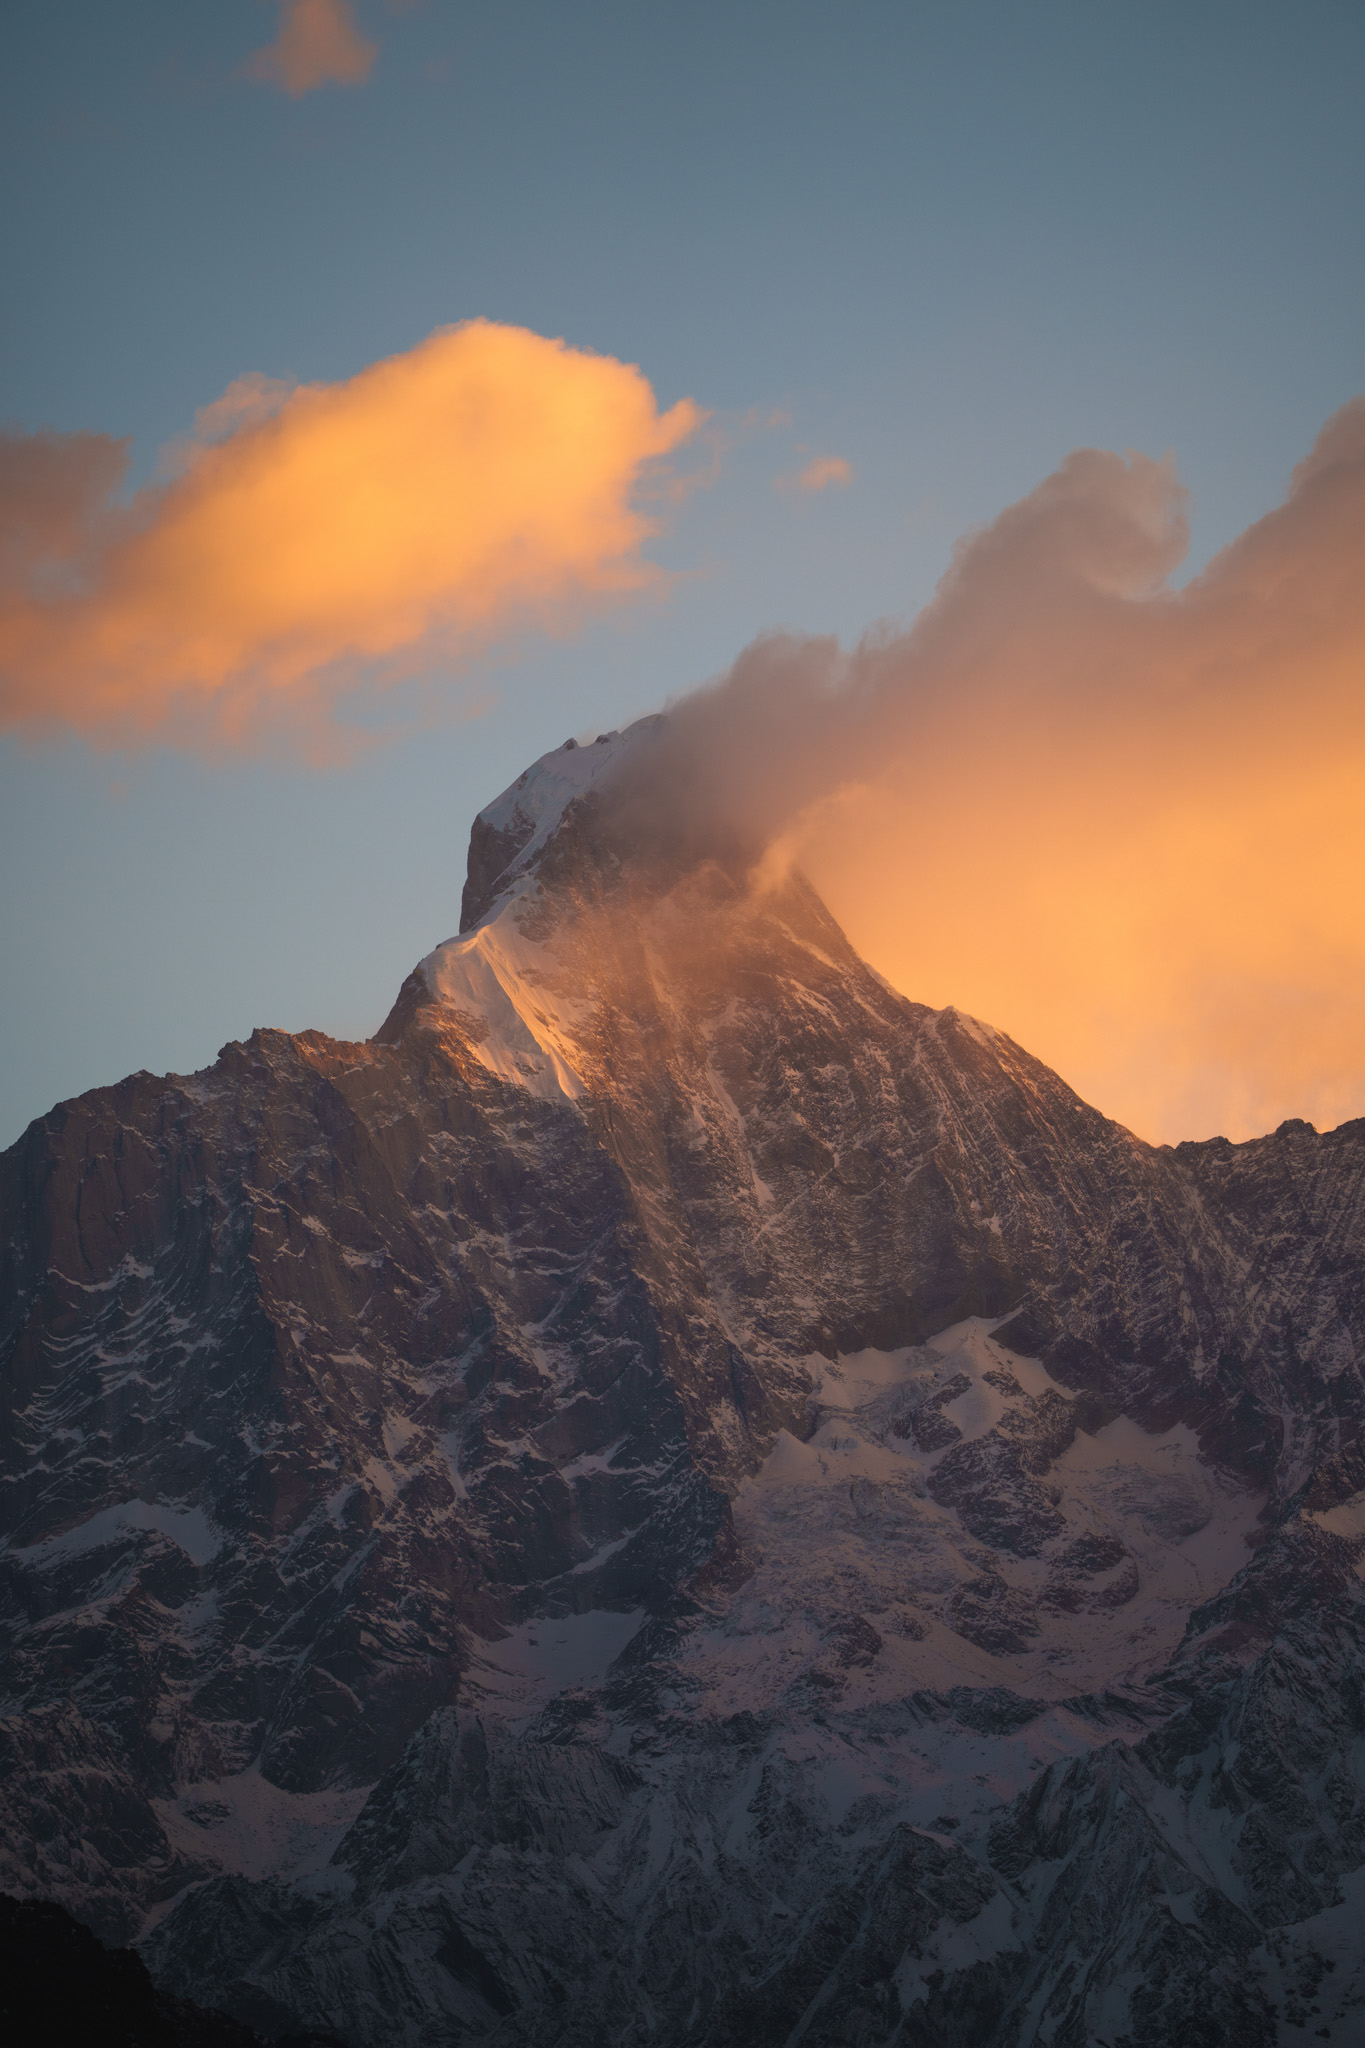
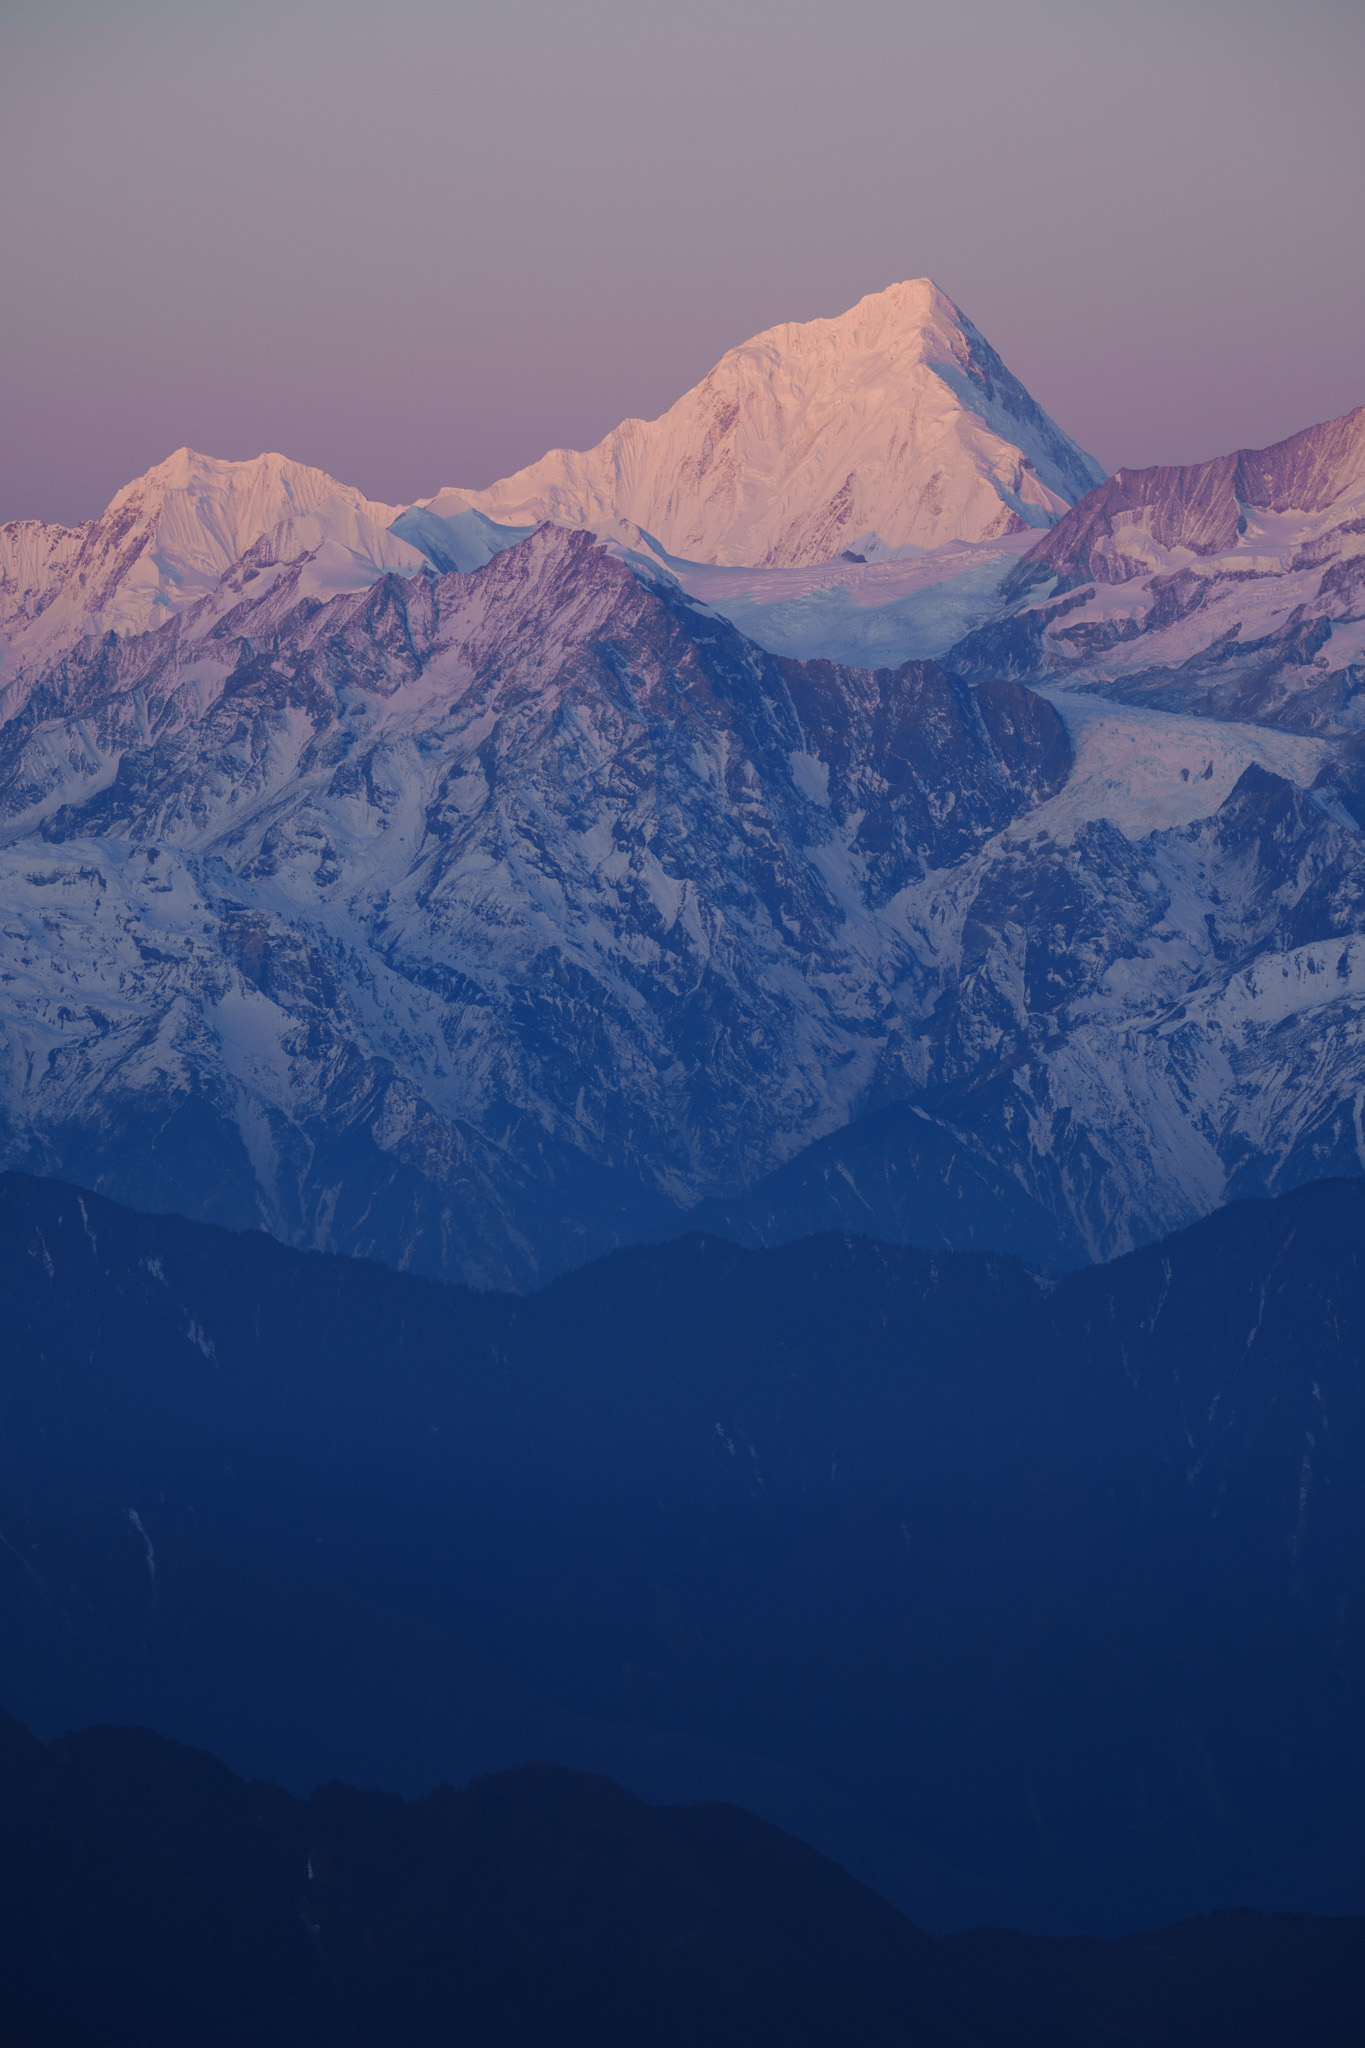
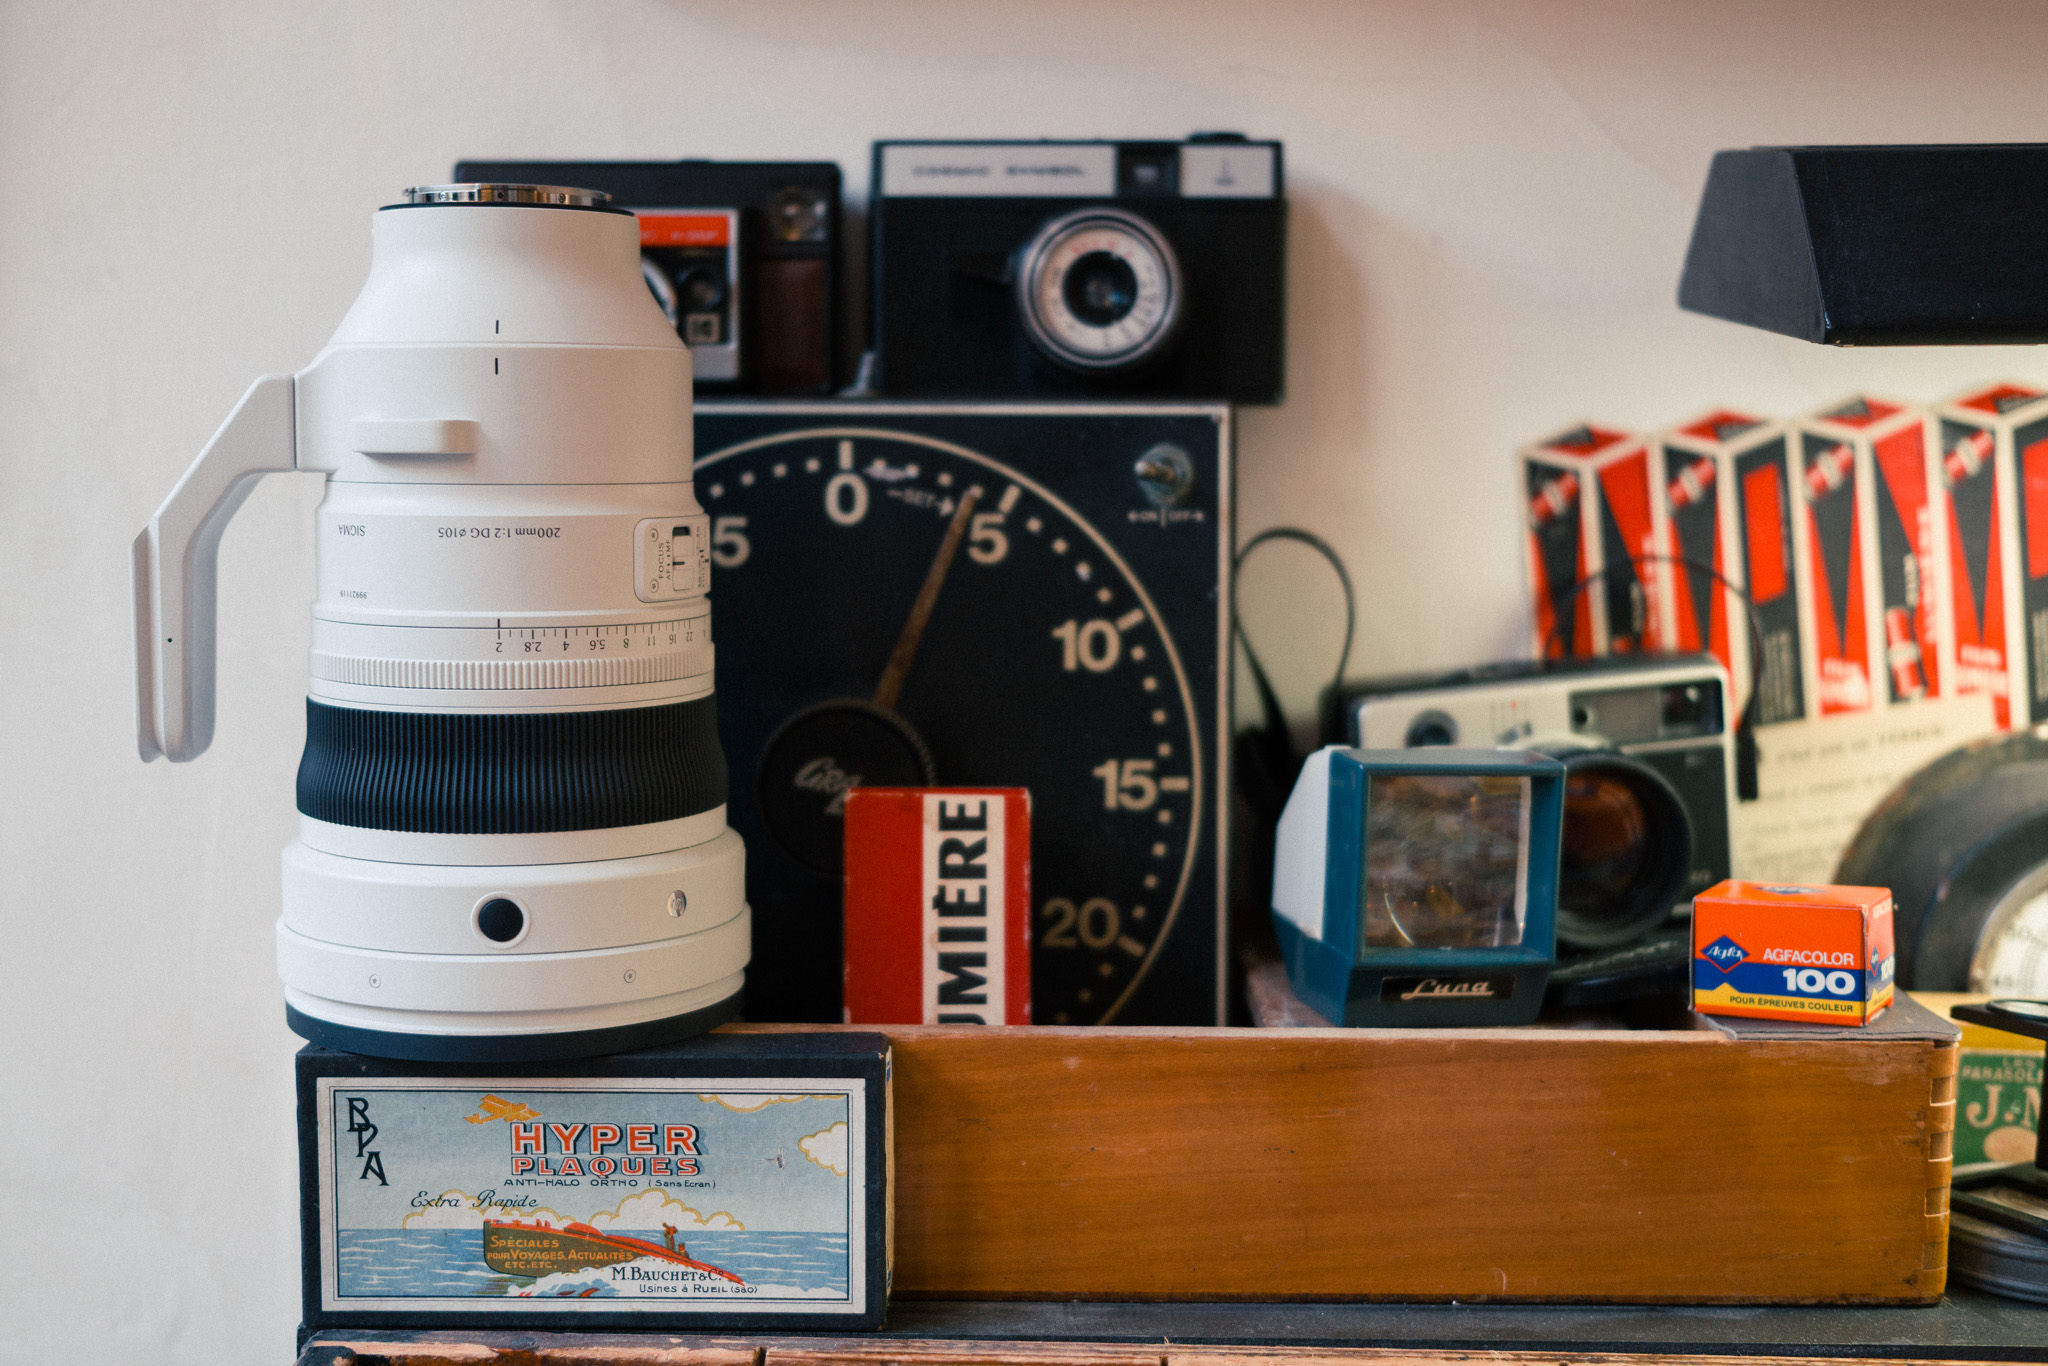
The Sigma 200mm F2 DG OS | Sports is a truly unique lens in today’s market. Before using it, I couldn’t fully envision the kind of results it could achieve. This fast telephoto lens delivers strikingly dramatic subjects, with a powerful sense of spatial compression and an extremely shallow depth of field.
Its ability to carve distinct visual layers in a scene is remarkable.
The lens is equipped with a High-response Linear Actuator (HLA), ensuring swift and precise autofocus. Even when photographing distant wildlife against a complex background, the lens rapidly locks focus on the subject, allowing me to capture dynamic moments with exceptional clarity.
Throughout this project, every shutter release amazed me. Familiar landscapes transformed before my eyes, revealing unexpected nuances and perspectives.
Sigma 200mm F2 DG OS | Sports Sony a1 ISO 100, F2, 2sSigma 200mm F2 DG OS | Sports Sony a1 ISO 100, F2, 1/3s
The F2 aperture, combined with the lens’s robust optical stabilization, enabled me to shoot at low ISO settings even in dim lighting conditions. This maintained superb image quality while unveiling delicate details I had previously overlooked.
From the faint glow of Tibetan watchtowers at blue hour to the warm flicker of lights in village homes, or the subtle glimmers atop mountain peaks at dawn – these intricate elements, once ignored, now enriched my visual narrative.
Sigma 200mm F2 DG OS | Sports Sony a1 ISO 100, F2, 1/26000sSigma 200mm F2 DG OS | Sports Sony a1 ISO 100, F2, 1/3200sSigma 200mm F2 DG OS | Sports Sony a1 ISO 100, F5.6, 1/640s
The optical performance of this lens exceeded my expectations.
Even at its widest aperture of F2, the image quality remained impeccably sharp from center to edge, even in complex lighting scenarios.
The lens features Nano Porous Coating (NPC) technology, effectively minimizing flare and ghosting. This proved invaluable when I witnessed a magnificent sea of clouds at sunrise. Even shooting directly toward the sun, the results were breathtakingly clear and vibrant.
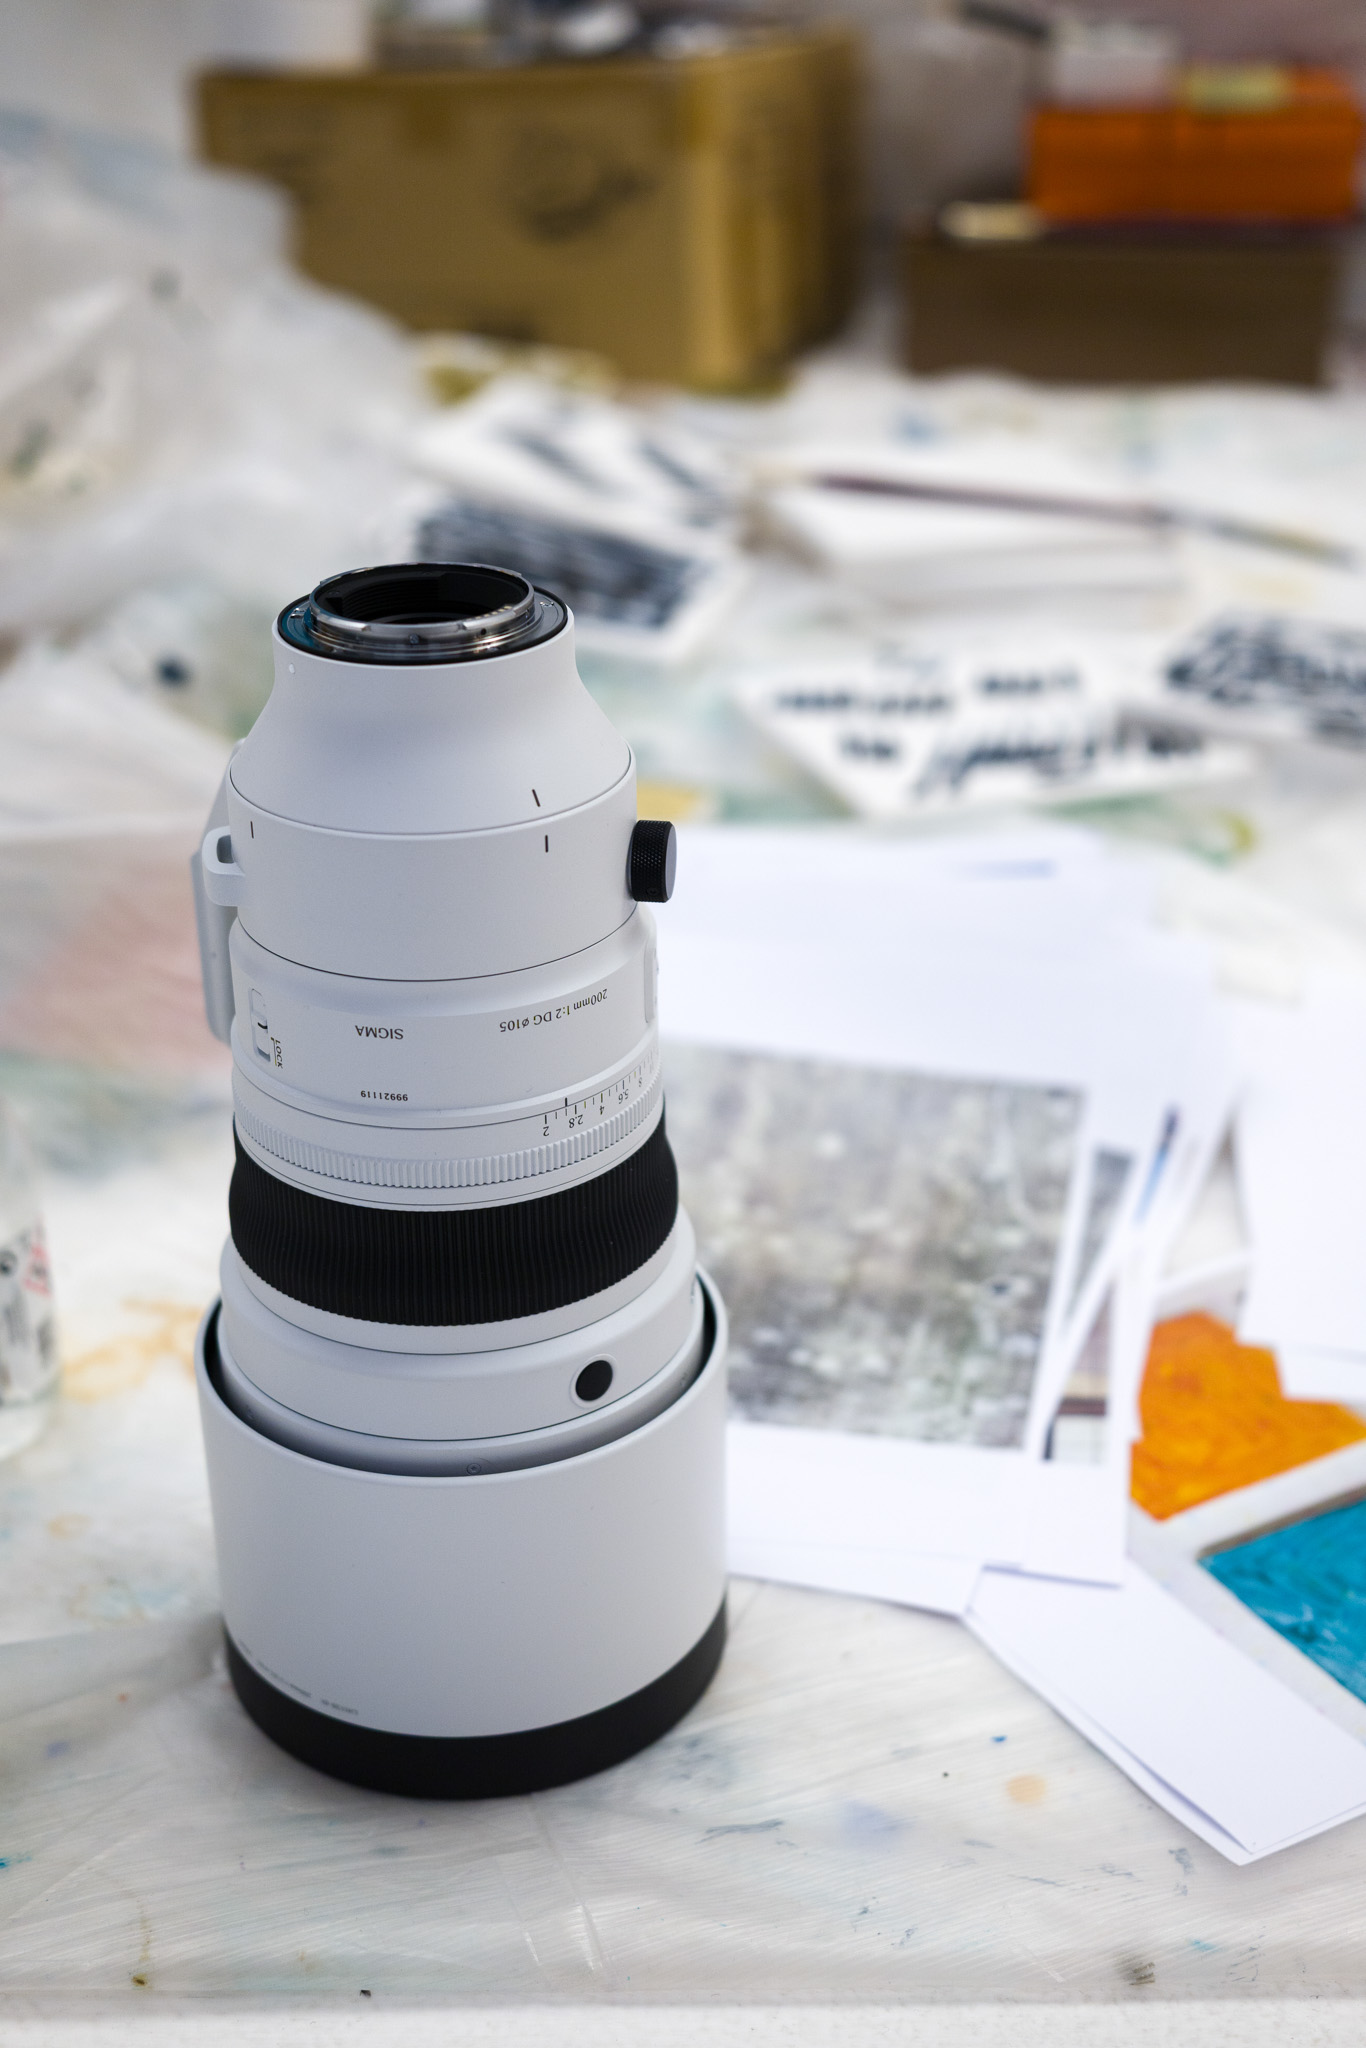
Another standout feature was the newly designed tripod mount, which doubled as a practical carrying handle. Its Arca-Swiss compatibility made tripod installation seamless, ensuring I never missed a decisive moment in the field.
Sigma 200mm F2 DG OS | Sports Sony a1 ISO 100, F5.6, 1/50sSigma 200mm F2 DG OS | Sports Sony a1 ISO 100, F4, 1/4000s
Sigma 200mm F2 DG OS | Sports Sony a1 ISO 100, F5.6, 1/1600s
My landscape photography journey with the Sigma 200mm F2 DG OS | Sports lens was immensely rewarding. The lens performed flawlessly, capturing nature’s intricate details and fleeting moments of light and shadow.
As a photographer, I find immense joy in waiting, observing, and discovering these subtle transformations.
With this lens, I was able to distill those magical moments into visual memories that reflect the beauty and wonder of our world.
Sigma 200mm F2 DG OS | Sports Sigma BF ISO 320, F2, 1/125s
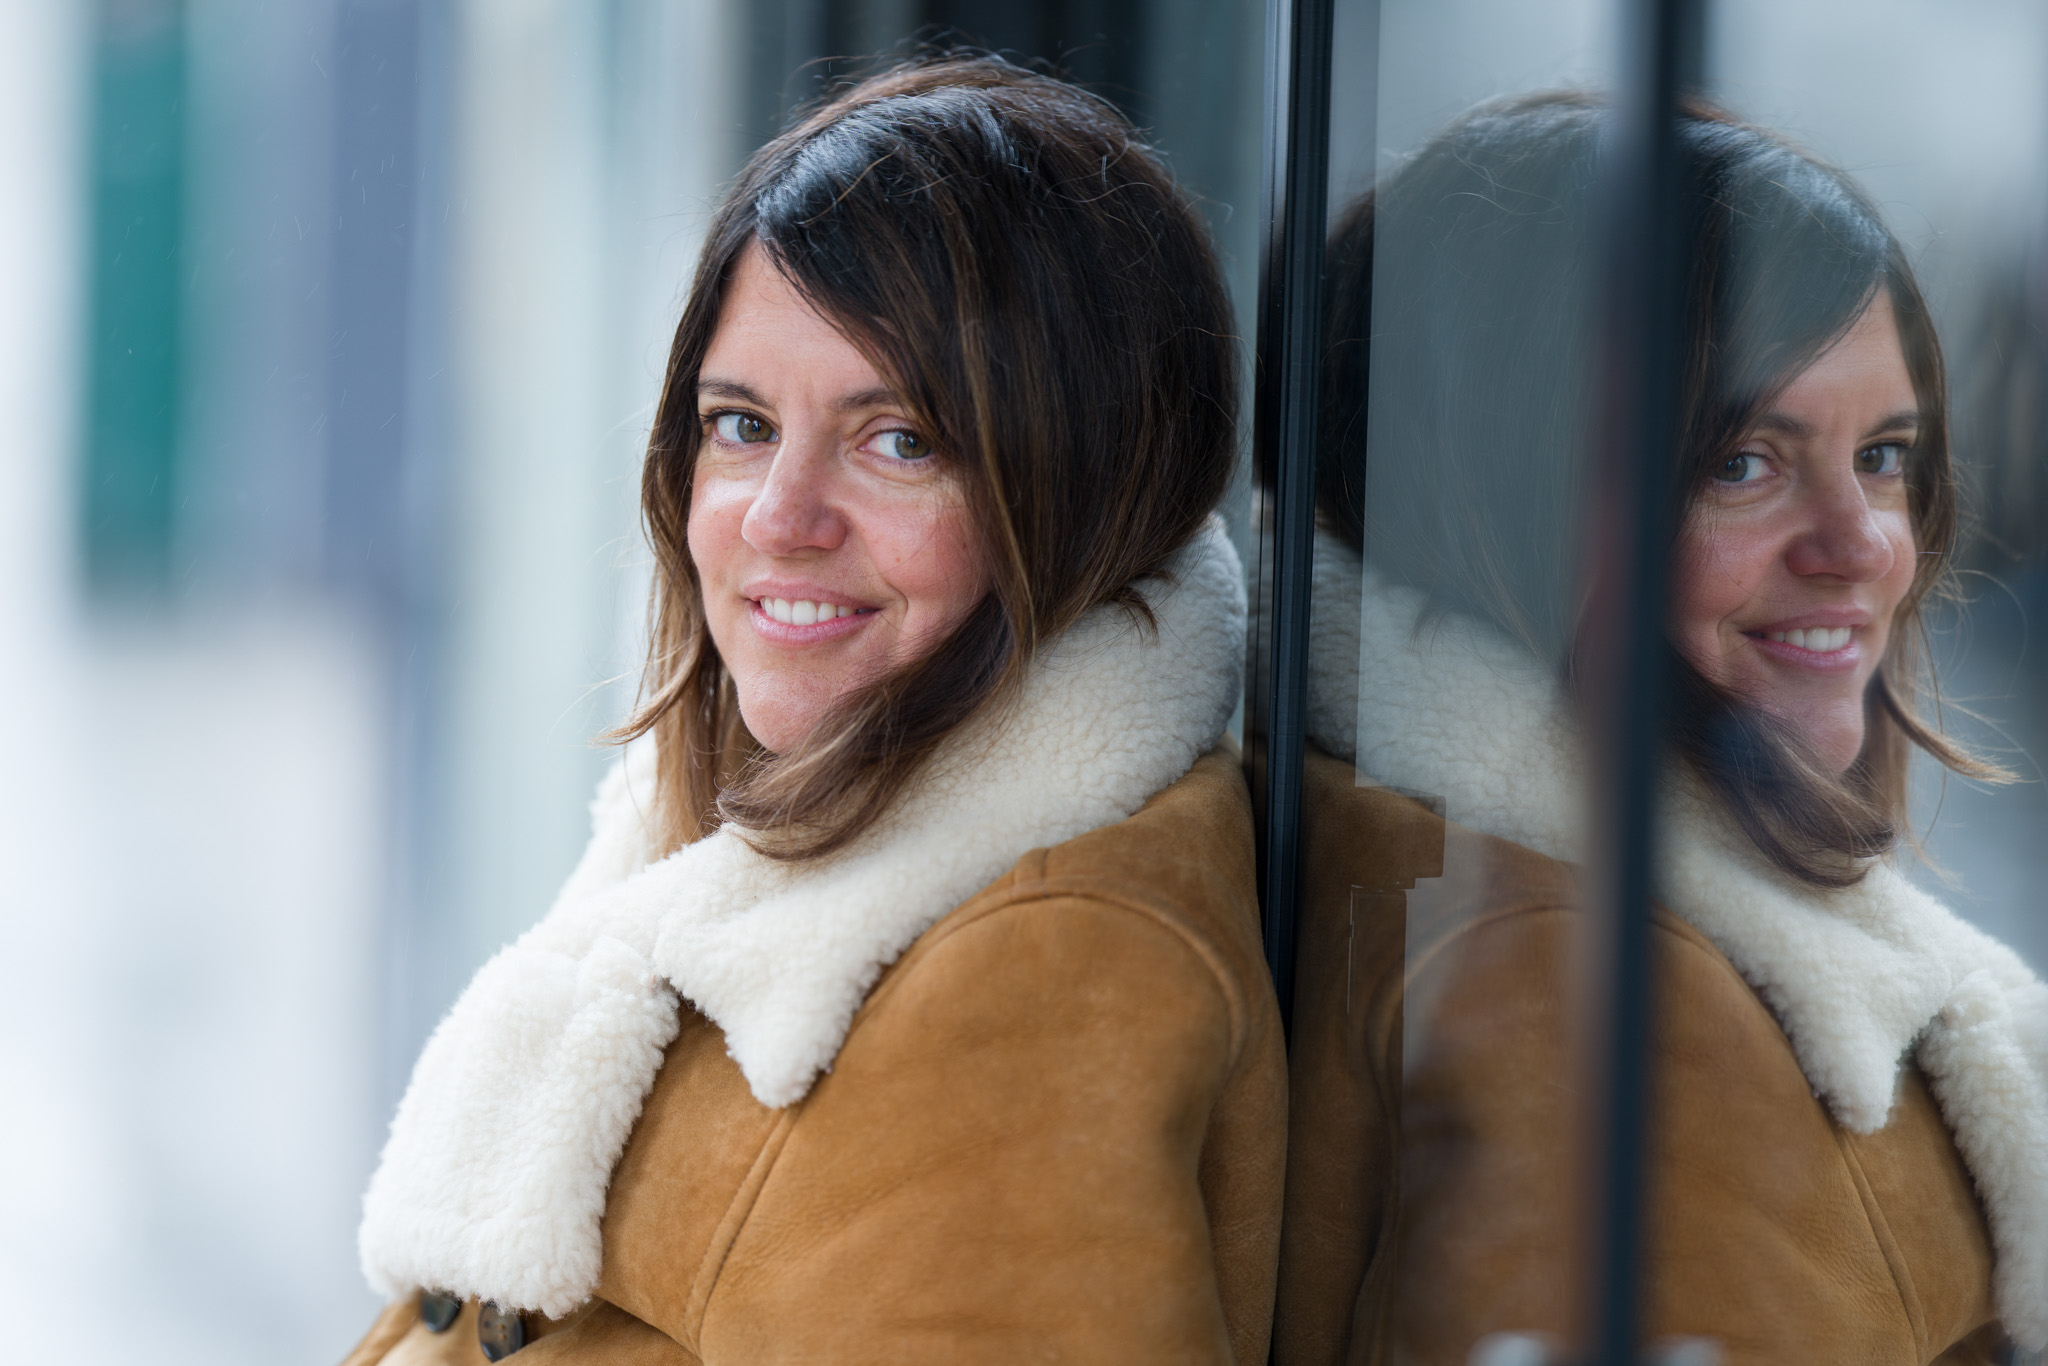
As a portrait photographer, what matters most to me is to capture something different from the subject. It is a challenge and it takes time. Time which we don’t always have these days as our lives are speeding up.
The rapport between me and the subject is essential to break down that barrier that protects us from the unknown.
I usually get up close to the subject to create this rapport, talking to them and directing them. I use the shallowest depth of field that a lens can offer. I focus on the eyes through which everything will be said, blurring the rest of the head and body. This allows the viewer to concentrate on the eyes.
Sigma 200mm F2 DG OS | Sports Sigma BF ISO 640, F2, 1/125sSigma 200mm F2 DG OS | Sports Sigma BF ISO 100, F3.5, 1/125s
So when I was asked by Sigma to use their new Sigma 200mm F2 DG OS | Sports with an f-stop of 2, I was intrigued! 200mm felt a little long for portraits as I usually use an 85mm.
It would require me to be further away from the subject, but at the same time, the length of the lens with such a small f-stop could only enhance the focus on the eyes that I desire so much.
Sigma 200mm F2 DG OS | Sports Sigma BF ISO 100, F2, 1/125sSigma 200mm F2 DG OS | Sports Sigma BF ISO 100, F2, 1/125s
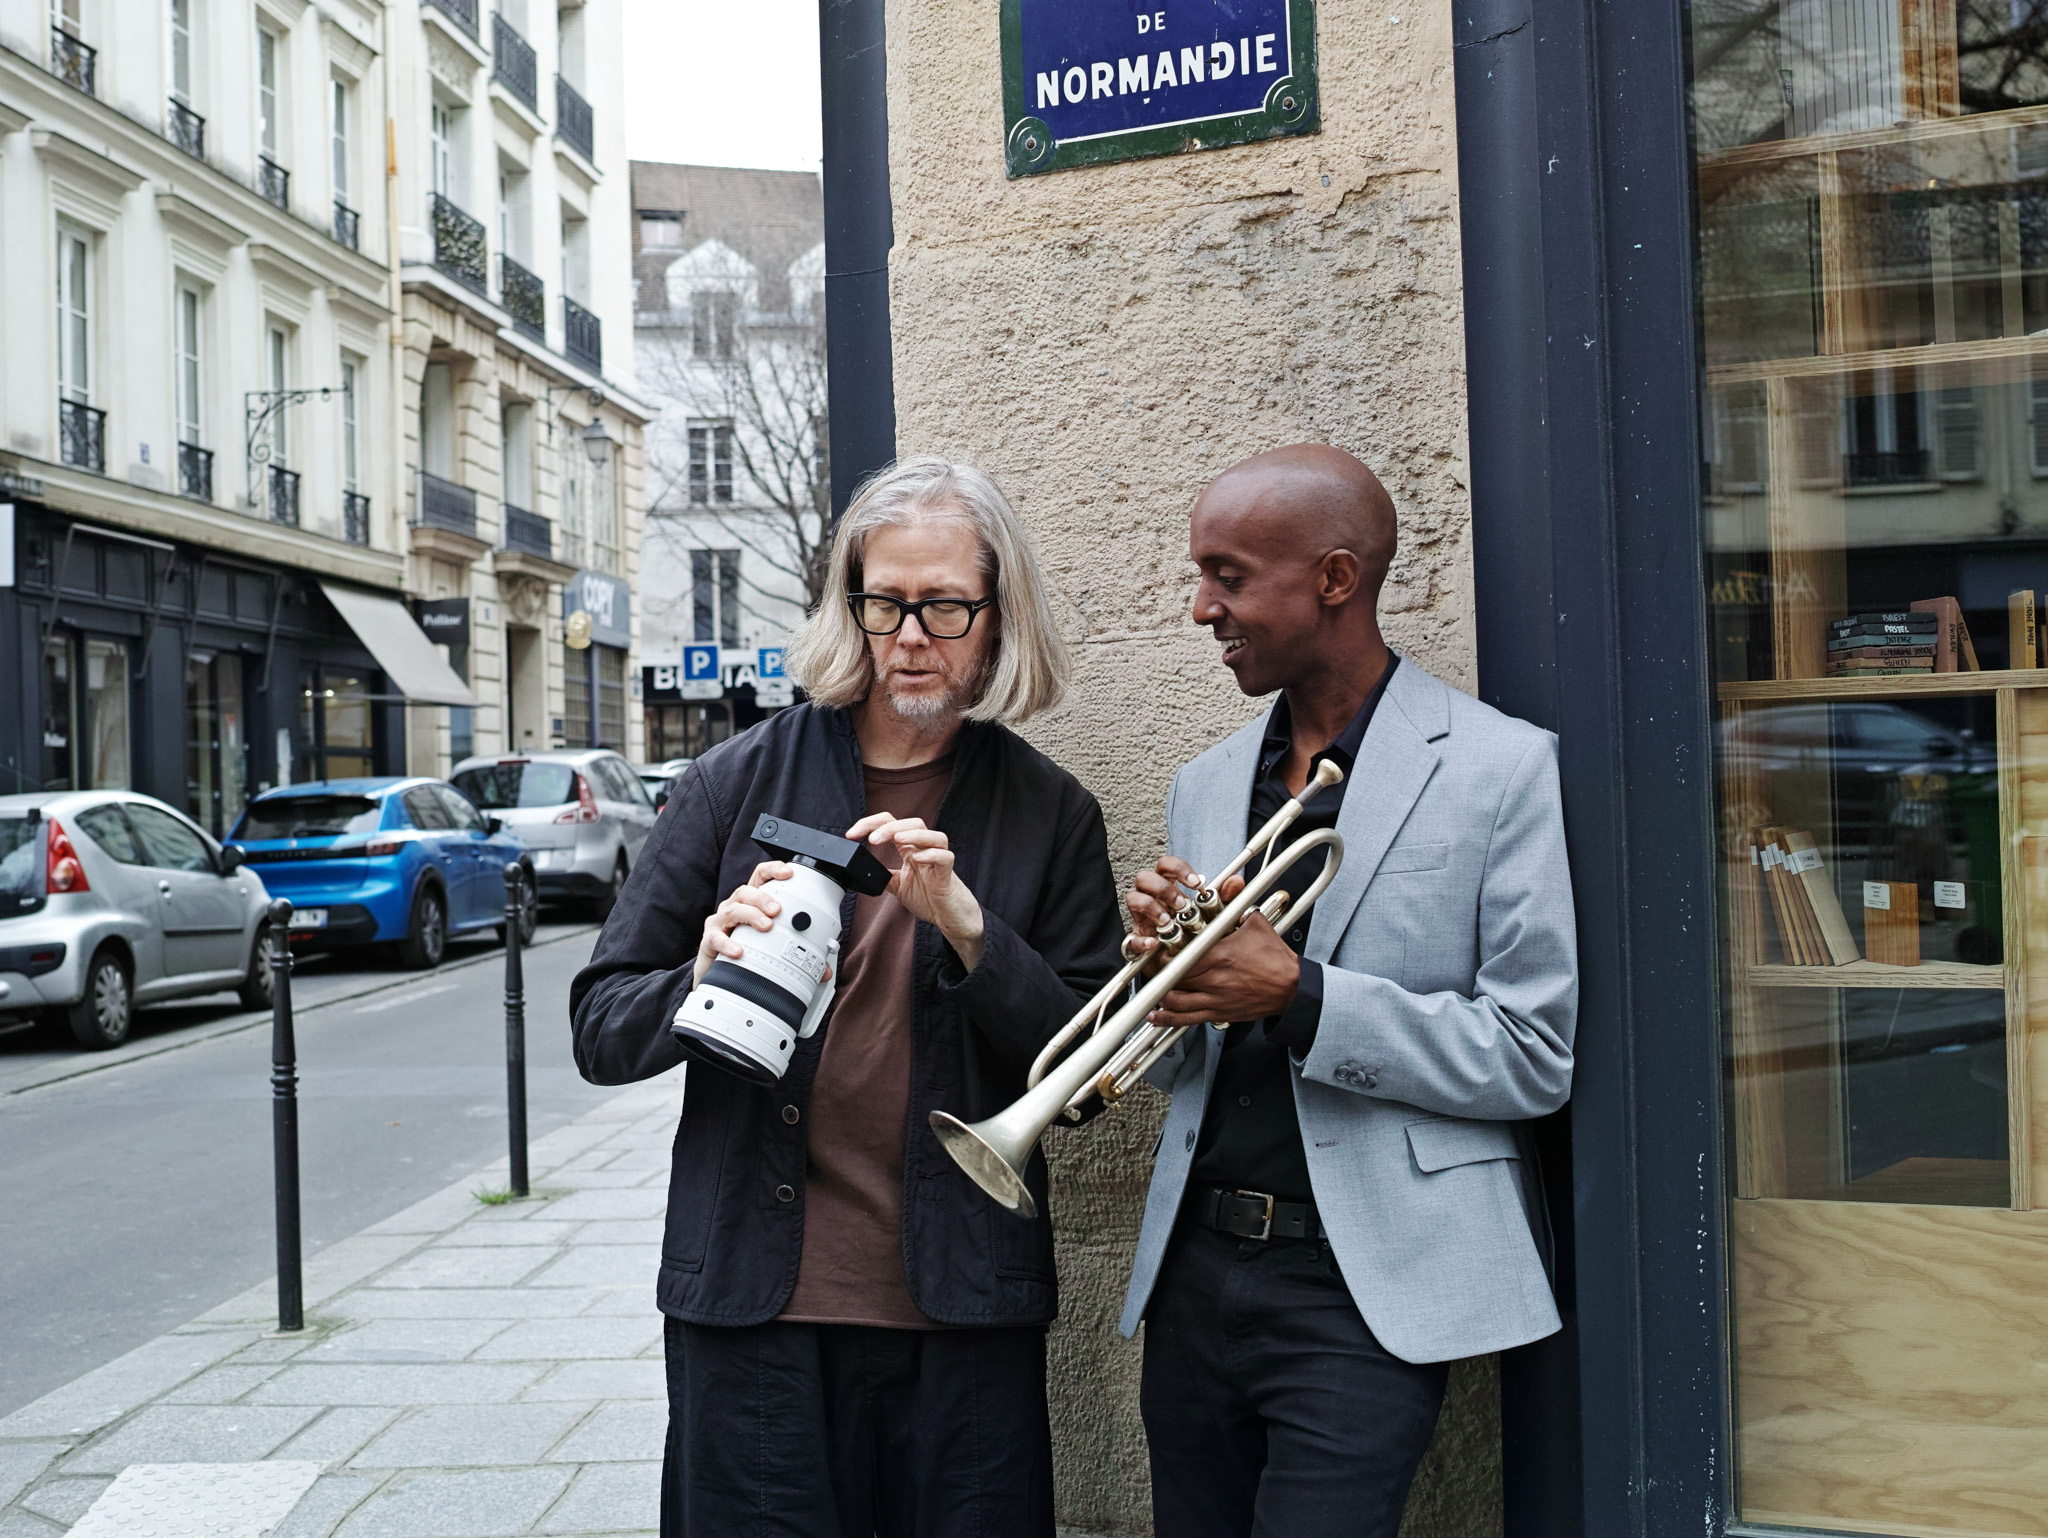
I have a coffee shop in the artistic Marais neighborhood in Paris where I have built a community around specialty coffee and photography.
The way I do coffee is artisanal, where precision is key and where quality is constant, two things that make a great cup over and over.
The community I have built, I have discovered over time, shares these same values.
Values that are also an intrinsic part of Sigma and why I use their cameras and lenses for my photography. Dedication to craftsmanship, precision and quality.
I chose to photograph some of my customers who share these same values. They are designers, artists, craftsmen or who work for companies that adhere to these values.
The weather in Paris has been grey and gloomy and shooting with the Sigma 200mm F2 DG OS | Sports with its F2 aperture and superb image stabilization allowed me to work in low light conditions whether inside an artist’s studio or out on the street. Another advantage of such an incredibly low aperture! It is a heavy lens but holding it and shooting hand-held was easy and effortless.
The tripod mount turned into a very convenient way to hold the camera and lens while talking to my subjects or moving from one location to another! Sigma seems to think of these small things that make a photographer’s life easier.
All the controls are ergonomically placed so I didn’t have to search for what I needed to adjust. When I saw the shallow depth of field, I was thrilled! The length of the lens did not interfere with my direction of my subjects. In fact, in some cases, the distance made certain subjects more at ease. The result was beyond expectation. The eyes in each portrait are very sharp with that soft blur in front and behind them made possible by the 200mm and the 2 f-stop which enhanced the expressiveness of the eyes.
Shooting hand-held in low light normally shows some blurriness especially with a relatively heavy lens, but the 200mm with its superior image stabilization captured perfectly sharp images. This allowed me more freedom of movement to find the right angle and compositions that I was looking for.
Sigma 200mm F2 DG OS | Sports Sigma BF ISO 100, F2, 1/125s
Taking portraits with Sigma 200mm F2 DG OS | Sports lens opened my mind and changed my ideas of what kind of lens would be good for portrait work!
That shallow depth of field on a long lens only made the portraits more intriguing and different than any other lens I have tried before.
The lens’s outstanding image stabilization gave me confidence that the images would be perfectly sharp in the low-light conditions where I would normally require a tripod. It has certainly gained its place in my arsenal of portrait lenses.
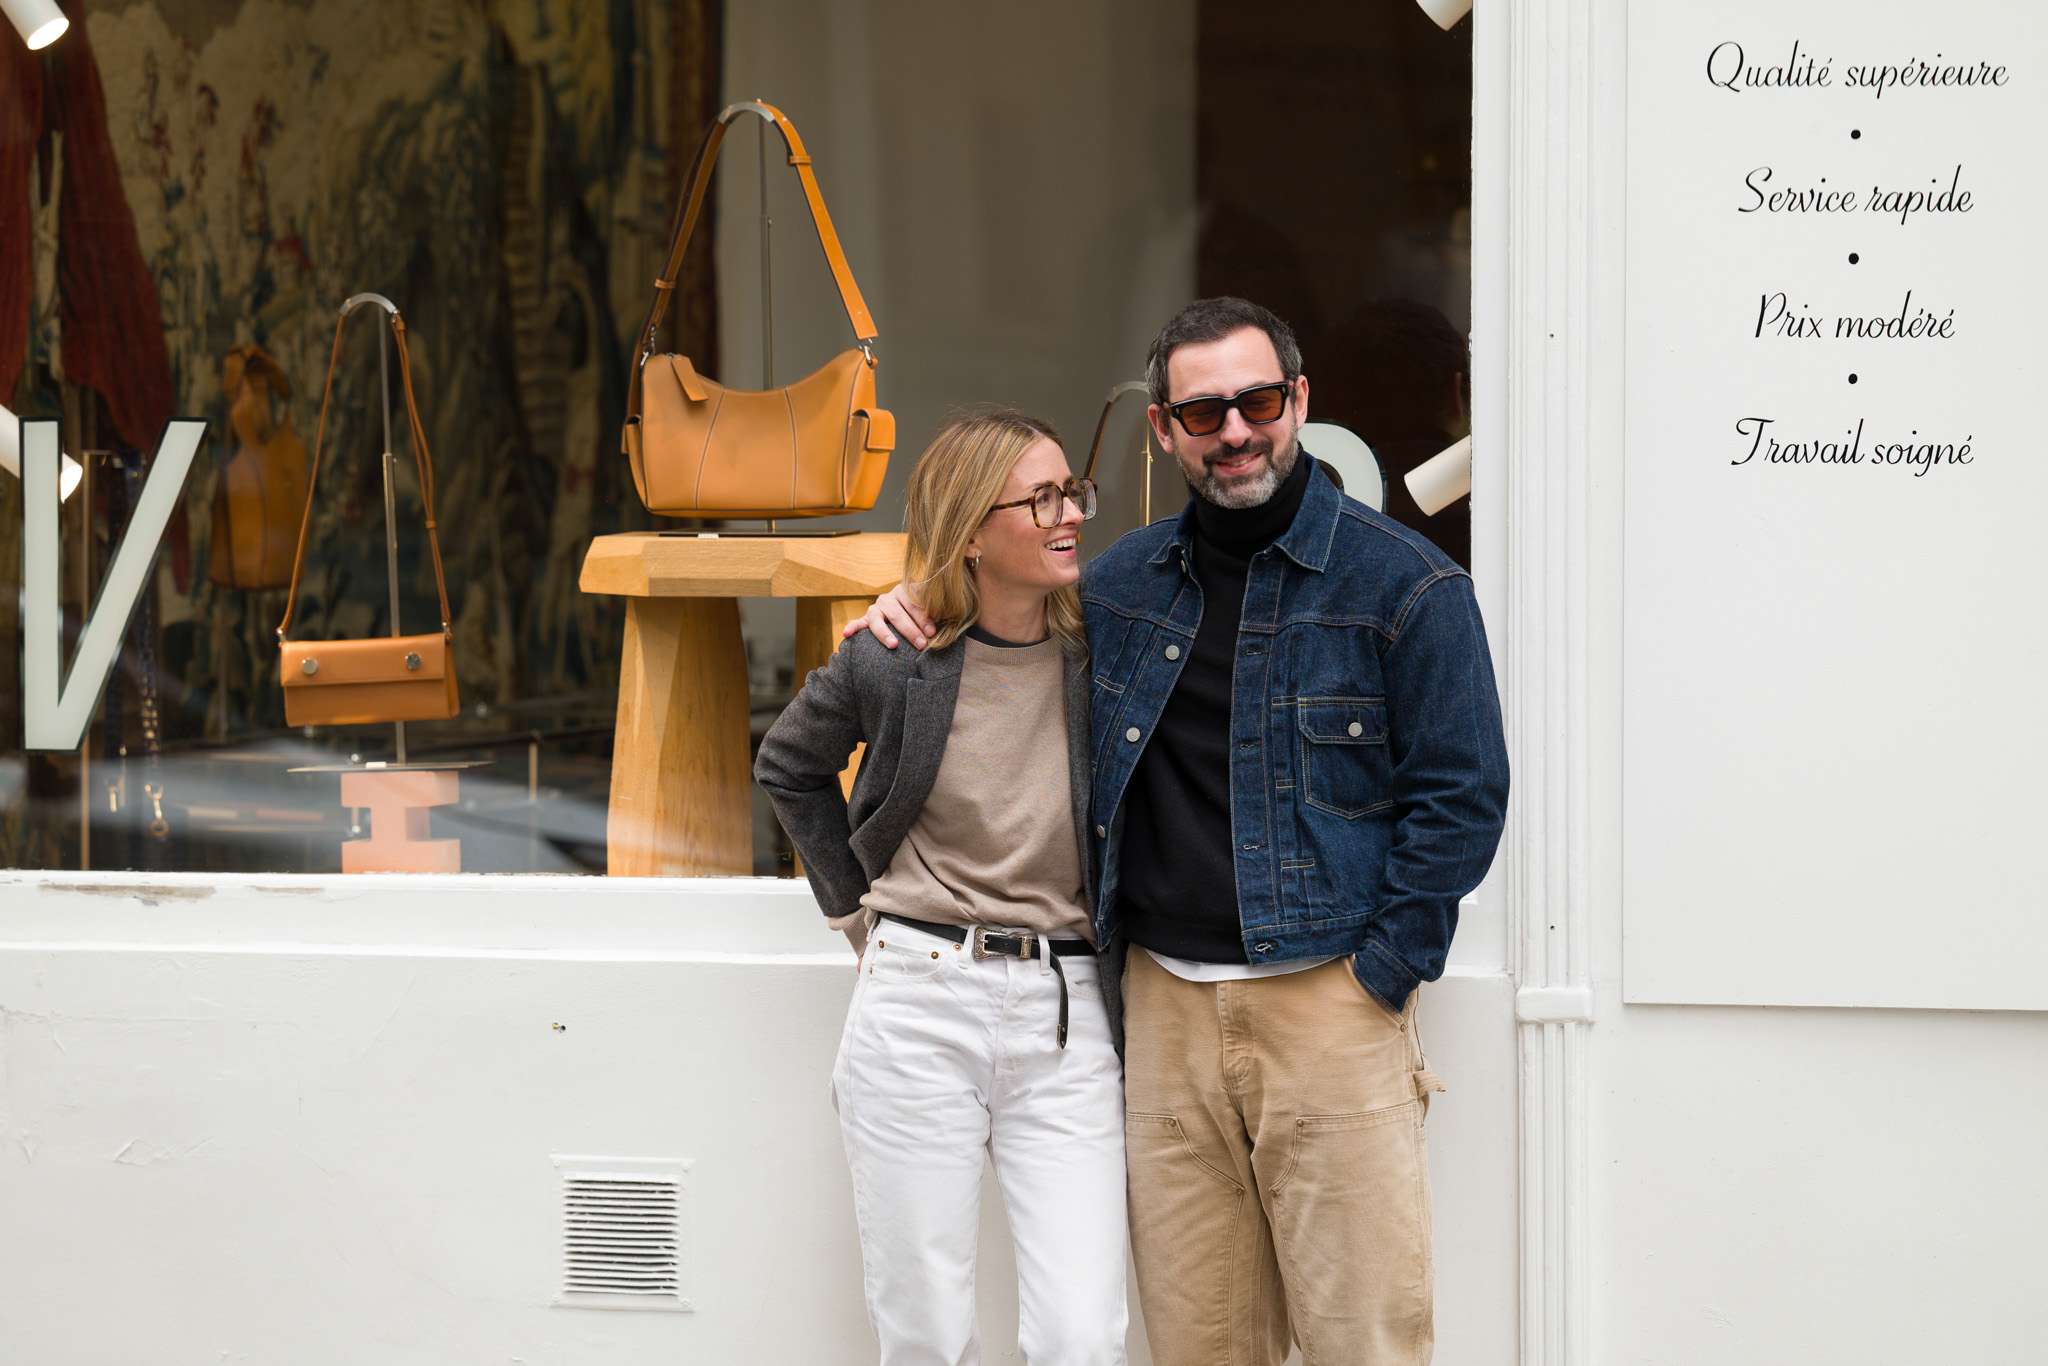
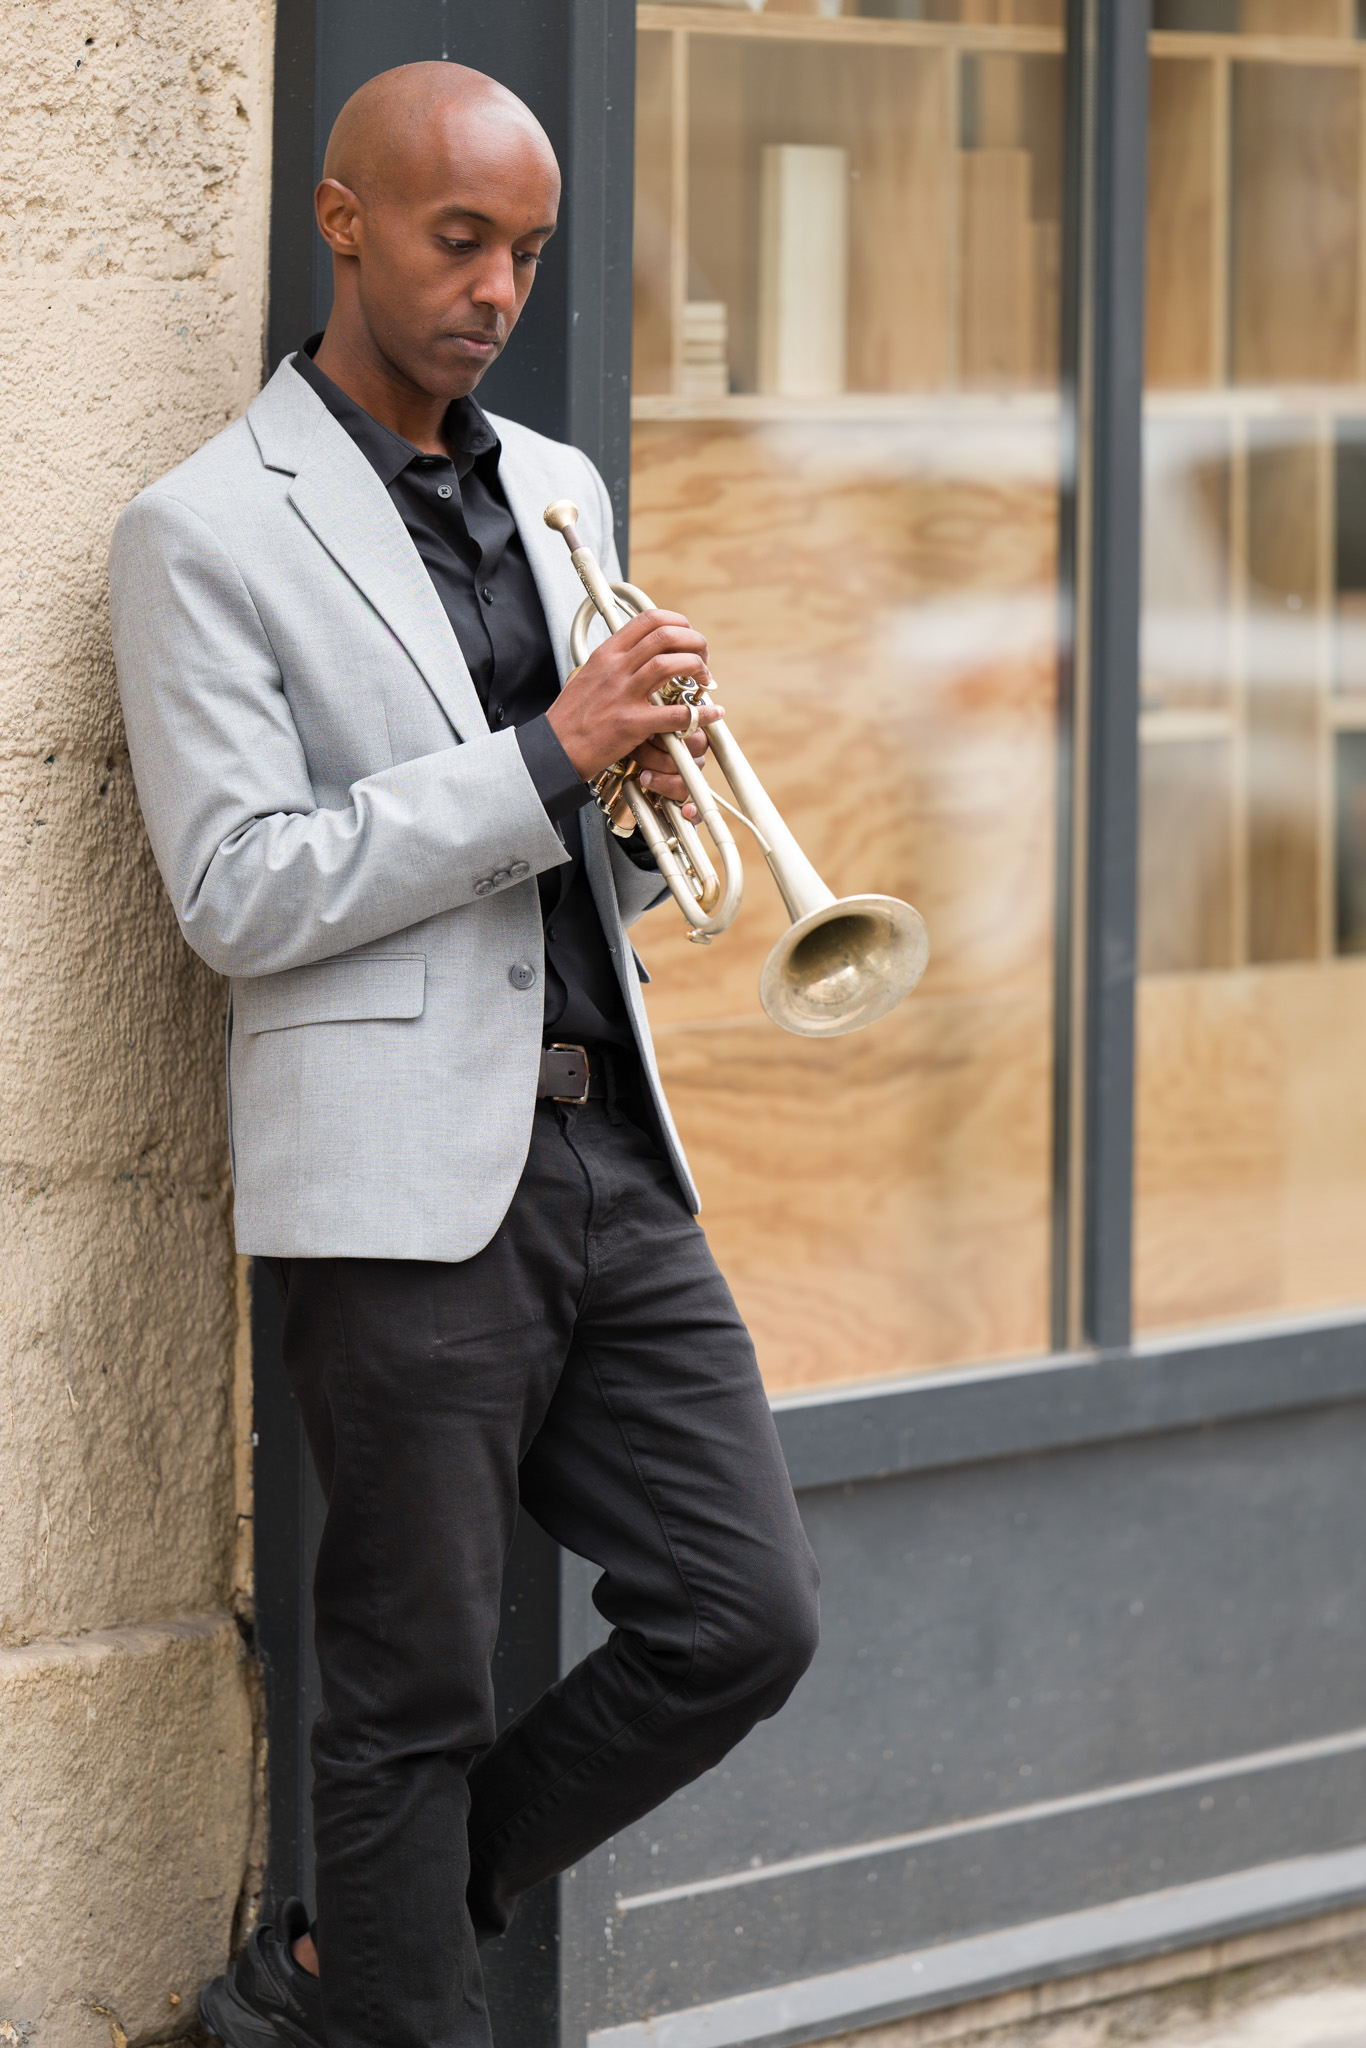
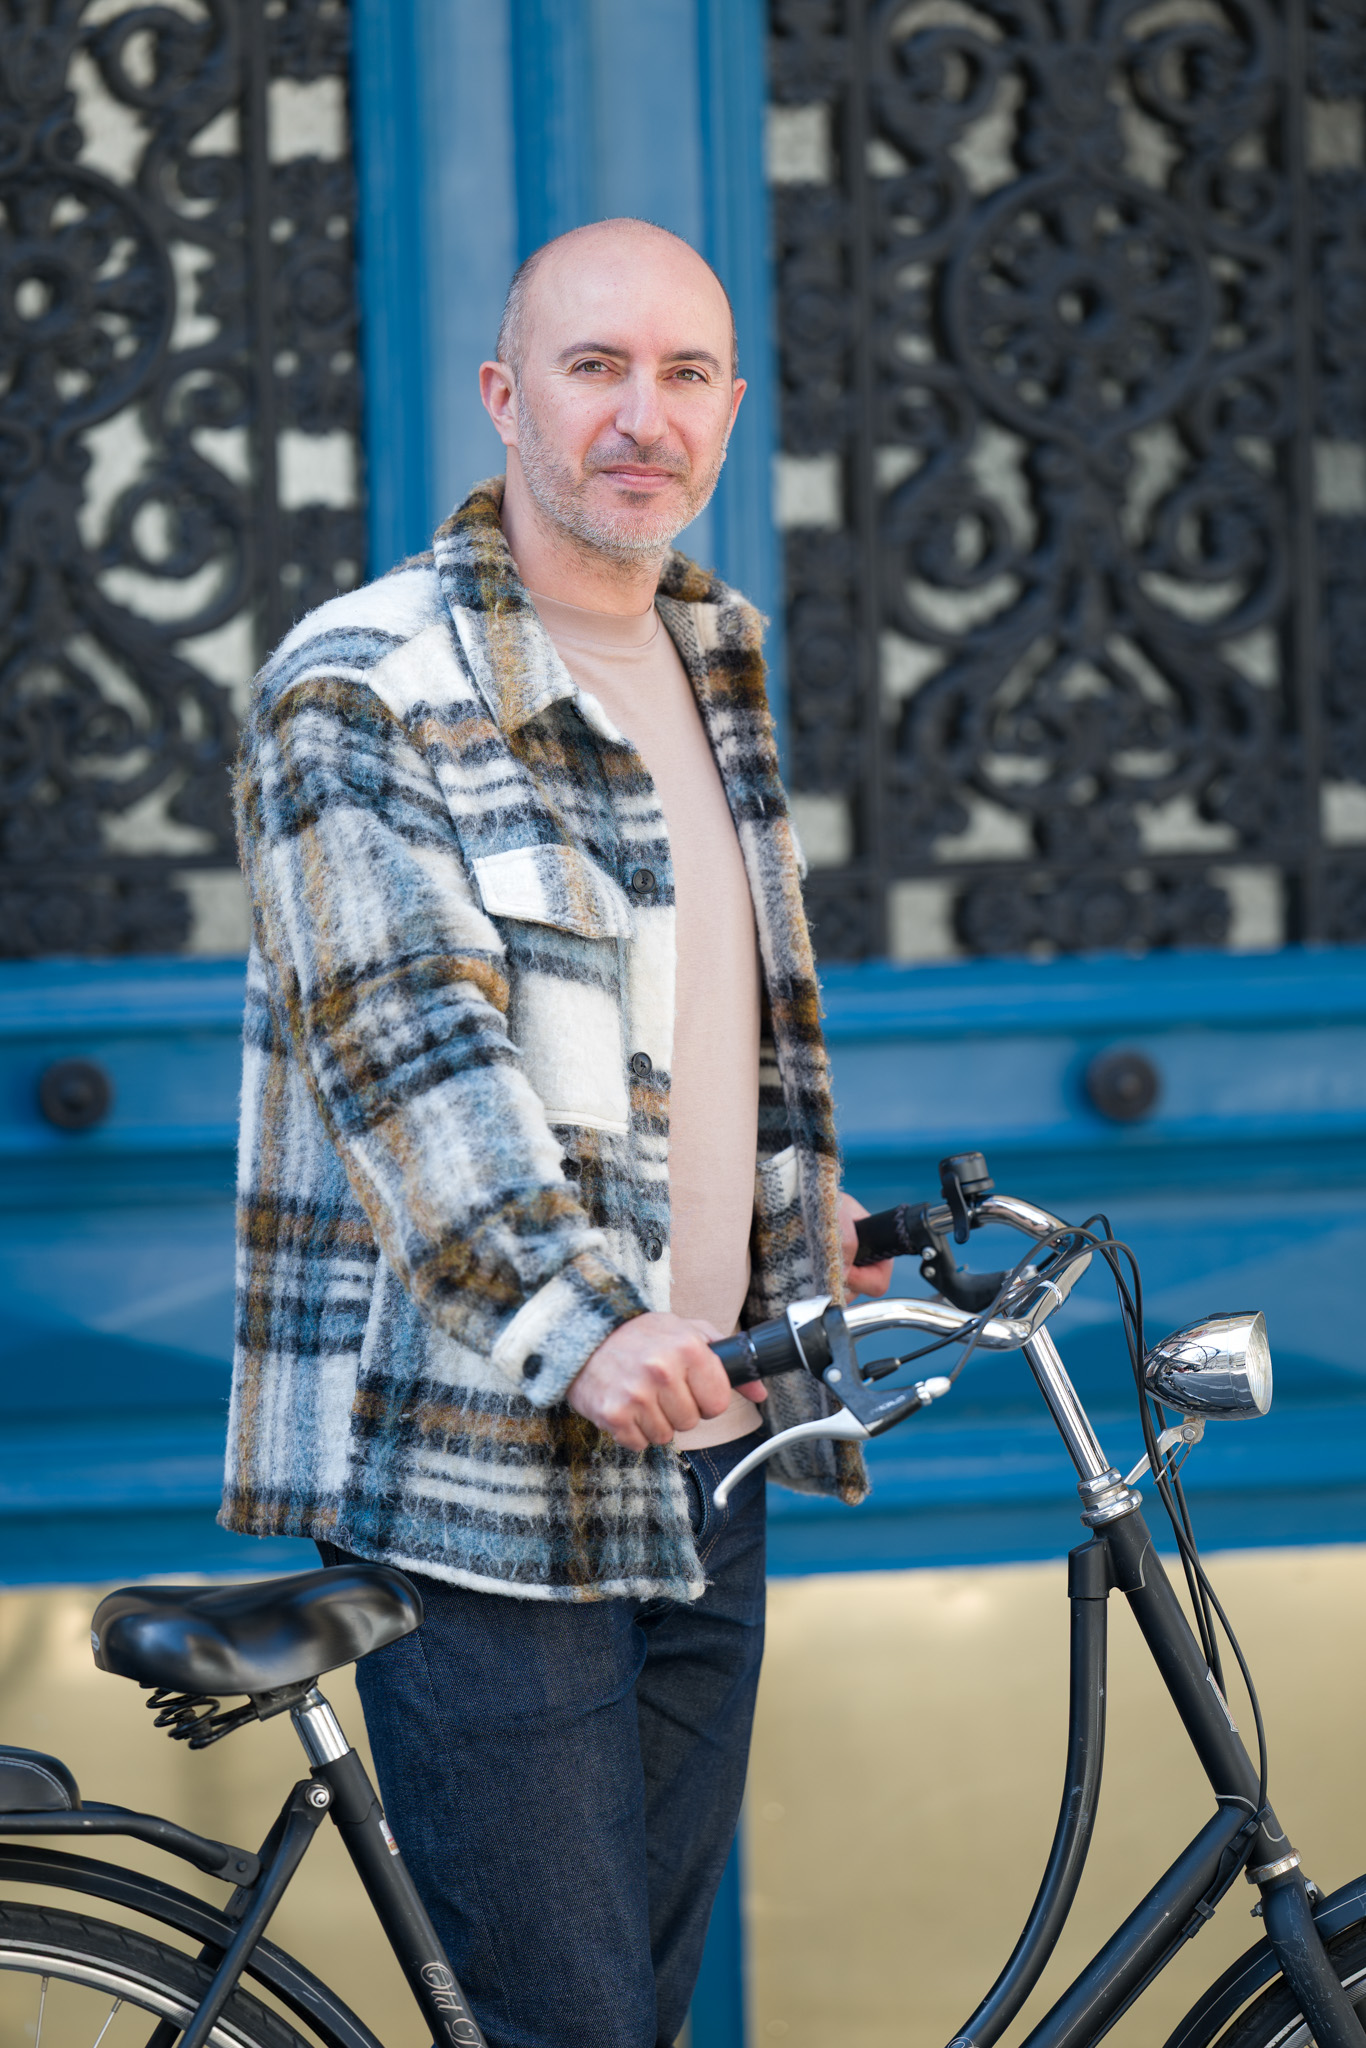
Thilan, Wall Architectes Max, designer Mehdi, Director of Immersive Art & Culture at Fisheye Benoît, artist and creative director at Tiffany’s Thomas and Aurore, founders of RSVP, handmade leather bags in France Hermon, jazz trumpetist Pascal, graphic designer and creative director at Gallimard Sophie, Chanel
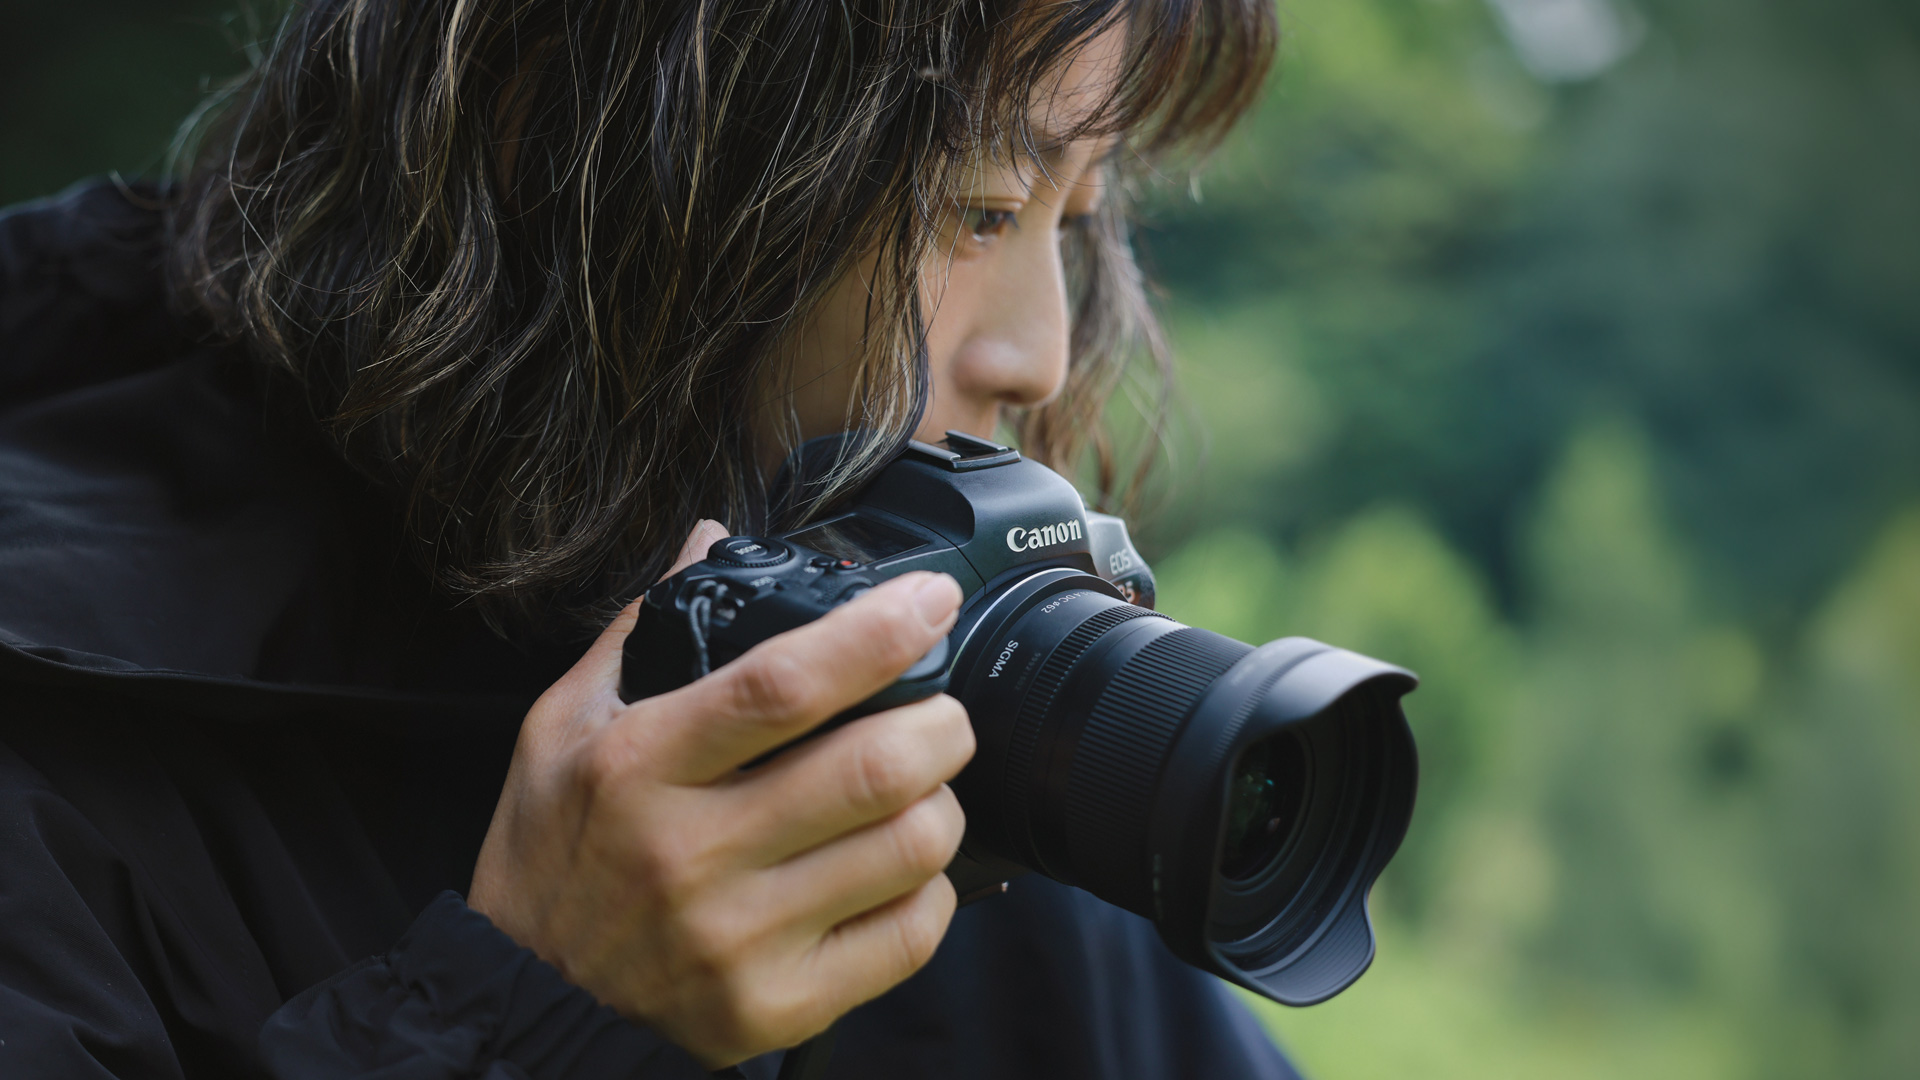
Sigma 12mm F1.4 DC | Contemporary Canon EOS R5 ISO 100, F2.2, 1/125s
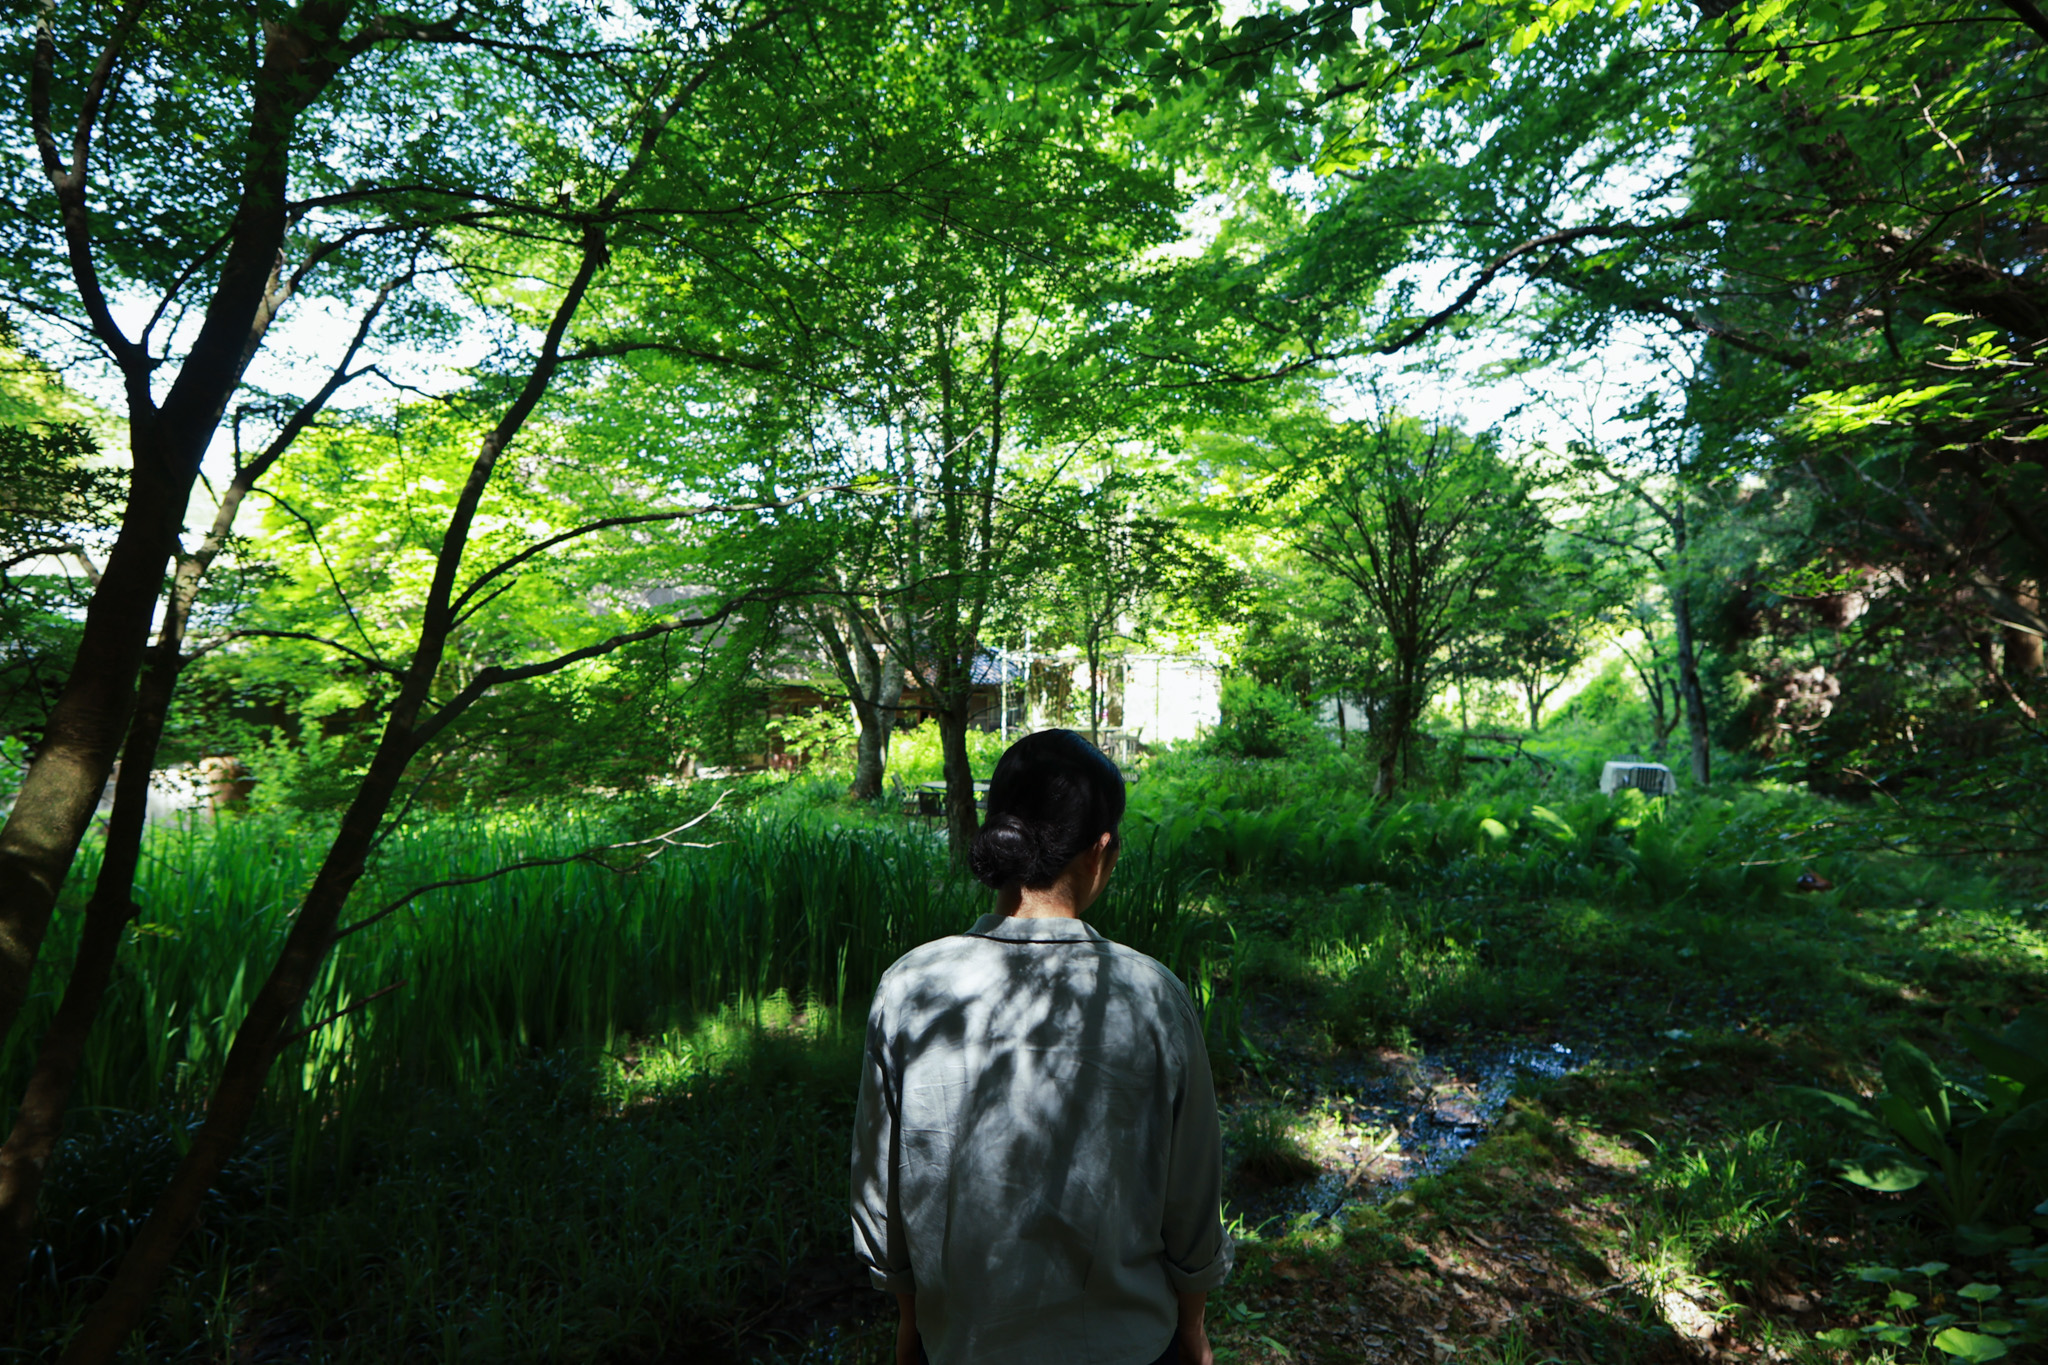
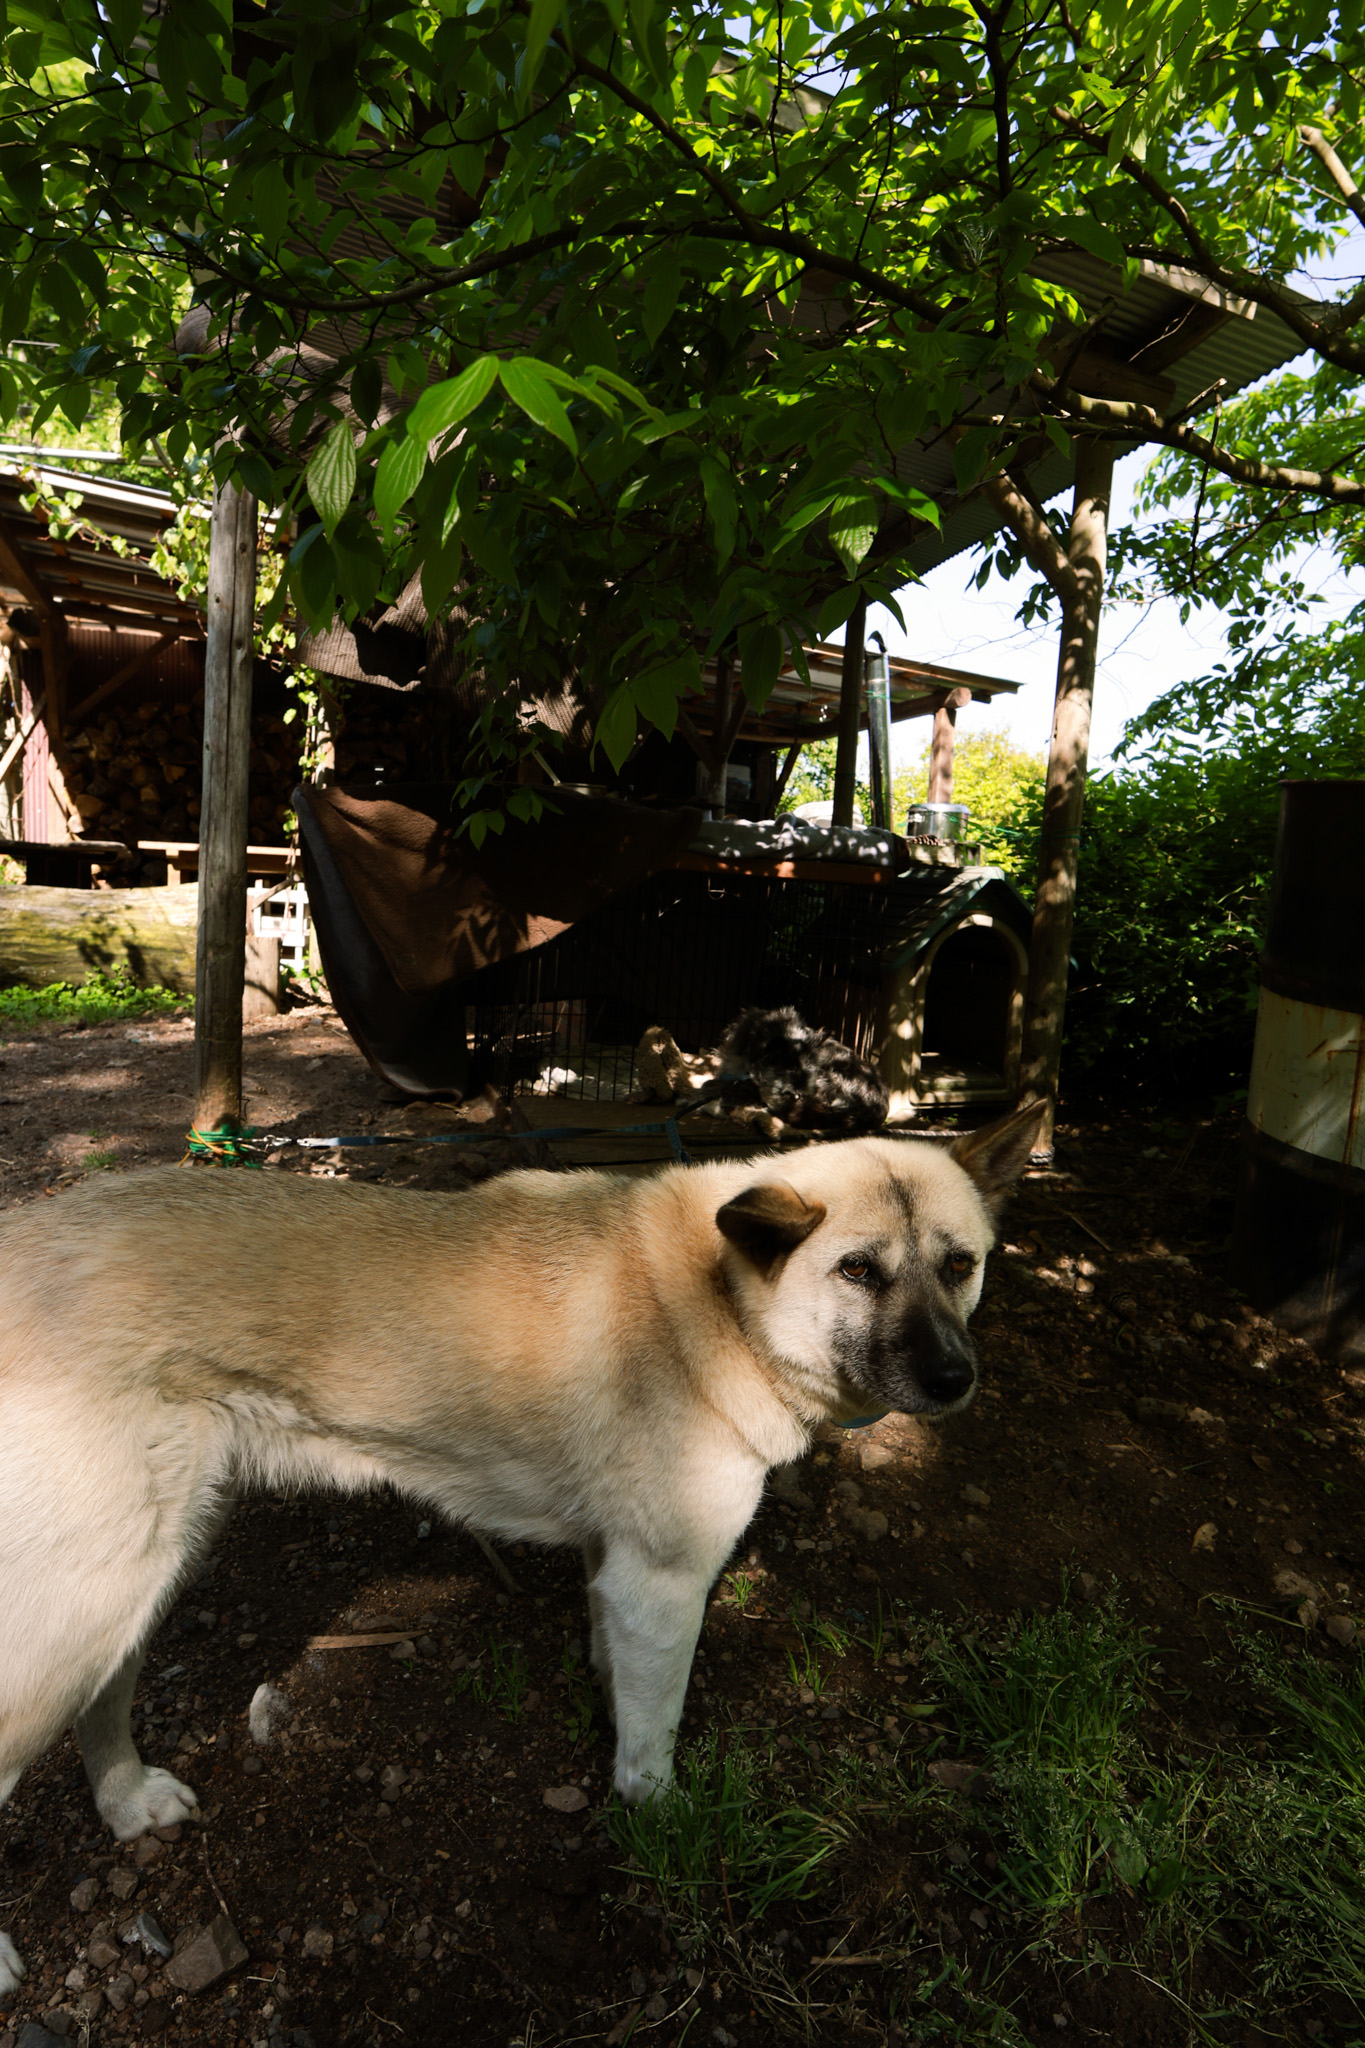
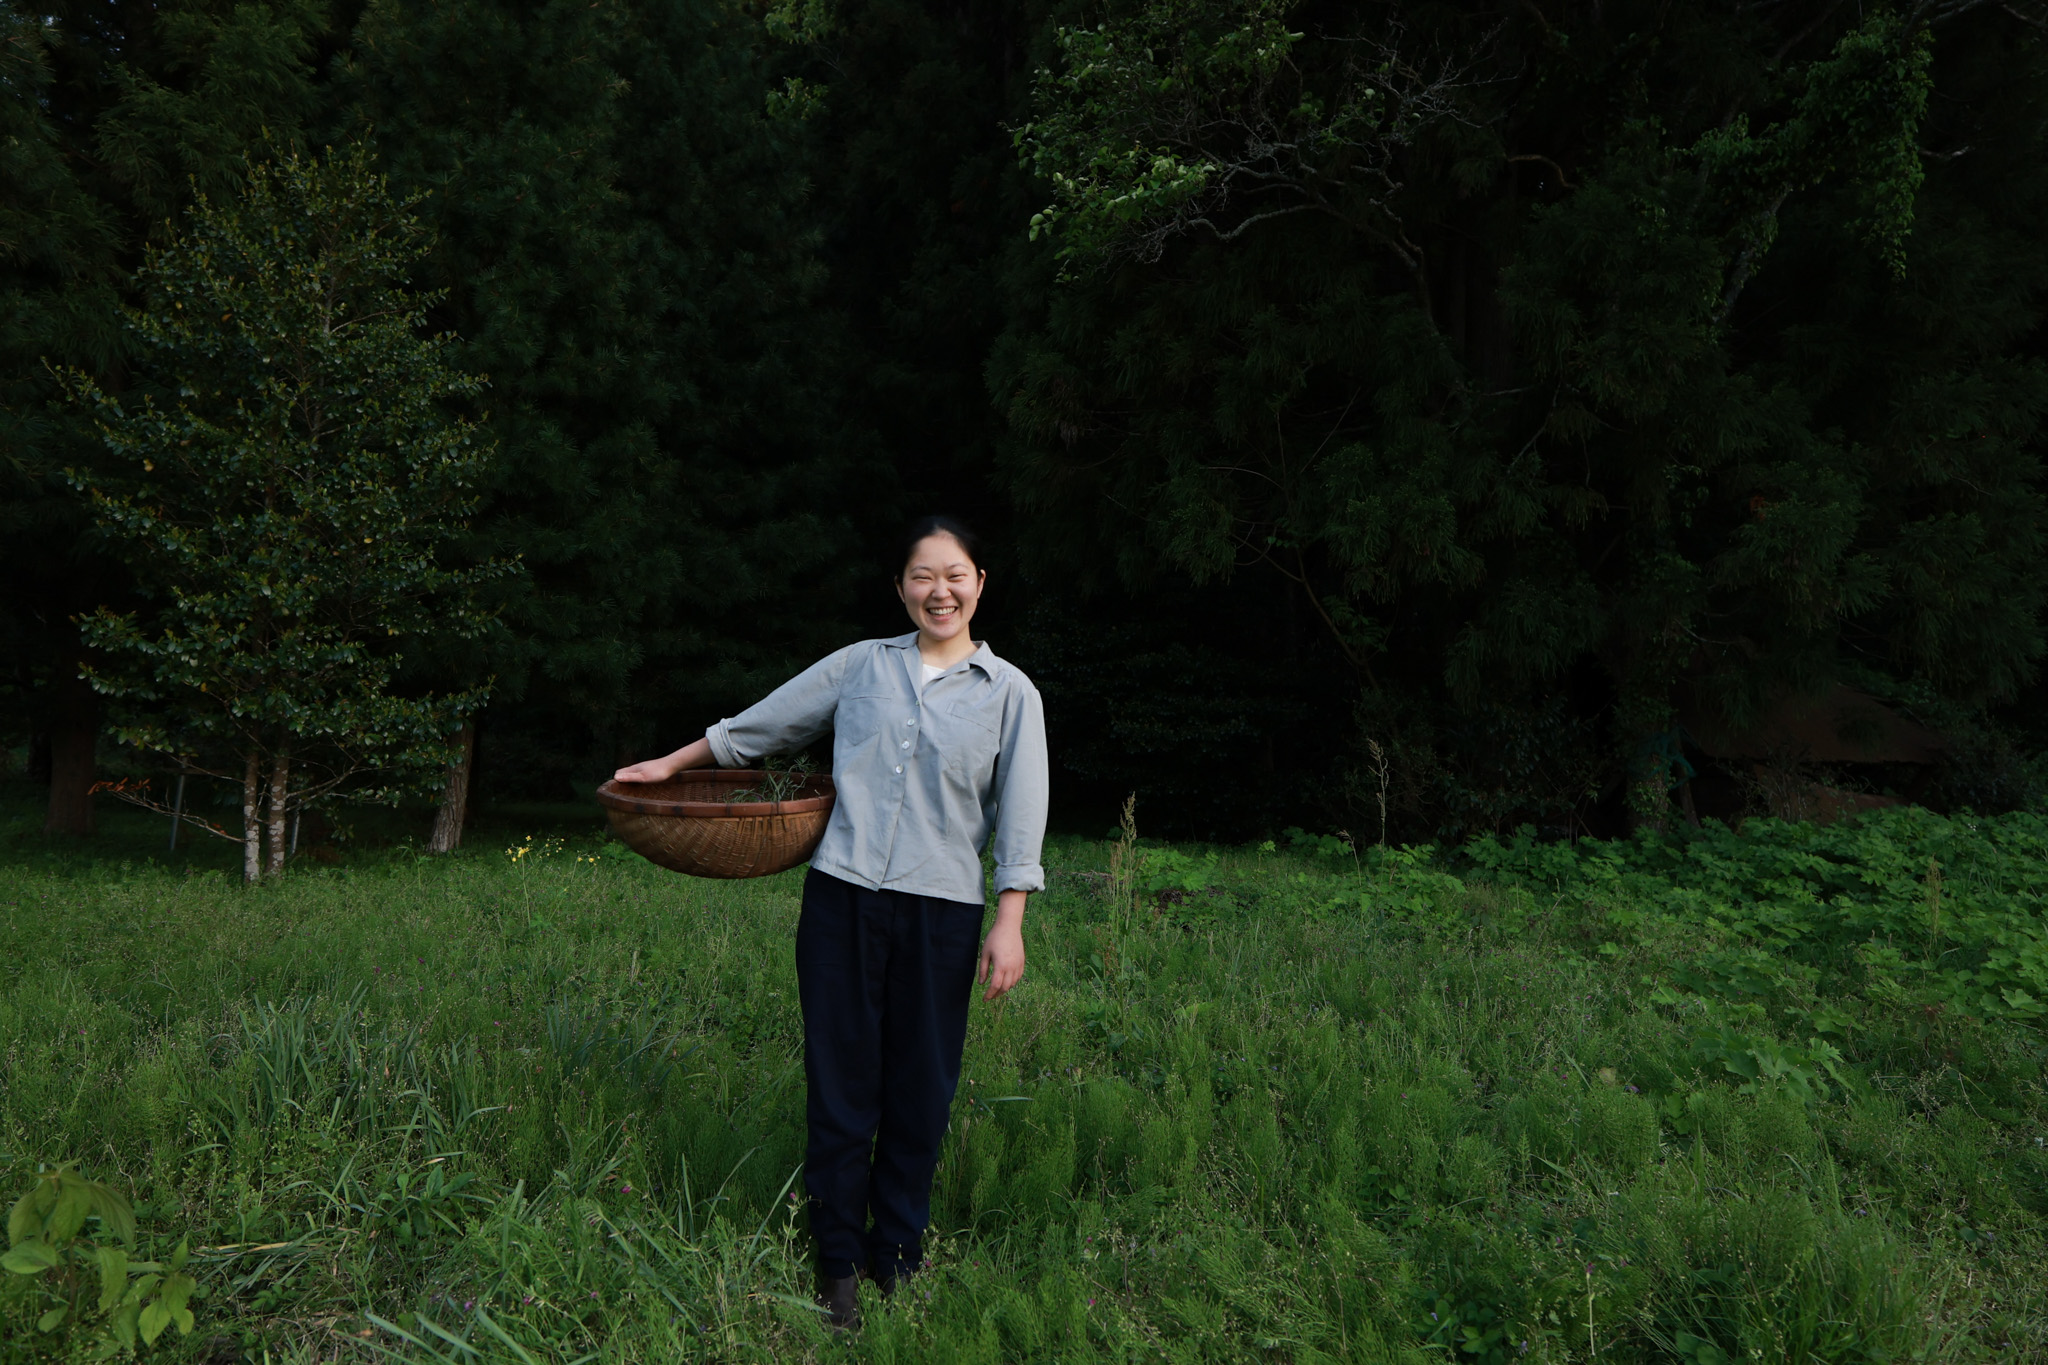
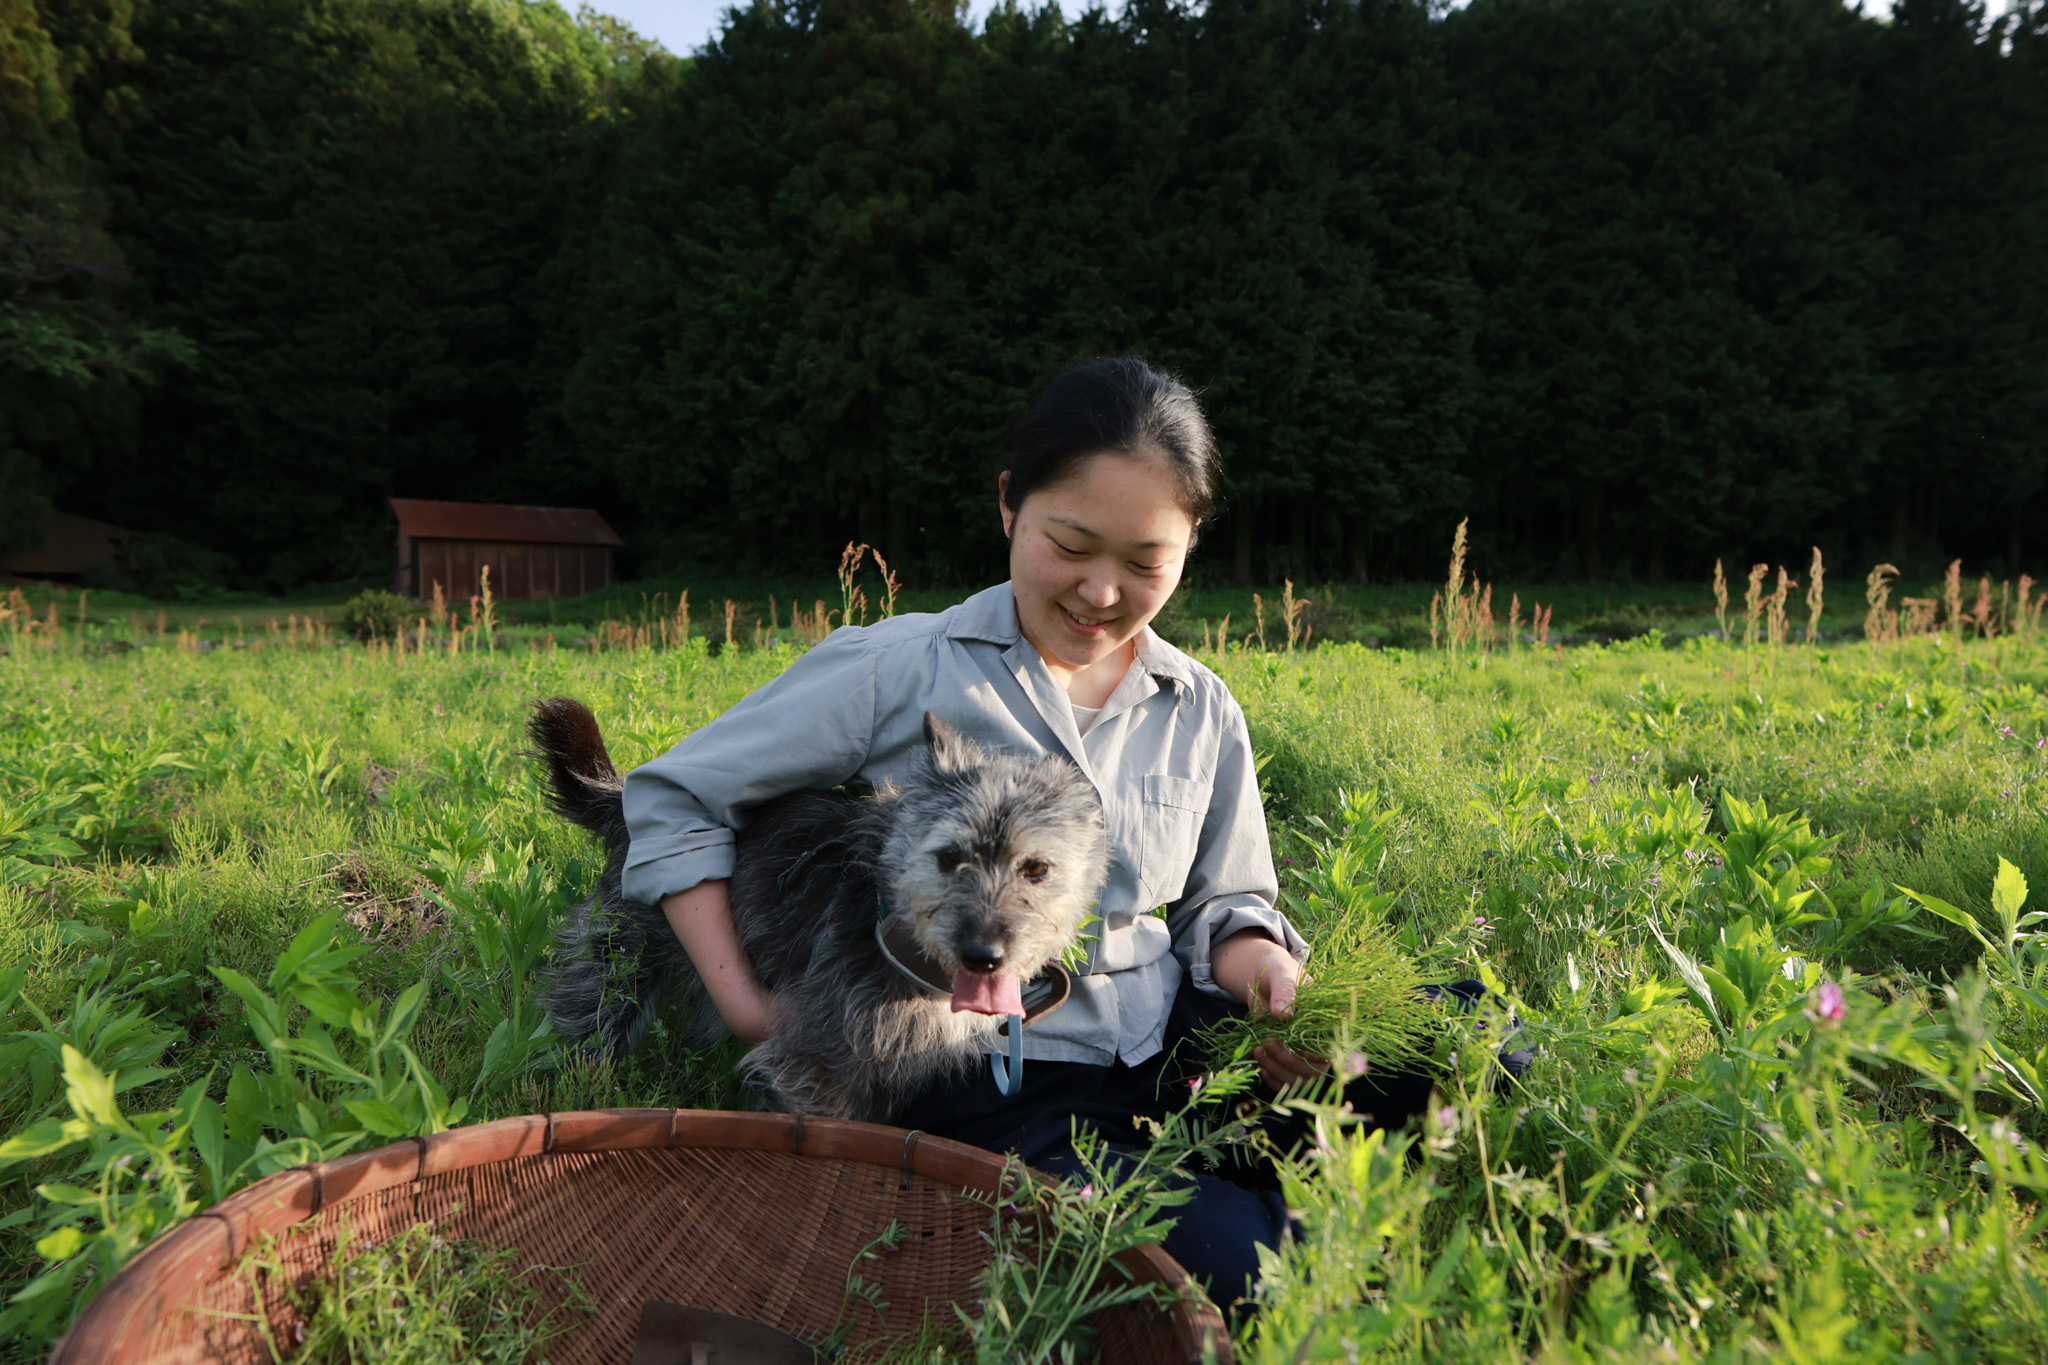
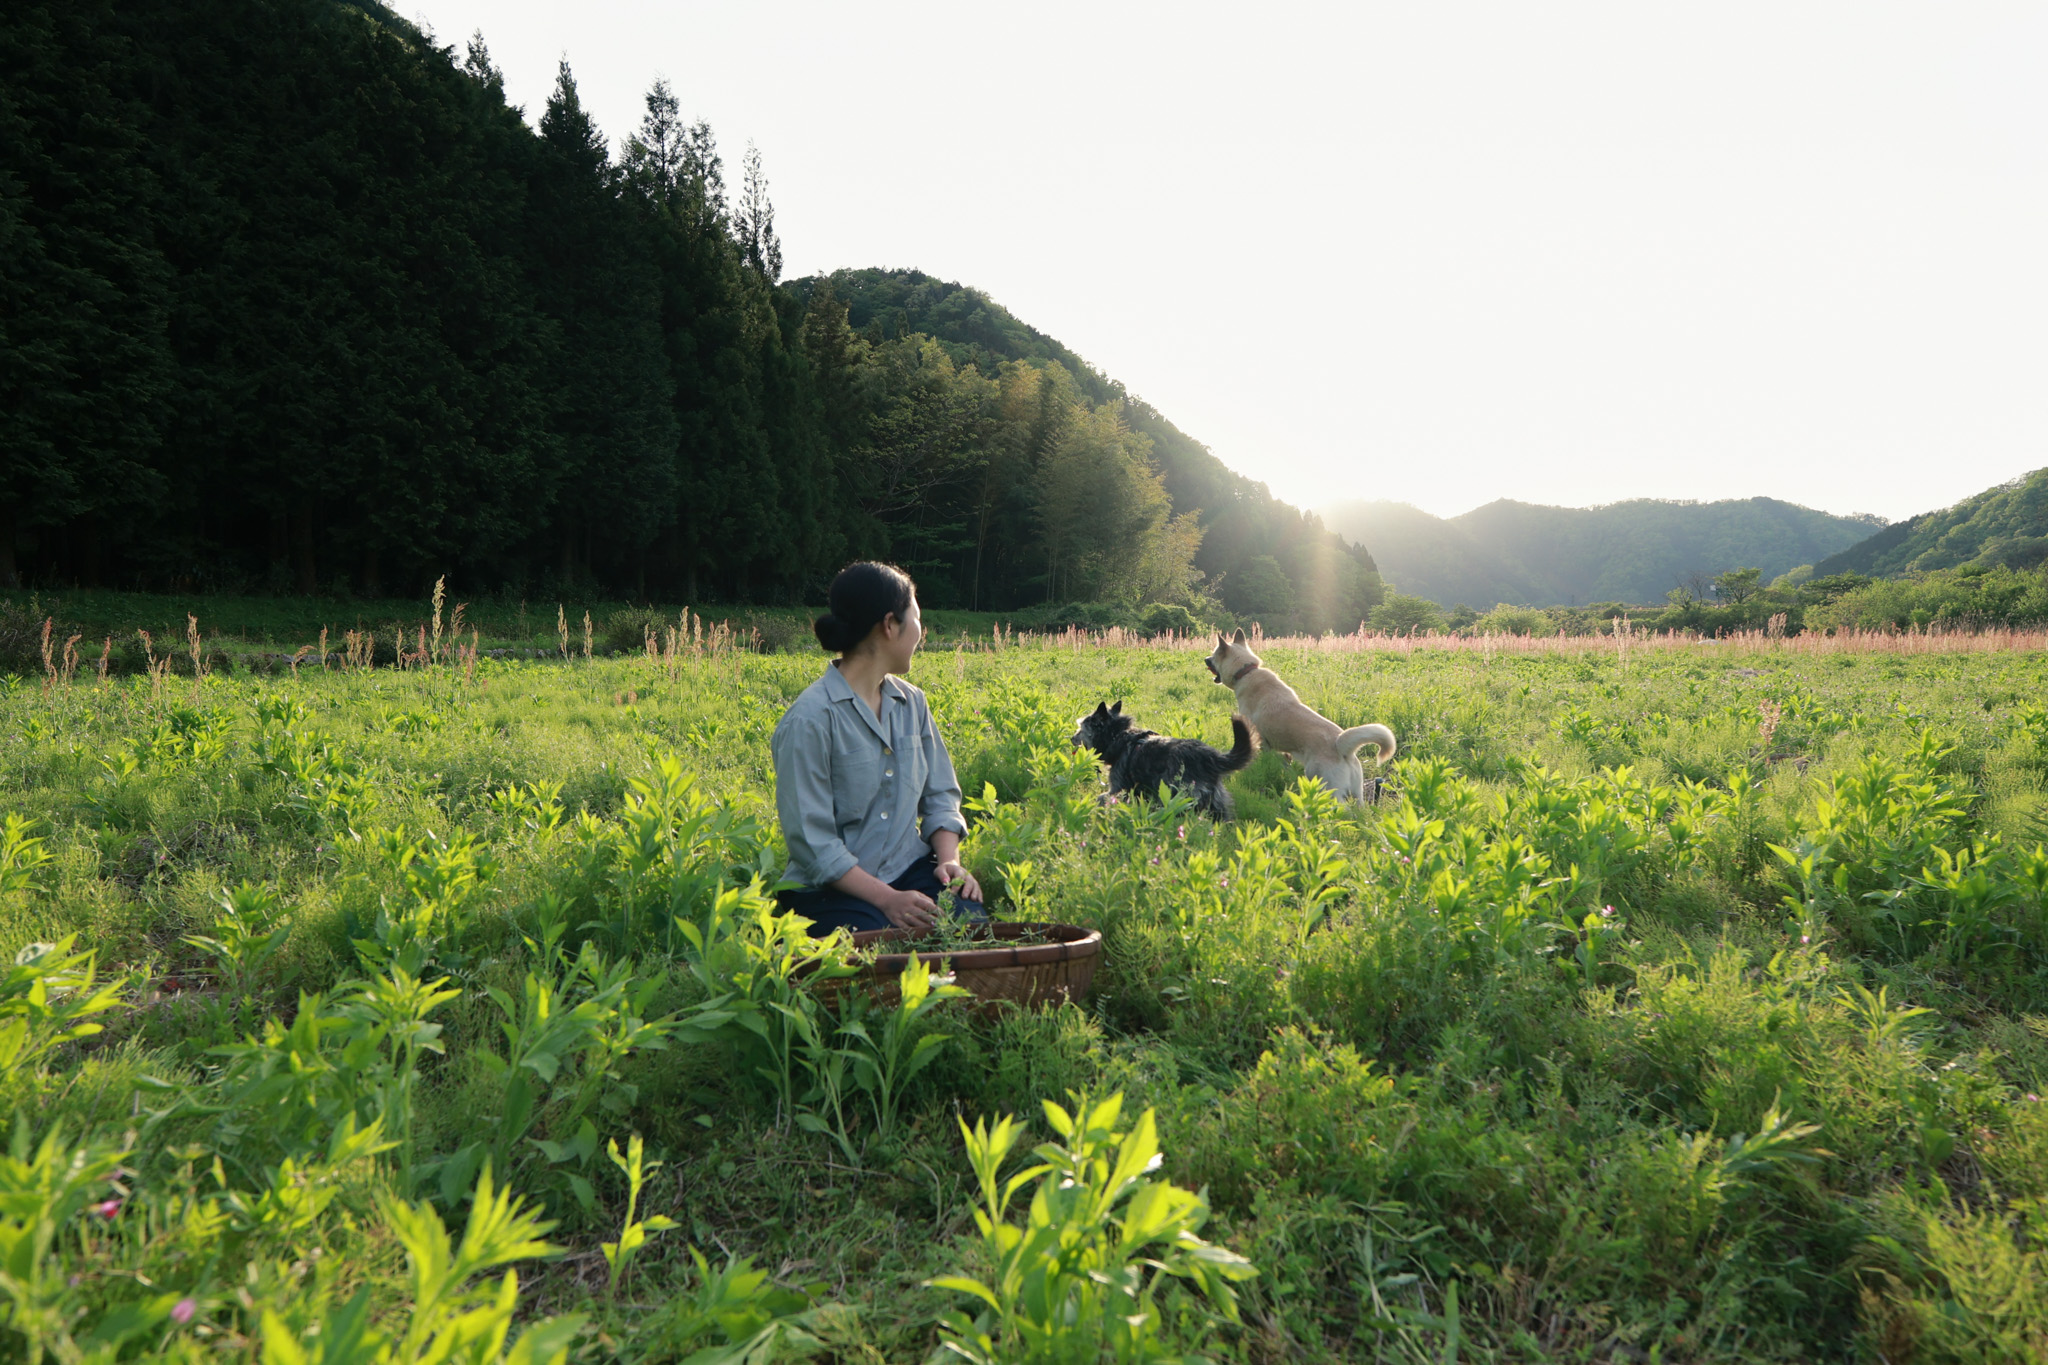
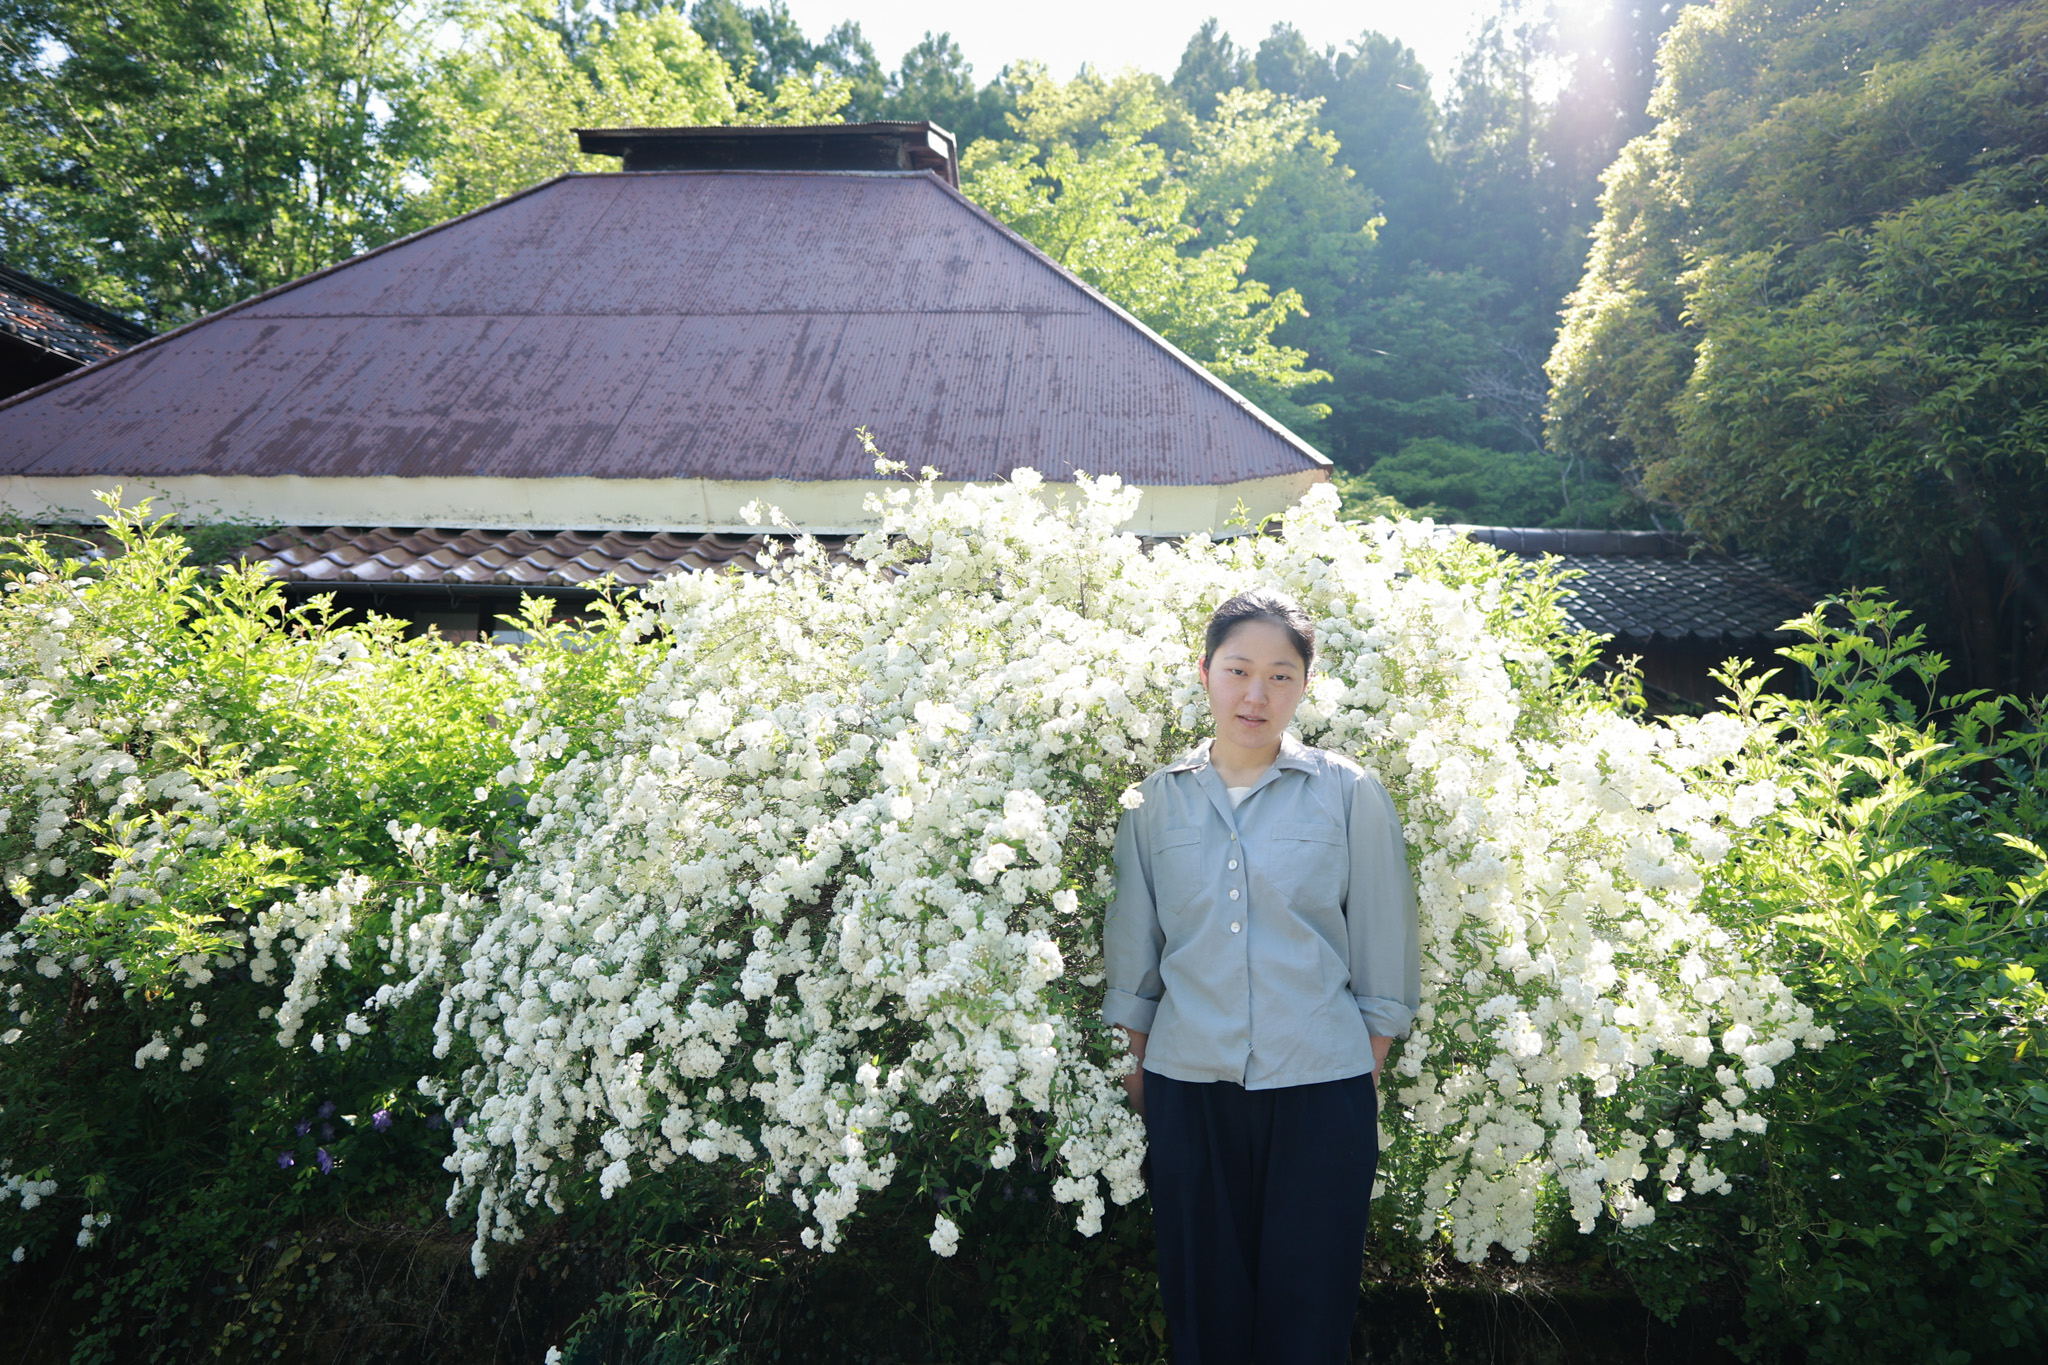
I am deep in the mountains at the western end of Shimane Prefecture. This is where Yuki lives.
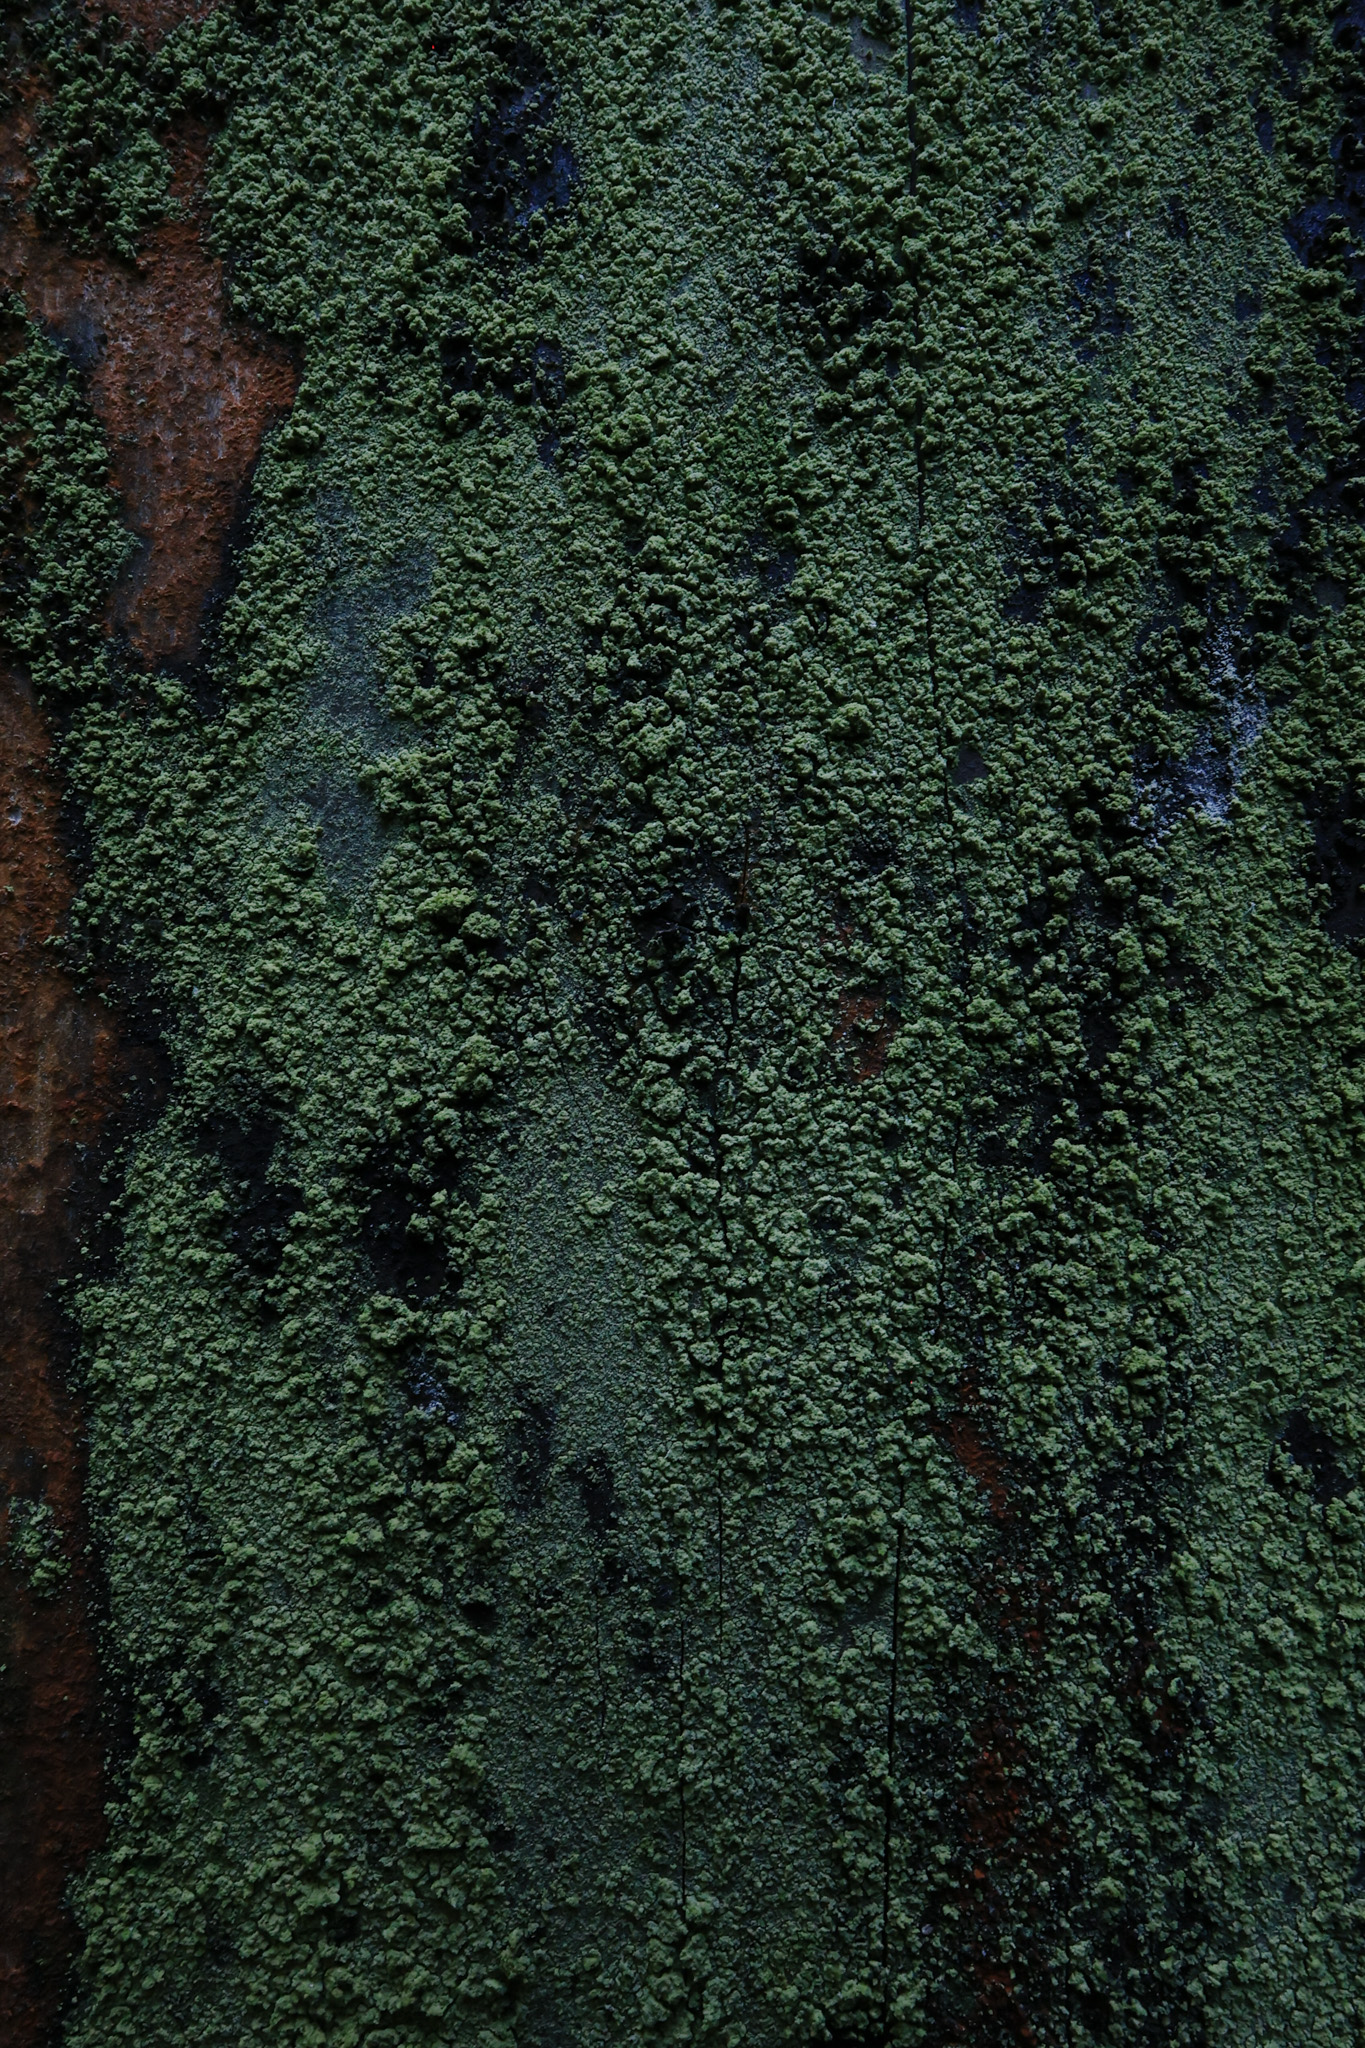
Everywhere I look, I am surrounded by the color green. Around me are mountains and rolling hills, and in between them, rivers, paths, and roads where animals come and go. I had heard before that plants communicate with each other. Here, I begin to feel as if we are all just tiny beings living in the world of the mountains.
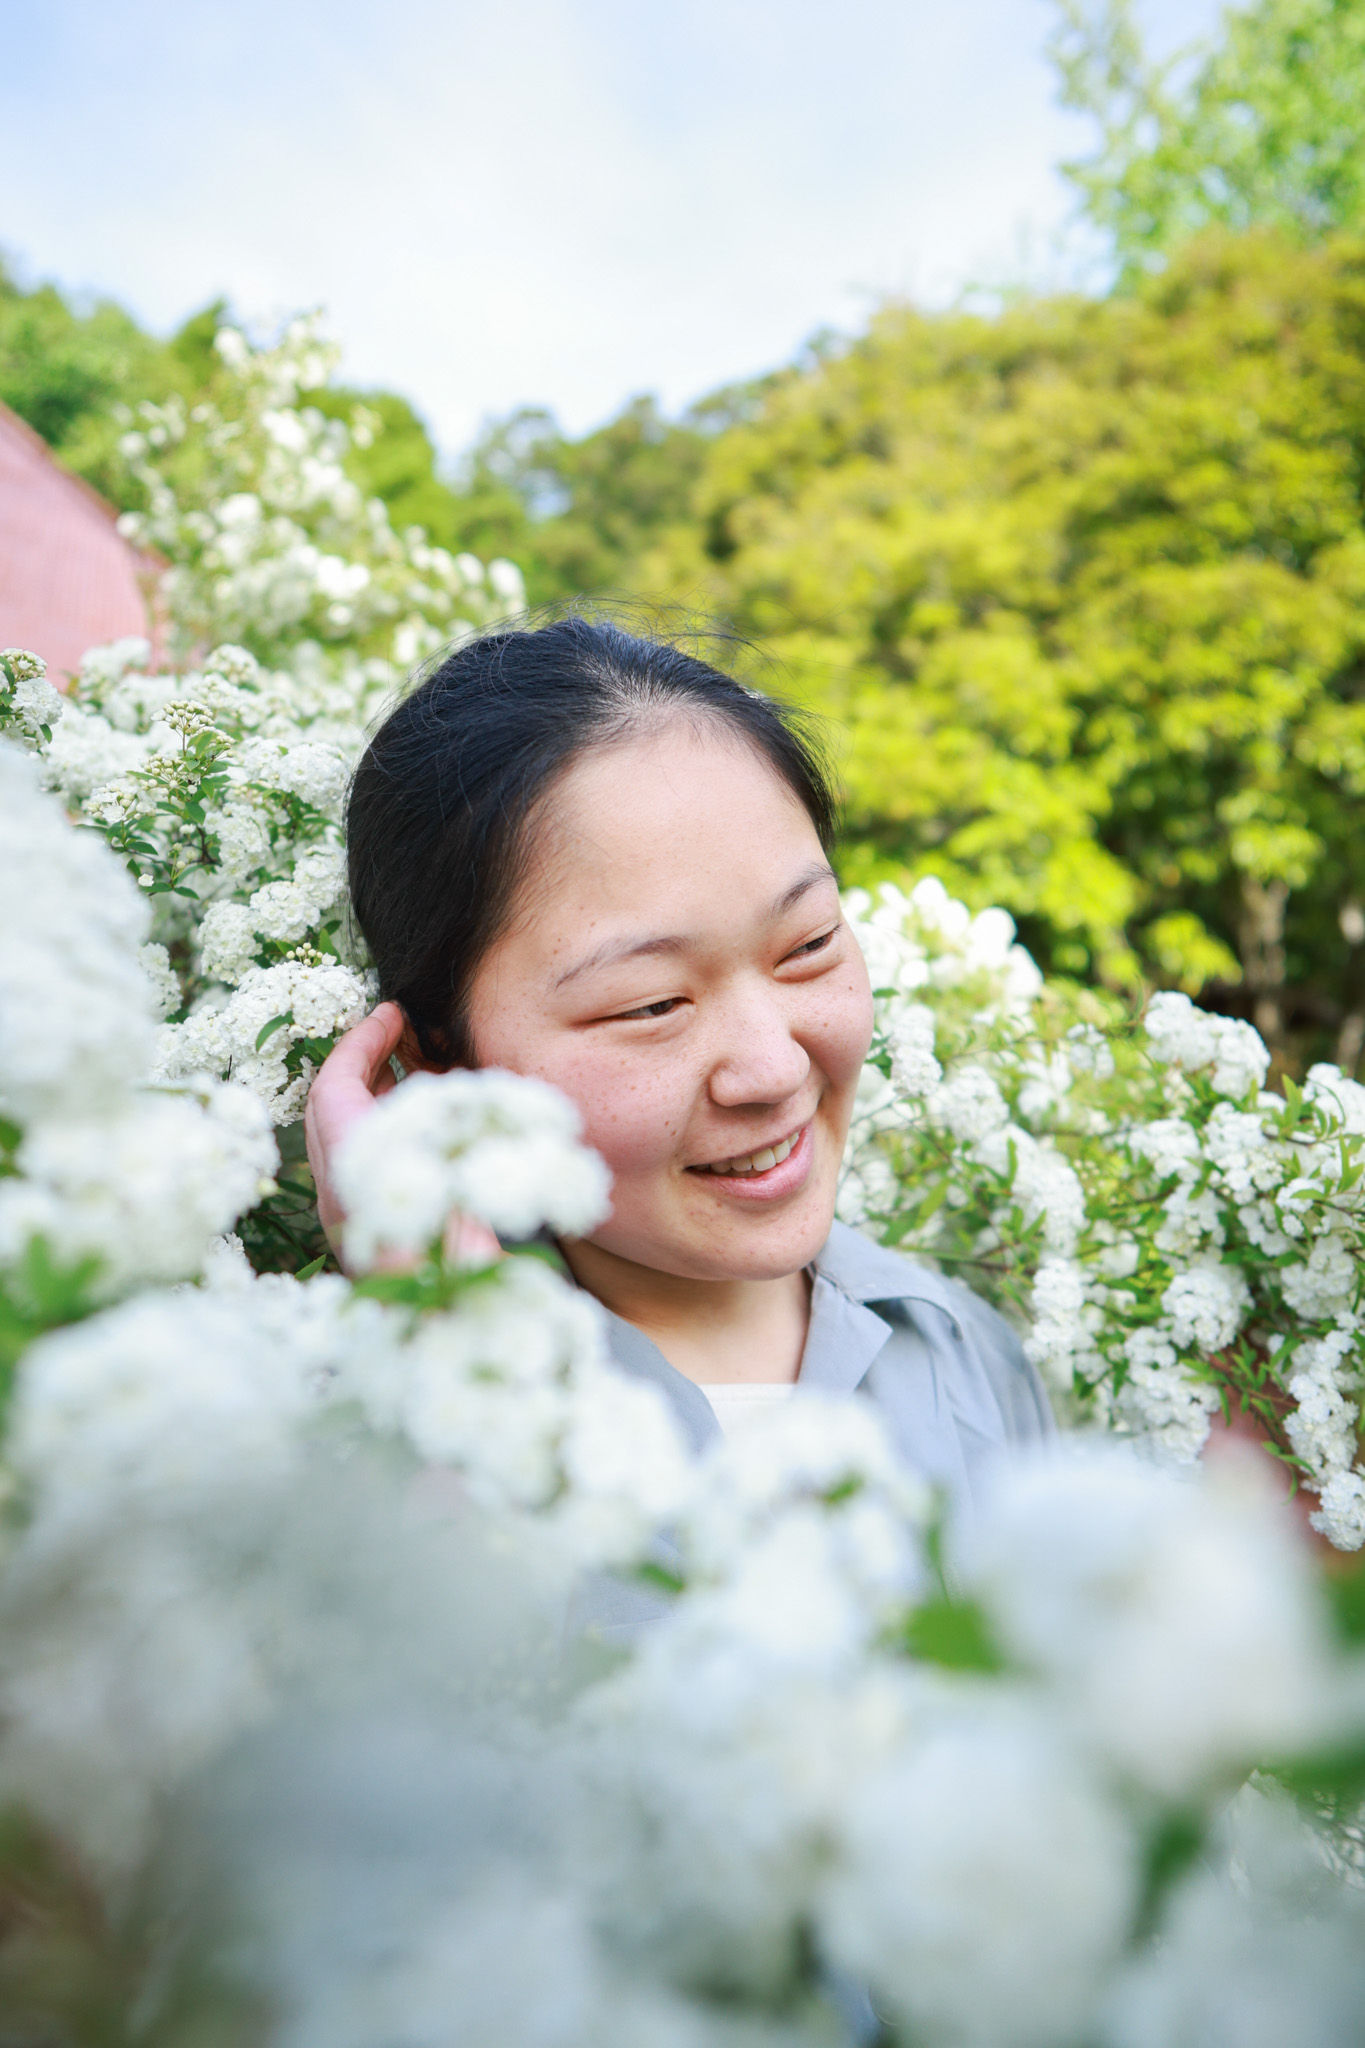
I always try to let people be themselves in front of my camera, free from doubt or self-consciousness. I believe it only really works if what I expect of my subjects also applies to me. Being ourselves means trusting each other. I often borrow techniques from the theater to help build that trust. But here, there was no need. All we needed to do was surrender to the present moment. Yuki understood this well. She had been so used to it already that she didn’t need to understand it first.
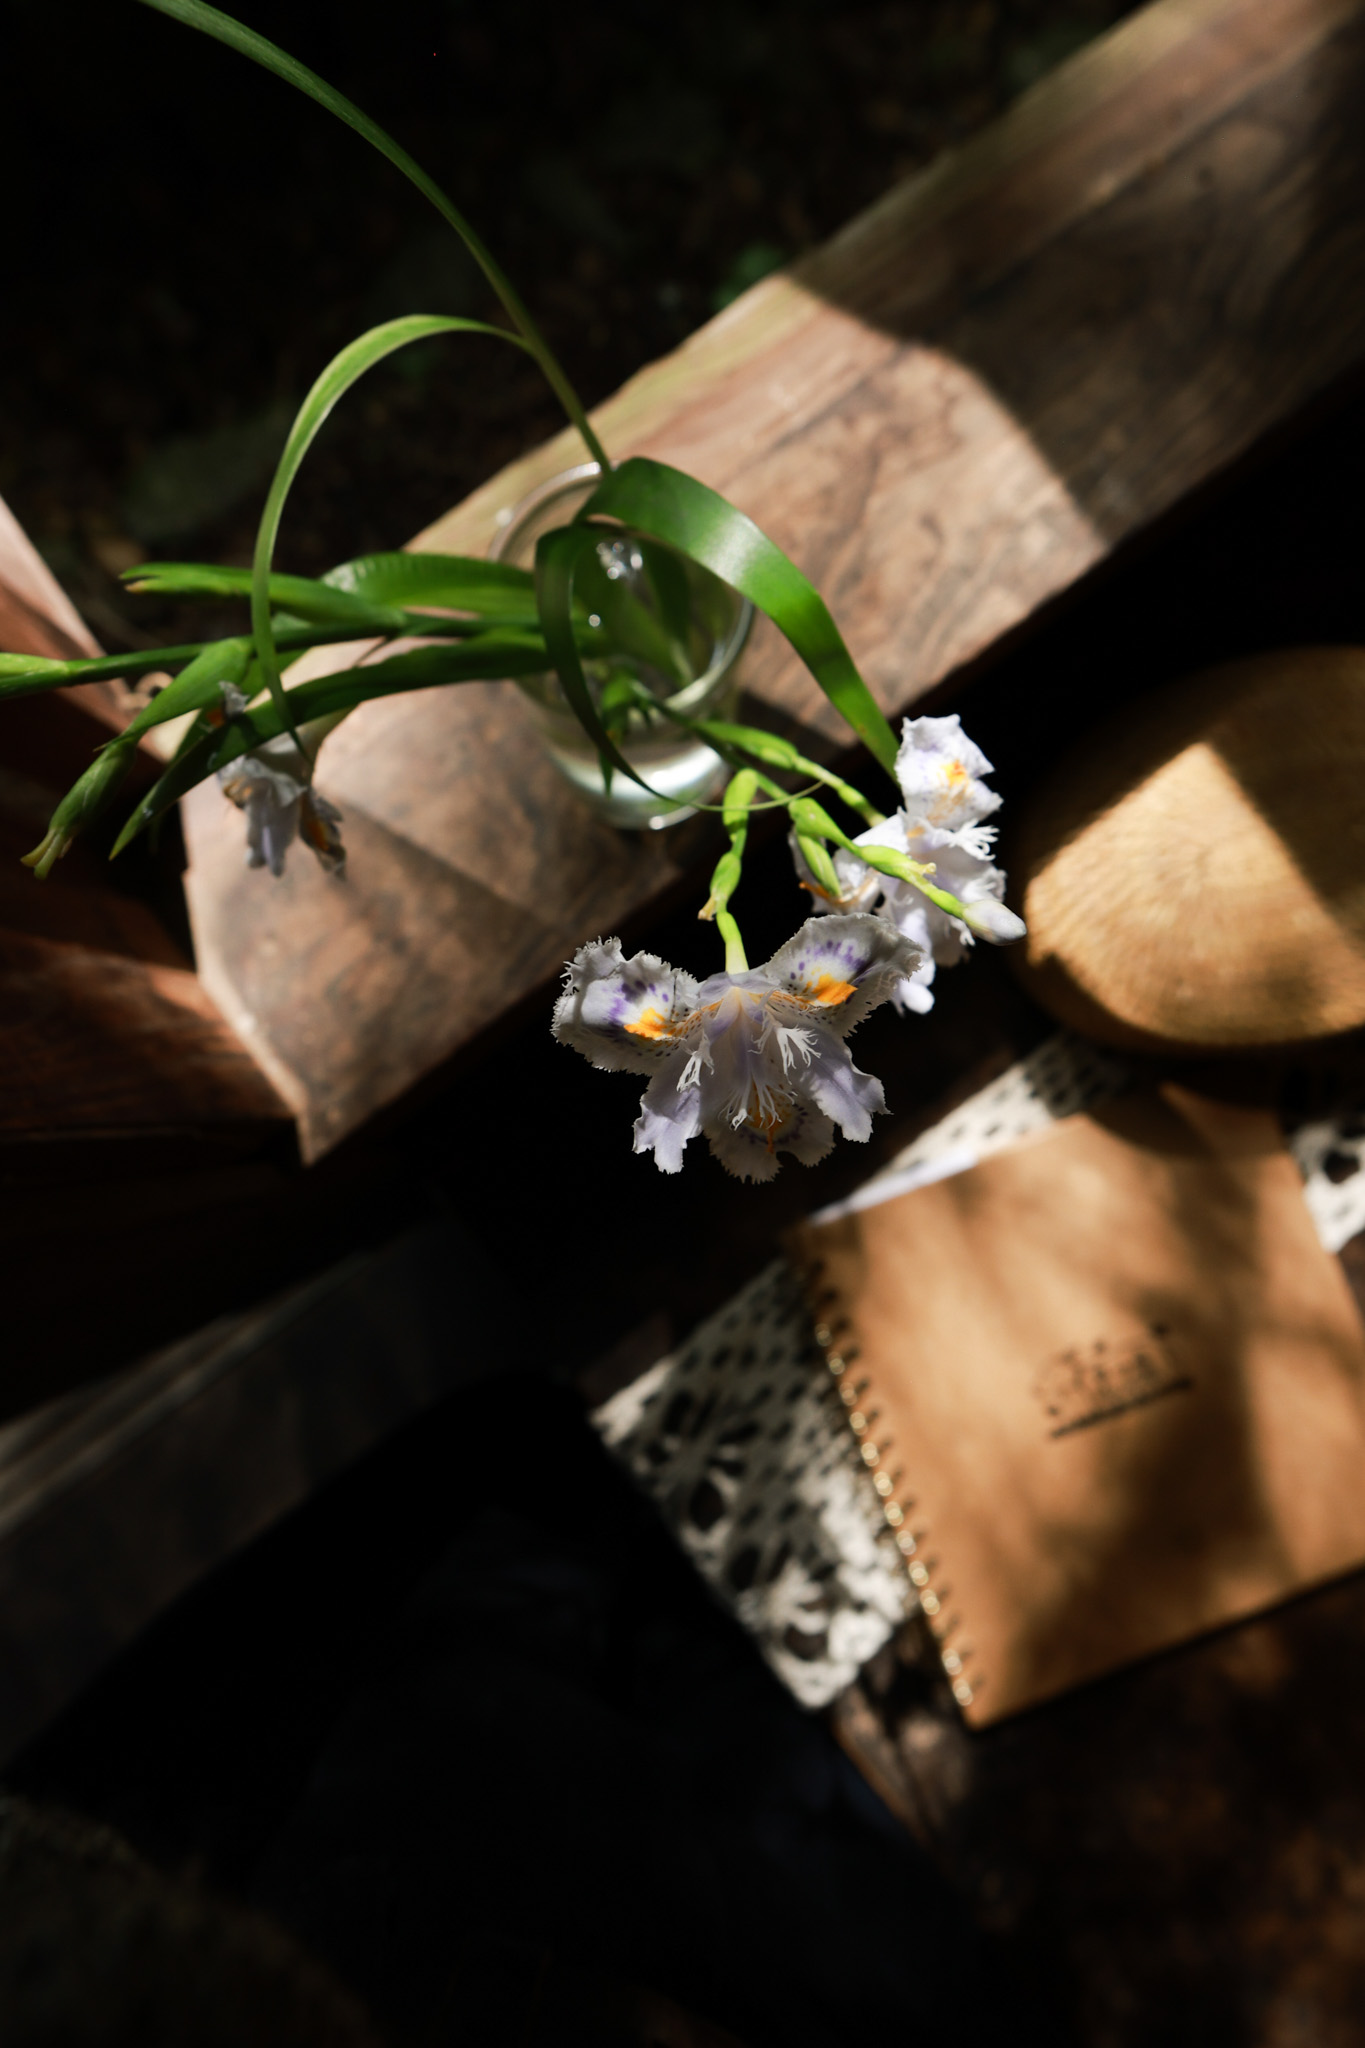
Yuki runs the restaurant Kusa no Niwa together with her mother. Every day, they cook and bake using vegetables grown in their fields, herbs and plants from the forest, and small fish and freshwater crabs from the nearby Takatsu River. Her mother built this place thirty years ago. In the garden, wild mountain flowers bloom across the ground, smiling up at me from below. Everything here is infused with a gentle sense of freedom. Nothing feels forced; everything flows naturally. This is how Yuki grew up.
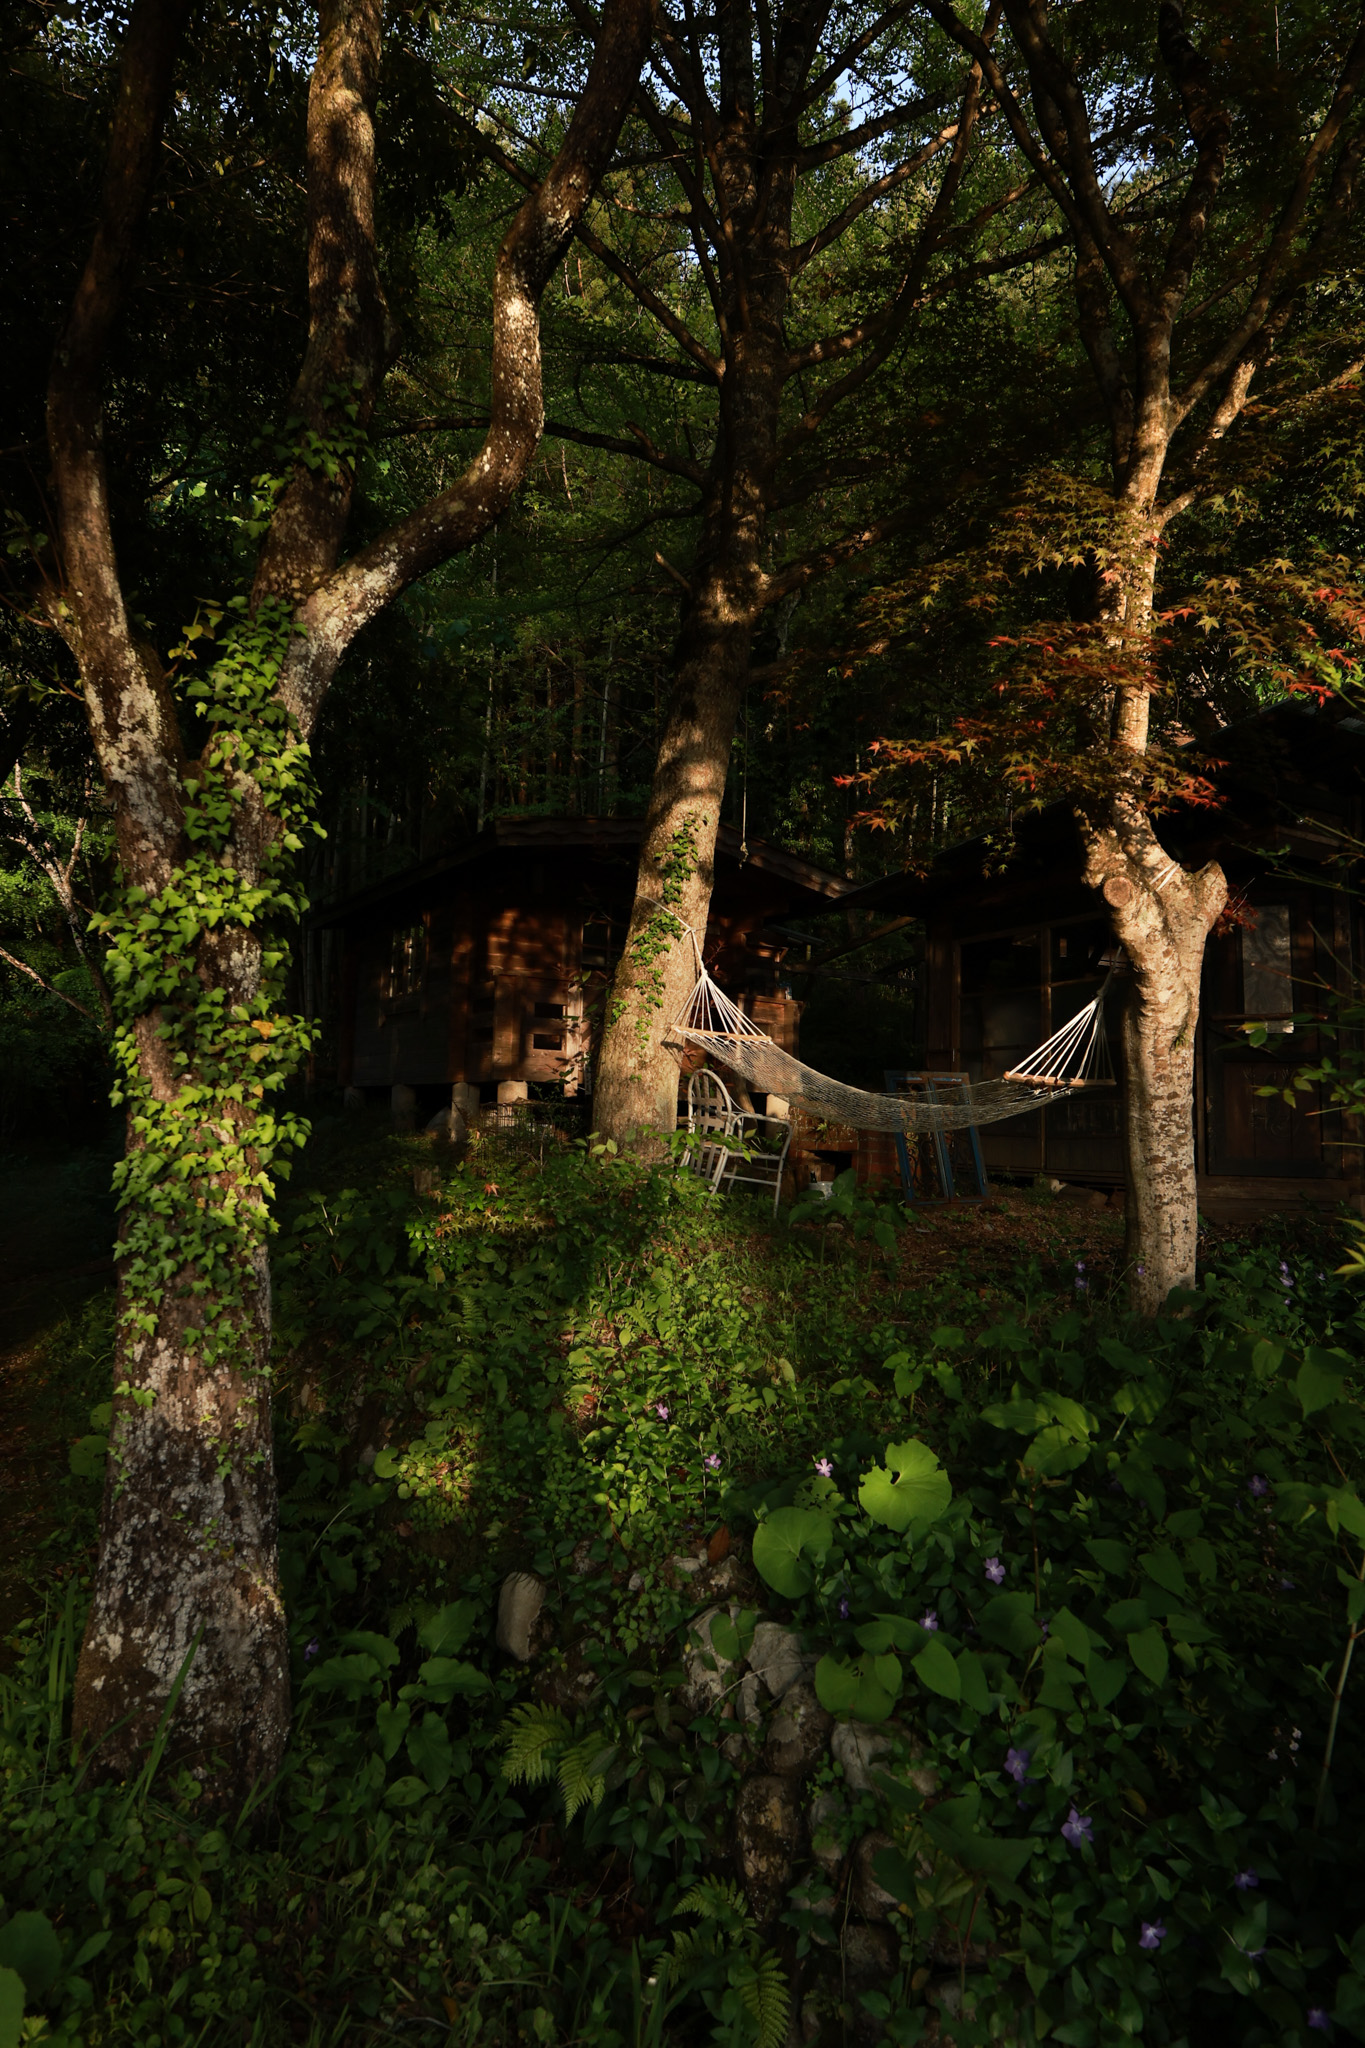
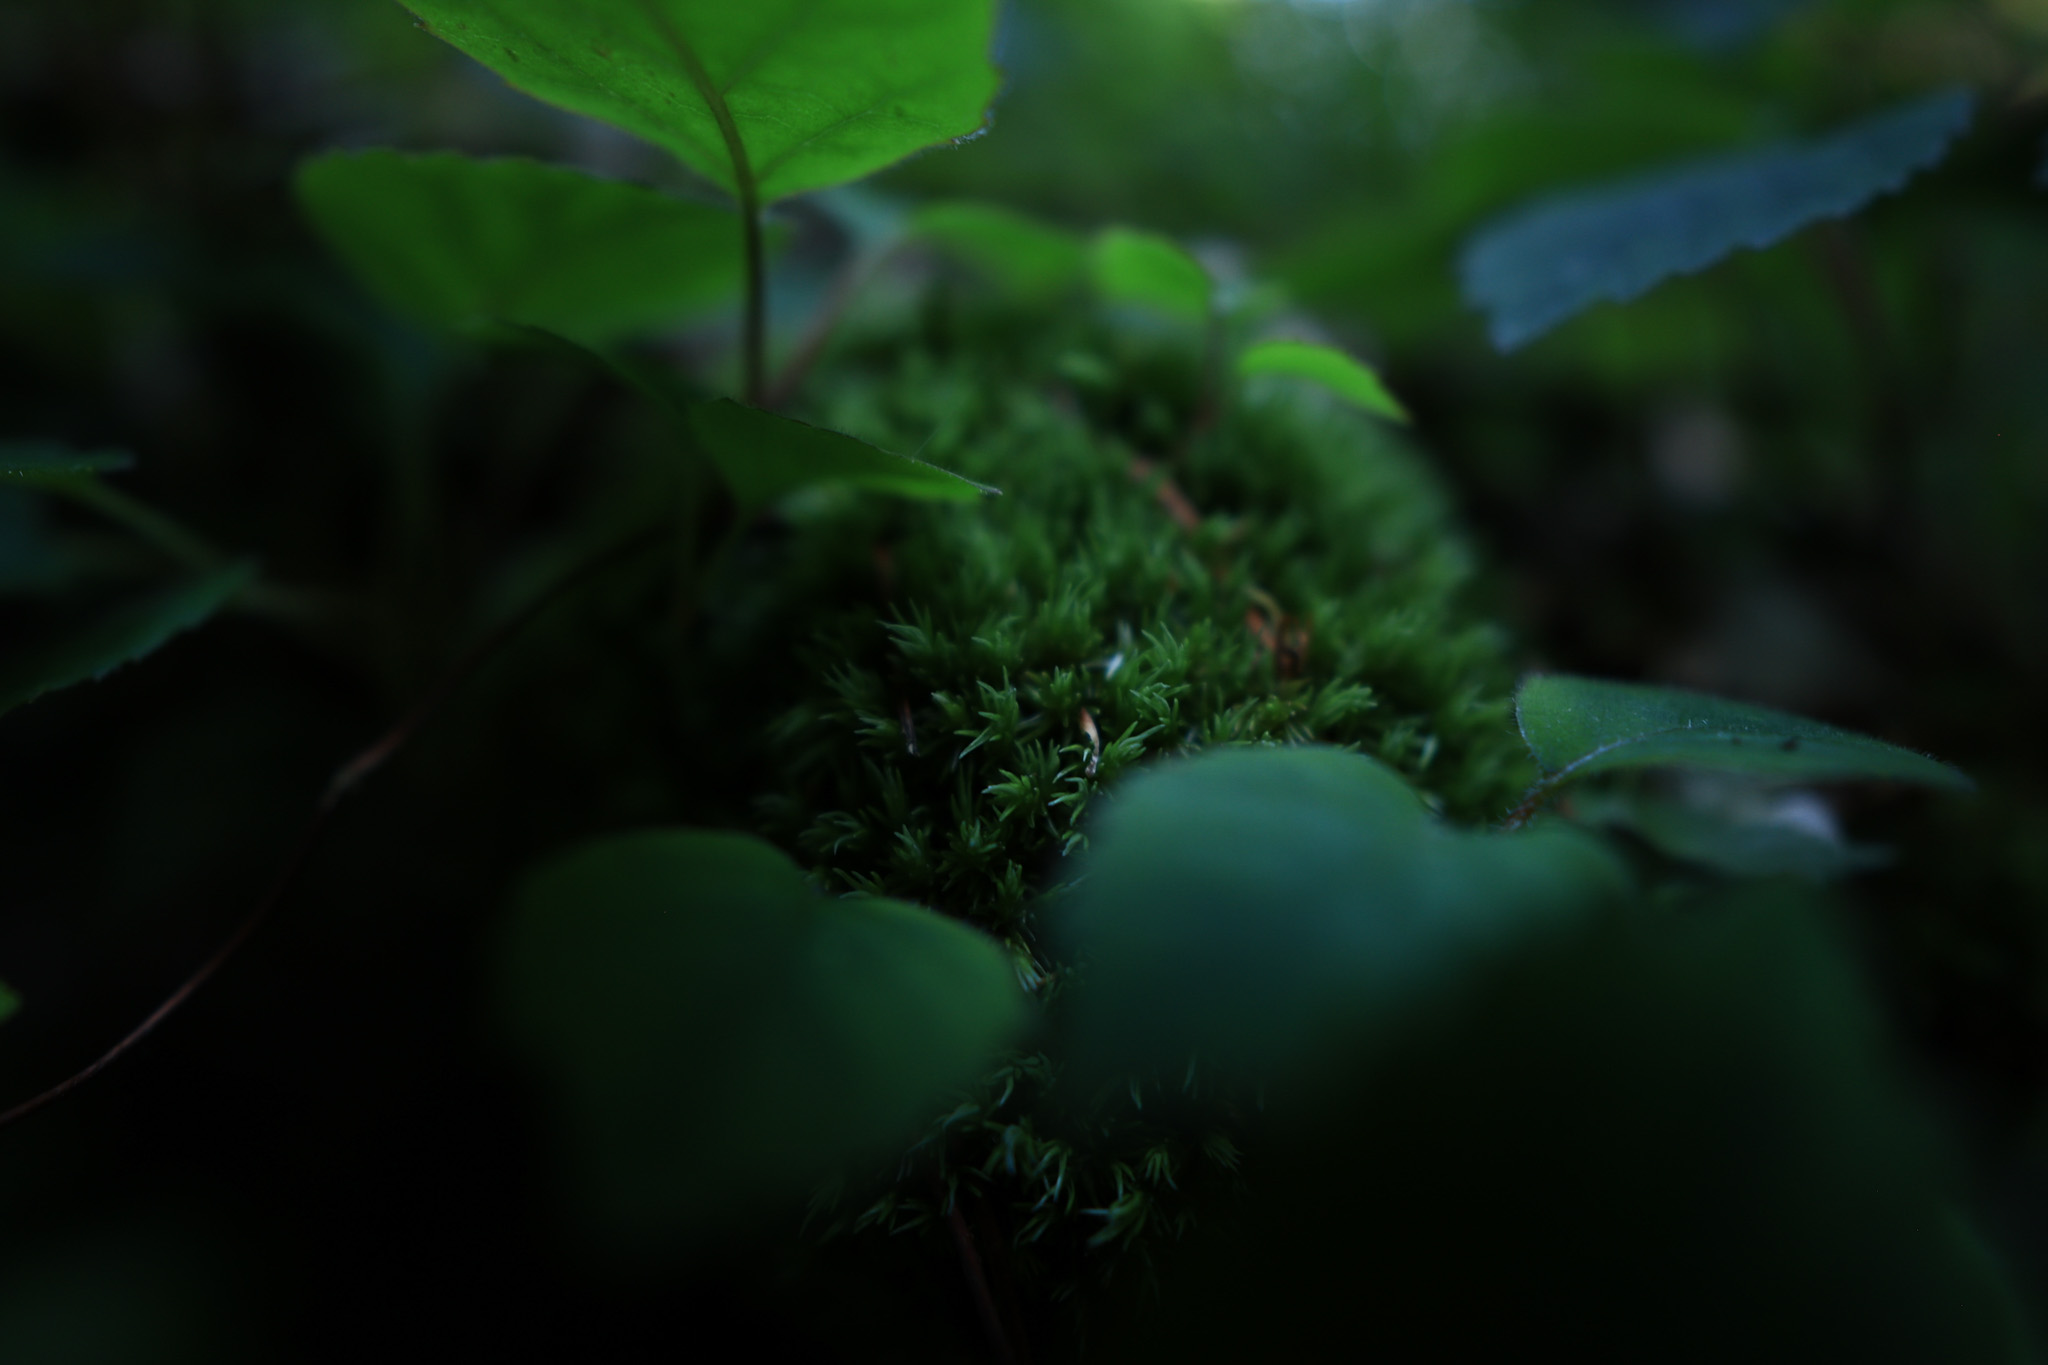
Together, we spent time beneath the trees, with light filtering through the leaves above, walked through fields lit by the evening sun, and relaxed in the quiet shadows of the old farmhouse. With the many valleys and marshes around us, I had to be careful not to lose my footing.
On my camera, the bright and lightweight 12mm F1.4 ultra-wide lens felt like an extension of myself. I began to move without thinking and let my senses take over.
Sigma 12mm F1.4 DC | Contemporary Canon EOS R5 ISO 200, F1.6, 1/2500sSigma 12mm F1.4 DC | Contemporary Canon EOS R5 ISO 200, F2.0, 1/1000s
Sigma 12mm F1.4 DC | Contemporary Canon EOS R5 ISO 160, F4.0, 1/400sSigma 12mm F1.4 DC | Contemporary Canon EOS R5 ISO 125, F5.6, 1/200s
Sigma 12mm F1.4 DC | Contemporary Canon EOS R5 ISO 160, F2.5, 1/1250sSigma 12mm F1.4 DC | Contemporary Canon EOS R5 ISO 250, F2.5, 1/320sSigma 12mm F1.4 DC | Contemporary Canon EOS R5 ISO 200, F4.5, 1/125sSigma 12mm F1.4 DC | Contemporary Canon EOS R5 ISO 160, F2.8, 1/1600sSigma 12mm F1.4 DC | Contemporary Canon EOS R5 ISO 160, F3.5, 1/800sSigma 12mm F1.4 DC | Contemporary Canon EOS R5 ISO 160, F2.8, 1/1000sSigma 12mm F1.4 DC | Contemporary Canon EOS R5 ISO 800, F3.2, 1/1600sSigma 12mm F1.4 DC | Contemporary Canon EOS R5 ISO 160, F2.5, 1/1250sSigma 12mm F1.4 DC | Contemporary Canon EOS R5 ISO 125, F2.0, 1/800s
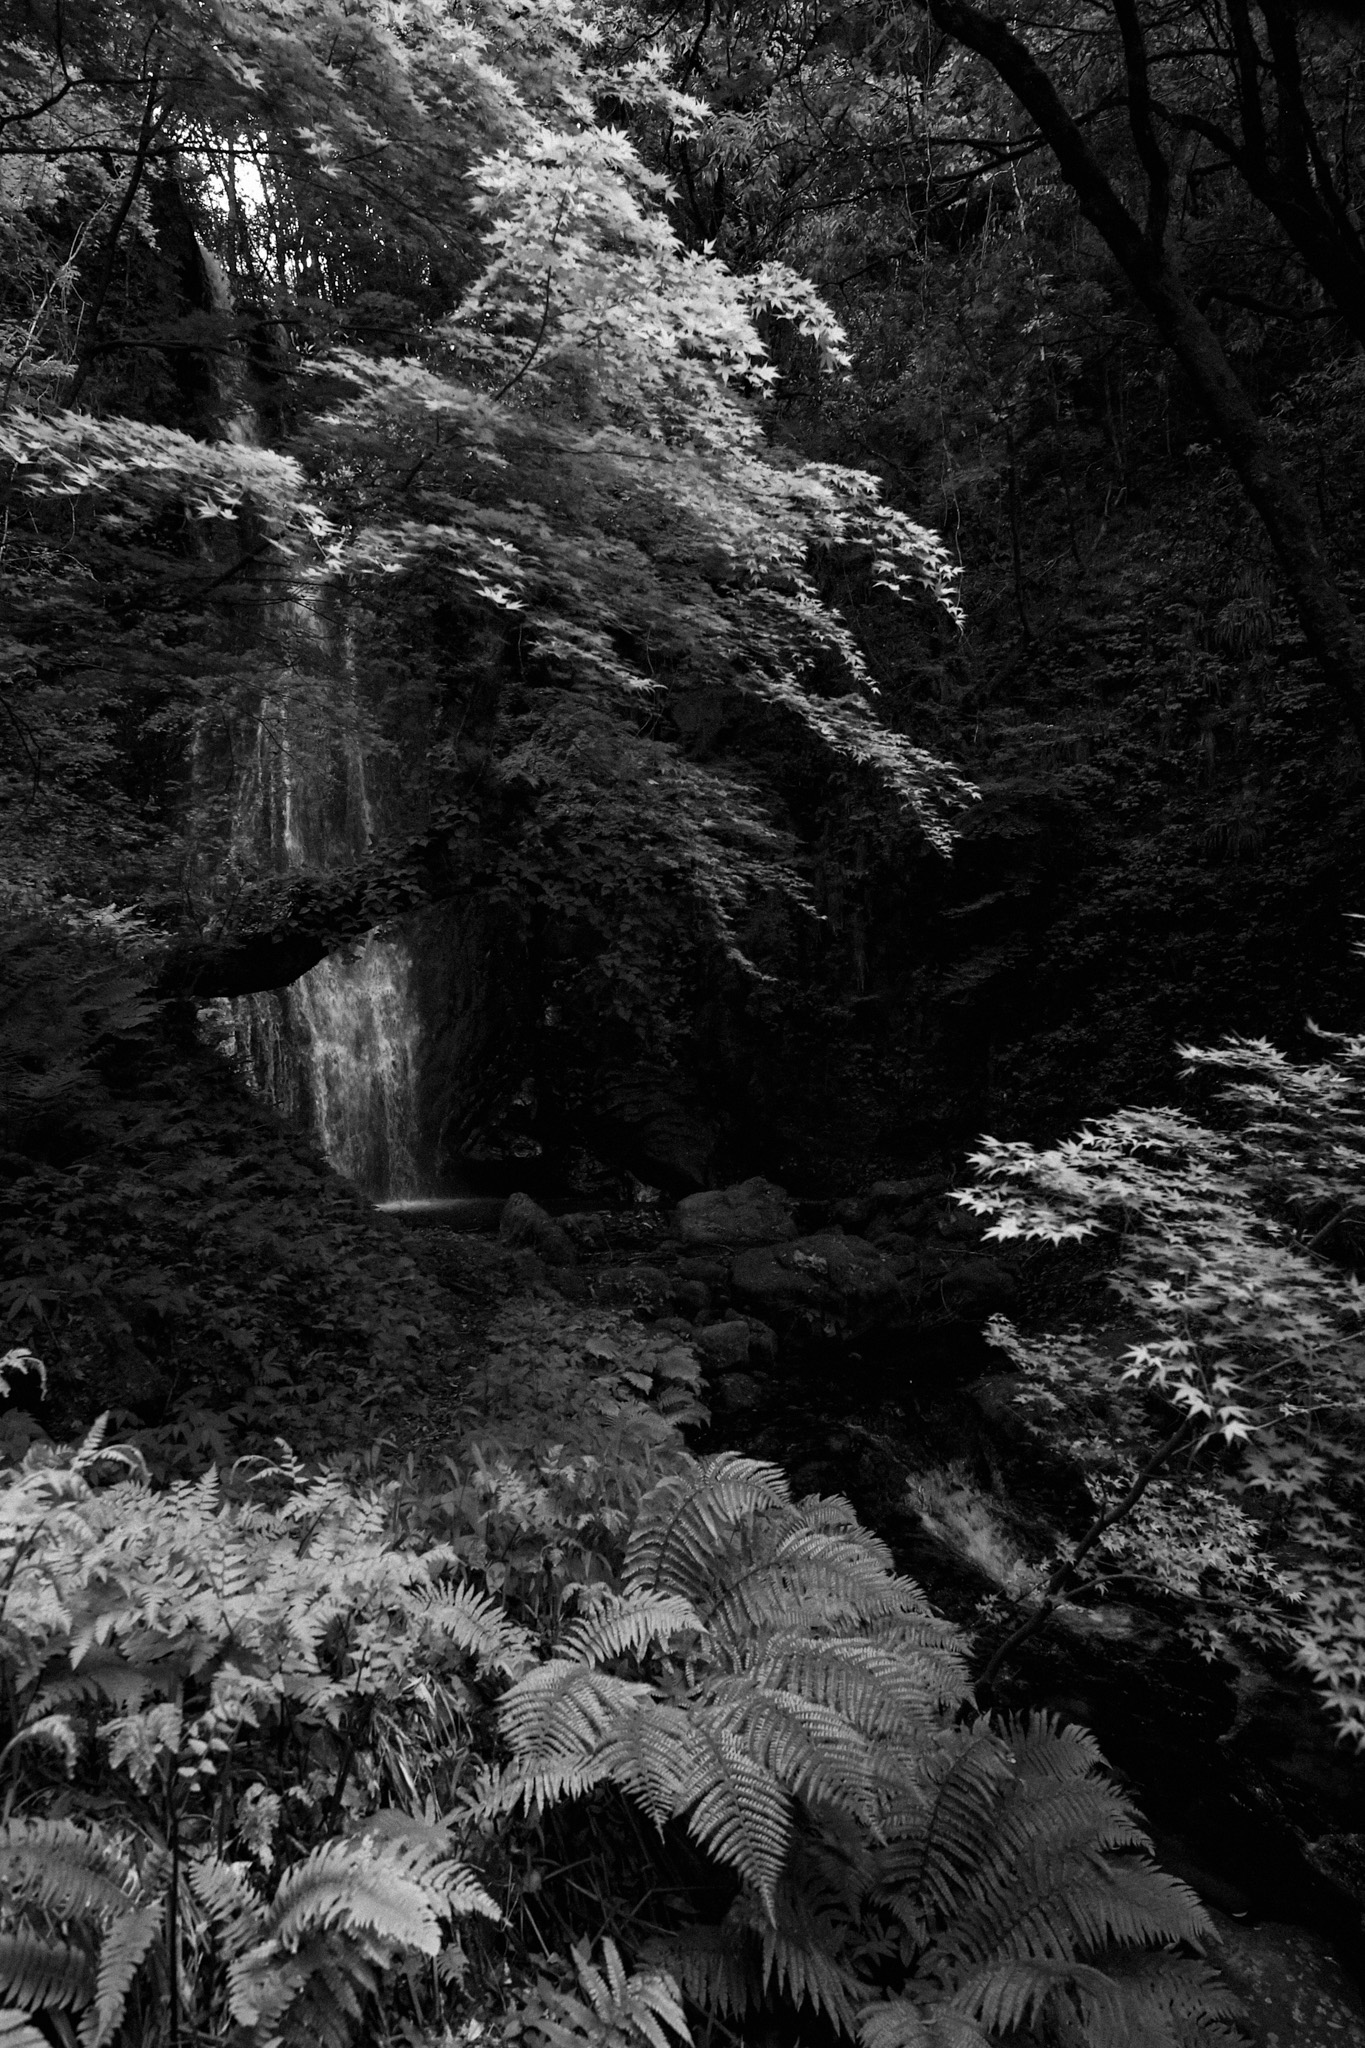
I also headed toward a spring, then to a secluded waterfall. I could sense the forest getting deeper by the way the wind changed. I passed a bench that must have been placed long ago. But no one would sit on it again now. The forest had begun to reclaim it as its own: an ending, but also the beginning of new life.
As I approached the basin of the waterfall, the leaves and plants around it swayed gently, as if to welcome me. It felt like a scene from an anime, where the protagonist meets the spirits of the forest in a strange land. I was neither scared nor unsettled. Perhaps my imagination had helped soften the moment. I couldn’t say how much time I spent there. I stayed until the night brought in a different wind.
In the mountains, we become aware of both nature’s vastness and its intricacy. We are reminded how important it is not to lose sight of either. With the Sigma 12mm F1.4 DC | Contemporary, I could capture both with a single lens.
Sigma 12mm F1.4 DC | Contemporary Canon EOS R5 ISO 500, F4.5, 1/320sSigma 12mm F1.4 DC | Contemporary Canon EOS R5 ISO 100, F2.2, 1/200s
Sigma 12mm F1.4 DC | Contemporary Canon EOS R5 ISO 640, F5.6, 1/500sSigma 12mm F1.4 DC | Contemporary Canon EOS R5 ISO 800, F1.4, 1/640s
Sigma 12mm F1.4 DC | Contemporary Canon EOS R5 ISO 800, F4.5, 1/125sSigma 12mm F1.4 DC | Contemporary Canon EOS R5 ISO 2000, F11.0, 1/60s
Sigma 12mm F1.4 DC | Contemporary Canon EOS R5 ISO 640, F3.5, 1/80sSigma 12mm F1.4 DC | Contemporary Canon EOS R5 ISO 125, F1.4, 1/125s