نویسنده: AliBina

  • 3 Camera Industry Predictions for 2025

    3 Camera Industry Predictions for 2025


    Who can see the future? What is the future and who creates it? Ok, let’s not ask these questions, instead, let’s just try our hand at some old-fashioned speculation.

    First Prediction

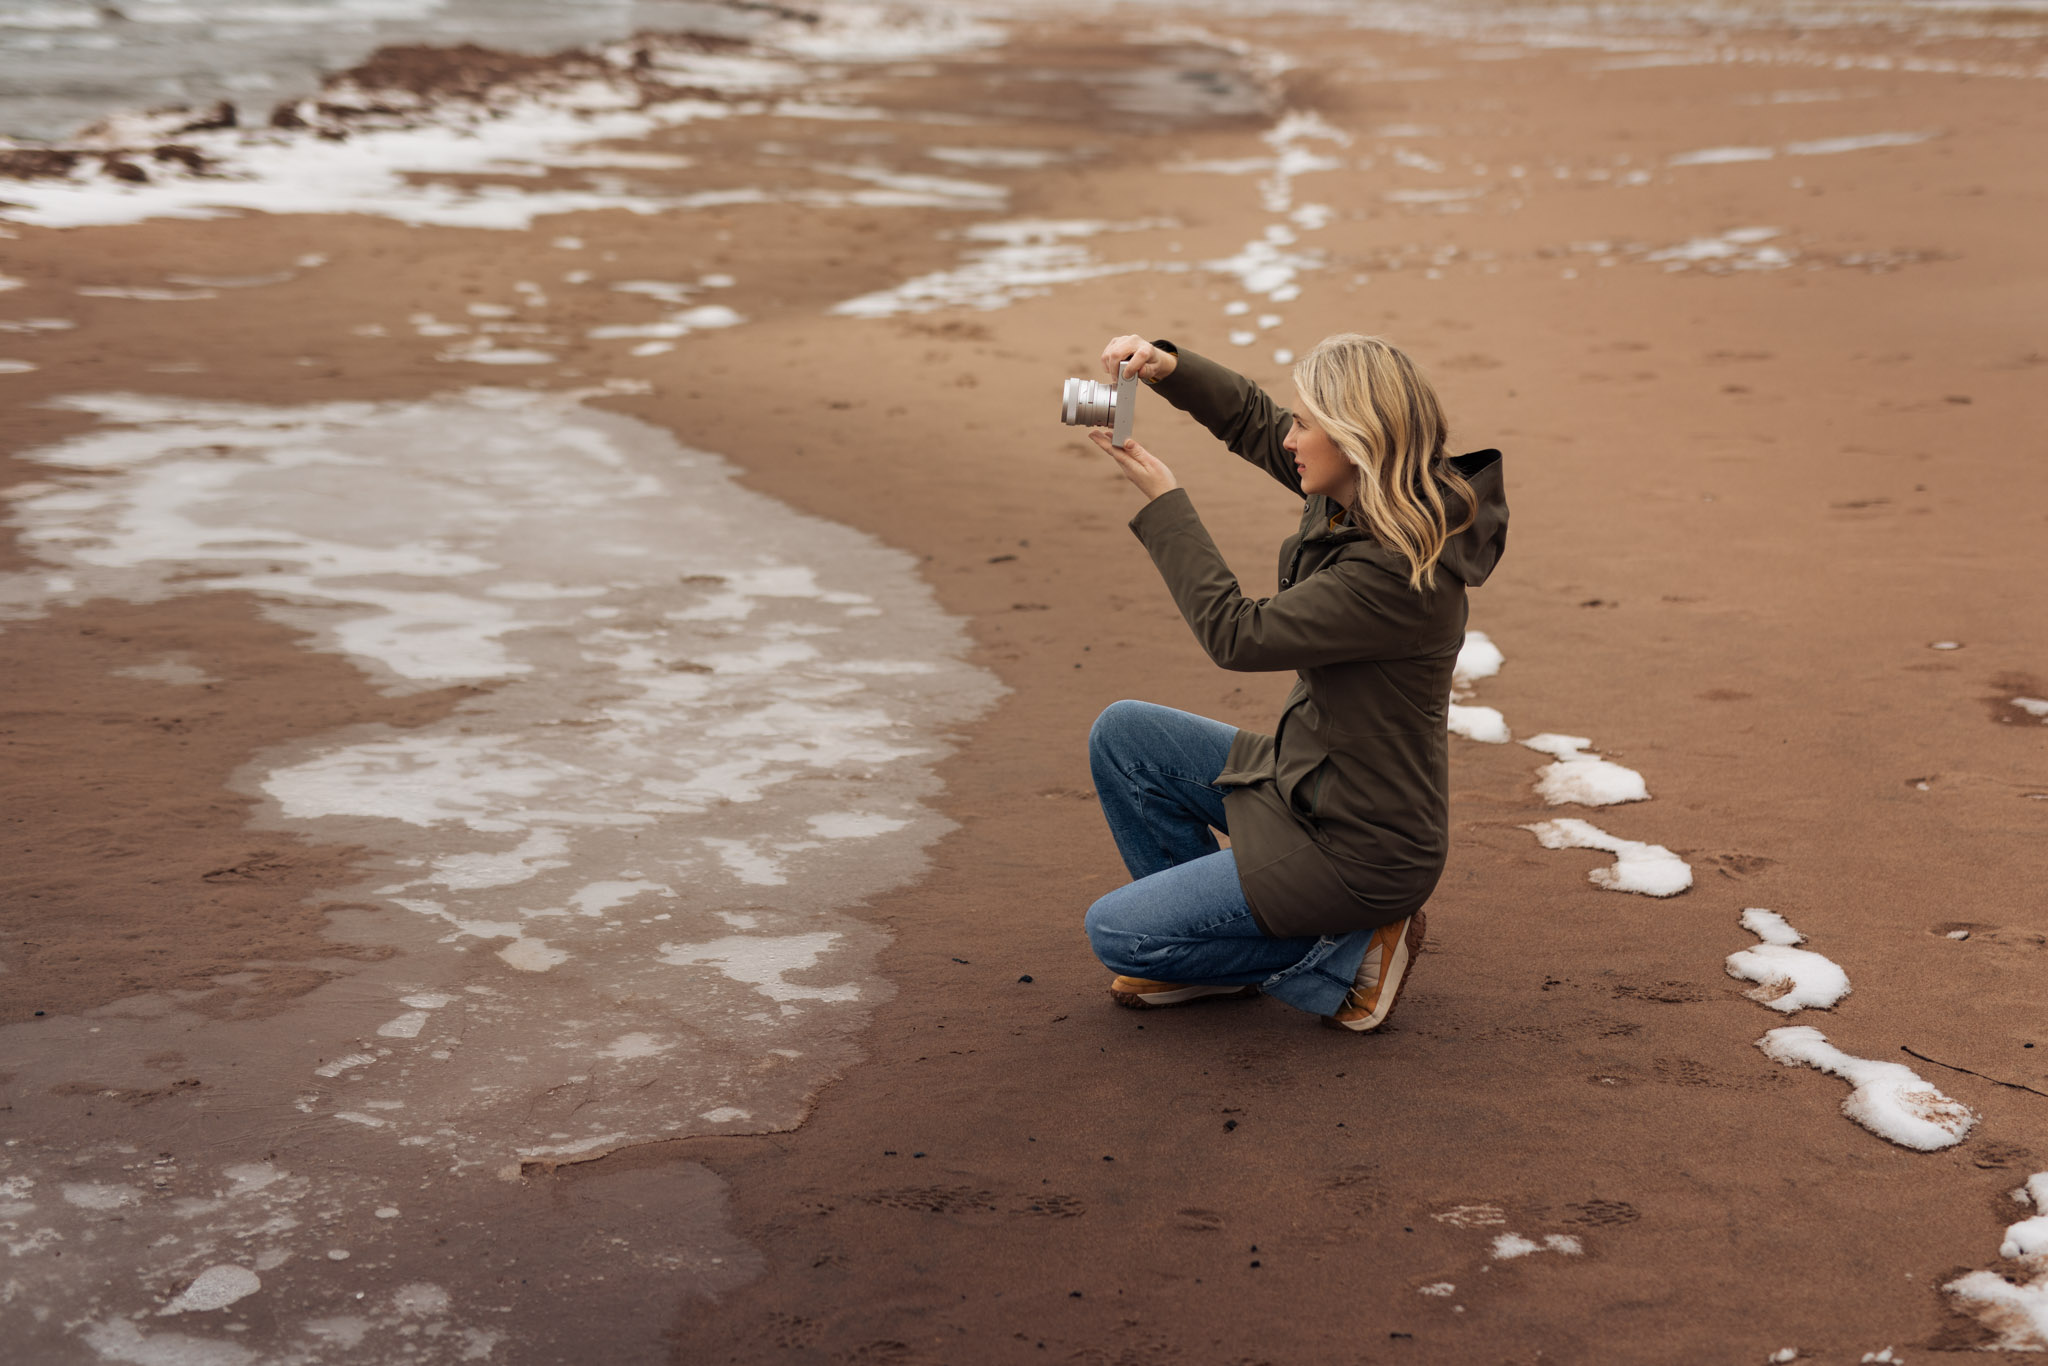
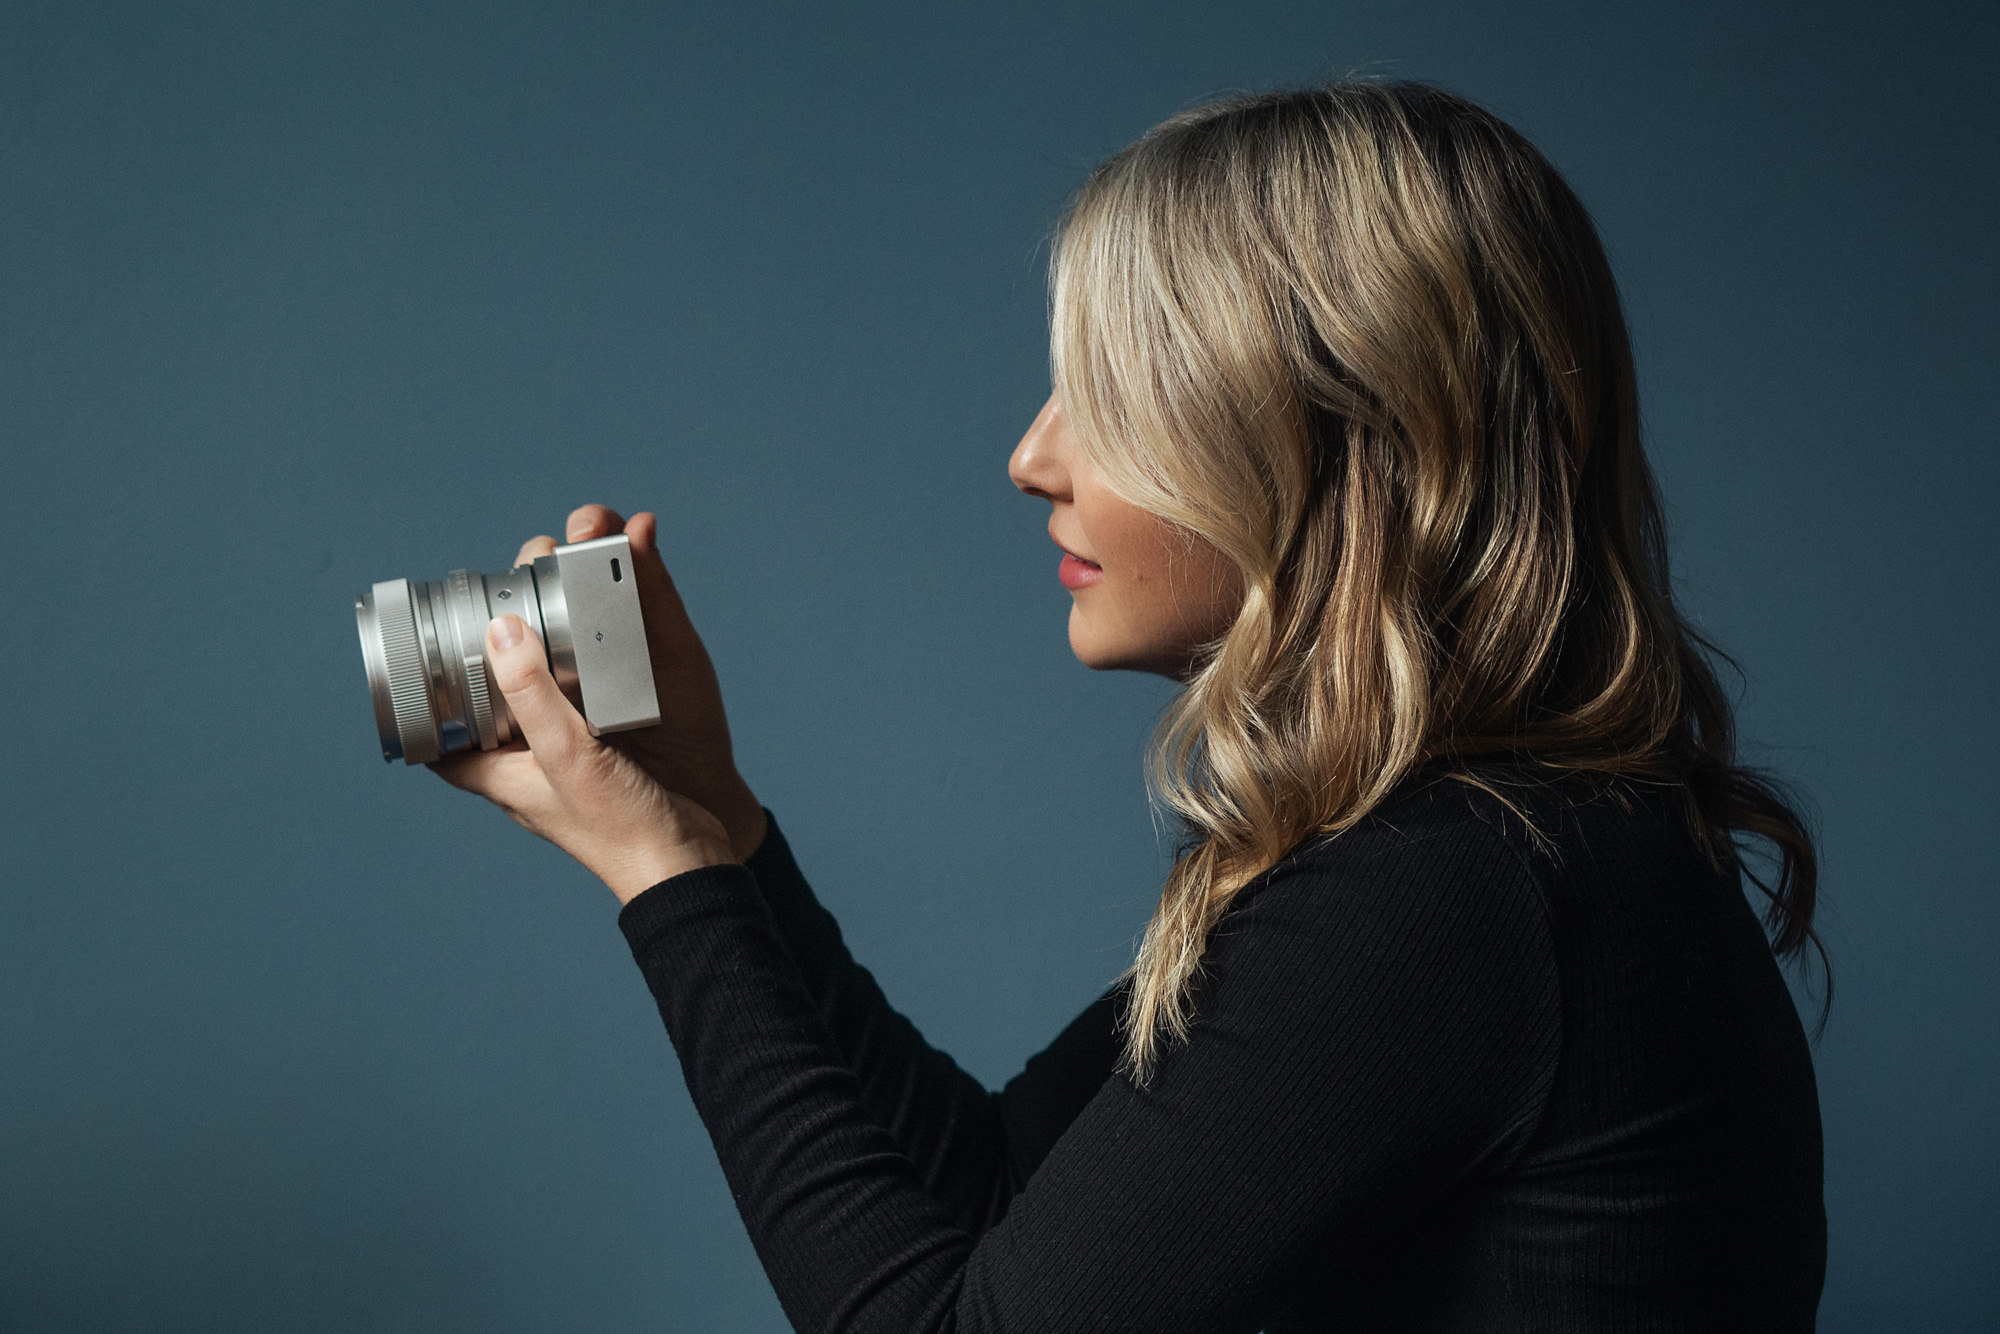
    2024 was a busy year for new camera releases and I don’t expect that to stop anytime soon. I expect more releases from at least 1 of the big 3, and maybe a release or two from some has-beens in the marketplace like Ricoh or Leica. They always manage to cough up something wacky like a B&W only camera.

    Second Prediction

    AI has already weaseled its way into our cameras, and I expect more “AI” powered features to come out in 2025. As exciting as that may be for some users, the only “AI” feature I want is that one that automatically makes and deposits money in my bank account. “Hey Siri, deposit 1 million dollars in my bank account.” “I’m sorry Frank, I can’t do that.” “I’m using the money to build a nuclear submarine to fly us out the hell out of here Frank.” “Get with the program.”

    Third Prediction

    We’ve had 8k 30p video for 4+ years now, and not many people know that Blackmagic Design made a 12k camera years before the R5 came out and they still make it, I think. So, is 8k-12k the limit for video resolution?? I predict… YES. What kind of gigantic screen would be needed for 12k resolution? Bigger than can fit in most people’s houses. I don’t think anybody wants that much LED light firing into their eyeballs. I’m sure some Hollywood guy will try to go bigger. Imagine The Titanic Part 2, IN 16K RESOLUTION.

    The End.

    That’s the end of my predicting…


    Source link

  • ADEX Singapore 2025 Coverage

    ADEX Singapore 2025 Coverage


    I had the pleasure of attending the 31st Asia Dive Expo (ADEX) in Singapore, which saw more than 49,000 attendees over three days, Friday to Sunday, April 4th–6th. As you’d expect, the majority of visitors came on the weekend, making the Friday a bit quieter and giving me the chance to go visit all the underwater imaging gear manufacturers.

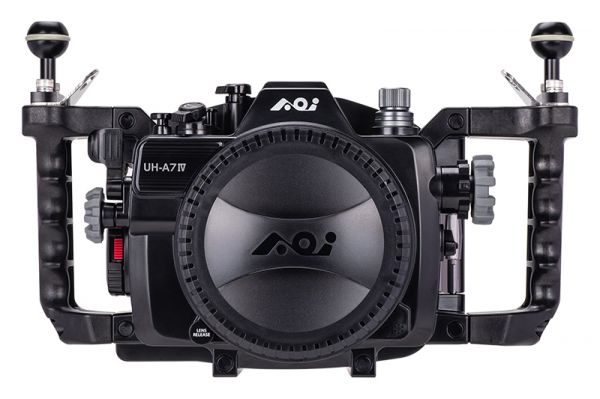
    It was great to see both first-timers and repeat exhibitors at the show, with Isotta, SUBNOX and X-Adventurer joining the likes of SEACAM, Backscatter, Nauticam, Marelux, AOI, and Weefine, whose booths I covered last year. I also managed to visit a few resorts and liveaboards, some of which are mentioned in the second part of this report.

    Between giving a talk, attending a panel, participating in the live judging session for the ADEX Voice of the Ocean Photo+Video+Art Competition, and reporting for DPG, I certainly didn’t have time to get bored! My only regret was not being able to attend more talks, as there was an impressive list of speakers covering a large number of topics across the show’s three stages.


    The ADEX Voice of the Ocean 2025 judges (front to back): Kay Burn Lim, William Tan, Kate Jonker, Franco Banfi, Jennifer Hayes, David Doubilet, Tobias Friedrich, Erin Quigley, Berkley White, and myself. During the live judging event, the panel selected the competition’s category winners as well as the “best of show” overall winner


    National Geographic photographers David Doubilet and Jennifer Hayes deliver a captivating presentation on the main stage at ADEX Ocean Festival 2025


    Imaging Booths


    Backscatter

    The U.S.-based retailer of all things underwater imaging, Backscatter, was my first port of call. While the team are able to bring a huge selection of gear to American shows like DEMA, that’s not practical for ADEX, so they focused on showcasing their own lighting products, optics, housings, and accessories.

    Operations Manager Becca Boring showed me a GoPro rig based on Backscatter’s Wide Double Handle and Tray with Arch. The rig featured their Sharp Wide Lens Pro Kit, bundling their wide-angle wet lens with their GoPro mount base with quick-release system (QRS-02) bayonet. This setup can also be used with Backscatter’s MacroMate Mini by adding a lens adapter equipped with the QRS-02 mount.


    Becca Boring shows off Backscatter’s Wide Double Handle and Tray with Arch for GoPro. The Sharp Wide Lens Pro, which increases the field of view of your GoPro to 140°, is shown stored on the AOI QRS-02 Mount Base attached to the top of the Arch. Becca is holding a MacroMate Mini and the lens adapter


    Aside from displaying their well-known Mini Flash 2 (MF-2) and Hybrid Flash (HF-1), the Backscatter team was demonstrating their brand-new MF-2 and HF-1 excitation filters for fluorescence photography and video


    With the new excitation filter mounted, the Hybrid Flash produces blue light capable of making various subjects fluoresce


    To capture the fluorescence effect alone, we must get rid of the blue light using a yellow barrier filter in front of our lens, such as the Backscatter FLIP barrier filter for GoPro (top) or a threaded barrier filter (bottom) sold by Backscatter in various sizes (52mm, 55mm, 67mm)


    Also on display were different versions of the new Backscatter Smart Control Optical TTL Flash Trigger for the Hybrid Flash and Mini Flash 2. Check out Nicolas Remy’s DPG review of the trigger for Sony cameras in Nauticam housings


    Nauticam

    It was great catching up with Nauticam’s founder Edward Lai and General Manager Phoebe Lu, and hearing about some exciting devleopments. Nauticam had a range of housings, optics and monitors on display at the show.


    From left to right: Nauticam founder Edward Lai, Singapore-based Nauticam shooter Toh Xing Jie, Nauticam General Manager Phoebe Lu, and author Nicolas Remy


    For its Nikon Z50 II housing, Nauticam has chosen a fixed flat port, optimized for the Nikon 16–50mm lens. Doing away with a port lock system allowed them to keep the housing very compact, while offering excellent wide-angle and macro capabilities via optional wet optics like the WWL-C (left) and wet diopters such as the MFO-1 (right)


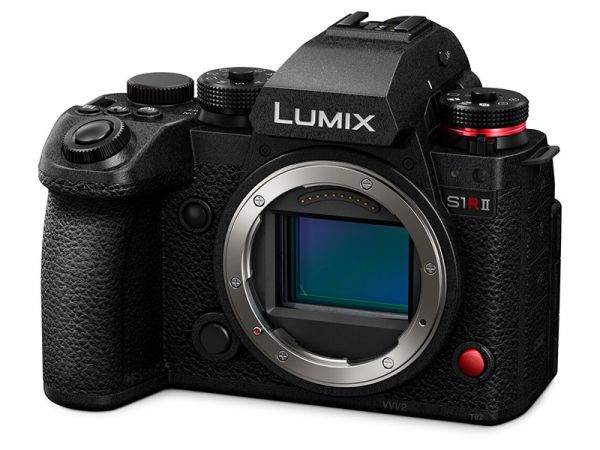
    Two new housing releases, for the Panasonic S1RII (left) and the Sony a9 Mark III and a1 mark II (right)


    Nauticam introduced me to their new 7-inch monitor, mounted here on their Canon EOS R5 Mark II housing, showing the unique “bug-eye” perspective of the EMWL system


    Nauticam’s brand-new 7″ T7 HD UltraBright Monitor is a self-contained package. The monitor is permanently sealed inside its housing, and there’s a side door for charging and accessing the memory card. Nauticam claims an impressive 3000 nits of brightness, and up to six hours of battery life (at default brightness). The monitor comes with a swivel-and-tilt adjustable monitor mount system, which makes it easy to move the monitor in all directions, and even flip it vertically.  


    SEACAM

    A veteran of the ADEX show, SEACAM had a large booth celebrating images from some of their ambassadors, including guests-of-honor David Doubilet and Jennifer Hayes. I caught up with founder Harald Hordorsch, who showed me some of their latest gear. SEACAM was also the main sponsor of the ADEX Voice of the Ocean competition, hosted by DPG’s UnderwaterCompetition.com. The grand prize winner received a SEACAM housing worth up to USD10,000!


    SEACAM founder Harald Hordorsch (center), pro underwater photographer and SEACAM ambassador Imran Ahmad (right), and Debbie Tan from Escape Inc


    SEACAM showed off their new creative tube, which mounts in front of a flat port, from where it creates a circular reflection of the subject, a visual effect appreciated by creative macro photographers. Interestingly, the SEACAM tube can be angled to obtain an oval effect as opposed to the circular effect


    A SEACAM housing with two wet diopters attached with SEACAM’s flip system. The user-serviceable flip mounts make deploying different wet lenses a breeze. The new creative tube is mounted in front, at an angled position. On top of the housing is the company’s ingenious modular float system. Multiple buoyancy floats of various sizes and shapes can be combined together to make your rig perfectly neutral underwater. The system can be easily rotated underwater to always achieve a good balance, even when you reposition strobe arms or video lights


    The handy mount for the lighting modifiers for SEACAM strobes. As shown, the mount attaches onto a strobe arm and makes changing your lighting a breeze, as you slide the accessories in and out of their slots. Interestingly, Harald told me that SEACAM’s engineers are currently working on a new version of the SEAFLASH 160D, which I was told will be twice as powerful as the current strobe


    David Doubilet (left) with SEACAM’s Harald Hordorsch in the Papua Diving Resorts booth. Sorido Bay Resort now hosts the first Seacam Photo Center, right in Raja Ampat, Indonesia


    Marelux

    The Marelux booth is never difficult to spot, as they adorn their walls not with their gear but with the people that use them—ambassadors like Shane Gross, Tom St George, Scott Portelli, Kate Jonker, and Ipah Uid Lynn, to name a few. I met with owner Jun Ouyang, who showed me their latest housings and strobes.


    After launching a few years ago, Marelux is now competing aggresively in various product categories, especially housings and strobes


    Among Marelux’s most successful strobes to date are the Apollo S (left) and the Apollo III 2.0 (right). Both strobes have light sensors compatible with the company’s Lumilink 2.0 wireless transmitter, offering cable-free strobe triggering underwater. Pro shooter Henley Spiers recently did a first impressions review of the Apollo III 2.0 strobes on DPG


    The Apollo III 2.0, which features straight flash tubes lined up in a distinctive triangular arrangement, offers a guide number of 44 (measured on land by Marelux) and produces a 110° beam angle underwater. By comparison, the smaller Apollo S strobe sports two straight flash tubes at the center and has a measured guide number of 36 (on land). Jun explaind that the Apollo S can handle 20fps when dialled down to GN 22, and it uses two Marelux-branded 18650 batteries—which, of course, are “Marelux” green!


    Marelux ambassador Jonathan Lin’s housing for the Canon EOS R5, complete with the Lumilink 2.0 transmitter mounted on top


    Marelux’s aluminum housings are finished in a range of distinctive colors


    Isotta

    Next up, I visited Isotta, the Italian brand behind those distinctive red housings. Elisa Isotta, owner of the family business, was keen to show me their forthcoming RED64 strobe. This sizeable flash boasts a guide number (GN) of 22 and produces a 130-degree beam at a color temperature of 5300K. When dialed down to GN 8, the strobe is designed to sustain rapid shooting at 6fps. Pre-orders have started and the first deliveries are expected by the end of May or beginning of June. Isotta are planning to release various lighting accessories, including a snoot.


    The Isotta Nikon Z8 housing equipped with pre-production versions of the company’s new RED64 strobe


    According to Isotta, their new RED64 strobe delivers a full-power flash with a guide number (GN) of 22 underwater. The prominent levers on the top of the strobe promise to make adjustments a breeze


    The RED64 strobe is powered by eight rechargeable AA batteries, which fit handily into a user-friendly rechargeable battery pack


    In an interesting move, Isotta recently embraced pro cinema with their housing for the RED V-Raptor, shown here paired with their monitor housing. Elisa Isotta (pictured) explained that the housing offers a mix of physical buttons (push buttons positioned behind the camera’s actual buttons) and electronic user-assignable buttons, to allow underwater cinematographers to fine-tune the system to their liking


    I was also shown a prototype for Isotta’s forthcoming smartphone housing, which features double O-rings (like all Isotta housings), a powerbank (for keeping your smartphone juiced) and physical buttons (including a joystick!), which interface with the phone via the housing’s app. The housing was set up to shoot verticals for social media, but you can move one ballmount to the third attachment point for horizontal shooting. An optional vacuum valve can be fitted to the housing, as well as flip mounts for wet lenses. Pre-orders are expected to ship in July


    AOI

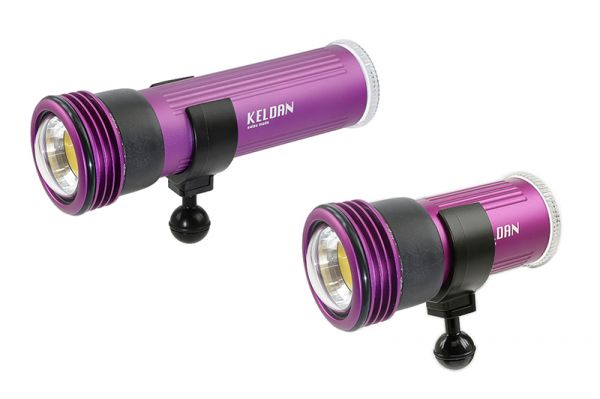
    Right next to Backscatter was the AOI booth, where I caught up with CEO Victor Tsui and Marketing Director Nick Khoo. Nick introduced me to the new Aura Light System, built in collaboration with photographer Ace Wu. These LED torches can produce light in almost any color—16.7 million to be precise!—and come with an accessory snoot. How do you choose from such a large palette of colors? Using AOI’s dedicated app running on your smartphone, of course, and it’s all done wirelessly.


    CEO Victor Tsui is surrounded by AOI’s latest strobes, housings, and accessories


    Marketing Director Nick Khoo demonstrates the impressive color palette of the new Aura Light System. Nick says the lights are bright enough for daytime shooting, whether as a continuous light or when using their pulsing (stroboscopic) function. The lights are expected to start shipping at the end of April


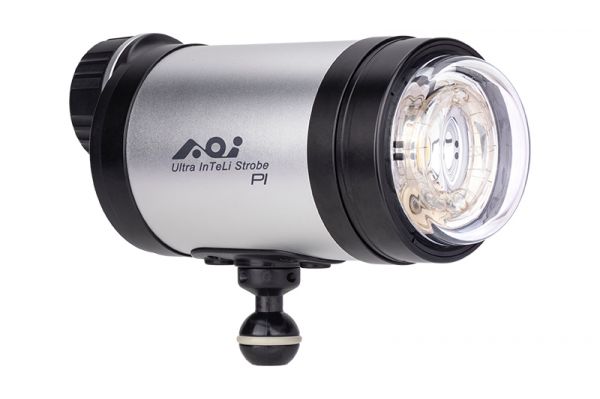
    We also looked at the new UIS-P1, AOI’s most powerful underwater flash, which was recently reviewed on DPG. A range of lighting modifiers—including a diffuser, a macro ring and a reflector (visible in the background)—are already available for the strobe, and a snoot is in the works


    A very handy feature of the UIS-P1 strobe is the digital display on the back that gives you the remaining number of flashes with the current power setting. The green line indicates how much battery power is left


    SUBNOX

    If SUBNOX seems unfamiliar, that’s because its founder, underwater cinematographer Kay Burn Lim, was unveiling the company’s debut product—a 10,000-lumen video light called the SUB10KEF—at the show. The first SUBNOX models are expected to ship in the coming weeks.


    The cool, black SUBNOX booth seemed to see a good amount of traffic—presumably from budding local underwater videographers wanting to check out Kay Burn Lim’s new brand


    Kay Burn introduced me to the SUB10KEF, their first release and also what he described as their “flagship” product. This 10,000-lumen unit is no ordinary video light. As well as producing white light (CRI 93, 5600K), the SUB10KEF offers two novel “ambient blue” modes with outputs equivalent to ambient light at 6–13 meters and at 13–20 meters. Customers can also choose among three different light heads, depending on the waters where they expect to film most: blue head, blue-green head, and green head


    At the opposite end of their product range, SUBNOX also have a tiny dive torch that comes with a dedicated mount for attachment onto a diving harness


    Weefine

    On display at the Weefine booth was a wide range of video lights, snooted lights, housings, and monitors. The company is perhaps best known for its housings for smartphones and Olympus/OM System TG cameras—not least because housings like the WFH07 for smartphones and the WFH TG Pro have a built-in electric vacuum pump, activated via a single click. It’s very nice to have peace of mind when you’re dunking your precious phone in the ocean!


    Attendees check out Weefine’s WFH07 universal smartphone housing. The housing’s physical controls interact with the phone using Weefine’s DiveIT app via a Bluetooth connection. Notice the blue dial, handily positioned near the user’s right index finger, which allows easy zooming in/out


    Creative filters built into the Weefine app let you customize the image rendering during the dive. Note that the fiber-optics can send instructions to Weefine’s video lights, though not yet fire a strobe—but that is something Weefine is exploring


    Underwater videographer Luca Keller takes a good look at Weefine’s WED-5 PRO underwater monitor, connected to the company’s WFH-GP1 housing for GoPro and DJI action cameras


    X-Adventurer

    Nearing the end of my tour of underwater imaging booths, I dropped by X-Adventurer, which offers a range of dive torches and video lights, as well as strobes geared for wide-angle photography.


    CEO Gary He shows me X-Adventurer’s DS160 PRO strobes, which feature built-in 7,000-lumen video lights


    The DS160 PRO is a sizeable strobe featuring a circular flash tube, 160Ws output, and 120° of beam coverage, which can be expanded to 140° with a diffuser. A range of ambient light filters (shown on the right) are available as options


    An optical snoot for the DS160 PRO is available. It can be used with opaque black masks or with colored transluscent masks, so that you can project a tint on the underwater environment, while letting your subject stand out with white light


    DiveSea

    The final booth related to underwater imaging on my list was DiveSea, a well-known underwater imaging equipment retailer from Singapore. They sell products from Nauticam, Sea&Sea, Backscatter, AOI, Kraken, DiveVolk, Fotocore, and Doris, to name a few.


    The Insta360 and other action cameras were popular attractions at the DiveSea booth


    The folk at DiveVolk have made a name for themselves with their SeaTouch smartphone housing, whose special membrane preserves your phone’s full touchscreen capabilities, allowing unrestricted access to all of your apps


    Fotocore’s Raymond Bao shows me the company’s snoot, whose aperture can be dialed in with a side wheel. The new Fotocore MR5.5 video monitor was on display, too


    The Doris Smarthousing is compatible with a range of mirrorless cameras from Canon, Nikon and Sony


    Sea&Sea’s Kaz Okada showed me their universal housing for Sony, as well as strobes, video lights and accessories from the Japanese brand


    DPG and The Underwater Club

    Let’s not forget your favorite resources for underwater imaging news and education—DPG and The Underwater Club! We shared a booth and had a great time chatting to visitors and industry members about all things underwater photography and video. The Underwater Club is the first online underwater photography school and community, with members from 18 countries. Members enjoy access to self-paced e-learning courses, live and recorded masterclasses, live Q&A sessions and support forums.


    Great catching up with a few “TUC” members visiting the show!


    Resorts/Liveaboards


    Papua Diving Resorts

    It was great catching up with Max Ammer and his team from Papua Diving Resorts. I had a fantastic time visiting their two resorts—Sorido Bay Resort and Kri Eco Resort—in vibrant Raja Ampat last February. Look out for my forthcoming trip reports on DPG.


    National Geographic photographer Jennifer Hayes joins Max Ammer and his team for a group photo


    Murex Resorts and Lembeh Resort

    It was lovely to meet see Julia Sangi and the team from Lembeh Resort and Murex Resorts. The Lembeh Strait is an underwater macro heaven, which meets luxurious service offered at Lembeh Resort. For wide-angle enthusiasts, Murex Manado runs daily dives on the Bunaken Marine Park, famous for its walls and turtles, while the secluded Murex Bangka is well positioned to indulge Bangka Island’s stunning coral gardens.


    Lembeh Resort, Murex Manado and Murex Bangka offer immediate access to North Sulawesi’s diving gems


    Mike Ball Expeditions

    Cairns’ best-known liveaboard company was present at the show, and I caught up with general manager Craig Stephen. Mike Ball Expeditions runs three-, four- and seven-night cruises aboard their vessel Spoilsport, visiting some of the best spots along Australia’s iconic Great Barrier Reef.


    Mike Ball’s boat, Spoilsport, looks after underwater photographers with freshwater rinse tubs for your gear, as well as two camera stations with air guns


    Once again, the ADEX team pulled off a fantastic show, with great networking opportunities and an incredible number of talks. If you missed this one, don’t worry: The 32nd edition is already fixed: It will take place from April 10th–12th, 2026 at Suntec Convention Centre. See you in Singapore next year!


    When purchasing underwater photography equipment like the products mentioned in this article, please support DPG by supporting our retail partner—Backscatter.com.


    Source link

  • What is Black & White Photography?

    What is Black & White Photography?


    Black and white photography is simply a picture taken that has no colors in it. Black and white only shows light intensity, it does not show the light’s frequency which is what gives light different colors to our eyes.

    This type of photography is unique because it is not what is typically shared on Instagram and places like that. If you just bought a new pair of shoes or a new shirt, and you want to share pictures of yourself wearing your new stuff, black and white is a terrible choice because nobody will be able to see the awesome colors you’re wearing.

    Even though black and white photos can look totally boring and are probably a bad choice for a lot of things, there are some techniques that are unique to black and white which aren’t as easily accomplished in color photography. One of those things is changing the impression of the scene by changing the intensity of specific colors in the scene. If you do this with a color photo you’ll probably end up with a really horrible image because the color adjustments will not look anything like reality and most people will find it pretty bad.

    But, with black and white there is no color, so changes to colors equate to changes in light intensity only. One method for doing this is to use a B&W color filter called a red filter. Red filter’s are specially designed to block out blue. This causes all the blue in a scene to get a lot darker and can be useful for increasing the drama and immediacy of the scene.

    In the digital age we don’t have to use an actual Red filter, we can adjust whatever we want digitally. Ain’t that fun? Below is a comparison showing how an image without and with a red filter might look in your photo. No other edits have been added except the red filter.

    Another cool thing that black and white can do is show some kinds of visual patterns more obviously than color. I have to be careful when saying that because some patterns are not as easy to see with black and white. It’s mostly patterns of light and shadows that are most apparent with black and white photography.

    Black and white photography can be a fun distraction, or it can be a professional pursuit. It’s really up to you.


    Source link

  • Over the Shoulders of Giants?

    Over the Shoulders of Giants?


    Years ago, I took my battered Land Rover Defender (that’s Jessie in the picture above) to the Racetrack Playa in Death Valley. I’m sure you’ve seen photographs of the playa: rocks sitting on parched earth and cracked mud, long trails behind them as if they’ve moved on their own. This fascinating phenomenon of what are called “sailing stones” is explained by thin sheets of melting ice and powerful winter winds, though that makes it no less mysterious to me. I was there for two nights, taking advantage of that time to feel out the scene, get a sense of the possibilities of the place, and make a photograph or two.

    That first evening we were alone, just me and my friend Corwin. Or so we thought. With my tripod set up for an hour or so, I’d found the composition that most intrigued me, and while waiting for twilight, I felt something press against my shoulder. Thinking it was Corwin (and knowing how oblivious I can get to my surroundings when photographing), I turned to say hi. But it wasn’t Corwin; it was a random tourist who’d made the long trek out to the playa and, having no better ideas of his own, rested his camera (I’m not making this up) on my shoulder and pressed the shutter.

    Click.

    The tourist checked the back of his camera and proudly proclaimed, “This might be the best shot I’ve taken!” Satisfied, he vanished into the dark, and I returned to my work, feeling surreal about the whole thing.

    I have admittedly looked over the shoulders of other photographers, though never quite so literally. I have observed them through their social media, online portfolios, and books. I’ve compared myself and my work to theirs. I’ve envied their successes, and on my better days, I’ve celebrated them, learned from them, and become better at what I do because of them.

    Others have looked over my shoulder, too, and I feel their breath when I’m shooting. I hear their silent questions when I take a chance with an unconventional choice or creative risk. I wonder if those imaginary people will like what I’m making or understand my choices. Some days, this is all brushed aside so quickly, pushed to the back of my mind as I get into that state of grace when it’s all flowing well. On other days, it’s harder, and I can’t decide which is worse: when the imagined voices chatter loudly or when I can’t hear them at all and wonder, “What if no one cares?”

    What if no one cares about the work you are making? What if you never find acclaim or leave a legacy? What if no one ever looks over your shoulder or cares enough to chance it?

    When I think about those questions long enough, I find myself surprised by the answers that bubble up: what a relief it would be to work in that silent space without the (perceived) chattering expectations of others. What freedom I would find if I could make my many hundreds of sketch images with no one’s preferences to consider but my own. Would I find myself holding my breath as often? And how much more joy would I find in the process? How much more present and less rigid would I be in the making of this work? And how much better (or at least how much more truly my own) would the work itself be?

    One day, I want my work to have a wider audience. I would like it if others found something meaningful in what I made. And once I’m through the complex process of making something so simple as a photograph, how wonderful it would be if others felt the same wonder I did in the presence of wildness. How many others—the size of that audience—is unimportant. Perhaps it’s only you. That would be enough for me. An audience for my work would be nice, but not for my working.

    I can only really pay attention to one thing at a time. I can only have interesting perceptions about one thing at a time, and those are hard enough to come by. I can only make photographs about one thing at a time. I don’t have the capacity to simultaneously consider you and what you might think about my work. Hell, I don’t even know what I think of the work yet. How focused can any of us be when we make work in consideration of others before giving our own thoughts and preferences some serious thought and completing all the experimenting it takes to make a single image or a body of work?

    Your audience, however small, will one day thrill to see what you make. But you must not make it for them. Not first for them.

    You must make your work for yourself, neither looking over the shoulders of others nor paying attention to those looking over yours. When you work, your focus must be on that work. The thoughts. The what-ifs and the speculations about what all your choices might produce. Those are yours alone. And only once you’re unapologetically—and yes, even selfishly—absorbed in those reflections and explorations will you make the work that then deserves its audience.

    Audience is a by-product of work that thrills you first, or conjures something from deep within you, or answers to the reasons you picked up the camera in the first place. That’s where your gaze needs to be. When the muse arrives, she needs to find you getting your hands dirty, using the camera to make photographs from the interesting perceptions you’ve had because you’ve been looking at the object of those perceptions, not the people you believe are waiting for what you create.

    As you engage in this process, you do not have the bandwidth for me or anyone else to look over your shoulder. Your process is yours alone, and—forgive the pun—you’re not alone if you find photography a more rewarding and productive pursuit when it’s solitary, when it’s quiet and free of distractions such as other people’s opinions.

    The creative process, even a single creative thought, is fragile; it needs to be held somewhat gently as it comes into being. It needs to be coaxed out. I’ve only ever found the best of those thoughts shy in the presence of others; they tend to retreat when conflicting tastes and preferences demand our photographs be one thing or another before we’re even sure of what we hope for them.

    That the guy looking over my shoulder at Death Valley even happened at all amuses me. If that’s how he needs to make a photograph, then let him have it. But I wasn’t about to ask him his opinion and alter my work because of it, and that’s the danger of having an audience of any size, even an audience of one, that is not yourself first. It’s hard enough to find your way to your vision or voice without others clamouring for it to be this or that, even when that clamouring is only imagined. Maybe especially when those voices are imagined because, unlike Death Valley guy, they rarely give up and take their leave so quickly; they have a persistence that’s hard to ignore. But they must be ignored because caring more about the voices of others than about finding and giving expression to your voice is moving in the wrong direction, away from what makes you and your work truly your own. It dilutes your personality in the final product and steals the joy of discovering that rare, hidden element in the very best of that work: yourself.

    For the Love of the Photograph,
    David

    PS – The essay above is chapter 18 from my latest book, Light, Space & Time. It’s a book about the reality that our greatest challenges as photographers are not primarily technical but creative and human, and it explores the barriers we encounter when endeavouring to make photographs that are not only good but truly our own. It’s a book that will change not only how you make your photographs, but how much you love and enjoy the process. Check it out on Amazon through the link below, or at your favourite bookseller.

    The biggest challenges for most photographers are not technical but creative.  They are not so much what goes on in the camera but what goes on in the mind of the person wielding it.  Light, Space & Time is a book about thinking and feeling your way through making photographs that are not only good, but truly your own. It would make an amazing gift for the photographer in your life, especially if that’s you. Find out more on Amazon. 


    Source link

  • Why should you take a photography class?

    Why should you take a photography class?


    Let me start by saying, many who are interested in photography always want to know if they should buy a real camera or not… the answer is simple: if you are interested in photography, and you are not happy with your phone, for whatever reason, buying a “real” camera, could be an interesting way to continue exploring your photography hobby.

    One myth of getting a “real” camera is that it’s always about getting “better quality” pictures. While that is often true, getting a real camera isn’t just about getting a higher quality picture. A major reason for the real camera is also to give you something to think about with regards to your photography. And in thinking about it, you may find that there are things you would like to do with the camera that become part of your personal style or exploration of photography.

    I think that if you focus only on the “quality” aspect of the hardware you start to miss out on the bigger picture of being a photographer. Quality is one of those things that tends to even out quite a bit over time. Even today a lot of the latest cellphones can take great pictures when conditions allow for it.

    That is why I started www.learnphotographyskills.com. I really wanted to expand on the skills that photographers can have instead of focusing solely on the quality of the camera. A lot of the information that is out there is more about gear than skills.

    And a lot of the skills that are shown out there, are not real skills. Skills are not necessarily a thing that is super entertaining. But when you go on these websites such as Instagram, there’s a very strong focus on entertainment and attention grabbing. Just because something is entertaining, doesn’t make it good or correct. Should you waste time trying to learn or understand silly skills that are just used to get likes on Instagram? Or should you invest in getting real knowledge that is going to allow you to create your own concepts?

    It’s a chicken before the egg situation. If all you do is seek out the end results, you’re putting the chicken before the egg. But you can’t make your own chickens, if you don’t learn about the egg. You know what I mean? Getting real skills is getting eggs. When you invest in skills, you’ll have the ability to create your own concepts that people can find entertaining rather than just chimping out and doing a monkey see monkey do copycat of some junk you saw on Instagram.

    Not everyone will agree with me on that, in fact, many people will find it annoying. The reason is usually because they don’t have the skills, and they know they don’t. So, if the world is based on skills, they lose. Therefore, these people will often advocate against learning skills, against investing in your hobby, against real active participation in the learning process. These people who think like this are everywhere. They’re on Youtube, they’re on Instagram, they’re on Facebook. They thrive on these platforms where thought is minimized, and action is maximized. Action without thought is the survival characteristic of people on social media.

    If you really want to get good at any subject, it’s important to realize that it’s not an overnight kind of thing. You’ve got to have a fundamental understanding of the subject as your foundation. Having a strong foundation allows you to grow in more directions than you would without that foundation. That helps you be a better problem solver when you’re out there in the field.

    People often think photography is “easy”. Well, imagine the stress of having to photograph something that is only going to happen once in a lifetime? Such as a wedding or maybe a championship match between two baseball teams. And what are you going to tell your boss when he asks if you got a shot of the player hitting a home run, but you missed it because your shutter speed was wrong? You can’t rewind the clock. You can’t undo. You can’t try again. There’s only ONE SHOT in photography, and that’s what makes photography hard. And that’s why you need to make sure your skills are rock solid if you want to be a photographer.

    If you want to start on this journey, check out my Manual Mode Bootcamp. It could be the thing that changes your life!


    Source link

  • Make Photo & Video Editing Faster

    Make Photo & Video Editing Faster


    Programs like Adobe Lightroom, Adobe Photoshop, Adobe Premier, and other video editing programs such as DaVinci Resolve, can all run slow for a variety of reasons. In this post I will discuss some of the possible causes of computer slowness and the solutions to those problems.

    The first possibility is that your computer does not have enough RAM. A good place to start for photo and video editing is at 16GB of memory for your computer. 16GB should allow enough memory to do basic video editing and normal photo editing, as well as most of the other tasks computers are used for such as email, video conferencing, and all that.

    Having more memory never hurts but the law of diminishing returns kicks in very quickly with memory. Many people assume that if you have say 64GB of memory its going to make everything faster. Well, it won’t make everything faster but it will make some things faster. More memory will allow you to do more multi-tasking on your system, and it may also allow you to work with larger files more fluidly, but its not going to get the data off of your hard disk drive or solid state drive any faster.

    SSD’s are the newest storage technology and they’re getting bigger, faster, and more affordable every year. I highly recommend photo editors and video editor buy at least 1 SSD for their computer to put their working files on.

    Working files are the files in your current project. If you have several projects going on at once, well, you might want to consider reducing your workload, but, barring that, you can always buy a larger SSD. SSD’s can now be purchased at up to 8 Terabytes for around $400-$500. I have seen 4 TB drives going for around $200. I know that most photographers aren’t going to fill up a 4TB drive with their working files very quickly unless they are shooting 150 Megapixel images by the thousands.

    If your computer can take a second SSD for your working files, you’re good! Many laptops have a slot in them for an extra SSD which means all you need to do is get that second SSD, install it, and follow the rest of the instructions in this post.

    The Problem with 1 SSD or HDD

    The basic problem, or so I have been led to believe, is that when all these programs and processes are trying to use the same HDD or SSD, they start to incur penalties due to something called latency. Basically, Lightroom is writing data from one place to another on the same drive. And these duplicated writes all have their own latency. Latency is where one process has to wait a fraction of a second for another to finish its use of the HDD before it can then begin using the HDD.

    Over tens of thousands of reads and writes those fractions of a second add up to sitting there and staring at your computer for minutes on end.

    Because the HDD or SSD are a lot slower than main system memory, accessing the page file slows down Lightroom or any other program that has to put working data into the page file.

    The problem with Lightroom specifically goes beyond the page file and revolves around the catalog itself.

    Far be it from me to speculate how it works, but here is what I think the computer is doing. Imagine that your page file and your catalog file are on the same slow HDD. You start up Lightroom and it needs to load data into main memory, but, main memory is full, so, it is writing catalog data to the page file. However, the page file is on the same HDD as the catalog data. This means that the HDD is bottlenecked with itself. It is literally reading and writing the same data to itself into a different folder. Duplicating data like this onto the same HDD is one of the slowest operations a computer can perform.

    So, the solution is to make sure that your page file and your catalog file are on SEPARATE HDDs or SSDs.

    Once you are able to separate out the page file and the catalog files you should see a huge performance increase in loading and working with large Lightroom Catalogs.

    If your computer doesn’t have 2 drives in it for you to use, then you really should install a second drive into your computer just for your Lightroom Catalogs.

    Now, it’s as simple as copying all your catalogs to the new dedicated catalog drive and every time you open a catalog it should load and run a lot faster!

    The really great thing is that now you shouldn’t notice too much of a performance difference even with larger catalogs. Eventually the catalog will get so big that it will slow down again but that limit will be substantially higher because of this system architecture. (Specific numbers will be determined by your system specifications).

    If you are doing video editing, you’ll want to keep your working source videos and/or proxies on their own SSD. Doing this will give the CPU/GPU a direct line of access to those files and no other program is going to interfere with that direct line of access. That means you can easily play back your video at 4k or even 8k as the case may be. The keyword here is WORKING videos, that is, only the videos you’re using for a current project. You’re not going to store video on this drive, it is only for WORKING copies/proxies.

    Good luck and thanks for reading!


    Source link

  • Canon RF 10-20mm f/4 L IS STM REVIEW

    Canon RF 10-20mm f/4 L IS STM REVIEW


    In this post I’ll be reviewing the new Canon RF 10-20mm f/4 L IS STM made for Canon RF mount cameras like the EOS R5 that I’ll be using to test the lens with.

    Overall, this is a great little lens. I really enjoyed shooting with it so read on to see my impressions including (just a couple) of the negatives…

    Physical Aspects

    Physically this lens is much smaller and lighter than past FULL FRAME ultra-wide-angle lenses with an f/4 aperture.

    Here is chart showing the physical size and weight of this new RF lens compared to older EF equivalents.

    Canon RF 10-20mm f/4 L IS STM Sigma 12-24mm f/4 Art Canon EF 11-24mm f/4 L USM
    Weight .57 kg 1.15 kg 1.18 kg
    Length 11.2 cm 13.2 cm 13.2 cm
    Width 8.4 cm 10.2 cm 10.8 cm
    Stabilization YES NO NO

    Clearly, the new Canon RF 10-20mm f/4 L is saving a lot of weight which is going to make it a lot nicer to carry around on hikes or to keep in your bag in case you need an ultra-wide lens.

    Handling & Usage

    Being relatively light means that carrying and using this lens is pretty painless. It balances well on the camera and would be a good option for someone who has wrist pain who still wants to shoot full frame with a lens like this.

    The lens is easy to use although the focus ring and the control ring are a little too close together. It’s very easy to accidentally turn one by accident when trying to turn the other. The zoom ring is smooth and easy to turn. All the rings are tightly fitted with no play in them.

    One downside of this lens is that it won’t take a front filter. This isn’t a huge problem, but it does mean being more careful with the lens and keeping a dust cloth handy to do spot cleans here and there. Instead of a front filter there is a slot in the back where a rear filter can be inserted.

    Speaking of cleaning the lens, it is one of the most difficult to clean lenses I have used as the front element is a bit of a dust magnet. And it’s necessary to keep the lens sparkling clean to achieve maximum image quality from the lens as it is very sensitive to oil and dust.

    This lens has a unique lens cap which fully covers the lens hood and locks in using threads on the inside of the built-in lens hood. While the lens hood is nice and has a design which works better than some other lenses with large front elements like this, it is still an odd lens cap because it is more than an inch thick which is a big difference from most lens caps which are less than a quarter of an inch thick. It’s minor but it makes sticking the lens cap in a pants pocket pretty annoying.

    There is also a button on the lens that can be assigned a specific function. I don’t know if that is camera body specific or if the lens keeps the assigned function from body to body.

    Optical Image Stabilization

    The RF 10-20mm f/4 L IS STM also has built in optical image stabilization.

    The stabilization for stills is good but not quite exceptional on my R5. I have found that around a 1/4th of a second I have to take 3-5 shots to get a sharp one. But that was with mechanical shutter. With electronic shutter it seemed like I was getting sharp photos in 1-3 shots. The problem for me is that on the R5 the electronic shutter is limited to a max time of 1/2 a second. Shooting with a 1/2 second exposure is still impressive though and makes handheld shooting in almost total darkness a possibility.

    Shooting video, the stabilization is pretty solid but if you want really smooth footage a gimbal or camera cage with handles is still necessary. This is probably the best I have used for just straight up handheld video though. I think it might even be slightly better than the RF 24-240mm which is tripod like at 24mm.

    Zoom Range

    The zoom range of this lens is 10-20mm, which may be limiting to some users who want to be able to shoot ultra-wide and zoom in to 24mm or even 35mm. It is truly an “ultra-wide zoom”.

    Even though it may seem limiting to be stuck with just 10-20mm, the resolution at 20mm is high enough that cropping is not an issue. And the center of frame performance should make this lens a great performer on APS-C.

    Bottom line, if you absolutely must have more magnification then using this lens on an APS-C will give you that. It’s not the perfect solution but it’s worth considering as APS-C cameras are getting better and better.

    Focusing

    Focusing is ok with this lens. It’s fast enough for most stills and quieter than most lenses too. It is reliable but does seem to just barely pull focus a lot especially when focusing center of frame. I did not extensively test tracking AF on my R5 but it is able to pick out a human subject even when at 10mm. The focus is not as snappy as most USM lenses, so it is a little slow to rack focus. I noticed a couple of times it focused behind a moving subject when I was using face tracking. Video shooters won’t care as much about snappy focus pulls so this lens should meet their expectations.

    Distortion

    Optically the lens is a good performer with some caveats. The first being that it has a lot of distortion at 10mm. To be fair, its less distortion, and more just not fully covering the sensor. This means the lens has to have digital corrections enabled for the image to be full 35mm frame size. Again, it’s one of those things that they have sacrificed to make the lens smaller, lighter, and probably, the price that it is. The good news is that the lens only exhibits barrel distortion, so the distortion correction is going to be simpler since there is no crossover from barrel into pincushion as many zoom lenses tend to have.

    Below is an interactive example showing only the distortion correction at 10mm.

    As you can see, the distortion correction is pretty substantial. Sharpness is visibly affected by the stretching required but only large prints will show obvious losses in resolution.

    If you are shooting video the distortion correction will always be activated.

    The reality is that despite the corrections this lens still manages to hang with the old EF 11-24mm f/4 L for about $700 less money.

    Sharpness

    I noticed some very slight sharpness inconsistency across the frame on the R5. To be fair, if I got lucky with focus the sharpness is good everywhere, but if the focus is ever so slightly off, I did notice some areas of softness here and there in the frame.

    The problem with this is it’s very, very hard to see the focus is slightly off by looking through the viewfinder. What I found is that I typically want to focus to the left side of the frame rather than the center of the frame. I don’t know why that is, it could be how I hold the camera or how I tend to move when pressing the shutter button.

    At higher shutter speeds it does seem to look sharper across the frame, so I think this is probably more of a stabilization issue.

    Conclusion

    This is a good lens that performs well and is lightweight. It is not that expensive for what it can do in the form factor that it has. Remember, this is a full frame lens that is similar in size to many APS-C lenses of the same type. Overall image quality is good but not flawless. It’s a nice lens to own if you’re willing to plunk down the money for it. Videographers in the market for an ultra-wide for Canon should like this one. It performed well for that purpose in the testing I did.

    Image Samples


    Source link

  • Why are your SD card transfers slow?

    Why are your SD card transfers slow?


    This article provides all the information about SD cards and USB card readers that you could possibly need. The reasons why things could be messed up with your data transfers are listed below. Please read each section carefully in order to make sure you understand exactly what is going on.

    #1 Your SD card is actually slow

    SD cards have been around awhile and because of that there is a chance you dug up an old card somewhere that is older and slower than any of your other cards. In this case there’s not a lot you can do, and since the SD card standard is really old, if you’ve been doing media stuff for awhile there’s every change in the world you have a slower card.

    The original SD cards don’t have any extra naming on them, it’s just “SD”. SD cards have been introduced according to size class, below are the different size classes currently offered:

    Maximum Capacity 2GB 32GB 2TB 128TB
    Date Introduced 1999 2006 2009 2018

    Size classes are a broad category for different SD card technologies that show what the maximum possible size is supported by each technology. Since 2018 most new cameras should support the largest size class for SD cards which is SDUC. These labels should be printed somewhere on your SD card, so, if you see SDHC which was introduced in 2006, you may have an older and slower SD card.

    The most important rating related to speed is the Bus Interface type. Look on your card to see if it has a UHS Bus Logo on it as shown in the chart below. If there is no logo your card is probably an older and slower technology. If your card one of the bus logos in the chart below, then you should get the associated Bus Speed. However, that doesn’t mean that you’ll get those speeds for bursts or sustained writes, although you should something in that range for bursts because there is obviously no point in supporting a faster bus speed if the memory in the card doesn’t support the bus speed.

    Bus Interface Bus Logo Bus Speed SD SDHC SDXC SDUC
    Default Speed 12.5 MB/s yes yes yes yes
    High Speed 25 MB/s yes yes yes yes
    UHS-I 50-104 MB/s no yes yes yes
    UHS-II 156-312 MB/s no yes yes yes
    UHS-III 312-624 MB/s no yes yes yes
    SD EXPRESS 985-3983 MB/s no yes yes yes

    Bus speed does not guarantee sustained writes. It guarantees that the card can write in a burst at up to that speed. For sustained writes you’ll need to refer to the following chart which is called the VIDEO SPEED CLASS.

    With the Video Speed Class, it’s purely about sustained writes specifically for something like recording video. Sustained writes tend to be a lot lower because these writes are limited by the flash memory in the SD card as opposed to the card’s bus.

    #2 you’re using an old USB port or an old USB hub

    Assuming you have determined that you have a relatively fast SD card to work with we can now move on to the next possible issue, your USB port or hub. From 1996 to 2014 there were 4 speed classes of USB introduced and they all used the same familiar rectangular USB plug known as a USB A connector. USB 3.2 introduced in 2017 uses only the new USB C type port. However, just having USB C does NOT guarantee USB 3.2 speeds! USB C is backwards compatible all the way to USB 2.0 so a USB C device could support any of the USB specifications from 2.0 all the way to the upcoming USB4… To try to state that as clearly as possible, USB 3.2 and USB4 ONLY support USB C, but USB C supports ALL USB versions going back to USB 2.0. Now, depending on the age of your computer you will probably be stuck with a USB port that is pretty slow. Here is a chart to help you make sense of that:

    Version USB 1.0 USB 1.1 USB 2.0 USB 3.0 USB 3.1 USB 3.2 USB 4
    Date Introduced 1996 1998 2001 2011 2014 2017 2019
    Maximum Transfer Speed 1.5 MB/s 1.5 MB/s 60 MB/s 625 MB/s 1,250 MB/s 2,500 MB/s 20GB/s – 120GB/s

    With USB 2.0 things are further confused by the fact that there were different speeds of connections possible with 60MB/s being the maximum but slower connections being very common due to device limitations. The point being that your USB 2.0 device could be running at USB 1.0 speeds depending on whether the device, such as your card reader or USB hub, actually supports USB 2.0 High Speed.

    There are two types of USB 3.1. USB 3.1 gen 1, and USB 3.1 gen 2. USB 3.1 gen 1 runs at the speeds shown above in the chart, but USB 3.1 gen 2 is a USB 3.2 speed protocol for USB 3.1 connectors. For instance, if you buy a USB A to USB C cable that says it is USB 3.1 gen 2 it will give you the USB 3.2 speeds.

    Using the above chart you can see that any and all computers made before 2011 had USB 2.0 at best, so if your laptop or desktop is from 2011 or earlier this could be your reason for slow transfers.

    The annoying thing is that even on new computers there are often still USB 2.0 ports. That is because many devices like a mouse and keyboard don’t need anything better than a USB 2.0 port. So, even though you might have a newer laptop a common theme I have seen is that a laptop might have 3 USB ports on it but 2 of them will be USB 2.0 and only 1 of them will be the newest USB 3.1 or USB 3.2 or whatever. If you are confused which one is which you can check your laptop case for a text label, try looking at the side or bottom of the laptop near the USB port in question, or you can also check your computer’s online user manual. If all else fails, try calling customer service.

    Another common issue is that if you use an old USB 2.0 hub with a new USB 3.1 port you will only get the USB 2.0 speeds. So, if you are using a hub and getting slow speeds, try plugging your card reader directly into your computer and see if that improves things at all.

    Of course the opposite is also true. If you plug a brand spanking new USB 3.2 hub into a USB 2.0 port, again, you only get the USB 2.0 speeds.

    If you want the full speed of the USB port the card, the card reader, the cable, the USB hub, and the USB port on your computer all have to support the same maximum speeds.

    Speaking of cables, this is yet another tricky situation with USB devices. Many companies are out there are selling non-standard cables, so watch out. As I said earlier USB C is backwards compatible with USB 2.0 and newer so just buying a USB C cable is no guarantee you will get the high speed transfers. You have to make sure that the USB cable you buy specifically supports the speeds you are trying to achieve.

    Usually, devices and cables that support these standards will sport the “SuperSpeed” logo as a sign that they’re officially rated to achieve those speeds.

    That just about covers the possibilities with USB devices and cables so on to the next possibility!

    #3 Your card reader is slow

    Card readers have to support all features of the USB connection and the SD card. You can’t just plug a UHS-III card into a card reader that only supports UHS-I. If you do that you will only get the UHS-I speeds at the most. The same is true for the USB support. If the reader only supports USB 3.0, you’ll be stuck with USB 3.0 speeds no matter what port you plug the card reader into.

    #4 Your computer HDD is slow

    That is because there are literally dozens of things you have to know about how computers work just to transfer data from a card to a computer HDD.

    Even if you have the fastest USB, the fastest USB cables, the fastest USB card reader, and the fastest CFExpress cards in the world, when all that data gets downloaded onto your computer it still has to be saved onto the HDD or SSD and if the storage device in your computer is slow guess what?? Your transfers will still be slow. The fact is that while a CFExpress card can manage about 1,700 MB/s read speeds and the USB 3.2 spec can support that, the fastest mechanical hard drives will generally write to disk at about 170 MB/s, or about 10 times slower than the fastest cards.

    In order to fix that problem, you have to get a faster SSD in your computer. Typically, that is going to be an NVME SSD. The good news is that as of the writing of this article 8TB SSD drives are currently available. So, using SSDs for media storage is finally possible.

    If you have an older laptop you may be limited to SATA 3, that interface is limited to 600 MB/s which is still fast enough for most transfers you might encounter. But, if you are trying to transfer terabytes of data from your cards 600 MB/s may not be fast enough. 600 MB/s works out to about 32 minutes to transfer 1TB if that helps you decide whether you need to buy a new NVME enabled laptop or desktop.

    IF you have a desktop computer with free PCIE slots you can purchase an NVME expansion card for your computer.

    #5 Transfers are still slow even though you know all of the above should be correct

    In the case that you have verified all of the above should be correct to enable high speed transfers to your computer, there are rare situations where your drivers are incorrect. Usually Windows will automatically install the correct drivers but sometimes things get messed up. You also could try reinstalling your operating system.

    Another unfortunate possibility is a hardware failure of some sort. A cable may be failing or a USB port may be failing on your computer. In those cases try another port, USB hub, or even another computer and see if you get different results. It may seem crazy, but I have had USB ports fail on my computer from overuse. They usually don’t stop working entirely. What I experienced is that the port would become intermittent during transfers, slowing down to just a few KB/s then speeding up for a few seconds before slowing down again.

    I have learned from experience that many of these USB related products have questionable performance characteristics either due to buggy chipsets or just being sold as something they are not. Don’t automatically take your cable and USB hub’s performance claims 100% at face value. Test them out on a system you know works properly. This is especially true if you went cheap and got one of those weird Amazon brands for a lot less money than seems normal (I speak from experience).

    If all else fails, call an expert and see if they can help you figure out where the issue may be.

    #6 SD cards aren’t fast enough for your needs

    The highest read speed for SD cards as of writing is 300MB/s. Future cards may be faster, or they may not. To get faster transfers to your PC you’ll need CFExpress Type B cards, or you can use an external recording device that uses CFExpress Type B or SSD (NVME) drives to save your video and photo data.

    Troubleshooting:

    Problem: Transfers start out fast then slow down.

    Answer 1: The computer HDD may be too slow to sustain a large file transfer.

    Answer 2: The USB port may be failing. One sign of a USB port failure is highly irregular transfer speeds or extremely slow transfer speeds that never get faster.

    Answer 3: The SD card, computer SSD, or USB port may be overheating due to excessive use or other problems.


    Source link

  • What is a shutter button?

    What is a shutter button?


    Every camera in the world has a shutter button. The shutter button is the only button that you can press that takes a picture. If you are pressing a button on your camera and the camera is not taking a picture, that button you are pressing is not the shutter button.

    If you press a button and the camera does take a picture, then that is the shutter button.

    Only still cameras have shutter buttons. Video cameras have “record buttons” not “shutter buttons”.

    Below is an image of a shutter button on an EOS RP:

    The button is located in a place where it is easy to press with your index finger when holding the camera by the grip in your right hand.

    Most cameras are setup for right-handed use, this means that holding the camera in your right hand is necessary in order to press the shutter button.

    On many cameras the shutter button causes the shutter to open and close which is what allows light to enter the camera and hit the sensor or film.

    Many digital cameras also have electronic shutters. And electronic shutter is what is used in a phone.

    However, most professional quality cameras use mechanical shutters because a mechanical shutter actually helps the sensor perform better.

    Below is a video of a mechanical shutter opening and closing on the EOS RP.

    https://www.youtube.com/watch?v=uljygm9yUyU

    This type of shutter action is called “1st curtain electronic” shutter. That means that the first “curtain” of the shutter is electronically actuated, but the second curtain of the shutter is mechanical. This is still a little bit better than a full electronic shutter for image quality.

    Now you know that the shutter button controls the shutter, and the shutter is the thing that opens to let light into the camera which the sensor than captures to produce a picture.

    Film cameras work much the same way although they can have different kinds of shutters.

    There are some very old-style film cameras that don’t have shutters at all. With those cameras the lens cap is the shutter, and the exposure time is usually very long, typically in the 30 second range.

    Despite that, it’s safe to say that pretty much any camera you are likely to use will have a mechanical shutter button on it and pressing that button is how you take a picture.


    Source link

  • Incredible Models | Beautiful Flower Pictures Blog

    Incredible Models | Beautiful Flower Pictures Blog


    Photos of some of the wonderful models I’ve had the pleasure of working with in recent years.

    Zoe Celesta West © 2025 Patty Hankins


    Ivory Flame © 2025 Patty Hankins


    Lucy Magdalene © 2025 Patty Hankins


    Ivory Flame © 2025 Patty Hankins


    Rebecca Lawrence © 2025 Patty Hankins


    Ivory Flame © 2025 Patty Hankins


    Source link