نویسنده: AliBina

  • How to Resize Images Without Losing Quality in Photoshop

    How to Resize Images Without Losing Quality in Photoshop


    You may have been told you need to compress and resize image files for websites, social media, and other uses. Why? Oversized images can slow down your site, mess with SEO, and even affect sales. But shrinking an image the wrong way? That can leave you with a blurry, pixelated mess.

    Luckily, resizing images without losing quality is easy once you know how. This guide walks you through how to resize an image in Photoshop without losing quality and all the other best methods—starting with what to consider before you begin.

    Preparing for image resizing

    Before you resize an image, consider the following: 

    • Aspect ratio: Make sure the image keeps its proportions so it doesn’t look stretched. Common ratios include 1:1 (square) for profile pics, 16:9 for banners, and 3:2 for product shots.
    • Required dimensions: Every platform has its own size recommendations—Instagram Stories need 1080x1920px, while blog images usually fall between 1200px and 1600px wide.
    • Resolution: Web images should be 72 DPI for fast loading, while print needs at least 300 DPI for high-quality results.
    • Use case: Think about where the photo will be used. This helps avoid distortion and keeps your visuals looking sharp. Websites and online stores need smaller file sizes for speed, while social media platforms have specific size guidelines to keep images looking their best.

    It’s also a good idea to make sure you start with a high-quality image. No amount of editing or resizing can make a poor-quality photo look great. 

    How to reduce image size in Photoshop: shortcut

    If you want a quick and easy way to resize images in Photoshop, follow these steps:

    If you’re already using Photoshop, open your image by going to File > Open from the menu at the top of the application window. If you have just opened Photoshop, you can still open the image directly from the opening screen. You can also use the shortcut CTRL + O (COMMAND + O on a Mac) to open an image at any time.

    Photoshop 2025 interface showing two ways to open files: through the top File menu and the welcome screen sidebar. The image highlights “Open” options with red ovals, ideal for tutorials or onboarding visuals.

    Navigate through your documents until you find your image, and open it. Then, go to Image > Image Size in the top menu. You can quickly access the Image Size window by typing CTRL + ALT + I (COMMAND + ALT + I on a Mac).

    Close-up of a female model with smooth skin and bold lipstick against a solid yellow background, shown within Photoshop's image resize settings dialog at ultra-high resolution of 8256 by 5504 pixels, suitable for detailed retouching and background removal.

    In the Image Size dialog box, enter the new dimensions you want to resize your image to. Make sure the chain link icon (to keep proportions) is enabled.

    If you are sizing an image for your ecommerce website, you will want the dimensions to be as small as possible without losing quality. A good rule of thumb? Keep images around 1000px wide (2000px wide if they are to fill the screen from side to side). You can keep an eye on the final file size with the “Image Size:” text at the top of the dialog box. In general, try to keep ecommerce images under 200K to ensure fast load times.

    Next to Resampling, choose a method that works best for the type of image you are working with:

    • Bicubic Sharper (reduction) is best for reducing the size while still showing a lot of detail
    • Bicubic (smooth gradients) will produce the best images for showcasing flawless skin by smoothing edges
    • Nearest Neighbor produces very harsh edges and emphasizes artifacts. Only use this if you want a grainy, pixelated look.

    All other resampling options are for enlarging images, not reducing them. If you’re not sure which resampling to choose, stick with “Automatic.”

    Click OK, then save your resized image (File > Export > Export As…).

    For more control over file size and compression, Photoshop’s Export As… tool is a great option—covered in the next section.

    How to reduce image size in Photoshop: Export As…

    The Export tool in Photoshop is one of the best ways to shrink image file sizes without sacrificing too much quality. Whether you’re optimizing a product image, a thumbnail, or a homepage banner, it can balance image clarity with fast loading speeds.

    Using the Export function in Photoshop is often comparable to the compression you’ll get from other tools, without the extra steps (or extra cost) of needing to access additional software.

    Before using the Export function, set your ideal image aspect ratio in the top, left hand corner after selecting the Crop tool.

    Once your image is cropped (if needed), resize and compress it using the Export function.

    Go to: File > Export > Export As…. You can also use the Export As… keyboard shortcut CTRL + SHIFT + ALT + W (ALT + SHIFT + COMMAND + W on a Mac)

    This opens the Export As… window, where you can fine-tune file size and quality.

    Photoshop image resizing settings

    Here are some of the image resize file size and other settings you can choose from:

    • Preview section: See what your image will look like after export. Clicking on 2-Up allows you to see different options side-by-side 
    • File format: On the right-hand side of the screen, you can choose what file type your exported image will be. JPEG is best for compression while keeping quality. PNG is great for transparency but results in larger files. If you have a simple vector-style graphic with no transparency, PNG-8 will give you a great-looking file at a fraction of the size of a PNG-24 (see below). If your graphic is animated, save as an animated GIF.
    • Quality (for JPEG): When the JPEG file format is selected, you can use the slider to move between low quality and high quality. A compression level around 5 or 6 is usually adequate. 
    • Quality (for PNG): When PNG is selected, you have the choice to choose “Transparency” and “Smaller File (8-bit)” If you want a high quality, transparent image (known as a PNG-24), check Transparency and leave Smaller File unchecked. However, if you need to compress an image heavily and transparency isn’t that important, choose Smaller File. This will allow you to export your file as a lower-quality, smaller-sized PNG-8.
    • Image size: The dimensions of your image. If you know the exact dimensions you need, you can enter them here. Or, if you want to reduce the size by a percentage, you can use the Percent scaler as well. 
    • Resample: This is how Photoshop “rebuilds” parts of the image’s data that are altered during compression. Any time you enlarge or reduce an image’s size, you’re going to affect the original proportion that the image had in relation to pixels per inch and dimensions. Bicubic creates smoother gradients, but does not allow for the most compression. Explore other options such as Nearest Neighbor (most basic and worst preservation of detail), Bilinear (usually better for upsampling), Bicubic Smoother (designed for upsampling) or Bicubic Sharper (better for downsampling/preserves detail).
    • File size: On the lefthand side of the Export As… window, you can see the file size of the optimized image.

    There’s no one-size-fits-all option here. When reducing an image in Photoshop, each image generally takes an individualized amount of tweaking to find the best image quality with the best compression.

    Web tools to edit images and reduce file size

    • Bulk Web Resizer: This site allows you to upload a batch of images and then resize according to your desired dimensions. You can also adjust the image quality to your needs (choose 100 if you want to preserve the original quality), as well as sharpen images.
    • Canva: Canva’s free photo editor allows you to crop and resize images on its site. Additional free editing tools include flipping and rotating images, adjusting the color, and adding filters.
    • ImageOptim: ImageOptim can be used in your web browser or via a Mac application. To shrink files, ImageOptim gets rid of EXIF meta­data, such as GPS position and the camera’s serial number — however, you can choose to keep specified metadata intact (which is essential to optimizing your product photos for SEO). There’s also a Lossy minification option, which ImageOptim says will result in the smallest file size possible, while preserving image quality. ImageOptim has pricing plans, starting at $9/month for 1,000 image optimizations.
    • Kraken: Kraken has a web application and a developer API that can handle bulk image optimization and resizing. The simple web interface is free, and you can drag and drop photos or upload by entering the image URL. There are also different pricing options depending on how many images you work with and how frequently you need to reduce their size. Pricing is based on the total number of GB.
    • Pixlr: Resize and also edit photos as needed. The image-editing site also has a free vector-editing tool, as well as free fonts and graphics you can use.
    • pngquant: This tool will compress .png files to reduce the file size. 
    • TinyJPG/TinyPNG: This site allows you to reduce the file size of your images. There are no editing features; instead, TinyJPG/TinyPNG focuses on compressing files to ultimately reduce the file size, stripping unnecessary data from your image.

    AI resizing and compression tools

    • Let’s Enhance: great for resizing photos for print and digital use.
    • Squoosh: web-based, Google-backed compressor with advanced controls.
    • Upscale.media: AI-powered upscaler for improving resolution.

    Plugins that reduce image size within your CMS

    There are tons of plugins on the market that make the image resizing process easier and more automated, all from within your CMS. Here are just a few:

    WordPress

    Shopify

    Tips for resizing ecommerce photos

    For ecommerce product photography, maintaining high quality while optimizing file size is key. Here are some best practices:

    • Recommended dimensions: Most platforms work well with 1000×1000 px for product images. If zoom functionality is needed, go for 2000×2000 px or higher.
    • Aspect ratio: Stick to 1:1 (square) for product photos and 16:9 or 4:3 for banners and hero images.
    • Compression: Keep file sizes under 200 KB for fast loading. JPEGs with a “High” setting in Save for Web are a good choice.
    • Background: Use a clean white or transparent background to keep the focus on the product.
    • Resampling: Use Bicubic Sharper for downsizing to preserve details.

    Tips for resizing headshots

    Headshots should look sharp and professional across platforms without being too large. Here are some tips to keep in mind: 

    • Recommended dimensions: For LinkedIn, company websites, or professional use, 400×400 px works well. For print or high-res needs, go for 1200×1200 px or more.
    • Aspect ratio: Stick with 1:1 (square) for profile pictures or 4:5 / 2:3 for portraits.
    • File type: Use JPEG for web (compressed but sharp) and PNG for transparent backgrounds.
    • Compression: Aim for a file size under 100 KB for web use to prevent slow loading.
    • Resampling: Use Bicubic Sharper when reducing size to keep facial features crisp.

    Outsource your image resizing needs

    Resizing images properly takes time, especially if you’re working with a large volume of product photos, headshots, or marketing assets. Instead of spending hours tweaking dimensions and compression settings, consider outsourcing to a professional image-editing service.

    At Path, we specialize in high-quality image resizing, background removal, drop shadow, and more—all done by expert editors with precision and speed. Whether you need bulk resizing for an ecommerce store or perfectly optimized headshots, you’re in good hands with Path.

    Need bulk image resizing done right? Try Path free—fast, flawless, and optimized for web.

    Simple pricing for stress-free, pixel-perfect photo edits tailored to your needs.

    Image resizing and compression FAQs

    Does resizing affect SEO?

    Yes, large images slow websites, hurting rankings.

    What’s the ideal file size for web images?

    The ideal file size for web images is under 100KB for optimal performance.


    Source link

  • 10 settings to boost your Canon EOS R5 to the max!

    10 settings to boost your Canon EOS R5 to the max!


    Did you just get a new R5 or R5 mk II? Here are 5 helpful settings that can help you get more out of your R5 mk II.

    Tip #1: Make sure IBIS (In Body Image Stabilization) is turned on.

    Both version of the R5 have IBIS. Make sure IBIS is on so you can get more sharp pictures with less camera shake.

    Tip #2: Turn your EVF and rear display up to the max!

    Set your display to use 120 hz pro motion for the best result. When looking at your screens it will look smoother and better, especially when there’s things moving.

    On the same menu you’ll see a setting called “Suppress lower frame rate”. To maximize performance, turn this off as well.

    Please enjoy the use of your camera.

    Tip #3: “Lower” the image quality to get more on your cards.

    The EOS R5 mk II can record with a variety of different file formats and compression algorithms to help you fit more data onto your memory card. This can be especially useful for 4k video and higher resolutions.

    Tip #4: You can use EF lenses on your R5 mk II with an EF to RF adapter.

    Canon was very nice to design an adapter that will let you use an EF lens with your RF camera. Simply buy Canon’s adapter and attach it to the back of your EF lens, then you can attach the lens to your R5 mk II just like any other RF lens. By do this, you can save money and still have a Canon lens. (Very nice.)

    Tip #5: Use the joystick to control your focus point.

    The R5 mk II has a joystick on the back of it that you can use to move your focus point around. By using the joystick, you can easily select where you want your camera to focus on the frame.


    Source link

  • How To Protect Camera In Bad Weather: 16 Pro Tips

    How To Protect Camera In Bad Weather: 16 Pro Tips


    The weather can be unpredictable, even in the most temperate of climates. Rainy days can make for a great photo shoot opportunity, but if you’re unprepared and don’t have the right gear, it could also mean some costly repairs for your camera. 

    Protect your camera from bad weather by investing in high-quality rain protection gear, covers, rain sleeves, waterproof backpacks, and UV filters. 

    Whether you’re shooting in the rain, snow, or extreme heat, there are steps you can take to ensure that your camera stays safe and functional:

    Quick Navigation

    16 Tips for Weatherproofing Your Camera

    1. Invest in a Camera Rain Cover

    A camera rain cover is the first line of defense against rainy conditions, and it’s a must-have for any serious outdoor photographer.

    upaa

    It is a simple and effective way to protect your camera from the elements. It fits over your camera and lens, creating a barrier between the camera and the rain.

    A good rain cover will protect your camera from rain, snow and sand—and can also be used to shield it from the sun’s UV rays. Rain covers attach to your camera using hook-and-loop fasteners (a type of adhesive), allowing you to easily remove or reposition the cover as needed.

    2. Use a UV Filter

    For those who don’t know, UV filters are basically clear pieces of glass that fit in front of your camera lens to protect it from scratches and damage. So why would you want one?

    Well, they’ll help keep dust out of your camera and prevent moisture from getting inside. Aside from that, they help reduce the amount of UV light that enters the lens, which can cause lens flare and other problems. A UV filter also provides an extra layer of protection for your lens.

    They’re also easy to clean when they do get dirty while you’re working outside with your camera! These filters come in all shapes and sizes – we recommend purchasing one with just a bit wider diameter than the front element on your lens so that it can easily slide into place without having to worry about vignetting (light falloff).

    3. Change your Lens Cap for a Tulip Hood

    To protect your camera from the elements, you can use a tulip hood. A tulip hood is an alternative to using a lens cap that will save you time and money. The benefits of using a tulip hood are:

    • It’s easy to attach and remove from your camera.
    • There is no need to remove it every time you want to take pictures.
    • It protects both sides of the lens at once—the front and back sides of the lens are equally protected by this cover!

    4. Use a Rain Sleeve on your Camera

    You can also use a rain sleeve as an additional protection for your camera gear. A rain sleeve is a protective cover for your camera that helps keep it dry and protected from the elements, including dirt, dust and water.

    Rainsleeves come in several sizes: some are designed for specific models like DSLRs or mirrorless cameras; others are universal and will fit any size device.

    If you’ve got multiple lenses that need protection but don’t want to buy multiple covers, consider buying an ultralight backpack instead of individual bags—many backpacks have built-in lens cases that can be opened with one hand while shooting!

    A good quality rain sleeve will have an adjustable strap to attach it securely around your DSLR or mirrorless camera body. It should also be made from high-quality material with waterproof zippers so that it doesn’t let any water in when you open the case up after using it in inclement weather conditions like heavy rain, light rain or snowfall.

    If you don’t want to buy one of these sleeves for every time you go out shooting photos outdoors during bad weather conditions then consider investing in a lightweight plastic bag instead (or even just zip lock bags).

    This way you can keep them as spares when photographing outdoors so that if something does happen with your gear while taking photos outside during rainy days then there’s always an extra layer protecting their expensive equipment!

    5. Keep your Camera Away from Direct Water Contact

    Keep your camera away from direct water contact
    photofocus

    The last thing you want is for your camera to get wet, so make sure you take precautions before heading out on your next adventure. If there’s even a chance of rain, keep your camera gear safe in a waterproof camera housing, bag or case for better protection. You must always be ready with weather-sealed cameras.

    And if it’s too late and the weather has already turned against you, try taking the battery out and bringing just that part inside.

    If a storm happens while you’re out in nature, quickly seek shelter under some trees or rocks until it passes—but don’t risk getting lost by trying to find shelter outside! If all else fails, consider changing plans altogether and rescheduling them for another time when it won’t be raining as hard (or at all).

    6. Carry Dry Bags with you

    Keep your camera inside a dry, protective bag. Dry bags are waterproof and can protect your camera from the elements. 

    A camera bag with a weather-resistant exterior can help protect your camera gear safe from the rain and other elements. It’s also a good idea to store your camera in a dry place when it’s not in use for better protection.

    They come in all shapes and sizes, so you can choose one that fits your needs. Make sure the zippers are strong enough to keep all the water out and make sure there’s a way for air to escape if it does get inside (don’t buy a dry bag with just a single valve).

    You can also use them to keep any other electronics you’re carrying dry. You can typically fit your photo gear, waterproof camera housing, a phone, wallet, passport, etc. in one of these small bags and just throw it into your bag or backpack.

    7. Shoot in RAW format

    Shooting in RAW format is one of the best ways to protect your camera from bad weather. Unlike JPEG files, which are compressed and have their colors reduced, RAW files are not processed by your camera settings until you open them on your computer.

    This means that they contain all of the information captured by the camera’s sensor—uncompressed, high-resolution images with more detail than JPEGs can ever hope for.

    8. Buy a Waterproof Backpack to Protect your Gear

    You may want to invest in a good waterproof backpack to keep your camera dry. Even if you are confident that your camera and lenses can stand up against wet conditions and the elements, it’s always better to get added protection and to be safe than sorry.

    dpreview

    Look for one that has been designed specifically with photographers in mind. It should feature an internal memory card slot, multiple accessory pockets and dividers for organizing equipment. It also needs to have padded straps to comfortably keep your camera inside during long hikes or treks through the city streets.

    The additional cost is worth it to protect your cameras and gear and keep them safe from the rain, cold, and other extreme conditions.

    9. Keep an Extra Camera Battery Handy

    The weather is not going to care if you are shooting a wedding or just trying to get that perfect shot of the sunset. You need to be prepared, as your camera’s battery life will be affected by all sorts of things, including temperature and humidity.

    As with human batteries (iPhones), the amount of charge left in your camera’s battery will decrease over time. If you use your camera often, then you should consider replacing the original battery with an extra one.

    10. Protect your Camera from Heat and Humidity

    If you store your camera for long periods of time, make sure it is dry and cool. Do not leave your camera in a car or on any surface that might get hot from sunlight or indoor heating.

    For extra protection, keep the lens cap on when not in use to prevent dust accumulation on the surface of the lens. If you’re going to be putting your cameras away for a while, consider storing it in a temperature-controlled environment (such as an air-conditioned room) or climate-controlled storage facility.

    11. Carry a Microfiber Cloth

    A microfiber cloth can be used to wipe away any excess moisture or dirt that gets on your camera. It’s a good idea to keep one in your camera bag at all times.

    12. Avoid Changing Lenses in Bad Weather

    If you need to change lenses, try to do it in a covered area to protect your camera from the elements. If you must change lenses in the rain, turn your camera off and cover the body and lens with a rain cover or umbrella to minimize the amount of moisture that gets inside.

    13. Use a Lens Hood

    A lens hood is a piece of plastic or metal that attaches to the front of your lens. It helps to shield the lens from heavy rain, snow, and other elements. It also helps to reduce lens flare and improve image quality.

    14. Avoid Shooting in Extreme Heat

    If you’re shooting in very hot conditions, try to keep your camera in a cool, shaded area as much as possible. Avoid leaving it in a hot car or direct sunlight for extended periods of time, as this can cause damage to the camera and its batteries.

    15. Use a Dry Box or Silica Gel Packets

    drycabinets

    If you’re traveling to a humid location, consider using a dry box or silica gel packets to protect your camera and lenses from moisture. A dry box is a small, airtight container that absorbs moisture, while silica gel packets absorb moisture and help to keep your gear dry.

    16. Use a Tripod in Windy Conditions

    If you’re shooting in windy conditions, a tripod can help to keep your camera steady and prevent it from being blown over. It’s also a good idea to use a cable release or self-timer to minimize camera shake

    Takeaway

    The takeaway from this article is that you need to be aware of the weather conditions and keep your camera safe when you are outdoors. You should also take precautions before heading outside.

    If it looks like it will rain or snow, keep your camera weather sealed, stay indoors, and wait for the storm to pass. Be sure to wipe off any moisture on your camera if it gets wet in the rain or snow, and make sure you keep it dry when indoors so that moisture doesn’t build up inside of it and damage its internal parts.

    The most important thing is to not let yourself get frustrated or discouraged when things don’t go as planned. Remember that there will always be beautiful days for photography.

    It’s impossible to keep the bad weather completely out of the picture. Tips, we shared can help you protect your camera from bad weather, and ensure that it stays in good working order, and takes better photos for years to come. Happy shooting!

    Lightroom Bundle Presets


    Source link

  • Best Media Storage Solutions for Pro Photographers

    Best Media Storage Solutions for Pro Photographers


    Andrew Hancock isn’t the type of photographer that has a lot of downtime from shooting. As one sports season wraps up, he’s already looking ahead to what’s coming up. And when Hancock is covering a sporting event, he’s typically overseeing the remote cameras aimed at the athletes—he estimates for a basketball or baseball game he’s managing anywhere between six to 12 cameras at a time. For horse racing, it can be as many as 20 cameras.

    It’s a massive amount of data that needs to be managed after the fact. Hancock trusts the SanDisk® Professional G-DRIVE® PROJECT desktop solution which has a built-in PRO-BLADE™ SSD Mag slot, and SanDisk® PRO-CINEMA CFexpress™ Type B cards to stand up the challenge when he is out in the field.

    “I’m only as fast as my slowest point and speed is everything, especially when you’re doing work for the teams,” Hancock says. “Cards can be the Achilles heel for sports photographers—we’re using high speed frame rates, and trying to get as much of the action as we possibly can. SanDisk PRO-CINEMA CFexpress Type B cards help let me push my camera to its limits.”

    The SanDisk PRO-CINEMA CFexpress Type B card is a key part of Hancock’s workflow. The card is designed for professional photographers and videographers who need a high-performance, reliable storage solution. The card is compatible with a wide range of cameras, and it offers read speeds of up to 1700MB/s1 and burst write speeds of up to 1500MB/s1. This means that Hancock can capture high-resolution photos and videos without having to worry about his cards slowing him down.

    Hancock says that SanDisk’s line of professional products has allowed him to create a daisy-chained ecosystem that works well together. The reliable, fast PRO-CINEMA CFexpress cards are loaded into the cameras, media on the cards is offloaded using the SanDisk Professional PRO-DOCK 4 or PRO-BLADE SSD Mag slots, eventually getting archived on a G-RAID® MIRROR.

    “The ability to be able to pump this data as fast as it can go and wherever it can go, means I’m not having to worry about overheating issues or filling the buffer,” Hancock says. “In a clenching situation, where I want to get as much as I possibly can, these cards allow me to actually focus on capturing the moment, without worrying about missing frames.”

    For Hancock, having these fast, top of the line cards and drives is as essential as his cameras and lenses when he’s on a job.

    “I know I’m not going to be covering a massive event and then something’s going to fail or underperform. At the end of the day that comes back on me,” he says. “It’s like being the quarterback of the team. It doesn’t matter if the receiver dropped the ball, everything comes back to your shoulders. It’s on you. As a photographer you’ve got to make those decisions. And it’s a business decision, quite frankly.”

    Professional sports photographers typically spend a good deal of time on the road—Hancock mentions that some years he has up to 200 travel days a year. Having a storage solution that’s been easy to pack up and set up on location has also been a huge part of the appeal for him. Beyond its compact size, the SanDisk PRO-CINEMA CFexpress Type B card also comes with a durable enclosure, withstanding up to 1-meter drops and the pressure of up to 50 newtons2, so Hancock can be confident his data will be safe on the go.

    “I’m like water, I want the path of least resistance. Having a streamlined workflow takes all the stress out of the situation for me,” he says.

    For Hancock having such a streamlined workflow with storing and archiving, enables him to perform at a higher level and be more creative when he’s working. But it’s also helped him get valuable back time. “It’s made my job easier and more efficient, which ultimately means more time with my kids whenever I’m home,” he says. “I love what I do, but any second that I can get back, I want it.”

    1Up to 1700MB/s read speed; up to 1500MB/s write speed. 1400MB/s minimum sustained write speed. Based on internal testing; performance may be lower depending upon host device, usage conditions, and other factors. 1MB=1,000,000 bytes.

    2Based on internal testing.


    Source link

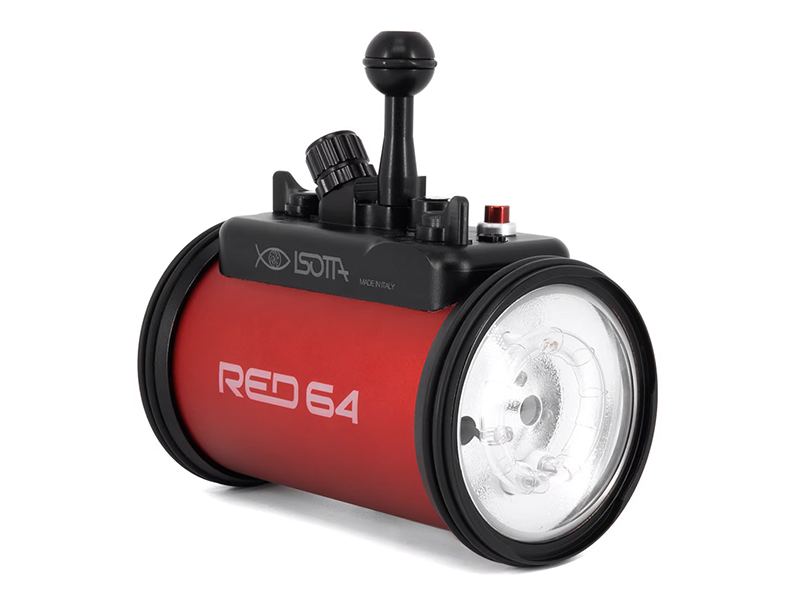
  • Isotta Unveils Housing for the Insta360 Ace Pro and Ace Pro 2

    Isotta Unveils Housing for the Insta360 Ace Pro and Ace Pro 2


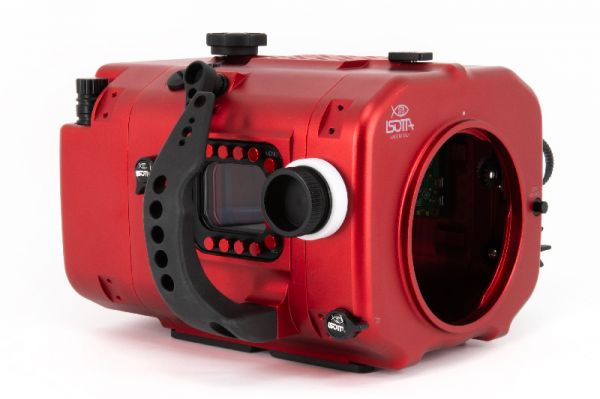
    After many years supporting the GoPro with their rugged aluminum housing, Isotta has turned its attention to the action cam competition—the Insta360 Ace Pro and new Ace Pro 2.

    The new housing has much in common with the company’s housing for the GoPro HERO13 Black: anodized aluminum construction and signature red finish; depth rating to 200 meters (650 feet); one-handed open/close; double O-ring seals throughout; and a removable shade that offers a clear view of the rear LCD in bright conditions.

    Priced at $515, the housing is available from retailers such as Backscatter.


    When purchasing underwater photography equipment like the products mentioned in this article, please support DPG by supporting our retail partner—Backscatter.com.


    PRODUCT INFORMATION

    Isotta Underwater Camera Housing for Housing for INSTA360 Ace Pro and Ace Pro 2

    Technical Data

    • Red color anodized aluminum body;
    • Back housing completely detachable from the front housing;
    • Single-hand closing knob for the back of the housing;
    • Aluminum buttons;
    • Wide back display viewfinder glass;
    • Double O-Ring seals on all buttons and removable parts;
    • Double square flat porthole;
    • Rubber covered feet for solid footing on boat floors or sea floor;
    • Cold shoe located on upper side of the housing for various accessories such as focus lights;
    • A M6 hole and a 1/4W hole located on housing bottom side for different accessories such as brackets for strobes or tripods;
    • Working depth: 200 meters;

    Commands

    • Mode button;
    • Shutter button lever;

    Optional

    • 1632 – Forefinger shot;
    • 1633 – Thumb shot;
    • 1862 – Tray for action cam;
    • 3073 – Single flip with magenta filter for action cam;
    • 3074 – Single flip with red filter for action cam;
    • 3075 – Double Flip with Filters for action cam;

    What Is Included

    • Housing;
    • Front lid;
    • Shade;
    • Replacement O-ring kit;
    • Warranty: 2 years manufacturer’s (excluding batteries);

    Spare Parts

    • 4409 – Set o-ring for INSTA360 Ace Pro and Ace Pro 2;
    • 4410 – Shade for INSTA360 Ace Pro and Ace Pro 2;
    • 3664 – Front lid for actioncam;


    Source link

  • Make It Different, Make it Yours.


    One of the great photographic challenges is making a photograph that is different: different from what others are making and different from the images you’ve made so many times before.

    Taking the same photograph over and over doesn’t appeal to me. I want to go further, learn more, and get closer and closer to images that feel uniquely my own. I’m betting you do, too.

    So how do we do that? It takes a conscious effort. It takes a recognition that the “same old, same old” isn’t scratching the itch it once did. And it also takes some risk. After all, we do the same old, same old because it works. It’s safe. It’s obvious to us. Approaching things a bit more obliquely isn’t obvious—at least not at first. But being in the moment and then thinking, “I need to do things differently!” isn’t much help, either. Which things? Different how? Asking more specific questions and looking for interesting answers has always been my starting point of departure from my norm.

    Here are five questions I ask myself to get unstuck and discover new directions.

    How Can I Change My Point of View (POV)?

    Often, the easiest way to change things is to get the camera into a new place—to go against your first instinct just to raise it to your eye.

    I spent my last safari in Kenya bent over the side of the vehicle or shooting low through an open door after removing one of the seats. Two years ago, I finally caved in and bought chest waders so I could get my camera closer to water level. I’ve started playing with putting my camera in places where I can only control it with a remote app on my iPad. I’ve seen some photographers do the same, but with the camera mounted high on a boom pole. Why not get a drone if it can be used without disturbing others? All these efforts began by asking, “How could I change my point of view?”

    Moving the position of the camera changes so much in the image, and it’s often just that one change that makes the biggest difference.

    How Can I Change My Technique?

    We’re such creatures of habit, aren’t we? We can spend all day shooting one way and only later think, “Oh man, I was going to play with some slower shutters and a sense of movement!” It’s hard to pull out of the rut, I know. But a different technique is a great way to mix things up. Could you play with strobes? Could you learn to shoot underwater? Have you ever used a tilt-shift lens? When was the last time you really dove into macro? I like this approach because it can be playful; I enjoy trying new things and playing with new gear.

    Part of this change in technique could just be a different lens. If you’re the photographer who is always out there with your 600mm, try using your 70-200mm and forcing yourself into different compositions.

    Learning new techniques is risky because it means trying something new, and the “failure rate” is high. I prefer to think of it as a “learning rate,” but either way, you’re not immediately going to succeed at making images you love, so there’s a risk of losing those opportunities. But remember, you set out on this adventure because something about your existing approach left you unfulfilled. Better to swing and miss but learn and get better, no?

    How Can I Change the Light?

    Maybe what most needs to change are your habits. Could you go out earlier in the day when the light is moodier or stay later at night? Maybe you’ve written off one kind of light as “bad” and decided only one kind of light is “good.” Creative thinking is thinking differently about a problem, so maybe you need more problems, like “How can I shoot in more challenging light?” Maybe you need to learn to shoot in backlight or light that is more dramatic. Soft light is easy, but is it the only light that satisfies you?

    Take a look at your best work. Is it all shot in the same kind of light? Maybe it’s time to mix things up a little.

    How Can I Change the Story?

    This is a big one, but think in terms of choosing different moments or different compositions from what your first instinct tells you to do. Maybe you’re the wildlife photographer who always shoots super-tight portraits of bears, and it’s time to include moments where the animals interact. I found just that one change made my photography more interesting and gave the images a stronger sense of story. Maybe it’s time to play with a greater sense of scale or wait for moments with a greater feeling of energy. Sure, you might miss the shot at first, but that’s the very impulse or worry we’ve got to fight against if we’re ever going to approach our craft differently.

    The impulse to get the safe shot over taking the risky shot is the same impulse that keeps you in your rut. You’ve got enough safe shots. Safe shots don’t teach you, and they don’t satisfy.

    How Can I Change the Way I Develop My Images?

    Lastly, is there a way you can set your images apart by changing how you develop or post-process them? We all have our preferred workflows, but if you’re like me, you developed yours ages ago, and things change. We change, and so should the tools we use if they’re just better tools.

    One of the things I like to do is watch one YouTube video a week about something in Lightroom. Pick a tool, go to YouTube, and search for a video about it. “How to use Tone Curve in Lightroom,” for example. Spend 15 or 30 minutes watching the two most popular videos on the subject and learn something new. See how others are solving some of the problems we all face or how they’re using colour. Maybe it’s time to up your game with black-and-white conversions.

    One of the most significant changes I made over the last two years is a shift from doing most of my developing work as global adjustments to using masking tools for most of that work. Once very blunt instruments that were hard to use with any real accuracy, the masking tools in Lightroom have become incredibly powerful and make it much easier to now adjust different areas of the image differently and in a much more refined way.

    My development in Lightroom is much stronger—and I think my images are becoming stronger—because I’m doing things differently. Not for the sake of being different, but because doing so allows me to get closer to my own voice, my own vision. If you haven’t dug into the new masking tools in Lightroom, I encourage you to do so.

    We’ve all got ruts we fall into. Sometimes, they look suspiciously like a creative groove until one day, they aren’t. The easiest way to escape that rut is to take a risk, shake things up, and do things differently.

    Learn a new thing and see where it fits. Try putting the camera somewhere else. Use a slower shutter speed or a different lens. Shake your habits up, and get curious.

    Stop playing it safe. If, like me, you feel like you don’t need any more safe photographs, it’s time to stop being such a safe photographer.

    Safe shots don’t move the heart, and they probably don’t give you the thrill you used to get when things were all a little newer, a little less familiar and certain. So mix things up a little, try a new thing or a new way of doing the old thing, but if you want different images, you’ve got to make them differently.

    For the Love of the Photograph,
    David


    Source link

  • سلام دنیا!

    به وردپرس خوش آمدید. این اولین نوشتهٔ شماست. این را ویرایش یا حذف کنید، سپس نوشتن را شروع نمایید!