The Underwater Awards Australasia 2025 is now accepting entries. The premier underwater imaging competition focused on the Australasian region is a three-way collaboration between DPG, Underwater Australasia, and UW Images. This year, entrants are competing for prizes in nine categories, including the contest’s unique “Reels Showcase” video category, with the top image or video among the category winners receiving the distinction of “Best of Show.”
This year’s prize pool has increased in value by more than 40% compared to last year, to a total of A$70,000! The prizes include dive trips with the world’s top resorts and liveaboards as well as the latest underwater imaging equipment and dive gear—even an underwater photography drone and an underwater scooter with photographic platform. The prestigious judging panel comprises photo judges Tobias Friedrich, Jayne Jenkins, Matty Smith, Tanya Houppermans, Scott Portelli and William Tan; and video judges Philip Hamilton and Ross Long.
The competition will culminate in an exhibition and awards ceremony at Go Diving Show ANZ in Sydney, in September 2025. The exhibition will feature high-quality metal prints of the finalist entries in the photo categories. Made by the competition’s Printing Partner PhotoMart, the prints will be available for purchase at the show, with the proceeds going to Environmental Partners Australian Marine Conservation Society and Take 3 for the Sea.
Head over to UnderwaterCompetition.com to find out more about the categories, prizes and judging panel, and make sure to read the rules and guidelines carefully before submitting. Entry fees are US$10 per image or video entered. The competition closes on July 20th, 2025.
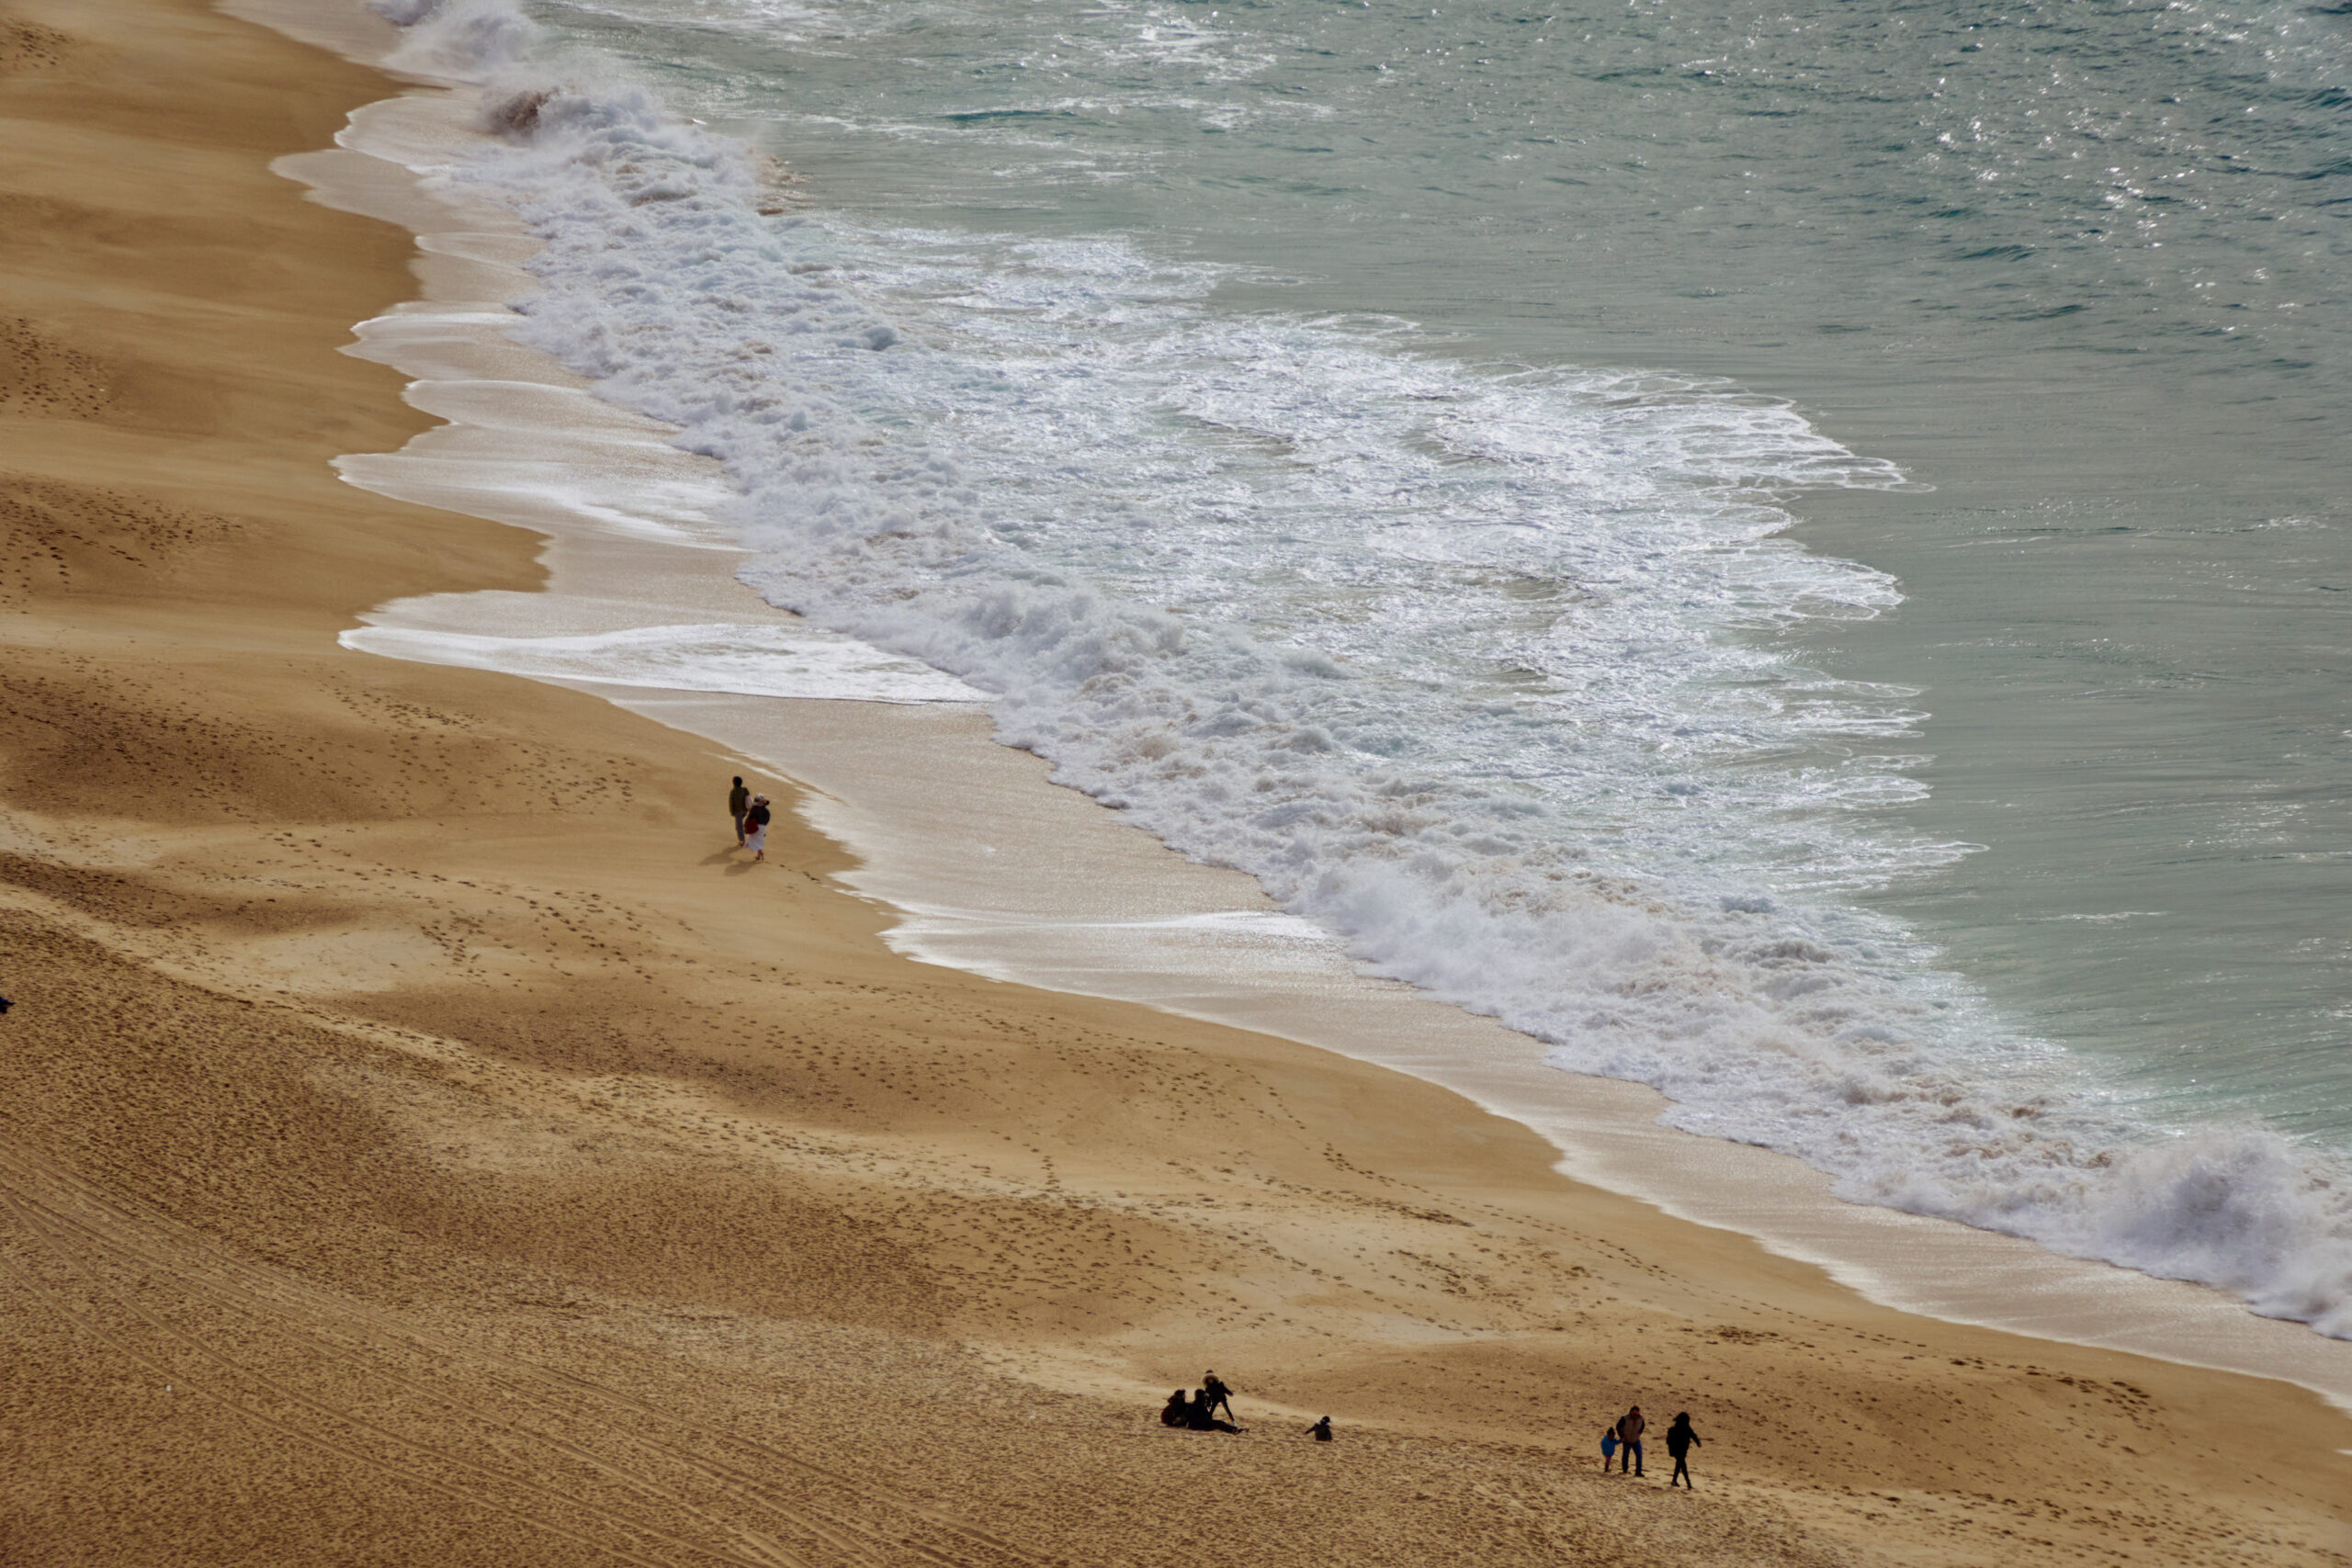
Sigma 16-300mm F3.5-6.7 DC OS | Contemporary Sony A6500 248mm, F6.3, 1/1600s, ISO 100
When Sigma reached out to me about testing a new lens, I was immediately curious to find out what it was. When I learned it was the Sigma 16-300mm F3.5-6.7 DC OS | Contemporary, I couldn’t help but be excited, as it was exactly the kind of travel lens I had been hoping for.
About 15 years ago, I used a high-magnification zoom lens from Sigma, and I still remember how incredibly useful it was – not only for travel, but also for commercial shoots.
This new lens feels a bit sleeker, yet sturdier, than the one I used back then. Since I travel so often, minimizing my gear is very important, and with this lens I no longer need to carry extra lenses. It is a real game changer.
I tend to gravitate towards a standard focal length of 40-50mm for street photography. But I also love the creative freedom that zoom lenses provide. The Sigma 16-300mm F3.5-6.7 DC OS | Contemporary, designed for APS-C cameras, offers an effective focal length of 24-450mm, which meant I could easily capture distant scenes without missing a moment.
When I came back from my travels, I took a few photos of my everyday life, and once again I was blown away by the stunning results, especially when shooting in soft backlighting. It actually exceeded my expectations.
I got my hands on this lens just one day before leaving for Portugal. Naturally, my photography was all about exploring Portugal. The camera and lens fit perfectly into my small everyday camera bag, almost as if they were meant to.
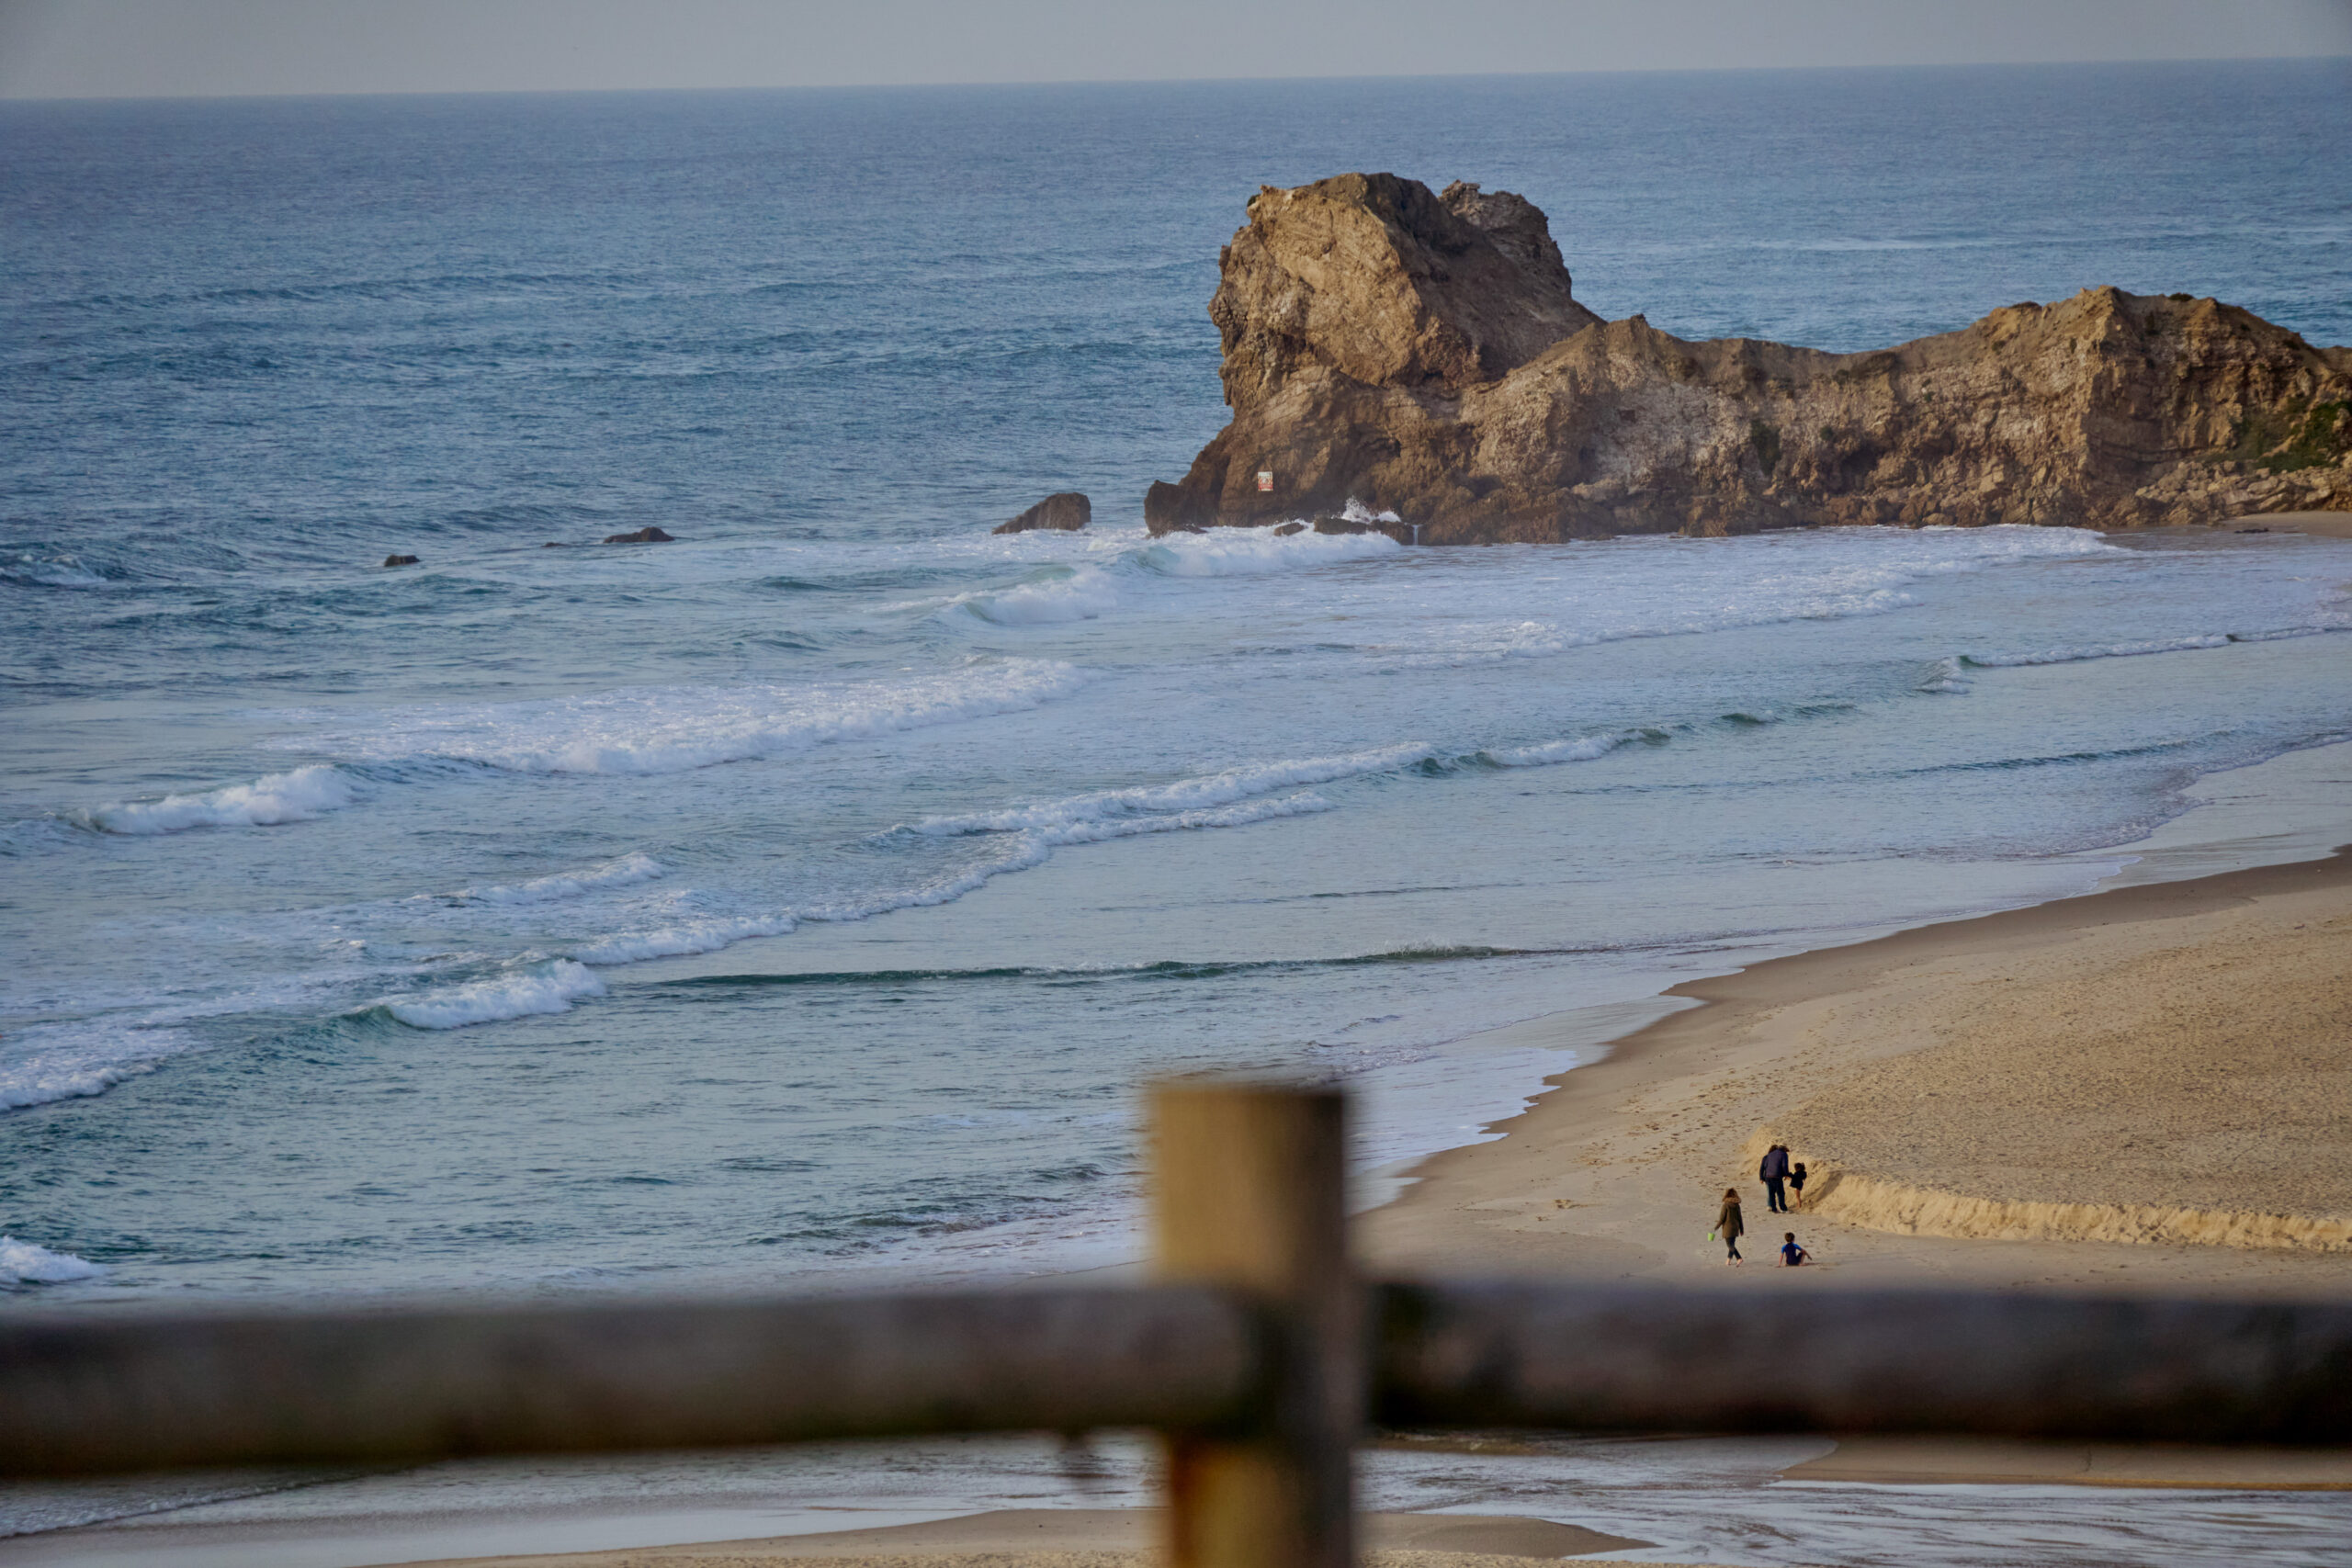
Sigma 16-300mm F3.5-6.7 DC OS | Contemporary Sony A6500 154mm, F6.3, 1/800s, ISO 250Sigma 16-300mm F3.5-6.7 DC OS | Contemporary Sony A6500 110mm, F6.3, 1/800s, ISO 1000
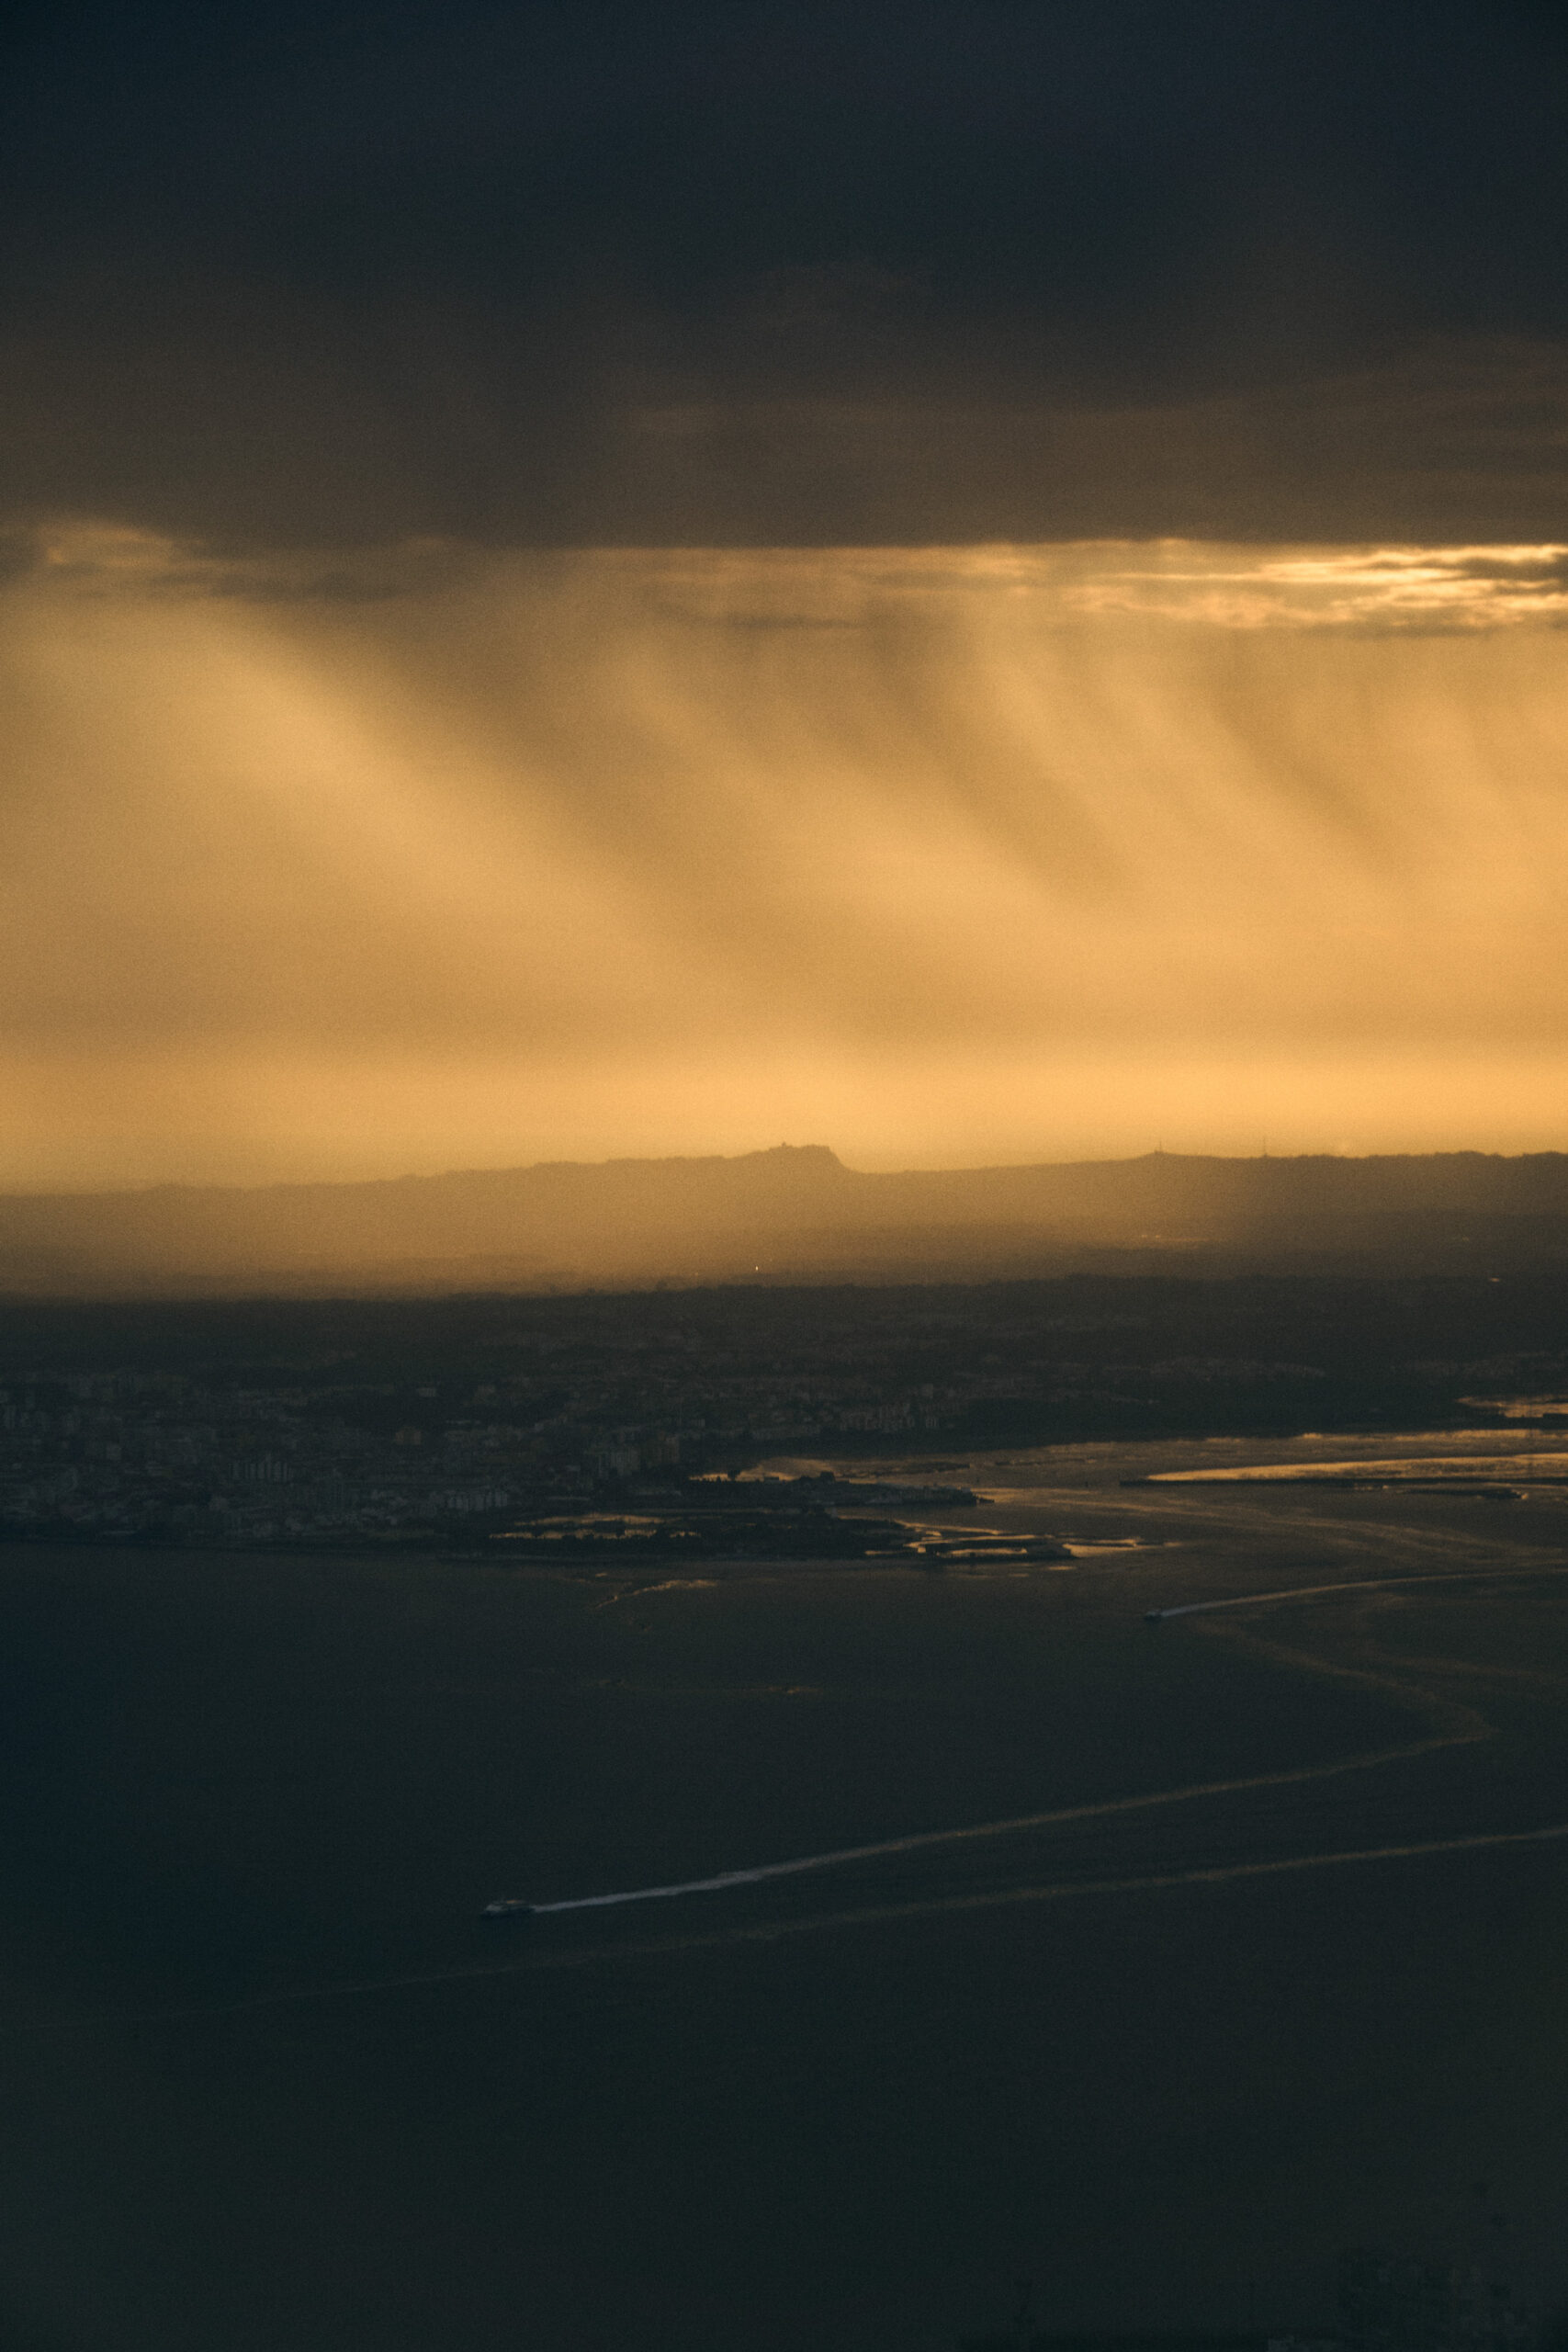
As the plane approached Lisbon airport, I noticed storm clouds in the distance. I quickly took out my camera and captured the scene. It was probably the first shot I took with this lens. Even though I wasn’t sitting by the window, the zoom still allowed me to capture the mysterious clouds.
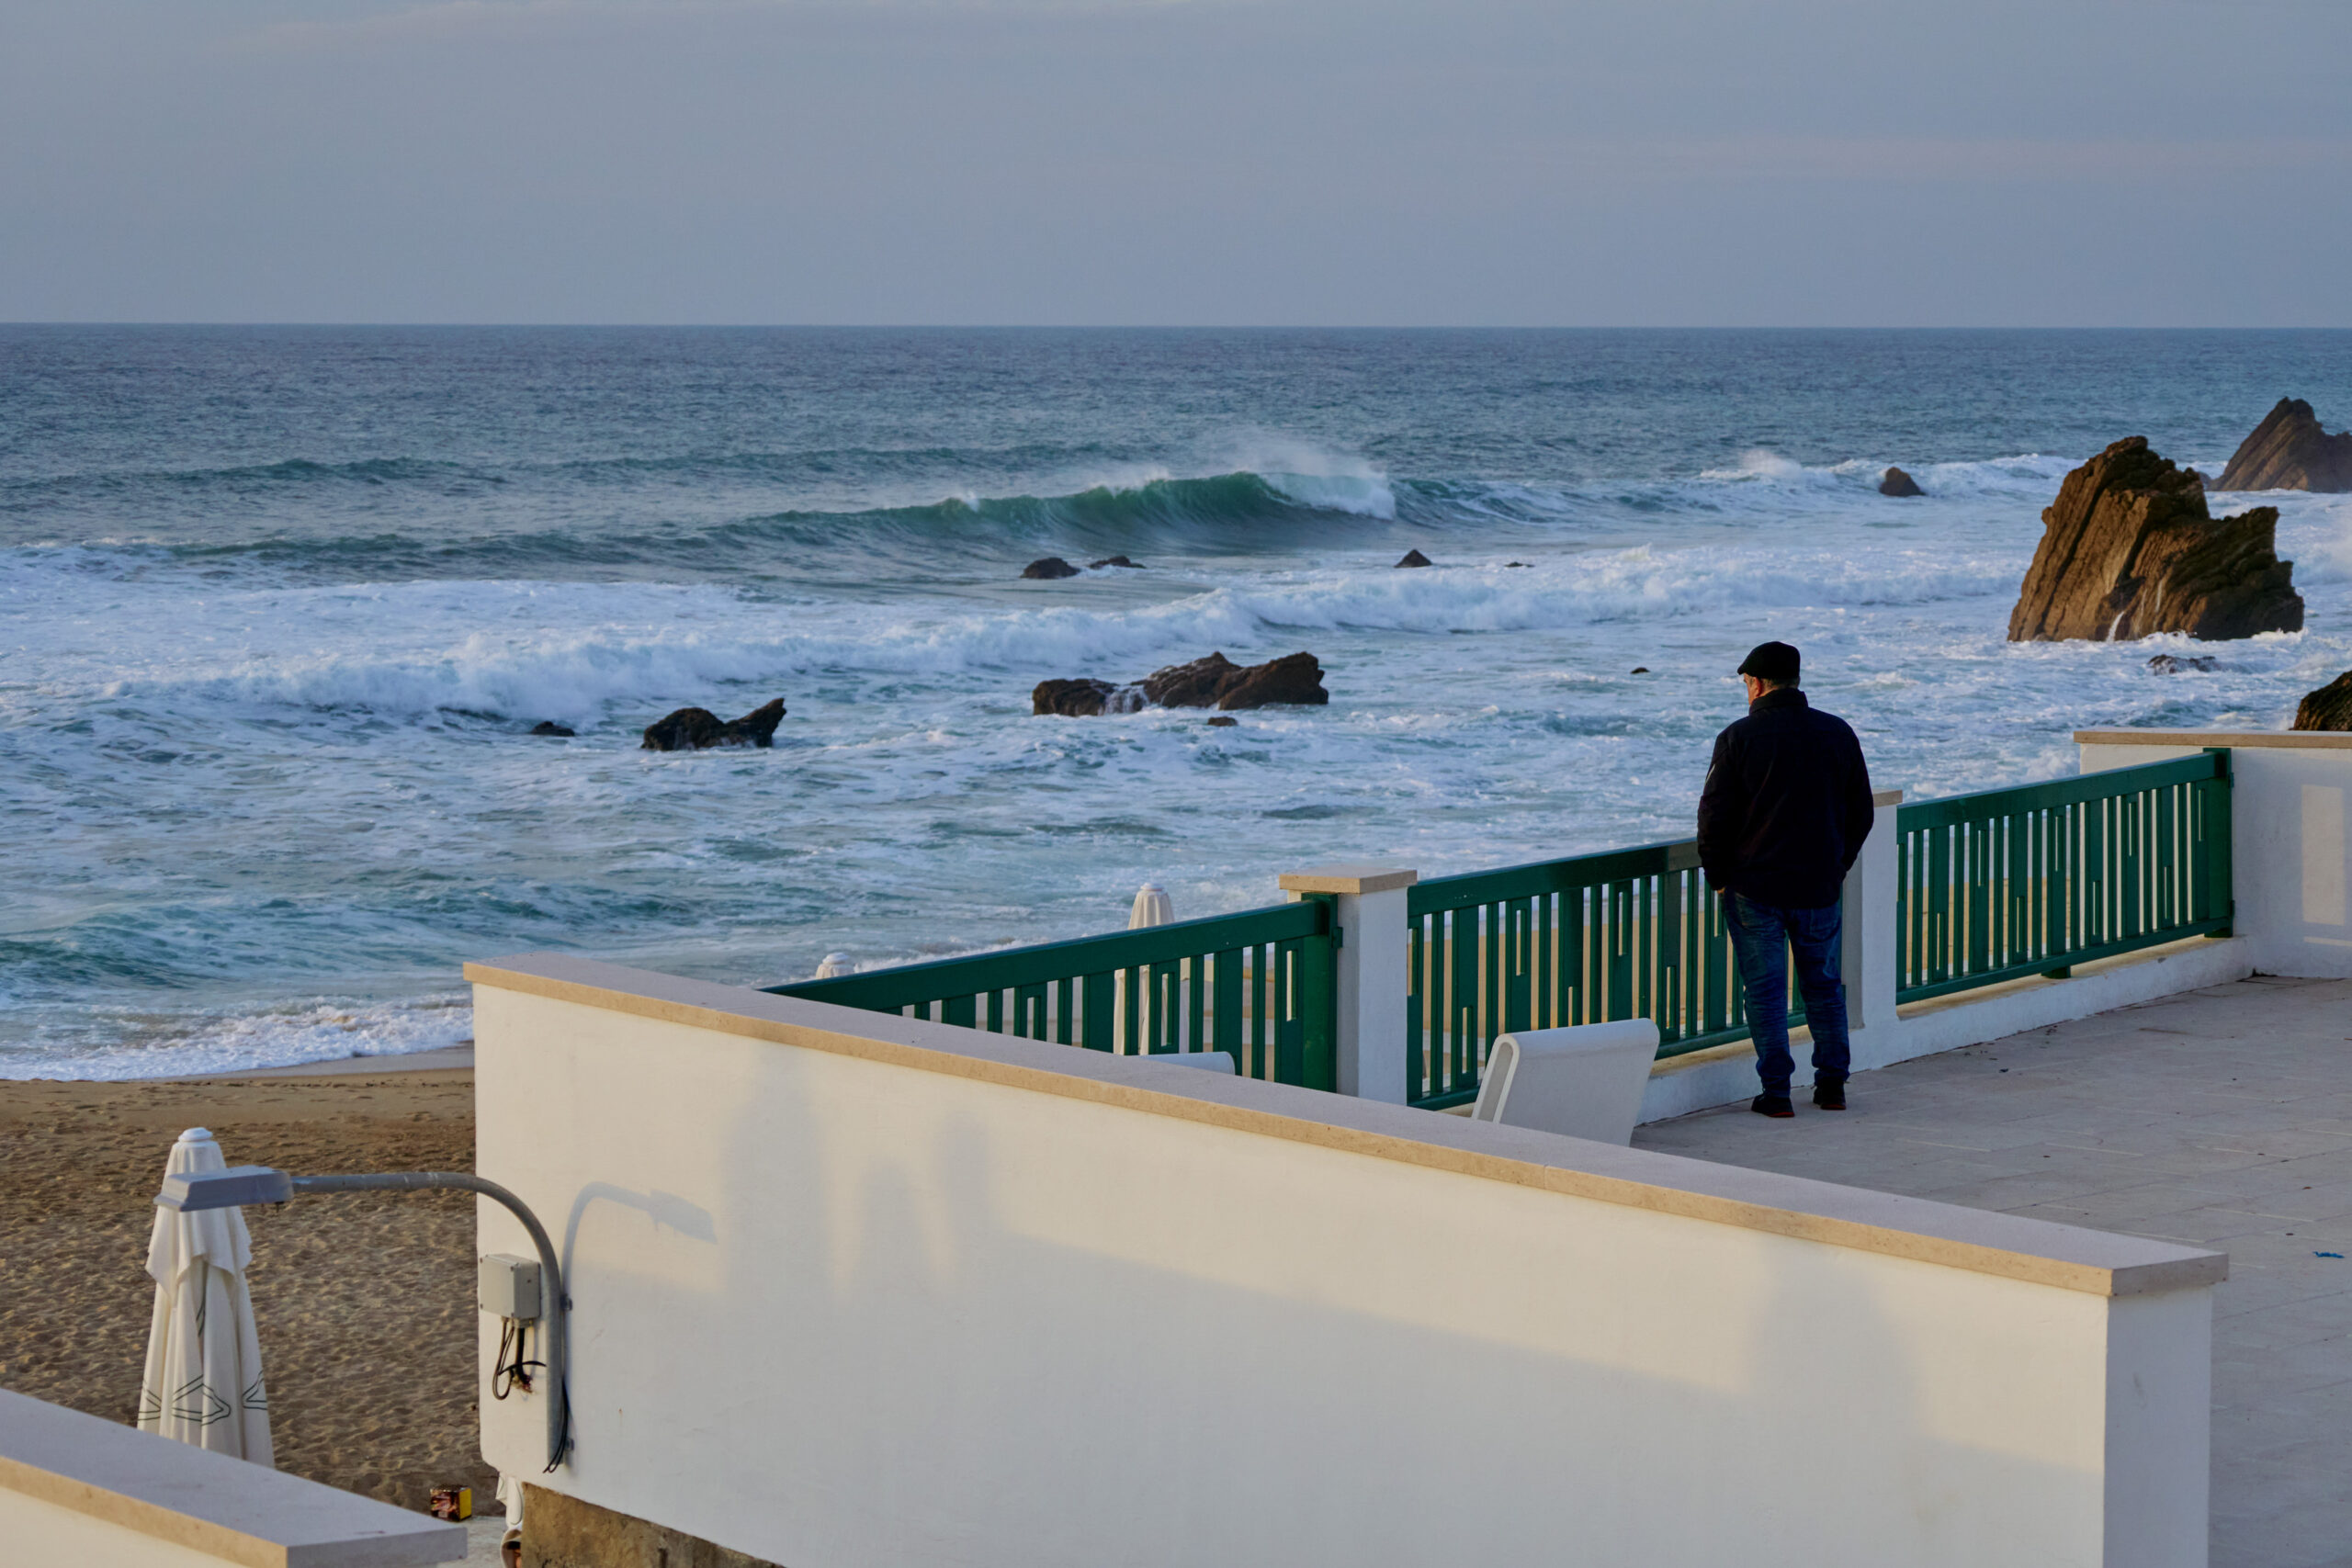
Even though I had been to Portugal before, this trip felt refreshing and new. I think it was because of this lens. One night before Christmas, I hopped on the iconic Tram 28 to experience Lisbon’s nightlife. A few days later, in the new year, I visited the peaceful villages of Alentejo and the coastal town of Nazaré, known for its giant surf waves. Wherever I went, my camera and lens were by my side.
A few years ago, on a trans-Siberian trip, I carried several cameras and several prime lenses to cover all possible focal lengths. My love of photography kept me going, but the physical exhaustion was undeniable. This time, with just one lens, I was able to capture the serene plains and rooftops of Évora Monte, the winter sea from a windy hill in Nazaré, and the ever-changing waves of the ocean. Again and again, I found myself grateful for the lens’s versatility.
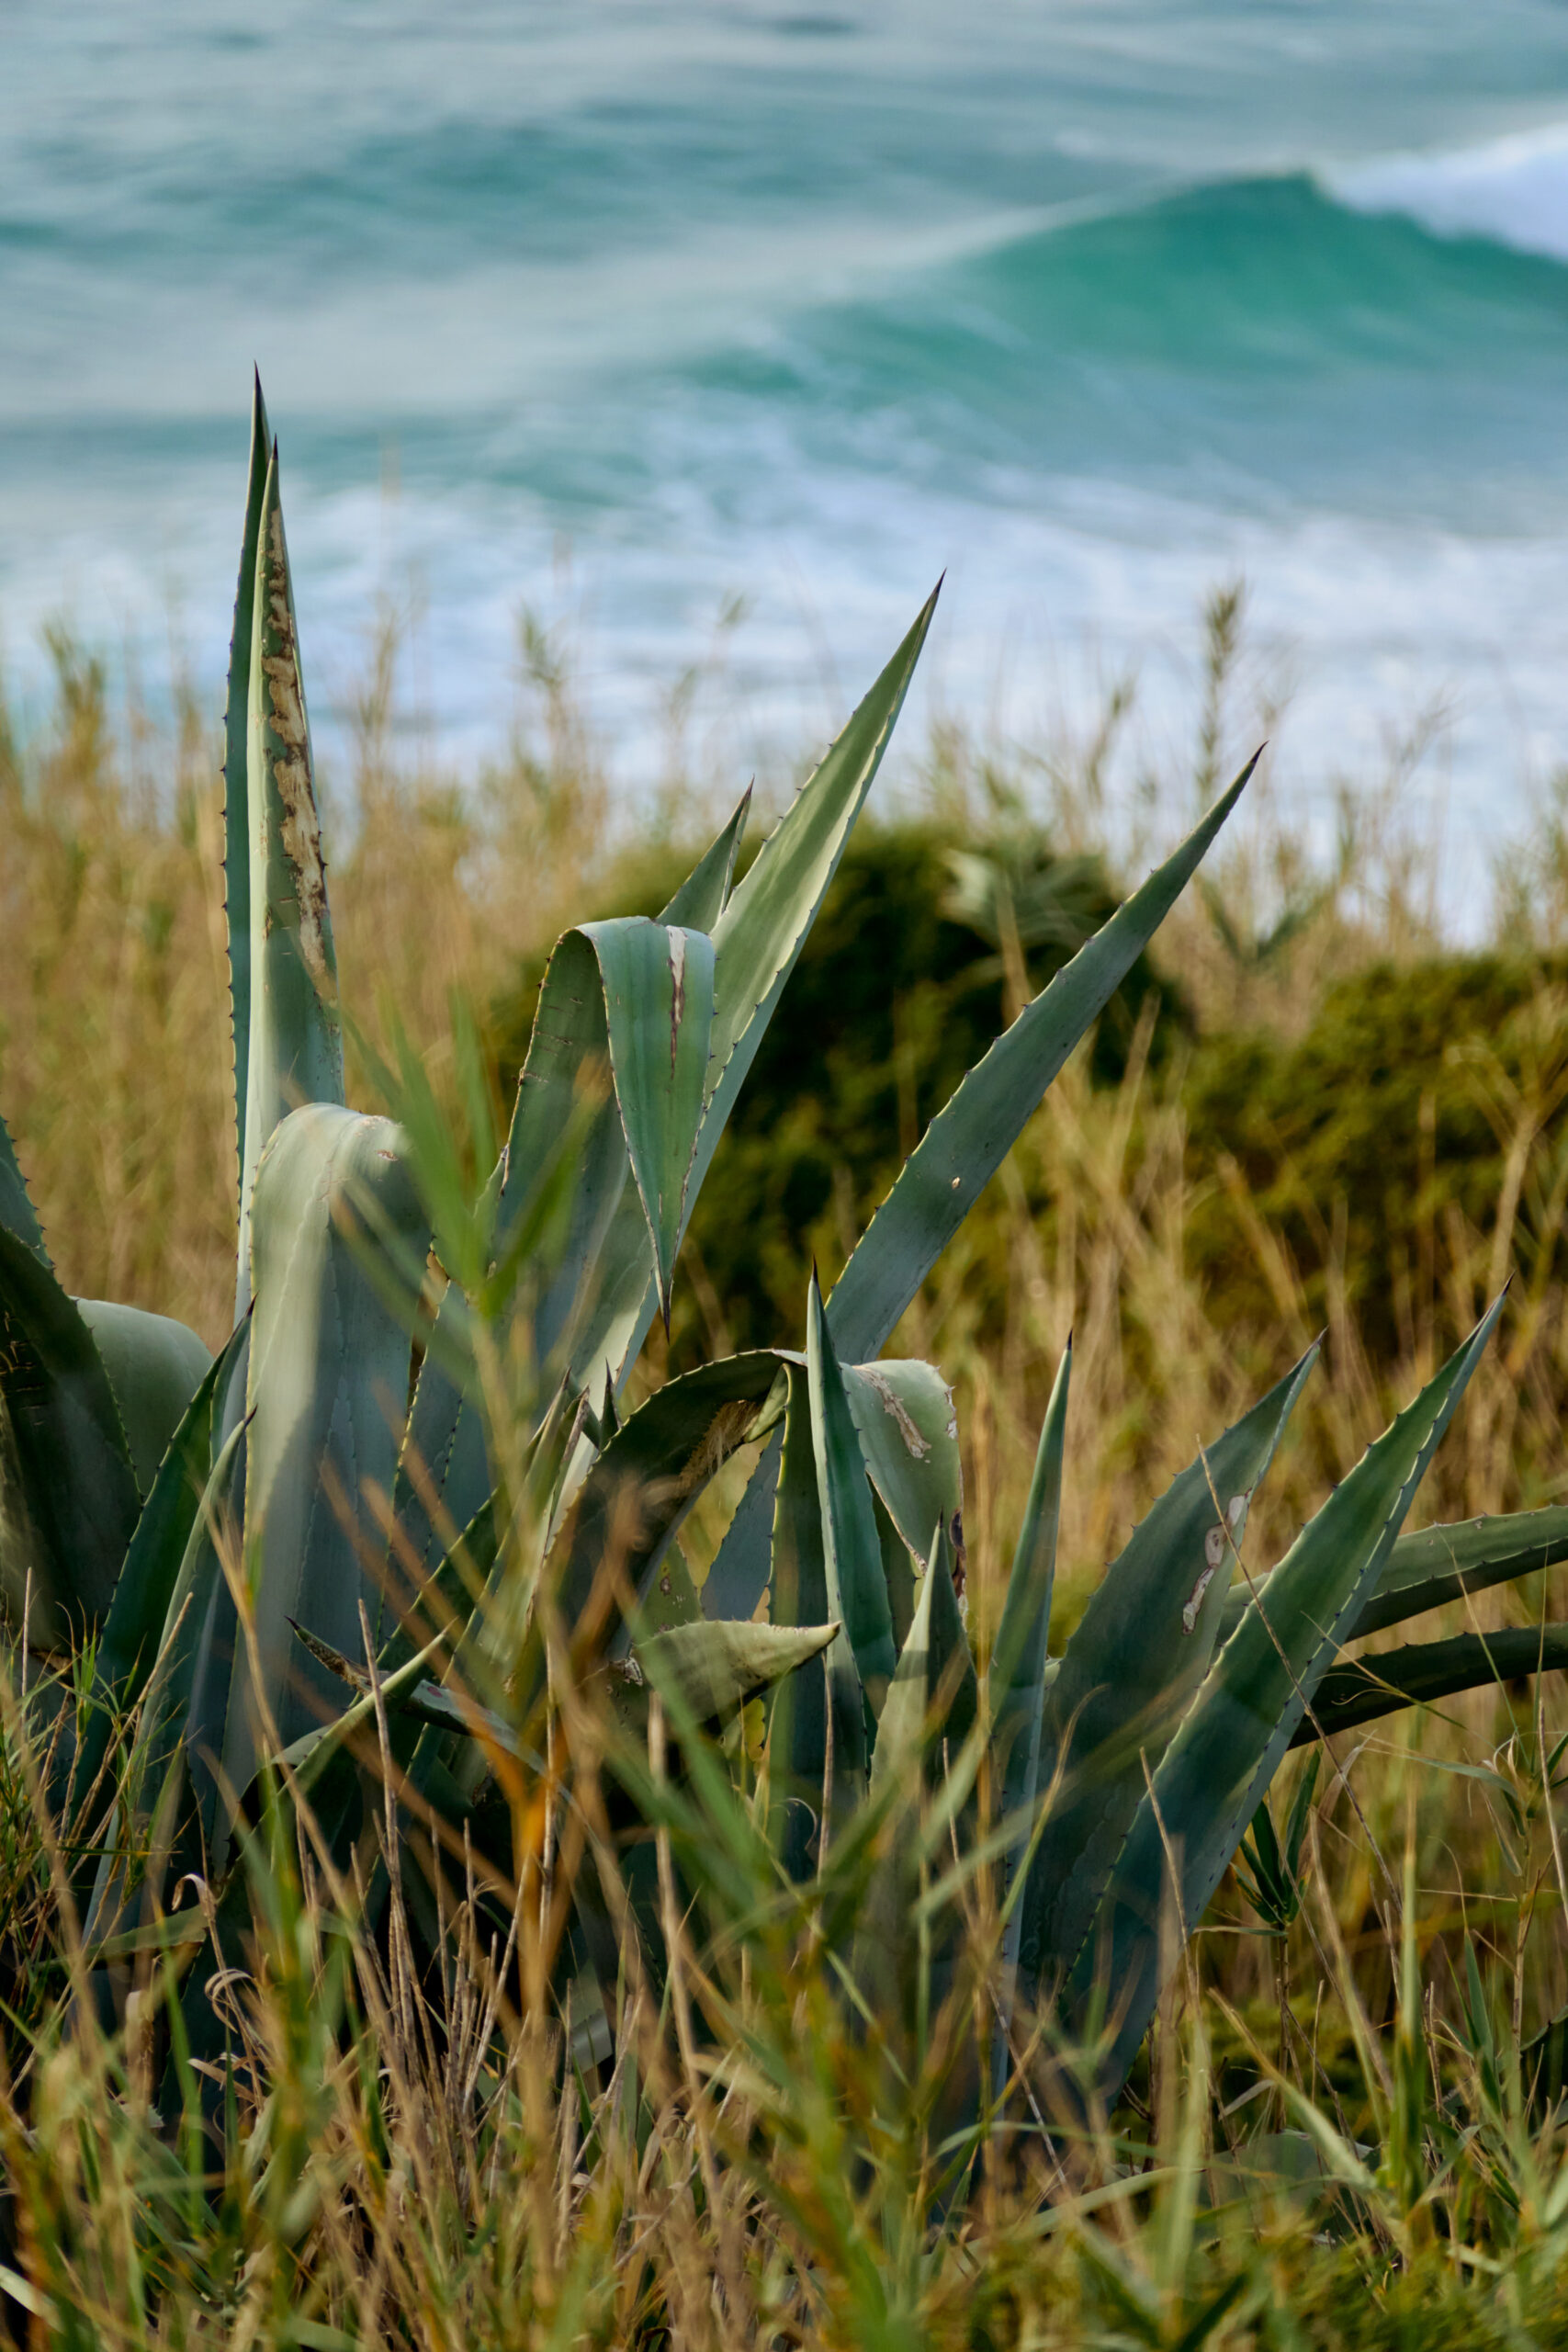
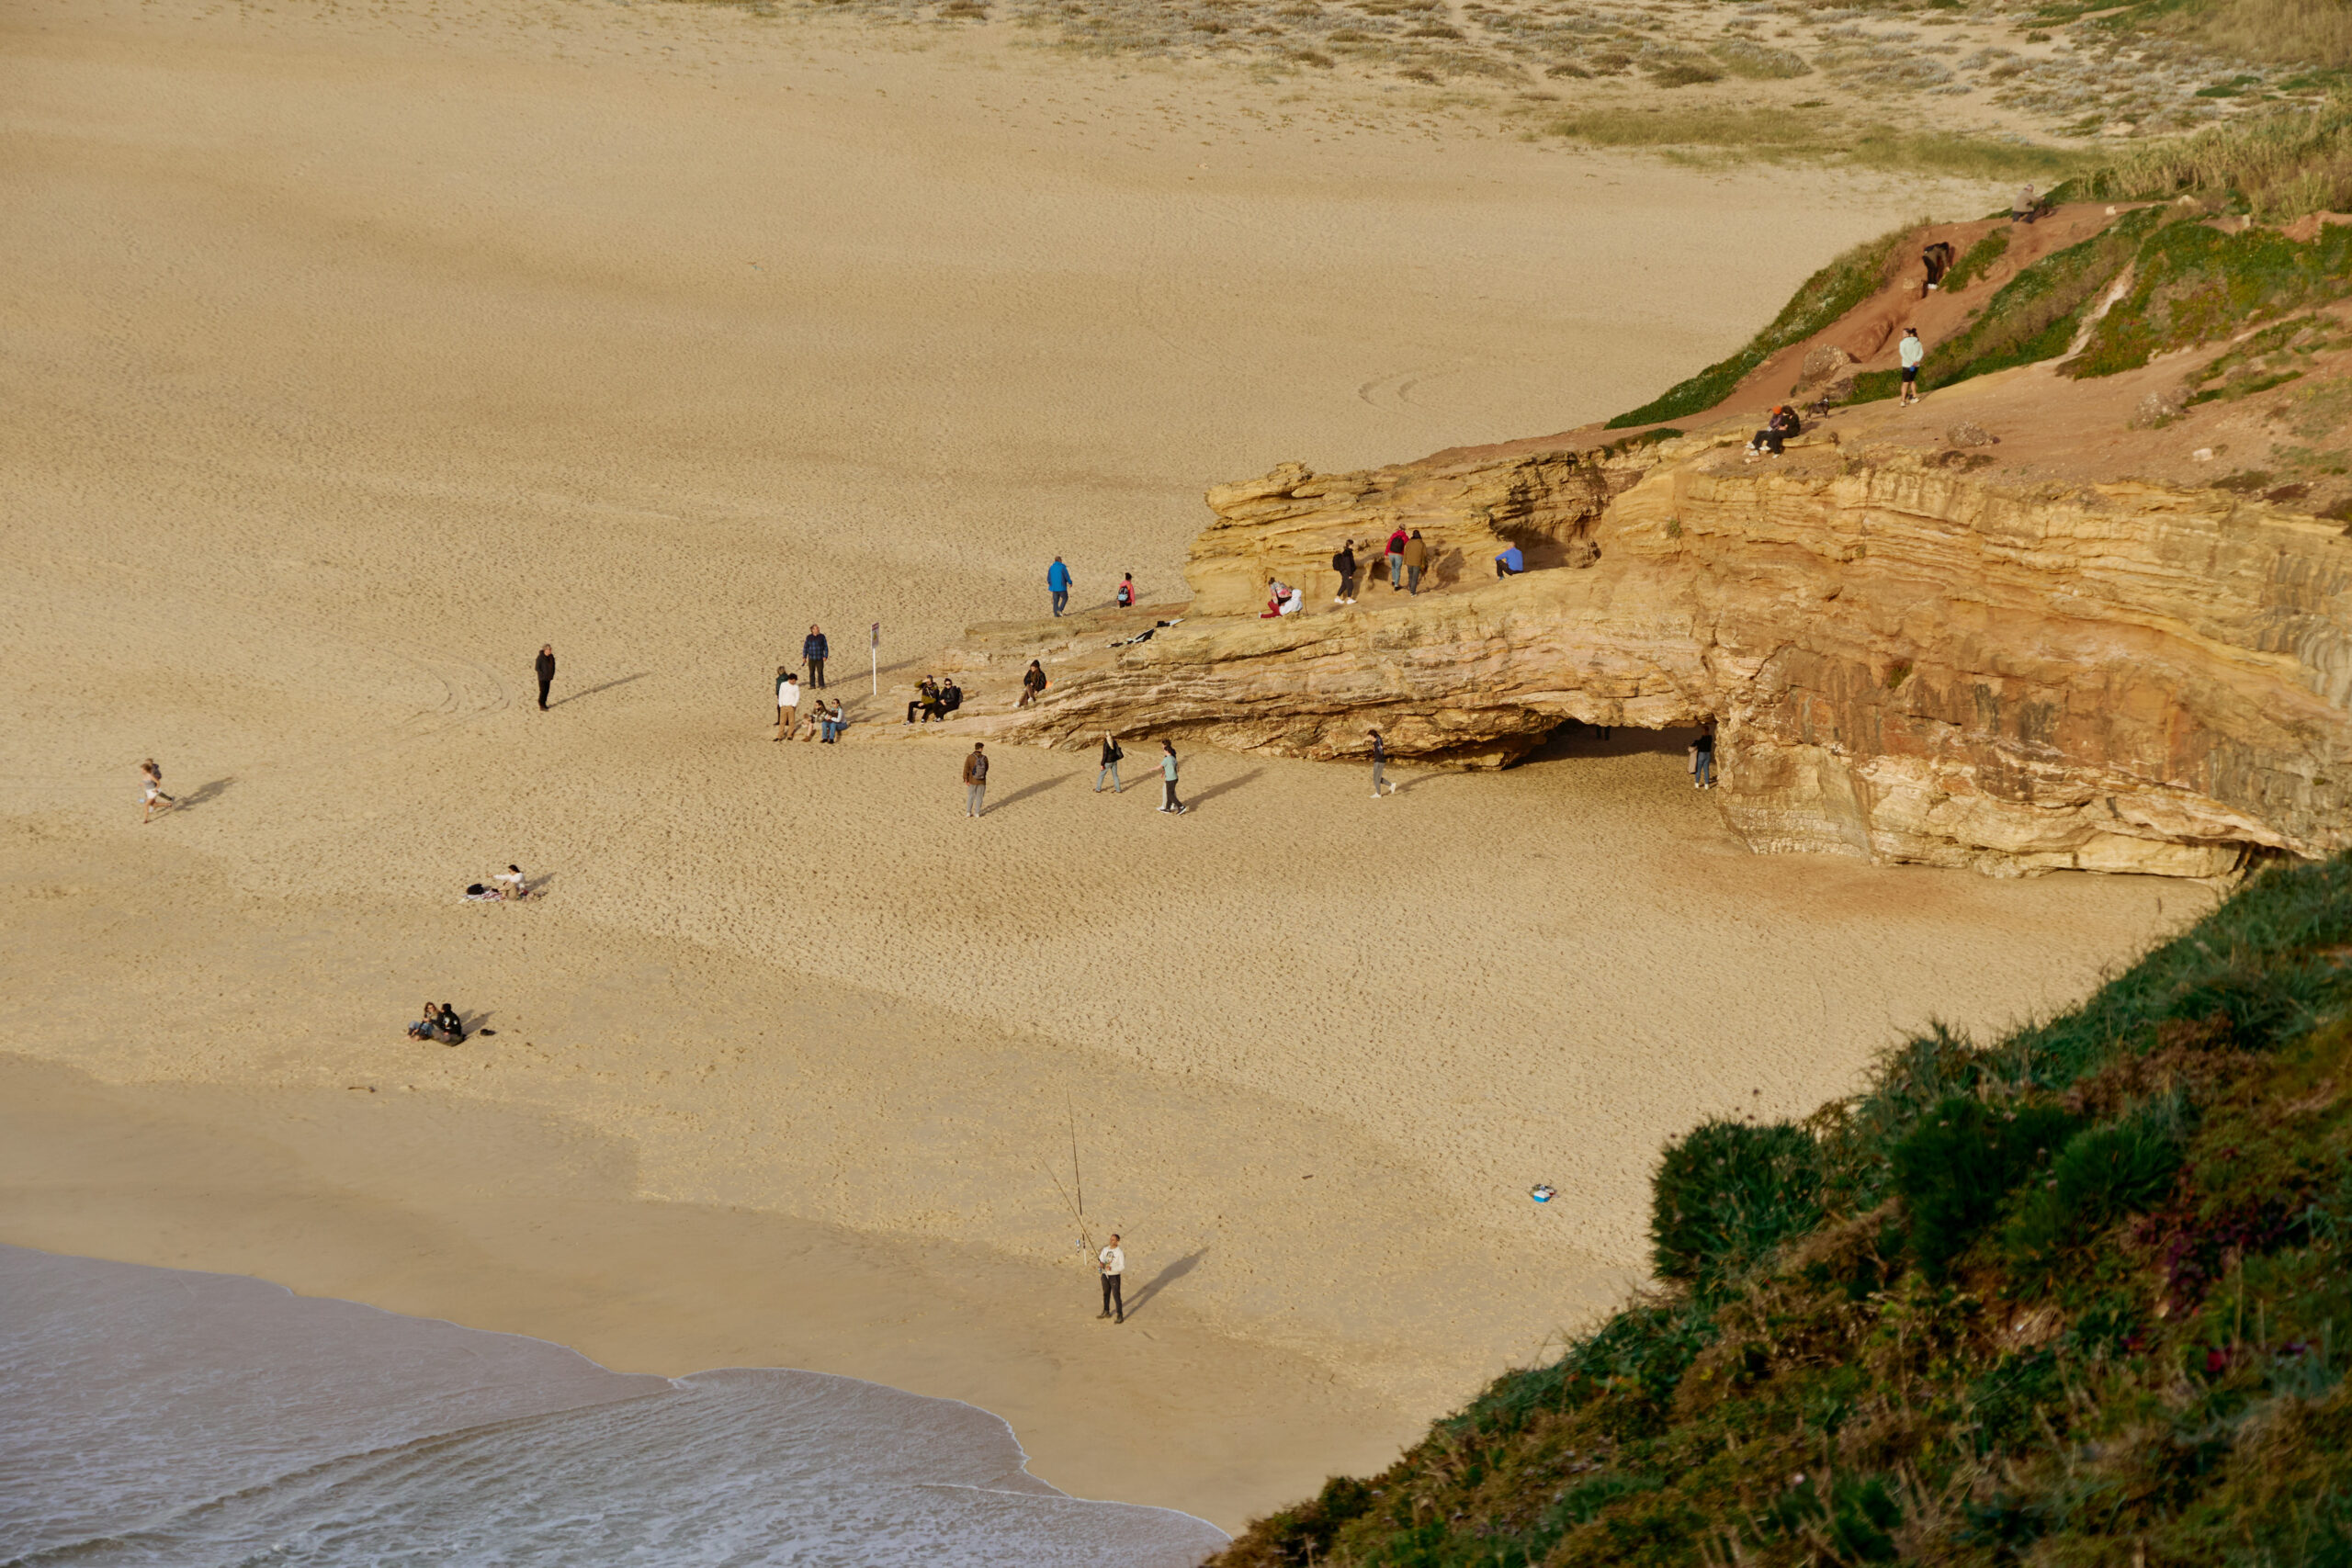
Sigma 16-300mm F3.5-6.7 DC OS | Contemporary Sony A6500 300mm, F6.7, 1/500s, ISO 400Sigma 16-300mm F3.5-6.7 DC OS | Contemporary Sony A6500 91mm, F7.1, 1/500s, ISO 100Sigma 16-300mm F3.5-6.7 DC OS | Contemporary Sony A6500 62mm, F5.6, 1/800s, ISO 500Sigma 16-300mm F3.5-6.7 DC OS | Contemporary Sony A6500 76mm, F8, 1/500s, ISO 100
When I was younger, I loved browsing through my father’s photographs. Later, I joined my middle school’s photography club and learned how to use a manual camera. Then, in the early 2000s, I got my hands on a digital camera and began documenting my life in earnest. I studied the work of great masters like Henri Cartier-Bresson and traveled the world to capture an endless number of moments. I was never without a camera. Photography became as natural to me as breathing.
I am inspired by the people I meet, the vibrant colors of nature, and the way light and wind play together. The scents of the places I visit, the books I read, the music I listen to, and the art others create move me deeply. Even longing and solitude are emotions that continue to inspire me. While light, composition, and framing are crucial elements of photography, I believe my photographs are truly defined by the attitude, authenticity, and mindset behind each shot.
If you want to fully experience the Sigma 16-300mm F3.5-6.7 DC OS | Contemporary, I recommend taking it on a trip and exploring with no other lens in your bag. It will give you the freedom to experience each moment and discover how it can move you in different ways. Also, always take the time to look at beautiful photographs and think about what kind of images you want to create and how to achieve them.
Sigma 16-300mm F3.5-6.7 DC OS | Contemporary Sony A6500 300mm, F6.7, 1/500s, ISO 250Sigma 16-300mm F3.5-6.7 DC OS | Contemporary Sony A6500 59mm, F5.6, 1/800s, ISO 320Sigma 16-300mm F3.5-6.7 DC OS | Contemporary Sony A6500 86mm, F5.6, 1/400s, ISO 100
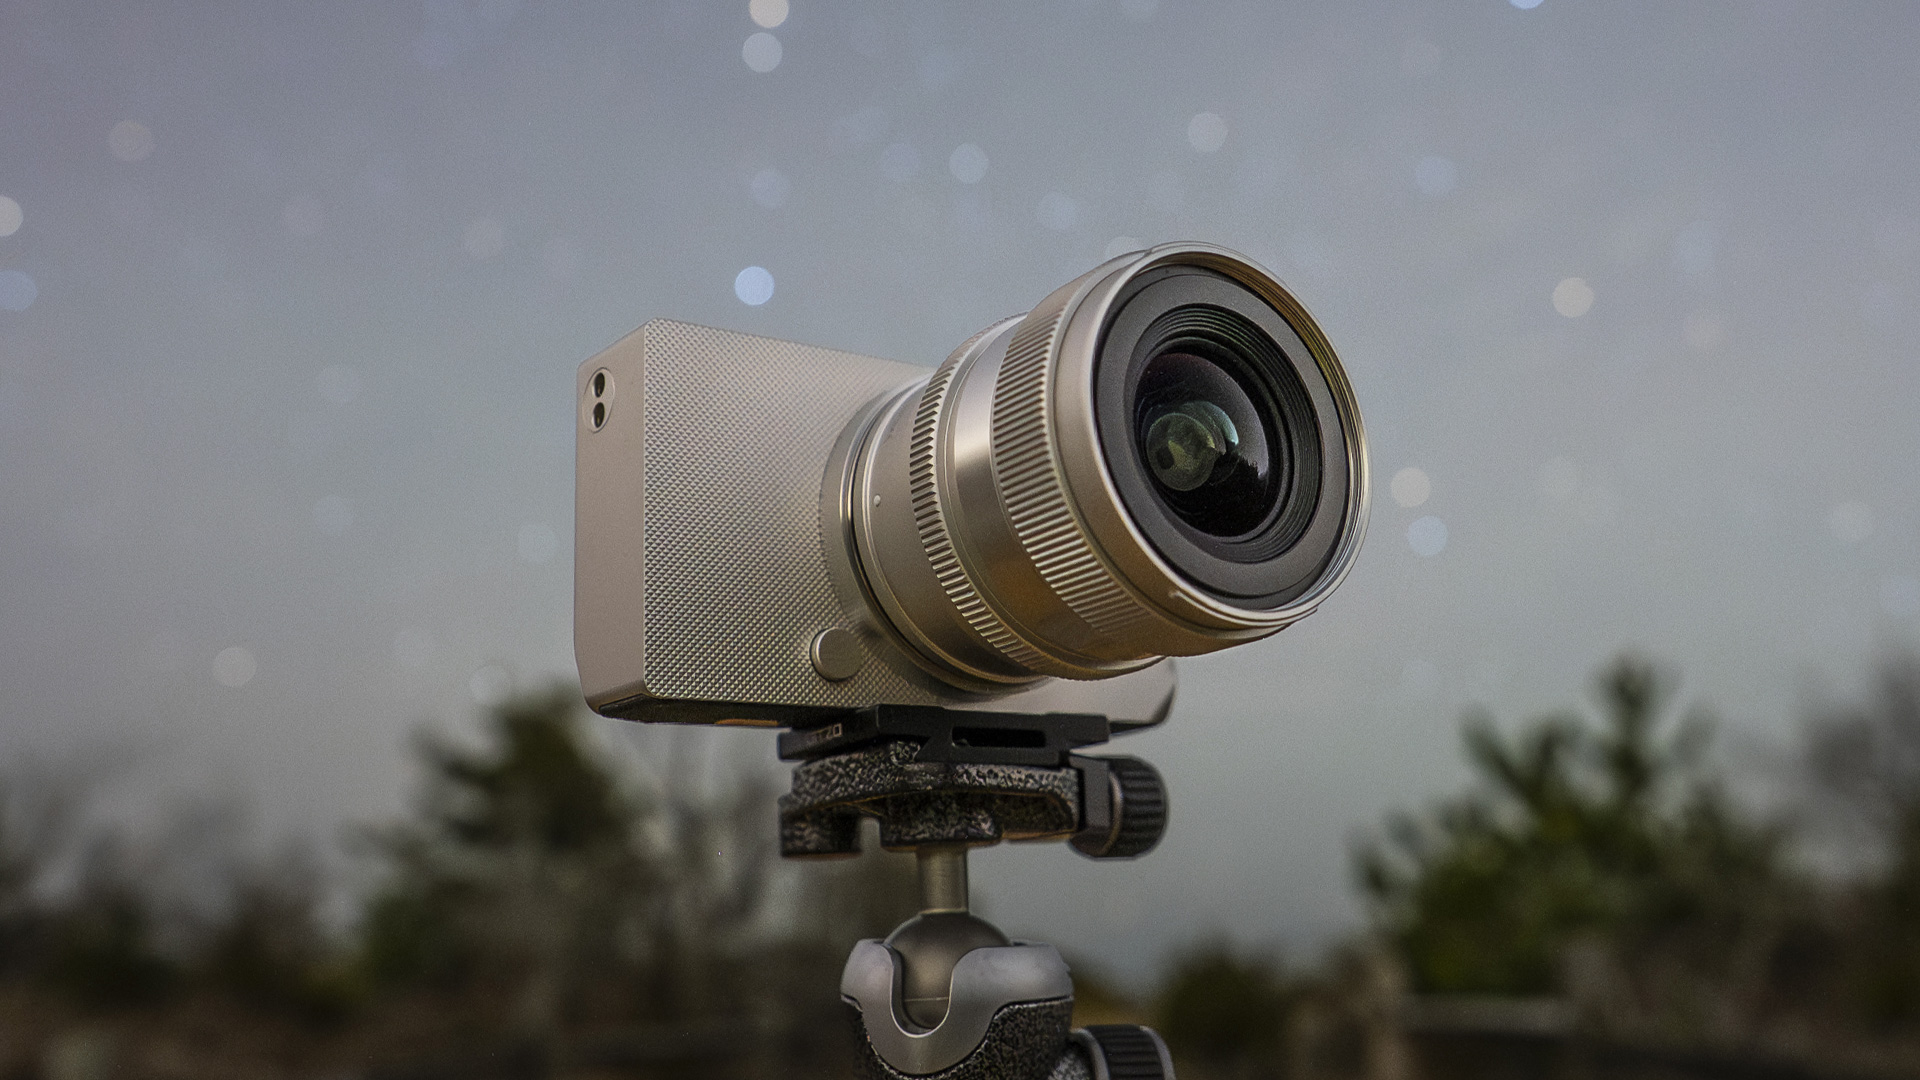
The Sigma BF looks stunning at night. But how are the images?
What does it take to get out of your comfort zone? Over the last 10 years or so, I’ve very rarely shot anything outside of astrophotography. I’ve always had an appreciation for other styles, but very little desire to explore shooting them myself. While I always try to improve my work, my comfort level with astro allows me to fully enjoy being out under the stars and focus on creating.
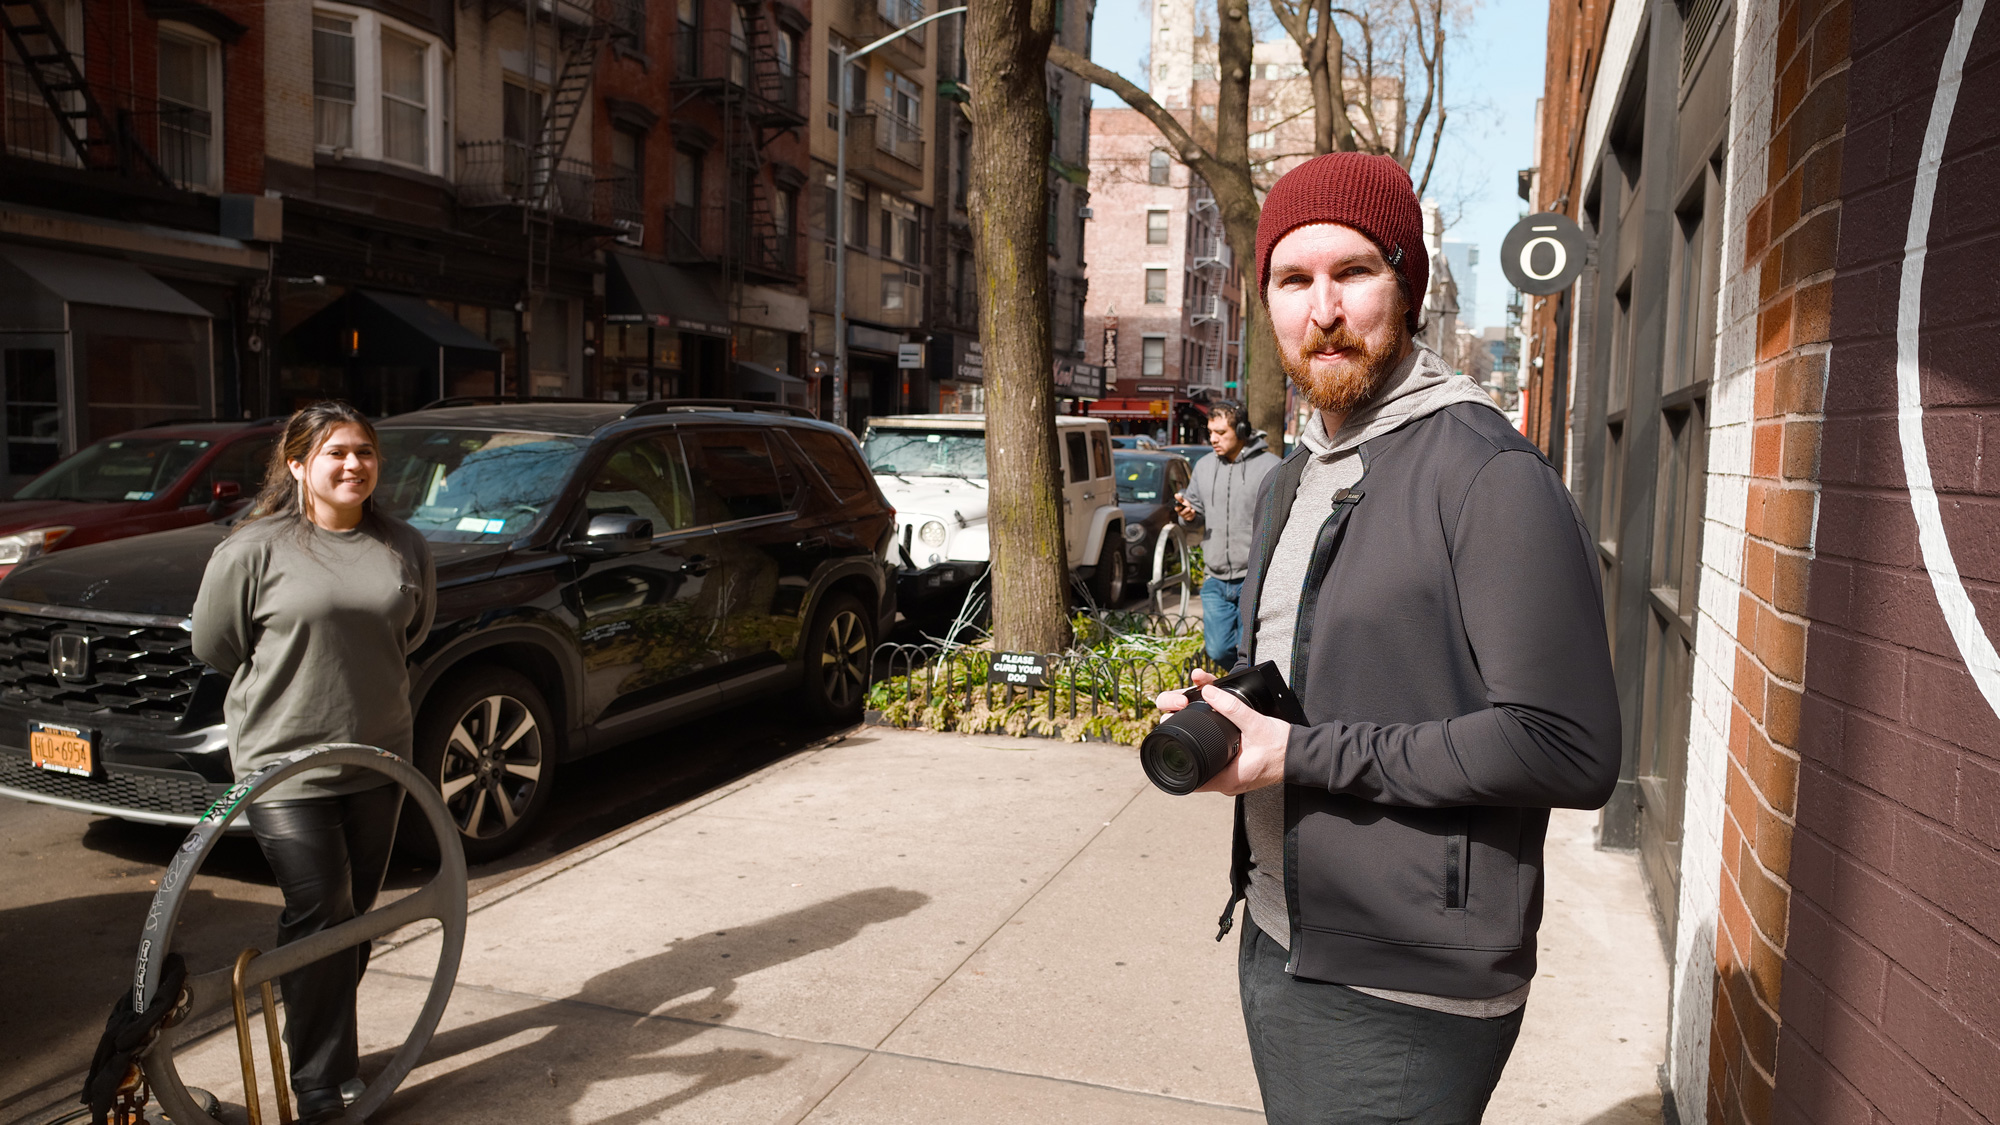
Hearing about some of the details around the new Sigma BF definitely had me intrigued. While it’s hard to deny the design of the camera stands out, it was really the simplified approach that grabbed me. I visited the pop-up in NYC during March 2025 to get my first look at the camera, and then returned two weeks later so I could have the chance to shoot with one.
With the Sigma America crew and my BF camera, ready to hit the streets.
Getting used to the minimal button system on the back of the camera didn’t take much time at all. Using the dial to make quick adjustments and my personal love for the aperture ring on the 20mm F2 DG | Contemporary lens made taking some of my first street photography images feel a lot more fun than like more of a challenge.
The Sigma BF as a walkaround camera
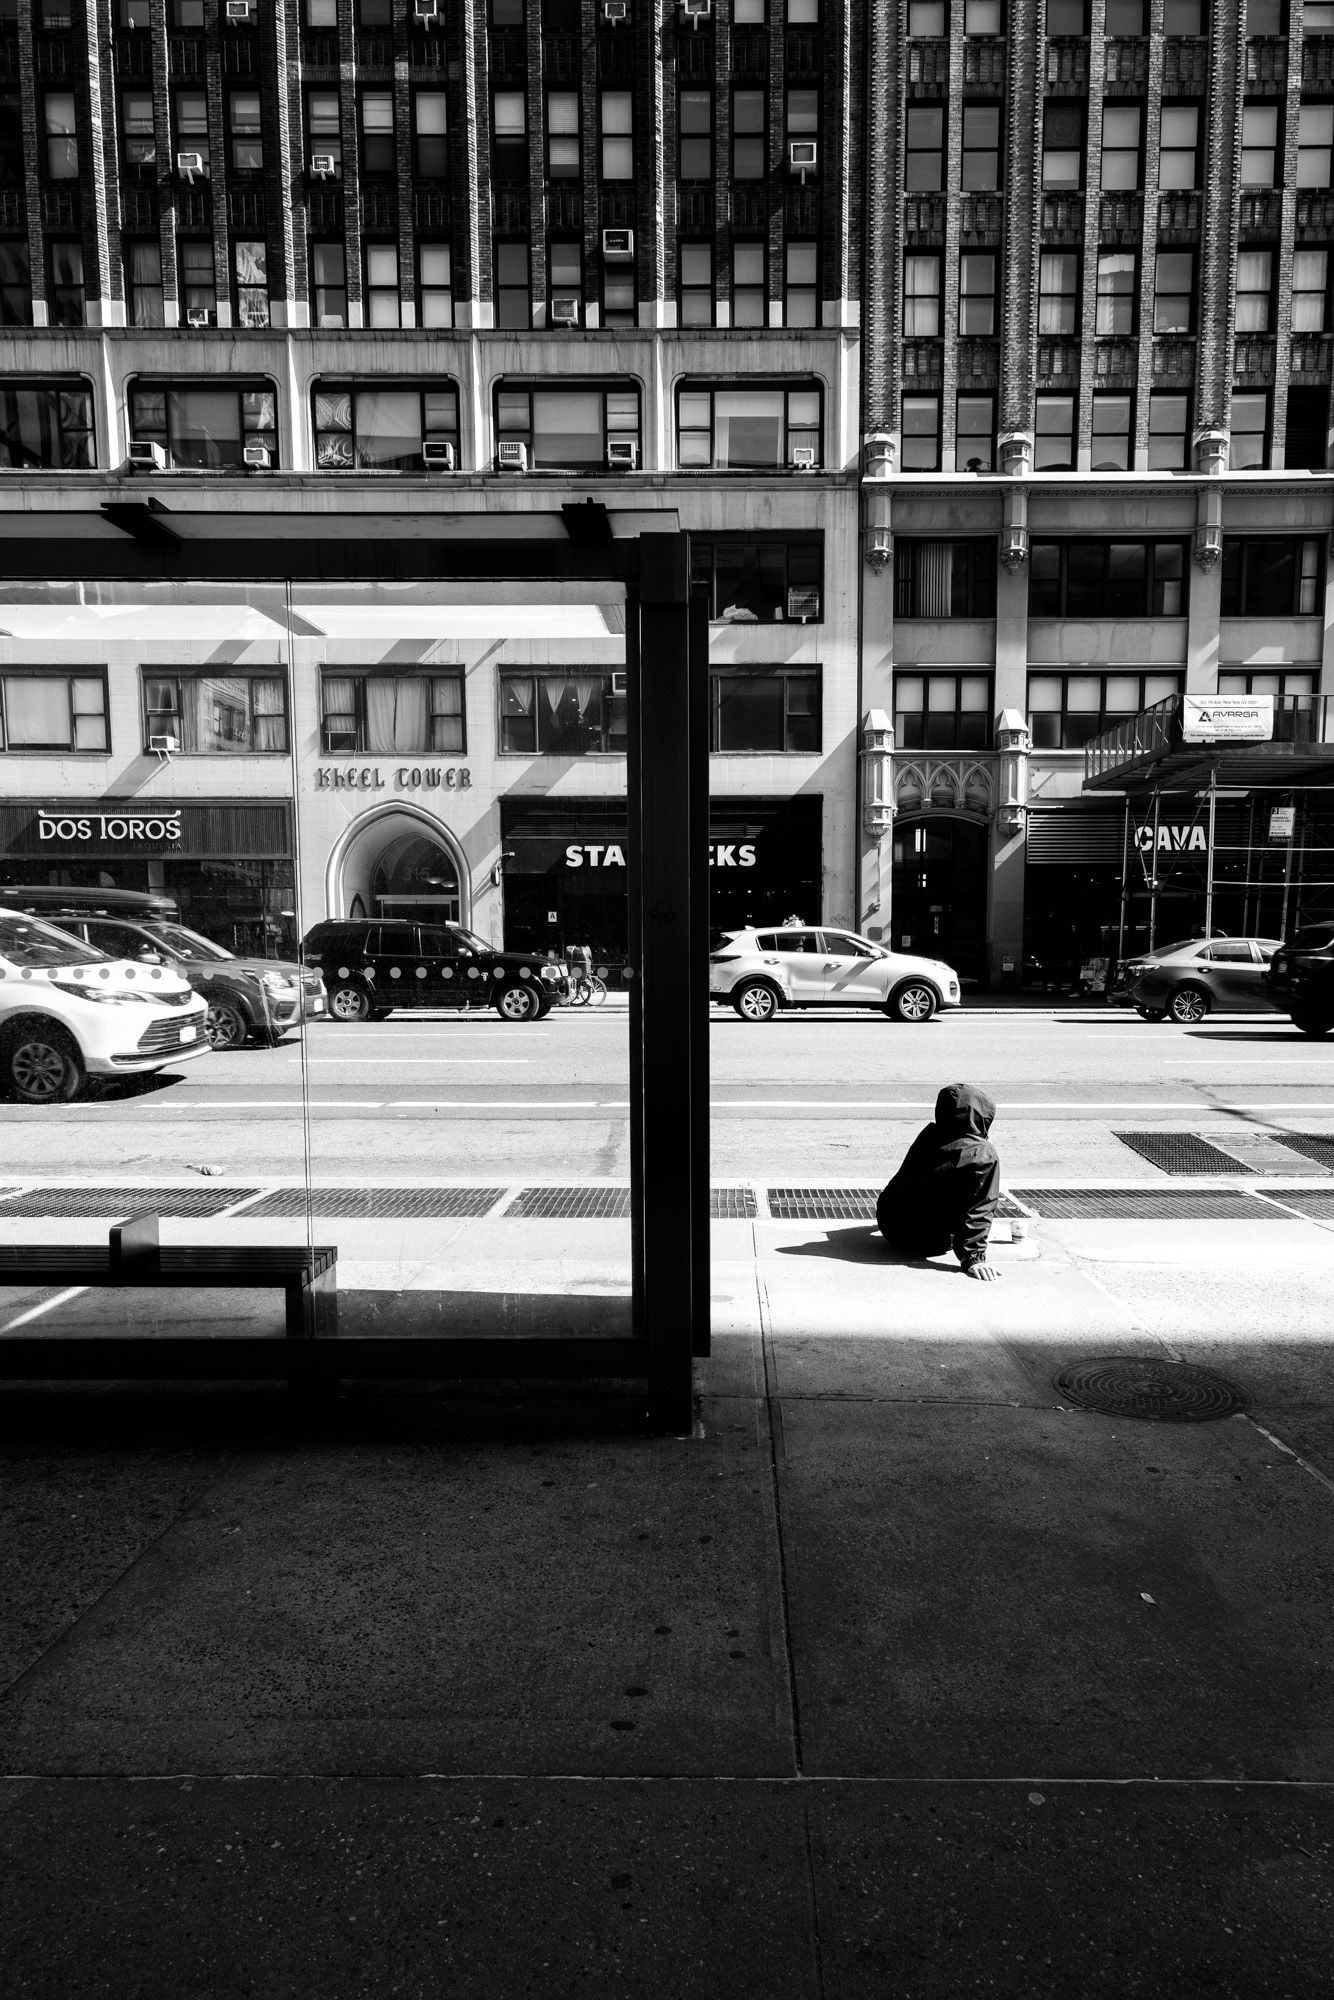
Street photography in particular is a genre I’ve had a special appreciation for when viewing someone’s work. It looks easy, but like so many things, only when it’s done well. I was a bit unsure about what to photograph, or if what I was photographing was any good, but I was having fun. And, at least personally, I was really enjoying the images I was capturing, too.
SIGMA BF CAMERA 20mm F2 DG | CONTEMPORARY F8, 1/1000s, ISO 400
SIGMA BF CAMERA 20mm F2 DG | CONTEMPORARY F8, 1/250s, ISO 400SIGMA BF CAMERA 20mm F2 DG | CONTEMPORARY F8, 1/500s, ISO 400
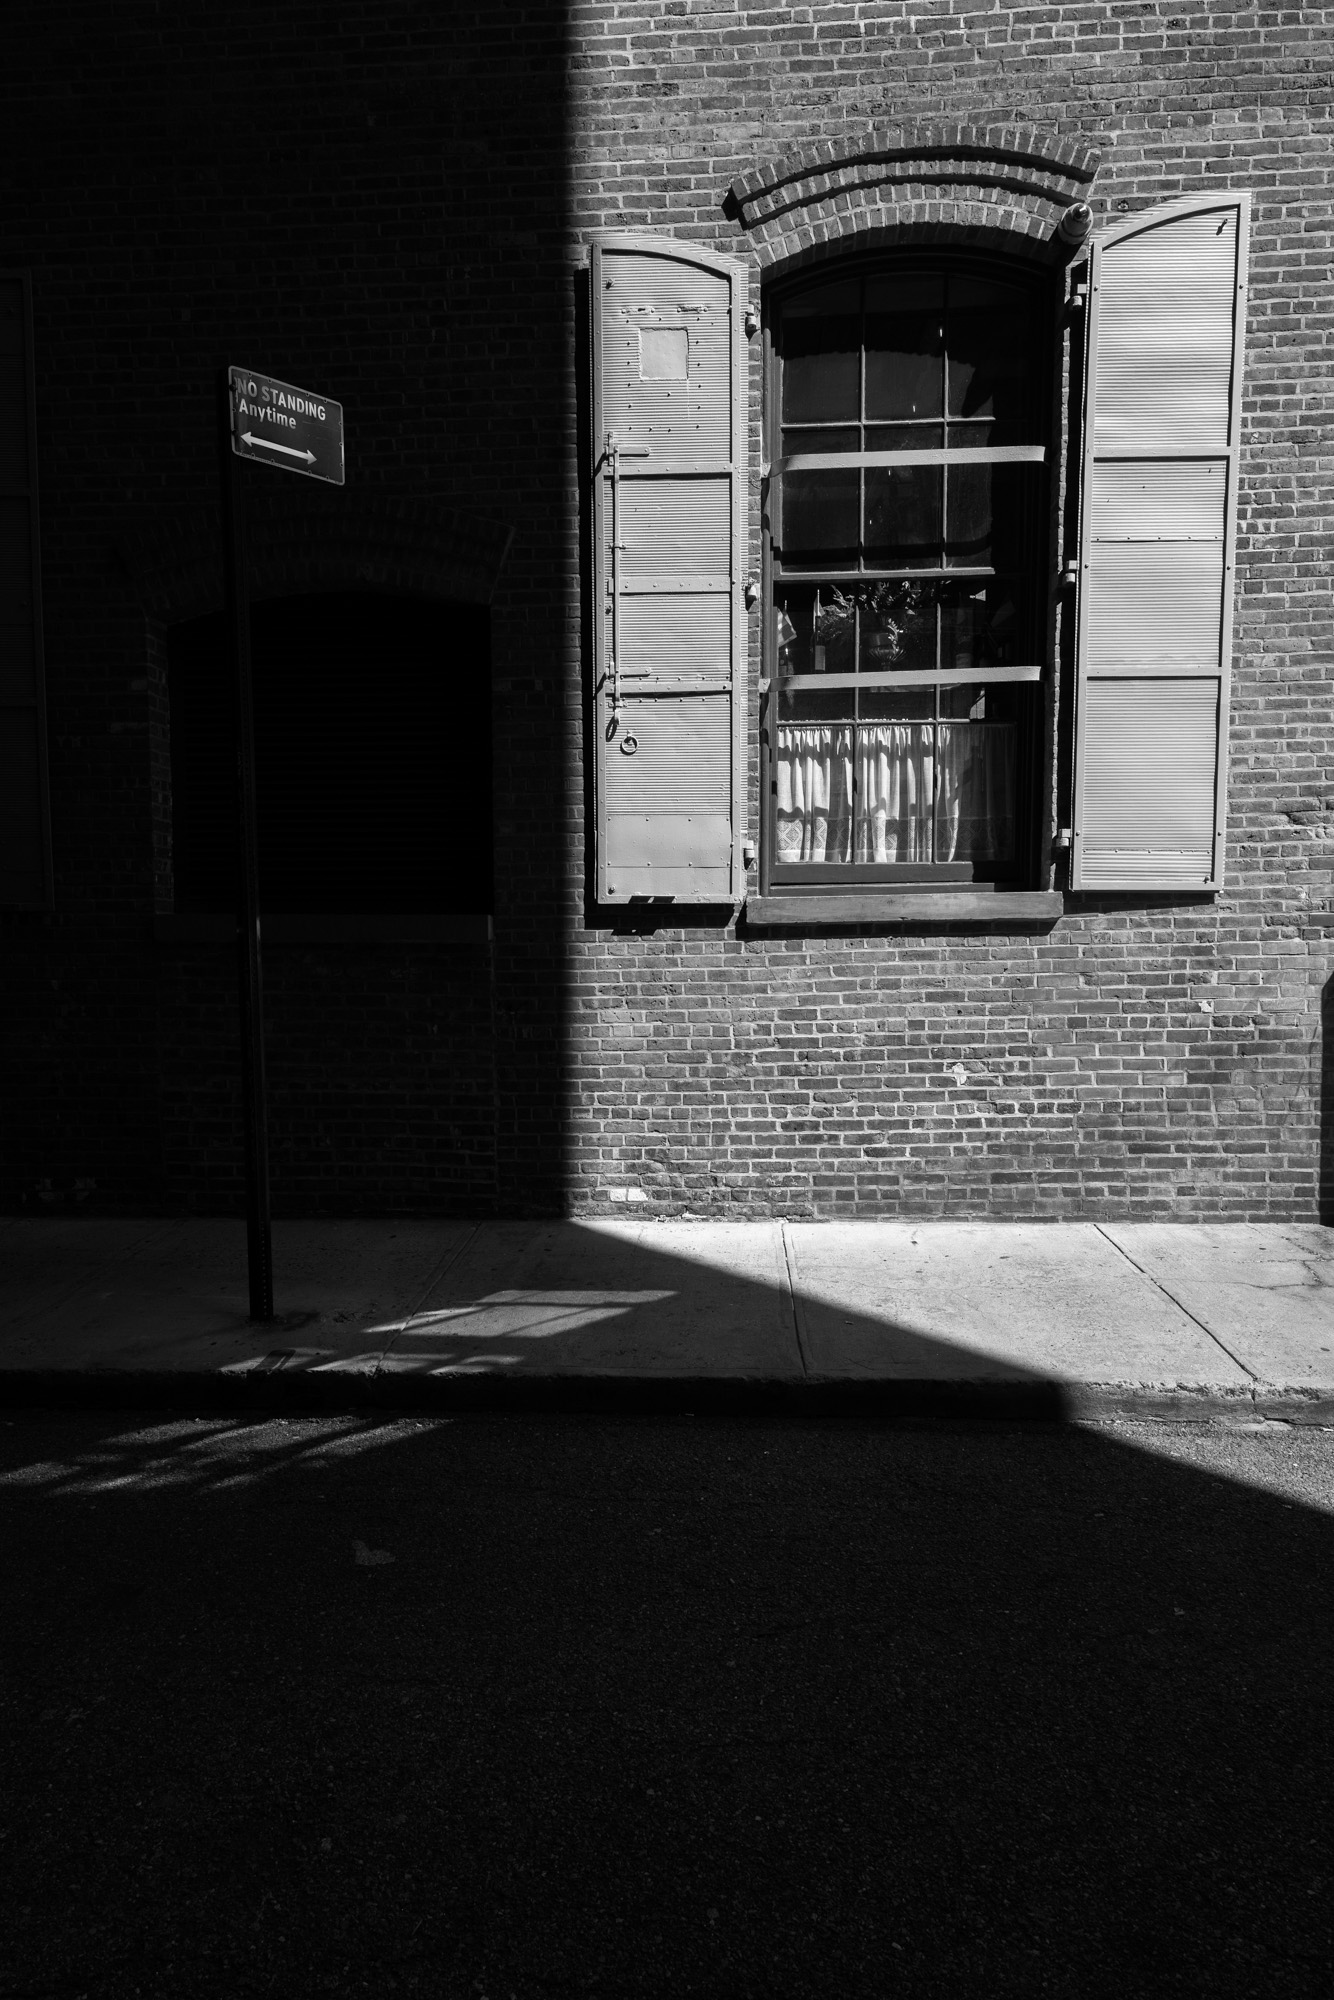
I didn’t wait long before heading back out with the BF. This time, I made my way to Princeton, NJ, again with the all-metal 20mm F2 DG | Contemporary, hoping to take some black and white architectural images. The built-in monochrome color mode helped me do just that, although other color modes were just a flick of the wheel away. Just walking around with a wrist strap and this new minimalist camera, I found myself looking at everything to try and find the perfect frame. These new (for me) genres of photography felt fresh and exciting.
SIGMA BF CAMERA 20mm F2 DG | CONTEMPORARY F9, 1/80s, ISO 100SIGMA BF CAMERA 20mm F2 DG | CONTEMPORARY F9, 1/400s, ISO 100
I worked my way all the way around buildings, up close and from a distance, watching the back of the camera to find that perfect angle or just waiting until something felt right. That’s such a special feeling when that happens while you’re out photographing. It means you’re completely present in the moment and paying full attention to finding that perfect composition.
SIGMA BF CAMERA 20mm F2 DG | CONTEMPORARY F8, 1/125s, ISO 100SIGMA BF CAMERA 20mm F2 DG | CONTEMPORARY F9, 1/30s, ISO 100
I found myself occasionally using the screen to use the tap to focus feature and other times just getting into that zone of snapping away as everything moved through the frame. Admittedly, autofocus is not a feature I’m often concerned with for astrophotography, but it felt extremely fast and accurate on both of my outings.
Exploring a genre outside of my comfort zone and not having to worry about things like autofocus performance or getting lost in menus, really allowed me to find that zone of being present and immerse myself in shooting.
Trying the Sigma BF for astrophotography
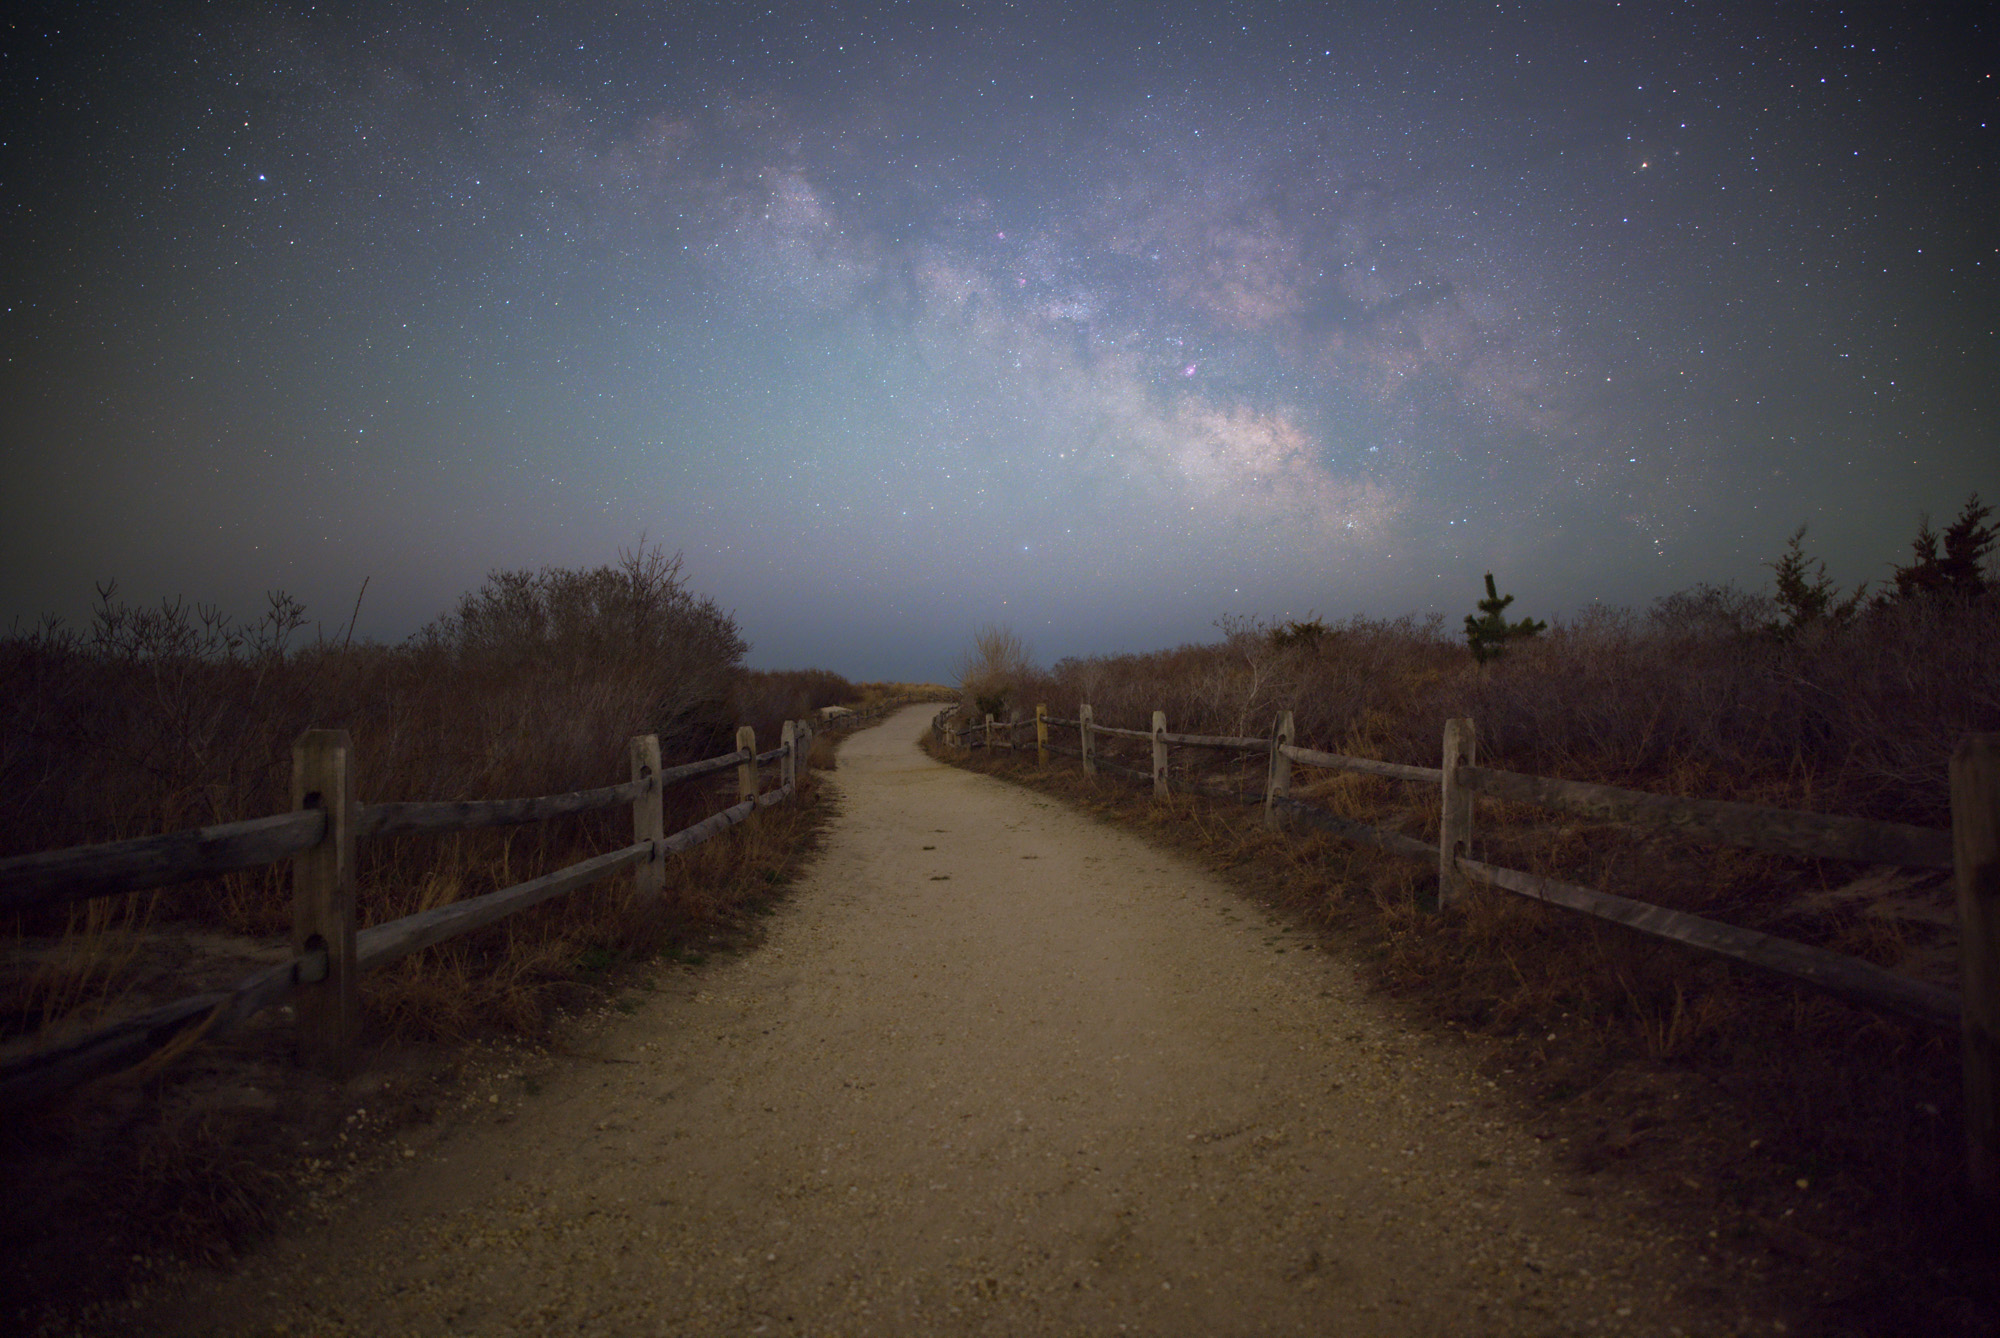
After a few days out in busy streets, I really felt like it was time to head out under the stars. With clear skies in the forecast for the entire night, I arrived a few hours before the Milky Way would be rising. I took a handful of test images as I wandered to find the compositions I would be shooting once the core of the Milky Way was sufficiently visible above the horizon.
One of the first things I noticed was how easy dialing in that very precise infinity focus on the stars was with the LCD screen. Even more importantly, one of the things I didn’t notice were the buttons on the back of the camera. It wasn’t until well after I was shooting the Milky Way that I had even thought about them. After two outings during the day, I think easily navigating a new camera in complete darkness speaks to how thoughtfully it was designed.
The Sigma BF only has a few physical controls and very simple menus that quickly become second nature.
I ended up shooting far longer than I anticipated using a number of different techniques ranging from stacking to separate foreground exposures. While admiring an image of the back of the camera is one thing, the real test for those high ISO captures is viewing on a much larger screen…
NOISE TEST IMAGE – SIGMA BF 20mm, F2, 13s, ISO 3200 (NO NOISE REDUCTION)
Working my way through the images and seeing how far I could push the files was probably the biggest surprise of my experience with the BF. It wasn’t that I didn’t have high expectations, it was a matter of those expectations being surpassed. Pushing astrophotography images while editing, bringing back detail in the shadows and trying to pull out detail in the sky, can often result in a very noisy final image. Shooting at these higher ISOs can also mean that your image lacks a bit of sharpness or just doesn’t have much depth to the color you captured, especially in the foreground. Not only was I able to push the files to bring out an incredible amount of detail through the image, they all felt very sharp and full of rich color.
SIGMA BF CAMERA 20mm F2 DG | CONTEMPORARY F2, 156s, ISO 1600SIGMA BF CAMERA 20mm F2 DG | CONTEMPORARY F2, 156s, ISO 1600
The Sigma BF for wildlife?
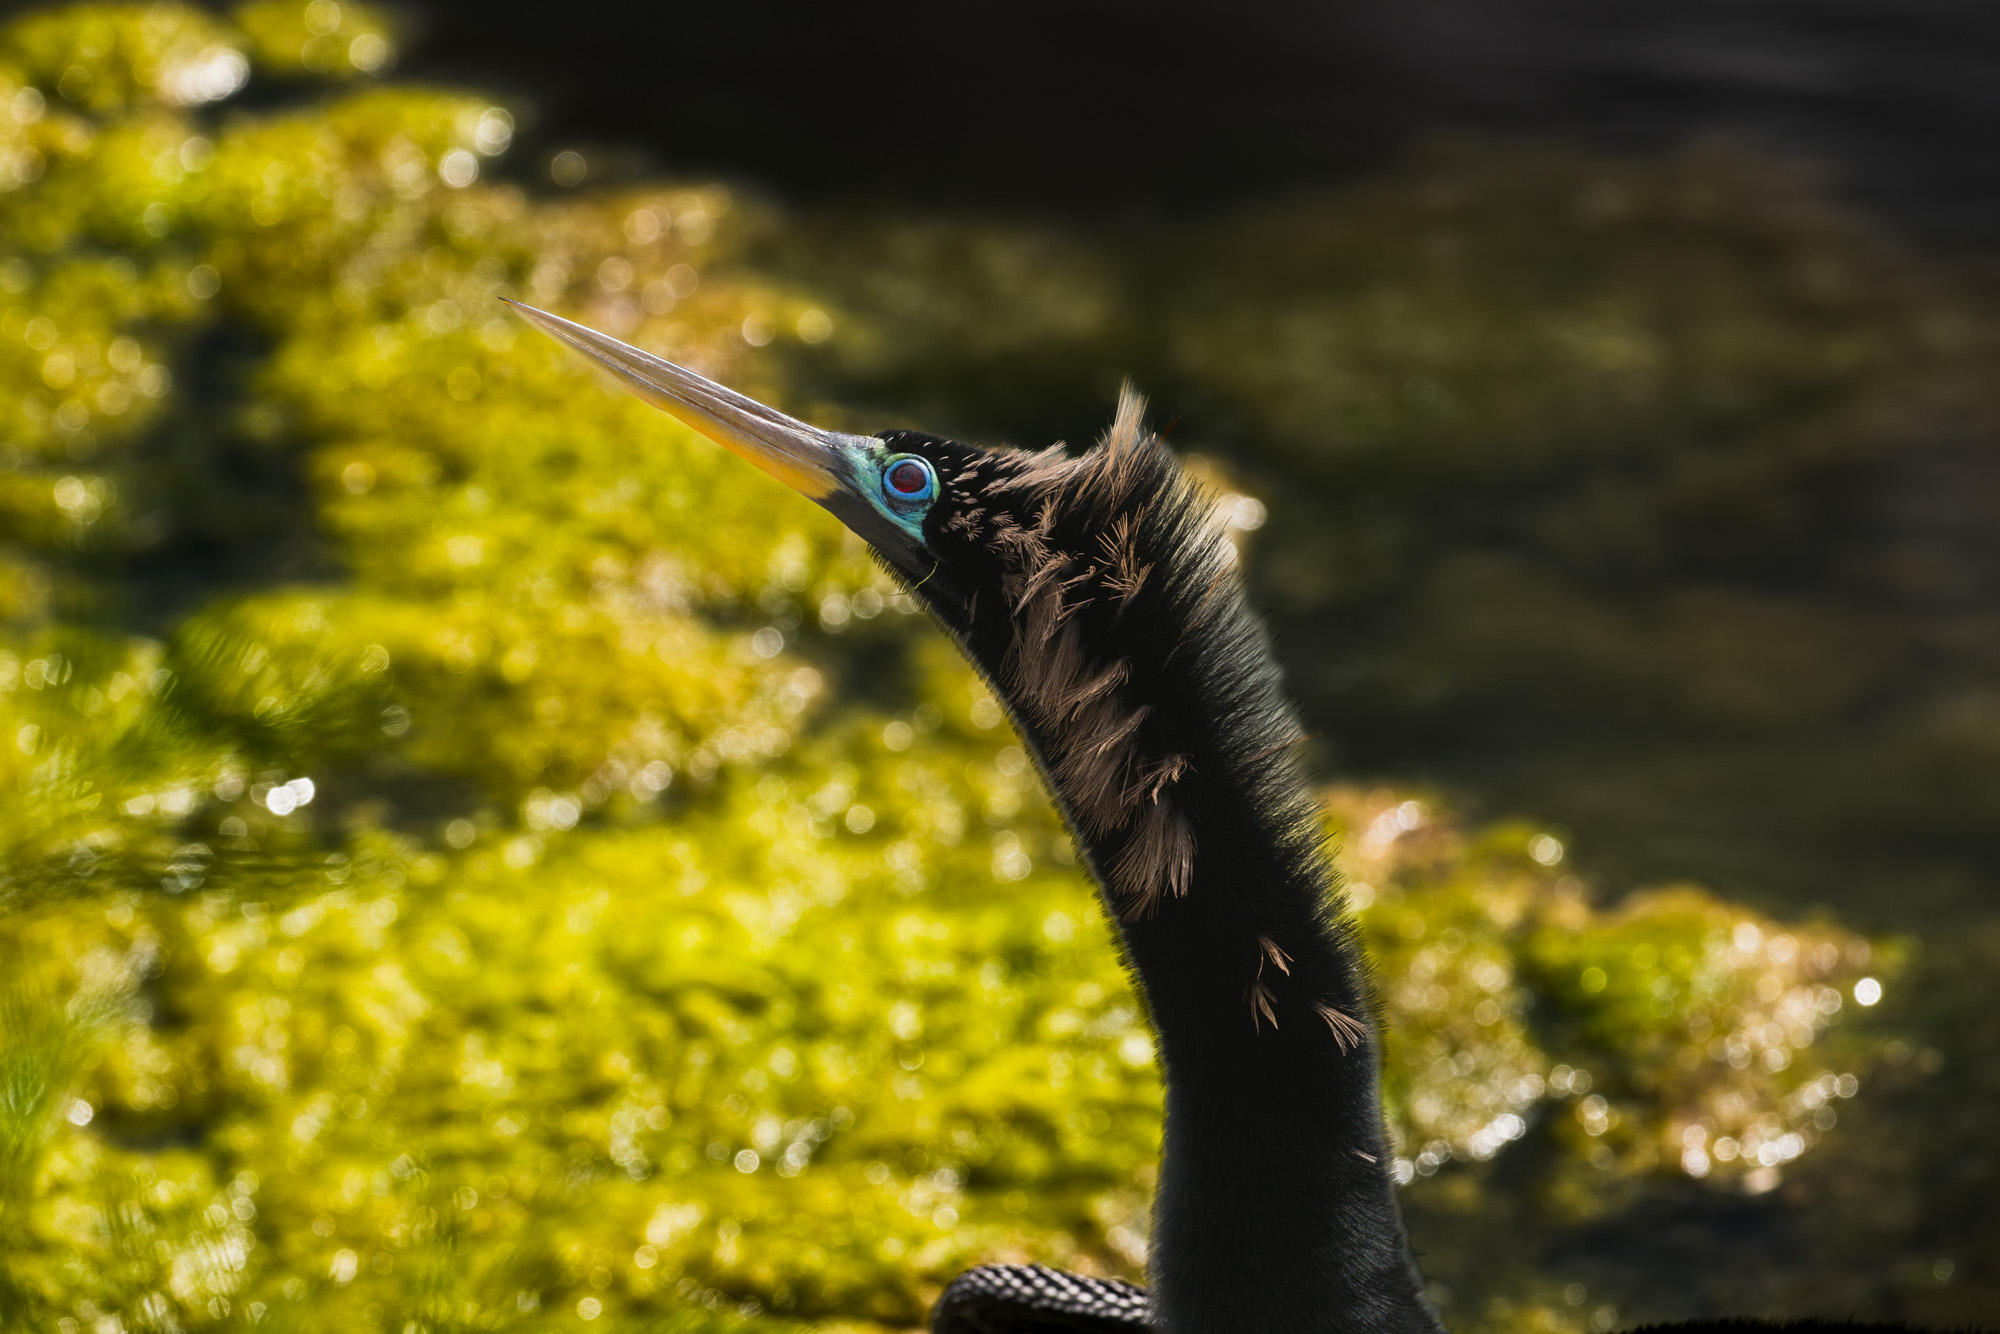
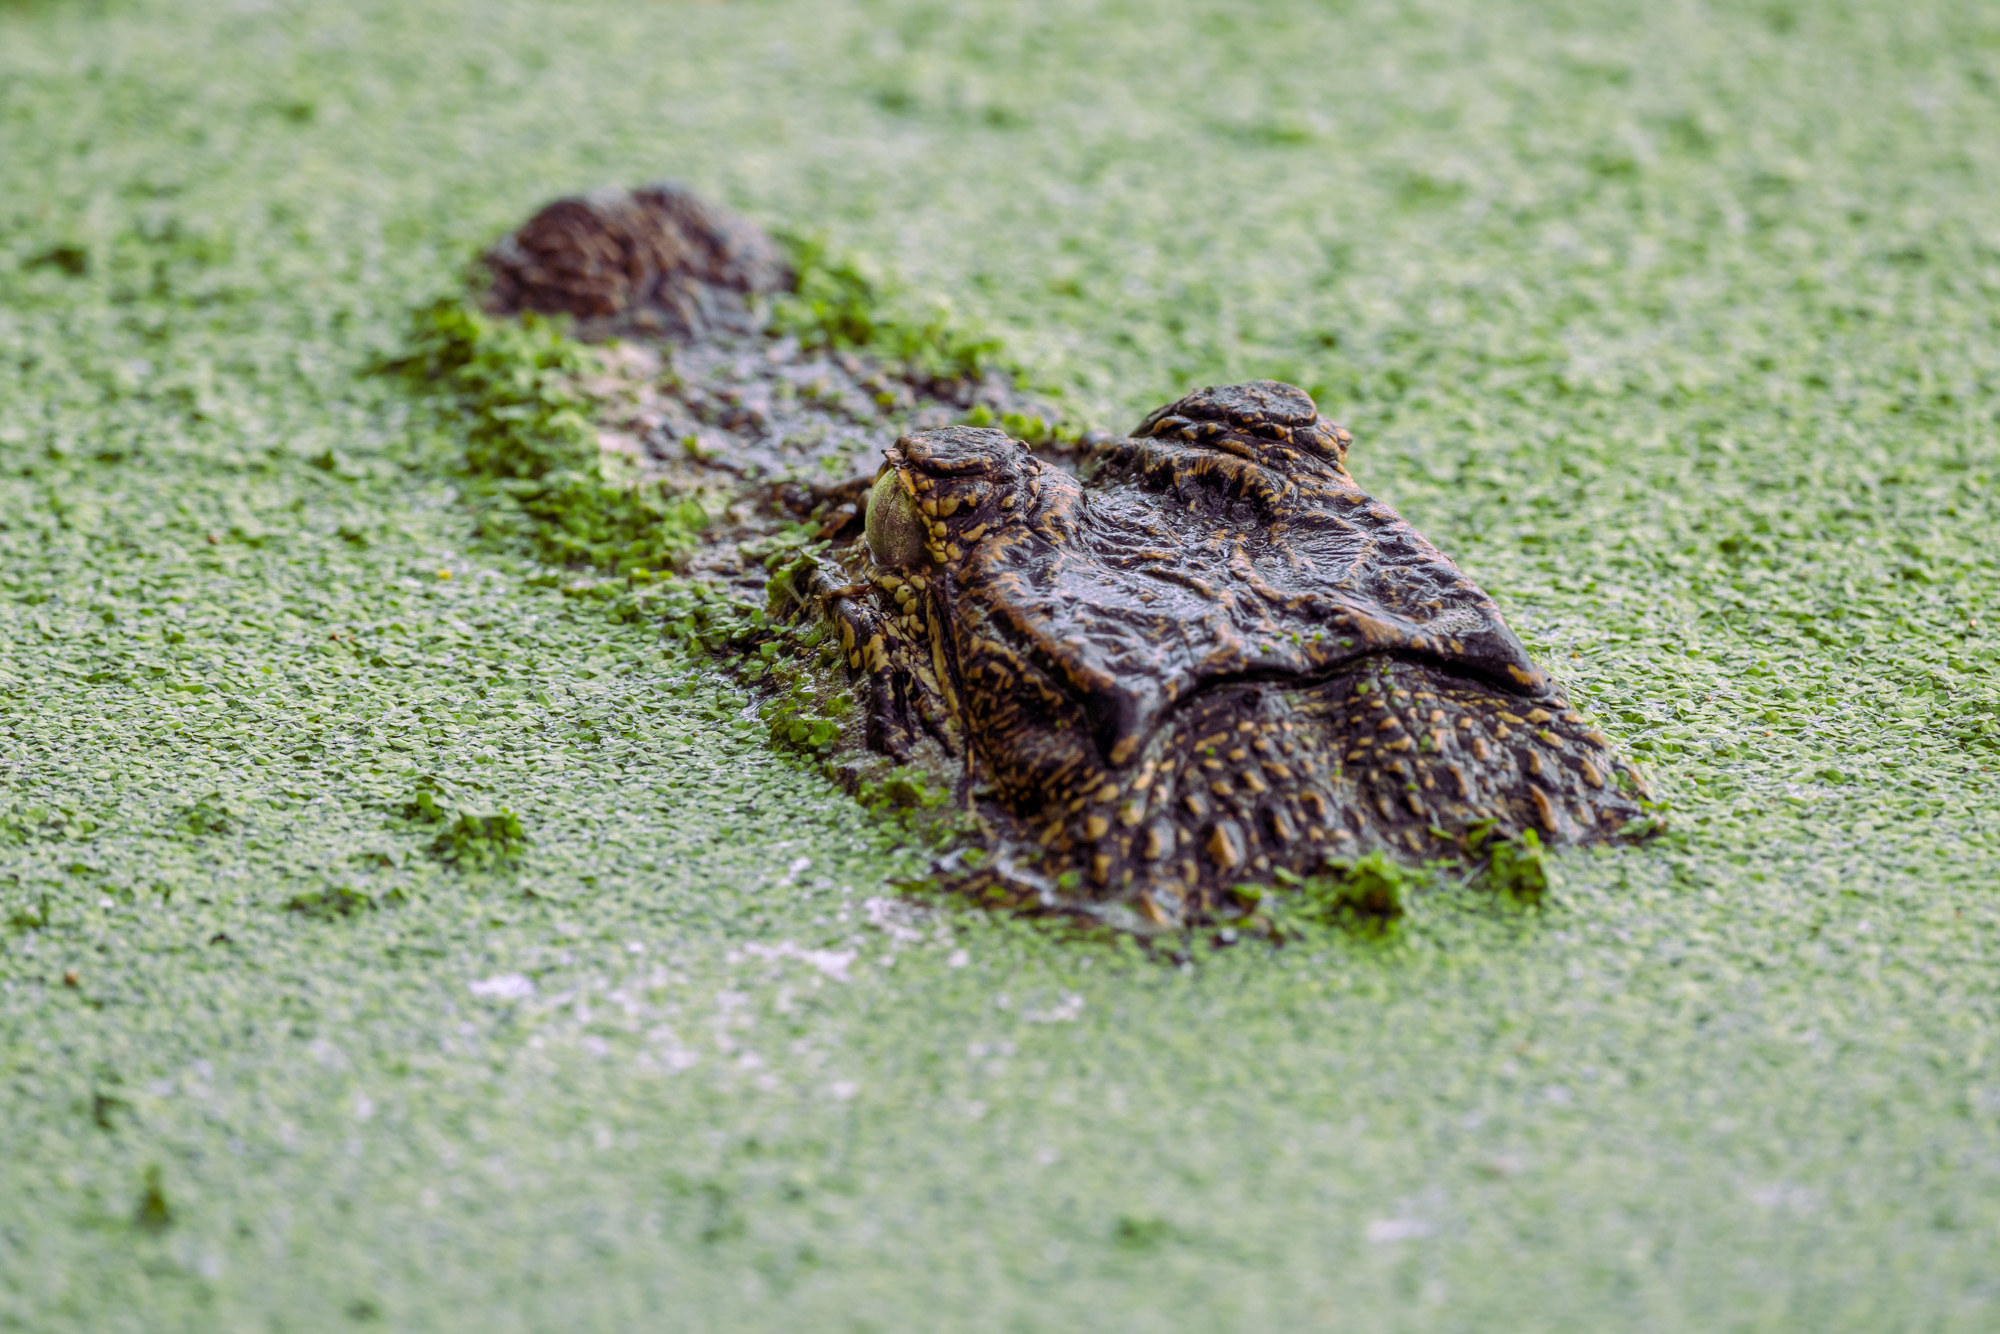
After my night under the stars, I had one more test for the Sigma BF. Wildlife. This was also a test for myself, as aside from a few fox photos about a decade ago, this was not something I had ever given a try. I found myself near Myrtle Beach, South Carolina with the BF and the Sigma 500mm F5.6 DG DN OS | Sports. I wandered Huntington State Beach Park with the hopes of photographing alligators. As I kept my eyes on the water, I saw a variety of different birds that I figured, “why not?” and did my best to take some photos along the way. Again, while this was a new genre of photography for me, I think the simplicity of the BF allowed me to just enjoy being in nature. The autofocus was quick to lock in, and while I didn’t attempt any in-flight shots, I was pretty happy with the results!
SIGMA BF CAMERA 500mm F5.6 DG DN OS | Sports F8, 1/320s, ISO 800SIGMA BF CAMERA 500mm F5.6 DG DN OS | Sports F13, 1/400s, ISO 400SIGMA BF CAMERA 500mm F5.6 DG DN OS | Sports F13, 1/250s, ISO 400
For better or worse, the only gators I saw were just peeking out of the swampy waters. Which at first, felt like a bit of a bummer, but I didn’t end the day feeling like I had checked something off a list. If anything, it felt like I was starting a new list.
SIGMA BF CAMERA 500mm F5.6 DG DN OS | Sports F8, 1/320s, ISO 800
SIGMA BF CAMERA 500mm F5.6 DG DN OS | Sports F13, 1/125s, ISO 800SIGMA BF CAMERA 500mm F5.6 DG DN OS | Sports F8, 1/500s, ISO 800
Maybe after a decade of shooting only astrophotography, a few days with the Sigma BF had inspired me to look at things a bit differently again. I’ve been out shooting more styles of photography in the span of a month than I ever have before. I think sometimes, whether it’s intentional or not, a bit of a reset can be a really helpful process to go through. Just taking a second to look at things differently and use that opportunity to step out of our routine.
I’ve always felt, as a photographer, the best gear is whatever helps me focus on creating first. While the world after a photo is taken demands our constant attention with excessive beeps and notifications, it feels refreshing to have those moments where I’ve connected completely to creating art. I think the BF is a camera that does just that, by encouraging you to look at things different and without distractions.
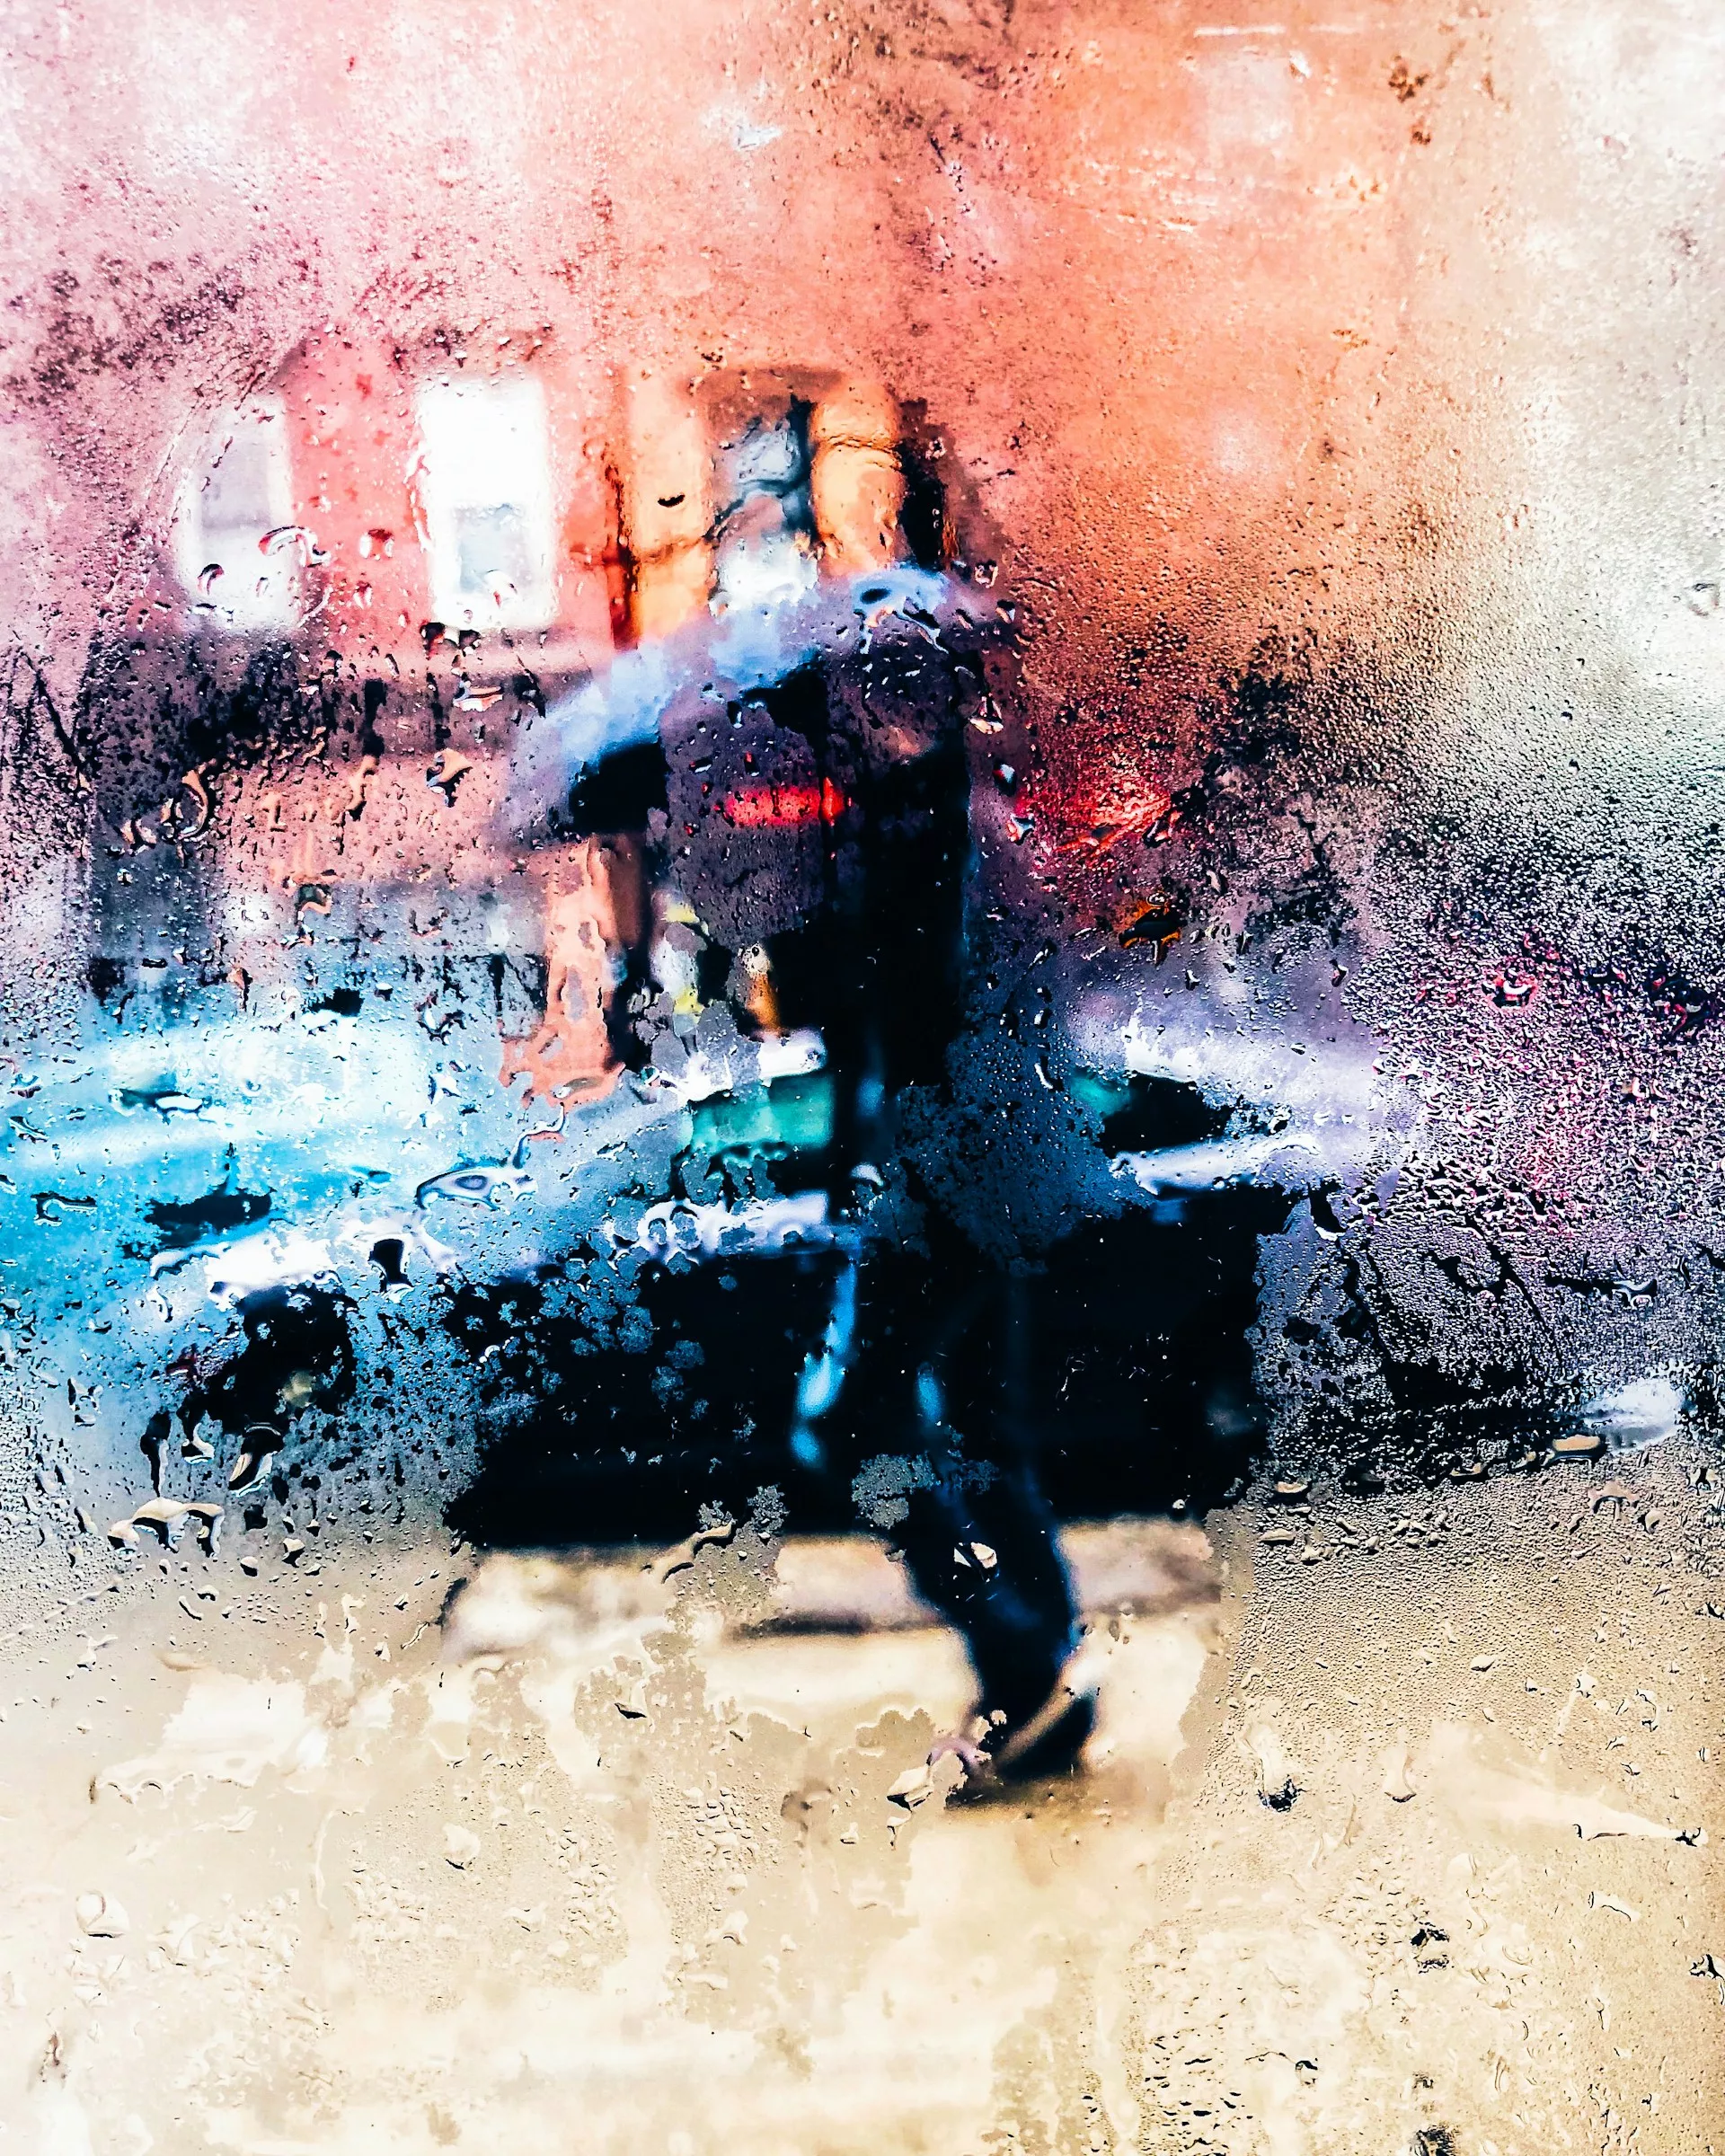
It is almost rainy season in most of the tropical and sub-tropical countries and it is one of those seasons that brings in respite from the summer heat, especially in the tropics. Some photographers worry about shooting in the rain, because they are concerned about their gears’ safety and also getting wet in the rain.
Rain photography is magical and sometimes dramatic, and can be very rewarding of you take a few precautions when shooting in the rain. There are a lot of subjects and scenes that can be beautifully shot during the rain if one embraces the elements, understands light and focuses on the details.
If you would love to understand the secrets of recognizing the right light, control it and manipulate it according to the situation you are shooting, we highly recommend you to check out the eBook “Understanding Light” by Photzy. This guide will uncover the secrets behind controlling the available light and will leave others wondering how you did it.
Here are 18 photographs of the rainy season that can help you with some inspiration to shoot in the rain.
Photo by Gil Ribeiro
Photo by Jusdevoyage
Photo by Todd Diemer
Photo by Jack Finnigan
Photo by Makoto Tsuka
Photo by Matteo Catanese
There are many ways in which rain can be photographed. You can capture the stormy sky, reflections, puddles, even stay indoors and capture the falling rain. During this time, the light can be quite tricky but shooting from the right angle and perspective while also using the right camera settings can help you to capture better photos. We recommend you to check out this eBook “Understanding Light” by Photzy that has 155 pages of fast and easy learning, packed with illustrations, case studies and assignments to verify your knowledge.
Photo by Urban Vintage
Photo by Imthiyas Iqbal
Photo by Hannah Domsic
Photo by Jack Finnigan
Photo by Luca Bravo
Photo by Michael Podger
When out to photograph the rain, besides the grand scene in front of you, it is also good to focus on the details for some macro photography, patterns and textures. Also look for actions in the outdoors, like vehicles speeding, children splashing in the puddles, or dramatic skies. The colours can be rich, so if you work with the light, you are sure to come home with some great photographs. Check out “Understanding Light” by Photzy if you need to learn more about using light to your advantage in tricky situations.
For those who haven’t been following the major rift in the world of photojournalism a quick summary of what is going on: A film called “The Stringer” directed by Bao Nguyen (previously directed The Greatest Night In Pop) and produced/starring Gary Knight (VII Agency co-founder and ED) premiered at The Sundance Film Festival on January 25 claiming and attempting to prove that 53 years ago Nguyễn Thành Nghệ actually took “The Terror of War” (AKA Napalm Girl) image and not Nick Ut. AP photo editor Carl Robinson claims his boss, Horst Fass, told him to switch the credit from Nguyễn, a stringer, to Nick, an AP photographer. The filmmakers find Nguyễn, and he says, yes, he took the picture.
Prior to the film’s premiere, the AP released a preliminary report disputing the claims of the film. At the premiere, the AP watched the film and followed up (May 16) with a 100-page report saying that there’s not enough evidence to remove Nick Ut’s credit.
Then, on May 16, World Press Photo released a statement saying they investigated (David disputes the characterization that they investigated and rather they simply got a private screening of the film and agreed with the conclusion) and are suspending Nick Ut’s credit on his 1973 Photo of the Year award.
This sparked outrage on social media with posts from what appears to me to be the VII camp (Ashley Gilbertson, Ed Kashi, Sara Terry) and the Nick Ut camp (David Burnett, Pete Souza, David Kennerly).
And the real zinger in the whole dust-up is that David Burnett was there! He’s an eyewitness to the events at Trang Bang, where the famous image was made.
Ok, one final note: besides the premiere at Sundance and private screenings, the film cannot be watched until a distributor is lined up. I’m aware of a screening in DC next month, but most people, including David and myself, have not seen the film.
I talked with David over the phone, and here’s a condensed and edited version of our conversation.
Screenshot from AP Report: Investigating claims around ‘The Terror of War’ photographScreenshot from AP Report: Investigating claims around ‘The Terror of War’ photographScreenshot from AP Report: Investigating claims around ‘The Terror of War’ photographScreenshot from AP Report: Investigating claims around ‘The Terror of War’ photograph
Rob Haggart: I want to start by asking if it’s really difficult for you to go back and rehash all this stuff.
David Burnett: No, I mean, I have these moments from not just Vietnam, but the jobs that I worked my whole life, French elections, Ethiopia, Chile, and it’s not really something that causes me great pain. There are so many of these things that I’ve lived through that the memories of them and what I was doing in them as a photographer is very, very clear in my head. And Trang Bang is really no different than almost anything else.
The first time I was under fire and had the crap scared out of me, it’s one of those things where you don’t just think, will I ever get over it? Because you don’t, they become part of what your life is about.
The running joke about Trang Bang and me was that, well, I missed the shot because I was changing film in my old screw mount knob wind Leica which is kind of a slow, kludgy film camera. It was not an easy camera to operate.
And yet, Cartier-Bresson shot with them for something like 20 years before the M2 and the M3 came along and made some pretty great pictures, so I mean, I think part of why I even bothered shooting with that camera instead of getting another M2 for 200 bucks, was kind of a historical thing with the old Contax and Leicas, you felt a little more attached to some kind history if you’re shooting with this kludgy old camera and um you know, and I was trying to reload it and anybody had ever owned one of the cameras knows that if you take a 35-millimeter film where you have the little cut-down tongue that you really need to cut an extra inch or inch and a half away from that one side that’s cut so that when you drop the film in the camera, it will seat itself perfectly.
I never bothered doing that, so I was always stumbling, trying to get the camera reloaded. So I was reloading it when the plane came in to drop the napalm. I was holding the open camera in my left hand and shooting with a 105 in the other hand. When the napalm hit right next to the pagoda, there was this Gigundo fucking fireball, Nick has that picture, and I kind of have it a few seconds later. But it was the in the days when you didn’t shoot with three motor drives, you know, you weren’t going out there to shoot 25 rolls of film. I think I shot maybe three or four rolls that day, and it was a fairly long period of time we were there because we were kind of hanging out waiting to see what was going on.
You could hear firing and shooting coming from the village. Then the planes came in, and there was that fireball, and then like three minutes later, the kids started running out of the field and onto the road toward us, and that is the moment, more than anything in my mind, where Nick was the one guy who was in a position to shoot the picture, and nobody else was. There was this line of journalists, and we were all within a few feet of each other lined up across the road. As soon as we could tell that, there were people on the road racing out toward us, and the kids were running as fast as they could run. Nick and this guy Alex Shimkin, who was killed a few weeks later up north, took off running towards them, and no one else did.
RH: When did you first hear a film was being made about this event and that there were questions about the author of the famous image?
I was sitting at a Walgreens parking lot in Florida 3 years ago going in to go get some stuff, and Gary Knight called me and said tell me everything you know about Trang Bang, so I spent a couple hours on the phone and told him everything I know and then said you know there’s this guy and he’s kind of a horses ass, ex AP guy and he says that Nick didn’t shoot the picture and I kind of think he’s full of crap as does everyone else but along the way you’re gonna run into Carl Robinson.
Carl had this real chip on his shoulder about AP, and he was never afraid to let people know how he felt like he’d been screwed over by the AP.
RH: So you’re telling me this rumor has been around for a while?
Yep, a long time. It’s not new. The last time I saw Horst Faas was in 2008. There was a gathering for a memorial wall at the news museum in Washington, and if you lived near the East Coast and worked as a journalist in Vietnam, you pretty much were there that day. Somebody at that point could have said, hey, Horst, let me talk to you about this thing that Carl’s been telling everybody that you told him to put Nick’s name on the image, and it was really some stringer’s film.
And no one ever, no one ever asked Horst.
No one ever just asked him point blank.
I guess Carl makes a pretty reasonable case for trying to talk about how the guilt of 50 years and being able to unburden his guilt when he finally met this guy. But you know, every crackpot theory that ever was has at least a 2% chance that it happened.
Could Horst have said it? I suppose he could have. But it would have been very out of line with what always happened.
If you talk to Neal Ulevich, who was in the AP bureau as a staff photographer for, I don’t know, six or seven years in Asia and was in the bureau the whole time, he will tell you about the sacrosanct policy of never allowing anyone’s film to have any name on it other than the actual photographer that shot it.
He said, “All the time I was in Asia, never once did I see anybody do anything like that.”
It just didn’t happen.
I was in that group of people who were looking at the first print of Napalm Girl when it came out of the darkroom, and I did what every photographer in the history of photography would have done, which is I look at this picture and I try and think to myself without having seen my own film, hm, I wonder if I have anything better. I’m thinking, yeah, that’s pretty good. That’s probably better than anything I have.
There were 3 or 4 of us looking at this little 5 x 7 print that was still wet, and Horst, without making a big deal out of it, just turned to Nick and said, “You do good work today, Nick Ut.”
I still have the memo I wrote when I went back to my office at the Time-Life Bureau. I said there was this accidental bombing in this village called Trang Bang, and I said, Nick from AP got a pretty good picture, and they tell me they’re shipping the negative to New York on what’ll be the same flight that my negatives are gonna be on, so you’ll be able to get an original print made in the lab rather than rely on a wire service photo.
So that’s what they ended up doing. It was in the front section of the magazine called the Beat of Life; there were always 3 or 4 of these big picture spreads.
Usually one picture, sometimes two or even three, and they ran one of mine of the grandma with the burned baby and Nick’s picture side by side, and when you look in the photo credits, it says page four and five, David Burnett, AP. I mean, it was the wire services in the 70s. They weren’t going to put a photographer’s name on it. It’s kind of funny that way.
RH: What are the chances, if you’re Nick, that you don’t know beforehand you made that picture?
There’s no way that either of those guys would not know they took that picture. It was such an enpassant moment, and I’m sure there was just one frame that was the one.
For sure, there are times when you’re surprised by something you’ve done when you move from wherever you shot it, and now, you know, we’ve kind of shut out the middle man, and you go right to the computer and see if what’s on there is anything like what you remember, but in the film days I would find it really hard to not know that you had something.
I can’t imagine that the camera wasn’t up at the eye; it’s not like a chest-high Hail Mary, although technically, it was never great, but maybe at the same time, some of the imperfections add to the raw reality of that moment.
RH: That leads me to this talking point I see from the film’s defenders saying that this is not a critique of Nick, but that would mean that Nick didn’t know he took the photo. But you think there’s no way he didn’t know he took the photo, so the film is saying he’s been lying for 53 years about this.
He’s a 21-year-old kid with a camera, and I think incapable of that. Yes, it was a good picture, but there were a lot of good pictures out there.
And, you know, some people have said, oh, but Horst knew right away that that was gonna be a great picture, and he wanted AP to have the copyright on it instead of a stringer. But the thing is, you’ve got all these little sub-arguments if you accept a certain premise, and you can walk yourself right off a cliff of trying to figure out what it is you believe or don’t believe.
Gary called me back at one point, and he said, you know, I think there’s really something to Carl’s statement here, but you know, once you get the first bit of the Kool-Aid, you just gotta drink the whole pitcher, and I just don’t see it.
I mean, like I said, it’s possible.
Everything’s possible, you know?
I mean, you know, once you start to believe part of it, you kind of end up believing the whole thing, or you believe none of it.
To me, it looks like Gary’s trying to make himself into a big documentary producer, and this is his launch pad.
Gary said you ought to be in the film, and I just said, Gary, I don’t wanna do a goddam Mike Wallace interview where I have no control over how you cut it or anything else. I’ve watched 60 minutes too many times where Mike managed to hammer somebody, and I had no confidence that it would be a fair representation.
Fox Butterfield was the reporter I was with that day working for The New York Times, and he got a call from Gary’s wife, a producer on the film, he started to tell her his version of what took place, and she told him everything you’ve said is wrong. That’s not a really good way to coax people into a discussion. She said he would have to sign a non-disclosure agreement, and he said, what the hell for? I’m the one telling you stuff; you haven’t told me anything.
Gary said to me last time I talked to him like six weeks ago, he said, well, you know, we’ve done all this forensic stuff, and we’ve proven that he couldn’t be down there to take the picture.
And I said to him, in my mind, because I remember the way he ran out on the road ahead of everybody else when the kids were coming down the road, he’s the only one who could have taken that picture because it was in the very first moments that the kids were coming down toward where the journalists were lined up, and it was after that everybody else started wandering around, but that was another five or ten or 15 minutes later.
And I just don’t see how anybody else was out there in front, and to me, that picture was taken out in front. It wasn’t taken right next to the press people.
It was out there away, maybe, I don’t know, 20 yards, 40 yards. 50 yards.
RH: How do you think the filmmakers should have handled this? What should they have done with the information they got from Carl?
You don’t ever want to get to a place where people are afraid to posit things, but I don’t know what the answer is, but you know, unlike a lot of people who don’t shut up about it, I’m not sure I have an answer to what the most perplexing question is.
And I never said I was right behind him when he shot that.
I saw him, I was changing my film, and it was a minute or two minutes later, and in those moments, that could be a long time. I offer it strictly as a witness to what happened that day and nothing more.
I find one of the most curious things of all, aware of the fact that Nguyễn probably had to leave Saigon with almost nothing, that he left everything behind, andI totally get that.
But apparently, he never sold another picture to anybody, and in the last 50 years, no one has even seen one picture that he’s taken.
Other than the most famous picture of the Vietnam War.
Film photography has never really gone away. Sure, it’s declined massively since the arrival of digital, however these days increasing numbers of newer photographers are trying their hand at film photography.
I have written several articles about shooting film here at Light Stalking, yet I have realized that there may well be an entire section of you that know little to nothing about it.
Many of you will have developed your photographic skills through the digital age, and whilst understanding the existence of film photography may be daunted by trying it out for yourselves. So today I am going to look at the absolute basics. Cameras, films, processing and shooting on film. Let’s get into it by looking at film.
There are a plethera of film cameras available for all budgets. By Mali Maeder on Pexels
Photographic Films
Photographic films can be broken down into three main types. Black and white negative film, colour negative film and colour transparency film also known as slide film.
Negative films do exactly as the name suggests, they record a negative image to the film. Blacks and whites are reversed, primaries become secondaries on colour negative film. Some of you might have seen processed colour negatives and wondered why they are orange. This is simply to mask the imperfections of the dyes in the film.
Negative films are made so because they are designed for printing. When you expose a negative onto photographic paper, you get a normal, positive image.
Transparency film is designed to be projected rather than printed, much like you would have watched a film in the cinema before the advent of digital projectors. It is much less tolerant to incorrect exposure than negative films. It used to be able to be printed via an Ilford process called Cibachrome, however that has been discontinued. As far as I am aware, the only way to print transparency films these days is to digitise them.
What’s also important to note, especially for digital photographers is that the ISO, also known as ASA, is fixed. A film will have a speed rating such as 100, 200 or 400 ISO and the camera must be set to that ISO to shoot. There are ways to change the ISO through the film processing, however that’s not for this basic guide.
I should note that photographic films and processing are relatively expensive these days compared to the film era. This is a simple supply and demand issue, whilst film is seeing a resurgence, it’s nowhere near large enough to bring prices down. Typically you will pay $8-10 for a roll of 35mm black and white film plus $15-20 for processing and scanning.
As digital photographers you will be aware of different sensor sizes, from the very small ones on our phones to the medium format sensors of Hasselblad and Fuji. Film cameras are very much the same. At the peak of film photography in the 1990s, the smallest commercial film was Disk Film, this was really tiny and as the name suggests, each frame was placed around a disk rather than a roll.
Next came 110 and 126, before we got to the ubiquitous 35mm. From there we stepped up to 120/220, both the same width of film but 220 being able to take twice the number of exposure. These are commonly known as medium format. Above that we had 5×4 and 8×10 sheet film used in plate/field style cameras.
Returning to the modern day, 35mm, 120 and sheet films are still made and available, the smaller films are now obsolete.
Apart from a few speciality companies, film cameras are not mass produced anymore. However there is a massive secondhand market for these cameras. The recent resurgence of film photography has pushed up the price of these significantly, however they are still bargains compared to modern mirrorless cameras.
As you might guess, the camera you buy determines the film that it requires. By far the most commonly used format is 35mm and there are two main camera types you will find. The SLR is the direct predecessor to the modern DSLR and shares a lot of the same ergonomics. Secondly there are the compact, rangefinder cameras. These can be as simple as the excellent Olympus Trip all the way through to Leica Ms with their interchangeable lenses.
Medium format, 120 film gets a little more complicated and a lot more expensive, even used. The smallest medium format cameras are 645. These take 15 images on a roll of 120 and as the name suggests the frame size is 6 cm by 4.5 cm. Next we step up to 6×6, the most common medium format, then 6×7 and 6×9. Generally all these formats use different cameras. For example Mamiya did a compact 645 camera and a 6×9 Press camera whilst Hasselbald were famous for their 6×6 cameras.
As a newcomer to film photography, I would strongly recommend a 35mm SLR camera. These are the cheapest and most available. Buy from a reputable used dealer rather than eBay or marketplace. This will ensure that the camera is in good working order. Things to look out for are light leaks, slow running shutters and electrical issues.
You can also break down SLRs into two main eras. Pre 1990s, cameras were mainly manual focus, manual film wind and with fairly rudimentary exposure meters and modes. The 1990s saw the introduction of many of the features we see in modern cameras such as matrix metering and autofocus. They also often had motorized film advance built in.
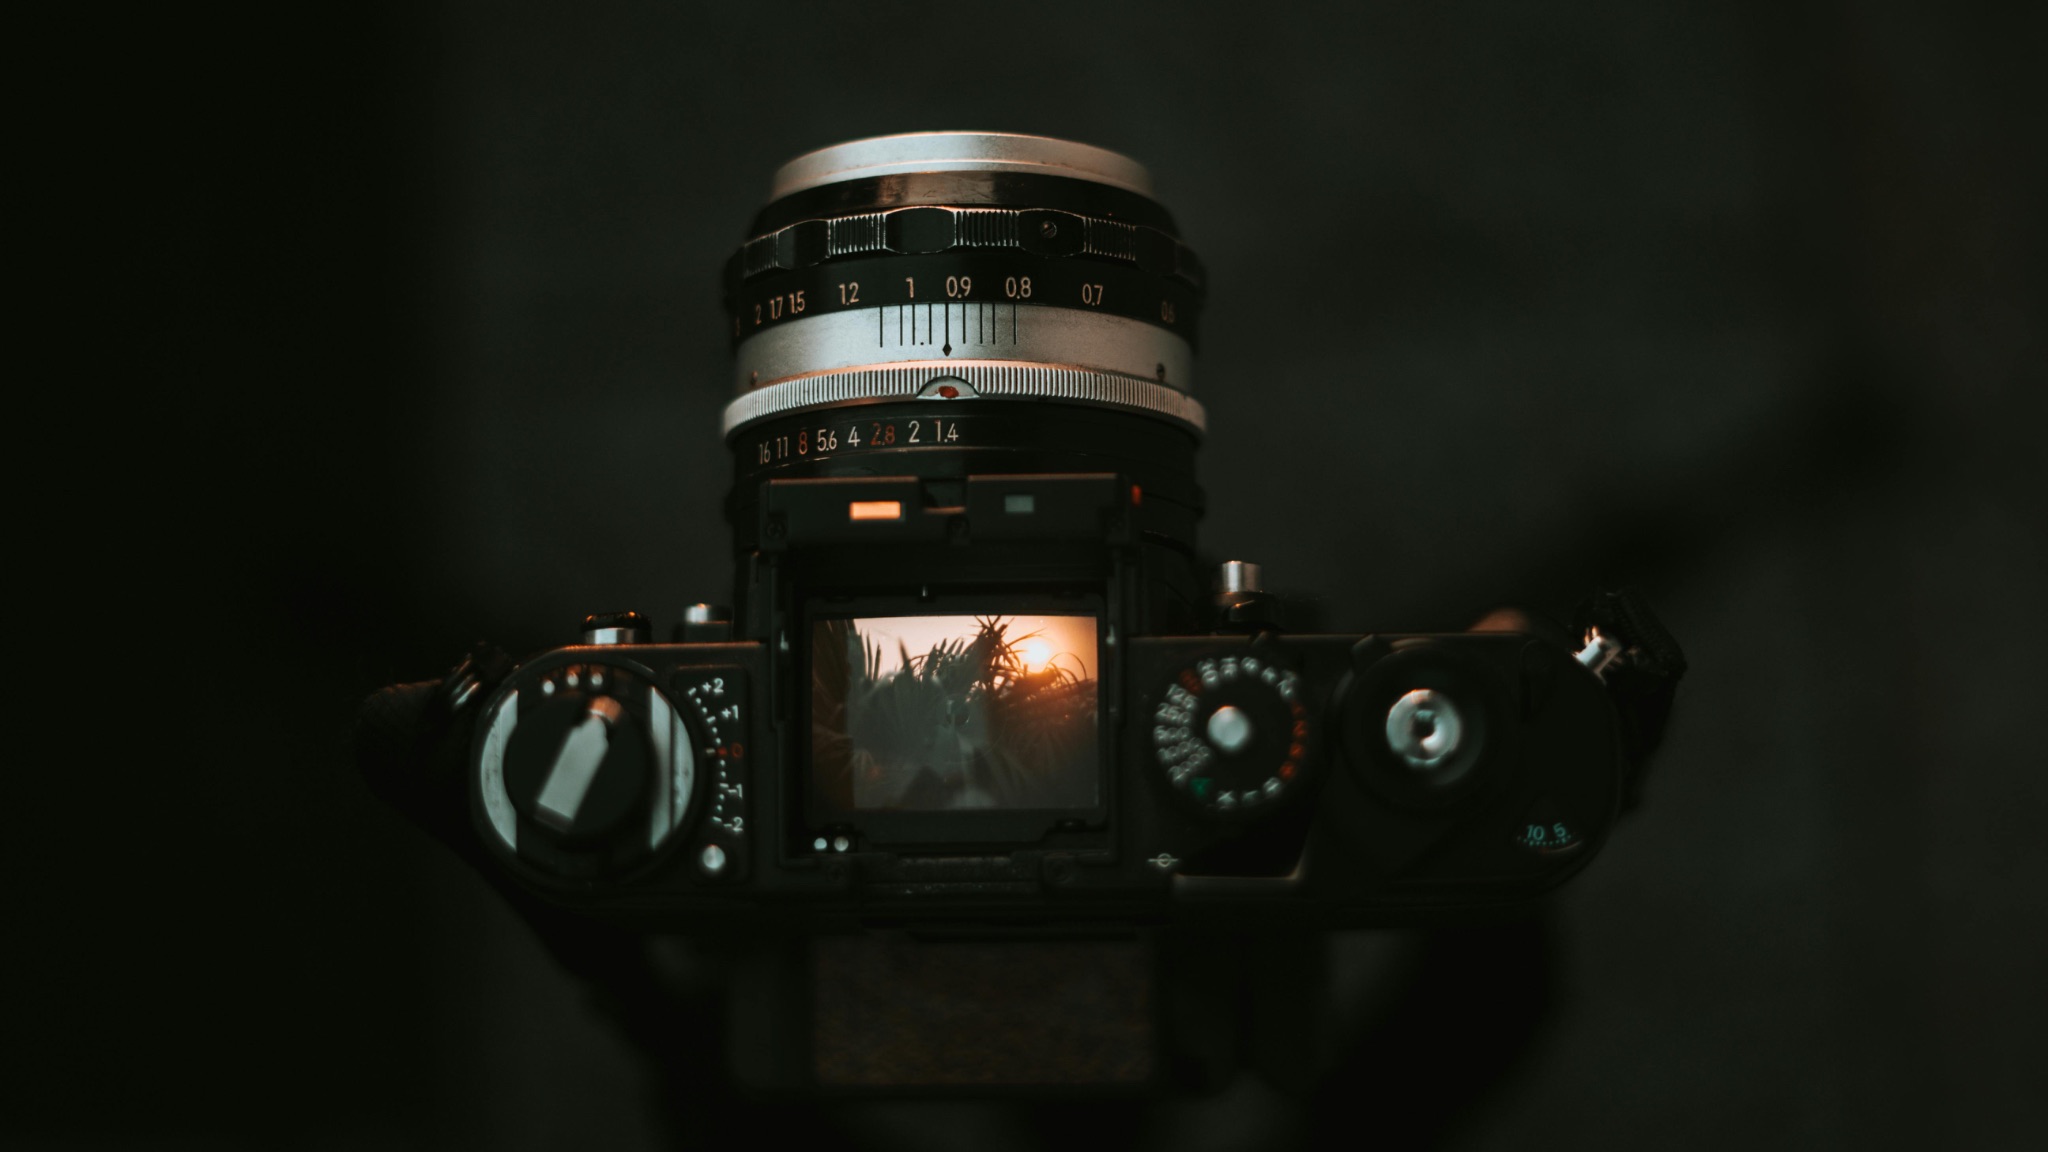
Shooting With A Film Camera
Those used to modern digital cameras will be in for quite a culture shock. The first thing you will notice is how bright the viewfinders are, before realizing that the information in that viewfinder is severely lacking, often just an exposure scale.
There will be a dial on the exterior of the body for setting ISO and this is very important to set as the wrong ISO will give you incorrectly exposed images. Plus of course, you cannot see that the images are incorrectly exposed.
On older cameras, focussing can be quite a challenge. Even more modern autofocus film cameras were slow and unreliable. Focusing manually, you would have the viewfinder’s fresnel screen or split screen. If you have less than stellar eyesight, this can be quite a challenge.
Loading film requires dexterity and practice. Getting the end of the film into the slots on the spool can be hard and often different cameras have slightly different ways to achieve this. One tip for manually wound cameras, is to watch the film rewind lever after loading the film. If this turns as you wind the film on, it is loaded correctly.
You are going to need to get used to shooting either 24 or 36 frames before needing to change the film but more importantly not 100% knowing whether you have nailed the shot until you get the films processed. Speaking of which.
Film Processing and Printing
At the top I mentioned the three main types of photographic film, colour and black and white negative film and transparency. Each of these has a different way of being processed. Standard black and white film is actually pretty easy to process yourself, however you need to have a dust free environment to do it. You don’t actually need a darkroom as you can load the film into a processing tank inside a dark bag. This can be a bit fiddly at first but becomes second nature with practice. Once the film is in the drum you can do the actual processing in light.
Both colour negative and slide films require much more complicated processing that are really best suited to a professional lab. Slide/transparency film, in particular, is very prone to colour variations when processed.
If you do not want to go down the home processing route, most labs will also offer black and white processing. These days there are plenty of processing labs available although they are unlikely to be local. You usually have to post your film in, and wait a week or two. The lab will probably offer processing and printing or processing with scans only.
Printing colour or black and white negative films has two options. You can print directly from the negative onto photographic paper, or you can scan the negative and print on a home printer. Most modern labs will actually be scanning your negative although that scan will be output to real photographic paper.
The more ambitious amongst you might want to try printing black and white at home. Although you can print under a red light, your darkroom must be completely sealed from any external white light.
Enlargers and processing trays are readily available, and most decent camera stores stock the processing chemicals. It’s not a difficult task to print black and white yet, immensely satisfying.
So that’s my brief beginners guide to film photography. Film photography is a wonderful medium that can teach you patience, the value of an image and a deep understanding of exposure. It can be relatively expensive compared to digital but can give great satisfaction.
As a creative, I try to push myself to develop new ideas and visions. I had this strong pull to do something different, to push the boundaries of what I could capture with my camera and convey the ever-changing beauty of our planet.
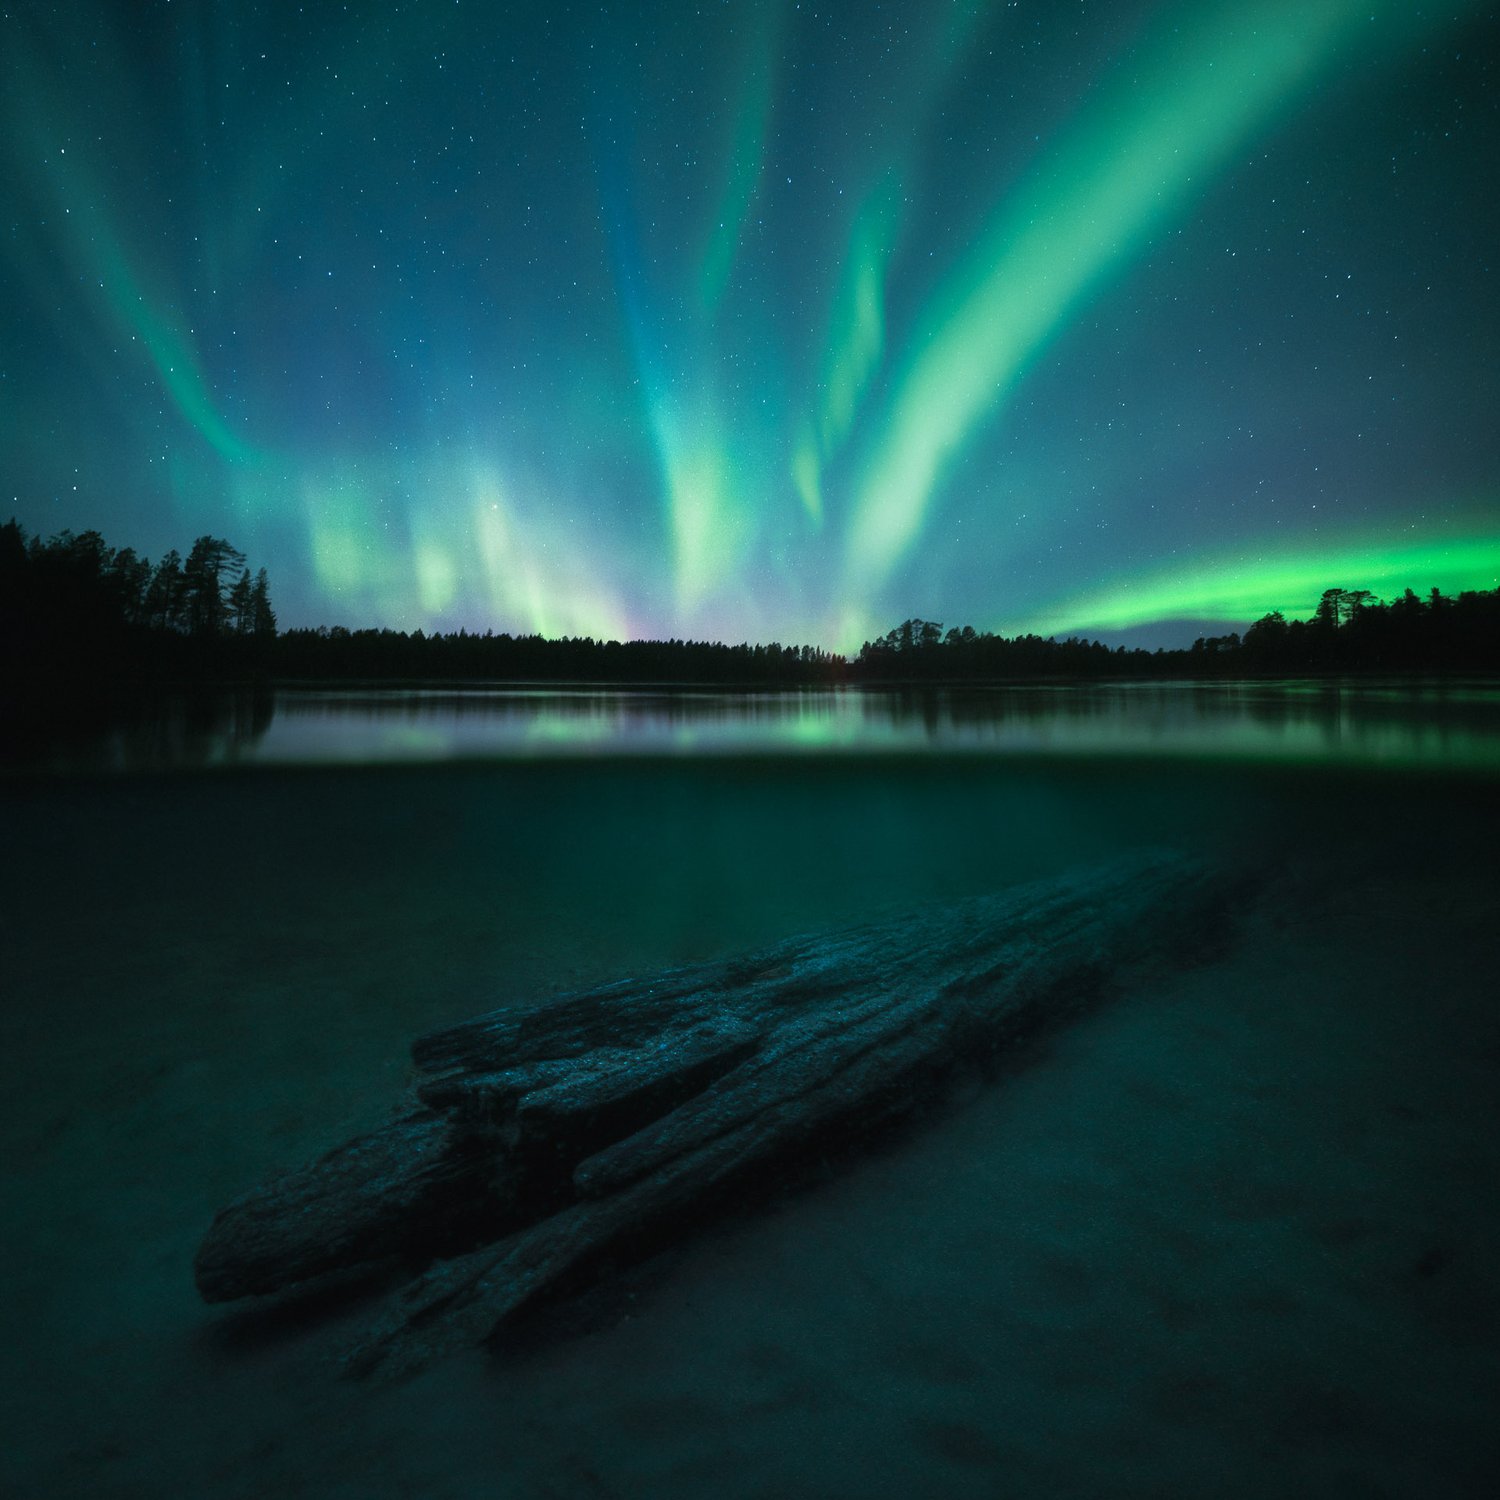
I wanted to push myself out of my comfort zone and express the emotions of transformation. I wanted to connect this piece to my roots, guiding the visuals with Finnish literature, Kalevala, the theme of the mythic transformation of nature, light, and darkness. This was the start of the birth of my new photography piece, Underneath The Surface.
I packed my gear and headed to the stunning landscapes of northern Finland, unsure how I would bring this dream to life. It sure wasn’t easy. The project turned into this intense journey of battling sleeplessness and the brutal cold of Finnish Lapland. Imagine spending hours in freezing water, trying, failing, and then trying again the next day.
But then, there was this moment. After all those attempts, I finally got the shot I was after. Sitting there in the icy water, watching the Northern Lights, I felt this overwhelming sense of connection and change. Time stood still, and I was there, soaking in every second.
It’s funny how we often scratch the surface of things, isn’t it? But we must keep pushing and trying, no matter how often we stumble. And that’s what makes us succeed.
This piece blends the natural world and the mystical stories from the Kalevala. It invites you to step into a scene where these two worlds collide, showing the ever-changing nature of our planet alongside those age-old stories. Through this process, I learned so much about myself and how pushing your limits can lead to some amazing discoveries. Below, you can find a behind-the-scenes video and a chapter on how this photograph was captured.