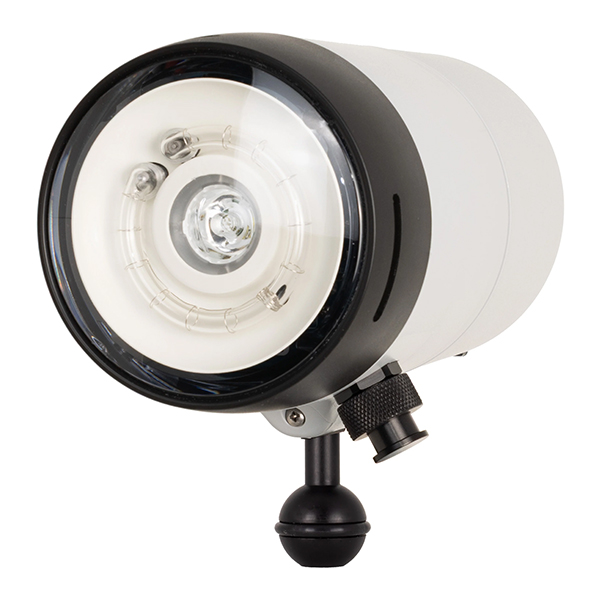
Ikelite has announced two new additions to its strobe lineup—the DS165 and RC165. And as you probably already noticed, only one of them, the DS165, is triggered the conventional way for Ikelite strobes—electrically. The other, the RC165, is a surprising—but many will say, welcome—departure into the world of fiber-optic triggering. While the U.S. company has offered fiber-optic triggering solutions in the past, these have been in the form of receivers that convert the electrical bulkhead to a fiber-optic connection. This is the first time Ikelite is offering a strobe with fiber-optic connectivity built in.
In Ikelite’s blog post on the RC165, the company says “this next generation of 165-series strobes is an improved upon and refined version of our famous DS160 II.” The power of the RC165 isn’t explicitly stated, but as an upgrade from the the DS160 II, the new strobe presumably offers the same 160Ws maximum power. Other specs are stated: Ikelite says the RC165 offers a “significantly wider 120º angle of coverage” (without the need for a diffuser), comparing favorably with the 110-degree beam angle with diffuser of the DS160 II. At 5000K, the RC165’s stated color temperature is also a little different to the 4800K color temperature of the DS160 II. Otherwise, the controls on the new strobe are identical to those on the DS160 II: Expect manual control across 10 stops in 1/2-stop increments.
Left: DS165. Right: RC165
As you’d expect, given Ikelite’s long history as TTL pioneers, it’s the strobe’s TTL capabilities that the company is giving the most emphasis. The RC165 supports TTL operation with compatible OM System, Olympus, and Panasonic cameras when firing the built-in flash in “RC” mode, and with compatible Canon cameras when using Ikelite’s TT5 Canon TTL Transmitter. The TT5 supports switching between TTL and manual strobe exposure using the camera’s flash menu, as well as rear/second curtain sync. Ikelite has promised TTL transmitters for Sony and Nikon systems are coming soon.
Current compatible Ikelite housings for OM System and Olympus cameras include those for the OM System TG-7, Olympus TG-3/TG-4/TG-5/TG-6 and the Olympus OM-D E-M10 Mark III. Various non-Ikelite housings are also compatible, such as Olympus or Nauticam housings for the Olympus OM-D E-M1 Mark II with FL-LM3 flash; Nauticam housings for the Olympus OM-D E-M10 Mark I to Mark IV; and Olympus, Nauticam, Isotta or Recsea housings for the Olympus TG-5, TG-6 or OM System TG-7.
In its blog post, Ikelite is careful not to overstate the benefits of fiber-optic connections, writing, “Fiber optic cords are not more reliable than electrical cords, but they may be more convenient.” And for anyone who isn’t bothered by the added O-ring maintenance associated with electrical triggering, the company has you covered with the DS165, which has all the same specs as the RC165, except the fiber-optic port is replaced with Ikelite’s conventional electrical bulkhead. Is the “165-series” the first of many to be offered in both fiber-optic and electrical versions? Is Ikelite slowly but surely going fiber-only? Only time will tell!
Shipping now from retailers such as Backscatter, the RC165 and DS165 are both priced at $995.
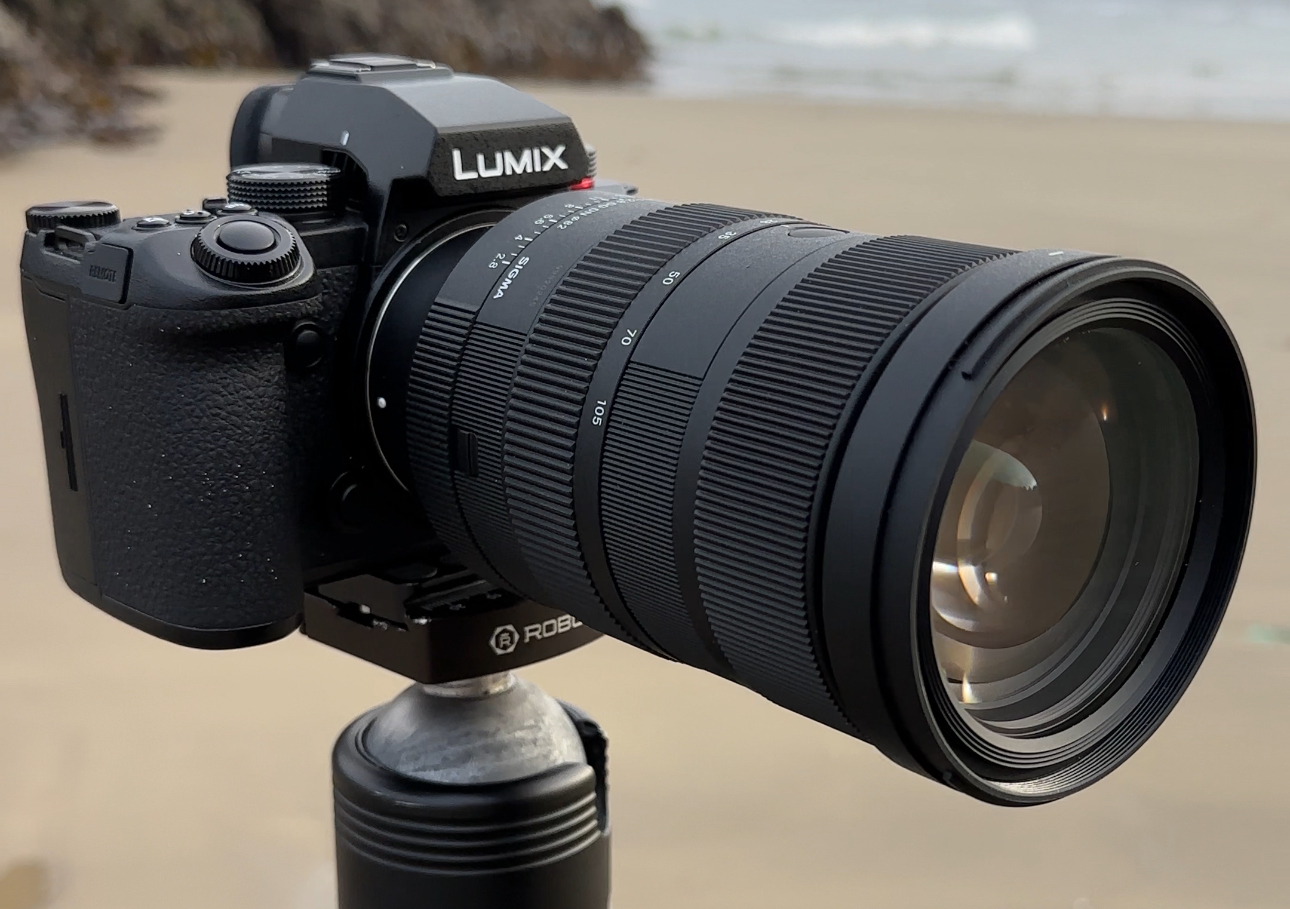
The L-Mount version of the Sigma 28-105mm F2.8 DG DN | Art, mounted on a Lumix S5 II camera.
Back in July 2024 I had the pleasure of being one of the first photographers to try the new Sigma 28-105mm F2.8 DG DN | Art lens that was soon to be released. It was an opportunity I jumped at when offered to me. I wrote this article for Sigma after using the lens for only a few weeks.
You’ll see the images I took back then with a Lumix S5 II camera and the Sigma fp L. In that article, I mentioned that I couldn’t wait to own the lens myself. Now I do, and it’s been nothing but pure joy to shoot with on my Nikon Z8. This lens is currently available in both L-Mount & E-mount, and I’m using the E-mount with a Megadap E-to-Z adapter.
After nearly a year of frequent use, I wanted to give a little update on my overall experience with the lens.
Experience and images
The lens is extremely sharp throughout the focal range from 28mm to 105mm, and for night photography the corners are very sharp at F2.8. Even the colors of the RAW files are very nice. The lens provides a beautiful amount of contrast along with excellent color to give you an incredible starting point for RAW files and instantly printable/publishable files if you shoot JPG.
Aside from shooting landscapes and general photography, one of the main reasons I wanted this lens was for its F2.8 maximum aperture throughout the entire focal range. This means that it’s a fantastic lens for night photography too. So I’ll start and end my image examples with night photos.
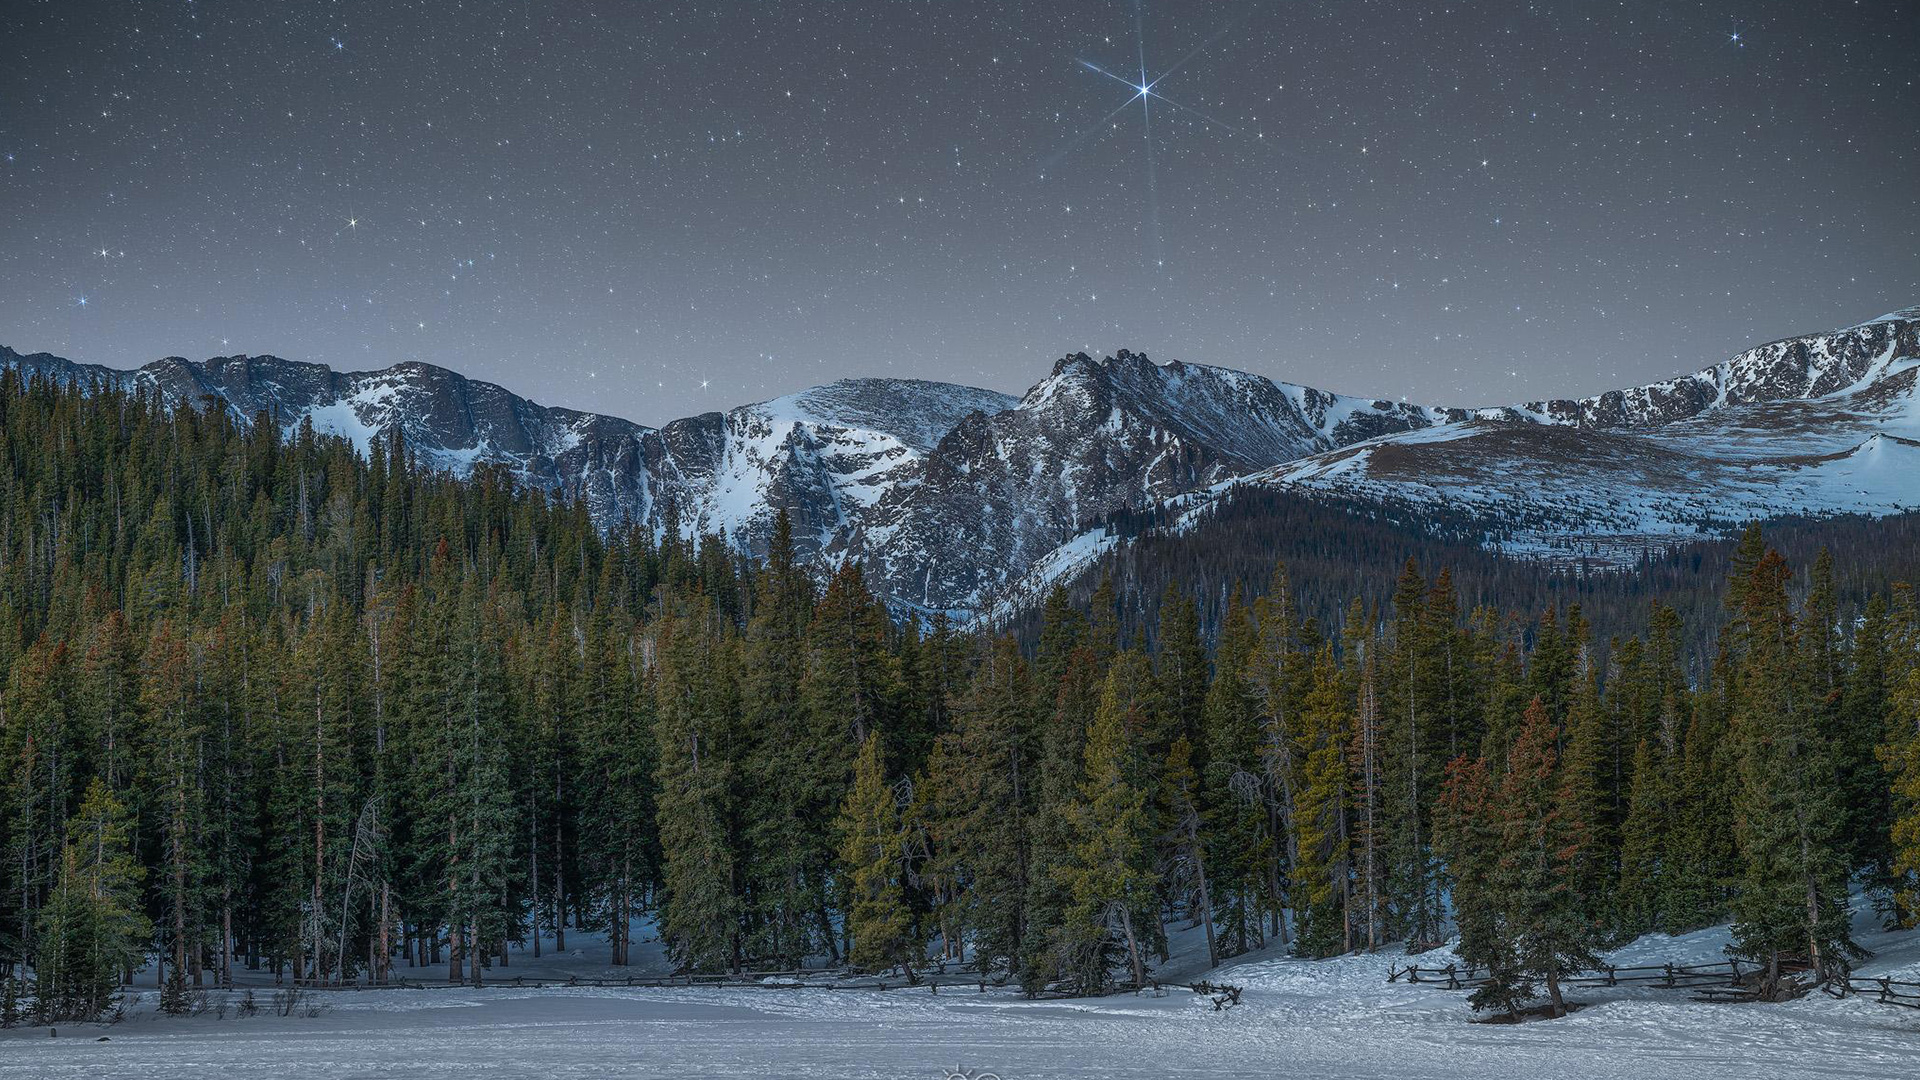
Sigma 28-105mm F2.8 DG DN | Art Nikon Z8 Camera
The above image “Echo Lake Stars” was shot on the morning of March 3, 2025. It was very cold and clear out. I arrived at Echo Lake near Idaho Springs, Colorado. I’ll admit, I was hoping for more snow on the trees, but we take what we can get, right? I knew this would be a good opportunity to not only test the low-light ability of the Z8 (although this blog isn’t about the Z8) but to really test the lens in low light again, this time not shooting the Milky Way, but just the stars.
The lens did an amazing job with manual focusing, and as you can see the details are razor sharp which allows for larger than normal printing if needed (that’s another topic for another blog). After shooting this landscape, I then took a series of shots for the sky to help reduce the noise for a better overall image. You don’t want a nice clean foreground with a noisy sky… that just wouldn’t look right. Even in the cold weather the lens performed flawlessly.
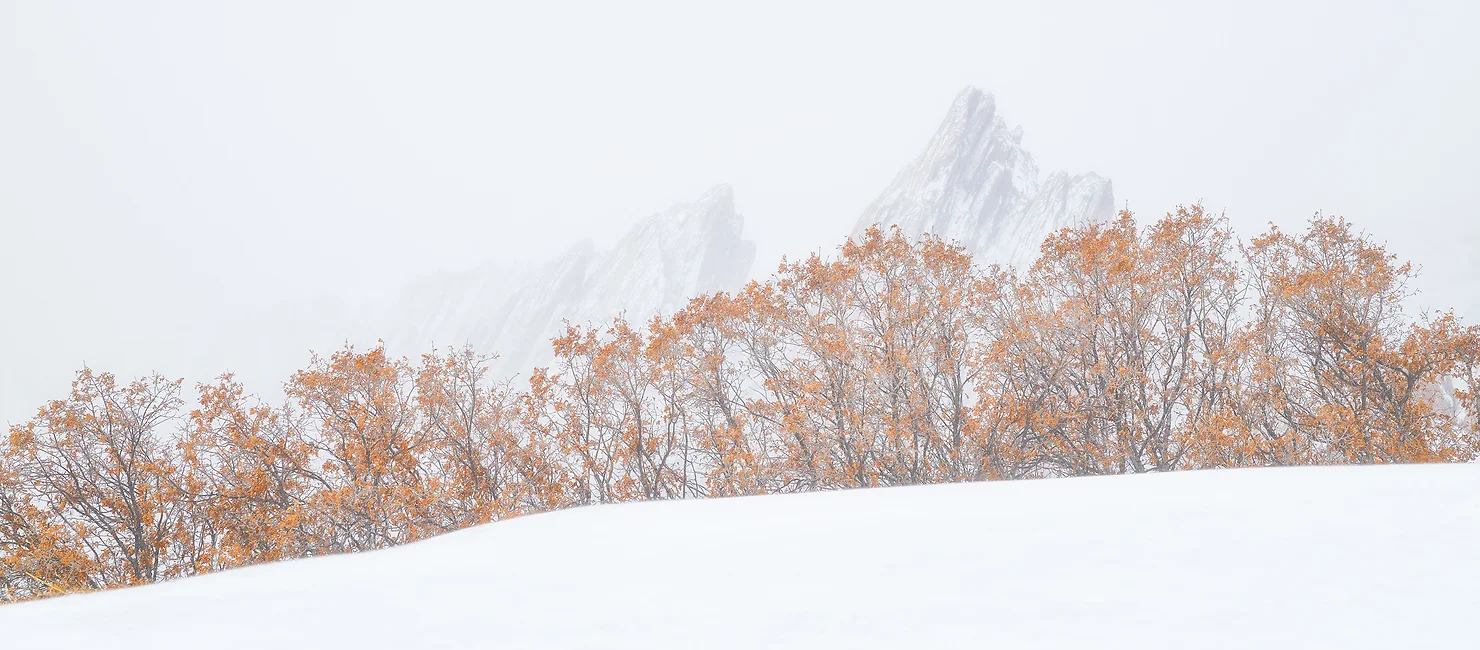
Sigma 28-105mm F2.8 DG DN | Art at 95mm Nikon Z8 Camera
Near my home in Colorado, there are scrub oak trees that look like autumn color most of the year. I captured this more intimate scene of the leaves and branches in all their details. Even at 95mm, there is detail from edge to edge, corner to corner. The versatile zoom range really lets you perfect your composition in-camera so there is less to do in post processing. The low dispersion elements in the lens do a fantastic job of eliminating chromatic aberrations (purple and green fringing) that could potentially be problematic in scenes like this.
Sigma 28-105mm F2.8 DG DN | Art at 105mm Nikon Z8 Camera
With the lens coming in right at 2 pounds, it makes it an easy walking around lens that I don’t need to put away in my bag when walking from place to place. The two above images were shot the same morning and are roughly 1/4-mile from each other. While this is a short distance to me, some may consider it quite a hike when walking through the snow. I’ve walked through both towns and natural settings like this for hours, and never felt like the lens was too heavy or bulky. I also find it balanced well on all three cameras I used it with… Nikon Z8, Sigma fp L & Lumix S5 II.
Sigma 28-105mm F2.8 DG DN | Art at 81mm Nikon Z8 Camera
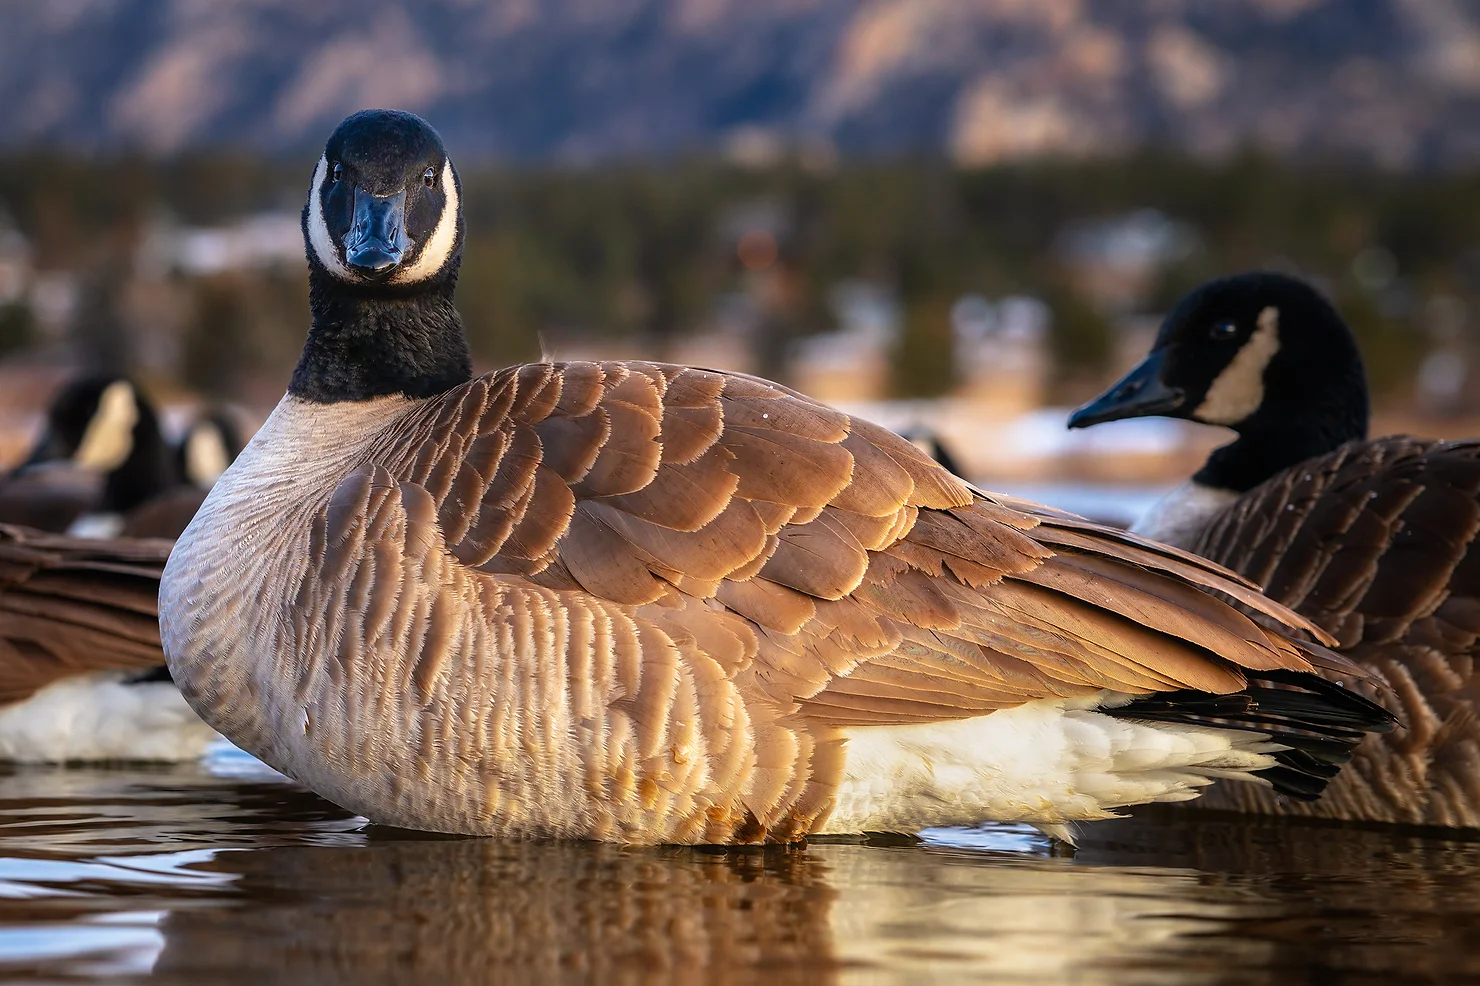
When I sat down to photograph these geese, I thought they were going to all fly or swim away. The exact opposite happened – they came right up to me to see what I was about. They were moving so fast and my camera wasn’t set up to shoot wildlife (AF tracking) so I just did the best I could, and was able to capture this image of a goose looking right at me. The lens nailed the focus to give the feathers incredible details to go along with the razor sharp eyes.
One feature that I have found to be extremely handy is the zoom lock switch. Because I generally walk around with my camera and lenses at my side, I really like to lock my lens at 28mm so it doesn’t extend down while I’m walking.
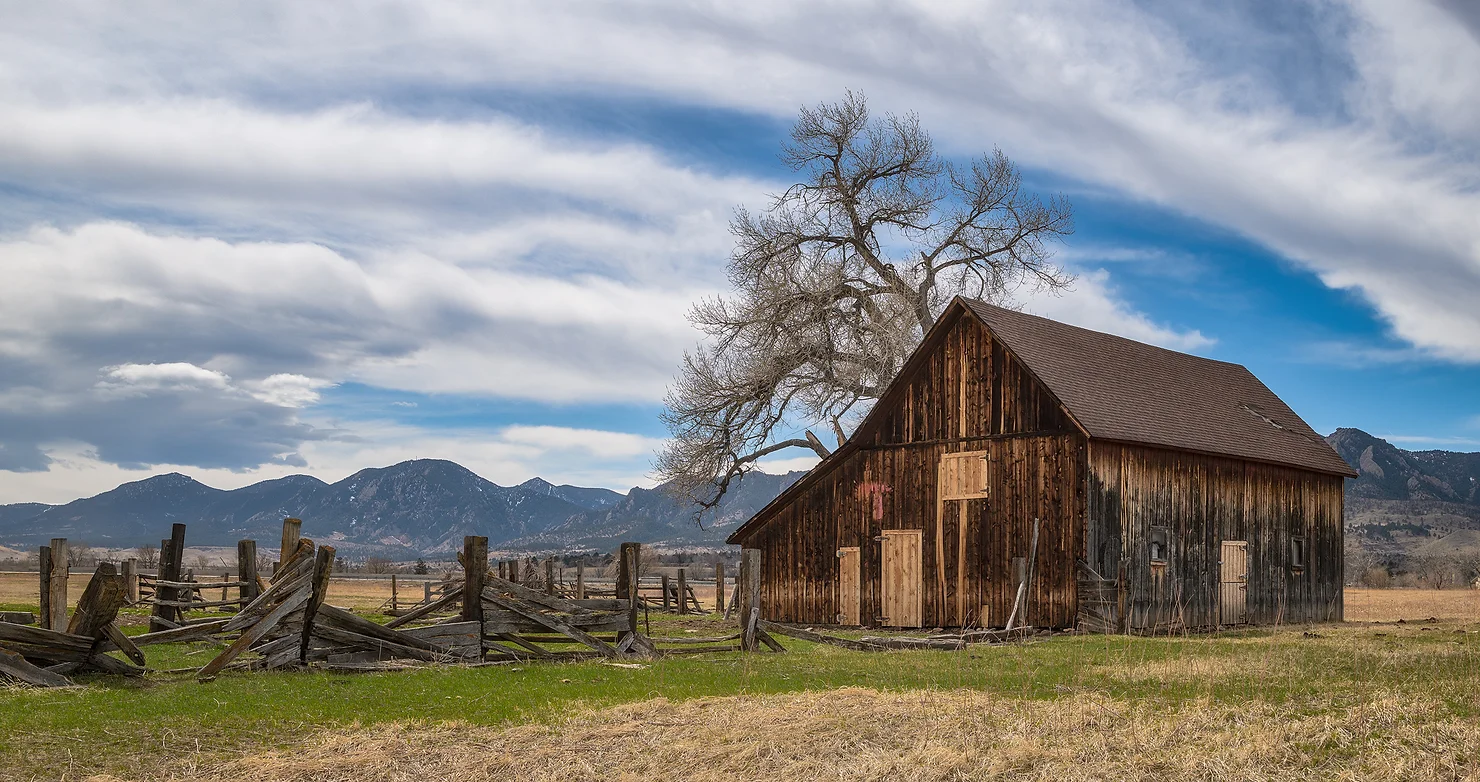
Sigma 28-105mm F2.8 DG DN | Art at 75mm Nikon Z8 Camera
I’m an absolute sucker for ice photos. Normally, I’d take out my Sigma 105mm F2.8 DG DN Macro | Art lens for shots like this. But now I can take advantage of the 28-105mm’s close focusing ability and save the macro lens for more technical work. The crazy amount of details in this image shows how well the lens performs even at close distances. I’d say the ice is only about 2-3 inches from the golden water below.
Sigma 28-105mm F2.8 DG DN | Art Nikon Z8 Camera
The above image and several photos below showcase what I like to call “subtle details”. Snow is the perfect example. By being able to visually see the small bits of snow, it really helps to tell the story of the image rather than if the snow was overexposed or not in proper focus. The Sigma 28-105mm F2.8 DG DN | Art really does a great job of nailing the focus to bring all the details to the viewer.
Sigma 28-105mm F2.8 DG DN | Art Nikon Z8 CameraSigma 28-105mm F2.8 DG DN | Art Nikon Z8 CameraSigma 28-105mm F2.8 DG DN | Art Nikon Z8 Camera
Recently, while walking around town, I captured a couple images that show differences in the lens’ ability – please click to expand the images and get a closer look:
Sigma 28-105mm F2.8 DG DN | Art Nikon Z8 CameraSigma 28-105mm F2.8 DG DN | Art Nikon Z8 Camera
The statue portrait shows the amazing close focusing ability to capture all the details while shooting at F2.8 to allow for a gorgeous blurred background. The street sign image shows how we can use the zoom range to fill the frame and keep everything in focus. These are nothing fancy by any means, but if you’re looking for a good travel lens, this one is hard to beat. I need to get out and do some city night photography with it soon.
Sigma 28-105mm F2.8 DG DN | Art Nikon Z8 Camera
As a mid-day walking around lens, the 28-105mm F2.8 DG DN | Art lens can really do it all. It’s the new workhorse standard by which all other 24-105mm and similar range lenses should be compared to. Even after all the shooting I’ve done with this lens, I’ve never been in a situation where I couldn’t get a shot because it was 28mm rather than 24mm. That 4mm at the wide end isn’t something I even notice, and neither will you unless you’re working in a very confined space or studio.
Sigma 28-105mm F2.8 DG DN | Art Nikon Z8 Camera
As a photographer who works primarily outdoors, I really like the idea of my gear being weather sealed for better protection against the elements. When your lens is this close to the water (see above), you feel safer knowing it’s protected from splashes and dust.
I’ve always said if you want to upgrade your equipment, it’s best to look at your lenses first. No matter how good your camera sensor is, it will only record the light that passes through all the elements of the lens. If that light doesn’t hit your sensor with crisp, colorful details, your camera simply can’t make adjustments to give you a better file. This is one reason why most people never keep their kit lenses after a year. They are striving for better images, and better images come from better light being passed through the lens onto your sensor.
Sigma 28-105mm F2.8 DG DN | Art Nikon Z8 CameraSigma 28-105mm F2.8 DG DN | Art Nikon Z8 Camera
Lastly, if you enjoy night photography and don’t want to buy a bunch of different lenses for the various types of photography you do, I highly encourage you to look at this lens.
Both of the images above were shot with the Sigma 28-105mm F2.8 DG DN | Art lens. 28mm is my favorite focal length for shooting the Milky Way, and for years I have used the Sigma 28mm F1.4 DG HSM | Art lens, which rarely leaves my Nikon D850 camera, my dedicated night photography camera. However, now that I have the 28-105mm, I find myself using my more compact mirrorless combination more often.
Final thoughts
I can’t say enough good things about this lens, its features, and the outstanding build quality. I still own the 24-105mm F4 DG OS HSM | Art lens for Nikon F mount, purchased roughly 12 years ago, and I suspect I’ll own this 28-105mm even longer. It’s fast, fairly lightweight, super quick to focus, and it makes photography fun without the hassle of changing lenses all the time!
If you have any specific questions about the lens, please don’t hesitate to ask.
If you were one of the nearly 50,000 attendees at the last Asia Dive Expo in Singapore—or any of the 30 previous editions of the hugely popular dive show—you will already know that ADEX is a must-attend event on the dive calendar. But the next one just got even more interesting, with the announcement of the first ADEX 360 BLU Awards.
Per the press release (below), the ADEX 360 BLU Awards will honor “outstanding individuals and organisations in the field of diving, innovation, ocean conservation, arts, and more,” with some 46 awards being given out during an evening ceremony on the second day of ADEX 32nd Edition in April 2026. The awards fall into four categories—“Sports & Education,” “Ocean Tourism,” “Arts & Science,” and “Individual Excellence”—and you’ll be pleased to know that “Photographer of the Year” is among them.
The nomination period is from June 1st to October 1st, 2025, with shortlisted nominees put to public vote between October 10th, 2025 and February 10th, 2026. Check out the press release below to find out more or head over to the ADEX website.
PRESS RELEASE
ADEX 360 BLU AWARDS 2026
Honouring Excellence: Celebrating the Industry and Community!
The ADEX 360 BLU Awards 2026 will honour outstanding individuals and organisations in the field of diving, innovation, ocean conservation, arts, and more. The diverse range of traditional and new award categories will recognise everyone who plays a role in this space, ensuring we celebrate contributions from both the industry and the community. We hope to celebrate leadership, sustainability, and creativity, while supporting marine conservation through a high-impact charity auction.
As part of the ADEX 32nd Edition Singapore Ocean Week, the longest-running and largest dive show in Asia, the ADEX 360 BLU Awards will be held on Saturday, April 11th, 2026, at Suntec Singapore. This ceremony is not only a celebration of excellence but a tribute to the passionate individuals, leaders, and changemakers who are shaping the future of diving and ocean protection.
Nominations are open to individuals and organisations worldwide and awards will be presented at both Asia and Global levels, with dedicated trophies recognising contributions across the diving world.
Award categories cover four key pillars, which are:
Sports & Education
Ocean Tourism
Arts & Science
Individual Excellence
Some of the awards include:
Diver of the Year – Celebrating a diver whose achievements have significantly advanced diving and marine exploration.
Ocean Hero of the Year – Honouring a changemaker whose impact and advocacy have made a real difference for our oceans.
Most Certified Dive Centre of the Year – Recognising excellence in dive training and outreach across the region.
Photographer of the Year – For imagery that captures the soul of the sea and the urgency to protect it.
Best E-Learning Platform of the Year – Acknowledging innovation in accessible, high-quality dive education.
Eco-Tourism Dive Resort of the Year – Celebrating leadership in sustainable diving and responsible travel.
Lifetime Achievement Award – Awarded to individuals whose lifelong dedication has shaped the global dive community.
The nomination period is open from June 1 to October 1, 2025. A shortlisting official committee will announce the Top 10 per sub-category by October 9, 2025, with public voting taking place from October 10, 2025 to February 10, 2026. Final winners will be announced live at the ADEX 360 BLU Awards Ceremony in April 2026.
Join us as we recognise those who inspire, protect, innovate, and lead in diving and ocean advocacy. The ADEX 360 BLU Awards 2026 are more than just awards, they are a celebration of our global ocean community.
ADEX 32nd Edition
The 32nd edition of the Asia Dive Expo, Asia’s largest and longest-running dive expo, will be held from April 10–12, 2026, at Suntec Singapore, during Singapore Ocean Week to celebrate ocean-related industries, culture, and conservation. ADEX 2026 will be dedicated to the Humphead Wrasse, raising awareness for its protection, and the Blue Revolution – Reduce, Innovate, Reuse: a commitment to promoting sustainability in ocean and diving practices. The show will feature diving innovation, ocean culture, sustainability, and community, from the TEK Asia Conference and underwater arts to tourism, tech, conservation, and beyond.
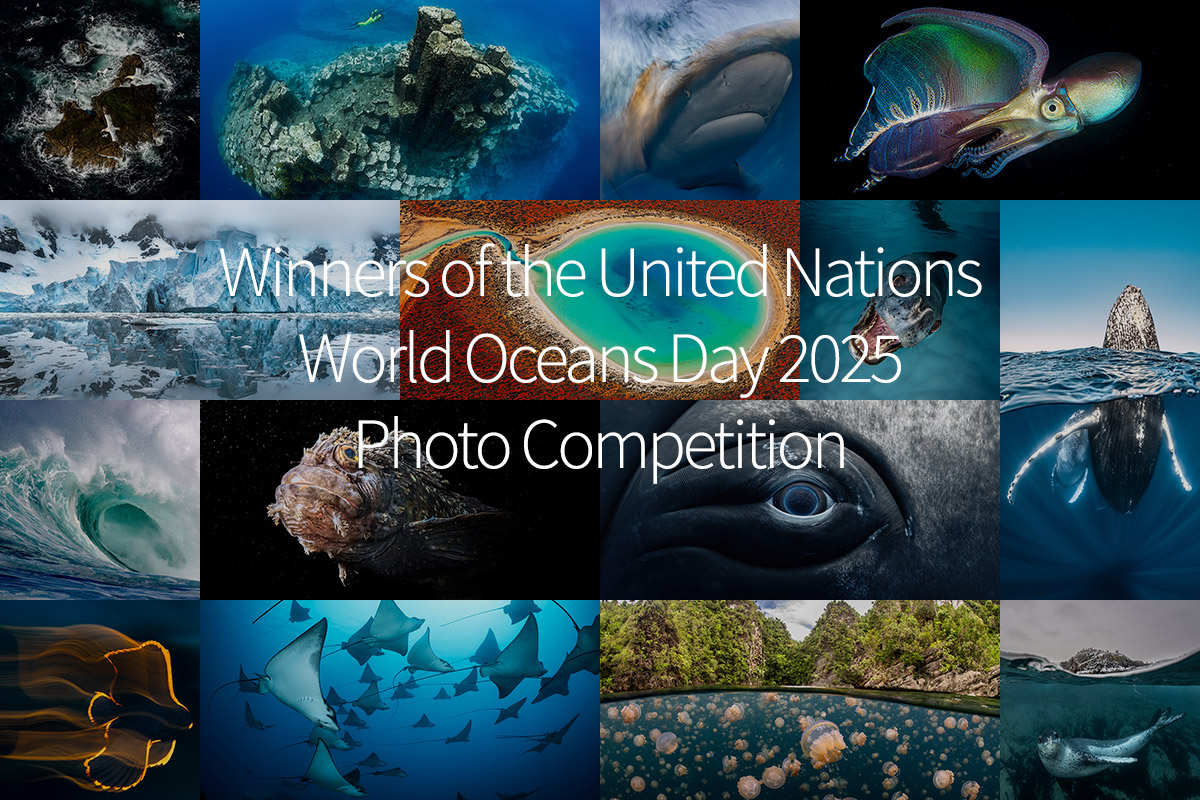
The winners of the twelfth annual Photo Competition for United Nations World Oceans Day were announced today surrounding the United Nations World Oceans Day celebration in Nice, France. A panel of world-renowned judges selected winners from thousands of global entries made by both amateur and professional photographers. This year’s competition featured the recurring categories “Big and Small Underwater Faces,” “Underwater Seascapes,” and “Above Water Seascapes.” The category “Wonder: Sustaining What Sustains Us” was newly added in celebration of the 2025 UN World Oceans Day theme sharing the same name. The 2025 winning photographers hail from eight different countries: Rachel Moore, Luis Arpa, Steven Lopez (“Wonder: Sustaining What Sustains Us”); Andrey Nosik, Giacomo Marchione, Lars von Ritter Zahony (“Big and Small Underwater Faces”); Dani Escayola, Gerald Rambert, Pedro Carrillo (“Underwater Seascapes”); Leander Nardin, Nur Tucker, Andrey Nosik (“Above Water Seascapes”).
Historically hosted at the UN Headquarters in New York, this year’s United Nations World Oceans Day moved overseas, taking place ahead of the UN Ocean Conference (UNOC3), which will also be hosted in Nice, France from June 9–13. The winning photographs will be presented live during the United Nations Ocean Conference, during a panel event on 11 June at the Agora in the La Baleine (Green Zone). The winning images will also be displayed in gallery exhibitions at NEO VogelART LAB (Nice) and at The Explorer’s Club (New York) throughout the week.
The 2025 photo competition was coordinated in collaboration between the United Nations Division for Ocean Affairs and the Law of the Sea, DPG, Oceanic Global, the Intergovernmental Oceanographic Commission of UNESCO. Since its inception in 2014, the competition has been curated by underwater and wildlife photographer Ellen Cuylaerts, and judged by a world-renowned panel of judges. Judges for 2025 included: underwater photographer Ipah Uid Lynn (Malaysia), underwater photographer William Tan (Singapore), wildlife photographer Vanessa Mignon (France), and underwater photographer Marcello Di Francesco (Italy).
The Photo Competition for UN World Oceans Day is a free-and-open public competition that calls on photographers and artists from around the world to communicate the beauty of the ocean and the importance of the respective United Nations World Oceans Day theme each year. All winners and participants in the competition signed a charter of 14 commitments regarding ethics in photography. Winning photos from 2025 as well as from previous years can be viewed via the virtual gallery on www.unworldoceansday.org and on DPG’s World Oceans Day Photo Competition mini-site. (On DPG’s mini-site, you can find extended captions for this year’s winners, which tell the stories behind the images.)
Wonder: Sustaining What Sustains Us
Wonder: Sustaining What Sustains Us — Winner by Rachel Moore (USA)
Wonder: Sustaining What Sustains Us — 2nd Place by Luis Arpa (Spain)
Wonder: Sustaining What Sustains Us — 3rd Place by Steven Lopez (USA)
Wonder: Sustaining What Sustains Us — Honorable Mention by Ollie Clarke (UK)
Big and Small Underwater Faces
Big and Small Underwater Faces – Winner by Andrey Nosik (Russia)
Big and Small Underwater Faces — 2nd Place by Giacomo Marchione (Italy)
Big and Small Underwater Faces — 3rd Place by Lars von Ritter Zahony (Germany)
Underwater Seascapes
Underwater Seascapes — Winner by Dani Escayola (Spain)
Underwater Seascapes — 2nd Place by Gerald Rambert (Mauritius)
Underwater Seascapes — 3rd Place by Pedro Carrillo (Spain)
Underwater Seascapes — Honorable Mention by Lars von Ritter Zahony (Germany)
Above Water Seascapes
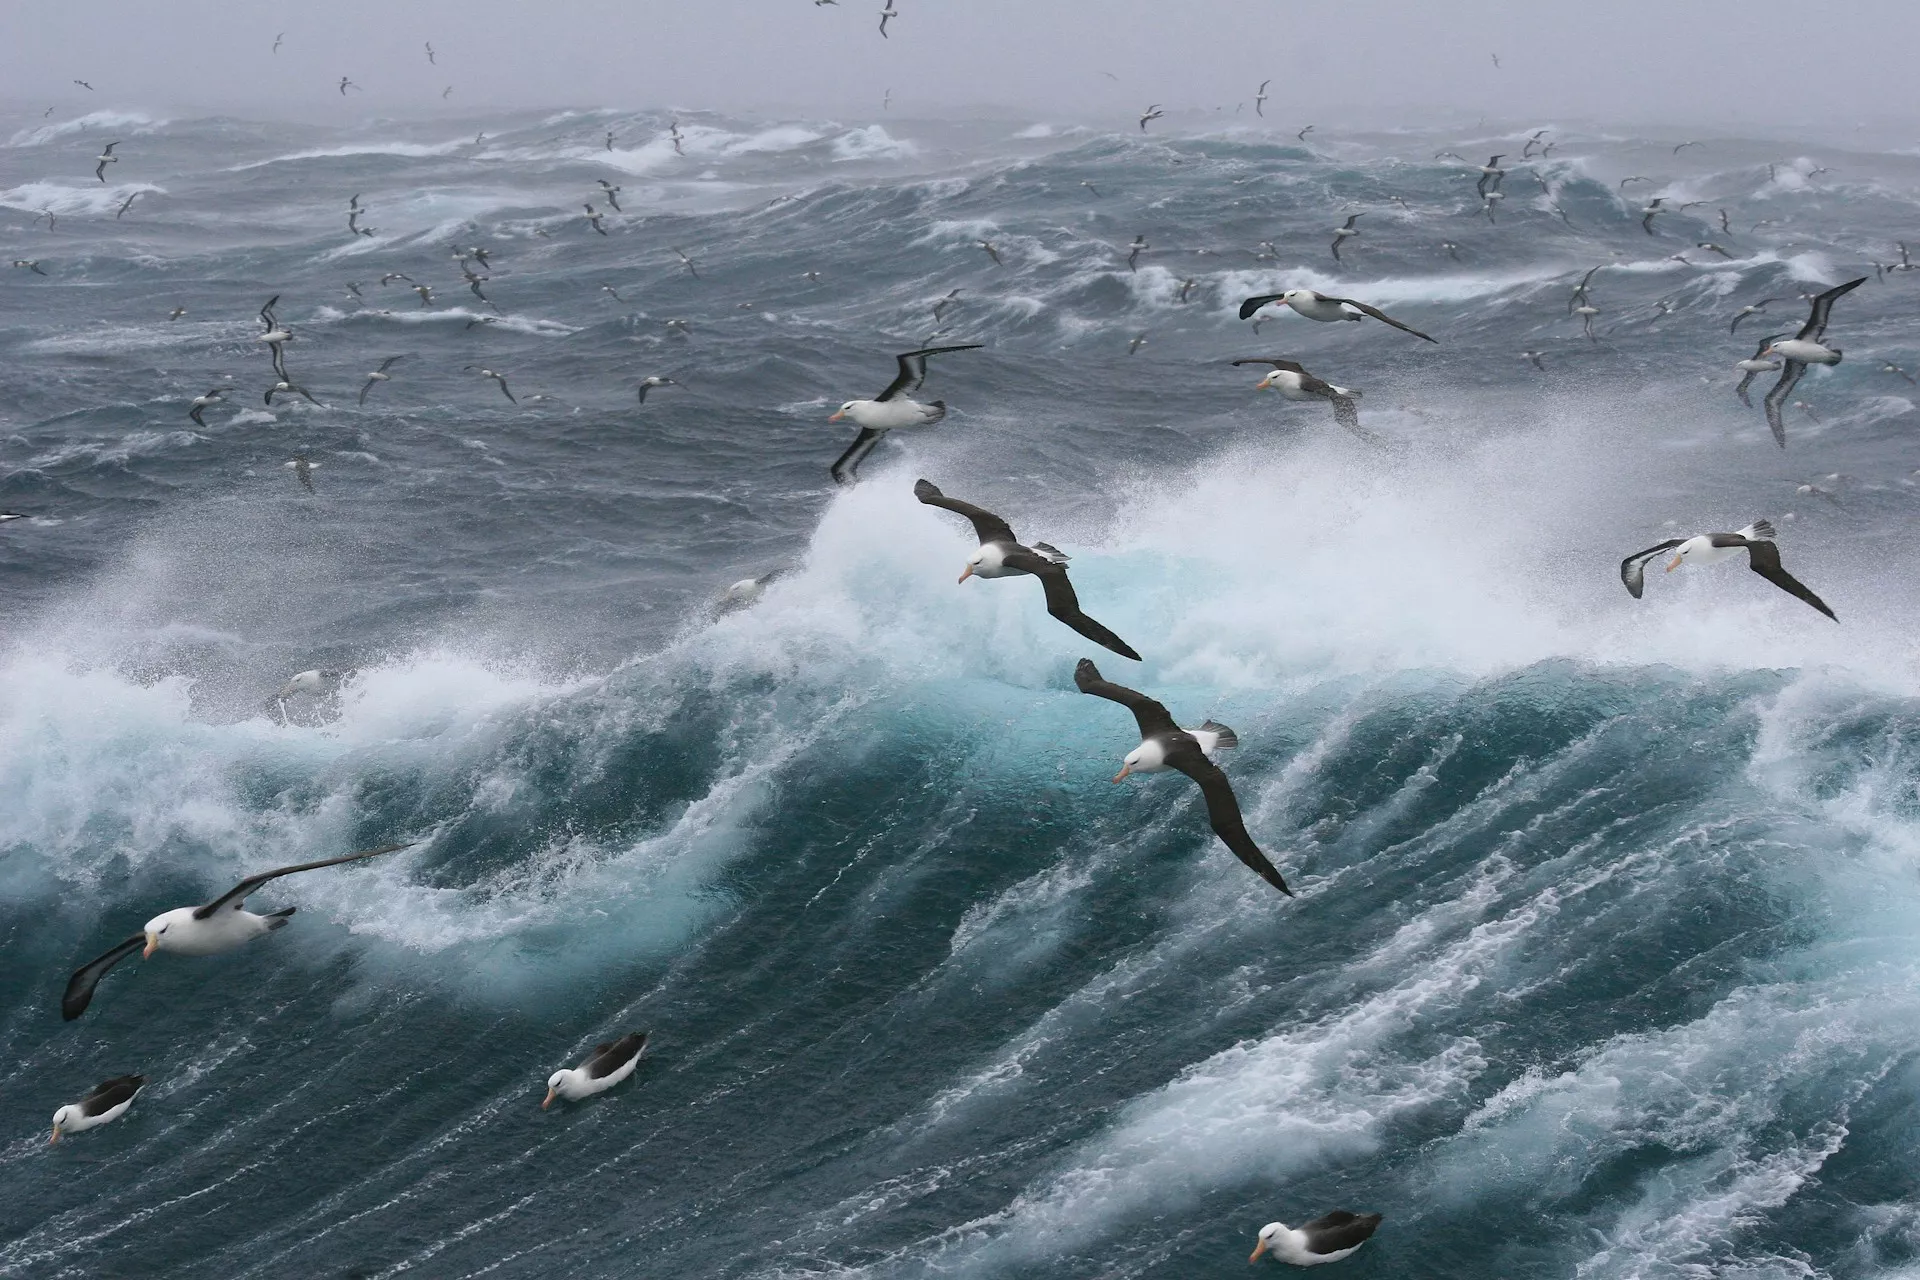
Above Water Seascapes – Winner by Leander Nardin (Austria)
Above Water Seascapes — 2nd Place by Nur Tucker (UK/Turkey)
Above Water Seascapes — 3rd Place by Andrey Nosik (Russia)
Above Water Seascapes — Honorable Mention by Ken Findlay (South Africa)
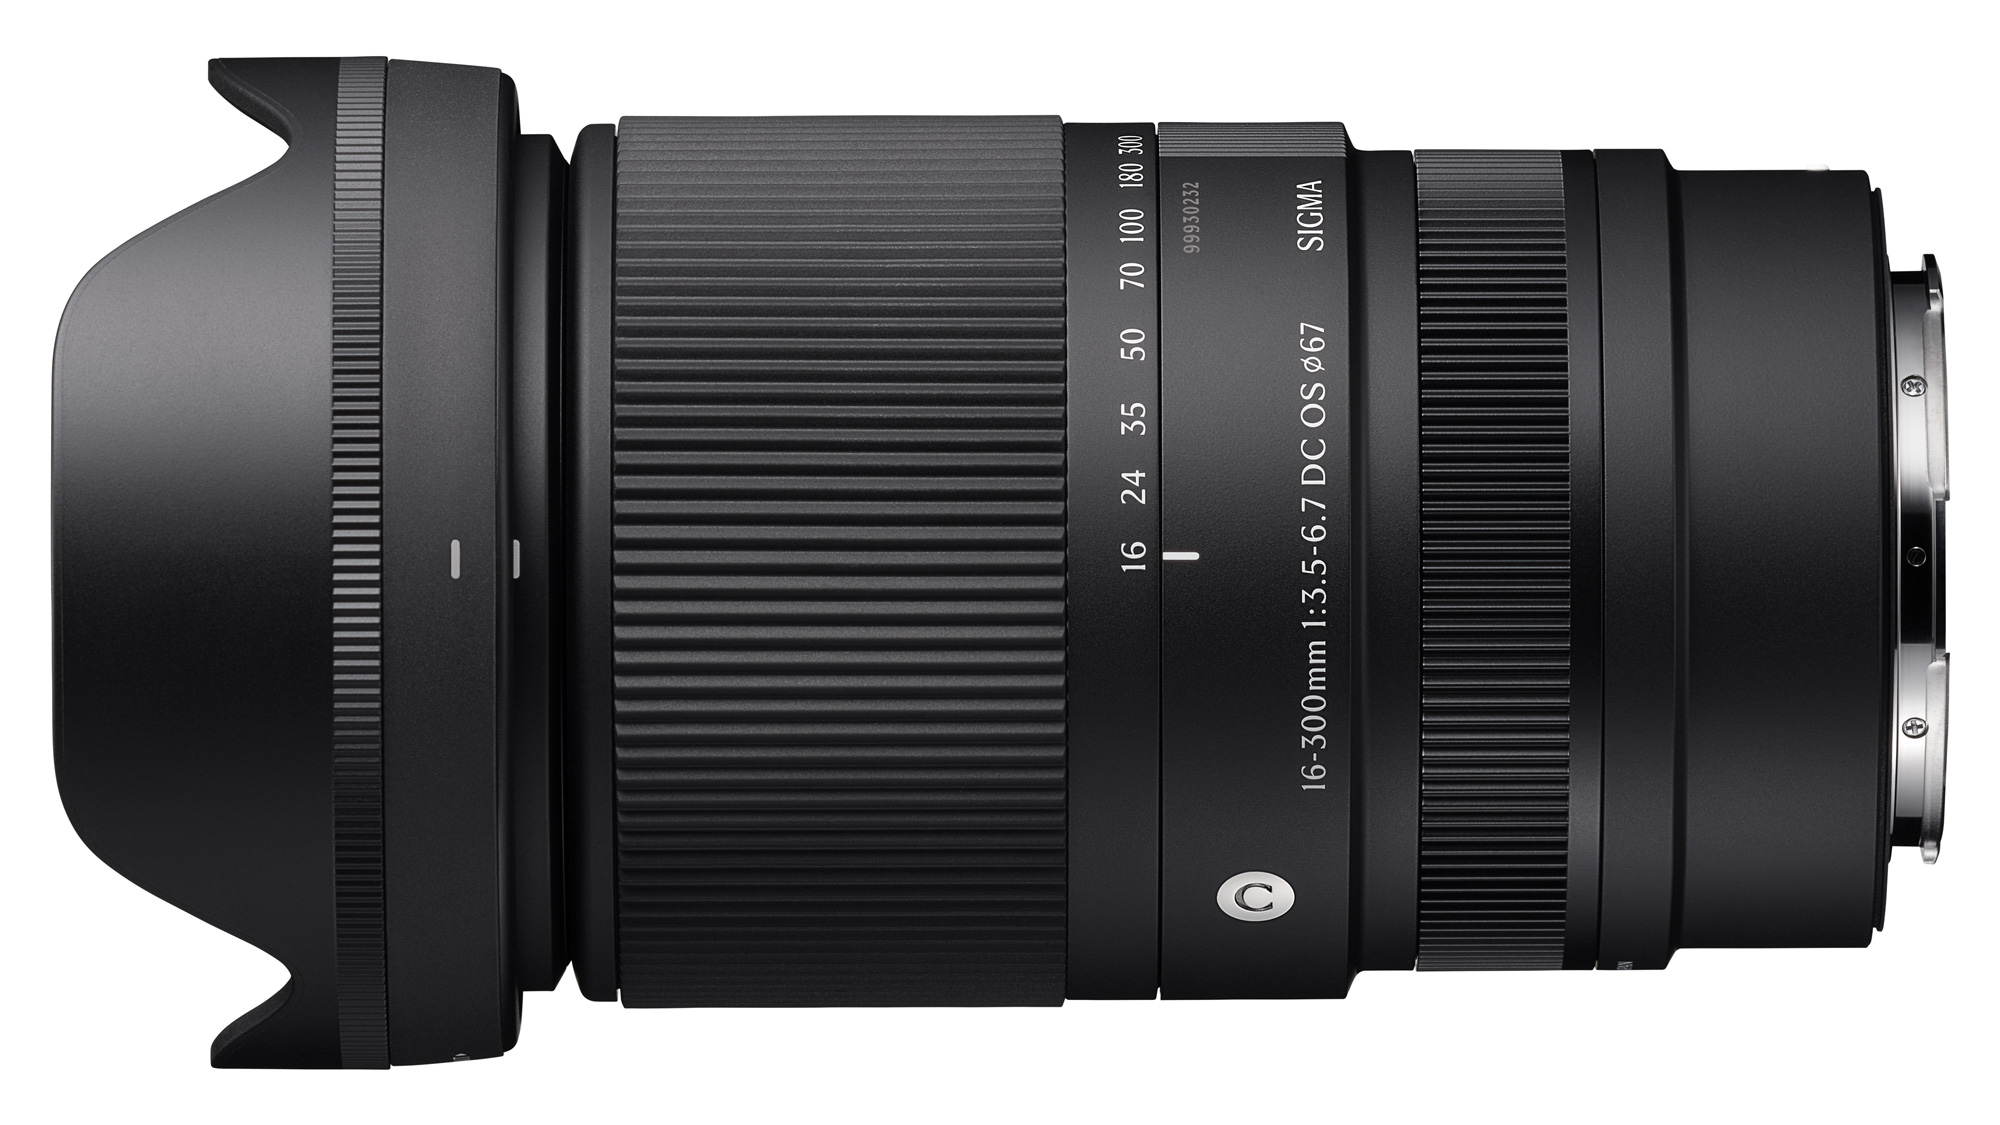
Sigma 16-300mm F3.5-6.7 DC OS | Contemporary Sony a1 II 300mm, F6.7, 1/640s, ISO 100
Sigma is pleased to feature a gallery of images by professional photographer Jim Koepnick. This gallery is comprised entirely of images shot with the extremely versatile 16-300mm F3.5-6.7 DC OS | Contemporary lens, released in 2025 for APS-C format mirrorless cameras.
Sigma 16-300mm F3.5-6.7 DC OS | Contemporary Sony a1 II 215mm, F6.3, 1/500s, ISO 200Sigma 16-300mm F3.5-6.7 DC OS | Contemporary Sony a1 II 251mm, F10, 1/500s, ISO 1600
Sigma 16-300mm F3.5-6.7 DC OS | Contemporary Sony a1 II 200mm, F6.3, 1/2000s, ISO 6400Sigma 16-300mm F3.5-6.7 DC OS | Contemporary Sony a1 II 270mm, F10, 1/500s, ISO 250
Sigma 16-300mm F3.5-6.7 DC OS | Contemporary Sony a1 II 166mm, F6.3, 1/500s, ISO 2500Sigma 16-300mm F3.5-6.7 DC OS | Contemporary Sony a1 II 49mm, F5.6, 1/160s, ISO 100Sigma 16-300mm F3.5-6.7 DC OS | Contemporary Sony a1 II 300mm, F6.7, 1/640s, ISO 100Sigma 16-300mm F3.5-6.7 DC OS | Contemporary Sony a1 II 177mm, F13, 1/500s, ISO 12800
Get your Sigma 16-300mm lens:
About
Jim Koepnick is one of the leading aviation photographers today, photographing for Cirrus Aircraft, Flying Magazine, Plane and Pilot, Air and Space Smithsonian, AOPA and EAA. He also shoots for the USA Today Network – Wisconsin in the Oshkosh area, specializing in sports and action. His freelance clients include Ripon College, AACD and Our Wisconsin Magazine.
Previously, Jim was Chief Photographer at the Experimental Aviation Association for 28 years. In that role, he photographed over 1000 aircraft while on air-to-air missions and supplied over 500 cover images for EAA Publications.
His photography has been a consistent winner of awards from Aviation Week and Space Technology, Wisconsin Imaging Photographers Association, American Advertising Federation and Calendar Marketing Association. His photojournalism has received awards from Wisconsin Newspaper Association, Wisconsin Press Photographers Association and Inland Press.
Equipment used
EXPLORE MORE
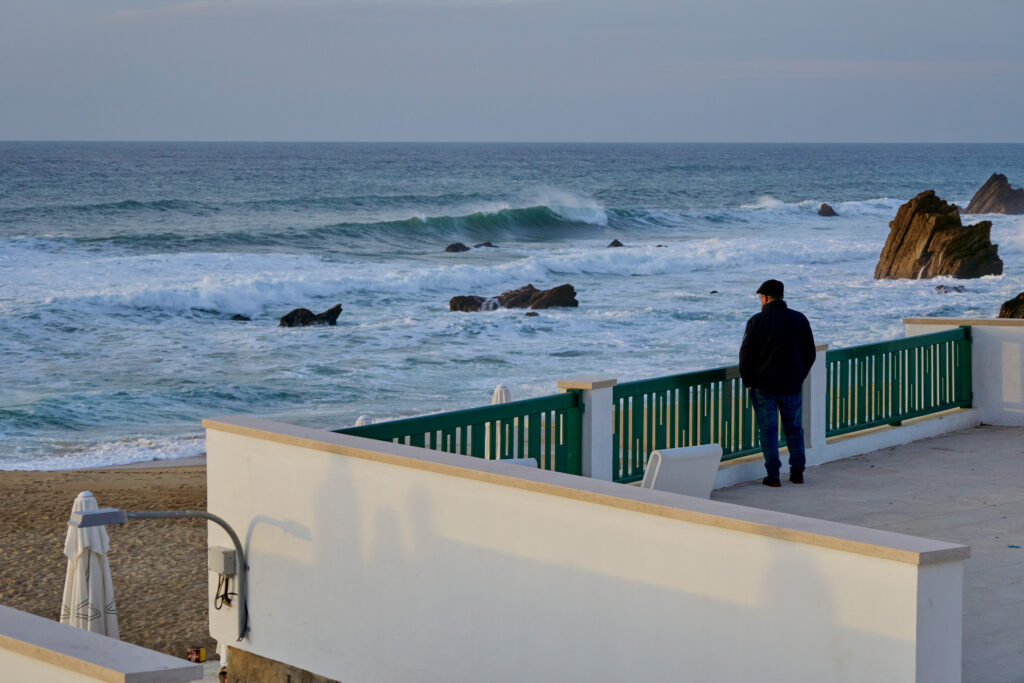
For your all-in-one travel photography needs, there’s simply no lens like the Sigma 16-300mm F3.5-6.7 DC OS | Contemporary, as Julie Mayfeng experienced on a trip to Portugal.
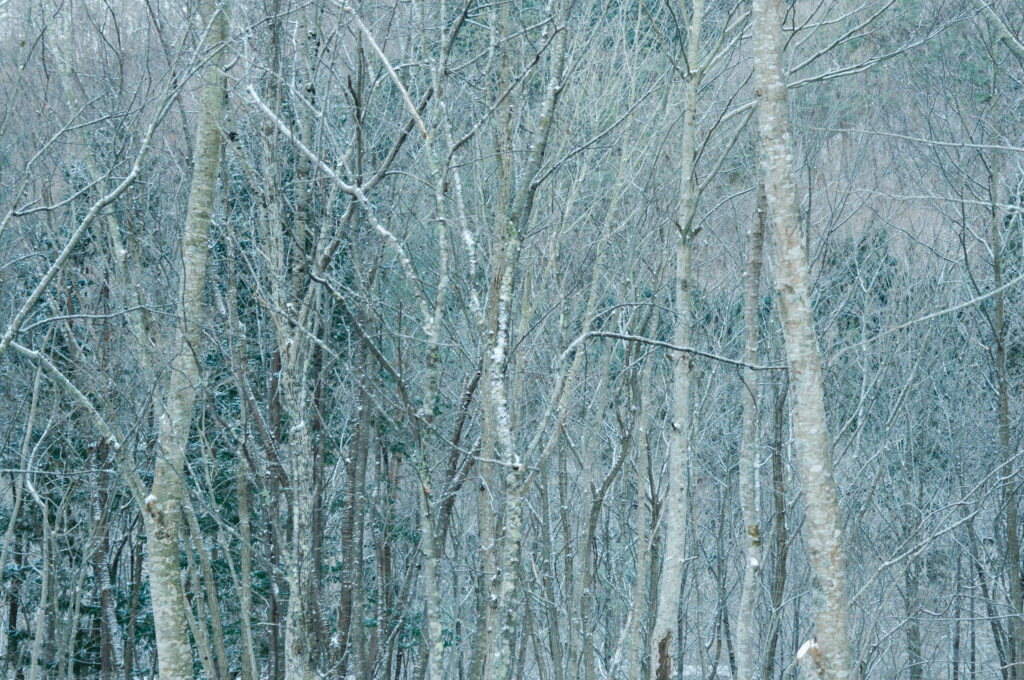
With a focal range that allows virtually any composition, photographer Mina Daimon strolls through the forests of Tono, Japan, capturing beautiful sights along the way with the Sigma 16-300mm F3.5-6.7 DC OS | Contemporary.
We have heard of many incidents in national parks where wildlife walk away or play with expensive camera gear. Most of the incidents happen during wildlife safaris where a photographer may have accidentally dropped their gear or the gear fell off their bags, etc.
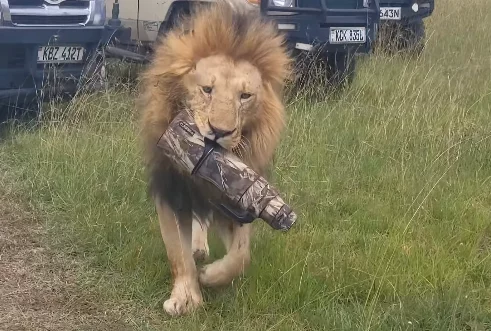
Image via Dansen Raddy
One of the most recent incidents is one where a lion walked away with a photographer’s very expensive lens and looks like this incident happened in Kenya’s Maasai Mara National Park. The incident was captured by another photographer, who posted the footage on his Instagram.
The footage was shared on many social media channels, reposted by other accounts and has gone viral. While a lot of viewers found the footage funny and entertaining, it has raised concerns and a bit of anger among other wildlife photographers.
As photographers, we always need to be ethical and mindful of the wildlife and their surroundings. Incidents like these only show that photographers are more concerned about getting the shot than being more responsible.
A lot of comments on the video shared here talk about how these incidents should not be entertained. Looks like there are also instances where photographers intentionally drop their gear to gain popularity on social media which is really sad, and more so when one claims to be a serious photographer.
While some viewers commented that the scene seem like a planned one, there are comments from witnesses who mention that it was an accident. Other concerns raised were how close the photographers and their vehicles were to the animals, which is not acceptable at all in photography and raises questions about giving animals their space and not disturbing them or their environment when capturing their photographs.
What are your thoughts on incidents like these and the rise in the number of such incidents? Let us know in the comments section below.
We have more news for you to read if you are interested at this link here.
The Art of the Personal Project is a crucial element to let potential buyers see how you think creatively on your own. I am drawn to personal projects that have an interesting vision or that show something I have never seen before. In this thread, I’ll include a link to each personal project with the artist statement so you can see more of the project. Please note: This thread is not affiliated with any company; I’m just featuring projects that I find. Please DO NOT send me your work. I do not take submissions.
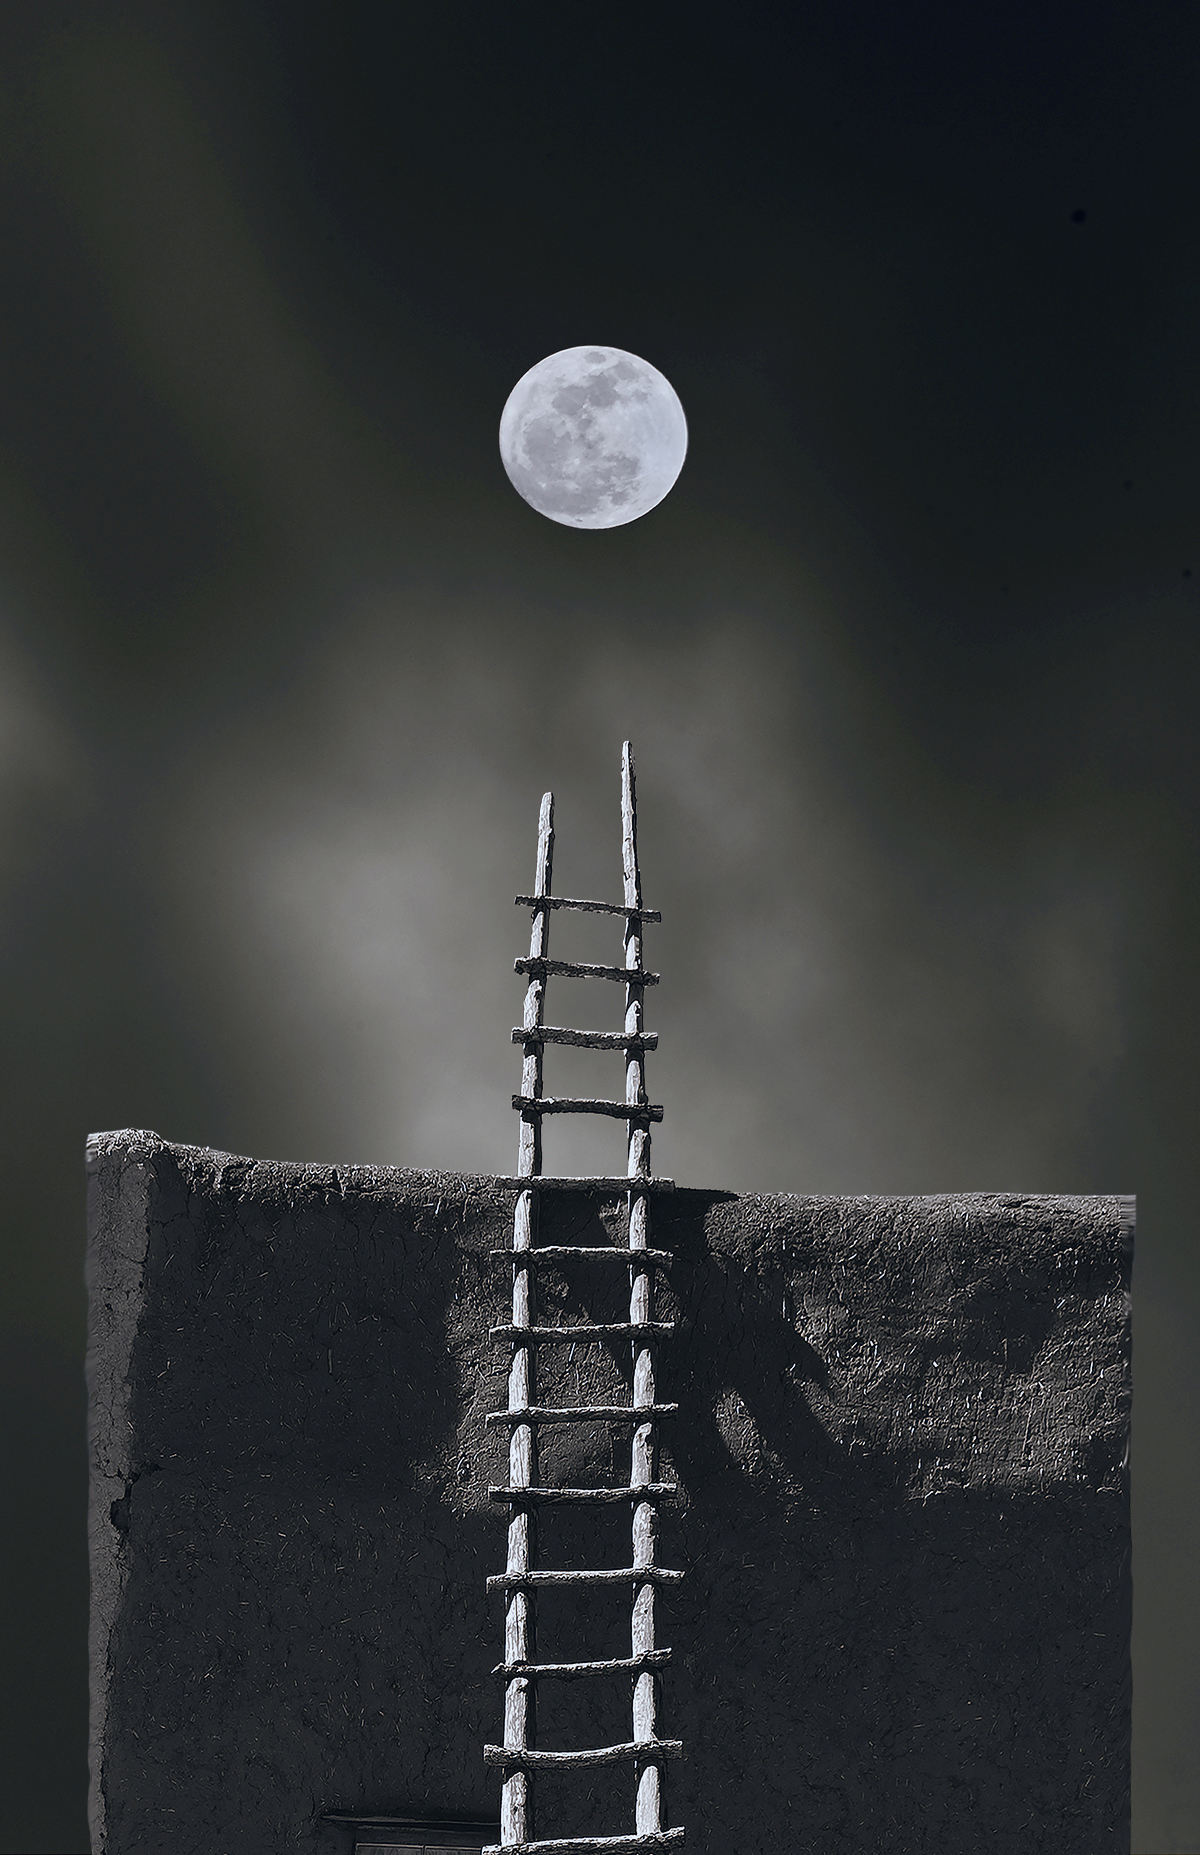
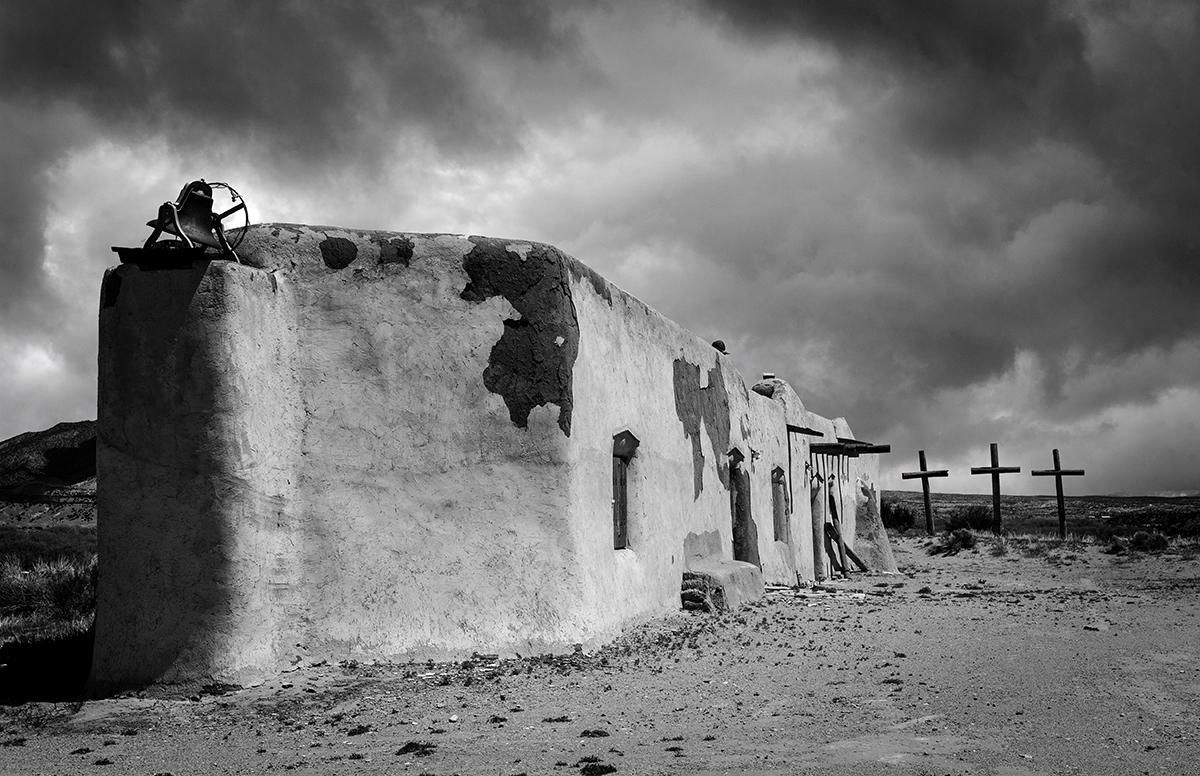
I create images that celebrate the spirit and beauty of the American Landscape, and like my father before me, photography is my passion and my career. In the world of solidity and structure, the silence of the desert, the play of light and shadow, and the forces of wind and water resounds with images that are stirring, touching, and profound. These are the places that occupy a special spot in my imagination. Places that seem to suggest more than just another beautiful spot. Transcending conventional clichés of location, each photograph is more than a record of natural beauty. Within the image, a feeling of vanishing moments when light, tide, and time hold one’s being in their grip and solicits a quiet and introspective moment that reflects the solitude of the work that I’ve done over the years.
I find my photography restorative, and often, while I’m travelling, I am inspired when I see places where priorities – nature and traditions that respect and preserve the land, all seem sensible, humane and in balance. With decades of dedication to the craft, my photography reflects a mastery of technique and a deep connection to nature. I work to capture those moments where the camera and life come together to create a feeling that’s authenticate and real, and although the stories I tell through my photography may vary, my dedication to finding beauty and originality is constant.
Suzanne Sease is a creative consultant and former ad-agency senior art buyer. She works with both emerging and established photographers and illustrators to create cohesive, persuasive presentations that clients can’t resist.
Suzanne offers something rare: an insider’s perspective on how client’s source creative talent. Her deep understanding of the industry is underscored by her impressive resume: 11 years as senior art buyer at The Martin Agency, seven years as an art producer for Capital One, and stints with the art-buying department at Kaplan-Thaler and the creative department at Best Buy, where she applied her expertise to reviewing bids to see which were most likely to come in on budget. Over the years, Suzanne has worked with a wildly diverse range of clients, including Seiko, Wrangler, Bank One, AFLAC, and Clairol Herbal Essence. Now, as a consultant, she is equipped to problem-solve for her clients from an unusually dynamic point of view.
As a longtime member of the photo community, Suzanne is also dedicated to giving back. Through her Art of the Personal Project column on the popular website aphotoeditor.com, she highlights notable personal projects by well-known and up-and-coming photographers. The column offers these artists excellent exposure while reflecting Suzanne’s passion for powerful imagery.
Windy days are not often considered to be a good day for outdoor photography, especially if one is shooting landscape, portraits, etc. When capturing photographs of any genre in general, photographers always aim to have the elements and subjects in the frame in sharp focus. But what if you can use the movements in the frame to your advantage to capture some creative photographs?
Here are 21 photos, that will inspire you to capture stunning outdoor photographs on a windy day.
The next time the weather gets windy, do not put your camera away and stay indoors. Some creative long exposure shots of the moving elements or even freezing the movement, can make for great storytelling photographs. Besides this creative idea, if you feel that you are running out of ideas to photograph anything, we recommend you to check out “The Creativity Catalog” by Photzy that will open your mind to the possibilities around you.
Photo by Fer Nando
Photo by John Fowler
Photo by Ksenia Makagonova
Photo by Ivo van Beek
Photo by Randy Fath
Photo by Sinitta Leunen
Photo by Shashank Kumawat
Photo by Regine Tholen
In order for photographers to keep their creativity running, they cannot be always travelling to exotic or new locations to capture new and exciting images. If you wish to come up with your own ideas and projects to kick-start your creativity, we recommend you to check out “The Creativity Catalog” by Photzy. This 209 pages guide covers 20 chapters that include creativity sparking assignments and ideas.
Photo by Andreas Brunn
Photo by Les Anderson
Photo by Terrillo Walls
Photo by Brandon Stoll
Photo by Vera Davidova
Photo by Abi Ismail
Photo by Jamie Street
For photographers, walking through the same neighbourhood or familiar places everyday can seem pretty boring and this may sometimes lead to photographer’s block. Photographers should always be ready to see things differently or from a different perspective in order to capture unique and creative shots everyday. Movements can also be used as a compositional tool. The “The Creativity Catalog” by Photzy comes with assignments that will make you feel inspired and motivated.
There’s a bit of growing unrest among photographers on whether LiDAR systems that are being fitted in new cars are actually capable of destroying camera sensors.
LiDAR systems are used by car manufacturers with self-driving cars to build 3D models of the surrounding environment so that the car knows where to steer.
A thread on Reddit talks about how a car photographer had several cameras destroyed after doing a car photo shoot.
What seems to be happening is that the laser from a LiDAR is too much for certain camera sensors to handle, and results in irreparable damage to those sensors.
As you can see from the video below, it certainly seems to be the case that LiDARs are destroying sensors in some scenarios.
But what is the nuance here?
In the first video, it is unclear what type of camera is being used to show the damage being done.
You will notice in the second video that the gentleman has trouble trying to damage his phone camera, whereas the LiDAR does damage the older iPad camera sensor.
Either way, it is clear that this doesn’t happen on every camera sensor every time it’s exposed to LiDAR lasers.
It also becomes clear from the comments that using a filter such as a UV filter will not protect your camera sensor from such damage. UV filters are designed to protect from ultraviolet light around 400nm, whereas LiDAR light at around 905nm to 1550nm will pass straight through such protective filters.
According to the gentleman in the second video, when he contacted Volvo about their LiDAR and the potential damage to camera sensors, they responded that they were aware of the situation and that people should be cautious about using cameras around LiDAR.