بلاگ

  • Capture Authentic Portraits With These Tips, Lighting Techniques, Styles And Poses

    Capture Authentic Portraits With These Tips, Lighting Techniques, Styles And Poses

    [ad_1]

    Portrait photography is a genre in photography where the photographer captures the subject’s personality and story. In order to capture effective portraits, the photographer needs to make use of the right light, background, props, attire and poses, as long as they are not candids where instant moments need to be captured. 

    Portraits can be captured in any environment under any light situations and it depends on the story and mood you are trying to capture in the image. Here are a number of resources that cover everything you need to know about capturing authentic portraits, from lighting to different styles and types of portraits.

    Photo by Amir Geshani

    Portrait photography may seem like a boring genre for some people who have not actually shot portraits or gotten deep into that genre. When it comes to portraits, there are a number of types of portraits that you can actually shoot and in many creative ways. It’s not just a couple of types like professional, candid, wedding, event, etc. This article talks about 23 different types of portraits you can try today.

    Photo by Jason D. Little

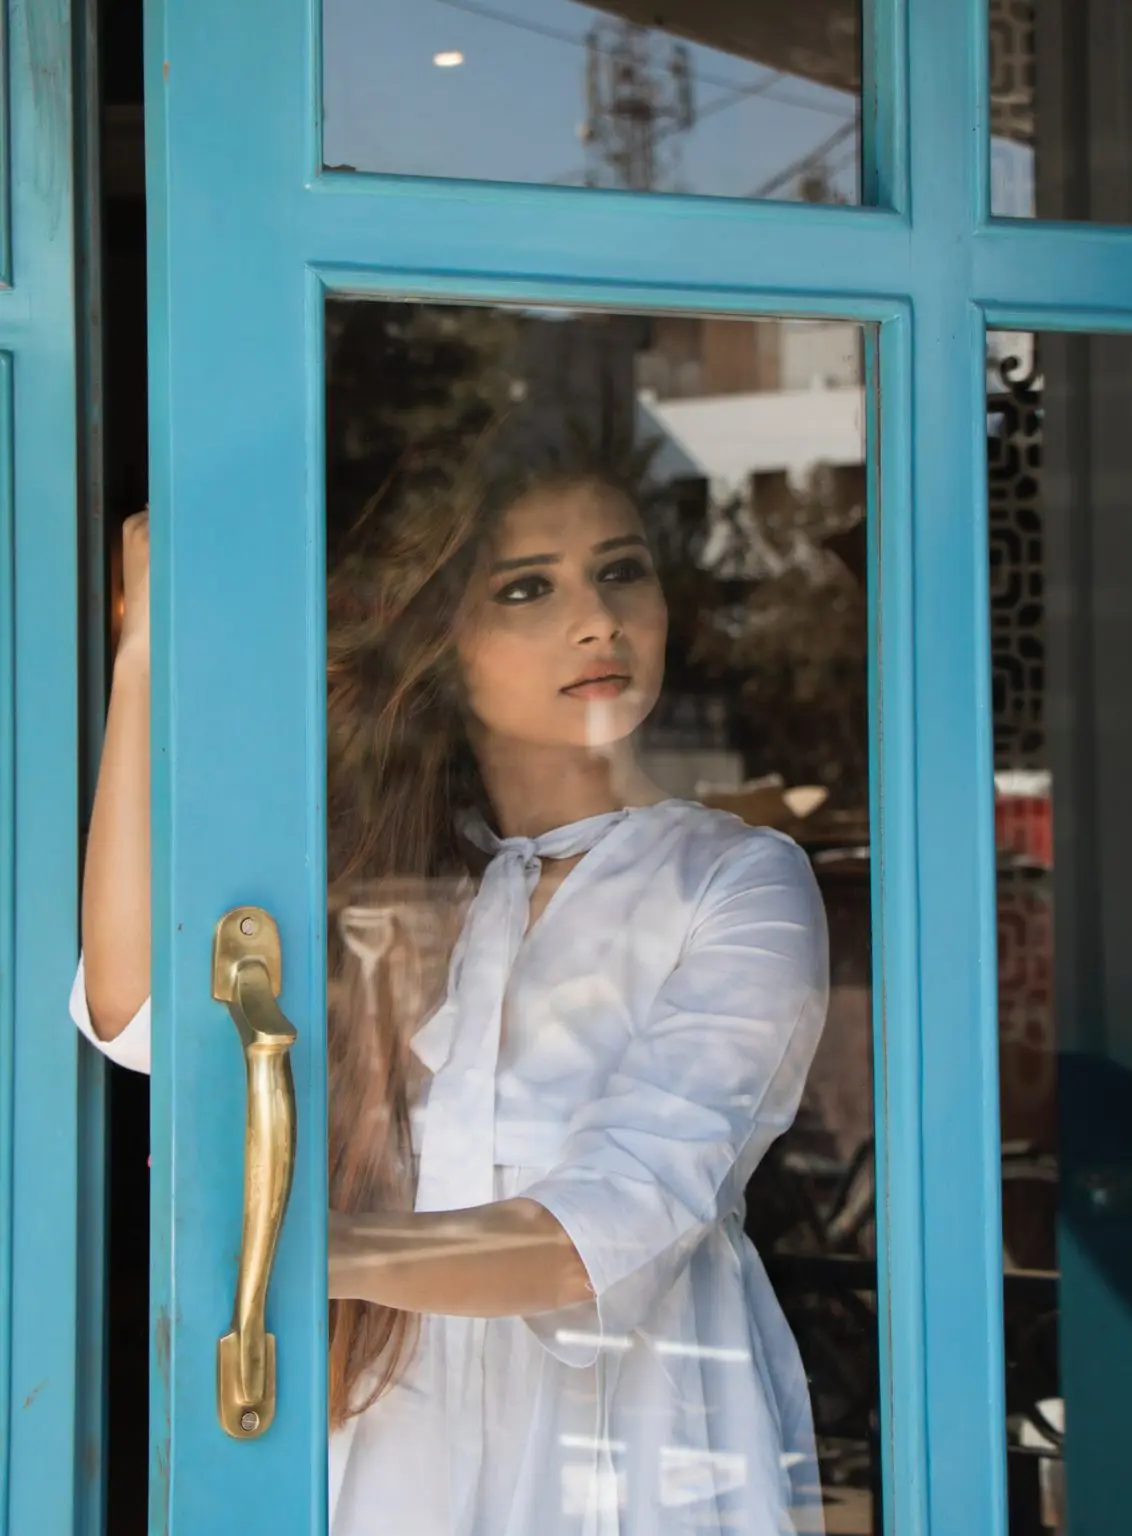
    Most photographers rely on natural light for their photography and this also applies to a lot of portrait photographers. Natural light is beautiful and if you have a good understanding of light, you can manipulate natural light to your advantage to capture stunning portraits. This article provides tips that will be useful for natural light portrait photographers.

    Photo by Leonardo Toshiro Okubo

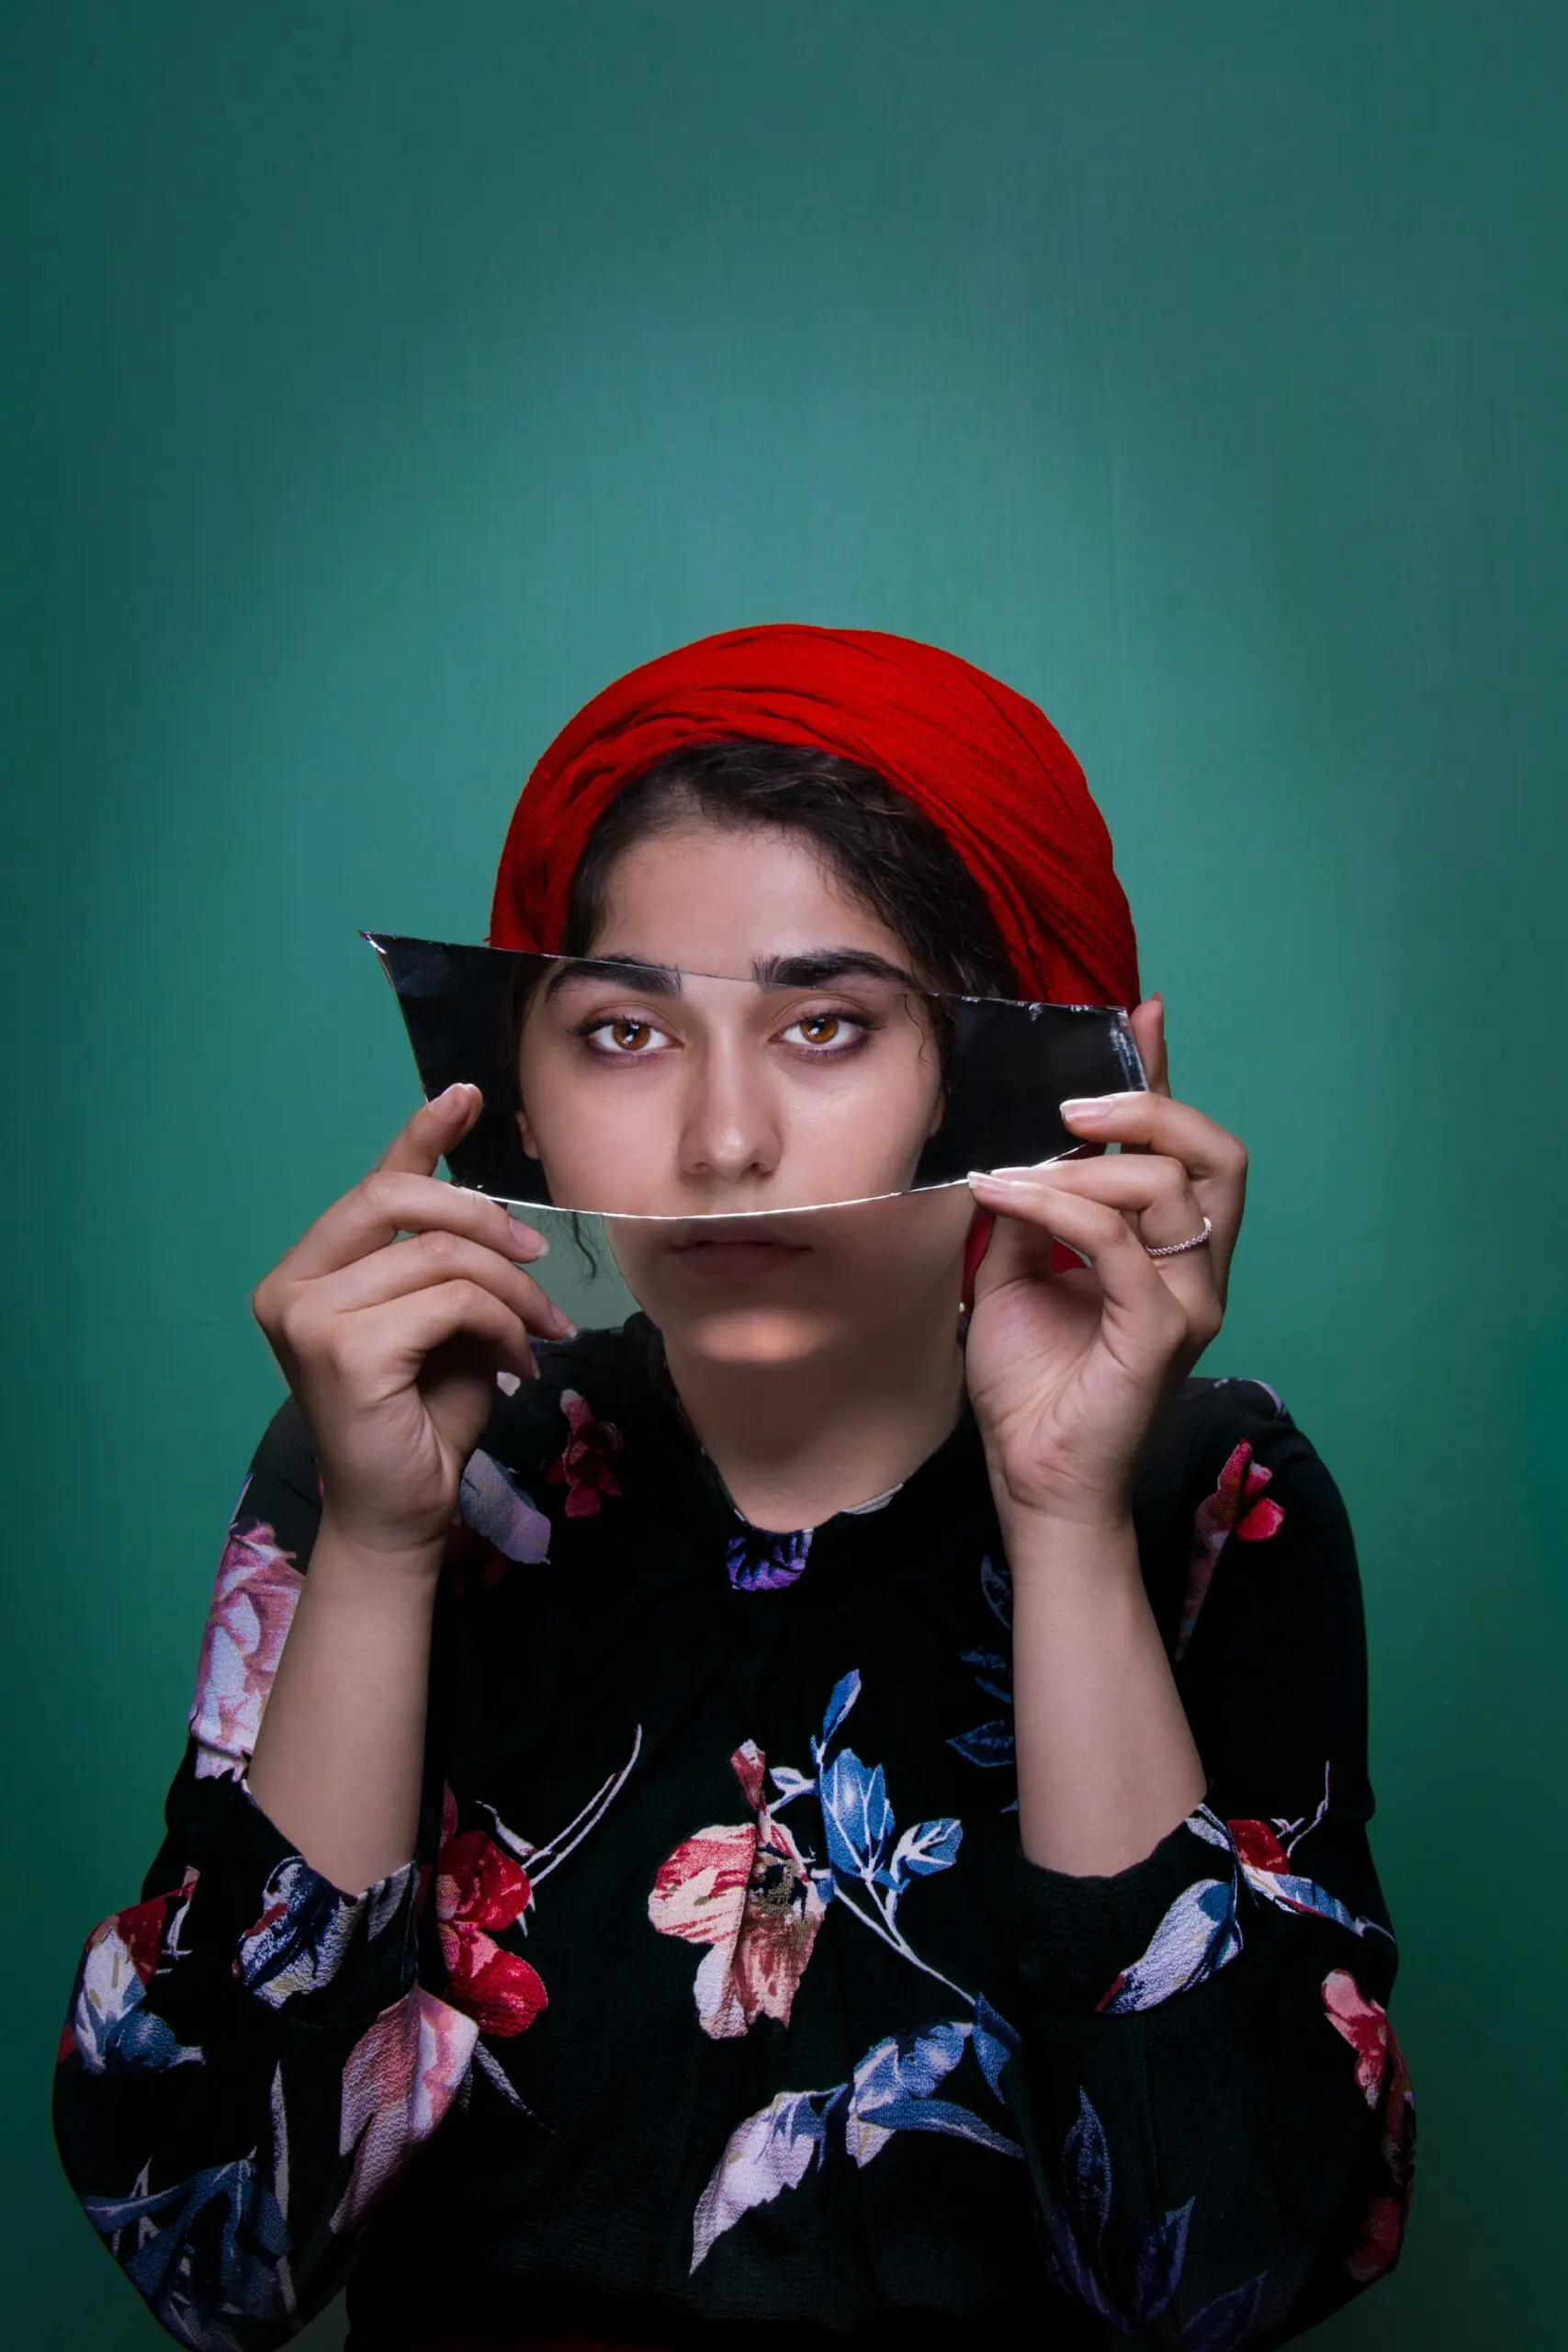
    Professional photographers mostly tend to shoot portraits in studios because they can have full control over the lighting, background and other elements that contribute to the process. It also saves the photographer from scouting for locations which in itself can sometimes be a tedious task. Shooting portraits in a studio also requires taking care of a lot of things and this article provides a ton of tips for shooting studio portraits.

    Photo by Aloha Lavina

    When we talk about natural light, we immediately think of grand landscapes, outdoor architecture, wildlife, outdoor, sports, nature photography, etc. Portraits can also be shot under natural light and they look really stunning if the light is used wisely. If there are times where your subject may require light to fill in shadows etc., you can use reflectors to fill in light. This article talks about the art of capturing natural portraits using reflectors.

    Photo by Warren Wong

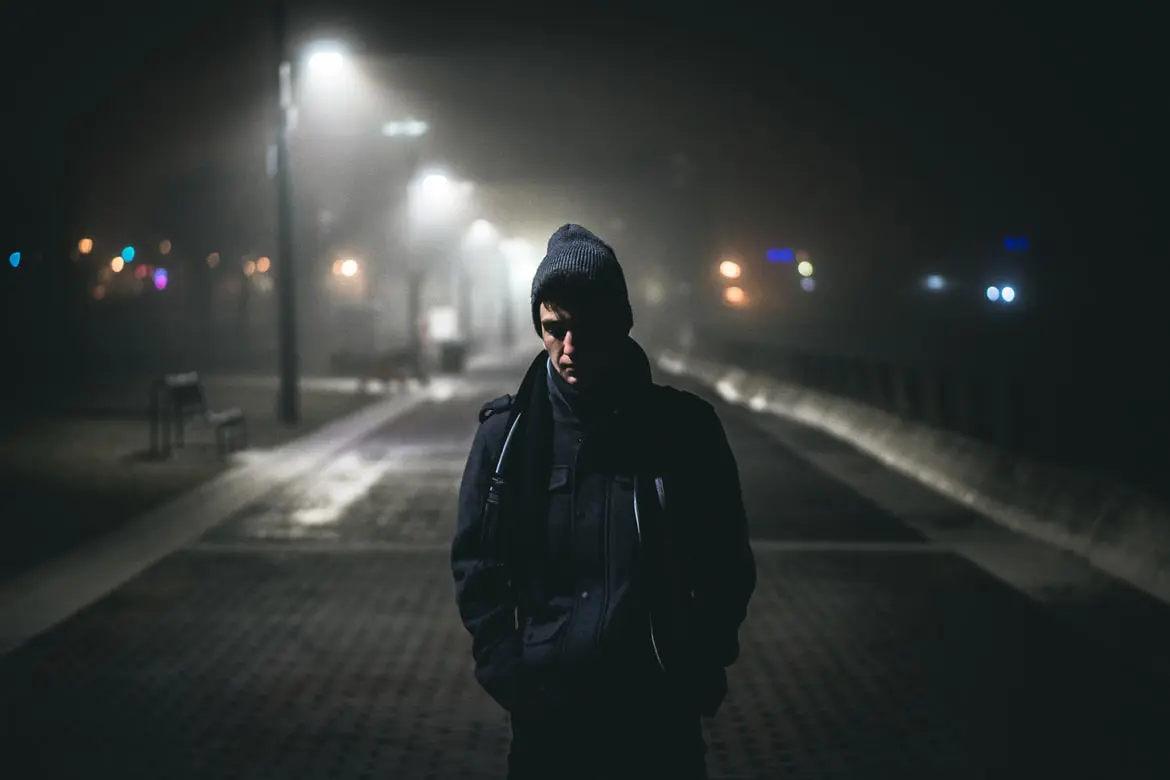
    Portraits can be shot either indoors or outdoors depending on the time of day, purpose of the shoot, the results that you are looking to achieve, the weather and so many other factors. When capturing portraits outdoors, care needs to be taken when choosing the location and the type of light (golden hour, overcast, midday, night, etc.). This article discusses some secrets to capture perfect outdoor portraits.

    Photo by vahid kanani

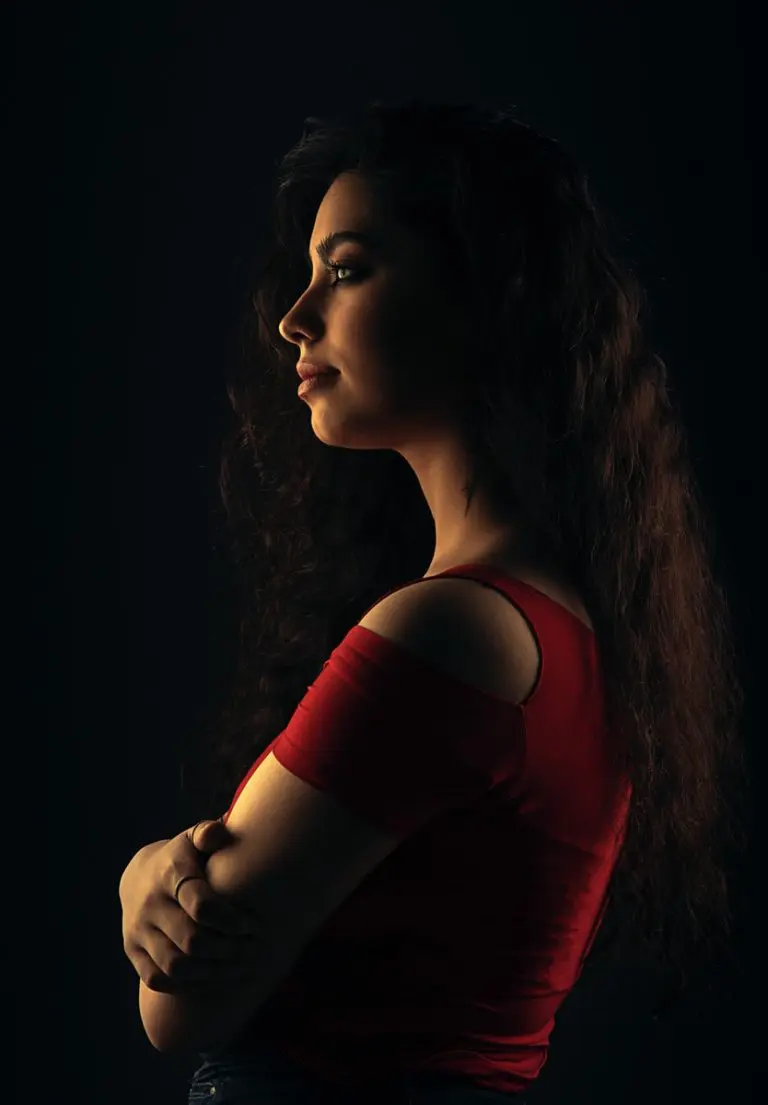
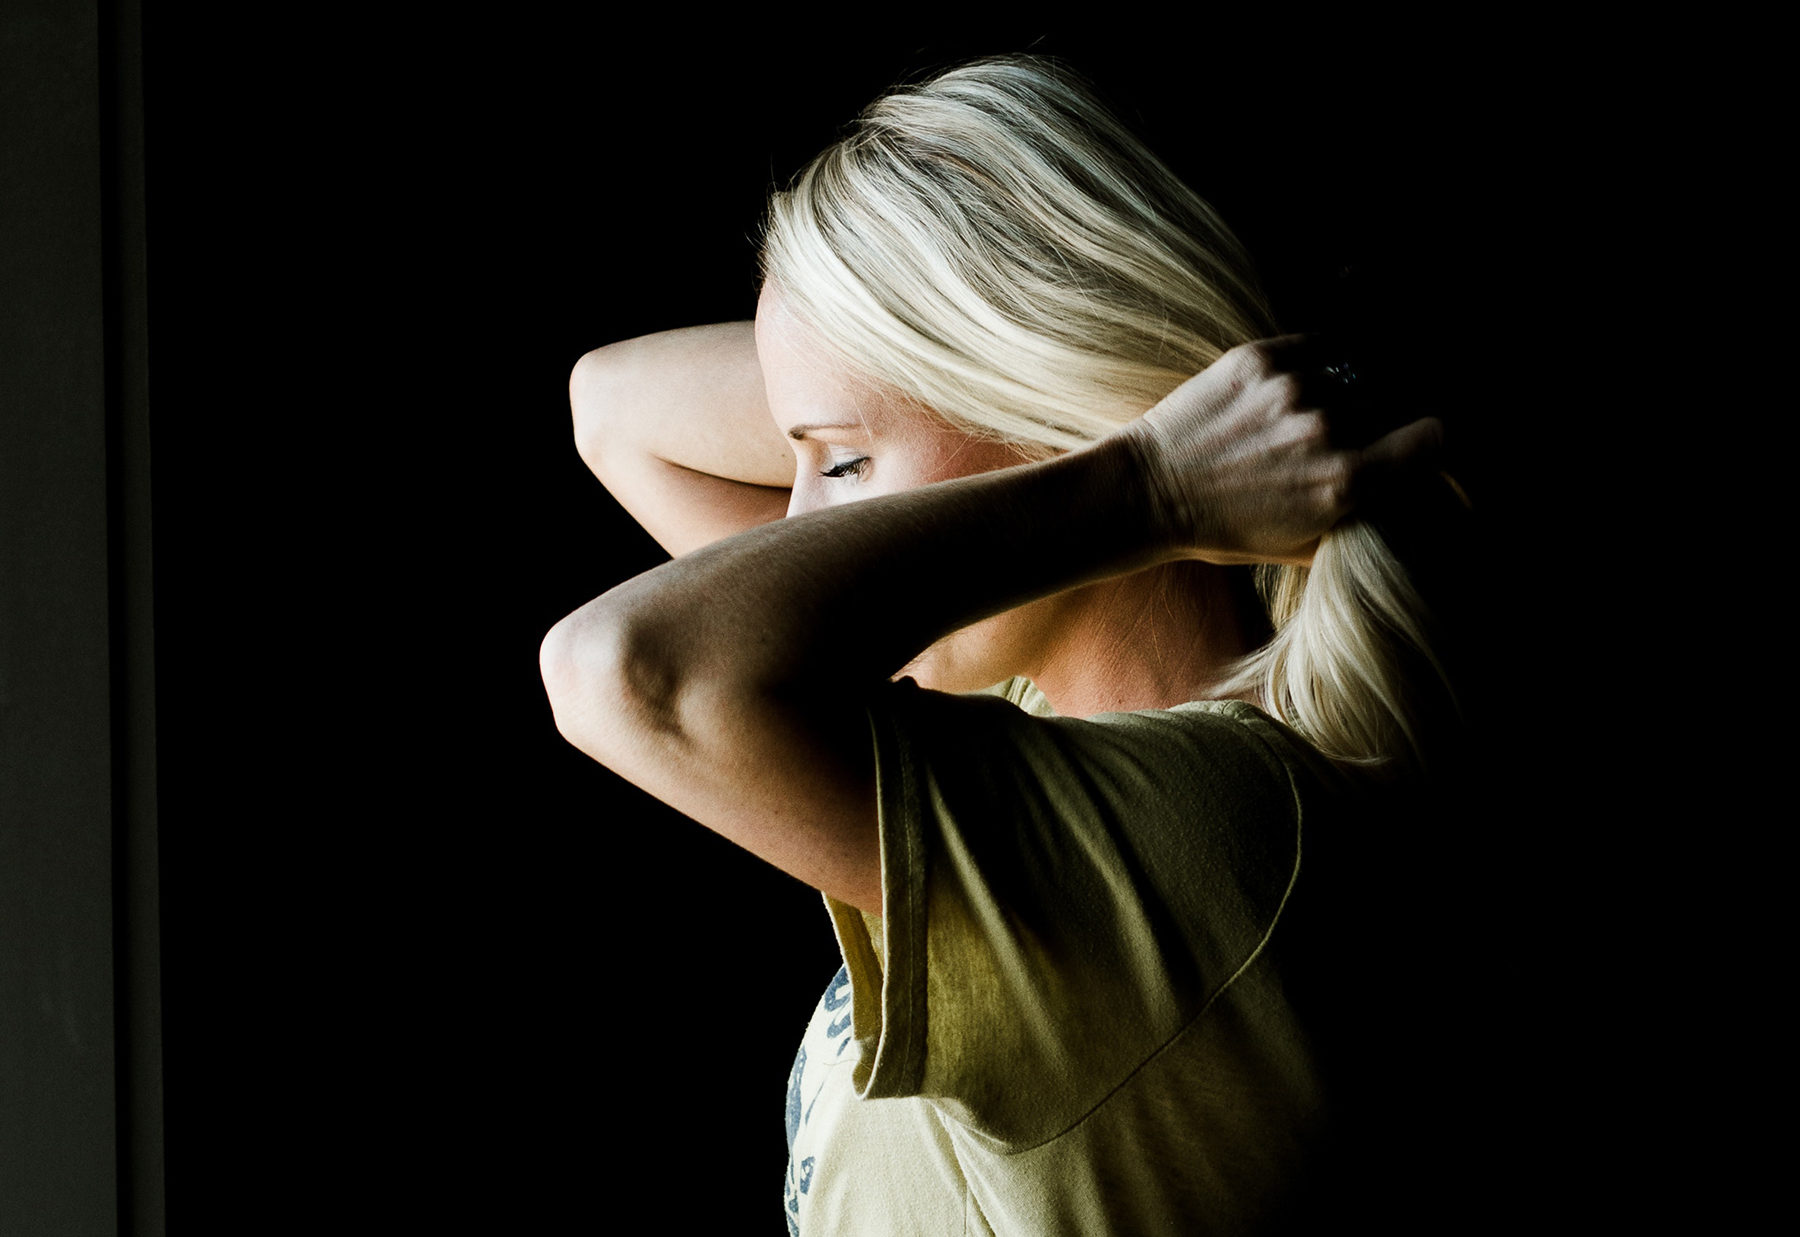
    Portraits that have a black background can look very professional and lend a certain mood to the overall image. In order to get a black background in portraits, you can either choose a black background and use the light settings effectively to keep the background dark. Or, you can make use of the contrast between the light and dark and make the background dark, no matter what the colour. This article discusses how you can capture a portrait with a black background.

    Photo by Tanja Heffner

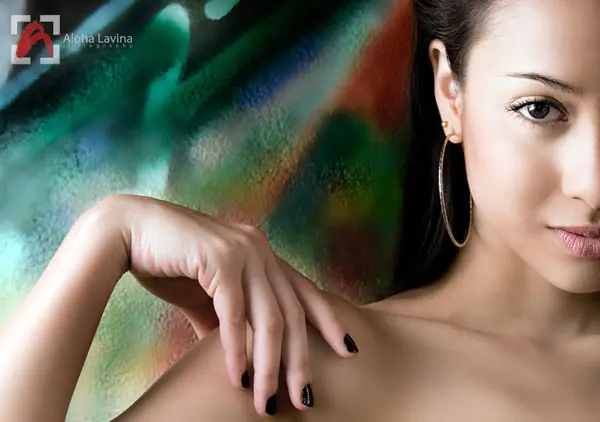
    In photography, shooting with available light is a skill as it requires a good understanding of light and some creative thought on how available light can be used for the best images possible. The same applies when capturing portraits – they do not always require additional or artificial lights and can be shot beautifully with available light if well planned. This article discusses how to use available light for good portrait photos

    Photo by Cottonbro

    There are times, especially indoors or outdoors when the sun is behind the subject and you need some light to bounce off something onto your subject for better illumination of your subjects in portraits. This is where bounce light comes in handy to fill in areas that are dark or need better illumination. Light can be bounced off walls, ceilings, reflectors, etc., and this article talks about some simple ways to bounce light to capture better portraits.

    Photo by Timothy Dykes

    There are times when the available light is just not enough to capture sharp details and the right colours in your portraits. If you shoot portraits often, then it is good to have a speedlight to improve the quality of your photos. With a single speedlight, there is a lot that you can achieve. This article talks about using speedlights to capture some of the best portraits.

    Photo by Samarth Singhai

    Having a camera, a good lens, location, subject and maybe a speedlight cannot help with capturing the best portraits all the time. In order for your portraits to be powerful and effective, you need to make use of compelling compositional guidelines that can take your portraits to the next level. Effectively placing the eyes and taking care of other factors when composing a portrait is important and this article talks about some fundamental composition techniques for portraits.

    Photo by Pablo Heimplatz

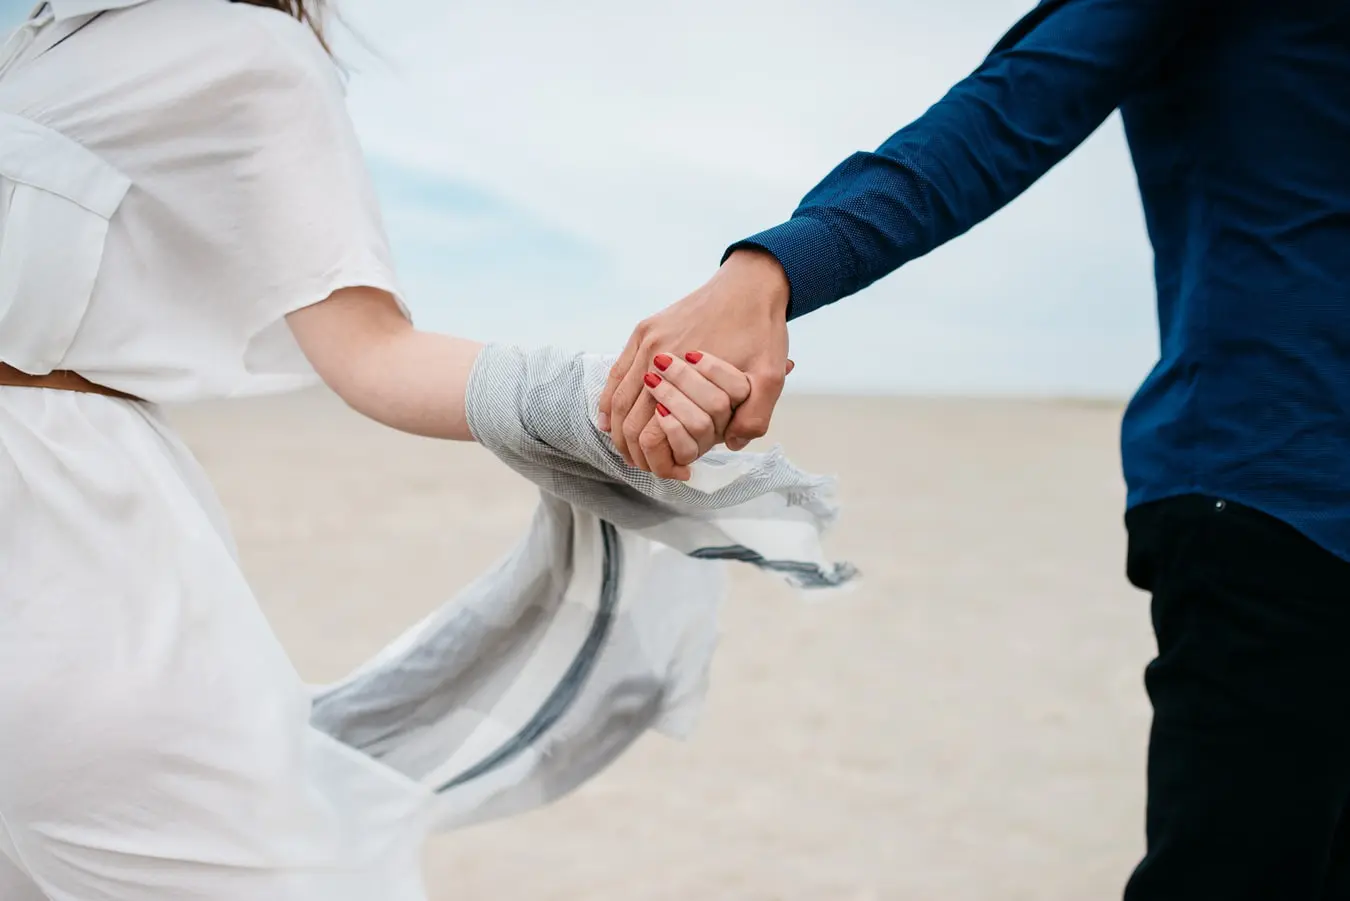
    Couple portraits are something that are most sought after in the field of portrait photography. Capturing couples in their candid moments can portray the bond or connection that they have with each other, but it is also good for experienced photographers to know some classic methods for posing in order to get the best results. This article talks about poses for impressive couple portraits.

    Photo by Kinga Cichewicz

    If you are someone who loves to capture portraits but are nervous to be in front of other photographers, or to capture photos of other people, you can capture your own portraits, which is self portrait. When capturing self portraits, you are working with yourself and you are both the subject and the photographer. You have the freedom to capture your personal moments without worrying about the fact that you have to pose in front of someone else. This article discusses how you can capture storytelling self portraits.

    Photo by Taya Iv

    Portrait photography does not have to be done with posed subjects, looing into the camera in a perfect location. There are times when you may have limited resources and space, but portraits can always be captured using the available light, simple props lying around the house and sometimes some DIY filters or hacks. This article talks about 10 ways in which you can elevate your portrait photography.

    Photo by Brad Starkey

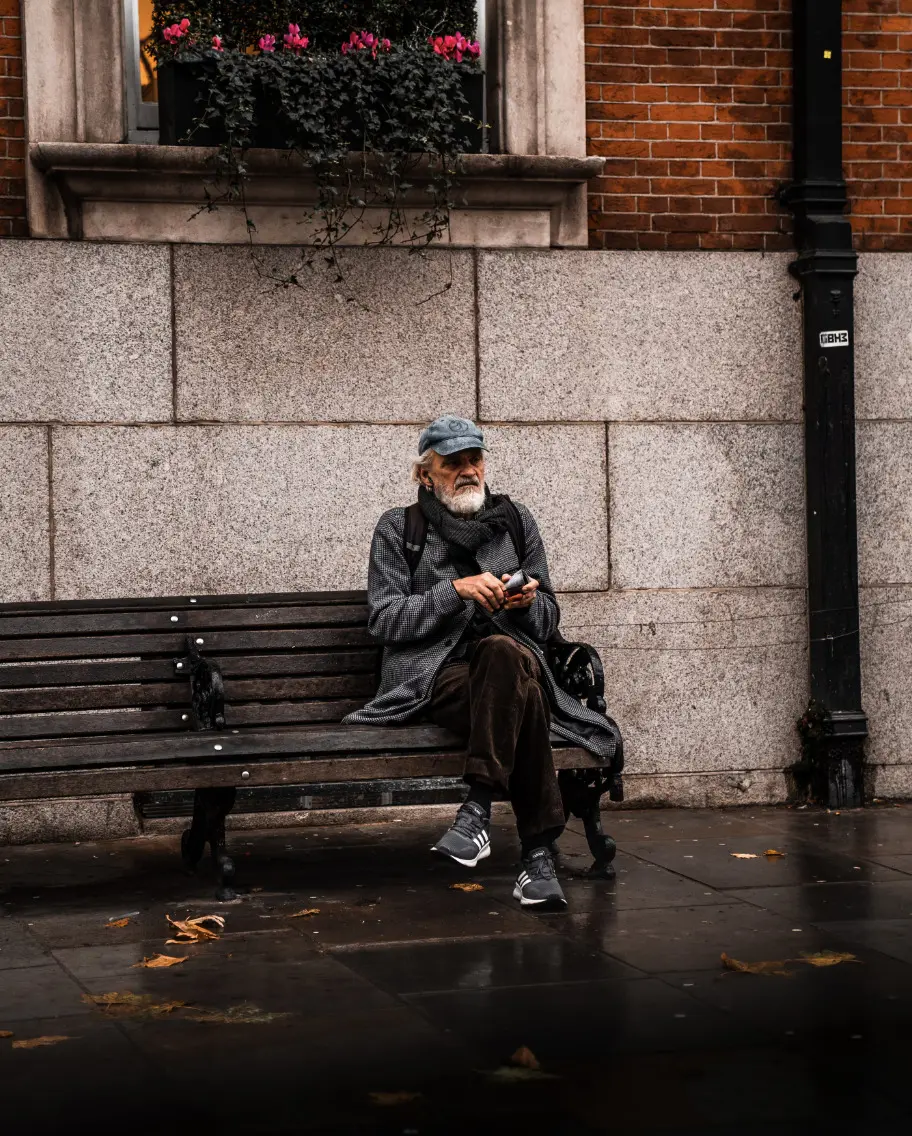
    If you are a street photographer, you can also capture stunning and powerful street portraits. Streets are full of moments, stories and colours and it is a great place to capture candid moments of people going about their daily lives. The right location, good use of light and some observational skills along with some patience will yield great street portraits. This article discusses tips on capturing stunning street portraits.

    Further Reading


    [ad_2]

    Source link

  • Sony Introduces FE 100mm f/2.8 Macro GM OSS Lens

    Sony Introduces FE 100mm f/2.8 Macro GM OSS Lens

    [ad_1]

    Sony has announced the FE 100mm F2.8 Macro GM—apparently the first macro lens deemed worthy of the company’s “G Master” label, signifying a premium, top-tier lens featuring the company’s most advanced optical design and technology. The high-end full-frame macro lens can achieve up to 1.4x reproduction, and when paired with a teleconverter, 2.8x magnification.

    Constructed using 17 elements in 13 groups—including two XA (extreme aspherical) elements and two ED (Extra-low Dispersion) elements designed to minimize chromatic aberration—the lens features an 11-blade aperture for “gorgeous G Master bokeh”; a pair of linear XD motors, which are faster, quieter and more accurate than the piezoelectric drive in its FE 90mm f/2.8 macro lens; and an optical image stabilization system that works in tandem with in-body image stabilization in Alpha camera bodies. A Nano AR Coating II aims to boost contrast and clarity by suppressing flare and ghosting.

    The lens offers a minimum focus distance of 10.2″ (26cm), weighs 22.8oz (646g) and is 5.8″ (148mm) long. As well as an AF/MF switch and an on/off switch for the optical stabilization, there’s a control for clicking and declicking the aperture ring and an iris lock switch. The lens also has two customizable function buttons. The lens works with both Sony’s 1.4x (SEL14TC) and 2x (SEL20TC) teleconverters.

    Released on November 13th, the Sony FE 100mm f/2.8 Macro GM will retail for $1,500.


    When purchasing underwater photography equipment like the products mentioned in this article, please support DPG by supporting our retail partner—Backscatter.com.


    PRESS RELEASE

    Sony Electronics Expands the G Master Series with the Versatile FE 100mm F2.8 Macro GM OSS

    Delivers Stunning Detail with up to 1.4x Magnification, Advanced Stabilization, and Optimized Macro Controls

    SAN DIEGO, Sept. 30, 2025 – Sony Electronics releases the FE 100mm F2.8 Macro GM OSS (SEL100M28GM), the new medium telephoto macro lens in the G Master™ series, compatible with α™ (Alpha™) E-mount cameras, featuring 1.4x magnification, advanced stabilization, and intuitive handling.

    “We’re on a constant mission to expand creative possibilities for visual storytellers, and the FE 100mm F2.8 Macro GM OSS fulfills that by going beyond traditional macro photography,” said Yang Cheng, Vice President of Imaging Solutions, Sony Electronics Inc. “With its world-class optical quality, it enables not only macro photographers, but also portrait and wedding photographers, to take their craft to a new level. We’re thrilled to offer the FE 100mm F2.8 Macro GM OSS as part of our acclaimed G Master series, maintaining a standard of peak performance Sony creators have become accustomed to.”


    Beyond Life Size

    The FE 100mm F2.8 Macro GM OSS achieves a maximum magnification of up to 1.4x, making it easy to capture flowers, small objects, and other close-up subjects in vivid detail, revealing subtle textures and features that are difficult to see by the naked eye.

    Compatible with an optional teleconverteri (sold separately), the lens offers up to 2.8x magnificationii. This enables impressive close-up shots while keeping a comfortable working distance. It is ideal for subjects that are hard to approach or for avoiding unwanted reflections.

    State-of-the-art Hardware Design

    The optical design effectively positions elements including two XA (extreme aspherical) lenses and two ED (Extra-low Dispersion) glass elements to achieve high-resolution performance from the center to the periphery of the image, reducing chromatic and other aberrations.

    To allow precise and intuitive focus adjustments for a variety of macro photography scenes, the lens offers three focus-dedicated features: a “Full-time DMF switch” enables instant MF (manual focus) by rotating the focus ring, even in AF (autofocus) mode; the “Focus Mode switch” allows instant switching between AF and MF; the “Sliding Focus Ring” enables FULL MF mode, linked to the distance and magnification scales.

    The four unique XD (extreme dynamic) linear motors that enable high-speed, high-precision, and quiet lens drive, make autofocus (AF) performance up to 1.9 times fasteriii than previous models.

    A dedicated aperture ring offers quick, direct control over aperture settings.


    Exquisite Image Quality

    The 11-blade circular aperture produces beautiful, ball bokeh, while carefully controlled spherical aberration ensures an ideal balance of resolution and background blur — creating the signature creamy bokeh of the G Master line.

    The unique “Nano AR Coating II” applies a uniform thin film to the entire lens surface, resulting in clear image quality that suppresses flare and ghosting even in backlit conditions.

    An integrated optical image stabilization system, designed for macro photography, accurately compensates for shift shake (up/down/left/right), angular shake, and front/back shake, ensuring steady handheld shots.


    Pricing and Availability

    The FE 100mm F2.8 Macro GM OSS will be available in November 2025 for approximately $1,499.99 USD and $1,799.99 CAD. It will be sold directly through Sony and at a variety of Sony’s authorized dealers throughout North America.

    For more information, visit: https://electronics.sony.com/imaging/lenses/all-e-mount/p/sel100m28gm

    Exclusive stories and exciting new content shot with the new FE 100mm F2.8 Macro GM OSS and Sony’s other imaging products can be found at www.alphauniverse.com, a site created to inform, educate, and inspire content creators.

    i Compatible with the 1.4X Teleconverter SEL14TC and 2X Teleconverter SEL20TC.

    ii When the 2X Teleconverter “SEL20TC” is attached

    iii Sony measurement conditions. Compared to the FE 90mm F2.8 MACRO G OSS SEL90M28G lens for the α E-mount digital single-lens camera.


    https://www.youtube.com/watch?v=TC7v6L6i0zw


    [ad_2]

    Source link

  • Why We Should Train Ourself To See In Layers

    Why We Should Train Ourself To See In Layers

    [ad_1]

    When we first start out in photography, be it with a smartphone or a full size camera, we tend to capture exactly what is in front of our eyes. We are, by default, taking pictures 5 to 6ft above the ground, straight on with a subject more than a few meters away.

    Modern cameras tend to flatter us with their amazing technical capabilities, great colour, spot on exposure and tack sharp focus. We see those first images and we are wowed by them.

    If you have been doing photography for a few months or years, I urge you to go back and take a look at them. There is one thing that may well stand out above all others. They look flat, very two dimensional.

    Now, I can hear a few people screaming at me right now, “of course they are flat, they are photos”. But they are missing the point.

    Whilst every photo will always be two dimensional, that doesn’t exclude us from purveying a sense of depth in them. In fact, adding depth to your images will make you a better photographer and your photos more engaging.

    But how do we do that? We do it by training our eyes to see the layers around us. Let me explain.

    What Are Layers?

    Every scene we photograph is three dimensional. Even if we are photographing a painting in an art gallery, it will have three dimensions. The thickness of the paper and the frame gives us that third dimension.

    Good photos will consist of three main layers, the foreground, midground and background. Each will be distinct from the other, separated by a camera technique or compositional element. Going back to our early photographs we will see that we do indeed have those three layers. However, what we have not done is separate them sufficiently.

    The San Diego Skyline and tour baot seen from Coranado
    This image has layers but they are flat and not well defined . By Jason Row Photography

    By isolating those layers we not only add depth to our image but we also create visual storytelling. We are leading the eye of the viewer through the image, to the subject. That subject doesn’t have to be in the background, it can equally be in the midground or foreground. However, by using visual separation, we create depth and draw the eye to the subject.

    Colourful Tuk Tuk on the streets of Bangkok's Chinatown at night
    This image has multiple layers that are linked, drawing your eye through the photo. By Jason Row Photography

    In the above image, the subject is in the midground. The shallow depth of field has separated the background of the street and the foreground, the rails. Our eye is naturally drawn to the subject, the image tells a story and it also has depth.

    How Do We Learn To See Layers

    It’s actually not that difficult and there is a pretty good chance you are already doing it. If you have ever shot a photo with leading lines, you have isolated at least the foreground and background, and if there is a subject on the leading lines, a midground too.

    When preparing to photograph a scene, make a conscious decision to look for the layers. In the example below, the foreground is the nearest building to the bottom right. The roofline of this creates a leading line into the midground, the two bridges and associated buildings. The background is the modern concert hall. Despite a deep depth of field all three layers are clearly defined. The light trains of the morning traffic serve as a connection between the layers.

    The Tyne Bridges in Newcastle at sunrise with the Sage Centre in the background
    Another example of layers being subtly linked. By Jason Row Photography

    Depth of field is a powerful tool in isolating layers. A wide aperture allows us to bring the eye to one single layer, whilst a deep depth of field, such as the bridges example above, can show multiple distinct layers.

    In the image below, the shallow depth of field brings our eye purely to the foreground layer. However, the composition clearly shows a midground – the sea and a background, the rising sun. The image has a distinct three dimensional feel whilst only concentrating on a single layer.

    Flowers tied to a railing in Whitely Bay, England. Shot with the rising sun
    Background, midground and foreground but it’s clear which one to concentrate on. By Jason Row Photography

    Next time you are out shooting, before you even raise the camera, look for the layers. They could be rocks in the foreground, a treeline in the background, perhaps people in the midground. Start to train your eye to look for those separations and you will soon see that every scene that you shoot has layers.

    Up until now we have been concentrating on physical layers, however they don’t have to be.

    Layers Do Not Have To Be Physical

    Light and shade are the fundamentals of photography. They are also fantastic tools for adding depth and layers to our images. Look at the image below. Whilst the lighthouse is the obvious background and a physical element, the foreground and midground are much more about two things. The light and shade on the grass and the motion of the grass in the wind. Both draw the eye through the image to the distant lighthouse.

    Herd Groyne Lighthouse framed by grass blowing in the wind
    Although containing physical layers, the wind is adding depth to this image. By Jason Row Photography

    The best images will have multiple layers that use both the physical and the conceptual combining together to lead the eye through the image as well as tell a story. This is illustrated in the image below.

    Corfu Castle, cannons and passing yacht demonstrating many layers in photography
    Multiple layers bring depth to this image. By Jason Row Photography

    The physical elements are the walls and cannons. The cannons are the foreground, the walls, the midground. The light and shade works as a leading line to the frame but also as a way of providing definition between the midground and foreground. The frame itself reveals the background. The combination of these gives the image a very three dimensional feel.

    In this last image below, we also have very defined layers created both physically and by light and shade.

    The C2C monument and Roker Lighthouse at sunrise demonstrating multiple photographic layers
    Using light and shade to create layers. By Jason Row Photography

    The monument to the right is in complete shade but clearly defined as a foreground. The hole through the monument leads our eye to the background which is the lighthouse. However, the walking figure to the left of the shot draws our eye to the midground and helps hold the whole image together.

    As mentioned earlier, layers are everywhere. Every scene we shoot has layers. Our task is to define them and isolate them. This can be through depth of field, light and shade or through composition such as leading lines. When we do, our images become so much more three dimensional and in turn, more interesting and engaging.

    Further Reading


    [ad_2]

    Source link

  • Seacam Shipping Housing for the Canon EOS R1

    Seacam Shipping Housing for the Canon EOS R1

    [ad_1]

    Seacam is now shipping its housing for the Canon EOS R1. Canon’s flagship full-frame camera, unveiled in July 2024, features a back-illuminated stacked 24.2-megapixel sensor promising essentially no rolling shutter and delivering 40fps continuous shooting using the electronic shutter (full-resolution RAW images with full AF). The EOS R1 can also record 6K/60p RAW, 4K/120p (pixel binned), and 4K/60p (oversampled) video using the full sensor width.

    As you’d expect, Seacam’s Silver housing offers the Austrian company’s well-known combination of ergonomic precision and premium engineering. Depth-rated to 260 feet (80 meters), the housing is milled from a saltwater-proof light metal alloy that is twice hardened and anodized, and the two housing shells are secured with Seacam’s titanium Safety Lock fastening system. The highest quality materials are used throughout, including stainless steel and anodized aluminum buttons and dials.

    The housing features removeable integrated handles, a window for viewing the camera’s LCD, and a second small window to view the essential camera information displayed on the R1’s top plate LCD. Users have the option of using legacy EF-mount lenses via a Canon adapter as well as native RF-mount lenses. The housing ships with S6 or N5 bulkheads for rock-solid electrical strobe triggering, but you have the option of fitting fiber-optic bulkheads and/or an HDMI bulkhead. Seacam’s optical-acoustic leak detector comes as standard, with the vacuum valve and pump purchased separately.

    The Seacam housing for the Canon EOS R1 is available from retailers such as Backscatter, where it is priced at $7,200.


    When purchasing underwater photography equipment like the products mentioned in this article, please support DPG by supporting our retail partner—Backscatter.com.


    PRODUCT INFORMATION

    The EOS 1 series has been the one and only choice for Canon pro shooters for years – now also available in mirrorless. The perfectly adapted SEACAM housing now opens up all the possibilities of this high-end camera under water, too: Fast action, high precision and ergonomic shapes make the Canon R1 system the perfect professional partner for missions below the surface.

    Discover the SEACAM silver Canon R1 in detail here.


    Knobs and control levers

    • Power switch, shutter release, main- and quick control dial, manual focus, zoom, lens release button, M-Fn 2, MENU, AE-lock/AF-point, AF-ON/Movie start, Film/Photo, AF Drive, LCD, +/– Correction.


    Push buttons

    • M-Fn 3, INFO/LCD, MODE, Multicontroller, delete, play, SET, INFO, Q – quick control, +/– magnifier, rate, movie start, WB.


    Data

    • 2 flash arm T-pieces 25mm, M8 thread on both sides underneath the T-pieces

    • Tripod thread 3/8″ M8 thread on the housing top and 2 removable handles

    • Optical-acoustic leak detector


    Optional

    • Vacuum system incl. socket and pump

    • Socket for Remote, Fiber Optic or Power


    Included in delivery

    • Spare O-ring set, grease and maintenance oil, allen key set and wrist strap in neoprene bag, protective caps and manual


    Dimensions: 260 x 215 x 140mm (without port, viewfinder and handles)

    Weight: 2900g (without port, viewfinder and handles, neutral under water depending on port and viewfinder)

    Operation Depth: –80m (deeper operation depth upon request)

    Price: from EUR 6550 (excl. shipping, taxes and custom duties)


    [ad_2]

    Source link

  • Inon Releases 4D Light Grip for Action Cameras

    Inon Releases 4D Light Grip for Action Cameras

    [ad_1]

    Inon has released the 4D Light Grip for action cameras (JAN/EAN: 4570018121258), a versatile pistol-style grip that allows users to attach both a camera and a light at the same time. The 4D Light Grip is equipped with a GoPro standard mount and YS Mount on both ends, and can be used with the ZD Front Mask for GoPro, Insta360 Ace Pro 2 and DJI Osmo Action 5 Pro.

    Available from October 7th from retailers such as Backscatter, the 4D Light Grip is priced at $19. The ZD Front Mask for Ace Pro 2 Grip Set and ZD Front Mask for Osmo Action 5 Pro Grip Set—which bundle the ZD Front Mask with the 4D Light Grip—cost $70 each.

    ZD Front Mask for Ace Pro 2 Grip Set (JAN/EAN: 4570018121234)

    ZD Front Mask for Osmo Action 5 Pro Grip Set (JAN/EAN: 4570018121241)


    When purchasing underwater photography equipment like the products mentioned in this article, please support DPG by supporting our retail partner—Backscatter.com.


    [ad_2]

    Source link

  • Tech-Diving Visionary Michael Menduno Passes Away

    Tech-Diving Visionary Michael Menduno Passes Away

    [ad_1]


    Michael Menduno—Editor-in-Chief of InDEPTH magazine and the man credited with coining the term “technical diving”—passed away in hospital on October 3rd, about a month after suffering a stroke. He was 73.

    Known to his many friends and colleagues as “M2,” Menduno founded aquaCORPS: The Journal for Technical Diving and its sister-magazine Technical Diver, which were published between 1990 and 1996, and helped launch tech diving as a discipline. InDEPTH magazine, which launched in 2018, grew out of long-running conversations between Menduno and GUE founder Jarrod Jablonski. After getting his full cave diver certification in 1990, Menduno worked closely with Captain Billy Deans to establish the first US tech diving training center.

    Menduno also produced major tech diving events, such as the Tek, EUROTek and ASIATek conferences, the early Rebreather Forums, and most recently, Rebreather Forum 4, which was held in Malta in 2023. A charismatic, sought-after speaker who gave hundreds of talks at shows, workshops, and conferences, he received the OZTEKMedia Excellence Award in 2011, the EUROTek Lifetime Achievement Award in 2012, and the TEKDive USA Media Award in 2018. He was also a senior editor and writer for DAN Europe, a regular contributor to various dive publications, and a member of the board of the Historical Diving Society USA (2019–2024).

    Read the various tributes to Menduno on his Facebook page. Our heartfelt condolences to Michael’s family and friends.


    [ad_2]

    Source link

  • A Better Edit Makes Better Photographs

    [ad_1]

    Take a few minutes to watch the video above or, if you’re more of a written word person, keep reading.

    It’s not uncommon for me to come home from a trip with thousands of photographs. On a wildlife trip I can average 1,000 photographs a day, which is really easy to do when you’re in a moving boat, excited about bears and your cameras are set to shoot 10 frames a second. Even when I’m not photographing wildlife, if I’ve had a good day out with my camera I can come back with hundreds of images. 

    But even on those trips when I’m gone for a month and come home with 30,000 photographs, I still get home with my edits mostly done, and my development mostly finished and ready to print. Often I’ve also got a PDF monograph ready to send out to the photographers in my community.

    In contrast, I have a friend who shoots trips like this and he won’t get around to doing anything with his photographs for years. Until then they will sit there on hard drives begging to be seen, to be printed, learned from, and put into some form of creative output that can be shared with the world. 

    Why? It’s not some kind of strategy, and he’s not giving them time to get objective about his edits. He just gets overwhelmed by it all. And he doesn’t have a system. He looks at all those images and gets paralyzed. So while I’m excitedly making prints and sequencing monographs or updating my web galleries, he and so many like him are doing…nothing with their images. No bodies of work created, no beautiful prints, no learning from their mistakes or experiencing the joy of seeing—and sharing—their finished work.

    I know so many photographers who walk in the door after making a bunch of photographs and say, “Well, that was fun. Now what?”

    The edit—choosing your keepers—can be so intimidating that it gets reduced to an ad hoc effort at picking a few good shots,  pushing some sliders around in Lightroom, and throwing them onto Instagram before moving on to the next thing. I’ve been there. 

    Before I started doing assignment work, my editing was scattershot and intimidating and took forever. But client work forced me to get intentional about how I imported and organized my images, to be clear about my criteria for selecting the best of that work, and more systematic about the output.

    Knowing I would be shooting for something, that my work would be used in certain ways made a big difference to me. It still does. In my personal work I know I will be making something—a book, a web gallery, a collection of prints—and that helps me make better choices about which images I shoot and how I select the best of that work. 

    This email is the first in a series in which I want to explore what you do with your images after the camera goes back in the bag and the ways that can make you an even stronger, more intentional, and more creative photographer when you take it out again.

    The first question I want to ask (on your behalf) is this:

    “How can I make the edit easier, less intimidating, or overwhelming?” 

    I’ve got three simple initial ideas that I think can be really helpful, and they’re a big part of how I am able to regularly come home with up to 30,000 images already mostly edited and the best of that work ready for output rather than dreading the pile of images I had yet to go through. Here are those ideas. I hope they help.

    Just Look for the Best of the Best

    We all photograph for different reasons and we all do things differently, but I think edits (especially the first edits done relatively soon after shooting) should be selections, not ratings. Pick them or don’t pick them, but don’t rate them. at least not at first.

    My own edit process goes much more quickly because I’m not looking for every single image that meets some basic minimal technical standard. I’m looking for the ones that make me lean in. The ones that make my heart sing. The ones that grab me and won’t let me not select them.

    You might have a great reason for rating images, but I think trying to decide whether an image deserves 2, 3, or 4 stars slows the process. Because I’m looking for a few frames that are a decisive “Yes!”, I’ve found rating them makes me look for the wrong thing.

    For me, a 3-star image isn’t a Yes! It’s a yawn.

    Consider being more binary. Yes! Or no. After all, how many images do you really need? Wouldn’t it be easier just to look for the best 12 or 24? It is for me.

    Do Smaller Edits

    Break it down. Make it easy on yourself. You don’t have to edit thousands of images all at once.

    I do daily field edits and come home with main selections already made. This makes it manageable, but it’s more than that. Doing daily edits means things don’t get away from you. And—as a bonus—it gives you a chance to spot things that aren’t working. For example, you’re more likely to notice that you accidentally shot small JPGs all day when you thought you had been shooting RAW. Or you discover your lens isn’t focusing quite right. Or your sensor needs cleaning. It’s better to discover that after one day of shooting and be able to fix it, rather than much later on when it’s just too late.

    Maybe you don’t do big multi-day projects, breaking your edits down into bite-sized pieces, perhaps into sequences or using Lightroom’s Stacking feature, can still make the process much more manageable and keep you excited, rather than doing one big exhausting edit later on. You don’t have to do it all at once and you probably should consider doing it all more than once. I have found multiple smaller edit sessions make the best of my limited resources of time and attention, which wane after a few thousand images, let me tell you!

    Consider Your Output

    Don’t just make photographs; make something with the photographs.

    I’ve found that knowing what I’m going to do with my images has made me a much better photographer and a much better editor because I now know what I’m choosing images for. 

    If you know you’re going to be making a book, you’ll make different choices. If you know you want a dozen horizontal prints, again, you’ll make different choices. If you know you want a body of work that explores a theme, what you shoot and how you edit will be affected by that. 

    When we edit we’re asking which are the best images, but first we need to ask “best for what?” And that is entirely your choice. Just don’t let it only be best for a couple Instagram posts or a handful of random images that never leave your hard drives. 

    These three ideas alone will make your editing simpler:

    1. Look only for the best and don’t worry about the others.
    2. Do smaller bite-sized edit sessions, and
    3. Consider—or make intentional choices about—what you want to do with your pictures so you can think not only about which images are best, but best for what.

    I’d love to hear from you on this. Where do you find your greatest challenges when it comes to choosing your best work and doing something with them, staying organized, and doing all the work that happens beyond the shutter? If you feel like talking about it, drop me a note in the comments below.

    For the Love of the Photograph,
    David


    [ad_2]

    Source link

  • Benevolent Demons in the Night: A Living Tradition

    Benevolent Demons in the Night: A Living Tradition

    [ad_1]

    It is December 31, the last night of the year. Snow is falling, and I can hear thunder in the distance.

    I’m following a group of namahage as they go from house to house, pounding on doors and growling like primeval beasts.

    In my hands, I’m holding the new Sigma 35mm F1.2 DG II | Art lens, attached to my Sigma fp L camera.

    I’m in the north of Japan, on the Oga Peninsula in Akita Prefecture, where the tradition of the namahage is still alive. Each year on December 31, young men in masks and costumes visit houses across dozens of villages to scold unruly children and ward off misfortune.

    They take on the role of spirits to bring rich harvests, plentiful catches, and good luck. In Akita, the namahage have been active for hundreds of years.

    I was finally able to accompany a group of them in the Shinzan area thanks to an acquaintance of mine.

    After sunset, young men gather in the town’s community center and spend a while chatting in a small room usually used by seniors to play mahjong.

    Then, when the time comes, they put on the kede, costumes made from straw, and the namahage masks, sprinkled with sacred sake, before heading out to the Shinzan Shrine. This is where they begin their tour.

    I had already been using the original Sigma 35mm F1.2 DG DN | Art lens for many years.

    To me, 35mm is the best focal length for documentary shoots.

    With 35mm, I’m able to capture a scene in its entirety but I can also get up close to my subjects and focus only on them.

    With the Sigma lens, the beautiful bokeh and shallow depth-of-field of the F1.2 aperture allow me to give subjects a vibrant sense of presence without having to get too close and produce videos and photos that leave a strong impression.

    Compared to its predecessor, the new Sigma 35mm F1.2 DG II | Art is even more compact and lightweight, which made it ideal for a project like this where I need to move and act quickly.

    The bright F1.2 aperture also made it possible to take photos at night without the use of a flash or other additional equipment. In the darkness, the flashlights that the namahage were carrying to illuminate the path in front of them provided all the light I needed.

    During my documentary shoots, I always try to capture situations as naturally as possible, without interfering or letting my presence be felt.

    This lens, with its bright F1.2 aperture, can render even faint light just the way our eyes perceive it. It was the perfect choice for photographing dynamic, moving subjects in dark conditions without affecting the situation.

    Each year, the number of young people dressing up as namahage dwindles in each village. Likewise, ever fewer households welcome their visits, and most of those that do will only greet them at the front door instead of letting them into the house.

    Having accompanied the remaining namahage in Shinzan amid heavy snowfall this year, I could share in their struggle to cover all houses in the area with so few people.

    At the last house we visited, we were greeted by an older couple. The husband was in poor health, and they had been waiting for the namahage to visit and bless their home. By that point, the namahage had been served sake at each house they visited that night and had trouble speaking clearly, but I won’t forget the couple’s delight when they finally saw them approach their home.

    [ad_2]

    Source link

  • Photo Gallery: From Brooklyn to Alaska with the Sigma 16-300mm

    Photo Gallery: From Brooklyn to Alaska with the Sigma 16-300mm

    [ad_1]

    Sigma is pleased to feature a gallery of images by photographer Devon Smith Jr. This gallery is comprised entirely of images shot with the Sigma 16-300mm F3.5-6.7 DC OS | Contemporary lens on a Fujifilm X-H2 camera body.

    This travel gallery was captured during Devon’s summer trip with Brooklyn to Alaska, an organization dedicated to helping diverse youth from Brooklyn, New York experience a once-in-a-lifetime adventure in Alaska’s rugged natural environment. From climbing a glacier, to rafting down a rushing river, to sleeping in a tent under the stars, BK2AK helps close the gap to outdoor adventure by increasing access to the outdoors.

    Learn more about Brooklyn to Alaska at brooklyntoalaska.org


    About

    Devon Smith Jr. is a Jamaican street and documentary photographer with roots in the Ocean Hill neighborhood of Brooklyn.

    His photography captures the nuanced interactions between people and their environments, blending a deep respect for cultural storytelling with an eye for unique, spontaneous moments.

    Devon’s inspiration to pursue photography came from his mentors at The Bklyn Combine, a community-focused collective he is actively involved with and collaborates with regularly. He also has a passion for landscape photography that was sparked during summers with his family in Manchester, Jamaica, where the rich cultural and historical layers of his heritage continue to influence his work.

    Equipment used


    16-300mm F3.5-6.7 DC OS | C

    EXPLORE MORE


    Having versatile, reliable gear is critical for young filmmakers and photographers, and a single lens that can handle a variety of scenes is a smart option. Film student Sophia Chew discusses her favorite Sigma zoom lenses and how they fit her needs as a college undergrad.


    In this photo gallery, photographer and video producer Nagamitsu Endo explores various peaceful locales in Maine, and captures the quiet beauty of nature along the way. These images are shot entirely on the Sigma BF camera along with the 35mm and 50mm F2 DG | Contemporary lenses.

    [ad_2]

    Source link

  • My Favorite Lenses for Beginner Filmmakers and Photographers

    My Favorite Lenses for Beginner Filmmakers and Photographers

    [ad_1]

    If college students know anything, it is how to find products that give you a bang for your buck. Everything is an investment that takes serious consideration, and when it comes to cameras, you don’t want to take any chances. In my case, this comes in the form of finding lenses that are high-performing, versatile, and reliable.


    A little background

    I am a film production undergrad student at Chapman University, on track to pursue cinematography as my major emphasis. I didn’t always know I wanted to pursue film, but photography was a central part of my upbringing, and once I hit high school, I naturally became “the camera friend”.

    Outside of photography, I’ve directed and DP’d a handful of shorts and video projects, but some of the ones I’m proudest of are fan projects. Specifically, two films inspired by songs from Taylor Swift’s album FolkloreAugust (2024), and Betty (2023). Much of my work is inspired by books, music, and films I love, and I think my obsessions and phases add a personal touch to my work!

    As a film student, your creative possibilities can feel limitless, but they can also feel intimidating. There are so many new things to learn, and it can be overwhelming. Thankfully, the safety net and supportive culture of my school program have offered a lot, and my Sigma lenses have been dependable additions to my kit and frequent topics of conversation on my sets.


    My go-to gear

    Student films and fan projects often operate on strict and fast schedules, which leads me to reach for my zoom lenses more often in order to optimize time. My favorite lenses (at the moment) are the Sigma 28-70mm F2.8 DG DN | Contemporary and the 28-105mm F2.8 DG DN | Art.

    28-70mm F2.8 DG DN | Contemporary

    The 28-70mm F2.8 DG DN | Contemporary has been perfect for photography and video shoots on location. As one of most compact full-frame zoom lenses available, the small size makes it perfect to travel with, and the light weight allows for fast setups and efficient shot execution. I feel confident with my close-ups and my portraits. I put a Pro Mist diffusion filter on the end, and love the freedom to construct the look of my images off Sigma’s clean lens builds.

    28-105mm F2.8 DG DN | Art

    The addition of the 28-105mm F2.8 DG DN | Art to my kit has been game-changing. I recently shot a short film for one of my director friends on the Sony FX6. We shot a simple dialogue scene in an small bedroom. It was a tight fit and I needed a solid range to cover all the shots we needed. The 28mm focal length was ideal for the establishing shot, and as we get closer to the characters in the scene, the 80-105mm range was ideal for capturing their emotions and progressing dynamics. I threw in a few handheld shots when both characters started stressing about their parents coming home. One of them dives under the bed and hides, and this lens could capture all of it!

    When I show the lens to my peers, an unexpected part that stands out is the aperture ring. The satisfying manual addition to the lens makes the relationship between the user to the camera more personal, which is something I’m finding to be important to me when operating cameras.


    Recommendations

    Both lenses quickly became essential for me. As a student photographer and filmmaker, my visual style continues to evolve, and I’ve found these lenses can keep up with my pace. My love for the 28-70mm was part of how I became an ambassador, even before I got the invitation to join the Sigma team.

    Whether you’re a starting photographer or an experienced camera user, I can’t recommend these two lenses enough, and I’m excited to use them in my projects next semester!

    [ad_2]

    Source link