We may earn revenue from the products available on this page and participate in affiliate programs. Learn more ›
Carbon fiber tripods offer several very tangible advantages over their metal counterparts. They are stiffer, stronger, and more durable than aluminum. Despite those things, they also weigh significantly less than aluminum, making them a popular choice for travel and landscape photography. Of course, they also will cost you more than an aluminum tripod, but for many, it is worth it. The best carbon fiber tripods will help you get stable shots while making it easier to bring a tripod along.
How we chose the best carbon fiber tripods
The writers and editors at Pop Photo have decades of photography experience across the full spectrum of photographic genres and equipment. We’ve used our fair share of tripods in a wide variety of situations, from cheap plastic and heavy aluminum to more advanced carbon fiber models.
When selecting the carbon fiber tripods on this list, we aimed to choose options suitable for different pursuits, from travel to studio work. And while carbon fiber tripods are pricier than aluminum, we looked for products at various price points to suit different budgets. In addition, durability, sturdiness, and ease of use were all part of our decision-making process. Lastly, though tripods aren’t exactly feature-rich, we looked for options with enough features to make them versatile and usable in different–even challenging–situations.
The best carbon fiber tripods: Reviews & Recommendations
There is certainly no shortage of carbon fiber tripods available. Below you’ll find our favorite options for a variety of situations and use cases, so you’re sure to find one that fits your needs.
Why it made the cut: Peak Design’s Travel Tripod weighs only 2.8 pounds and folds down to the width of a water bottle while still being able to support up to 20 pounds.
Specs
- Maximum height: 60 inches
- Minimum height: 5.5 inches
- Weight: 2.8 pounds
- Weight capacity: 20 pounds
- Folded length: 15.5 inches
Pros
- Includes a ball head
- Compact and lightweight
- Good height range
- Excellent strength-to-weight ratio
Cons
- Expensive
- Only two leg angles
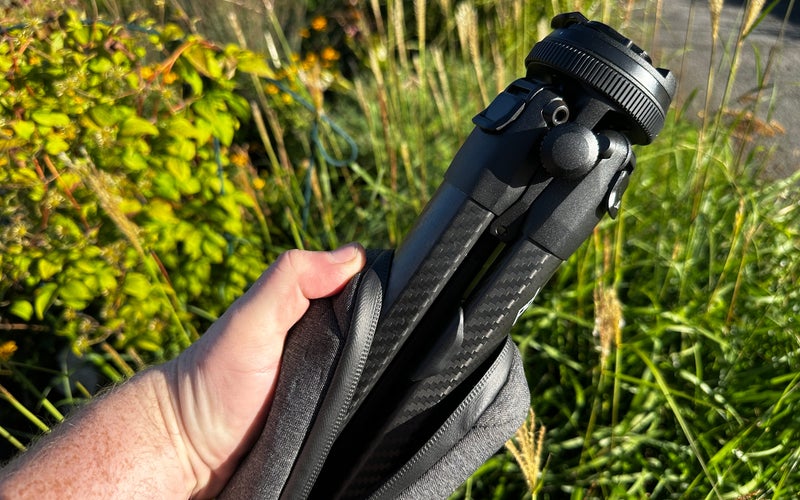
Originally released through a Kickstarter campaign in 2019, the Peak Design Travel Tripod made waves thanks to the unique leg design. When folded down, it is just 15.5 inches tall and about the diameter of a water bottle. That makes it very easy to throw in a backpack‘s side pocket instead of fumbling with attachment points and straps.
The five-section legs can all be deployed at once with the aluminum lever locks to save time–and to look really dramatic. It can support up to 20 pounds and is very sturdy, considering its small size. The included ball head is minimal and aids in the tripod’s compact design. Instead of levers and knobs like normal tripod heads, there are simple locking and adjustment rings.
The Peak Design carbon fiber tripod can extend to 60 inches with the center column or 51.25 inches without that extended. For low angles, the center column reverses and hangs underneath the legs. There is also a removable hook on the center column, so you can easily hang weight to add stability. And this tripod comes with a slick travel bag, mobile mount, and hex wrenches. The mobile mount is a nice touch and makes this tripod excellent for all sorts of creators.
Why it made the cut: Its lightweight form factor but very adjustable height and 20-pound weight capacity make this a great option to take backpacking.
Specs
- Maximum height: 59.1 inches
- Minimum height: 16 inches
- Weight: 2.8 pounds
- Weight capacity: 19.8 pounds
- Folded length: 16.1 inches
Pros
- Includes a ball head
- Lightweight and compact
- Three leg positions
- Well-designed twist lock legs
Cons
- Center column doesn’t move as smooth as the legs
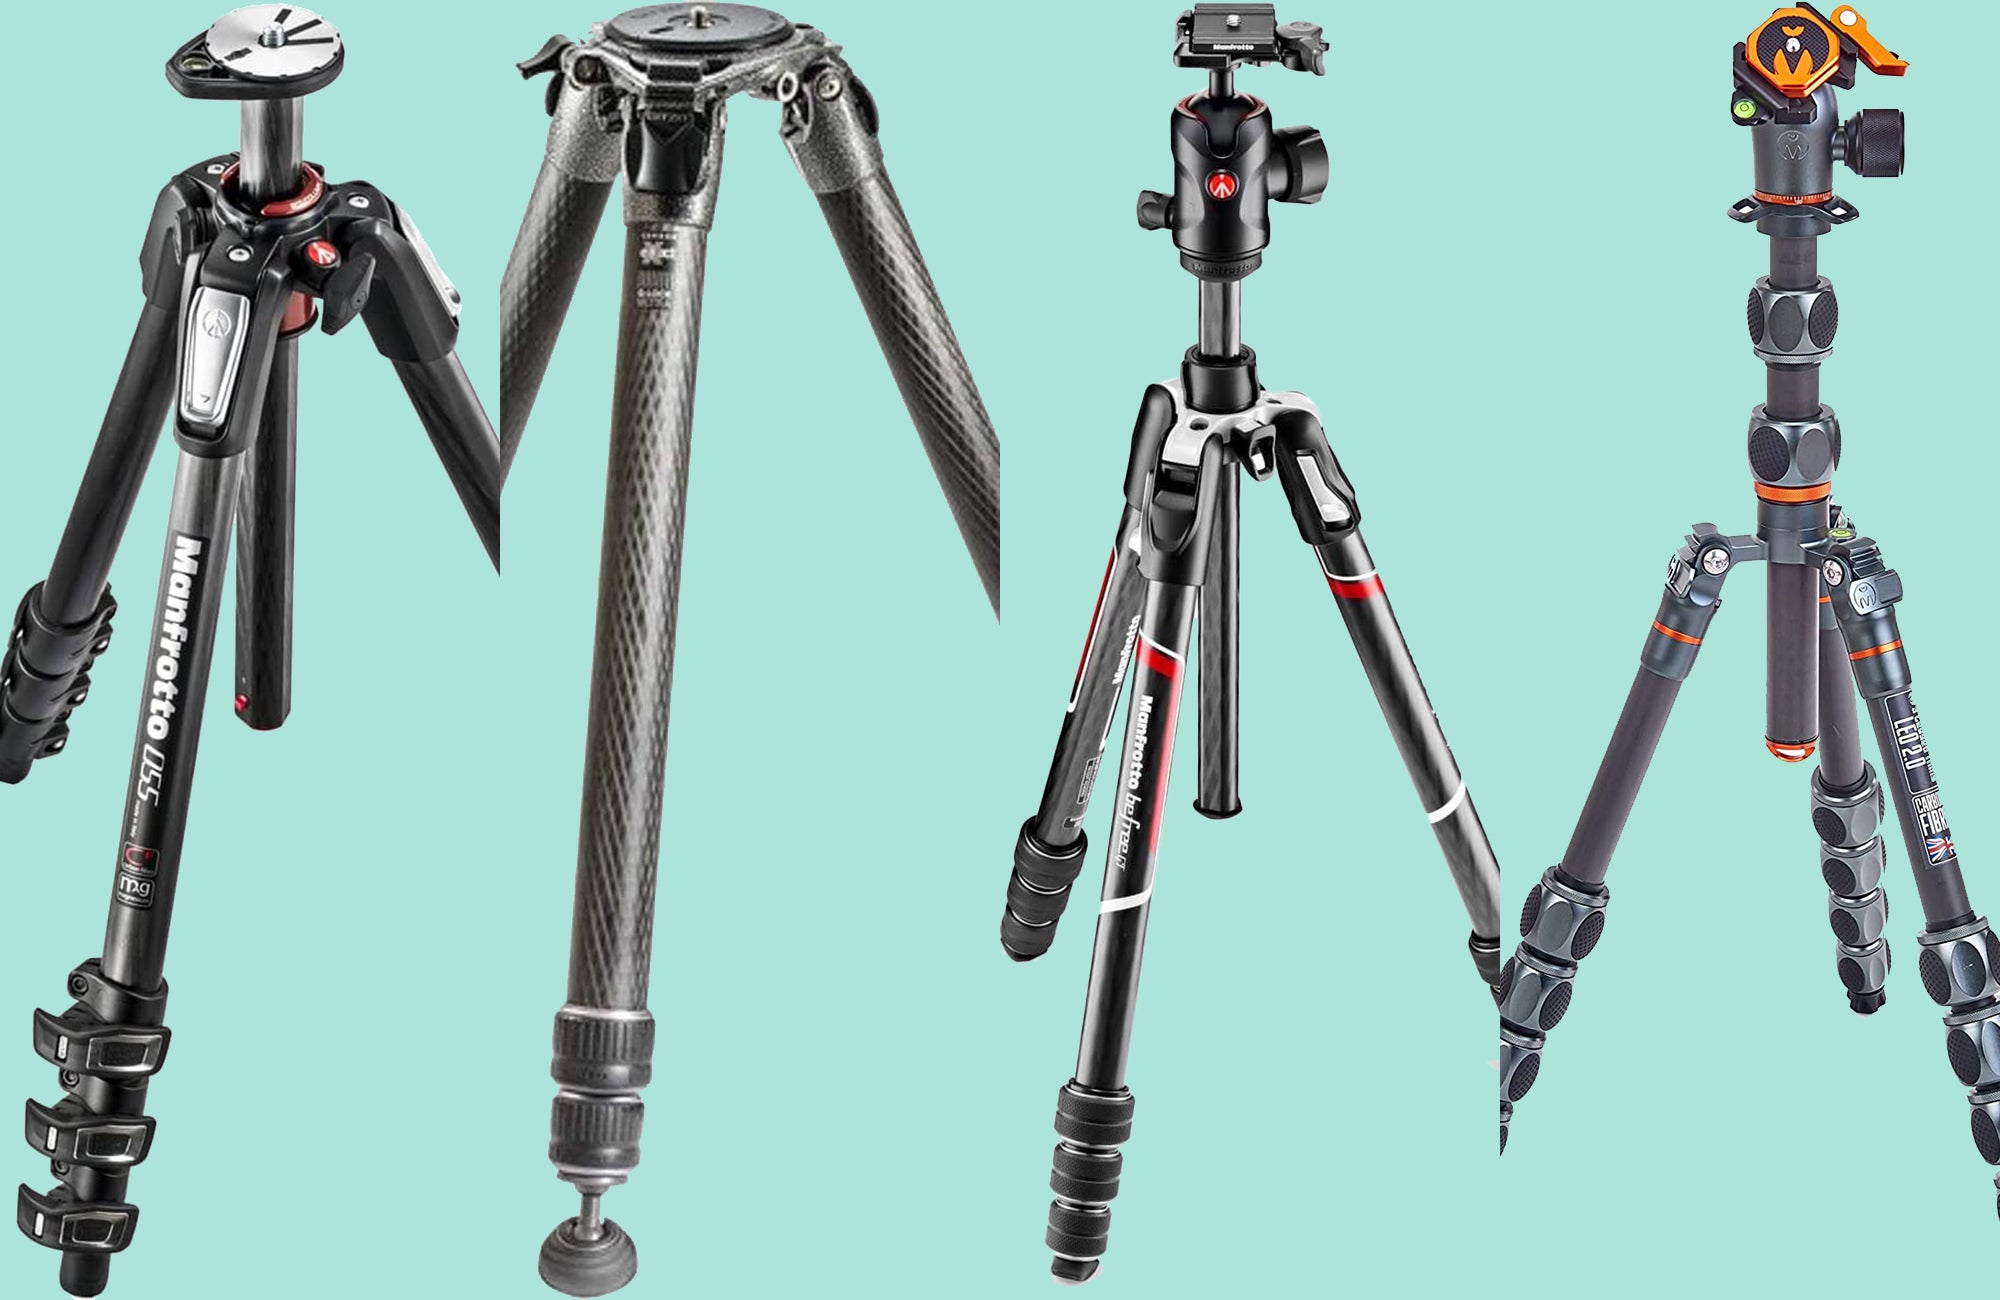
Manfrotto’s Befree line has been a popular choice for travel and adventure photographers for years. The Advanced version brings a higher weight capacity to the line, able to support nearly 20 pounds. It weighs the same amount as the Peak Design tripod mentioned above, though it is slightly larger when folded down. However, it still fits nicely into a side water bottle pocket on a hiking backpack. And the extra space between the legs makes it easier to secure with a strap for peace of mind while hiking.
The Befree Advanced tripod comes with a ball head, or you can also get it with a fluid head if you need smoother movements for shooting video. The ball head offers 360 degrees of swivel and can tilt 90 degrees for portrait orientation as well. It’s easily controlled via the large knob, even if you have gloves on. The center dial in the control knob allows you to adjust the tension and get more precise positioning.
The legs are made up of four sections and are locked into place using twist locks. Unlike other tripods I’ve used, the leg sections don’t automatically extend when untwisting the locks, which is good and bad. It takes a little more time to set up but is less of a pain when putting the tripod away or if you forget to lock one down all the way. The legs lock at three different angles, giving you lots of flexibility.
Why it made the cut: As the name suggests, the Everest T3 is built for harsh conditions. It is cold weather resistant, features CNC machined dust-proof construction, offers anti-corrosion faces, and comes with spiked feet for better traction.
Specs
- Maximum working height: 64.17 inches
- Minimum working height: 13.4 inches
- Weight: 3.2 pounds (without ball head)
- Weight capacity: 33 pounds
- Folded length: 19.7 inches
Pros
- Sturdy, heavy-duty build
- Built for harsh environments
- Comes with spiked feet for added grip
- Available with or without a ball head
Cons
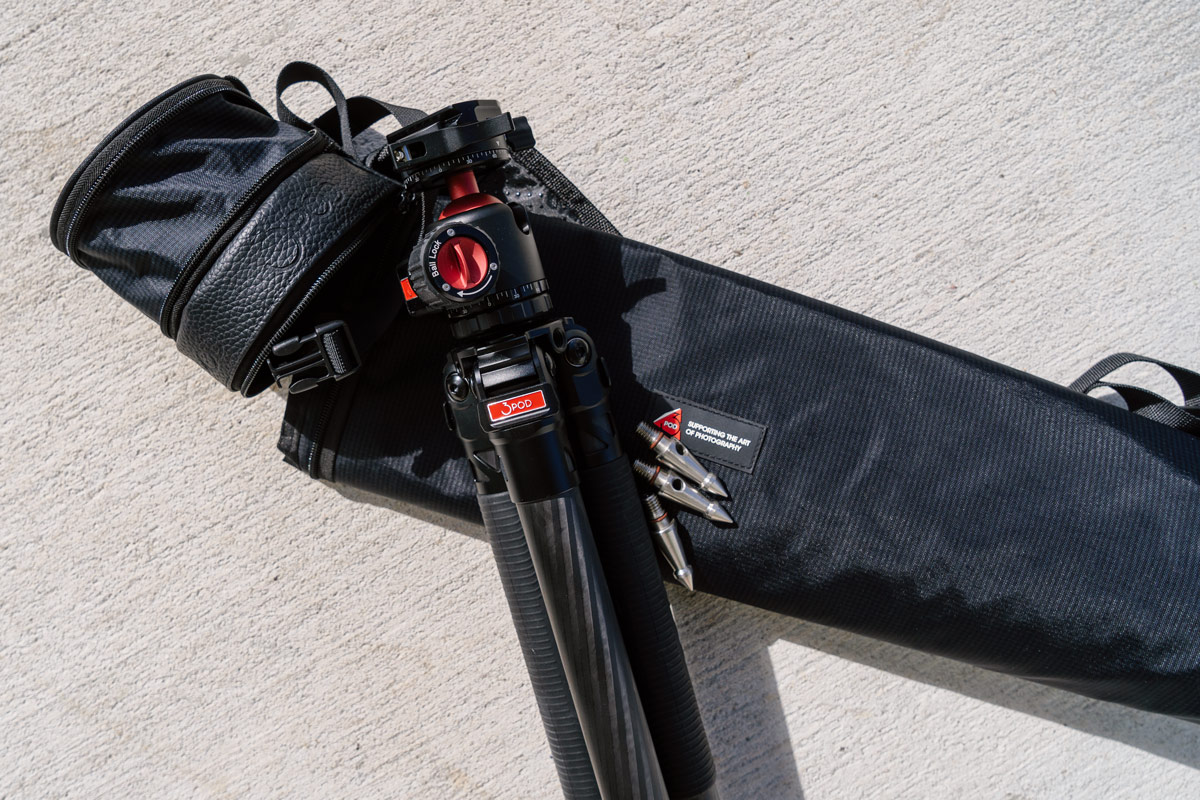
Photography can take us to some wild, rugged places. The 3Pod Everest T3 is up for the challenge, thanks to a seriously rugged build. 3Pod made this tripod with CNC precision for a dust-proof design. It’s also cold weather resistant, meaning the joints will keep moving even in extreme cold. The grippy material on two of the legs makes it easier and more comfortable to hold in the cold, even if you have gloves on.
The legs of the Everest use a twist lock design for quick assembly and breakdown. It comes with 3Pod’s H4 ball head (or you can opt for a version without a head) and Arca-Type quick-release plate. The ball rotates very smoothly with just enough resistance. Two bubble levels help you ensure your shots are level in-camera. This carbon fiber tripod can extend to 5.3 feet with the center column extended or 4.4 feet without the extra extension when you need extra sturdiness. Should you need a low-angle shot, you can remove the center column to get shots as low as 13.4 inches. You can invert the center column for creative angles as well.
The main downside to the Everest T3 is that it’s a fairly bulky tripod. It weighs 3.2 pounds and is pretty long, even when folded down. But, the heavy-duty design results in a 33-pound weight capacity. Should you want something more robust, 3Pod also makes a larger version—the Everest T5—which offers a 55-pound load capacity and 6.6-foot maximum height.
Even more carbon fiber tripods to consider
If one of the three above doesn’t tick all the boxes for you, check out these additional options.
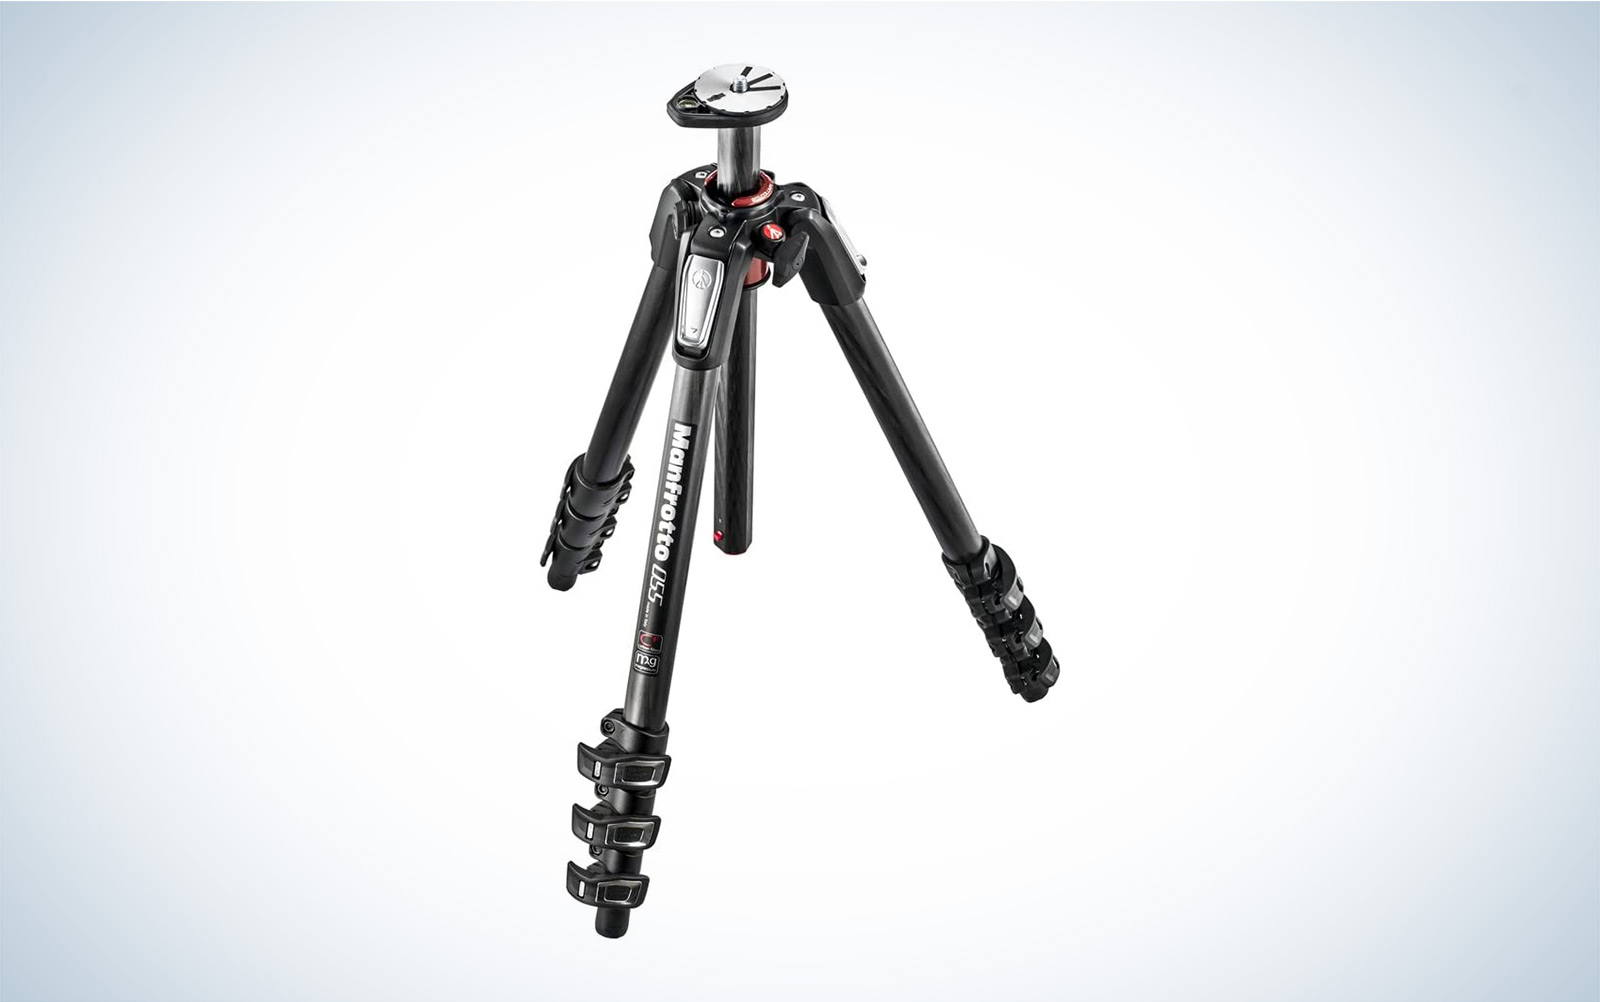
Why it made the cut: This versatile Manfrotto tripod can go from 3.5 inches to 66.9 inches, thanks to the angle selectors on the legs and sturdy center column. Plus, it has a convenient attachment point for arms to hold accessories like reflectors.
Specs
- Maximum height: 66.9 inches
- Minimum height: 3.5 inches
- Weight: 4.6 pounds
- Weight capacity: 19.8 pounds
- Folded length: 21.3 inches
Pros
- Ample height range
- Sturdy and durable
- Center column bends 90 degrees
- Includes attachment point for accessories
Cons
- Tripod head must be purchased separately
Manfrotto has long been one of the top tripod producers. Its MT055CXPRO4 is an extremely popular tripod, and for good reason. At 4.6 pounds, it weighs a bit more than some of the other models on this list. But it is very sturdy and supports nearly 20 pounds, which is more than enough for a full-frame camera and hefty telephoto.
Each leg features Manfrotto’s Quick Power Locks (a type of lever lock), which are easy to use but extremely sturdy. The legs can be set to multiple angles, allowing you to set the tripod as low as 3.5 inches. You’ll be able to get some really dramatic and unique angles for landscapes while still getting stability from a tripod.
With the center column extended, you’ll get 66.9 inches of height. Manfrotto redesigned the center column on this carbon fiber tripod to enable one-finger operation, so you’ll be able to raise it with much less fuss. And the center column can bend 90 degrees for better versatility or more unique angles. There is an Easy Link attachment point for adding accessories like a LED light or reflector with a compatible arm.
At the top of the tripod is a bubble level that swivels 360 degrees so you can see it no matter how you have your tripod set up. But, you will need to purchase a head for this tripod separately. For most people, we’d suggest Manfrotto’s XPRO Ball Head.
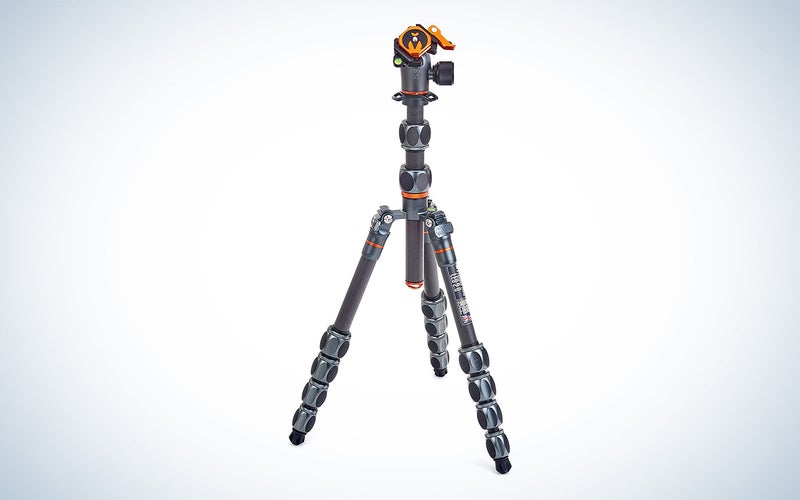
Why it made the cut: It can hold up to 66 pounds, so even if you use a large camera and bulky lens, you won’t have to worry about stability. And yet, the tripod only weighs 4.8 pounds, so it will still be feasible to pack on a trip.
Specs
- Maximum height: 54.3 inches
- Minimum height: 4.9 inches
- Weight: 4.8 pounds
- Weight capacity: 66 pounds
- Folded length: 14.7 inches
Pros
- Heavy weight capacity
- Good height range
- Lightweight and compact
- Highly modifiable
Cons
- Not as tall as other options
3 Legged Thing is a small British company that was launched in 2010. The Leo 2.0 has a surprising weight capacity, supporting up to 66 pounds. So even if you use a large DSLR or medium format camera with a heavy lens, this tripod will be able to handle it. And yet, the tripod only weighs 4.8 pounds with the head attached, which is only slightly heavier than the Manfrotto 055.
One of the best things about the Leo carbon fiber tripod is that it is very modifiable. Each leg can be removed and acts as a monopod. The center column can either be removed entirely or inverted to get lower to the ground. And you can purchase tripod feet for better stability on different types of surfaces.
This tripod comes with a carrying case and also the 3 Legged Thing Toolz multi-tool for adjusting various parts of the tripod. It can’t extend quite as high as other options, but the ability to modify it so much and the large weight capacity are huge benefits.
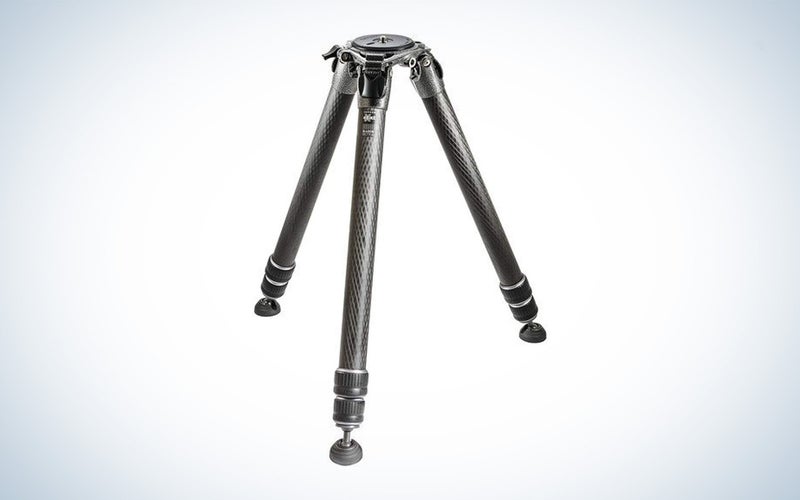
Why it made the cut: The Gitzo Systematic Series 5 holds a whopping 88 pounds, making it the ideal choice for those shooting with large cameras and lenses.
Specs
- Maximum working height: 52.8 inches
- Minimum working height: 3.9 inches
- Weight: 6.2 pounds
- Weight capacity: 88 pounds
- Folded length: 24.4 inches
Pros
- Very heavy duty
- Available in different heights and configurations
- Exceptionally sturdy
- Feet are articulating for better stability
Cons
- Center column or head must be purchased separately
If the 3 Legged Thing doesn’t provide enough stability for you, the Gitzo Systematic Series 5 will. It supports up to 88 pounds, which is ideal for those using large lenses or cameras. Even if you use a large format camera, you’ll get enough support from this carbon fiber tripod. Even when the legs’ three sections are extended, the tripod is extremely sturdy with limited flex.
The Systematic Series is unique in that they do not include center columns, unlike other tripods. Center columns are not very sturdy when extended, so it makes sense to leave that out if you want the most stability. It does, of course, limit the height you can get from the tripod, but luckily Gitzo makes different heights in this line.
Like the 3 Legged Thing, Gitzo sells lots of accessories compatible with this tripod line. For example, should you want a center column, you can add a compatible one, as found on Gitzo’s website. You’ll also need to purchase a tripod head if you want more than the flat top plate. And there are also alternative types of feet available for better stability on different surfaces.
Why it made the cut: At a much more affordable price, this budget carbon fiber tripod still offers support for up to 26.5 pounds and can convert into a monopod.
Specs
- Maximum height: 66 inches
- Minimum height: 23.2 inches
- Weight: 3.40 pounds
- Weight capacity: 26.5 pounds
- Folded length: 19.3 inches
Pros
- Can be broken down into a monopod
- Affordable
- Comes with a ball head
- Center column can be inverted
Cons
- Does not go very low
- Not as durable as other options
Neewar is fairly well known for its affordable lighting and accessories. Like its other gear, its carbon fiber tripod is much more affordable than other brands but still offers a good amount of quality and features. Unlike more expensive options, it comes with a ball head, so you don’t need to purchase it separately.
It supports up to 26.5 pounds, so even somewhat heavy cameras and lenses will work. And it only weighs 3.4 pounds, so it won’t be too much trouble to pack with you on trips. You can break it down into a monopod, so it is multifunctional. And the center column can be inverted if you want low to the ground shots. The legs have three sections and are controlled via twist locks.
Of course, with the budget price comes some downsides, though they are luckily minor. The included ball head isn’t all that stable, so you may want to invest in a better tripod head if you will be pushing the weight limit of this tripod. And some have had issues with pieces breaking after not all that much use. It may not last as long as more expensive options, but if you want to get started with a tripod without breaking the bank, this still is a great option.
Things to consider before buying the best carbon fiber tripods
Tripods, in general, aren’t exactly feature-packed, as they are pretty basic, straightforward pieces of equipment. But, that said, there are still some vital things to pay attention to before purchasing to ensure that it will fit your needs and work with your camera setup.
Weight
Though carbon fiber tripods weigh less than their aluminum counterparts, their weight still varies across different brands and models. And while you may assume you need to find the lightest option, that won’t always be the best. Lightweight tripods lose stability unless you add weight to them. That could be via sandbags or a backpack hung from the center column. Without added weight, the tripod may be prone to getting blown over by strong winds or tipped over if bumped. So, if you are looking for a sturdy option and don’t want to fuss with adding weight, go with a heavier tripod.
On the flip side, if you travel or like to have a tripod while hiking, be sure to go with a lightweight option. Tripods are never all that convenient to carry along, but if it weighs a lot, you definitely won’t want to bring it along.
Capacity
Beyond the weight of the tripod itself, tripods will be able to support different sizes of cameras and lenses. For example, some tripods are only suitable for lightweight mirrorless setups with small lenses, whereas others can hold heavy medium-format cameras.
Before purchasing a tripod, be sure to do a rough calculation of what your heaviest setup will be. Look up the weight of your camera and largest lens to ensure that the tripod and tripod head you are considering is able to support that much weight.
Maximum and minimum height
All tripods will be able to extend only so far. Some will be able to go quite high with the help of a center column, while others won’t go beyond eye level, if that. If you like to get serious height with your tripod for unique perspectives, be sure to look for a tripod with a tall maximum height.
On the other side, some tripods can’t go lower than the closed length of the tripod. Some, however, allow you to bend the legs out, resulting in the camera sitting very low, sometimes just inches off the ground. This ability is ideal for landscape photographers who want dramatic angles or like to focus on things in the foreground. If you want more flexibility with angles, be sure to look for a tripod that can get low as well as high.
FAQs
Q: Are carbon fiber tripods worth it?
Carbon fiber tripods are worth it for some people, but not all. Those who travel or hike a lot will want a compact and lightweight tripod, as heavy or bulky ones will be frustrating to carry around. Carbon fiber tripods are smaller and lighter than aluminum alternatives, and those weight savings can absolutely be worth it. But, if you need a sturdy tripod for a studio or other general-purpose setting, a carbon fiber tripod may not be worth the cost.
Q: How much do carbon fiber tripods cost?
Carbon fiber tripods will cost you anywhere from around $150 all the way up to $1,700 or so. Typically, the more expensive the tripod, the sturdier it will be and the more weight it can support.
While you may be tempted to go with the cheapest carbon fiber tripod you can find, keep in mind that all carbon fiber is not created equal. A cheap carbon fiber tripod may actually be less durable and sturdy than an aluminum tripod that costs the same amount.
Q: Which is better, carbon fiber or aluminum tripod?
Whether carbon fiber or aluminum tripods are better depends on your needs and preferences. Carbon fiber tripods are stronger, more durable, and lighter, making them the better choice for photographers who travel or use a tripod in harsh conditions. But, they are more expensive, and because they are so lightweight, they may need weight added in order to have enough stability.
Aluminum tripods are much more affordable than carbon fiber, making them better for beginners. And, for those using big, heavy cameras or needing extra stability without additional weight, aluminum may be the better choice.
Q: Can you buy refurbished carbon fiber tripods?
Yes, you can buy refurbished and used carbon fiber tripods. This can be an excellent way to get a quality carbon fiber tripod while saving some money. You’ll find plenty of options on sites like eBay or the B&H used section.
Final thoughts on the best carbon fiber tripods
Carbon fiber tripods are not cheap pieces of gear, especially good ones. They are an investment, to be sure. But for a bit of equipment that can keep your camera safe and potentially improve your images, it is worth spending a bit more to ensure you have a reliable tripod that will last for years.
Why trust us
PopPhoto has a long history of delivering the opinions of some of the sharpest and most prolific camera dorks the world has to offer. Since 1937, we’ve been reviewing cameras, providing wisdom from well-known photographers, and generally just nerding out about all that goes into making great pictures. Our current crop of writers and editors have decades of professional photography and camera writing experience among them. Collectively, we’ve probably shot with just about every camera and lens combo you can imagine—as well as some obscure stuff you may not even know about. Remember the Casio Tryx folding camera? PopPhoto does.
We also get that buying a camera is a big decision, which is why we’re dedicated to helping folks choose the right one (or, in our case “ones”) for their needs. Case in point: Handing over top dollar for an expensive rig may leave you unsatisfied if it doesn’t fit your preferred shooting style. Sure, a $6,000 sports-oriented DSLR can capture landscapes, but do you really need to do it at 30 frames-per-second? No, you don’t.