بلاگ

  • 8 Ideas to Spark Your Creativity With Photography Projects — Mikko Lagerstedt

    8 Ideas to Spark Your Creativity With Photography Projects — Mikko Lagerstedt


    As a photographer, I have discovered that starting a project can help me channel my creativity and bring new dimensions to my work. A project can be a way to explore new techniques, themes, and perspectives, leading to personal and artistic growth. Currently, I am working on a new photography series that will challenge me to think more deeply about my craft and explore new horizons. While I cannot reveal my project, I encourage you to consider the benefits of taking on your own photography project.

    A project can provide purpose and direction to your photography work. It can help you explore a specific subject or theme, experiment with different techniques, and improve your photography skills.

    To inspire you, I have compiled a list of project ideas that can help you enhance your photography skills in various ways. These ideas cover different aspects of photography, such as exploring different genres and experimenting with lighting, composition, and post-processing techniques.

    Selecting the right photography project can give new life and meaning to your work. It can allow you to explore new themes, experiment with new techniques, and help you take your photography to new heights. To help you get started, I have curated eight project ideas that can benefit photographers, whether you’re a seasoned professional or just starting.

    Project Ideas

    1. One Landscape, One Day

    Capture a single landscape over 24 hours. This exercise in patience and timing, observing how light transforms the scene, is fundamental for mastering exposure and understanding the nuances of natural light.

    2. Seasonal Series

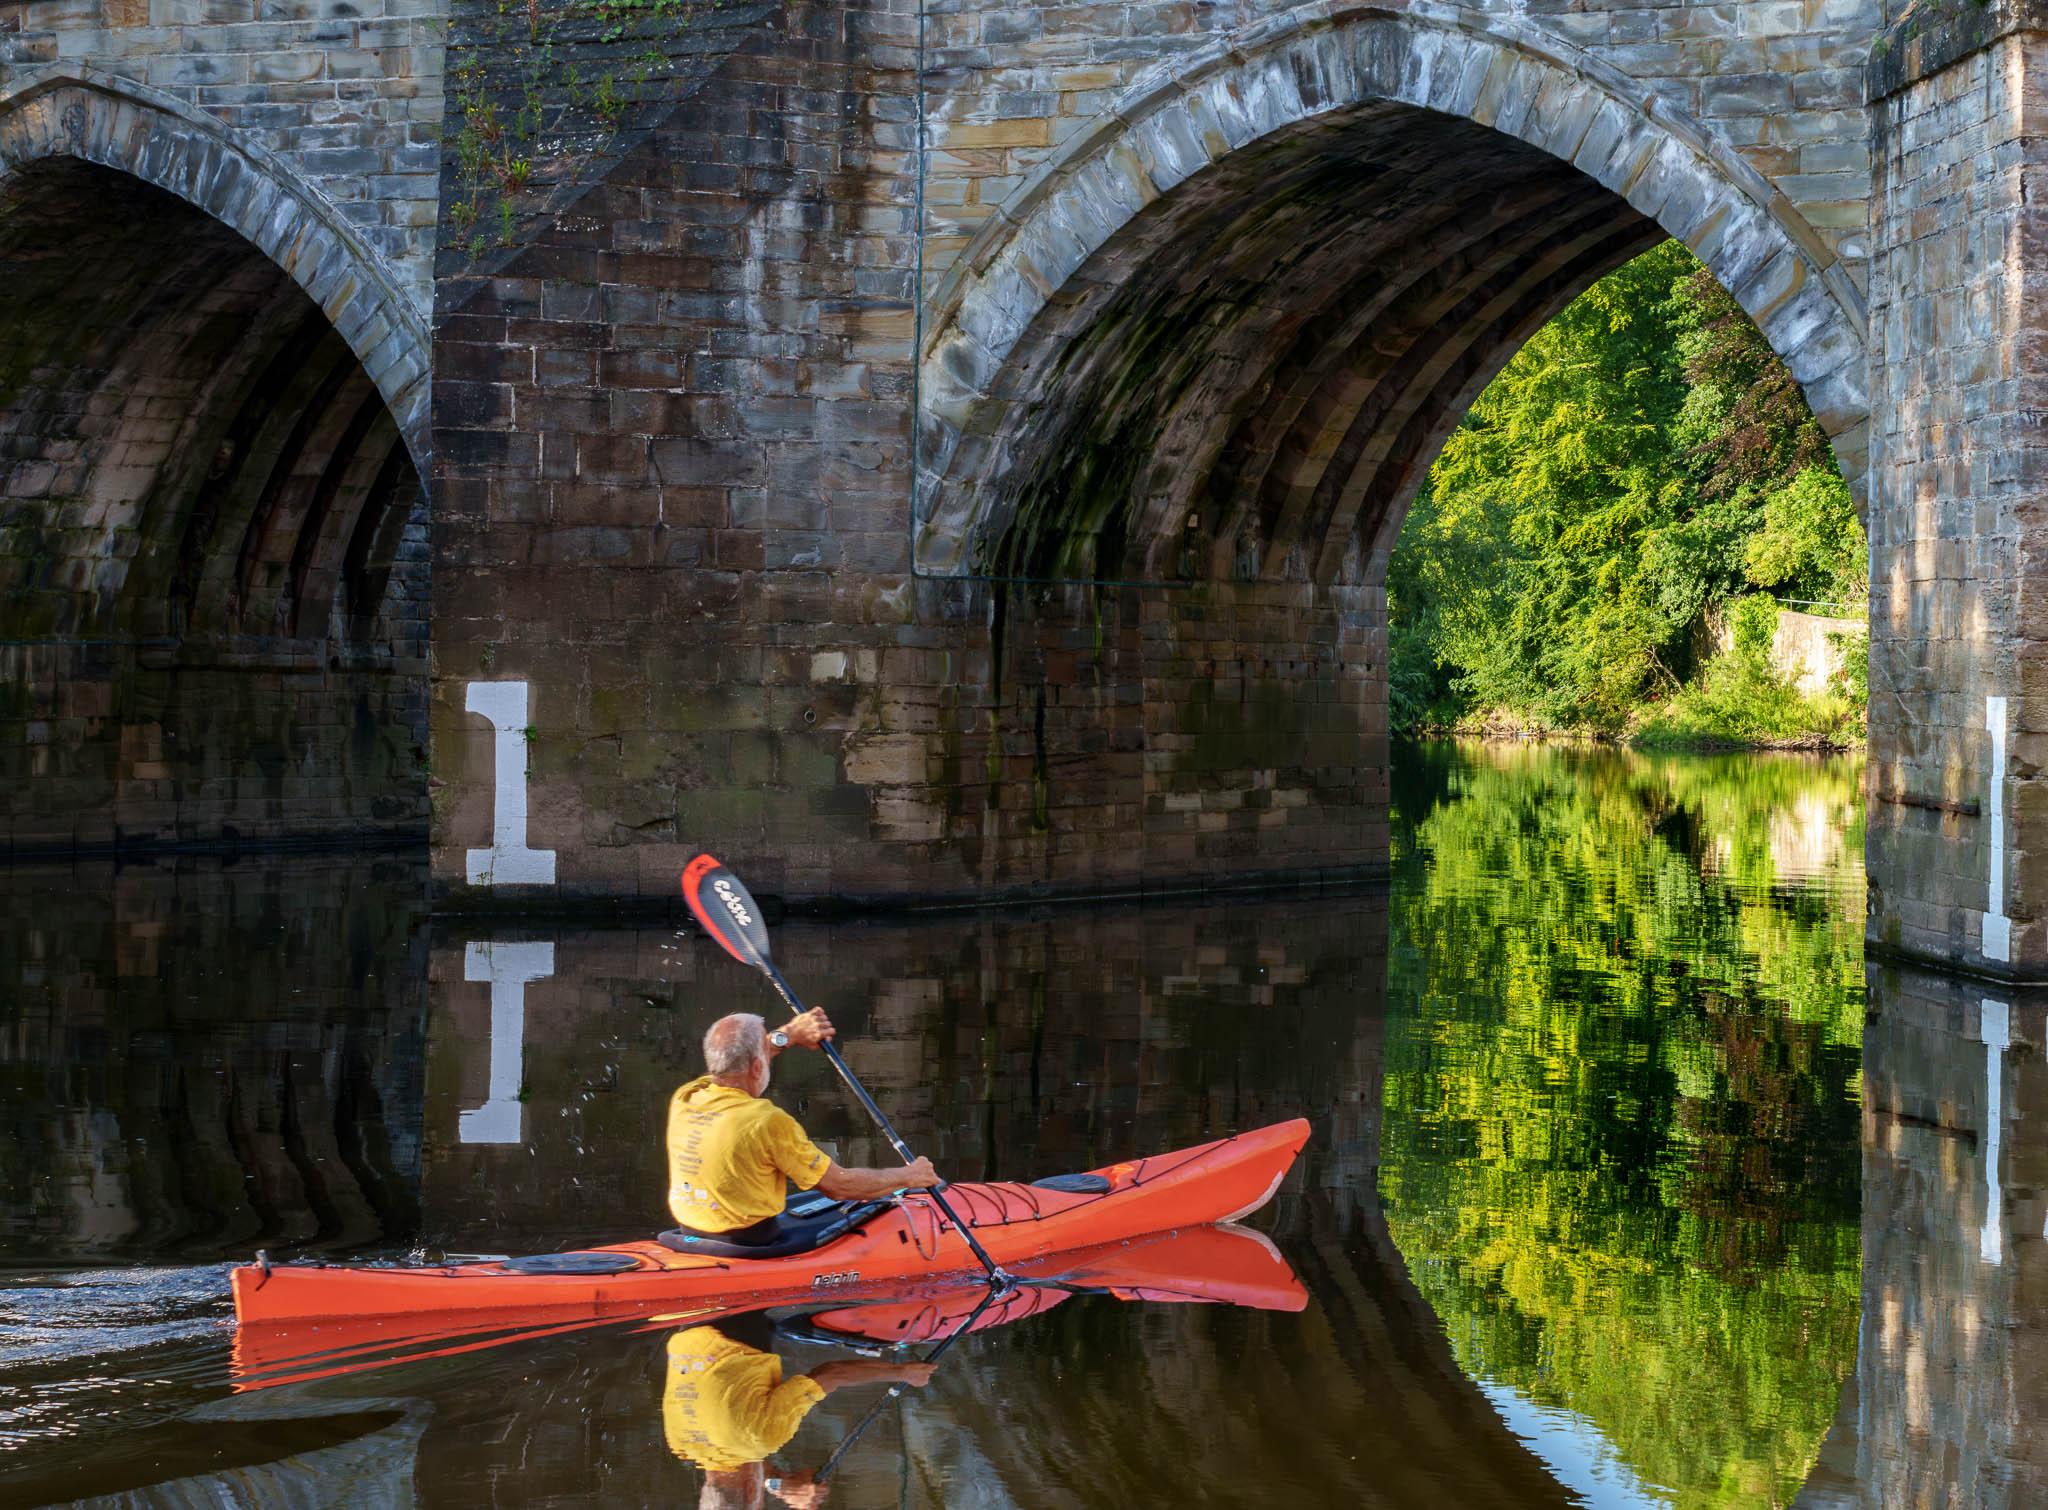
    Document the same location across different seasons. This long-term project highlights nature’s transformative power and tests your commitment. It’s perfect for studying changes in color, light, and weather. Below is my try at capturing this location in different seasons.

    Here is an ongoing series of this beautiful tree I’ve captured with different seasons, from Autumn to the start of Winter to Mid-Winter. The only season missing is Summer. However, I’ve shot it multiple times and never really gotten anything special in summer.


    Source link

  • How to Make a Music Video with Final Cut Pro X


    I’ve got something a little different today. Call it a slight expansion of my teaching skills. Teaching to my passions, if you will. Or you can just think of it as little bit of Friday fun and entertainment.

    In my latest YouTube tutorial, I show you how to make a music video. That’s right. Having grown up in the golden age of MTV, and having made a handful of them with my own original recorded songs, I decided to share my knowledge of how to create a classic-style music video using the Multicam feature in Apple’s Final Cut Pro software

    Specifically, I show you the steps needed to shoot and edit a handful of clips, so that they’re all in sync with the music. Final Cut Pro makes this really easy, but if you don’t know where to look in the software, it’s hard to figure this out. To illustrate, I use the video clips from my own song and music video, A Very Cozy Christmas, which I released back in 2020.

    Now, I realize, that a lot of my readers probably don’t use Final Cut Pro, or have any intention of every making a music video for that matter, but who doesn’t love a good music video? The classic ones have such cultural significance in our lives. Or at least they once did.

    With that in mind,  it might just be fun to watch this video, just to see how they’re made, and to support my efforts. If you enjoy my teaching style, this is a great way to help me expand my audience, which helps me continue to make more photography tutorials. So, even if you’re not a Final Cut Pro user, or a music producer, please consider watching and leaving a comment, just for that reason. 

    So whether you were raised on videos like ThrillerJumpEvery Breath You TakeHungry Like the Wolf and Sledgehammer, or not, thanks so much for your support and have a great weekend, and I promise, I’ll get back to making some more photography tutorials very soon!


    Source link

  • My Bestselling Fujifilm Guide Now Covers the X-H2 and X-H2S

    My Bestselling Fujifilm Guide Now Covers the X-H2 and X-H2S


    I’m excited to announce that my bestselling Fujifilm guide, X SERIES UNLIMITED has just been updated will full coverage of the new 5th generation X-H2 and X-H2S cameras. You can grab the latest 2022 Edition here.

    The latest comprehensive revision includes all of the new features found in the X-H2X-H2S, and revised/expanded information about all of the other current X Series models, including the X-T4, X-T3, X-Pro 3, X-E4, X-S10, X-T30/30 II, X100V and the X-T100. 

    If you’re a Fujifilm shooter, then this is the most definitive guide to the X Series cameras you can get. It explains every single feature and every single function, and it does so with clear descriptions, real world examples and a very easy-to-follow format.

    X SERIES UNLIMITED – October 2022 Edition

    It teaches you everything you need to know in order to become a better, more proficient, more creative photographer with your Fuji camera.

    It has full coverage of all current and past models, all the way back to the 1st generation X Series cameras, and if you purchase the book, you’ll be entitled to free updates in the future when Fujifilm releases new models and firmware updates. 

    Click here to see what other people have said about the guide, and then let me help you get the most from your Fuji camera. Join thousands of other Fuji users around the world who have downloaded the guide and benefitted from the vast amount of knowledge and expertise I’ve put into it. 

    If you’re on the fence. rest assured; it comes with a 100% money back guarantee. If you don’t like the book for any reason, I’ll refund your purchase.


    Source link

  • Check Out My Brand New Online Photography School!

    Check Out My Brand New Online Photography School!


    A couple weeks ago, I asked my subscribers to let me know what kinds of online photography courses they’d like to see me teach, and I got some incredible feedback! After reading hundreds of answers, I have some solid direction about how to proceed, and I’m looking to start filming some brand new courses in the next few weeks.

    With that in mind, I’m excited to announce the launch of my brand new online school, which features a free course, called Creative Color Techniques for Photographers and brand new options for personalized individual coaching.

    My Signature Course – Now in 3 Flavors!

    In addition, I’m now offering 3 different options for my signature 30-lesson course, Photography On The Brainthat are designed to better match a variety of budgets and commitment levels.

    ESSENTIALS gets you unlimited access to all 30 lessons and downloadable PDF assignments, at the lowest price I’ve ever offered. (Even lower with the discount below!) 

    WORKSHOP adds full forum access where you can share you own insight, post your images for critique, and get input from me and other students. 

    MENTORSHIP goes even deeper by adding personal coaching with a series of 4 one-hour video calls. This is the ultimate way to keep your motivation up and get targeted instruction and insight as you progress through the lessons. 

    Photography On The Brain is still the most thought-provoking instruction on composition and creativity that I’ve ever offered. 

    I cover such a wide variety of topics that you are guaranteed to come away with a huge batch of new ideas, confidence and inspiration.  

    If you want to be better at composition gain more creative confidence, then I strongly urge you to check out this course, because I know it will help you expand your creative skills in a big way.  

    Go Deeper with Personal Coaching

    I’m also unveiling my brand new PERSONAL PHOTOGRAPHY COACHING SESSIONS

    With three different video call options that range from 30-minute Quick Coaching sessions, 60 minute 1:1 sessions and an extended series of 4 one-hour monthly sessions, I can give you one-on-one advice, targeted instruction, and provide critiques, direct feedback and direction that will help you progress in your current photography life. 

    Whether you just need quick answers about a specific topic you’re struggling with, insight about how to better apply a certain creative technique, or if you want more in-depth feedback and ongoing follow-up, this is an incredible option for learning. 

    Awesome New Course Interface and iOS App

    I’m so excited about my new course site, which is built with the Teachable interface. The user dashboard and lesson pages are so easy to navigate, and they look great! You can view the lesson videos and assignment briefs with unlimited access on any device, and there’s even a free iOS app you can use for streamlined viewing of lesson material when you’re offline. 

    I actually did a 12-week online singing/vocal course last winter that was built with the the same framework, and I was really impressed by the clean format and ease of access that Teachable offers. That’s why I’m using it for my own courses, and I think you’re really going to like how it looks and functions.  

    Limited Time Launch Discount!!! 

    Finally, to celebrate the launch of my new course site, I’m offering my readers a special limited time discount code for Photography On The Brain.  

    Use coupon code LAUNCH20 at checkout to save 20% on either theESSENTIALS or WORKSHOP tiers(This code is only good for the next two weeks.)

    My readers have been incredibly supportive over the years, and that’s why I’m so excited about my new course site. I know that you guys like to learn from me, and you deserve the best possible user experience to access and absorb the information that I share.  

    I’m looking forward to building and uploading more courses in the coming weeks and months, but for now, I encourage you to check out the site, try out my free color course, and the share my courses with your other photographer friends.  

    Thanks so much for reading and take care.


    Source link

  • Best Sports Photo Background Ideas for Stunning Athlete Portraits

    Best Sports Photo Background Ideas for Stunning Athlete Portraits


    One way to improve your sports photos is to get the right background. Choosing the right background can make or break a sports photo. Whether you’re capturing individual headshots, team portraits, or promotional images, the backdrop plays a crucial role in setting the tone, reinforcing branding, and making the subject stand out.

    In some cases, a transparent background gives you max flexibility, while other scenarios call for a bold team-branded backdrop, a dynamic stadium setting, or a clean, neutral tone. Check out some of the best background options for sports photography—including field and court settings, team logos, dramatic lighting effects, and templates—to help you create impactful images every time.

    Sports photo background ideas

    The “field”

    Using a real sports environment helps establish context and energy in your shots. Some great location choices include:

    • Stadiums: A stadium backdrop can emphasize the grandeur of the sport, making it ideal for professional headshots or team portraits. Be mindful of the composition—an empty stadium creates a different feel than one filled with fans.
    • Tracks: A running track or cross-country trail provides a sense of movement and purpose. Position the athlete at a starting line for an action-driven portrait.
    • Beach: Perfect for sports like beach volleyball, surfing, or running, the ocean and sand can create a lively, high-energy image. Plan your shoot during golden hour for the best lighting.
    • Indoor arenas: Basketball courts, hockey rinks, or even boxing gyms provide an enclosed environment with controlled lighting. Use a wide aperture to blur out distracting elements while keeping the athlete as the focal point.
    • Sports fields: Soccer fields, cricket pitches, or rugby grounds offer a natural, open space that works well for solo and group shots. If the field is in use, position your subject in an area with minimal distractions.

    Split-image of two athletes preparing to compete—on the left, a track runner in a crouched starting position holding a baton, and on the right, a swimmer standing on a diving block, ready to jump into a pool. Both images capture moments of intense focus before the start of their respective races.

    Gyms and locker rooms

    For an intense, gritty look, gyms and locker rooms can provide a compelling backdrop. Weight rooms, benches, and training spaces add authenticity, making the athlete’s preparation a key part of the story.

    Split-image of two athletes engaged in fitness training—on the left, a woman in a pink tank top balancing on a BOSU ball in a gym, and on the right, a shirtless man performing a kettlebell exercise in a CrossFit-style gym. Both demonstrate strength, stability, and focus in their workouts.

    Use directional lighting to highlight muscle definition and create dramatic shadows. If shooting in a locker room, frame the shot to include elements like jerseys, team logos, or open lockers for added storytelling. Pay attention to the composition. You can avoid cluttered backgrounds by positioning your subject in front of an open locker with a neatly arranged jersey and equipment, for example.

    How One Sports Photographer Uses Path to Edit Photos for 16 Teams Every Season

    Urban settings

    Cityscapes, iconic landmarks, or industrial settings can be excellent backdrops for sports photography, especially for athletes who train outdoors. This option works particularly well for individual portraits of runners, cyclists, or street athletes.

    Split-image of outdoor urban activities—on the left, a large group of cyclists participating in a biking event on a city street, with a man in a green shirt joyfully riding with his arms open. On the right, two young boys play street soccer on an open road, showcasing energy and movement in a lively urban setting.

    Again, be mindful of busy backgrounds—use a shallow depth of field to keep the focus on the athlete. Early morning or evening shoots often provide softer light and less foot traffic.

    Smoke or lighting effects

    If you want to add drama, using colored lights, LED strips, or smoke effects can create a bold, high-impact background. This is a great option for marketing shots, posters, and social media content.

    A triptych of intense sports moments surrounded by smoke—on the left, a motocross rider emerges from a cloud of dust in a black-and-white image; in the center, two athletes wave blue smoke flares on a grassy field; on the right, an American football player walks through thick smoke and sparks, creating a dramatic entrance scene.

    Smoke and lighting effects can create a variety of looks, so the possibilities are truly endless. In the examples above, you can see how smoke and fog add dama to photos of a dirt biker, soccer players, and a football player. 

    In some cases, you may shoot with the smoke, lighting, and fog on location—in others, you may add it in during the editing process. Find out how to add smoke and fog to photos in this tutorial. 

    Branding

    Showcasing team identity is always a smart choice. You can use the team logo or colors, or a sponsor’s logo and colors. Solid or gradient backgrounds in team colors can create a consistent, polished look.

    A composite image featuring two sports teams—on the left, an American football player in a black and orange

    Image source

    Blur

    A blurred background helps isolate the subject and remove distractions. This technique is useful when shooting in a busy location, like a crowded gym or an active playing field.

    A collage of three sports images featuring athletes in action: an American football player running with the ball, a boxer intensely training with sweat on his face, and a group of cyclists racing with motion blur in the background.

    There are a few ways to get a blurred background: 

    • Shoot with a shallow depth of field: Use a wide aperture (e.g., f/2.8 or lower) to blur the background while keeping the athlete sharp.
    • Use motion blur: Works well for dynamic shots where slight movement is captured.
    • Edit the background in post-production: If you can’t get it in-camera, you can add the blur effect during the editing process. Find out how to blur the background in this tutorial.

    Neutral

    A clean, neutral backdrop—like gray, white, or black—keeps the focus on the athlete. This is a solid choice for profile shots, media use, and professional headshots.

    A triptych celebrating women's fitness—on the left, a woman in athletic wear performs a high jump against a white background; in the center, a dancer leaps gracefully in mid-air with a black background highlighting her movement; on the right, two women in colorful activewear smile and pose confidently together, showcasing strength and joy in fitness.

    Use a softbox or ring lights to help maintain even lighting without harsh shadows. Seamless paper or collapsible fabric backdrops work best for the backdrop materials.

    Transparent

    For maximum flexibility, a transparent background allows you to place the subject onto any background later. This is especially useful for promotional materials, digital content, and merchandise design. You can find out how to make a transparent background with this tutorial and in the video below: 

    https://www.youtube.com/watch?v=SXTiQNtoQS0

    Editing your sports photo backgrounds

    Not happy with the background you’ve already got? Remove it and try a new one with Path’s background removal services.

    Save a ton of time with pro background removal from 39¢ per image

    Start a new order Start a new order Start a new order

    Sports photo background FAQs

    What’s the best background for a team photo?

    A stadium, team-branded backdrop, or a solid color with team colors works well for team portraits.

    Should I use a green screen for sports photos?

    A green screen can work if you plan to replace the background, but good lighting is crucial for a clean result.

    What’s the advantage of a transparent background?

    The advantage of a transparent background is that it gives you flexibility to place the subject onto different backgrounds later, making it ideal for marketing materials and graphics.


    Source link

  • Beautiful Flowers


    A few of the wonderful flowers I’ve photographed (or photographs I’ve edited) recently            


    Source link

  • Nauticam Announces T7 and G7 HD UltraBright Monitors

    Nauticam Announces T7 and G7 HD UltraBright Monitors


    After many years of producing housings for monitors, including the Atomos Shinobi II and SmallHD Ultra 5, Nauticam has now released its own monitor—contained in an integrated housing. Featuring a 7-inch UltraBright panel with 1920×1080 resolution, the monitor offers a peak brightness of 3,000 nits, according to Nauticam. That’s brighter than any currently available monitor for underwater work, promising to make it possible to shoot in even the sunniest conditions.

    The monitor offers a slew of advanced video assist tools, including customizable aspect ratios, false color, focus assist, focus peaking, histograms, image flip, vector scope, waveforms, zebra stripes, and anamorphic de-squeeze (to correct the distortion created by anamorphic lenses). Rather than a standard ball mount, the monitor comes with a newly designed swivel-and-tilt mount, which is attached to a housing via two ¼’’-20 UNC screws.

    Depth-rated to 100 meters (330 feet), the monitor comes in two flavors: The T7 offers a single HDMI 1.4 input, while the G7 supports both HDMI 1.4 and SDI inputs. The G7 also offers an SDI output for connecting to a monitor on the surface. Both varieties are powered by four Li-ion rechargeable batteries, with the latest NightCore NL2160HP 6000mah batteries providing up to six hours of use at the default backlight level.

    Available now from retailers such as Backscatter, the Nauticam T7 HD UltraBright retails at $3,778, while the Nauticam G7 HD UltraBright costs $5,008.


    When purchasing underwater photography equipment like the products mentioned in this article, please support DPG by supporting our retail partner—Backscatter.com.


    PRODUCT INFORMATION

    Introducing Nauticam 7” T7 HD UltraBright Monitor (HDMI 1.4 input, excl. cables)

    Key Features:

    • Exceptional Brightness & Clarity: With an impressive 3000 nit brightness, the monitor provides clear, vibrant images even in direct sunlight, so you won’t miss a detail.

    • Advanced Image Control Tools: Easily access the following tools all at your fingertips. Anamorphic De-Squeeze, Customizable Aspect Ratios, False Color, Focus Assist, Focus Peaking, Histogram, Image Flip, Vector scope, Waveform, Zebra

    • Swivel and Tilt Adjustable Monitor Mount System: This newly designed mount ensures smooth adjustments any any angle, making this monitor an invaluable tool for underwater image makers.


    What’s In The Box:

    • 16611 Nauticam 7” T7 HD UltraBright Monitor
    • Monitor Hood
    • Swivel and Tilt Adjustable Monitor Mount System (attached to camera/Cine Housing with 2x ¼’’-20 UNC screws)
    • Spare O-ring for battery door, O-ring remover and lubricant
    • Padded Travel Case


    Required Accessories to use with HDMI 1.4 input:

    • 25033 Standard HDMI bulkhead with M16 thread
    • 25081 M24-M16 Step Down Adaptor may be required for certain cameras
    • 25100 HDMI (D-A) 1.4 cable in 200mm length for NA-a1/FX3/GH6 (for connection from HDMI bulkhead to camera) 
    • 25047 HDMI (D-D) 1.4 cable in 800mm length (for connection between HDMI bulkheads)

    Introducing Nauticam 7” G7 HD UltraBright Monitor (HDMI 1.4 and 2K SDI input, excl. cables)

    Key Features:

    • Inputs and Outputs: The G7 supports both 4K HDMI and 2K SDI inputs as well as SDI output. Please note HDMI to SDI cross conversion is not supported.

    • Exceptional Brightness & Clarity: With an impressive 3000 nit brightness, the monitor provides clear, vibrant images even in direct sunlight, so you won’t miss a detail.

    • Advanced Image Control Tools: Easily access the following tools all at your fingertips. Anamorphic De-Squeeze, Customizable Aspect Ratios, False Color, Focus Assist, Focus Peaking, Histogram, Image Flip, Vector scope, Waveform, Zebra

    • Swivel and Tilt Adjustable Monitor Mount System: This newly designed mount ensures smooth adjustments any any angle, making this monitor an invaluable tool for underwater image makers


    What’s In The Box:

    • 16611 Nauticam 7” G7 HD UltraBright Monitor
    • Monitor Hood
    • Swivel and Tilt Adjustable Monitor Mount System (attached to camera/Cine Housing with 2x ¼’’-20 UNC screws)
    • Spare O-ring for battery door, O-ring remover and lubricant
    • Padded Travel Case


    Required Accessories to use with HDMI 1.4 input:

    • 25033 Standard HDMI bulkhead with M16 thread
    • 25081 M24-M16 Step Down Adaptor may be required for certain cameras
    • 25100 HDMI (D-A) 1.4 cable in 200mm length for NA-a1/FX3/GH6 (for connection from HDMI bulkhead to camera) 
    • 25047 HDMI (D-D) 1.4 cable in 800mm length (for connection between HDMI bulkheads)


    Required Accessories to use with SDI input:

    • 25058 M16 SDI Bulkhead
    • 25060 SDI cable in 0.4m length (for connection from camera to underside of SDI Bulkhead)
    • 25061 SDI cable in 0.75m length (for connection between SDI Bulkheads)


    Required Accessories to use with SDI out

    • 25064 SDI surface monitor cable in 15m length (for connection from SDI Bulkhead to Surface Monitor on land)
    • 25065 SDI surface monitor cable in 45m length (for connection from SDI Bulkhead to Surface Monitor on land)


    Source link

  • Canon adds three new lenses and a Power Zoom accessory to its RF lineup

    Canon adds three new lenses and a Power Zoom accessory to its RF lineup


    Canon is offering up some holiday treats as we head into winter. The company has announced two new full-frame RF lenses, one APS-C RF lens, a Power Zoom Adapter, and firmware updates for the EOS C70 and EOS R5 C cameras. The three new lenses cover everything from wide-angle to ultra-telephoto, offering a bit of something for everyone. They include the RF-S10-18mm F4.5-6.3 IS STM, the RF24-105mm F2.8 L IS USM Z, and the RF200-800mm F6.3-9 IS USM. There’s lots to unpack here, so let’s get into it.

    Canon RF24-105mm F2.8 L IS USM Z

    We are especially excited to see the RF24-105mm F2.8 L IS USM Z. This lens is the world’s first 24-105mm focal length lens with a consistent f/2.8 maximum aperture. Canon designed the RF24-105mm as a hybrid lens, tailoring it to high-level video content creators and video production individuals or firms. It did specify that this is not a cinema lens but does approach that category with new features.

    Though it offers many video-centric features, it should also be a superb still photography lens. The 24-70mm has long been the workhorse lens for many photographers, but we could see this extended range becoming the new go-to for many. The fast and constant f/2.8 aperture will offer excellent low-light performance, adding to its versatility. It will be ideal for a vast number of applications, including portraits, weddings and events, fashion, photojournalism, sports, wildlife, and more.

    RF24-105mm F2.8 L IS USM Z build & design features

    Canon’s RF24-105mm offers a constant overall length when zooming and focusing, which is a big advantage for videographers. It also offers a stepless manual aperture ring for video use. Canon optimized the optical design for high-end video, with excellent focus breathing performance and superb image quality. The image stabilization results in 5.5 stops of optical IS or eight stops of coordinated IS.

    The lens can focus as close as 1.5 feet at all focal lengths and offers a maximum magnification of 0.29x at 105mm. Two Nano USM focus motors drive the autofocus system, resulting in fast and accurate focusing abilities. Its 11 aperture blades provide beautifully smooth bokeh.

    The RF24-105mm weighs 2.9 pounds and is 7.8 inches long. It offers an 82mm filter thread.

    Power Zoom Adapters

    For videographers, one of the most exciting aspects of this new lens is the option to use a newly developed Power Zoom Adapter. This new optional accessory will connect to the side of the RF24-105mm without any tools required. It enables super-smooth zoom control when recording video. Zooming will look more natural, and it will make control easier for solo creators.

    Canon is making two different versions of the Power Zoom Adapter. You can opt for a standard version (PZ-E2) with only a USB port or a 20-pin port version (PZ-E2B) to support zoom and focus demands. It’s important to note that, as of now, the Power Zoom Adapter is only compatible with the RF24-105mm.

    Pricing & availability

    The Canon RF24-105mm F2.8 L IS USM Z will be available in December, though is available for pre-order now for $2,999.00.

    Both versions of the Power Zoom Adapter won’t be available until the spring of 2024, but you can already pre-order both. The standard version (PZ-E2) is priced at $999.00, while the 20-pin port version (PZ-E2B) is $1,299.00.

    The Canon RF200-800mm telephoto lens is placed against a white background.
    Canon

    Canon RF200-800mm F6.3-9 IS USM

    For those who need ultimate telephoto reach, the RF200-800 F6.3-9 IS USM should fit the bill. This lens is impressive for many reasons, most notably the range it offers. There are not many zoom lenses that offer a maximum focal length of 800mm, with most topping out at 600mm. And at $1,899, it’s very reasonably priced for what it provides. For context, Nikon’s new NIKKOR Z 180-600mm f/5.6-6.3 VR lens is $1,696.95, so you’ll get 200mm more reach for roughly $200 more.

    Its long reach makes it perfect for photojournalism, wildlife, outdoor sports, and dramatic landscapes. Should you need even more zoom power, it’s compatible with the Canon RF 1.4x and 2x tele extenders, which will get you up to a whopping 1600mm.

    The maximum aperture varies from f/6.3 at the wide end to f/9 when zoomed in, so its low-light capabilities are slightly limited. But as we would expect on such a lens, it offers image stabilization to assist with obtaining sharp images even when handholding the lens. You’ll get 5.5 stops of correction at 800mm, and 7.5 stops at 200mm. It also offers automatic panning detection.

    RF200-800mm F6.3-9 IS USM design & features

    The RF200-800mm uses an extending lens design, meaning it gets longer when you zoom in. Even though this lens isn’t in Canon’s pro-level L-series, it did apply weather sealing, meaning it is still durable and protected against the elements despite the extending design. The lens is surprisingly lightweight for what it is, weighing just 4.5 pounds. It should be feasible to shoot handheld for at least short durations. A rotating tripod mount on the lens makes it easy to attach to a tripod as well.

    Canon pointed out that even though the lens RF200-800m is white, it is not the IR reflective surface found on the latest L-series lenses. A single, compact Nano USM motor drives the autofocus system, which is fast and quiet. It is a varifocal lens, meaning it won’t stay in focus as you zoom in. But Canon promised superb image quality thanks to an optimized optical design.

    Pricing & availability

    The Canon RF200-800mm F6.3-9 IS USM will be available in December, but you can pre-order it now for $1,899.00.

    The Canon RF-S10-18mm lens is placed against a white background.
    Canon

    Canon RF-S10-18mm F4.5-6.3 IS STM

    The third lens of the new trio is a beginner-friendly APS-C lens. And at just $329, it is extremely budget-friendly as well. The RF-S10-18mm F4.5-6.3 IS STM lens offers a full-frame equivalent view of 16-29mm. Canon designed this lens for video and vlog creators as well as amateur photographers. The wide-angle perspective is ideal for selfie videos, travel videos, and landscape, travel, or architectural photography. For many, this could be the only lens they use on their camera because of its versatility and size. It would pair well with cameras like the R100, R50, or R7.

    RF-S10-18mm F4.5-6.3 IS STM design & features

    Canon created an entirely new optical design lens for the RF-S10-18mm, one that isn’t based on any current Canon lenses. It is absolutely tiny, weighing only 5.3 ounces. It utilizes a collapsible design to maximize its compact size for travel, meaning you’ll need to extend it out in order to start shooting. But when collapsed down, it is a measly 1.8 inches.

    Surprisingly, Canon included image stabilization on the RF-S10-18mm. You’ll get four stops of optical IS and six stops of coordinated IS with your camera’s in-body image stabilization. For video users, this can also be combined with Movie Digital IS for added stability, but that will result in a crop. Canon also mentioned that the focus breathing is very well handled with this lens. There is some present, but it is minimal, and some cameras offer focus breathing correction in-camera to improve it even more.

    A stepping motor drives the autofocus, and it offers close focusing abilities of 5.5 inches with autofocus at all focal lengths or 3.4 inches at 10mm with manual focus. Unsurprisingly for such a compact, budget-friendly lens, there is no focus switch on the lens, so you’ll need to change between manual focus and autofocus in your camera’s menus.

    Pricing & availability

    As with the other two lenses, the Canon RF-S10-18mm F4.5-6.3 IS STM lens will be available in December (just in time for you to pick it up as a Christmas gift for a photographer in your life) and is available for pre-order now for $329.00.


    Source link

  • How To Do Landscape Photography Using Smartphone

    How To Do Landscape Photography Using Smartphone


    When you’re traveling, it’s always a good idea to travel light. The fewer things you’re carrying, the easier it is for you to move around. However, when you’re a photographer, it can be quite challenging since DSLR cameras are quite heavy and bulky.

    A smartphone can be all you need for your next landscape photography adventures. You just need to know how to find the best exposure along with other tips and you should be able to produce really great images.

    In this guide, you’ll learn about the 15 best smartphone landscape photography tips for your next nature travel!

    Tips for Landscape Photography Using Smartphone

    Tips for Landscape Photography Using Smartphone
    cnet

    Ready to get started?

    Make sure to take note of the following tips. They’ll help you get the best landscape photos using just your smartphone.

    1. Finding the Best Exposure

    Sometimes when you shoot during the sun’s peak time, the exposure levels may be too much. You must do more than tap, focus, and shoot to have the best landscape images. iPhone users need to slide up or down the screen to adjust exposure levels. On an android phone camera phone like Samsung, find a light bulb at the bottom part and slide left to right to change the exposure.

    2. Use the Rule of Thirds

    The next thing to do is to compose your shot. It would be better if you put a horizon line on your screen. Try searching on your settings app or directly within the camera app to add grid lines.

    It would be best if you focused on your subject to make the rule of thirds. For instance, you want to take a flower with a landscape scene in the background. Often, we want to put the flower or the object at the center. However, in the rule of thirds, it will be more pleasing when the things are in the left-most or right-most quadrants of the grid lines.

    Reading from left to right is ideal for putting your subject on the left vertical line. By doing this, your eye will be given a flow, which also conveys movement and direction.

    3. Ensure a Straight Horizon

    Aside from using the grid line feature for the rule of thirds, you can also use it to make sure to get the horizon straight.

    As a landscape photographer, do this one right so you will save time in straightening up your smartphone images in the post-production.

    4. Check Camera Settings

    Check Camera Settings
    oreilly

    Your phone can undoubtedly take a great landscape photo in its automatic settings, but let’s push things a little further.

    Change into the “pro” mode on your phone if it allows you to adjust settings manually. If it doesn’t, you can modify settings like ISO, shutter speed, and white balance using an app like Moment, Lightroom, or MuseCam.

    In landscapes, altering the white balance is often crucial. Being able to tone down some of the highlights from a bright sky or bring up the shadows in the foreground is essential. You also need to know how to alter your white balance after you have taken the shot.

    It will give you much more flexibility in your editing (particularly on occasions when you want to warm up the tones in a beautiful sunset, for example). 

    5. Shoot Too Early or Too Late

    The time of the day is a significant factor in landscape photography. No, it is EVERYTHING! I suggest you check the night before what time the sunrise and sunset will be. Then, set your alarm to capture the sunlight slowly rising. Also, ensure you are in a gorgeous location on top of a mountain, near bodies of water, or by the beach.

    On the other hand, you can also stay out late. You will witness shades of yellow and orange when you wait for the golden hour. Note that midday is not a good time to shoot in raw format due to the shadows created by the overhead light.

    6. Use the Autofocus or Auto Exposure Lock Feat

    New smartphone cameras have the capability to autofocus subjects with every move of the lens same goes for the exposure. You can do manual control by tapping on the object you want to focus on, and the rest of the background will blur.

    Long press the screen to lock in the amount of exposure and focus of your preference. This feature works well for iPhone mobile photography.

    7. Try Wide and Zoom Lenses

    You can also buy different interchangeable lenses available online or in tech shops to enhance your camera phone. Wide lenses enable you to widen and double the field of view. Meanwhile, telephoto lenses allow you to have a digital zoom without making the landscape photos pixelated.

    Do not be afraid to experiment with your wide and zoom lenses in taking photos. Give it a try, especially since some smartphone cameras do not have a wide camera mode.

    8. Post Edit Landscape Photos

    VSCO App
    iphonephotographyschool

    The debate about whether to shoot in raw and leave it as is or use editing apps has gone on for years. Some people would want to maintain the landscape photos they took without processing them afterward. However, did you know that you can enhance the scene’s colors when you post-edit the pictures?

    There are free and low-cost editing apps available to install, like Snapseed and VSCO, with decent presets for landscape photography. VSCO is best used for minor adjustments like brightness, contrast, and sharpness. It will also let you adjust the filter intensity. You can opt for paid editing apps to enjoy more editing features.

    Lightroom and Photoshop can help you remove distracting elements. You can use these editing tools using your phone and computer.

    Therefore, you’ll need to load your images onto your computer anytime you need to make adjustments that demand more processing power, such as removing rocks, adding a dramatic sky, or making other changes.

    9. Get Low

    Since most mobile phones have wide-angle lenses, going close to the topic can make it much more intriguing. Your foreground will appear longer and more fascinating in your photos if you get down low. They will notice features that previously would not have stood out, like shrubs, flowers, and rock faces.

    You may give your image a lovely balance by having the foreground and background meet in the bottom third. Mobile phones frequently include a thirds overlay that will help you do this more evenly while also assisting you in maintaining the alignment of the images.

    The pictures don’t look all that attractive from above. However, the images seem more unique and intimate when you look at them directly down on your knees. It’s comparable to bending to take a child’s picture.

    10. Use a Tripod or a Stabilizer

    Did you know that a DSLR camera has a more prominent camera shake than a smartphone one?

    On the market, most mobile phones offer built-in image stabilization. However, if your phone has a high-megapixel sensor, it tends to be very sensitive to motion blur. And it can give your sharp photos. However, this won’t eliminate motion blur if you utilize long exposures, time lapses, or other features.

    Use a Tripod or a Stabilizer
    iceland-photo-tours

    Invest in a good tripod or stabilizer. The ones for smartphones do not cost a fortune. Make sure they are also handy and not bulky for your light travels.

    11. Try Timelapse

    This type of shot is quite simple, thanks to built-in smartphone stabilization and computational photography, which eliminates all the arithmetic and post-production work. With the help of time-lapse photography, you may view the passage of time in precise seconds. You can observe patterns and waves in the sky in even a minute-long clip that are too sluggish to be visible with the bare eyes.

    A tripod or phone stabilizer will be essential for creating excellent time-lapses. Set it up, pick the recording speed, then allow the phone to record for however long it is necessary.

    Tips for using timelapse for your smartphone landscape photography:

    5x Speed – capturing people and their emotions

    10x Speed – when the photographer is on the move, like walking, running, on car rides, and even on planes.

    30x Speed – works well when using a tripod to record motion in a city or other setting. Excellent for recording weather for 10 to 30 minutes. A 15-second video is produced after 7.5 minutes of recording.

    120x Speed – for dramatic weather changes and fluctuating light conditions. Imagine converting a downpour into a beautiful evening. Thirty minutes of the recording are needed to create a 15-second video at this Speed, 

    12. Feature a Strong Foreground

    Spend a few minutes looking around for something you can include in your shot to help the area come to life when you’re shooting your photograph at the top of the hill. In your scenes, look for foreground interest. In landscape photography, you can use things like tree stumps, moss-covered boulders, and even some gorgeous wildflowers to draw attention to a location.

    13. Flip Your Phone to Get Close to the Water

    This trick will leave you completely astounded. You need to come up close to the surface to see reflections in puddles. When you look down at them, all you will see is the sky, not the scene that is taking place in front of you. But if you don’t want to immerse the bottom half of your phone in water, the way we hold our phones naturally makes finding the puddles challenging.

    So, to get around this, simply flip your phone over and start taking pictures! I also employ this technique when photographing tiny flowers, fungi, or other difficult-to-approach subjects.

    14. Play with Distance in Smartphone Photography

    Play with Distance in Smartphone Photography
    digital-photography-school

    Note: If your subject is a wild animal, disregard this advice. It would be best if you kept animals at a safe distance. If your background is dull, dimly lit, or very distracting, approach near and allow your subject takes up most of the screen.

    Try to back up to a medium distance for dynamic action photos. Be in a position just far enough to fit your subject’s entire height in the frame.

    Try backing up even more and using a person, animal, or item in the middle distance to produce a sense of enormous scale to highlight a beautiful background.

    15. Try Burst in Moving Objects

    When you have a moving objects like animals or vehicles in your smartphone photography, try using burst mode to capture them. It will give you a varied range of photo options. 

    Using the burst mode will reduce your chance of the camera shaking because you only need to touch the shutter when you start and stop taking pictures. As a result, you’ll be able to quickly shoot a series of photos that you may evaluate afterward to select the best and most precise ones.

    Know Your Smart Camera Phone

    For all these tips to work, you need to know your phone. Smartphones have different camera settings and features. Most of the time, quality precedes price.

    Although most cameras on the market have built-in stabilization, this won’t be sufficient to prevent motion blur when capturing long exposure photos, such as time-lapses and other similar photographs. Perhaps the best investment you can make to steady your smartphone and save time is to purchase a small, affordable phone stand or tripod.

    Smartphone landscape photography

    Using smartphone cameras in landscape photography is a very convenient way of taking photos. However, if you plan to do this often, make sure to have enough phone memory or storage for your editing apps and pictures.

    Also, remember that the key to getting great photos lies in your camera sensor size. The quality of your images will improve as the sensor size increases. It would also be nice if your camera phone had a great night mode feature, even in dark scenes and low-light places.

    Lightroom Bundle Presets


    Source link

  • The FUJIFILM X-T5 is Here!!!

    The FUJIFILM X-T5 is Here!!!


    8 years ago early 2014, Fujifilm released the groundbreaking X-T1. This was the world’s first fully weather sealed, fast autofocus, action-ready mirrorless cameras designed specifically for outdoor photographers.  

    With its incredible, innovative capabilities and small stylish, SLR-inspired body, this amazing camera took the world by storm and set the tone for everything that came afterward in the entire industry.  

    I had the privilege of being one of the very first photographers in the U.S. to shoot with the X-T1, and since that day, my photography life was changed forever, from the moment I first picked up the camera.

    Following up on this highly innovative machine, Fujifilm improved each generation of the X-T line with more power, more performance, more features and constantly improving image quality, and today, they have announced the brand new 5th generation X-T5.

    Designed with the same 40MP X-Trans HR BSI sensor and 5th gen X-Processor Pro 5 engine, the X-T5 has nearly the same specs and feature set as the X-H2. It has up to 7 stops of IBIS in-body stabilization, 15 fps mechanical shutter, up to 20 fps ES, the new ultra-fast Subject Detect AF system, the new Pixel Shift Multi Shot feature, and 6.2K/30p video capabilities with up to 13+ stops of dynamic range.

    And it retains the same classic styling that so many people have come to love on the X-T series.

    In many ways the X-T5 is nearly identical to the X-H2, but there are a few differences. I have just uploaded my X-T5 launch day video analysis, where I preview the new camera and discuss the main specs and features, and let you know how it compares to the X-H2. 

    • 40 Megapixel X-Trans CMOS 5 HR BSI Imaging Sensor
    • 15 Frames per second in Mechanical Shutter
    • Up to 7 stops of Internal Body Image Stabilization (IBIS) 
    • New shutter 500,000 snaps.
    • 160MP pixel shift multi shot 
    • New subject detect AF
    • Nostalgic Neg film sim
    • 1/180,000 Max Shutter Speed in Electronic Shutter
    • 0.8x Magnification, 3.69 Mil Dots EVF
    • Externally Record Apple ProRes Raw or Blackmagic RAW
    • Up to 13+ stops of dynamic range with F-Log2
    • 6K/30P 10-bit 4:2:2 Video 

    This is a very exciting day indeed!!! Enjoy the video, and be sure to leave a comment and let m know what you think or if you have any questions.

    Finally, you can preorder the X-T5 here at B&H Photo and Amazon. It starts shipping in two weeks, on November 17.


    Source link