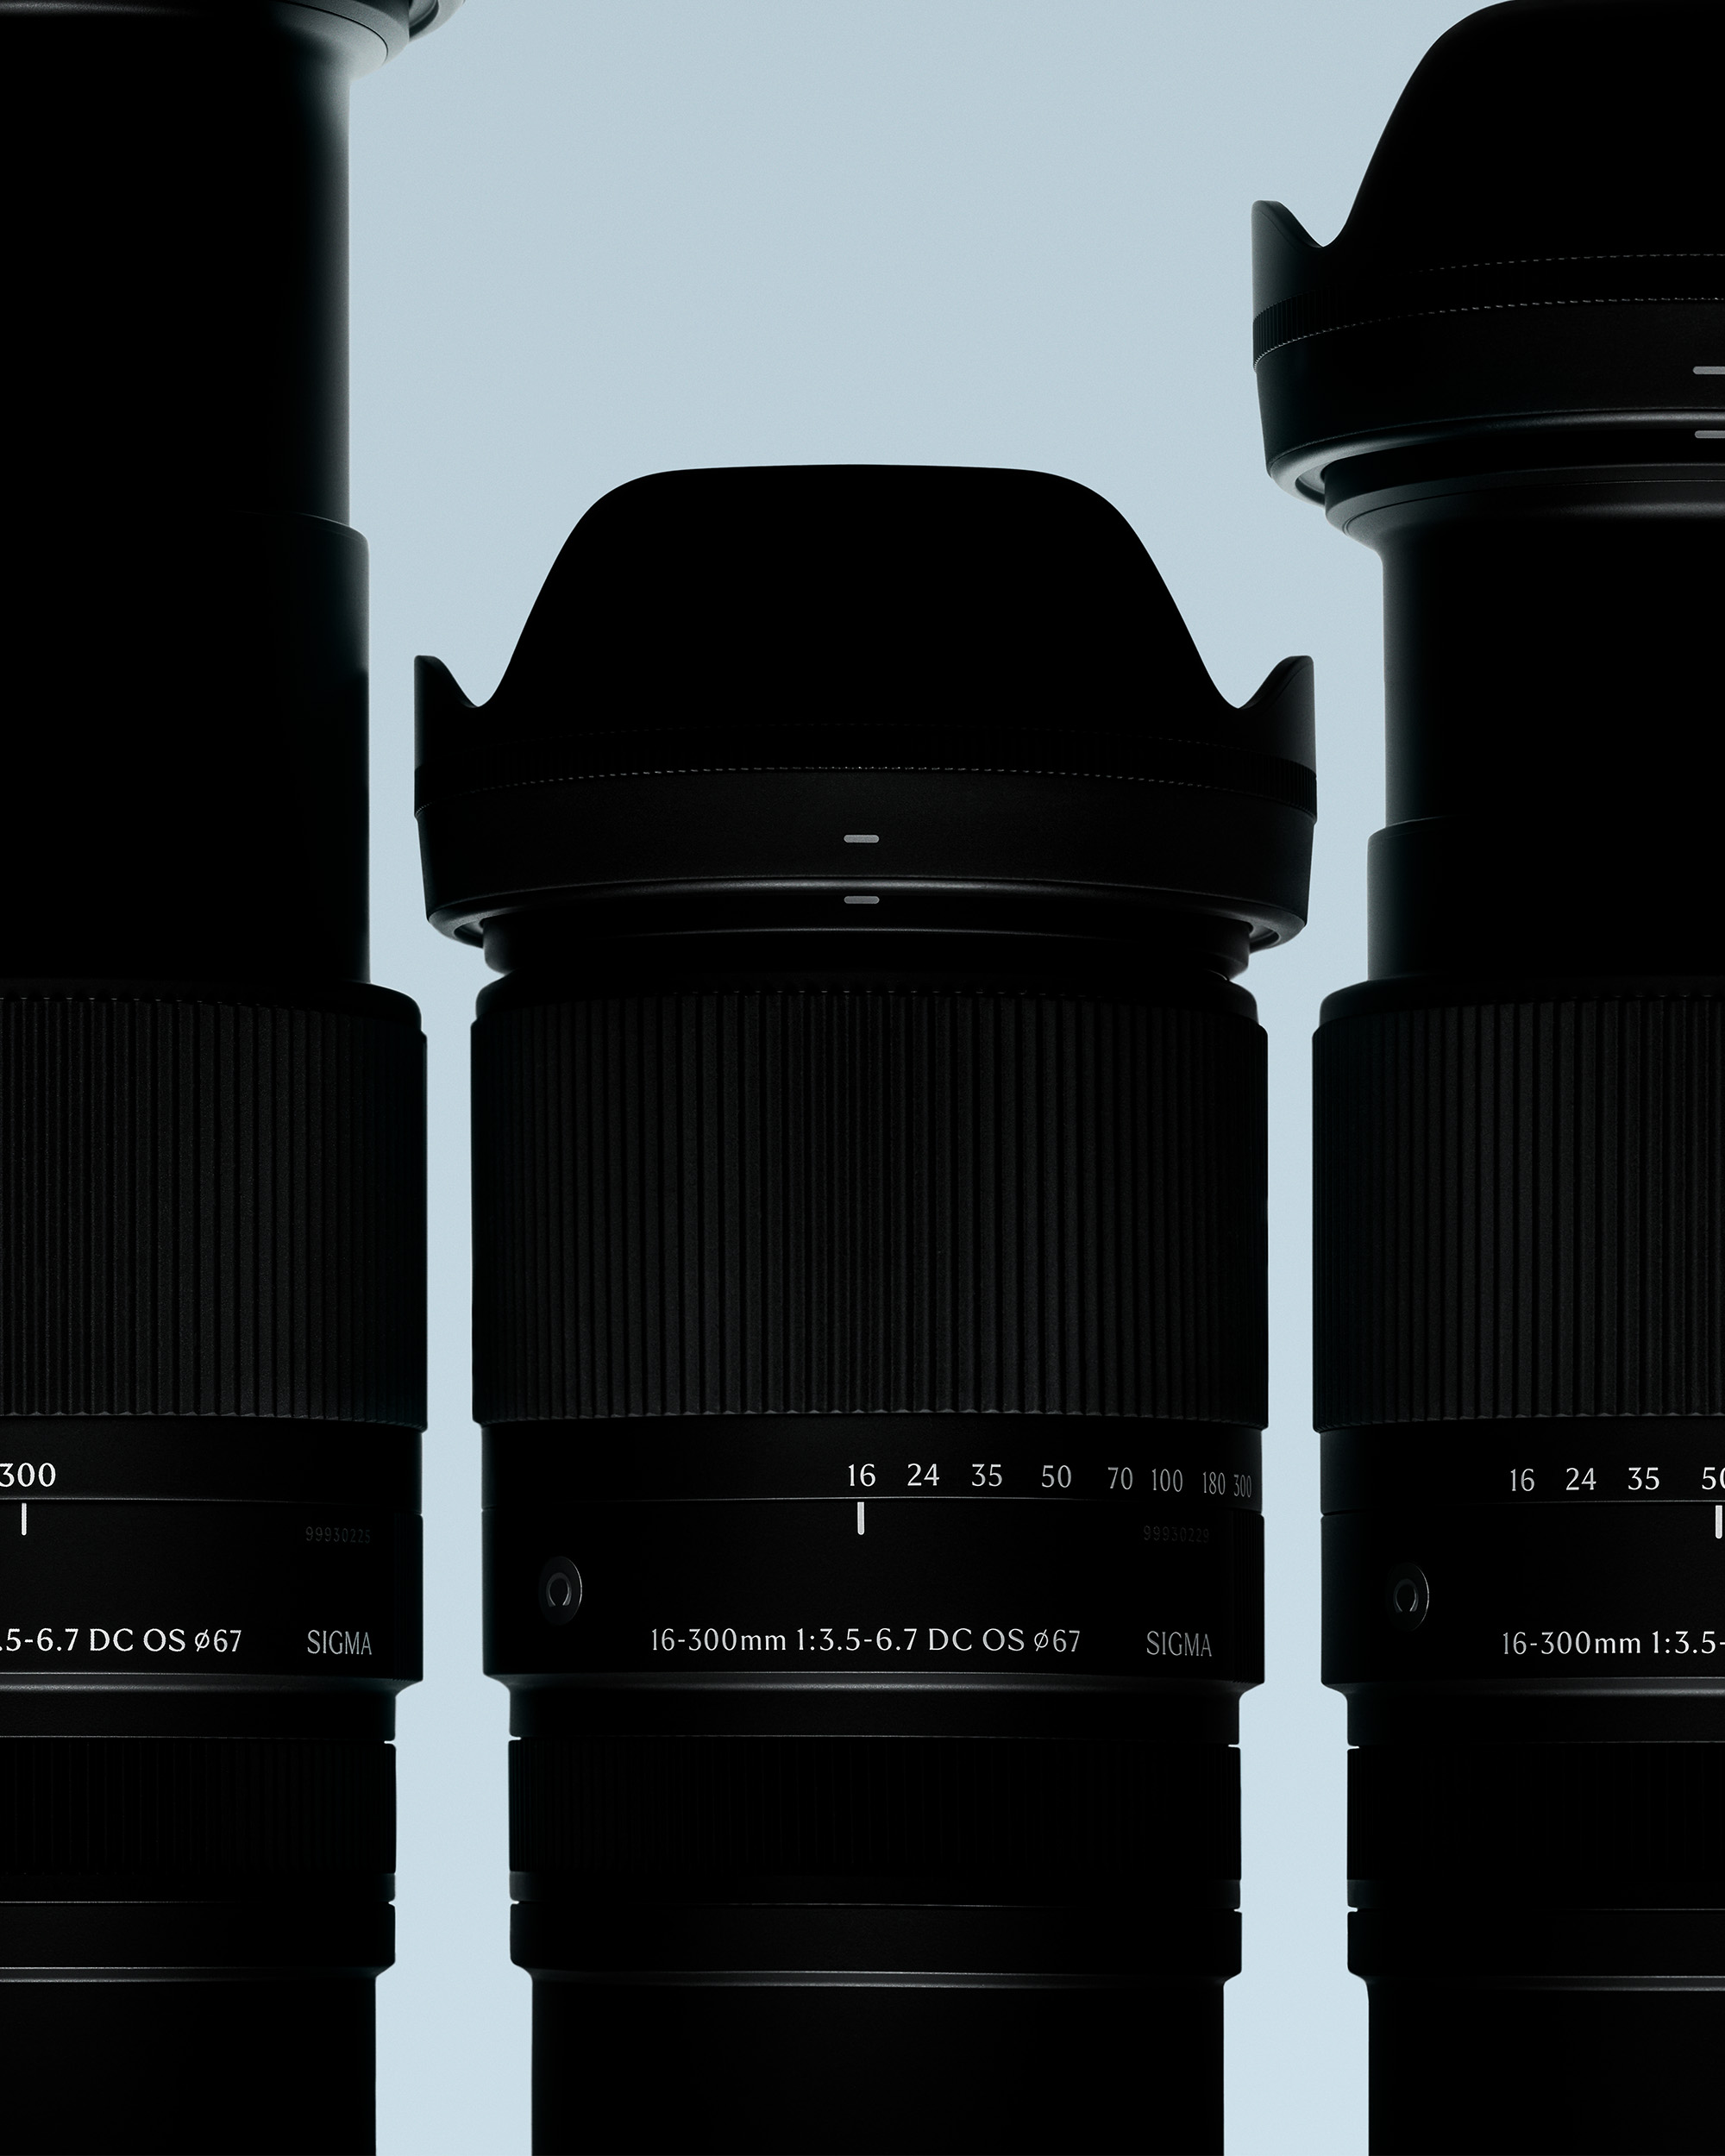
Sigma 16-300mm F3.5-6.7 DC OS | Contemporary Fujifilm X-H2 56mm, F7.1, 1/125s, ISO 400
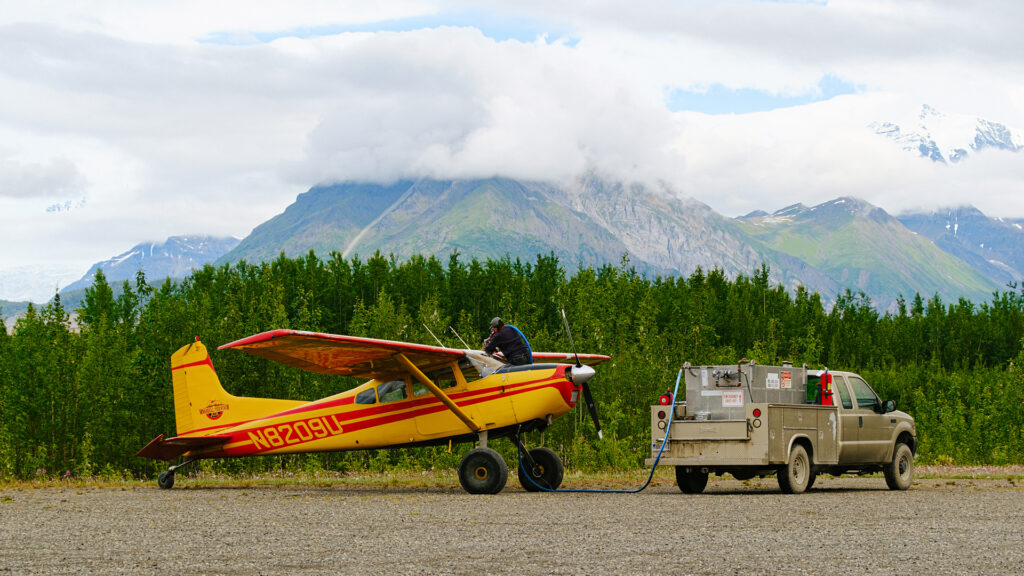
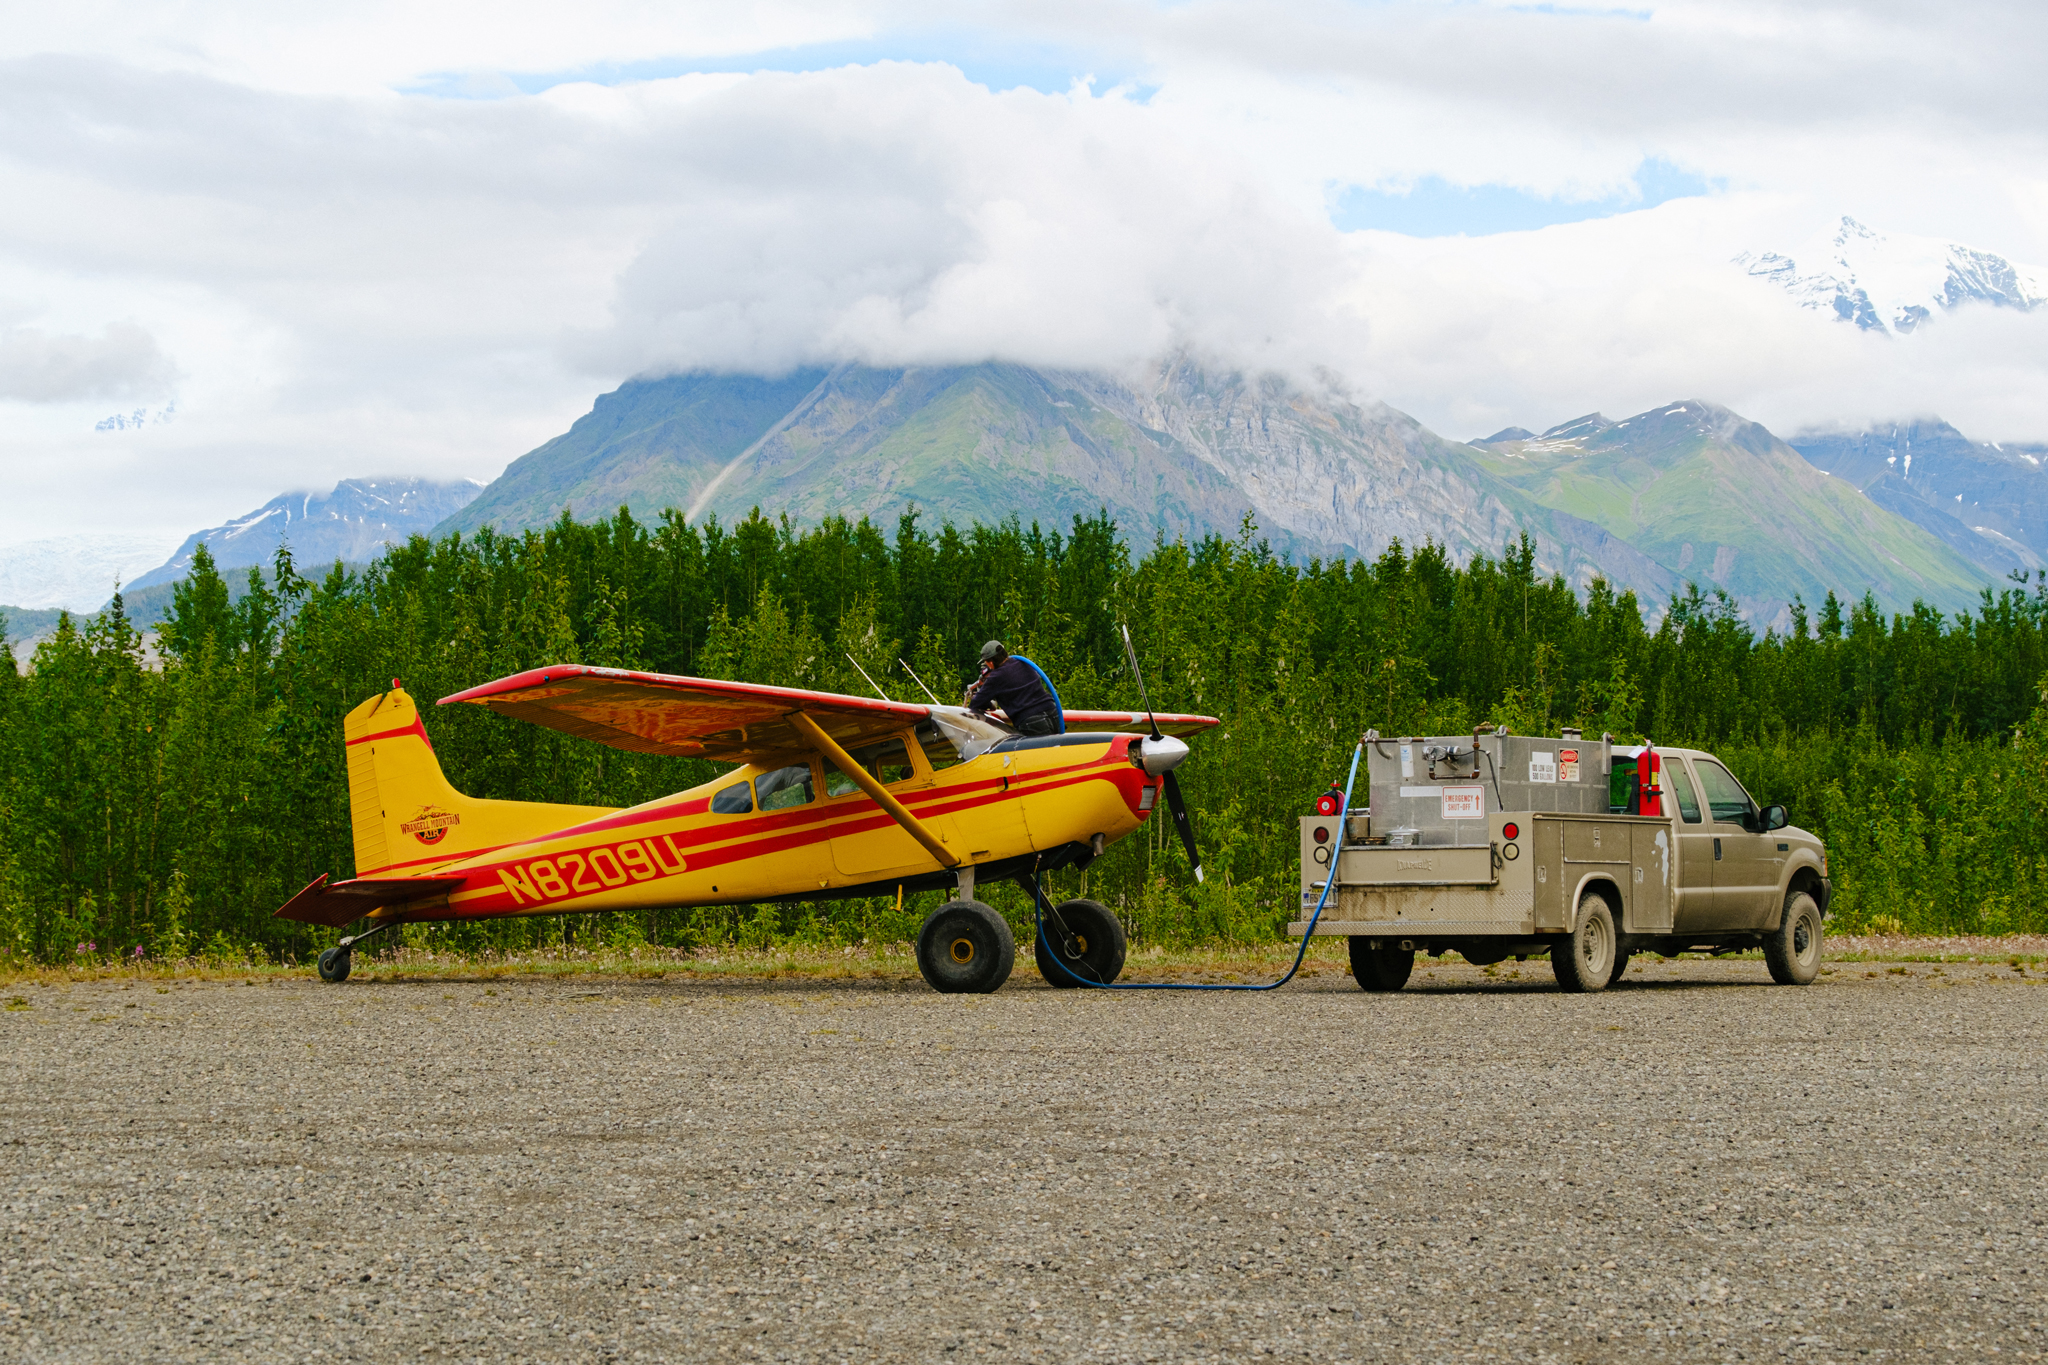
Sigma is pleased to feature a gallery of images by photographer Devon Smith Jr. This gallery is comprised entirely of images shot with the Sigma 16-300mm F3.5-6.7 DC OS | Contemporary lens on a Fujifilm X-H2 camera body.
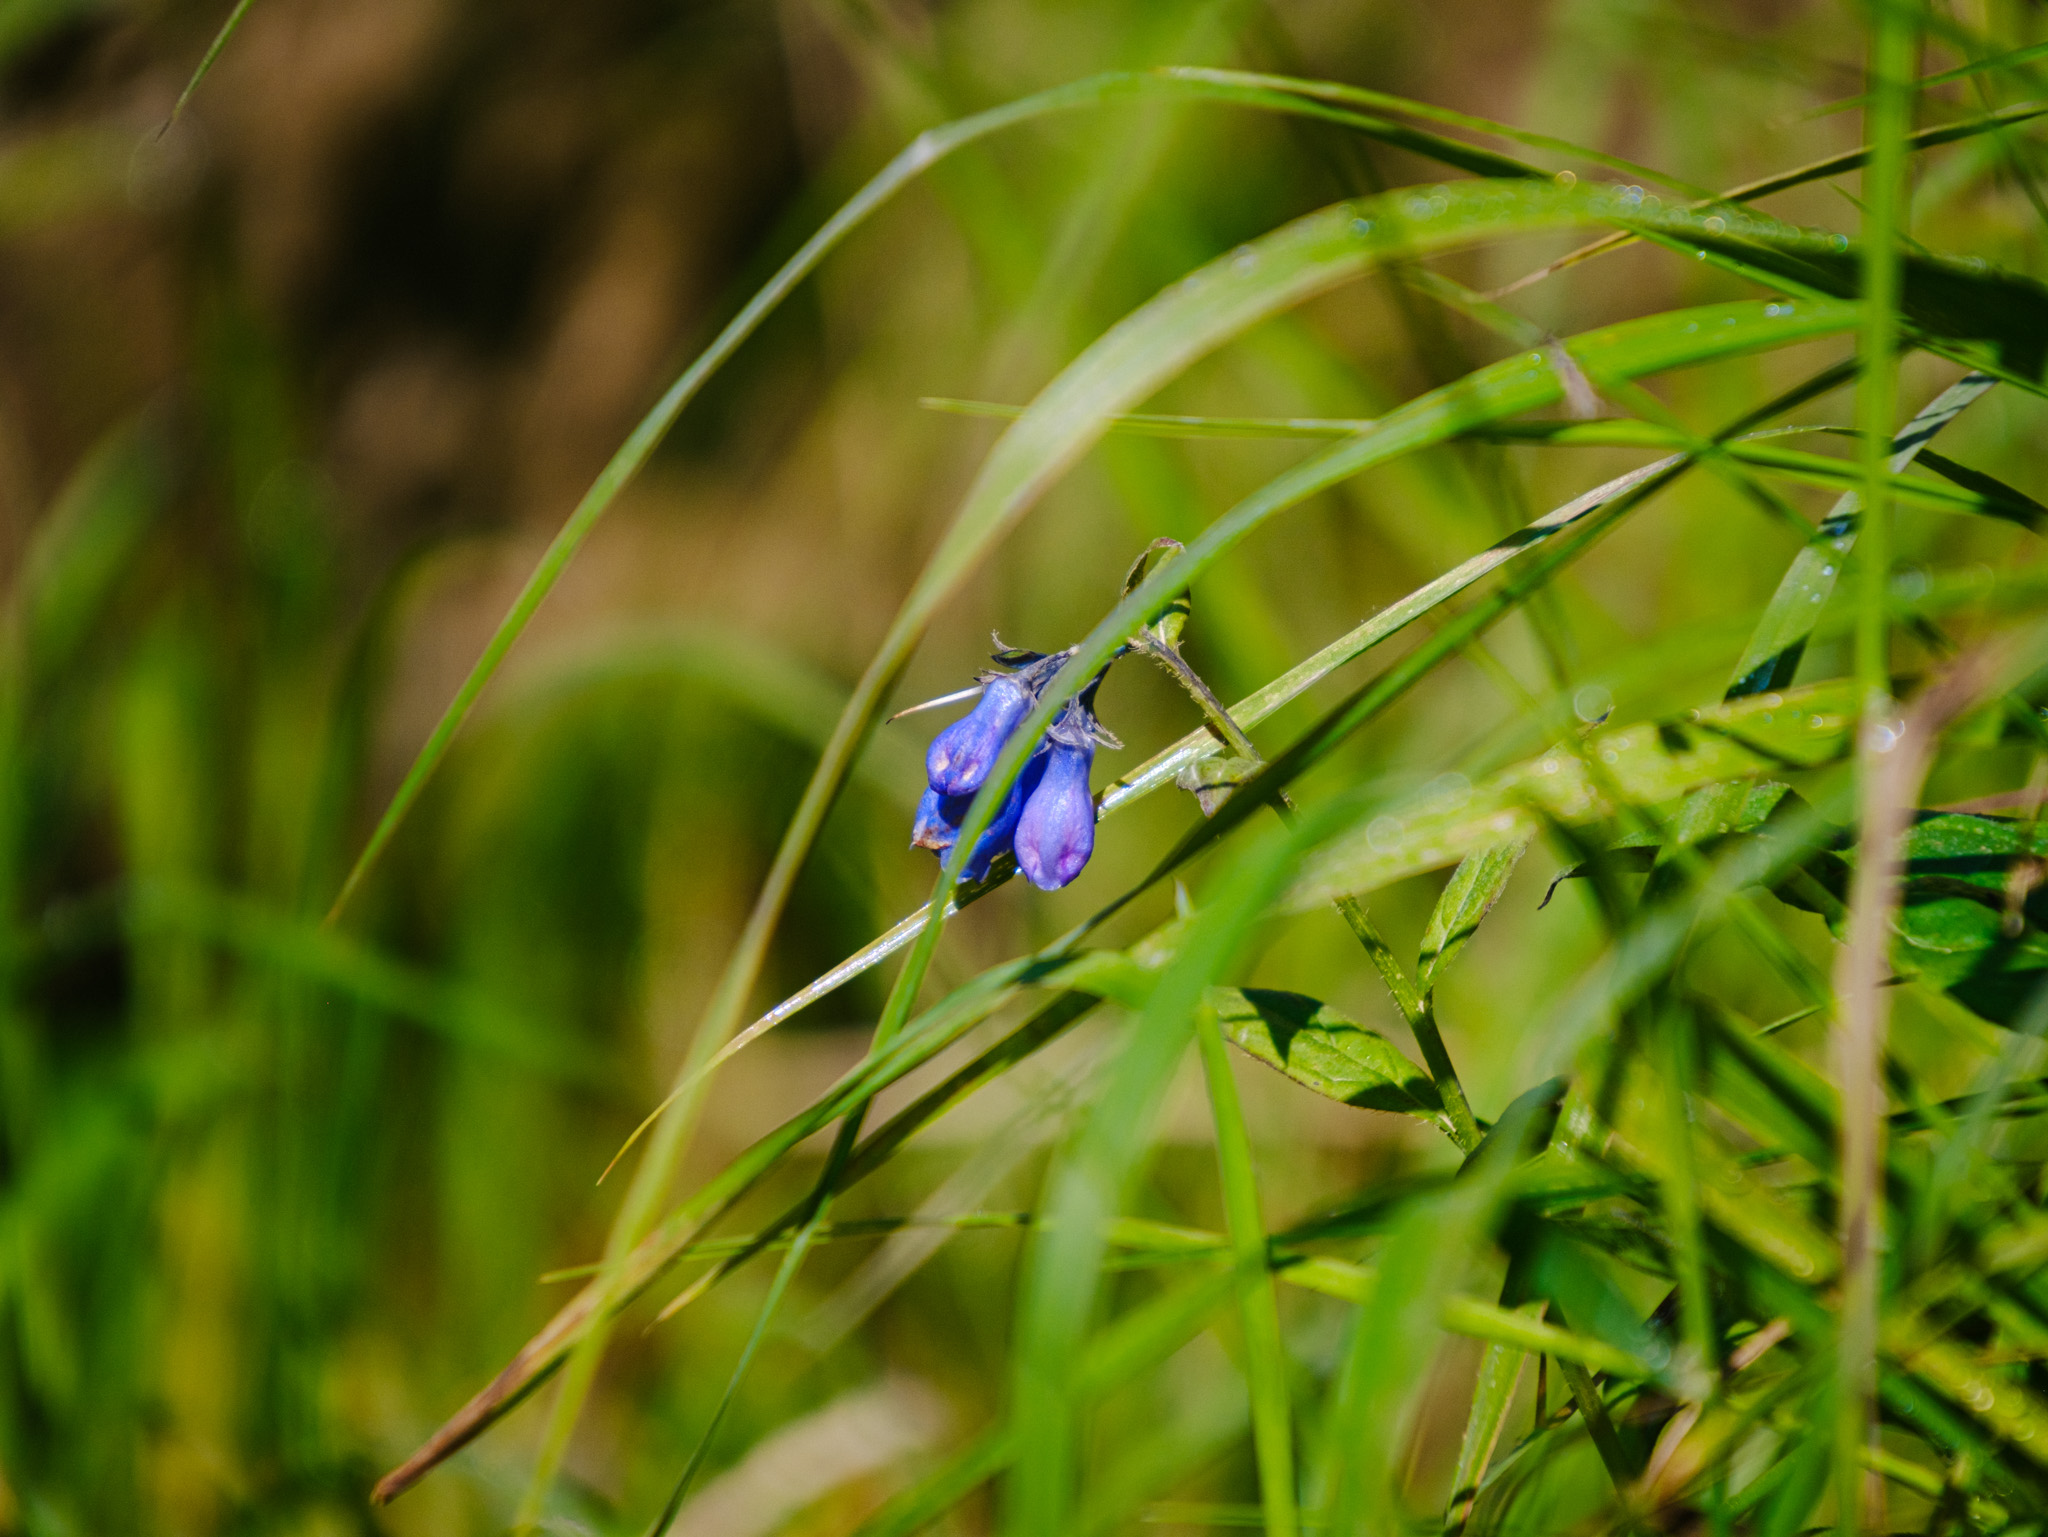
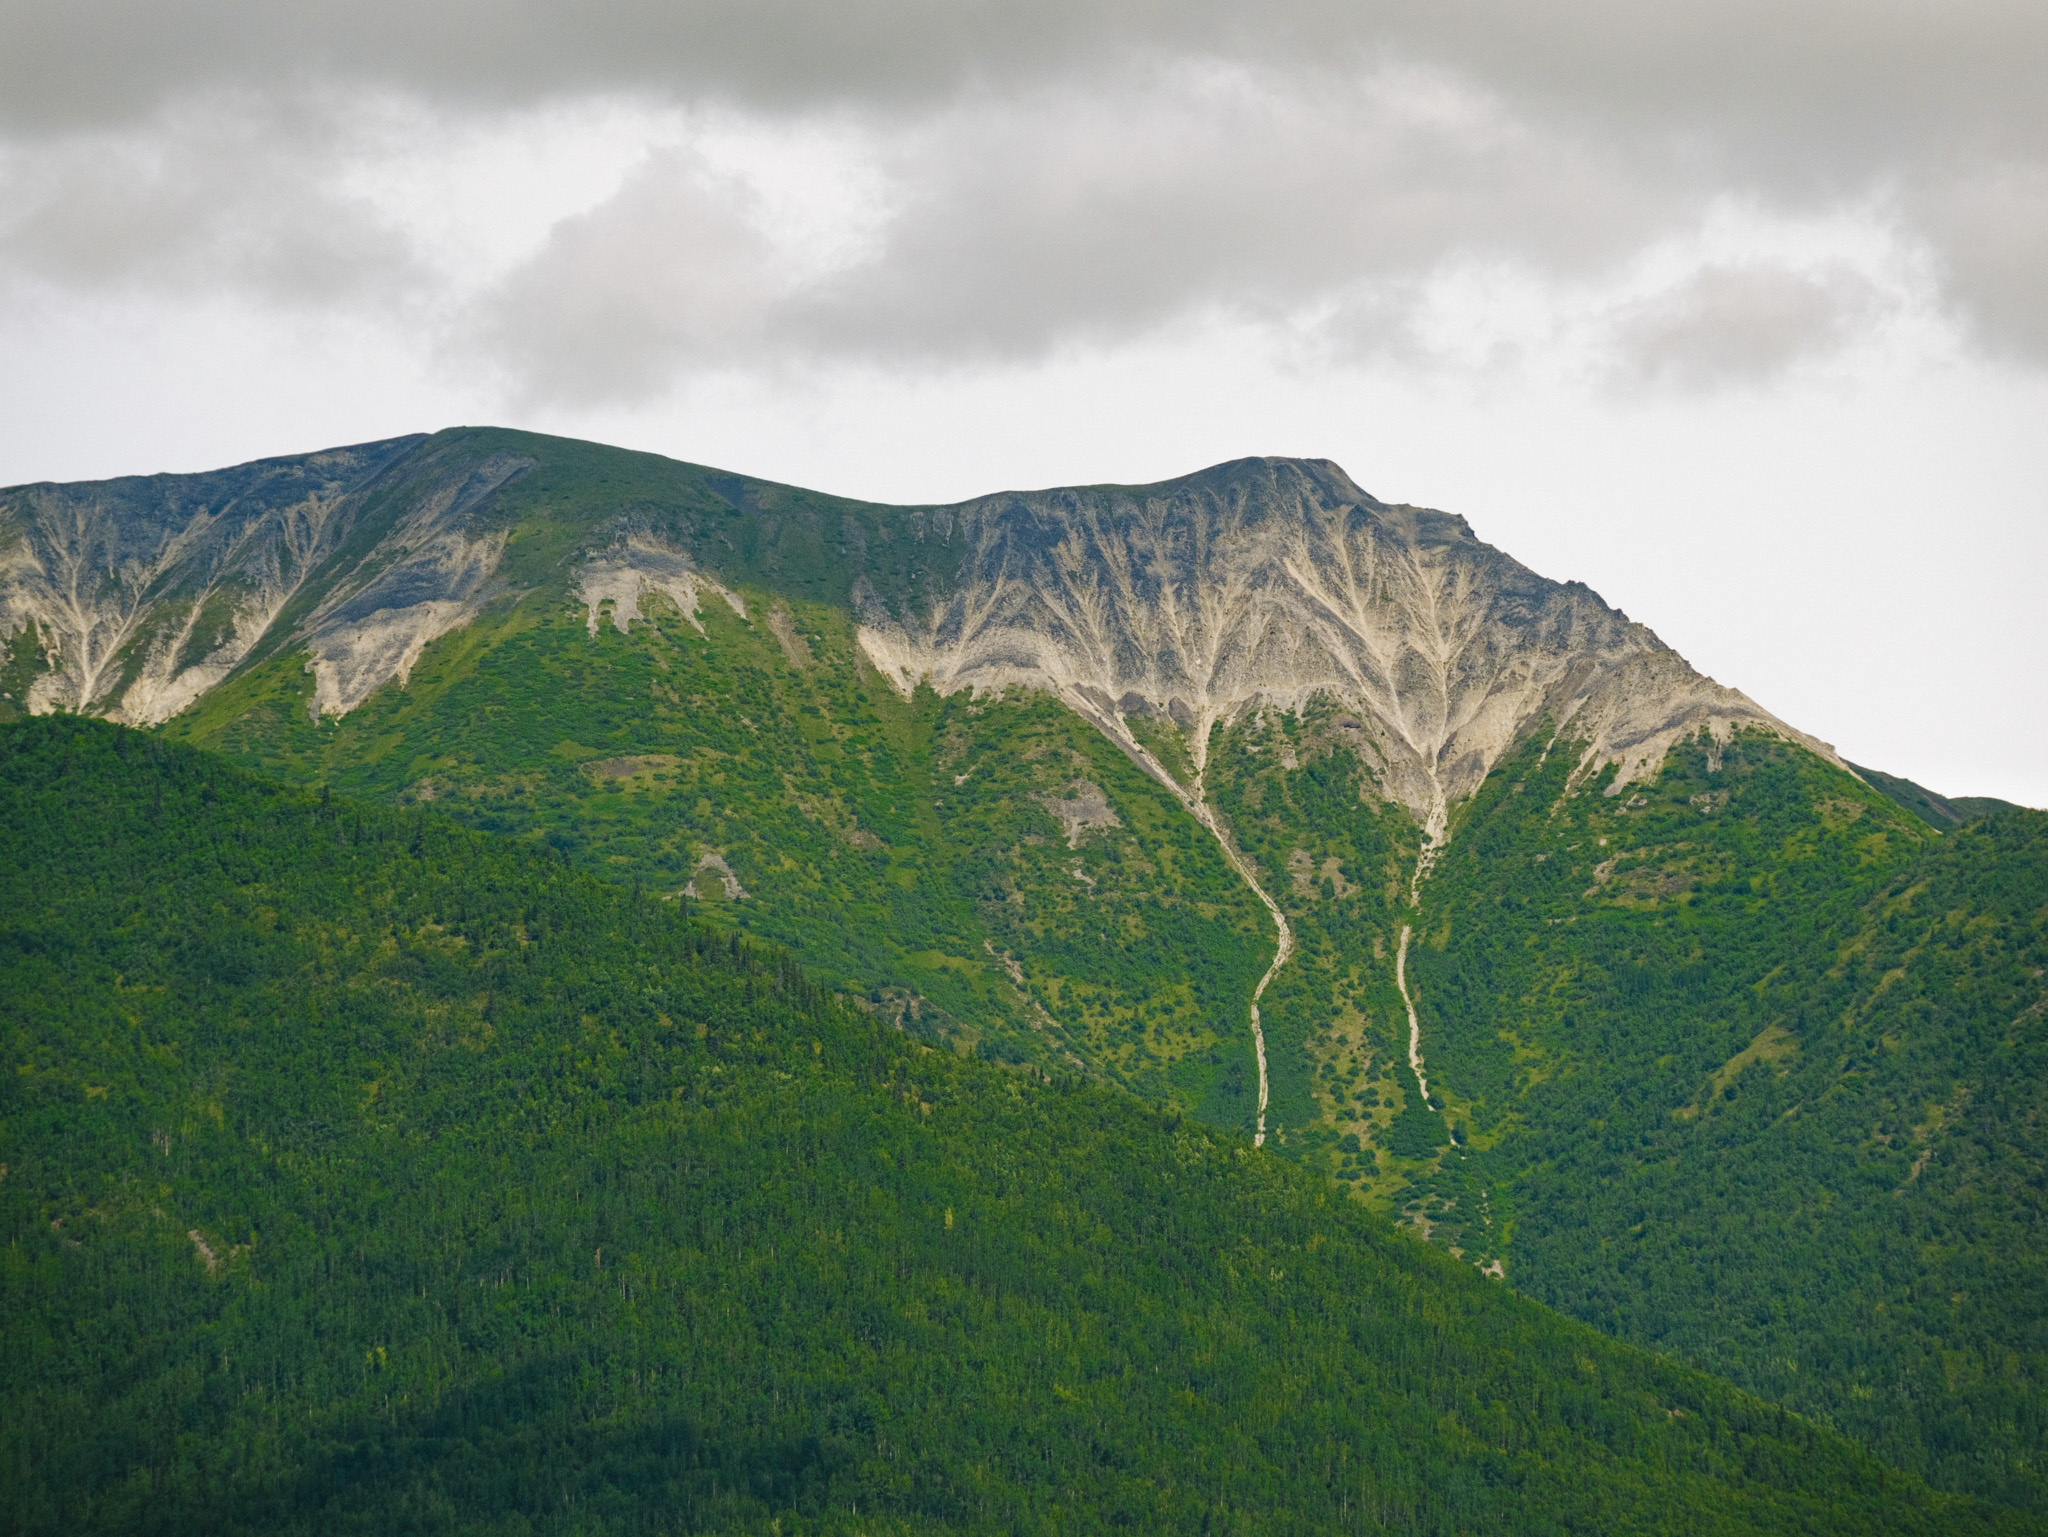
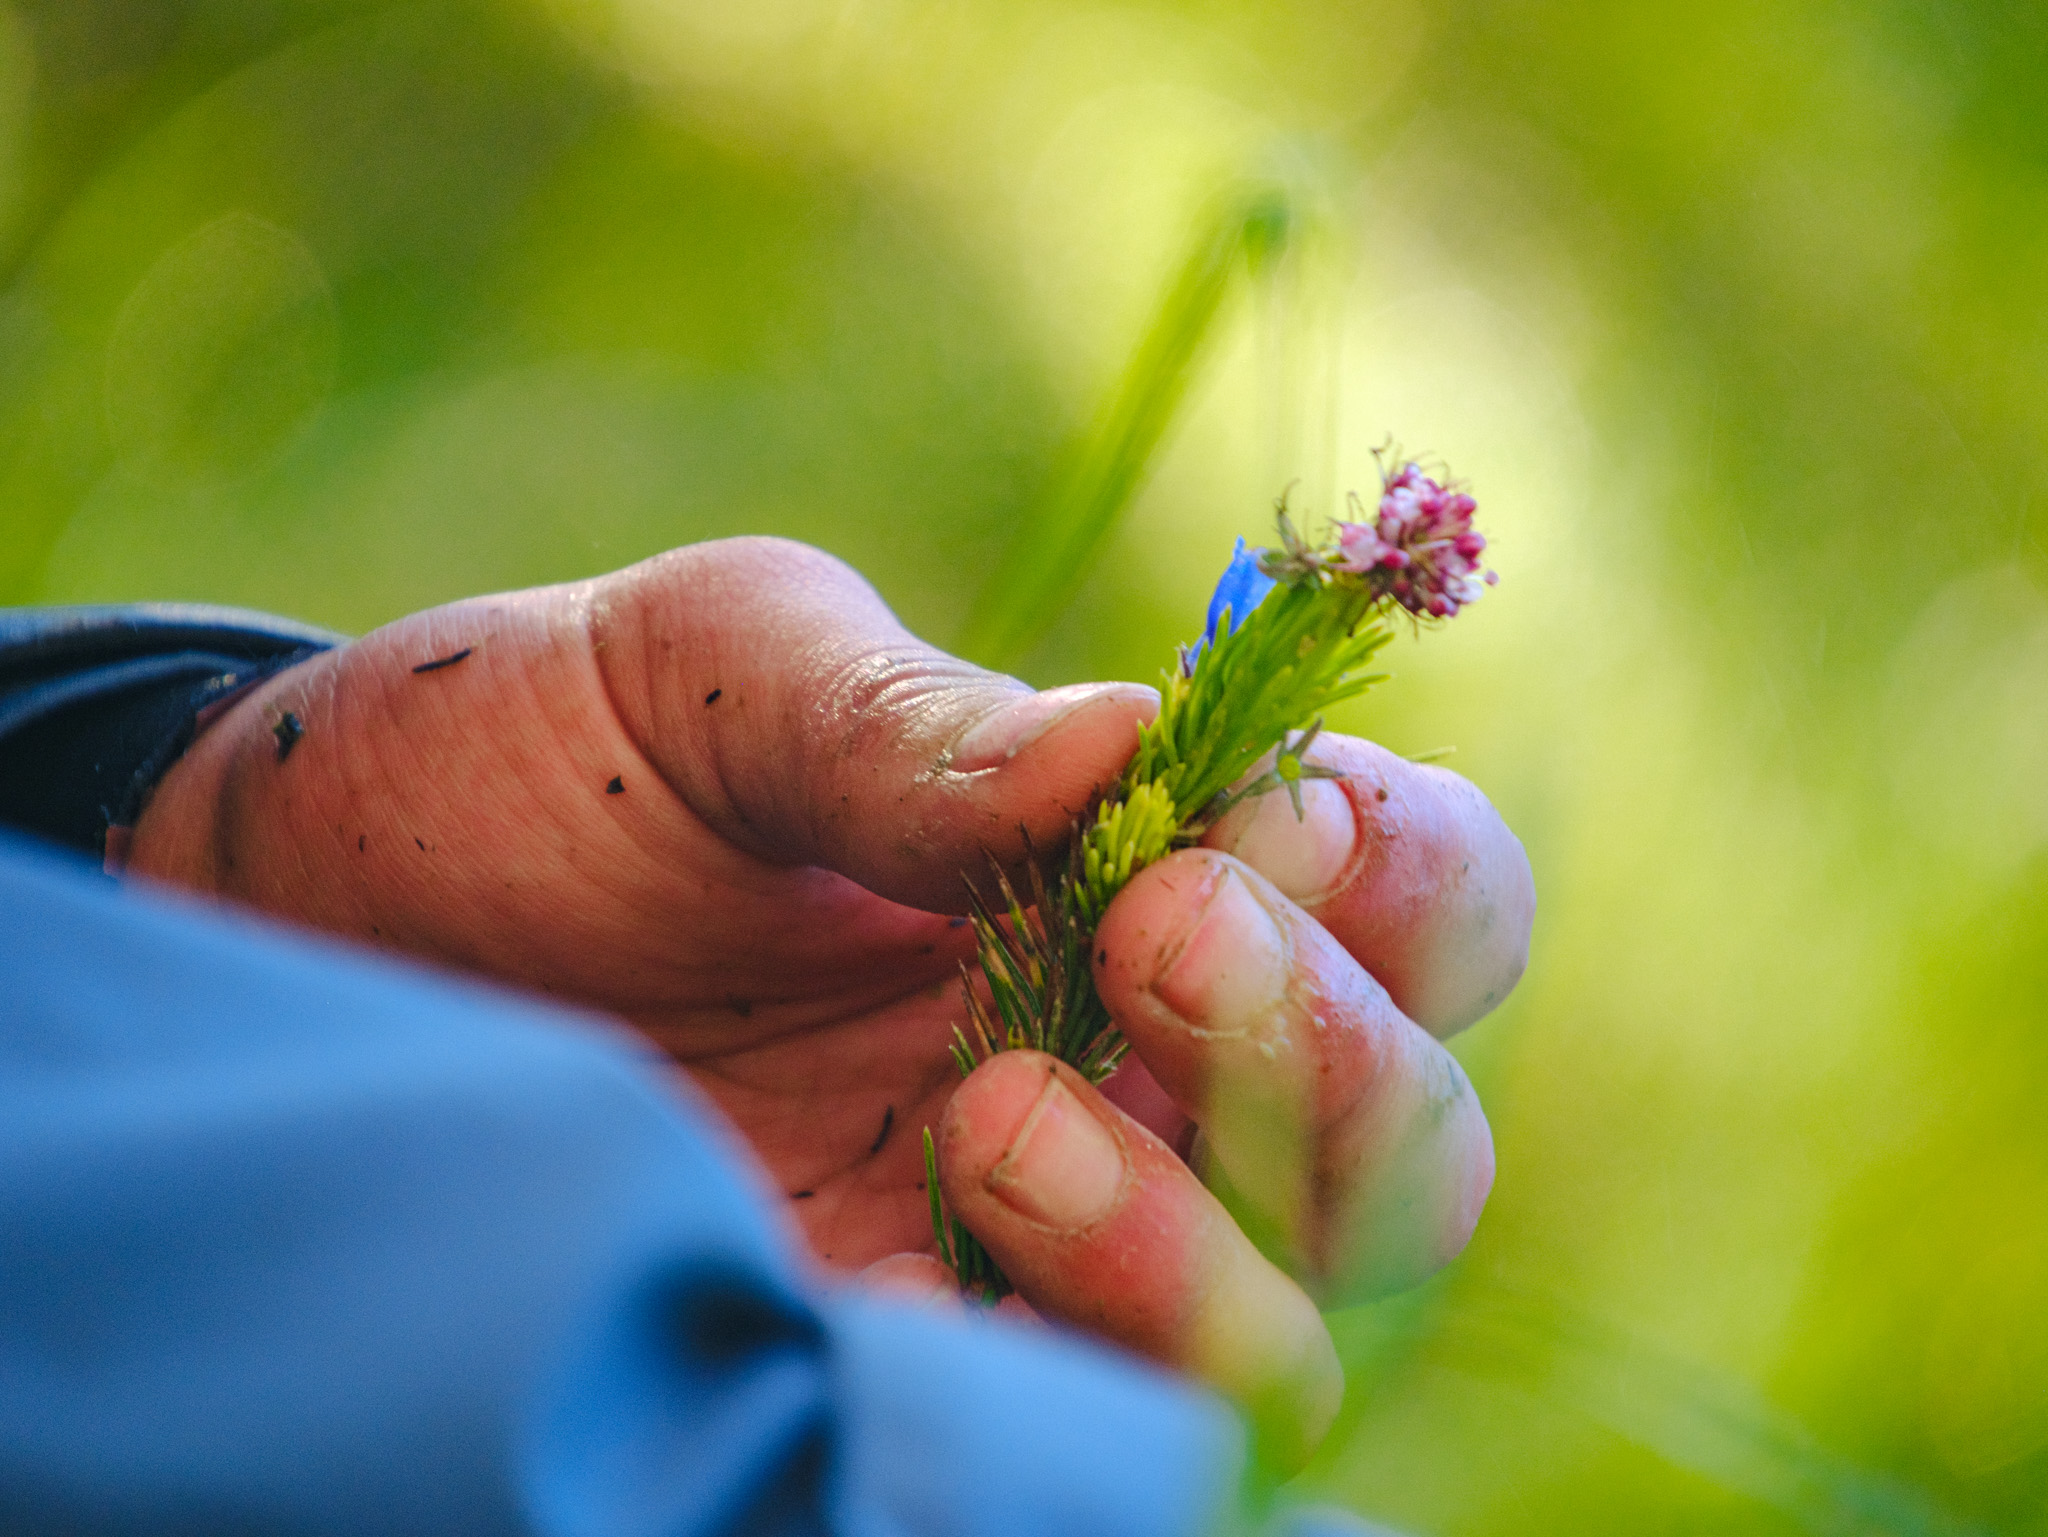
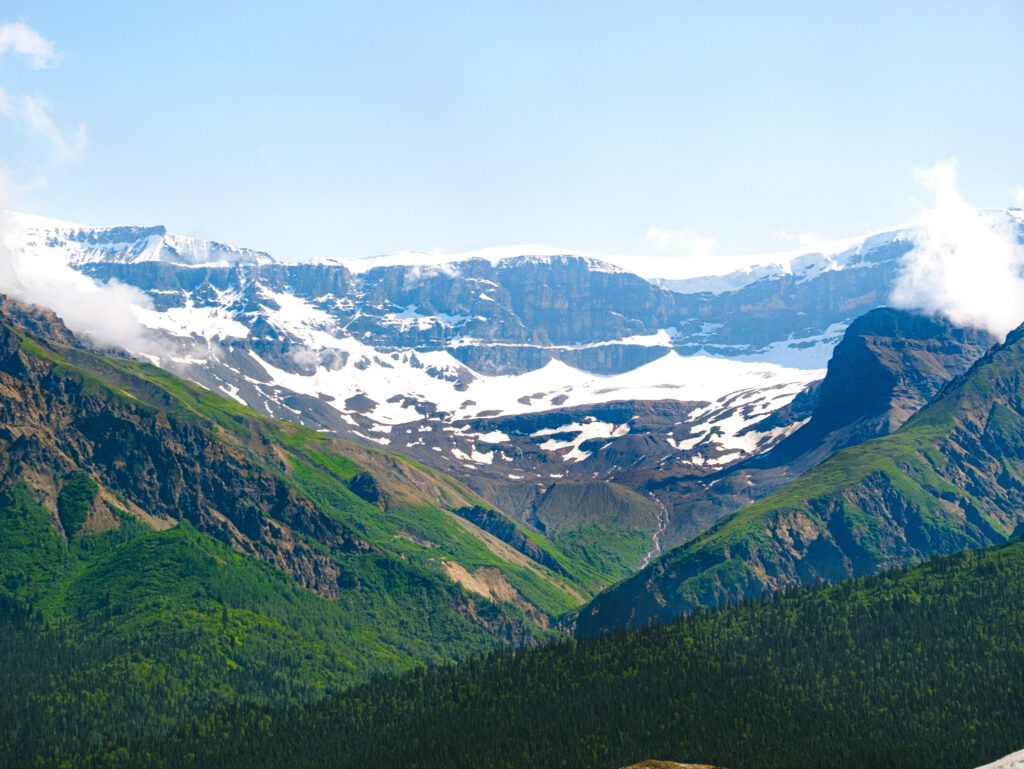
This travel gallery was captured during Devon’s summer trip with Brooklyn to Alaska, an organization dedicated to helping diverse youth from Brooklyn, New York experience a once-in-a-lifetime adventure in Alaska’s rugged natural environment. From climbing a glacier, to rafting down a rushing river, to sleeping in a tent under the stars, BK2AK helps close the gap to outdoor adventure by increasing access to the outdoors.
Sigma 16-300mm F3.5-6.7 DC OS | Contemporary Fujifilm X-H2 16mm, F5.6, 1/160s, ISO 400
Sigma 16-300mm F3.5-6.7 DC OS | Contemporary Fujifilm X-H2 16mm, F7.1, 1/125s, ISO 400Sigma 16-300mm F3.5-6.7 DC OS | Contemporary Fujifilm X-H2 86mm, F7.1, 1/125s, ISO 400
Sigma 16-300mm F3.5-6.7 DC OS | Contemporary Fujifilm X-H2 300mm, F6.7, 1/125s, ISO 400Sigma 16-300mm F3.5-6.7 DC OS | Contemporary Fujifilm X-H2 117mm, F7.1, 1/250s, ISO 400Sigma 16-300mm F3.5-6.7 DC OS | Contemporary Fujifilm X-H2 37mm, F7.1, 1/125s, ISO 400Sigma 16-300mm F3.5-6.7 DC OS | Contemporary Fujifilm X-H2 43mm, F7.1, 1/250s, ISO 400
Sigma 16-300mm F3.5-6.7 DC OS | Contemporary Fujifilm X-H2 92mm, F7.1, 1/125s, ISO 640Sigma 16-300mm F3.5-6.7 DC OS | Contemporary Fujifilm X-H2 300mm, F7.1, 1/125s, ISO 640
Sigma 16-300mm F3.5-6.7 DC OS | Contemporary Fujifilm X-H2 48mm, F6.3, 1/160s, ISO 800Sigma 16-300mm F3.5-6.7 DC OS | Contemporary Fujifilm X-H2 156mm, F6.3, 1/160s, ISO 800Sigma 16-300mm F3.5-6.7 DC OS | Contemporary Fujifilm X-H2 37mm, F7.1, 1/250s, ISO 400
Pack lighter and explore more.
About
Devon Smith Jr. is a Jamaican street and documentary photographer with roots in the Ocean Hill neighborhood of Brooklyn.
His photography captures the nuanced interactions between people and their environments, blending a deep respect for cultural storytelling with an eye for unique, spontaneous moments.
Devon’s inspiration to pursue photography came from his mentors at The Bklyn Combine, a community-focused collective he is actively involved with and collaborates with regularly. He also has a passion for landscape photography that was sparked during summers with his family in Manchester, Jamaica, where the rich cultural and historical layers of his heritage continue to influence his work.
Equipment used
EXPLORE MORE
Having versatile, reliable gear is critical for young filmmakers and photographers, and a single lens that can handle a variety of scenes is a smart option. Film student Sophia Chew discusses her favorite Sigma zoom lenses and how they fit her needs as a college undergrad.
In this photo gallery, photographer and video producer Nagamitsu Endo explores various peaceful locales in Maine, and captures the quiet beauty of nature along the way. These images are shot entirely on the Sigma BF camera along with the 35mm and 50mm F2 DG | Contemporary lenses.
If college students know anything, it is how to find products that give you a bang for your buck. Everything is an investment that takes serious consideration, and when it comes to cameras, you don’t want to take any chances. In my case, this comes in the form of finding lenses that are high-performing, versatile, and reliable.
A little background
I am a film production undergrad student at Chapman University, on track to pursue cinematography as my major emphasis. I didn’t always know I wanted to pursue film, but photography was a central part of my upbringing, and once I hit high school, I naturally became “the camera friend”.
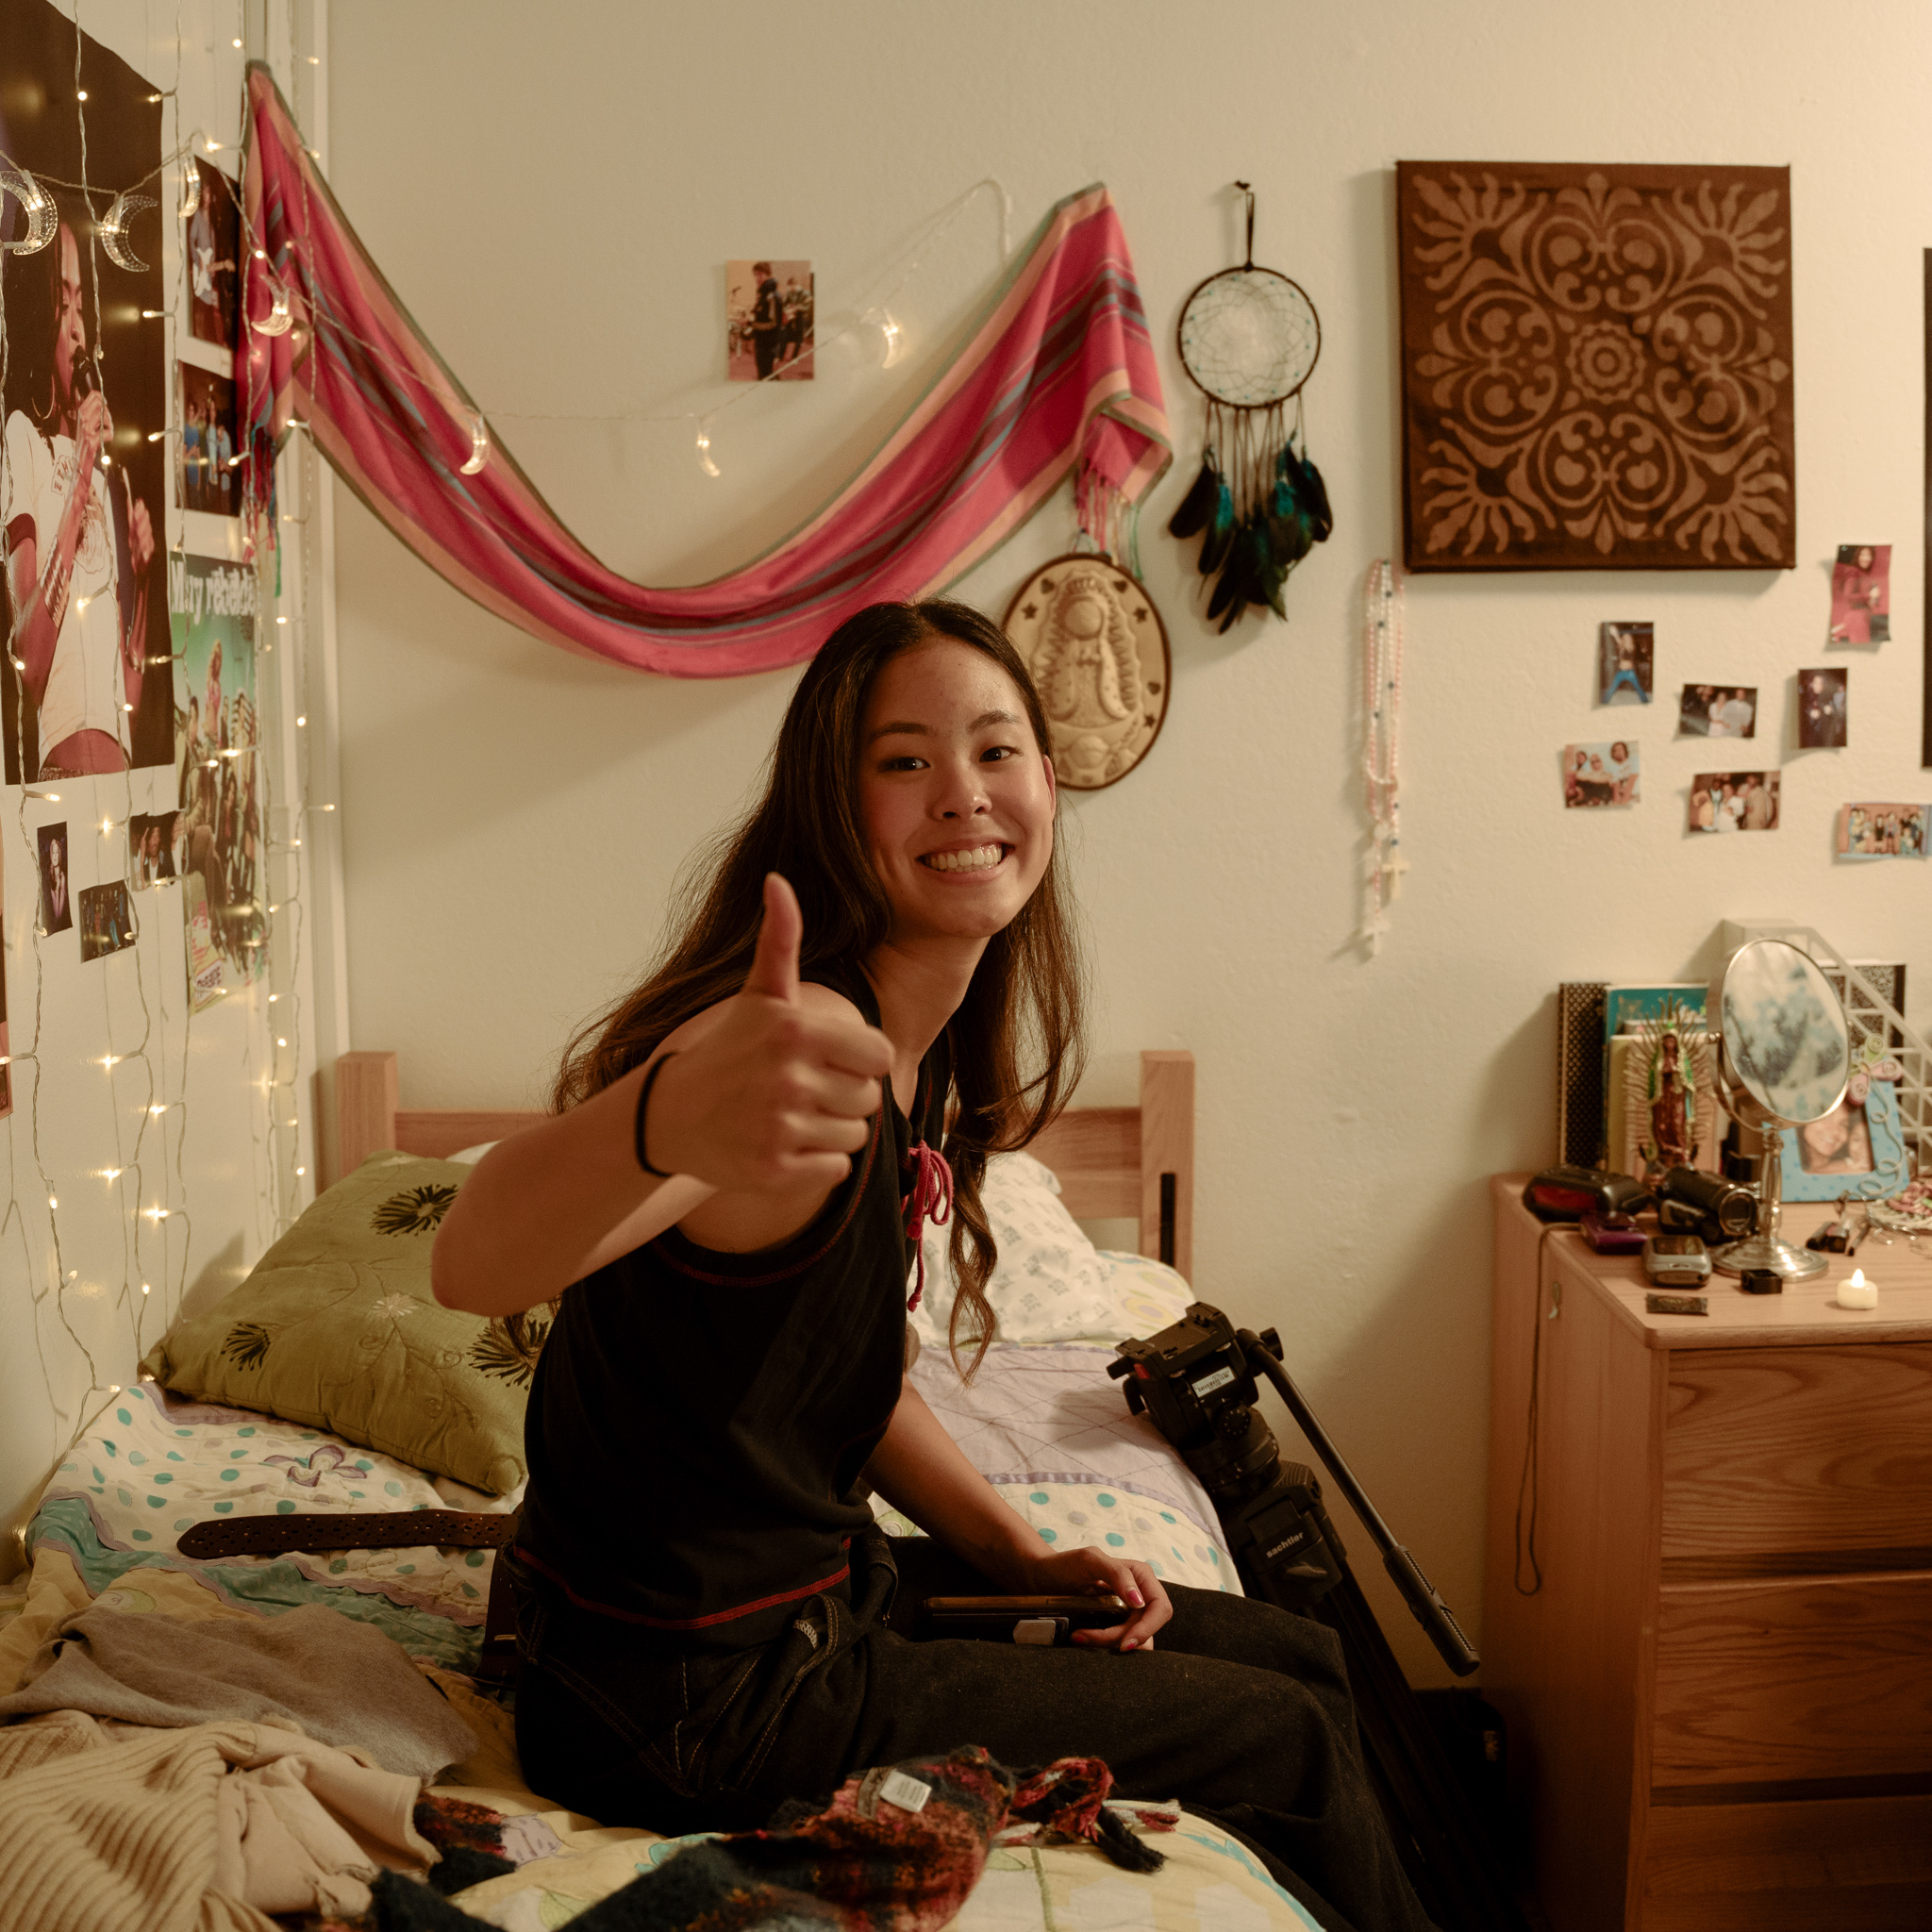
Chapman University film student (and Sigma Ambassador) Sophia Chew
Shooting in your dorm room is an essential part of the film student experience.
Outside of photography, I’ve directed and DP’d a handful of shorts and video projects, but some of the ones I’m proudest of are fan projects. Specifically, two films inspired by songs from Taylor Swift’s album Folklore – August (2024), and Betty (2023). Much of my work is inspired by books, music, and films I love, and I think my obsessions and phases add a personal touch to my work!
As a film student, your creative possibilities can feel limitless, but they can also feel intimidating. There are so many new things to learn, and it can be overwhelming. Thankfully, the safety net and supportive culture of my school program have offered a lot, and my Sigma lenses have been dependable additions to my kit and frequent topics of conversation on my sets.
My go-to gear
Student films and fan projects often operate on strict and fast schedules, which leads me to reach for my zoom lenses more often in order to optimize time. My favorite lenses (at the moment) are the Sigma 28-70mm F2.8 DG DN | Contemporary and the 28-105mm F2.8 DG DN | Art.
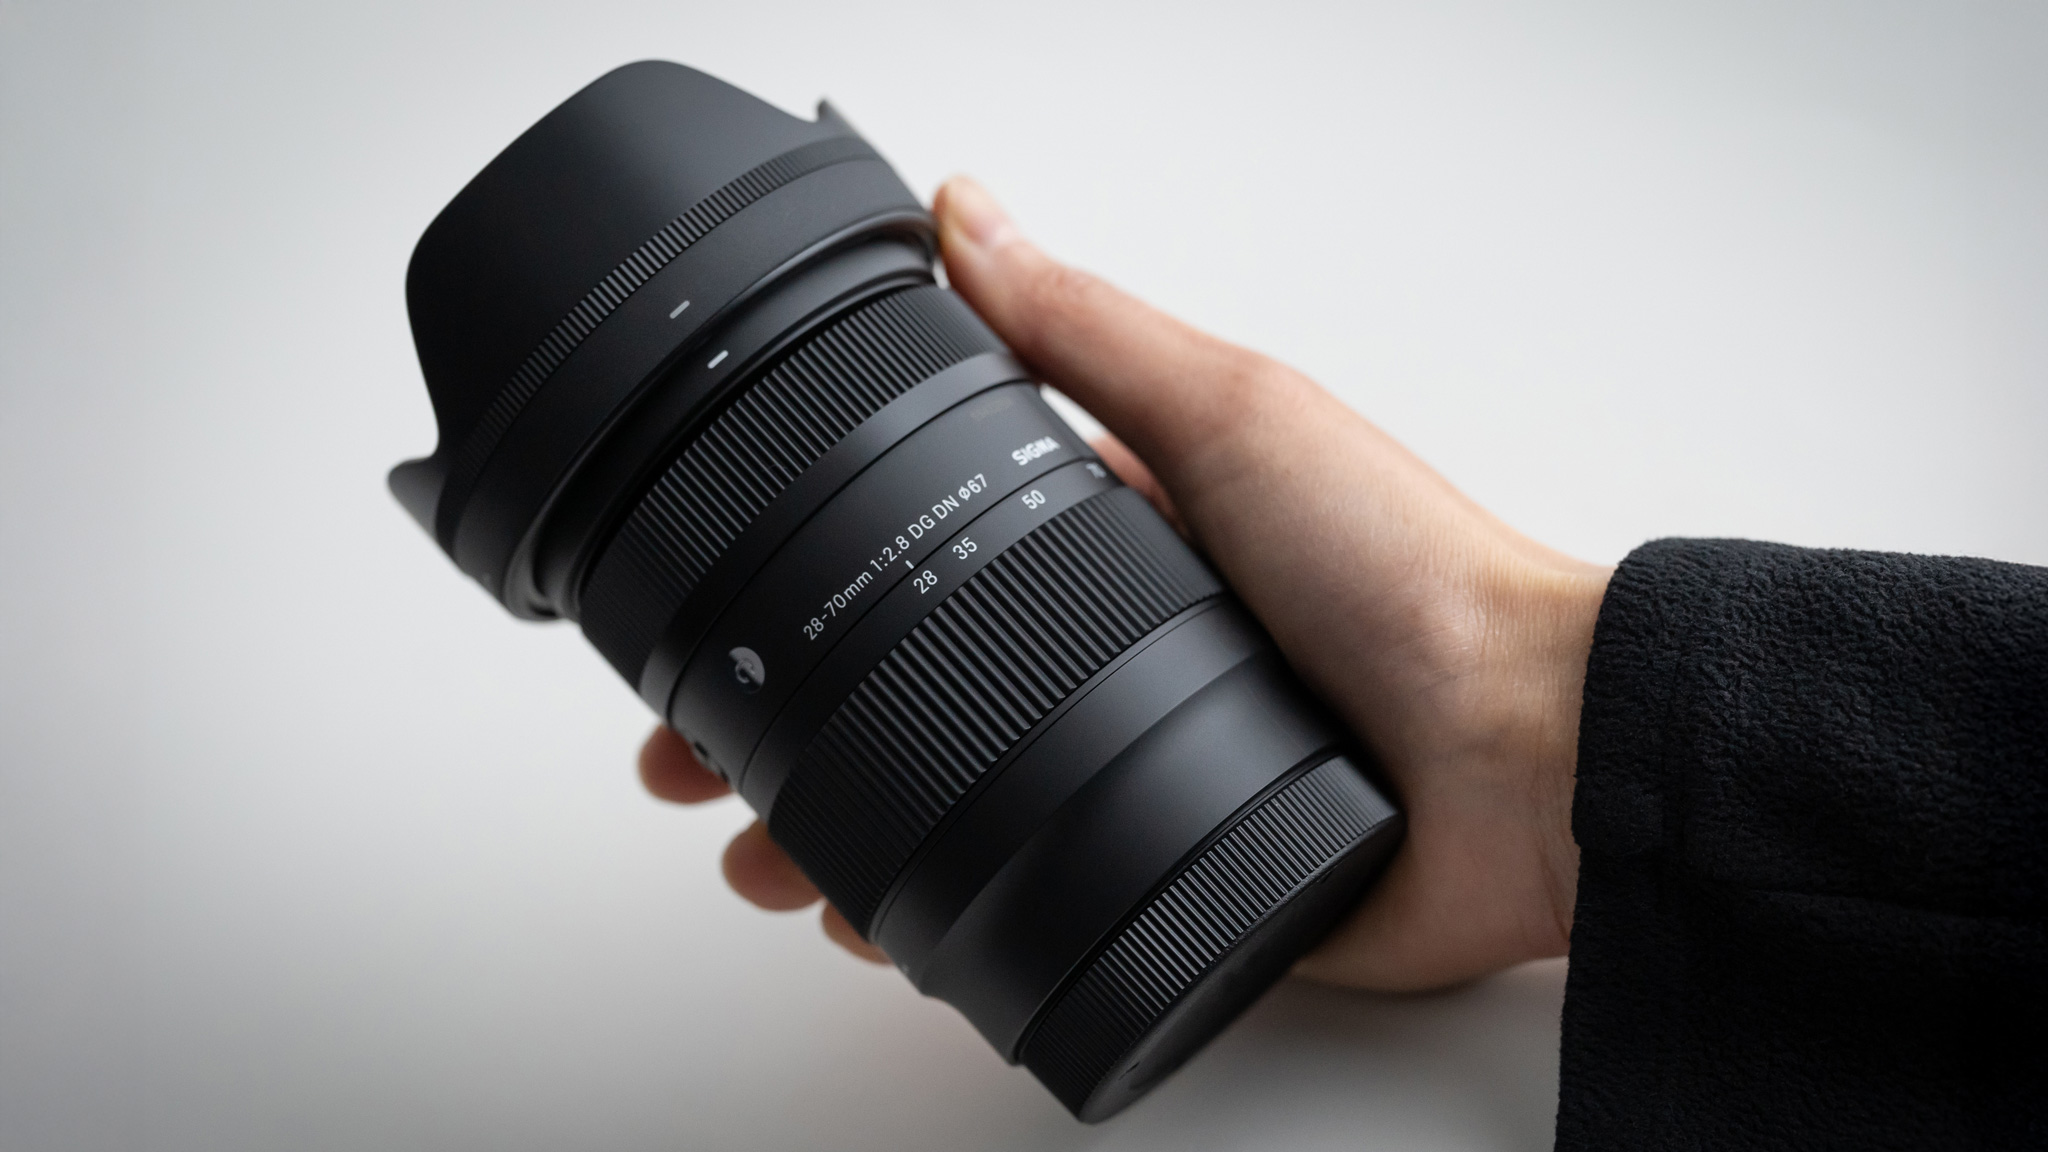
28-70mm F2.8 DG DN | Contemporary
The 28-70mm F2.8 DG DN | Contemporary has been perfect for photography and video shoots on location. As one of most compact full-frame zoom lenses available, the small size makes it perfect to travel with, and the light weight allows for fast setups and efficient shot execution. I feel confident with my close-ups and my portraits. I put a Pro Mist diffusion filter on the end, and love the freedom to construct the look of my images off Sigma’s clean lens builds.
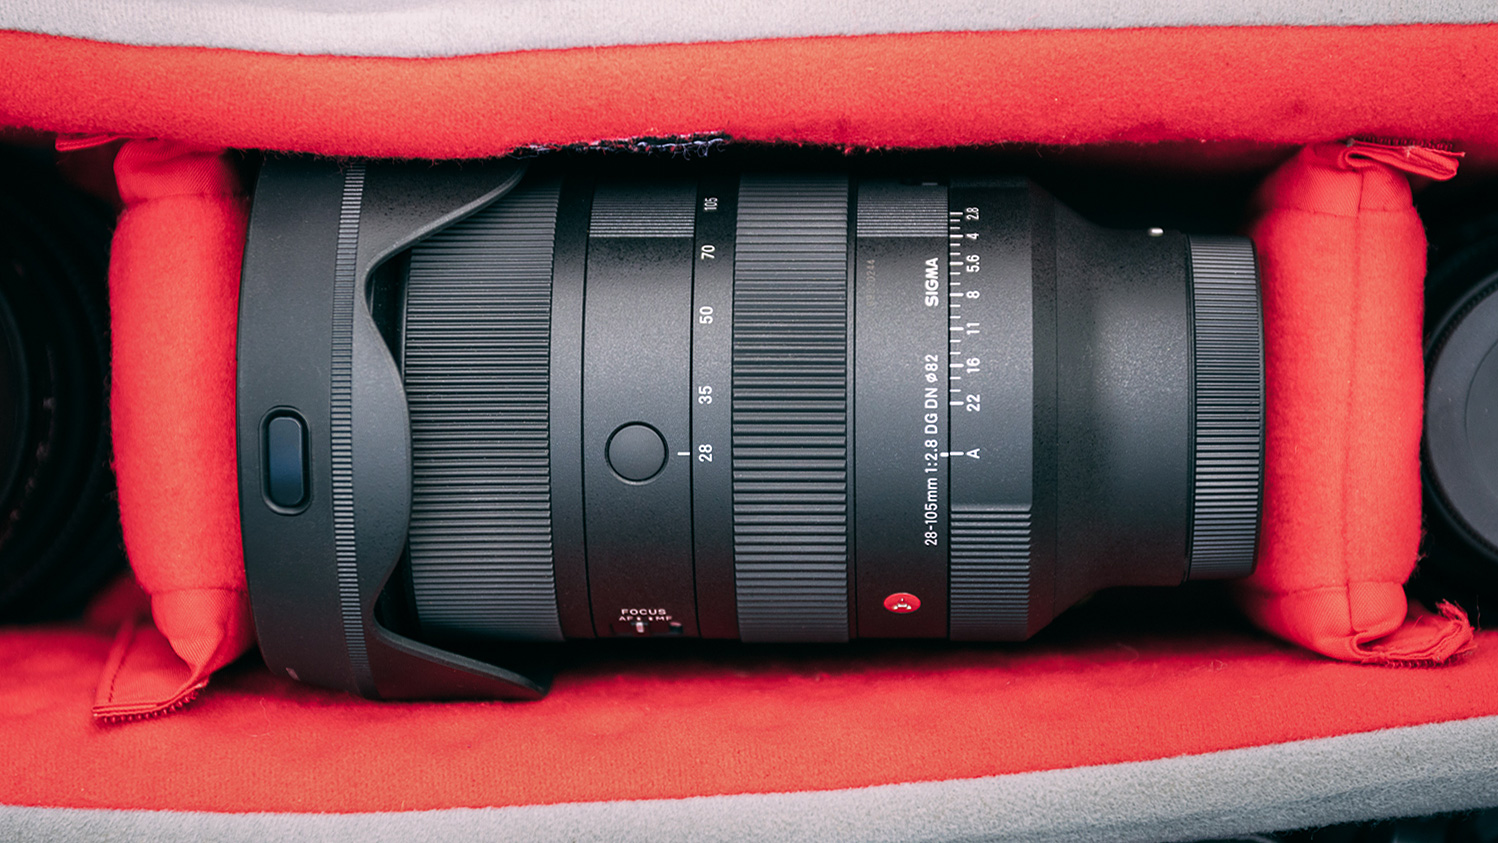
28-105mm F2.8 DG DN | Art
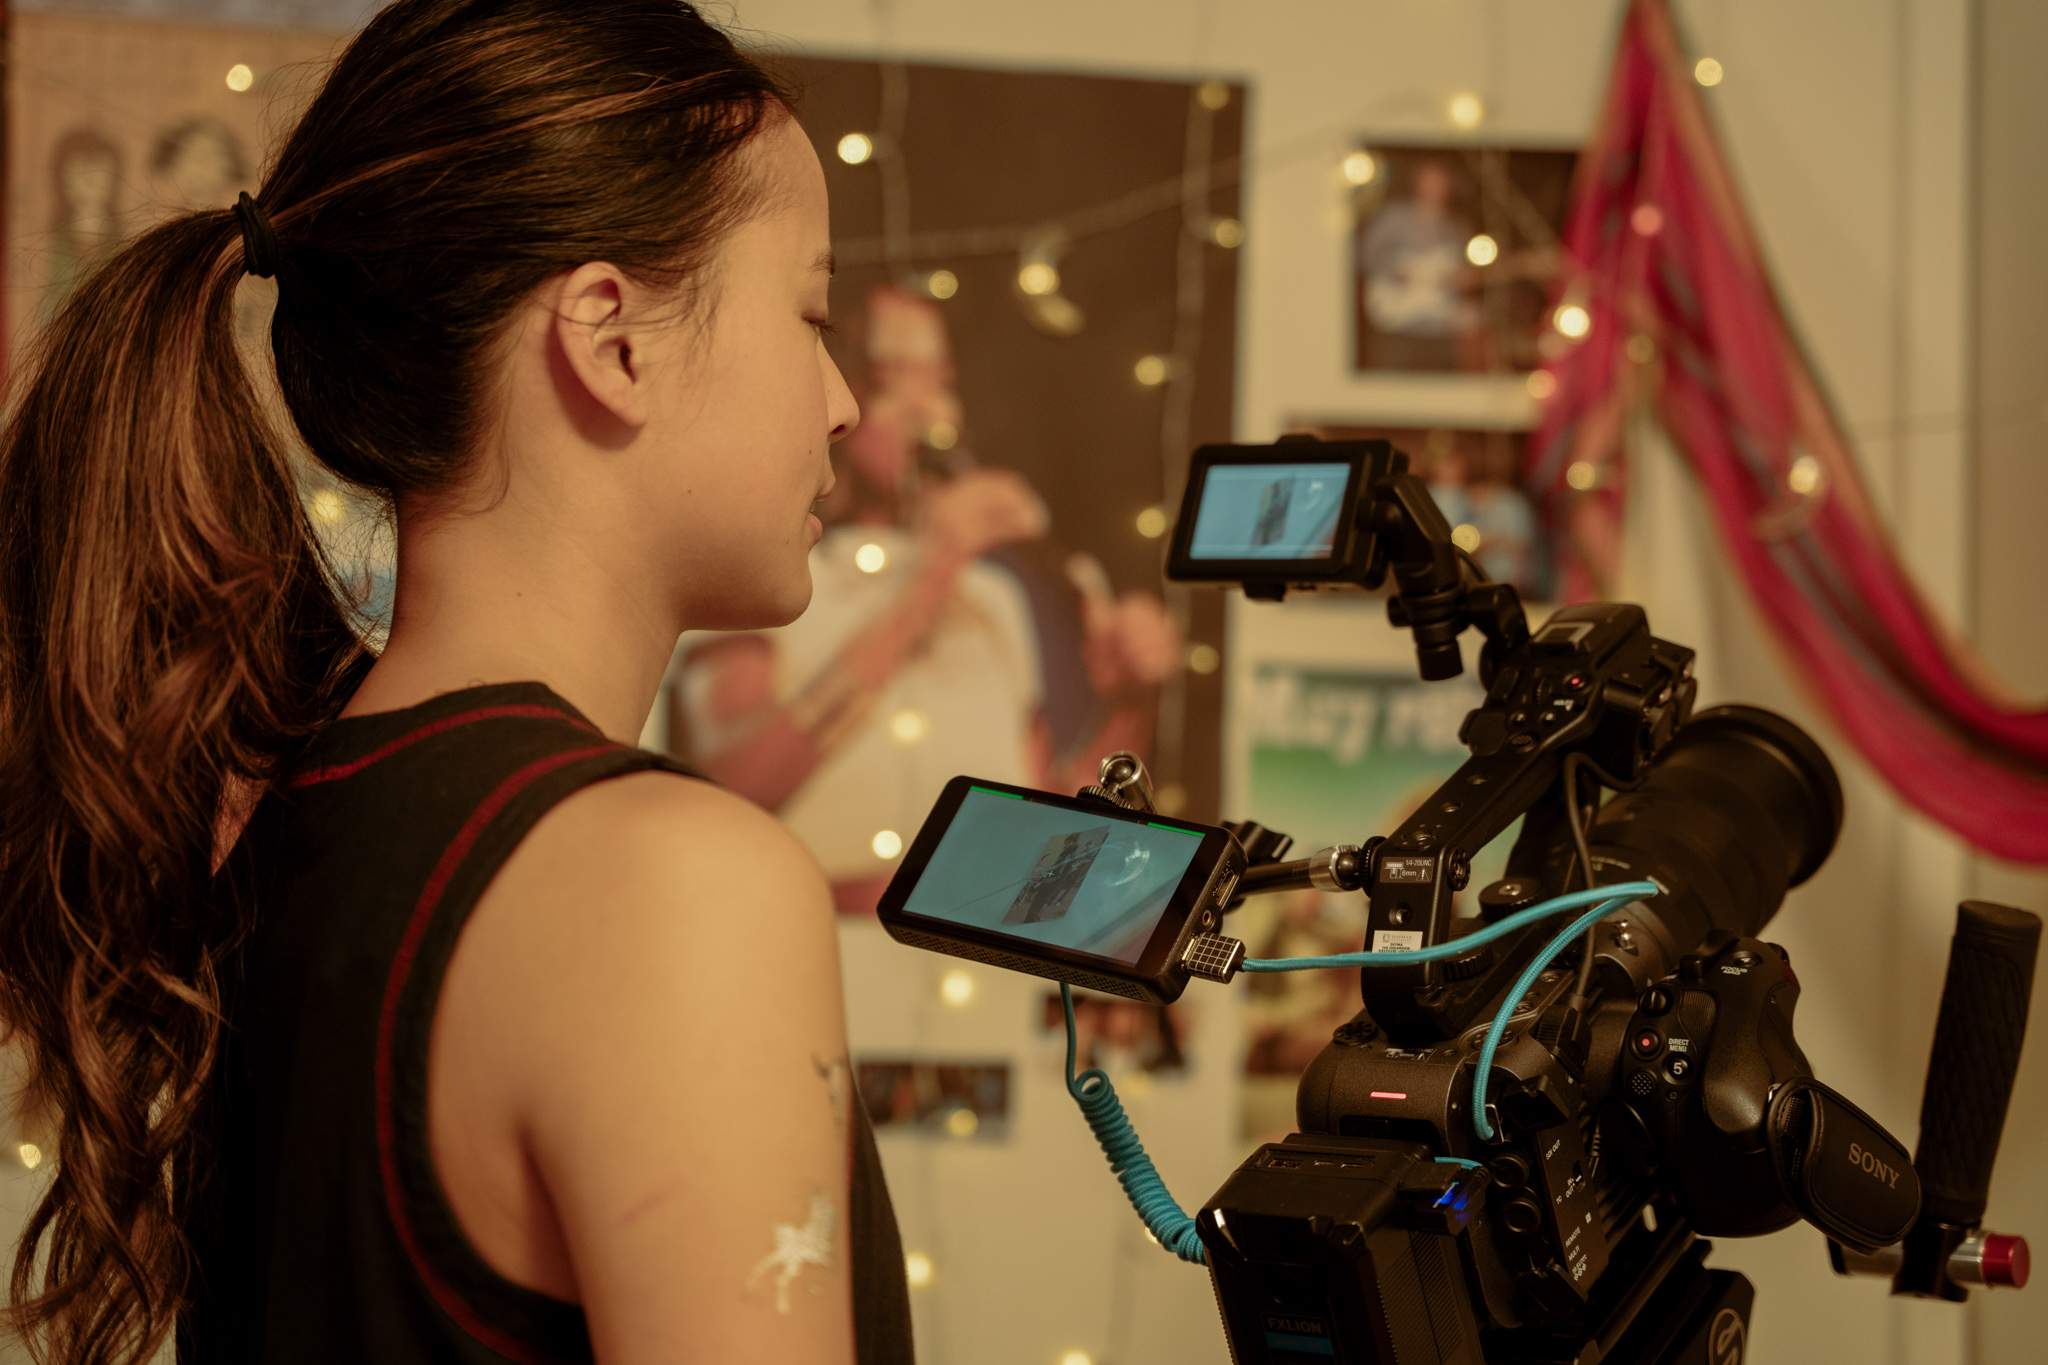
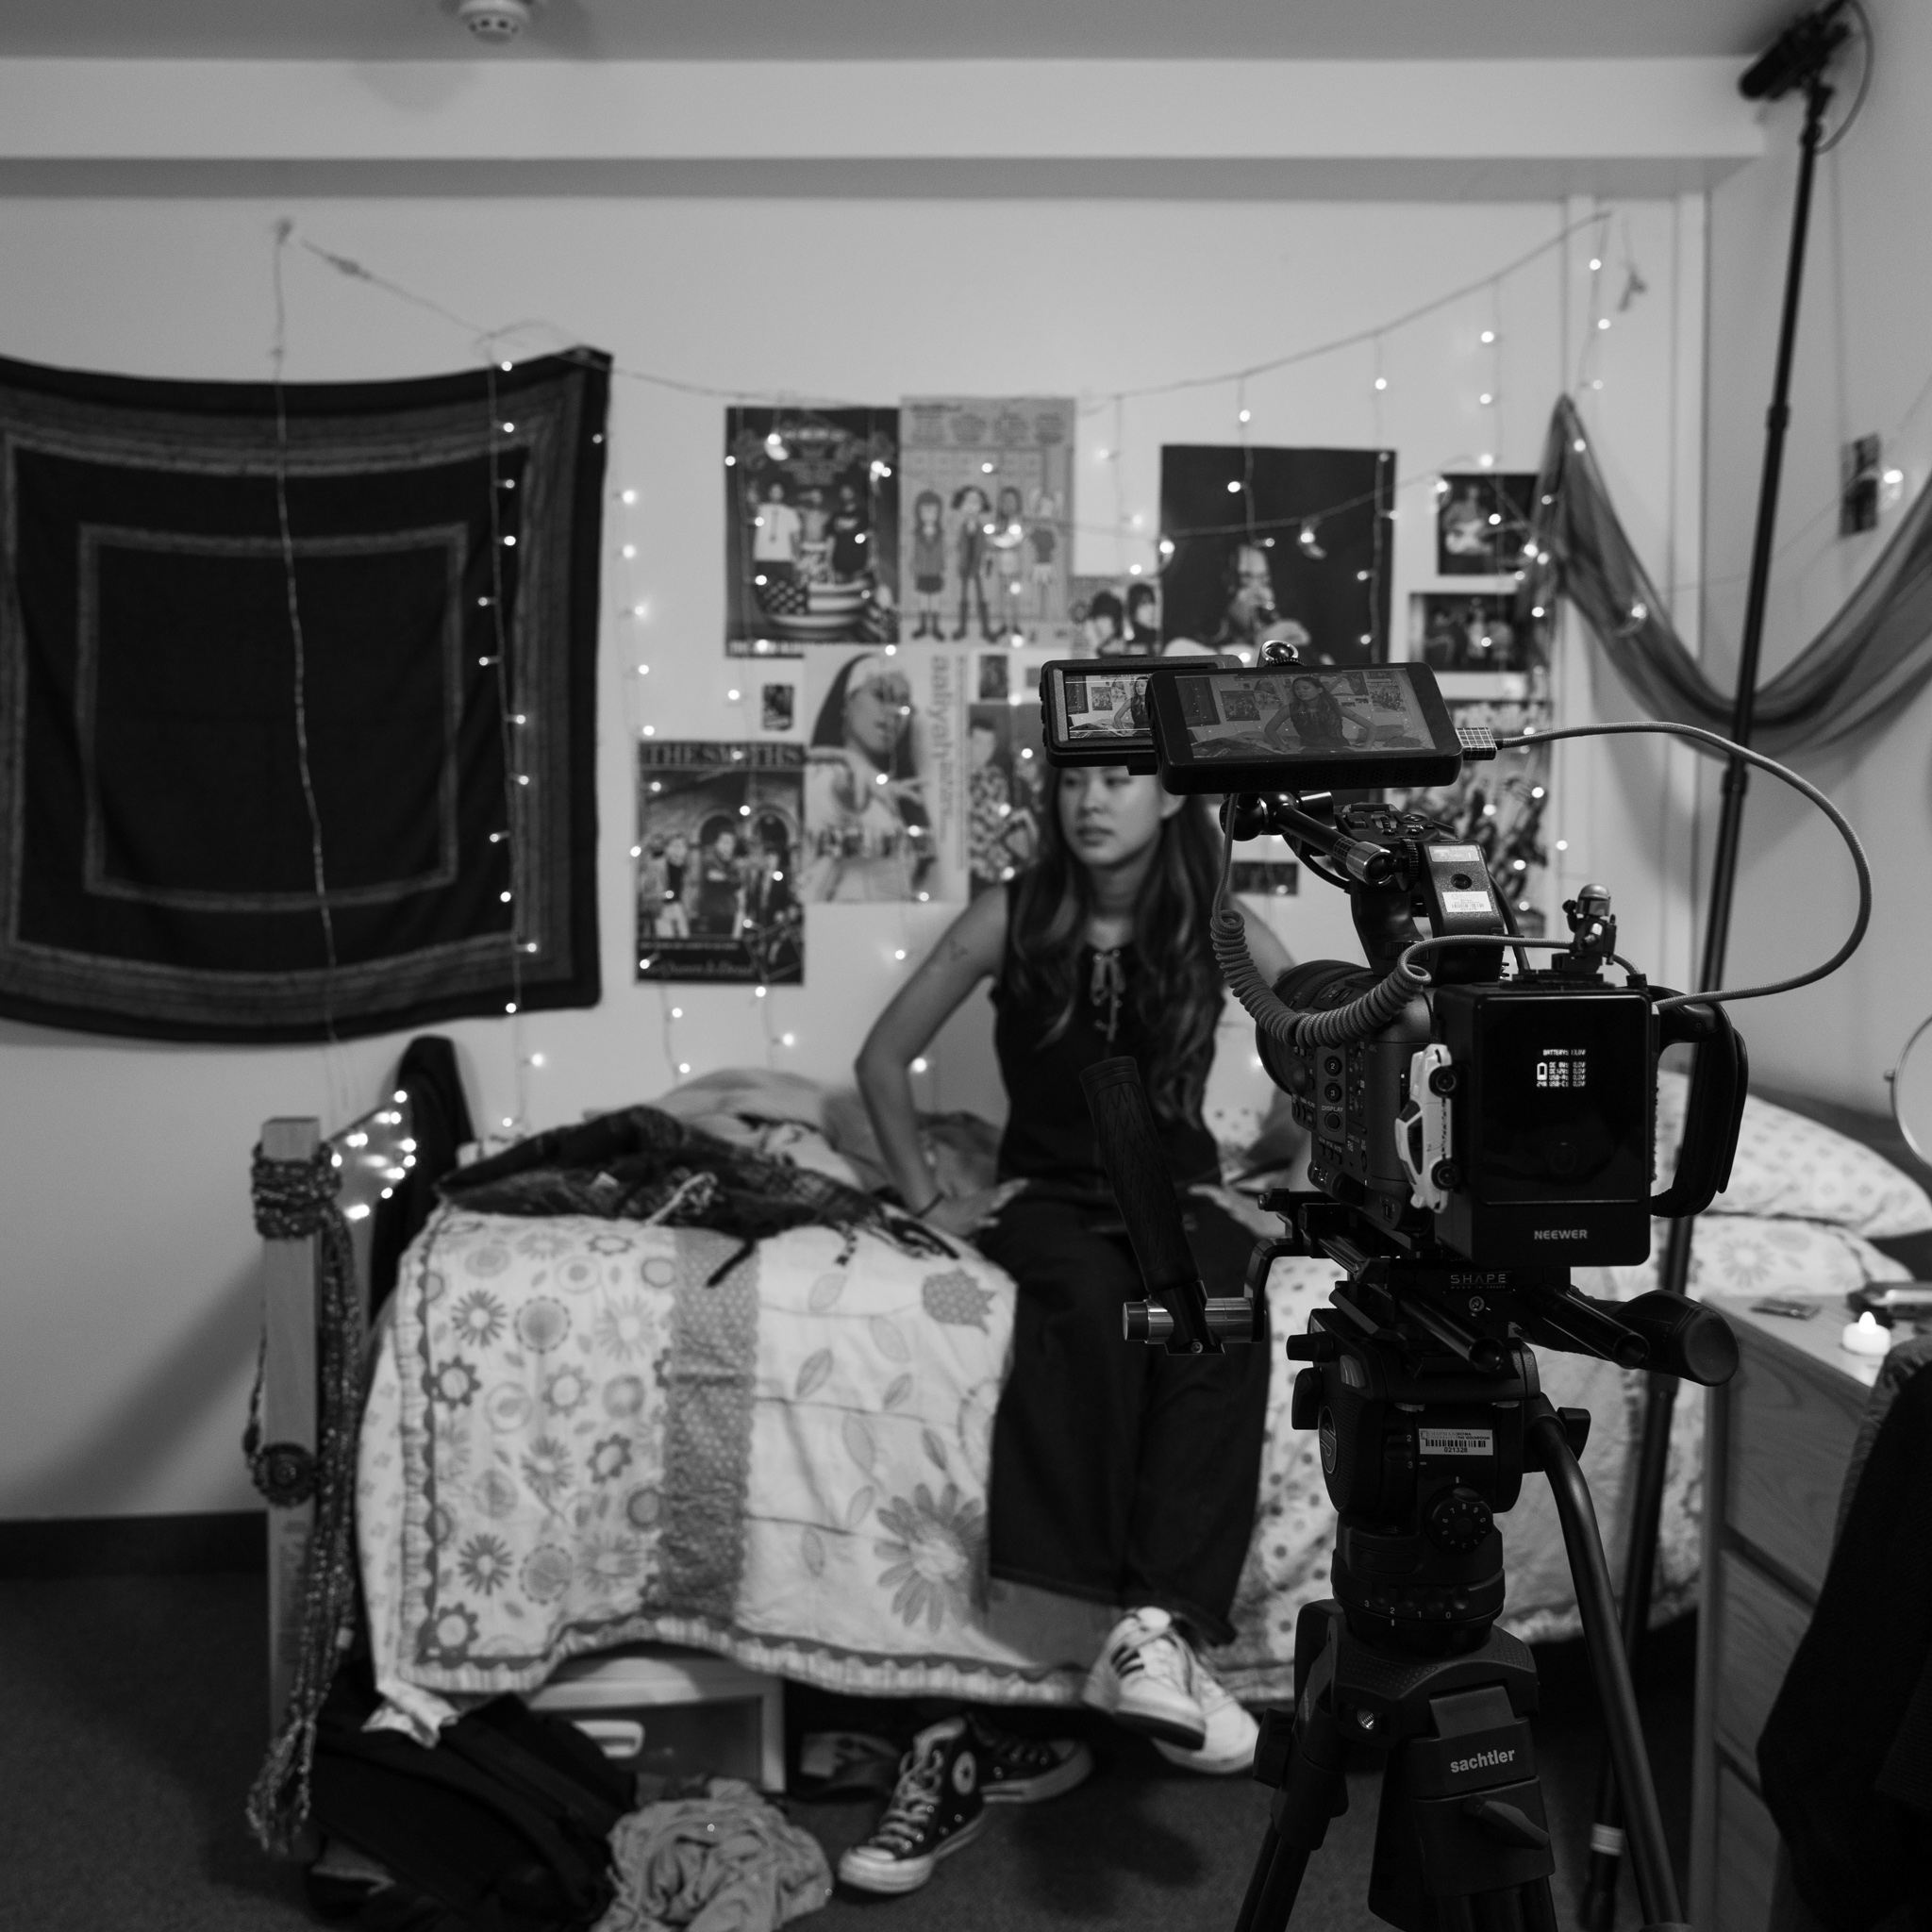
The addition of the 28-105mm F2.8 DG DN | Art to my kit has been game-changing. I recently shot a short film for one of my director friends on the Sony FX6. We shot a simple dialogue scene in an small bedroom. It was a tight fit and I needed a solid range to cover all the shots we needed. The 28mm focal length was ideal for the establishing shot, and as we get closer to the characters in the scene, the 80-105mm range was ideal for capturing their emotions and progressing dynamics. I threw in a few handheld shots when both characters started stressing about their parents coming home. One of them dives under the bed and hides, and this lens could capture all of it!
This location was tiny, cramped, and dim – but the Sigma 28-105mm was able to handle every shot.
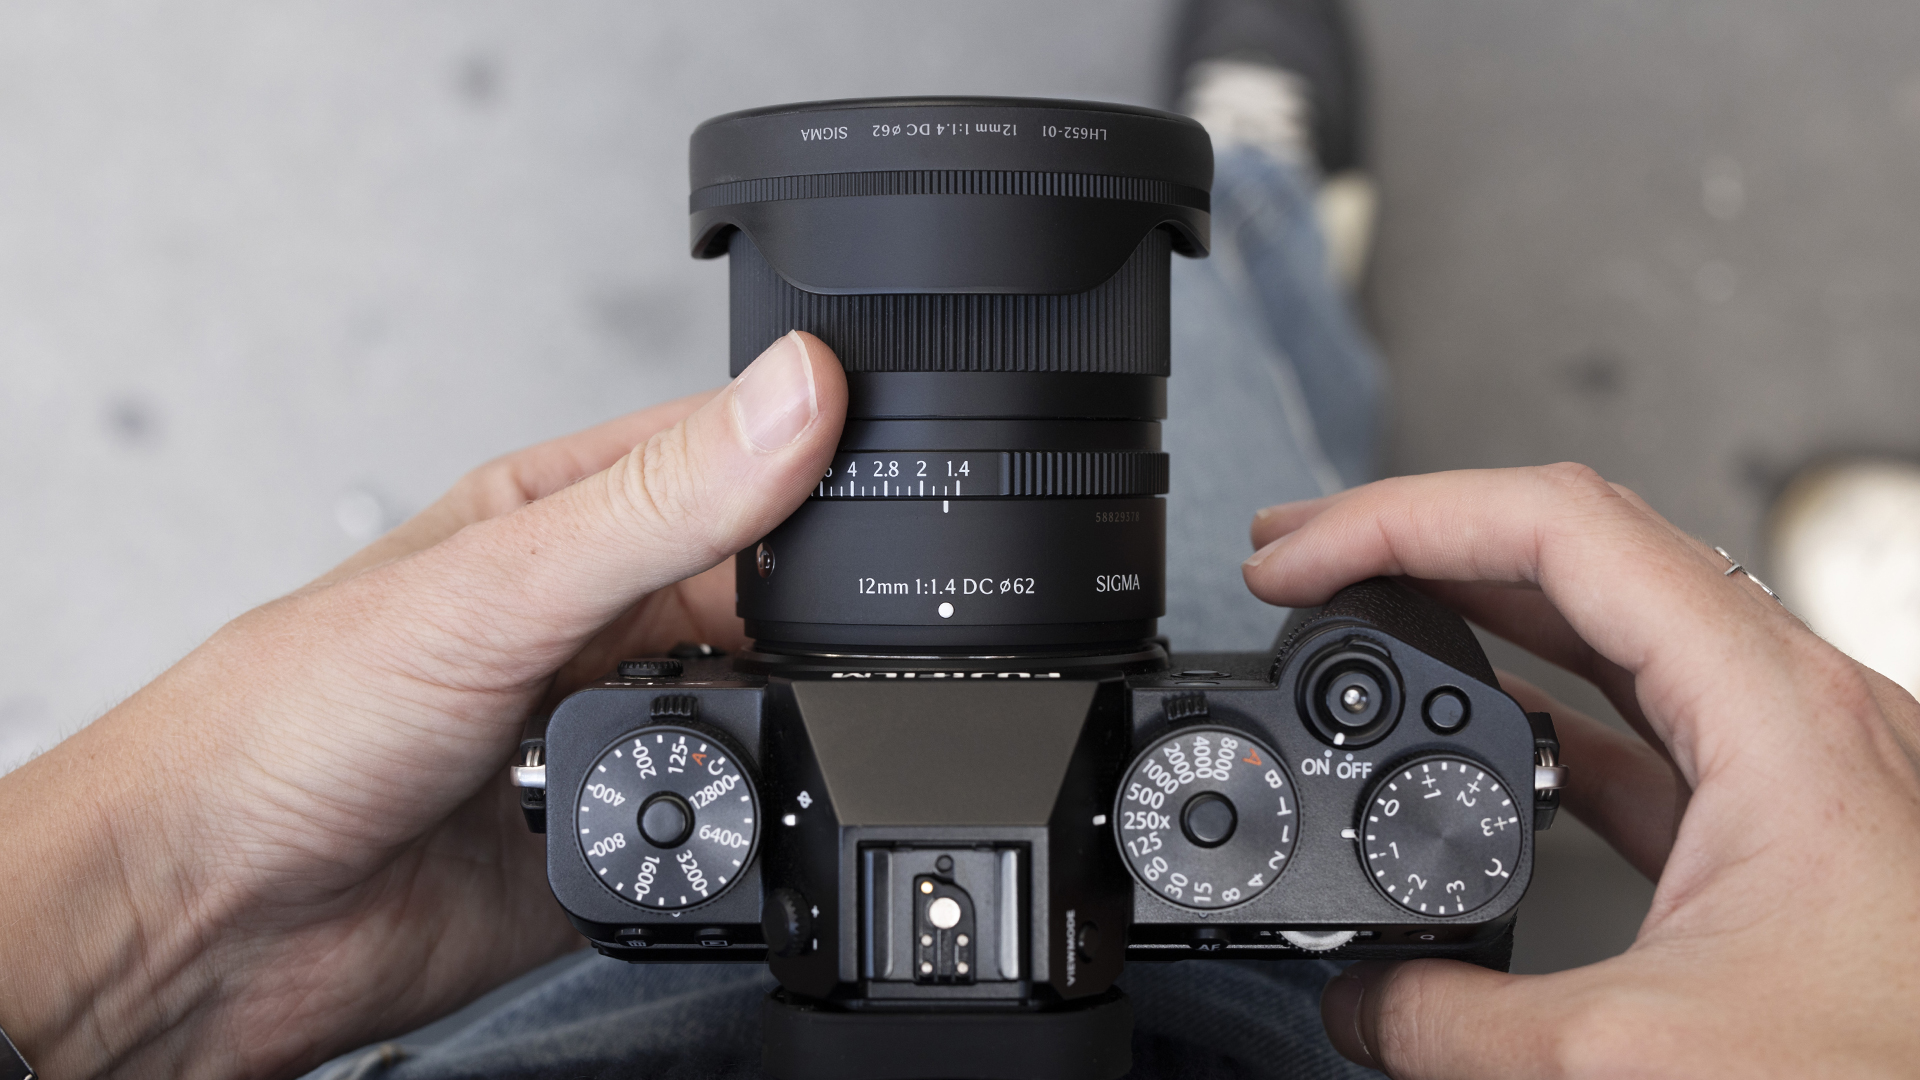
When I show the lens to my peers, an unexpected part that stands out is the aperture ring. The satisfying manual addition to the lens makes the relationship between the user to the camera more personal, which is something I’m finding to be important to me when operating cameras.
A manual aperture ring is a nice addition for filmmaking. All Sigma’s latest Art line lenses, as well as the all-metal I series primes, have this feature.
Recommendations
Both lenses quickly became essential for me. As a student photographer and filmmaker, my visual style continues to evolve, and I’ve found these lenses can keep up with my pace. My love for the 28-70mm was part of how I became an ambassador, even before I got the invitation to join the Sigma team.
Whether you’re a starting photographer or an experienced camera user, I can’t recommend these two lenses enough, and I’m excited to use them in my projects next semester!
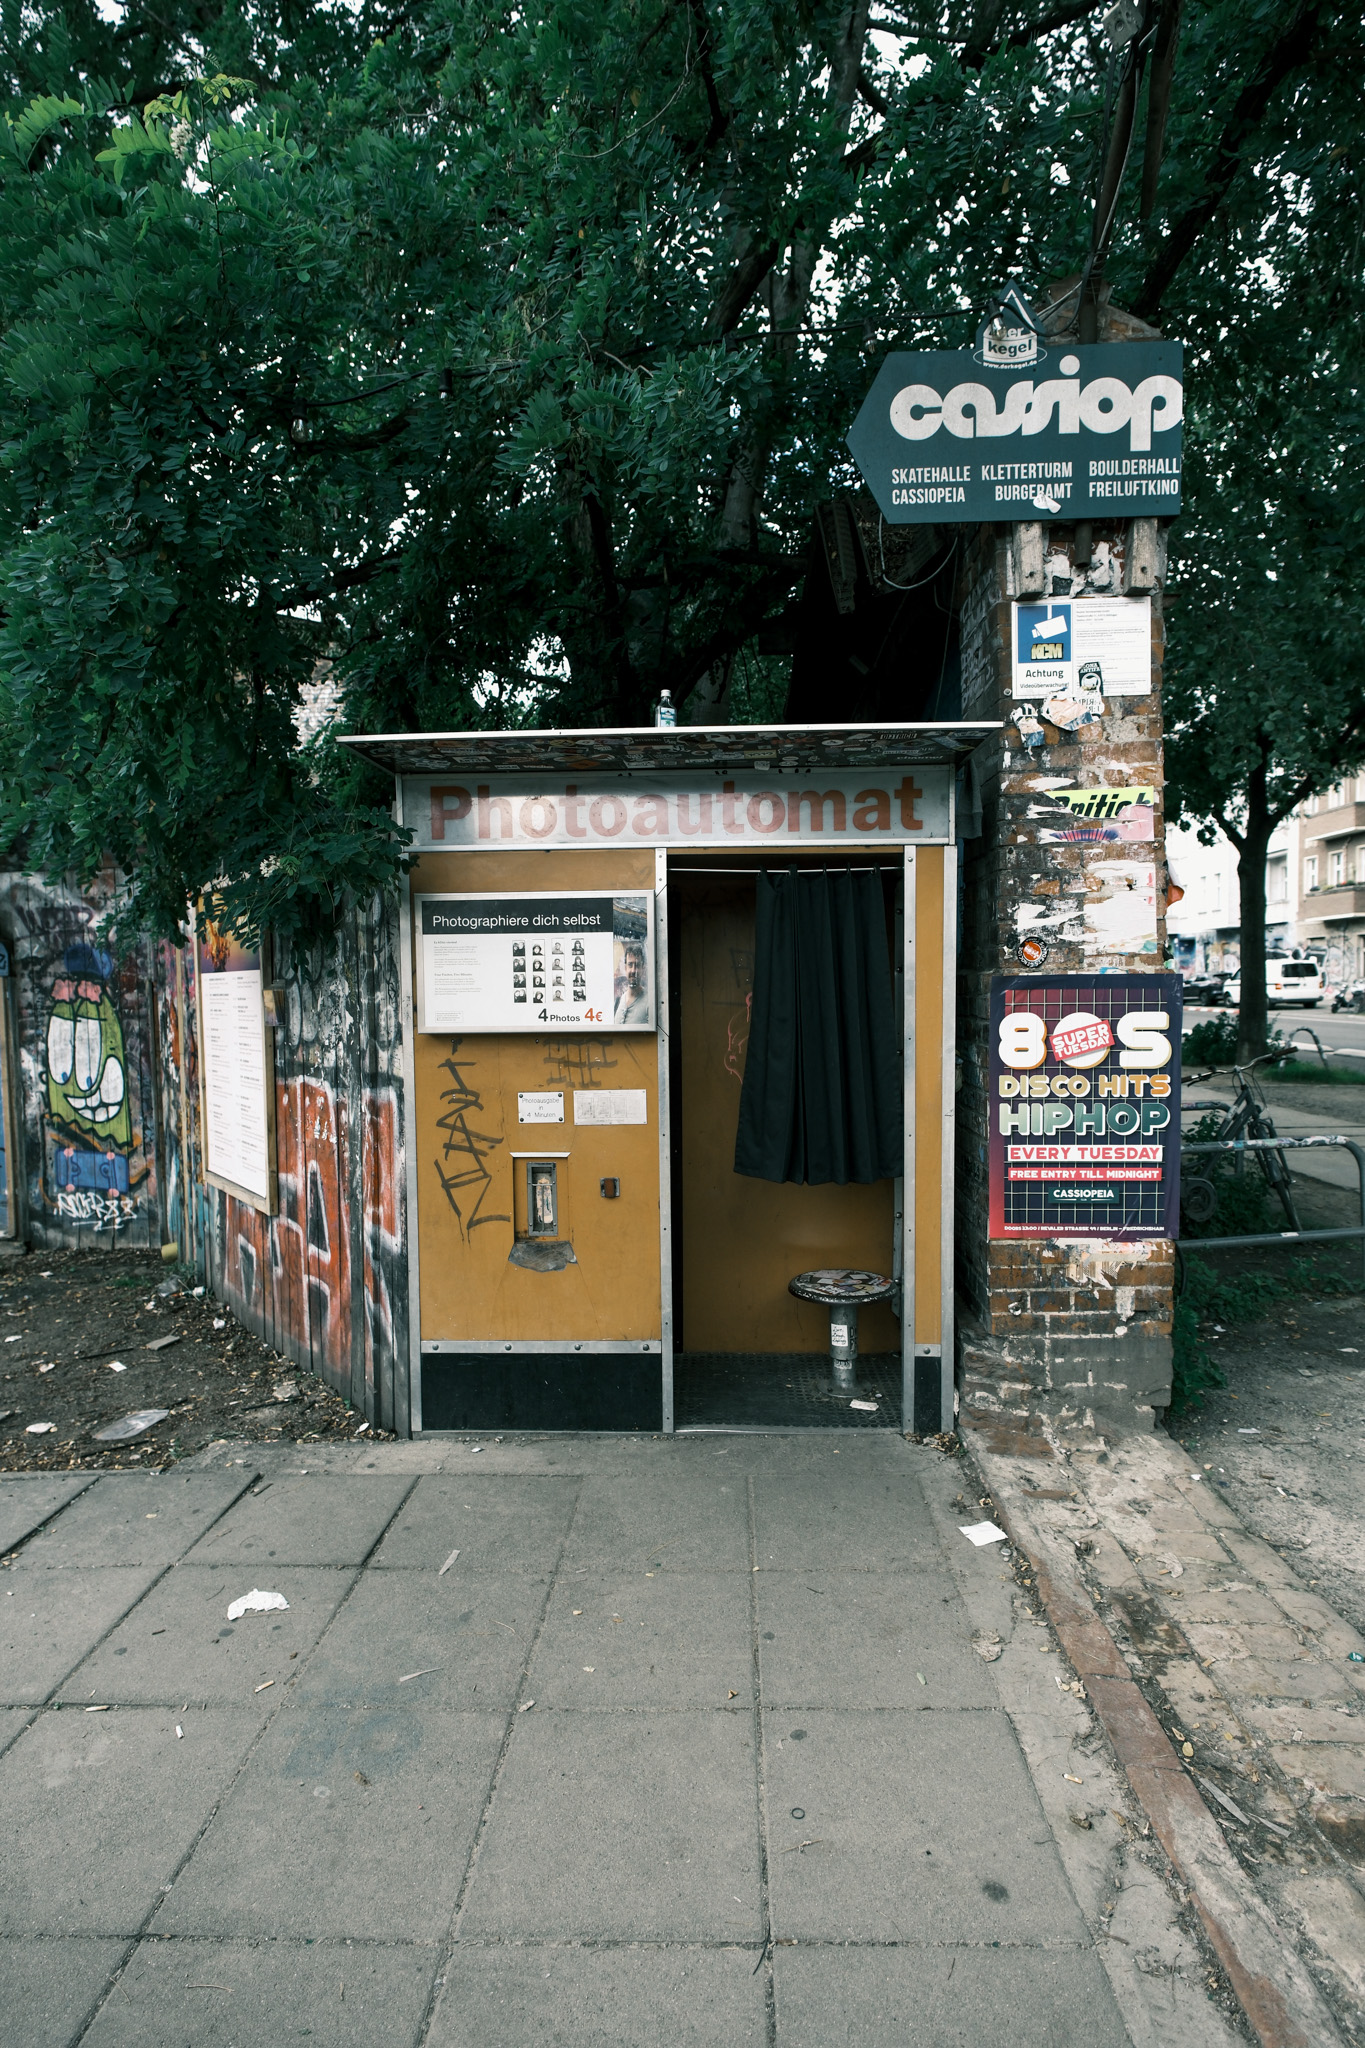
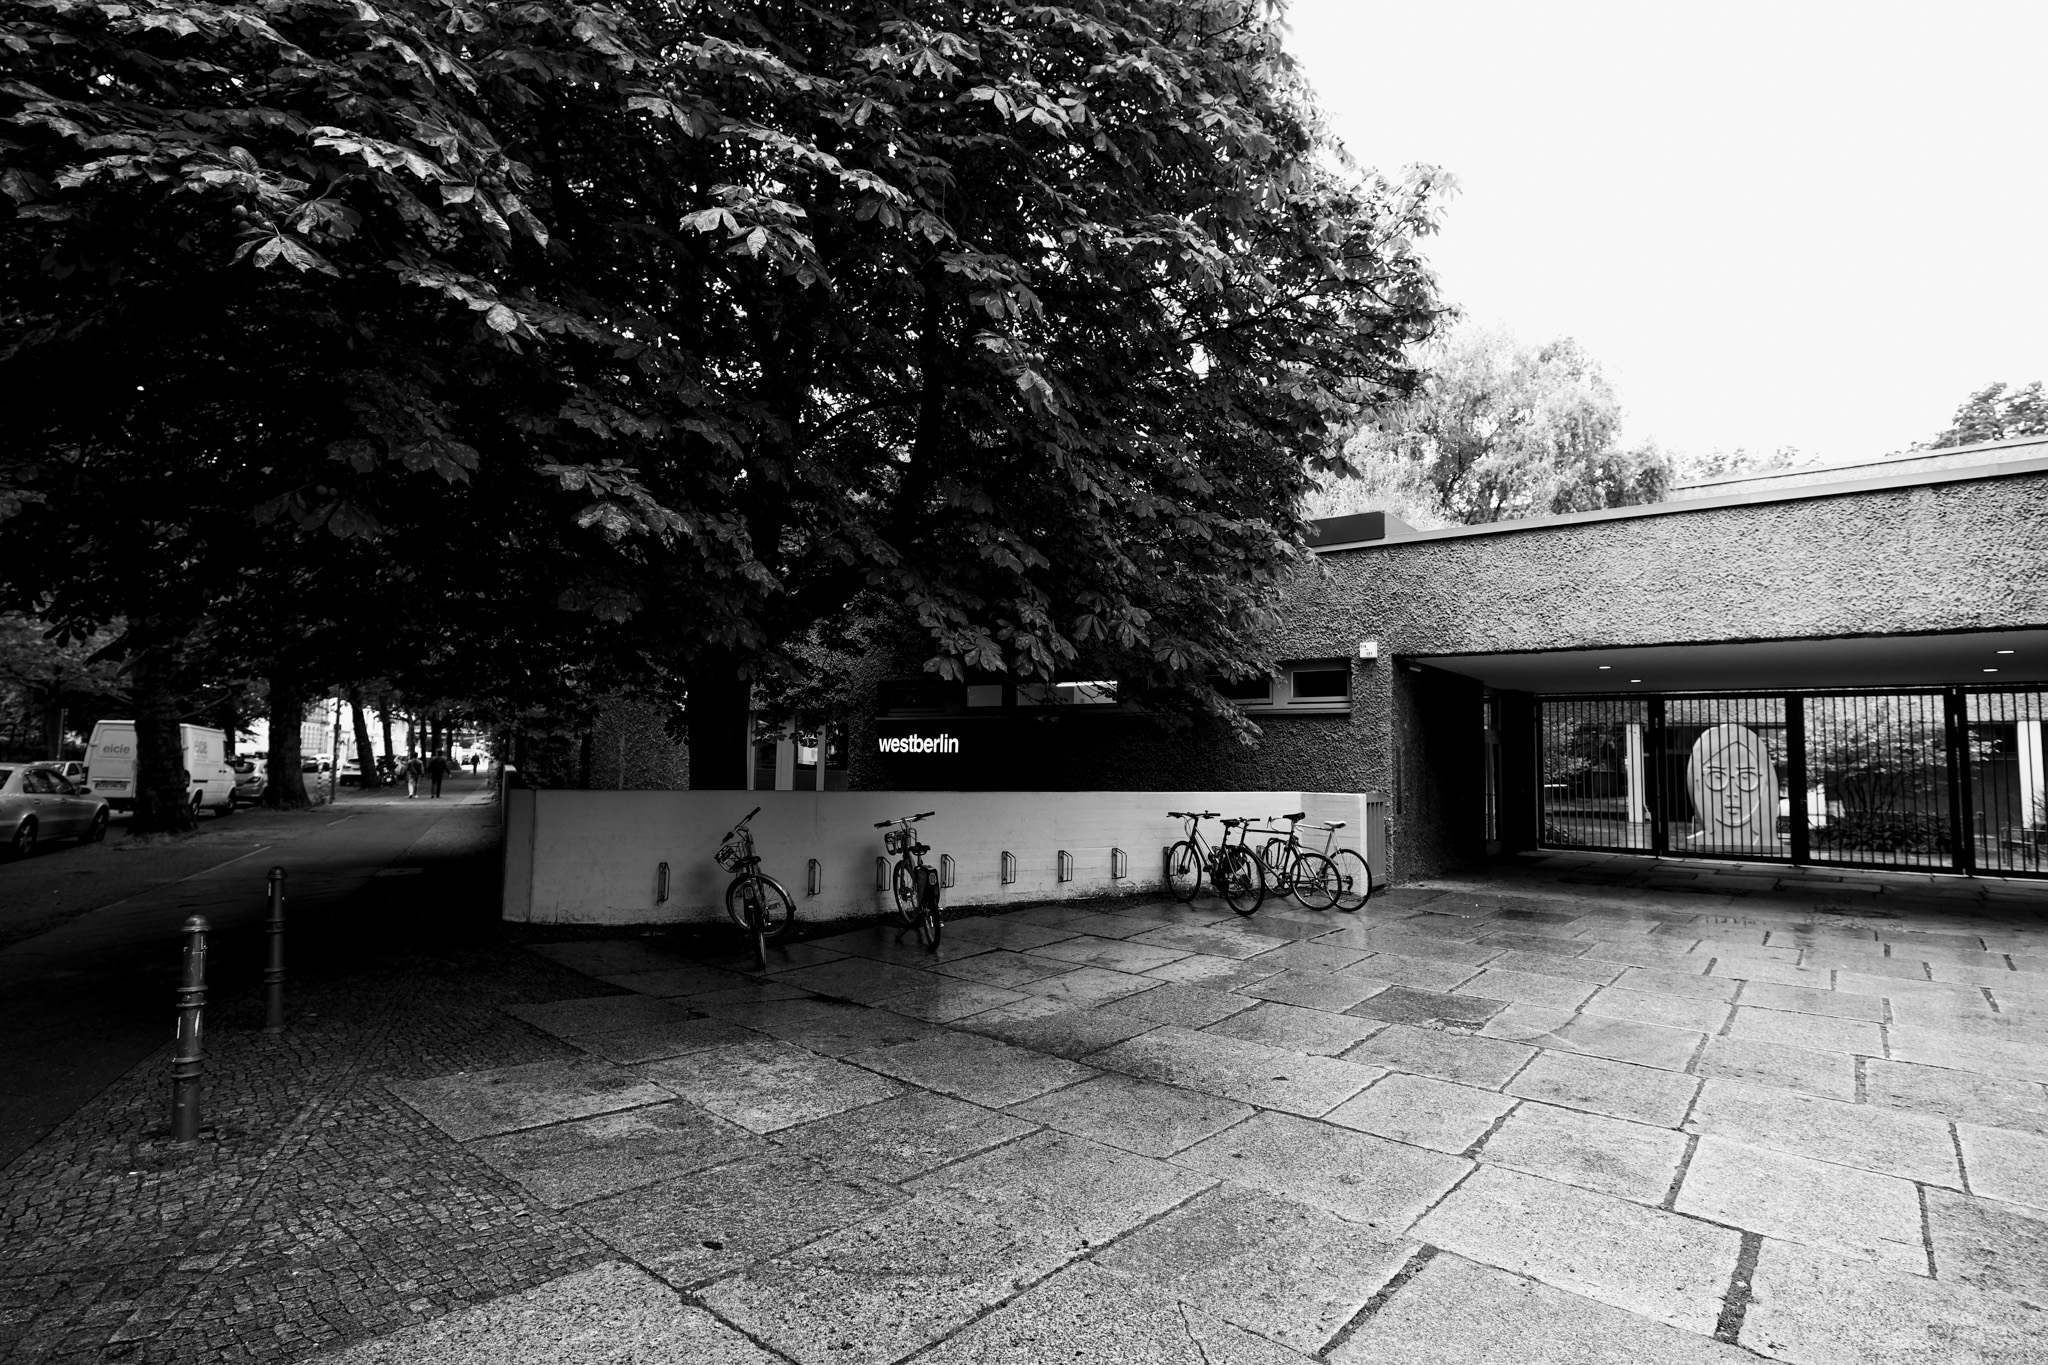
Committing to a single focal length for an entire trip can feel risky. Combined with a Fujifilm X-T5 camera, the Sigma 12mm F1.4 DC | Contemporary became my only lens for exploring Berlin, a decision that completely changed how I approached photographing the city.
Wide-Angle Perspective
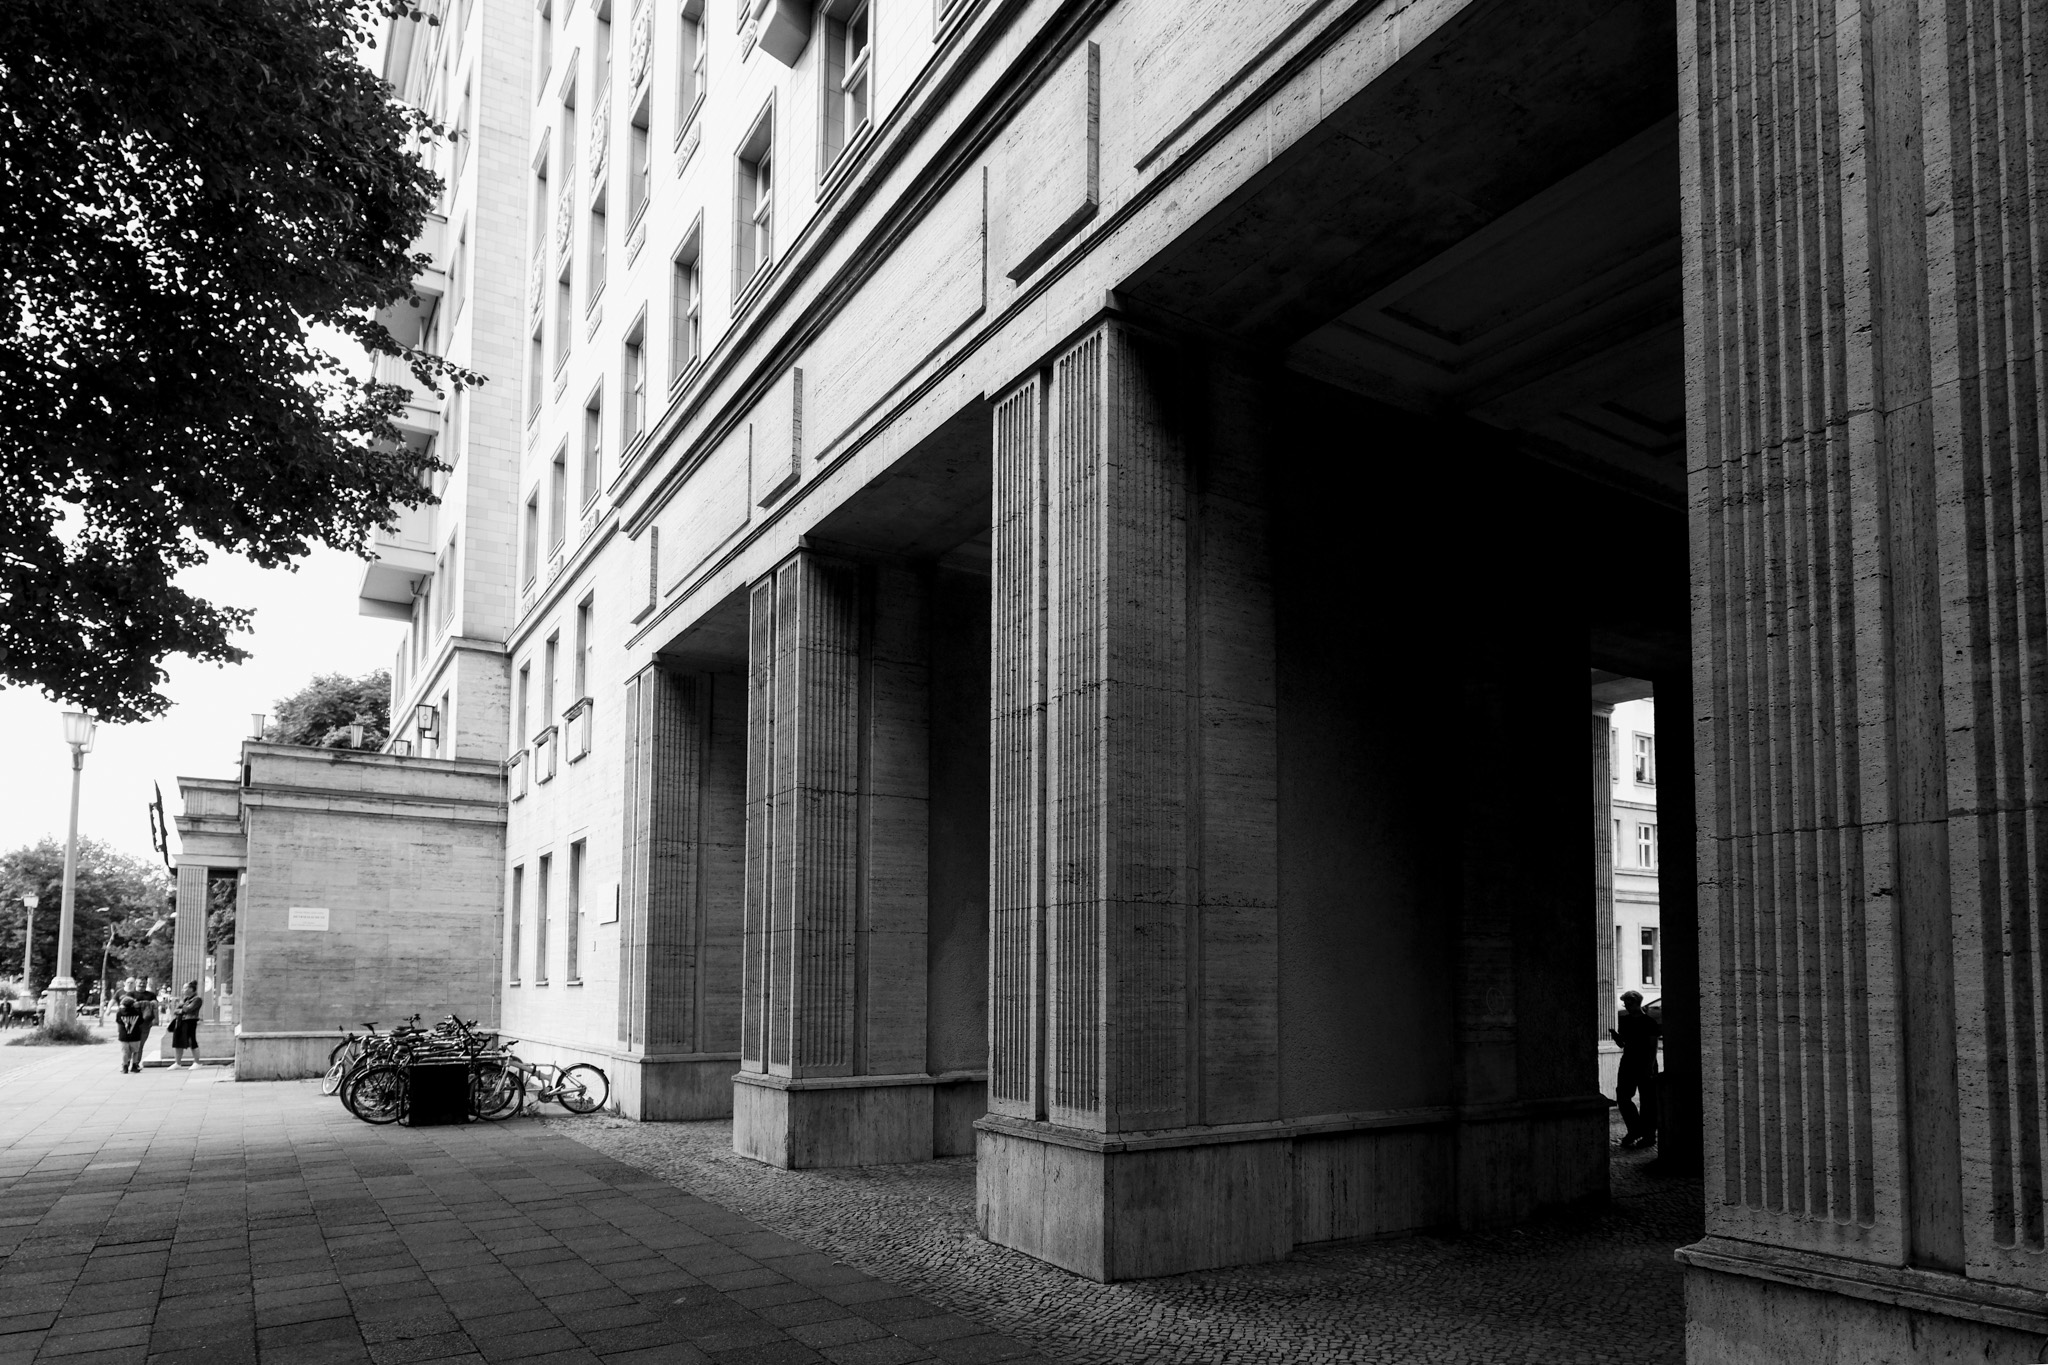
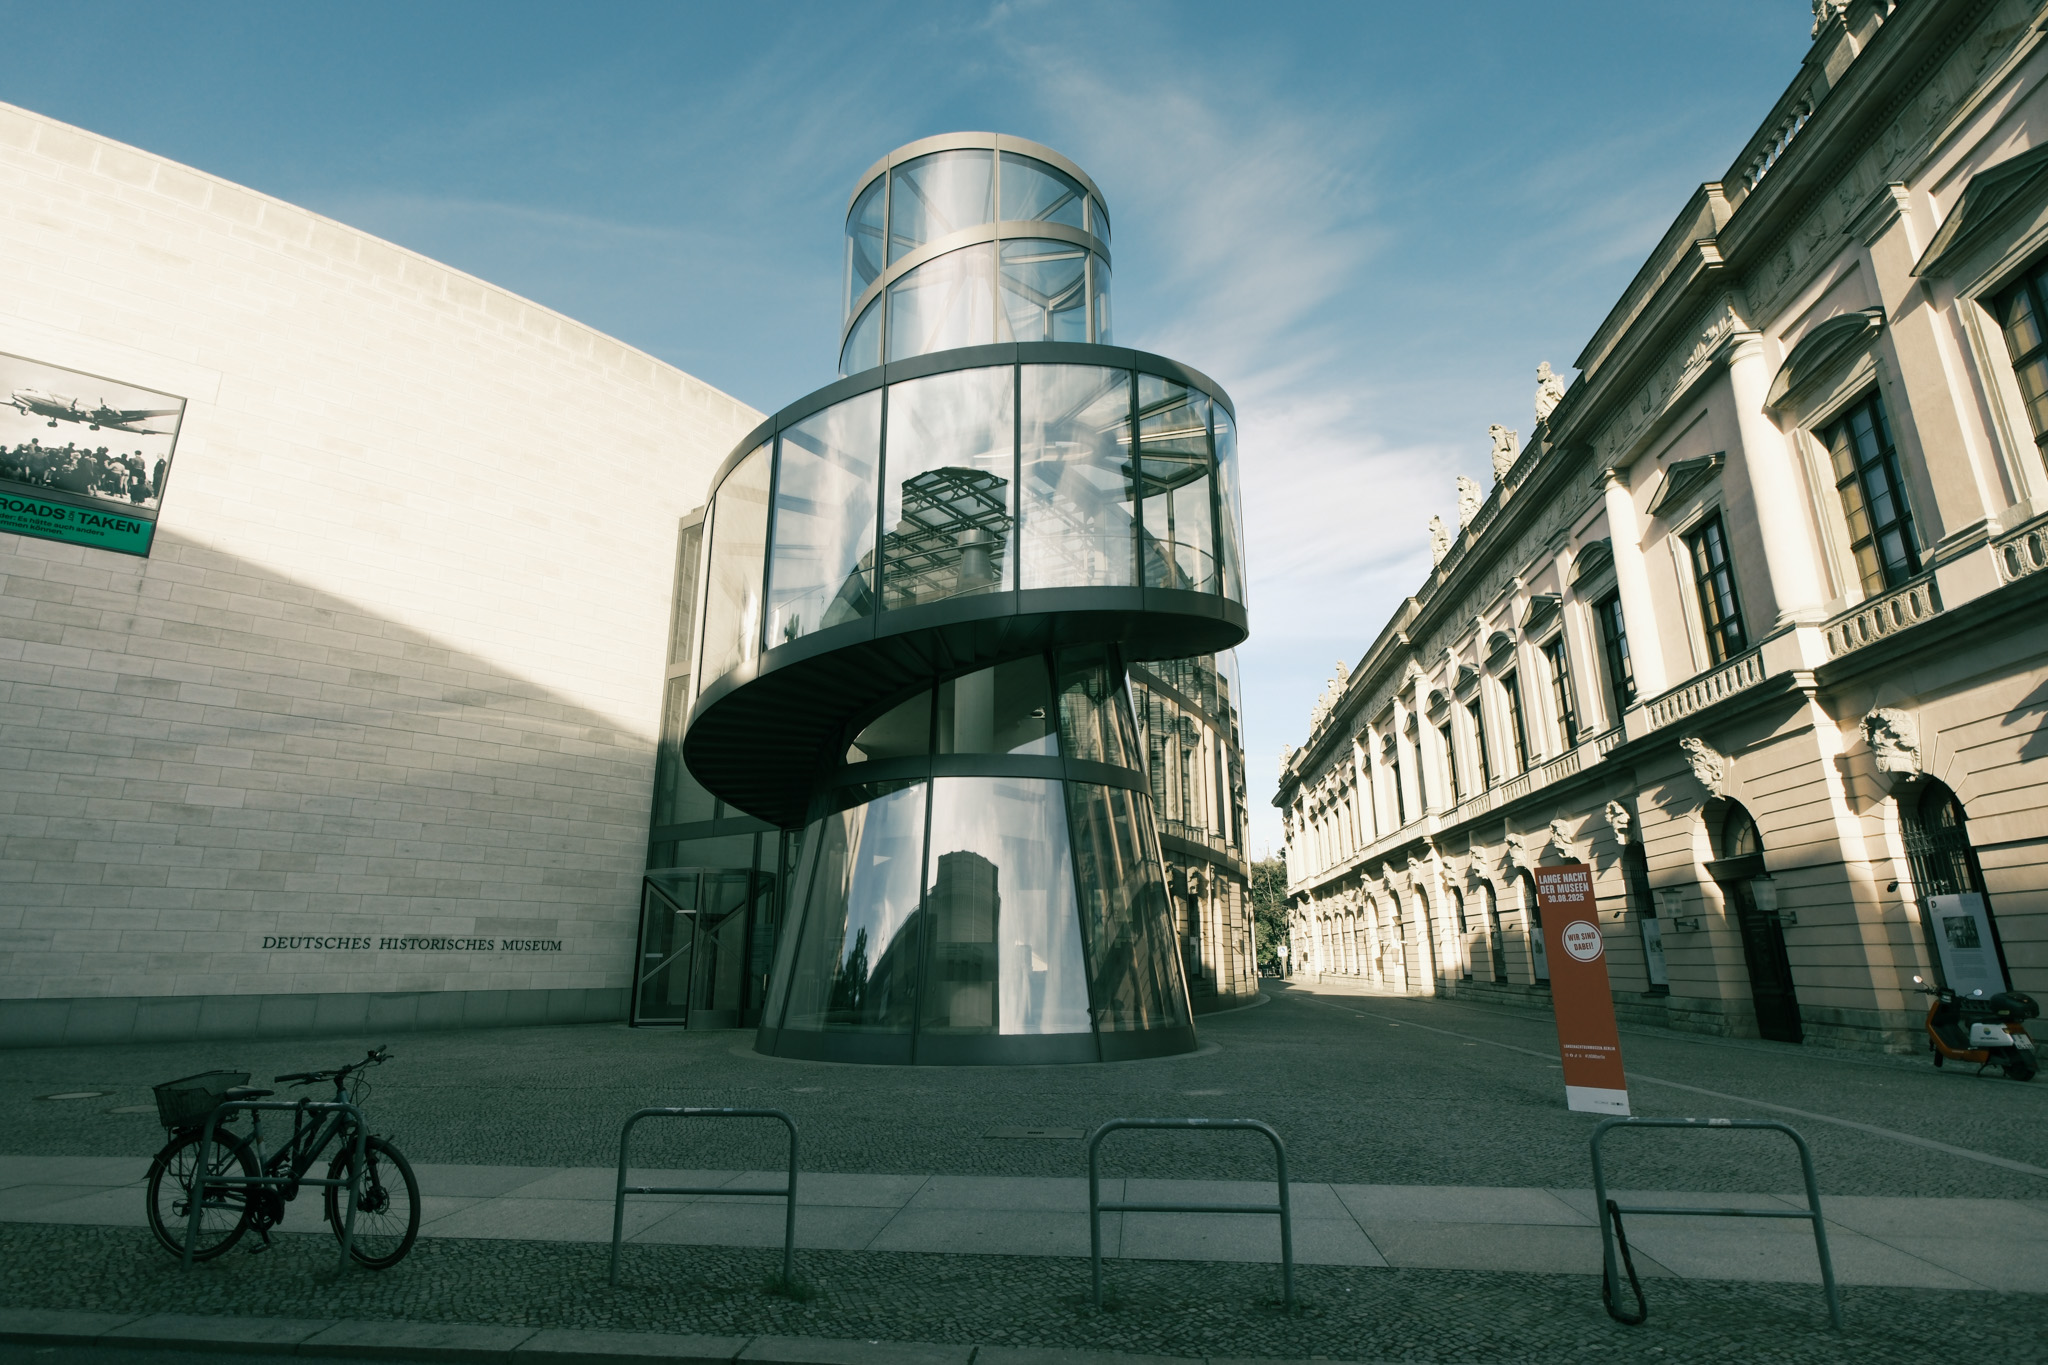
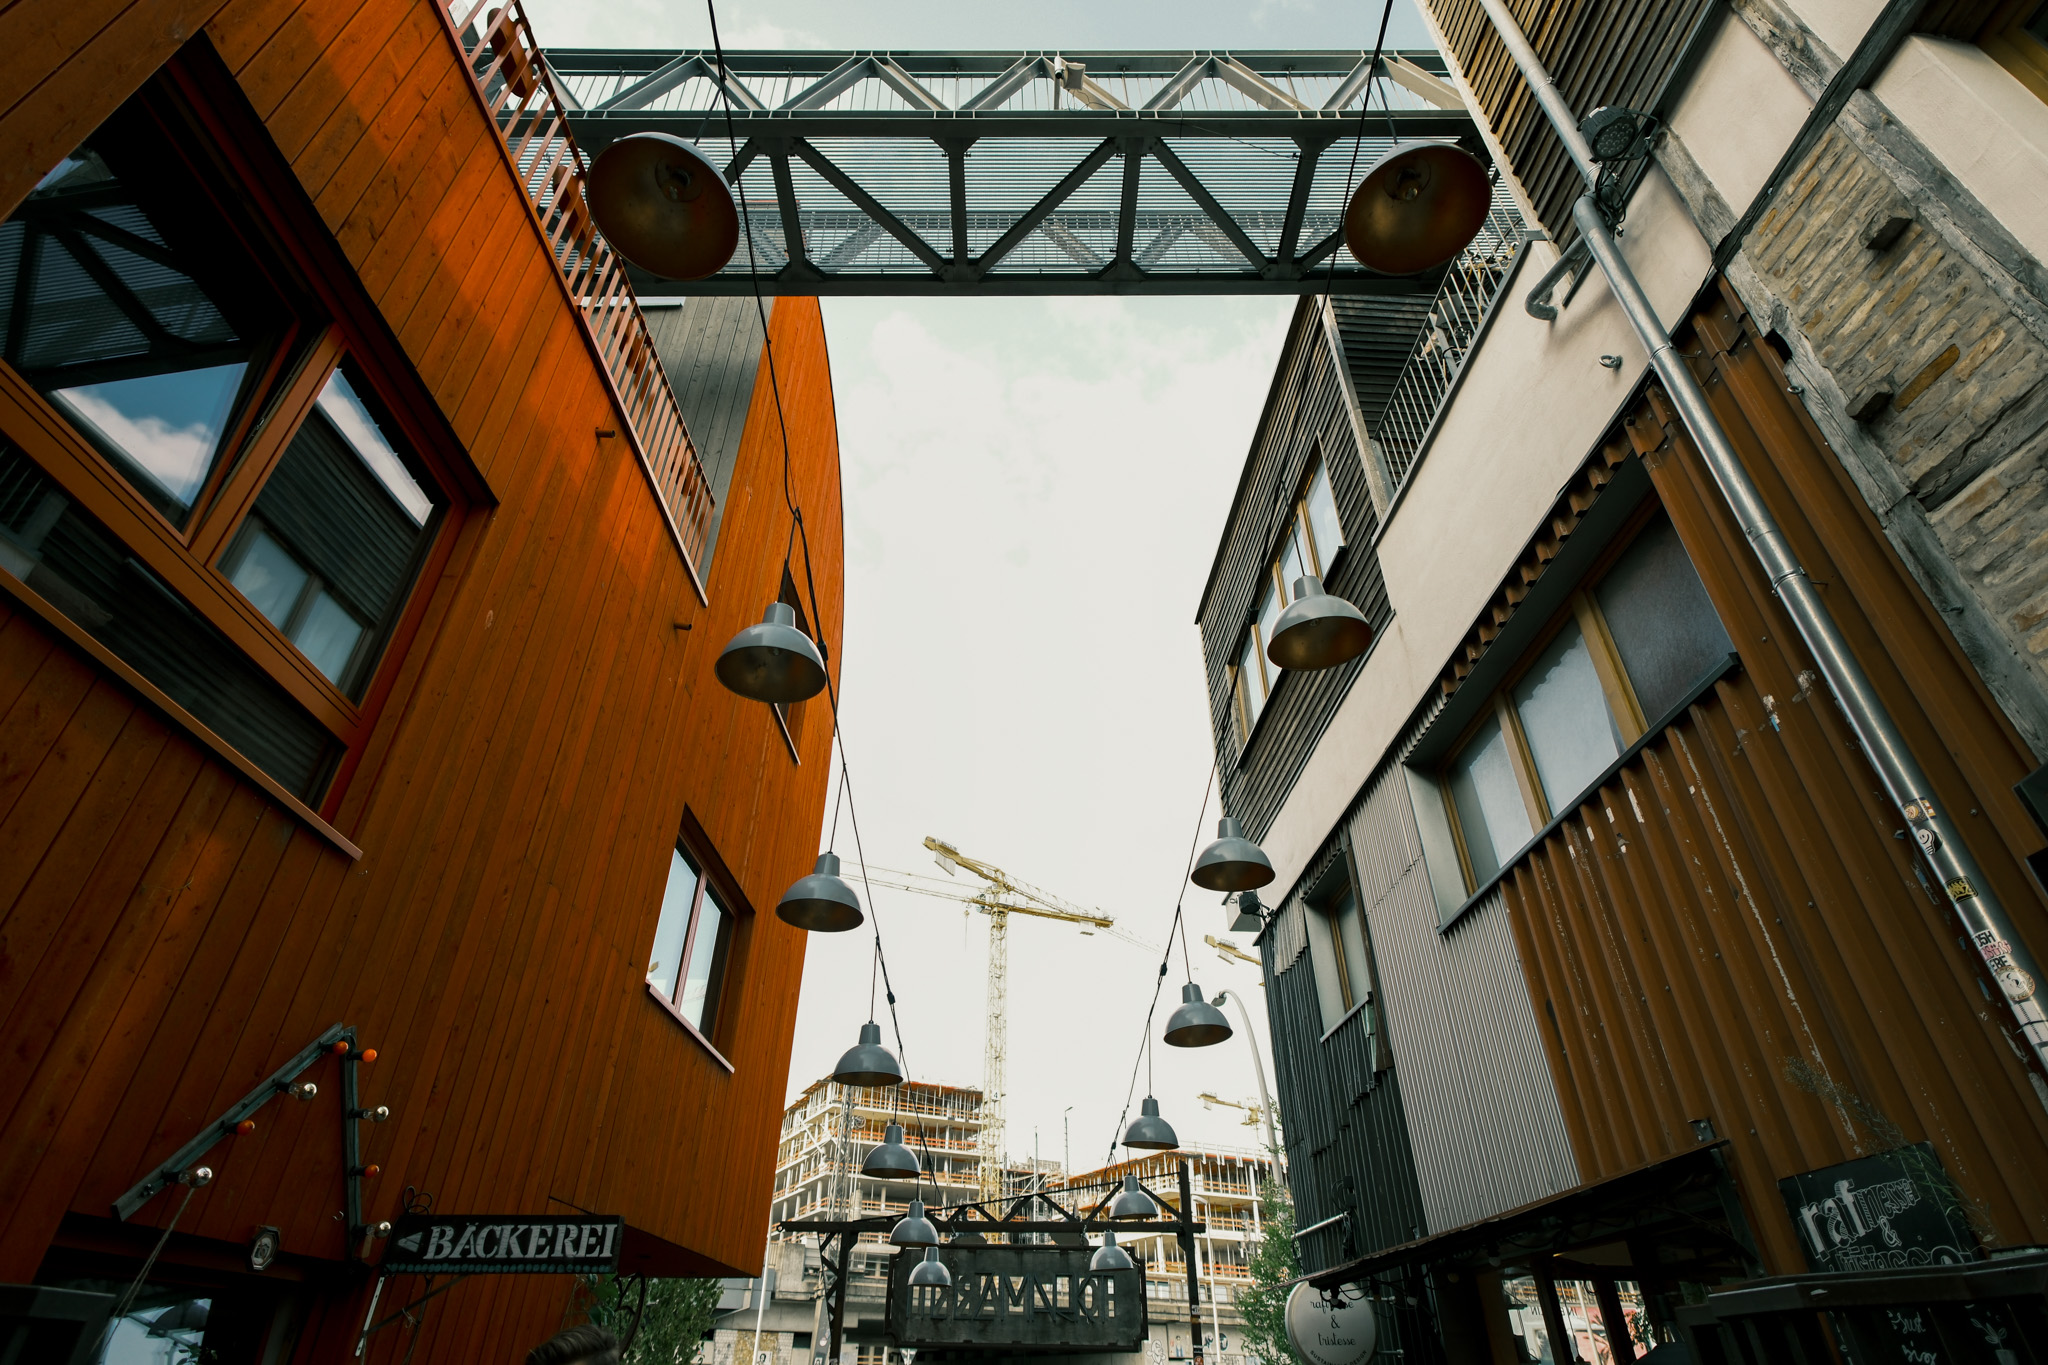
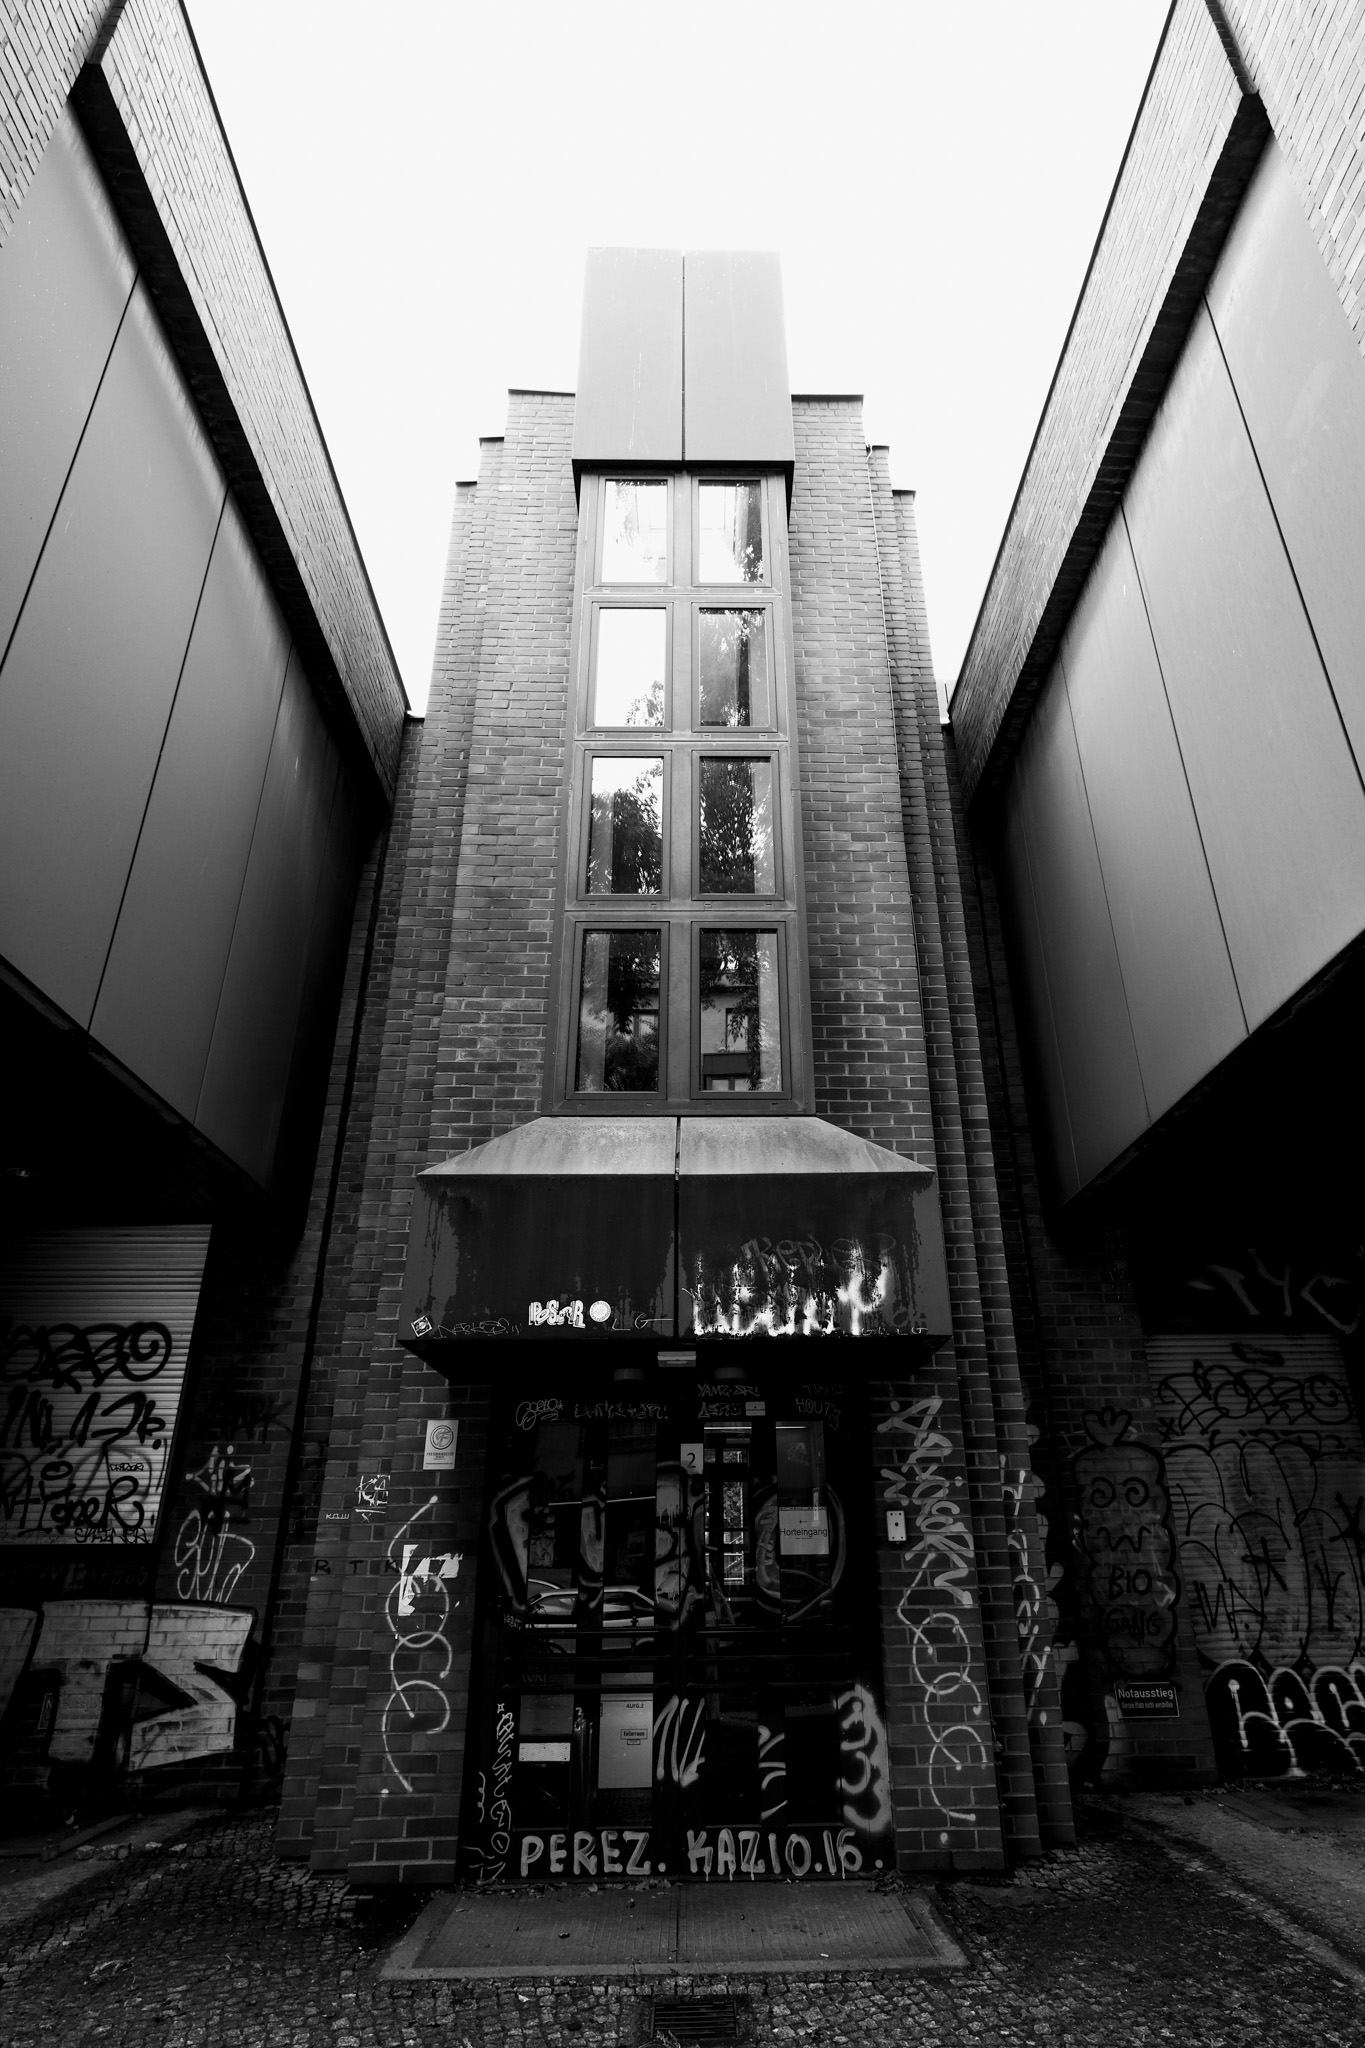
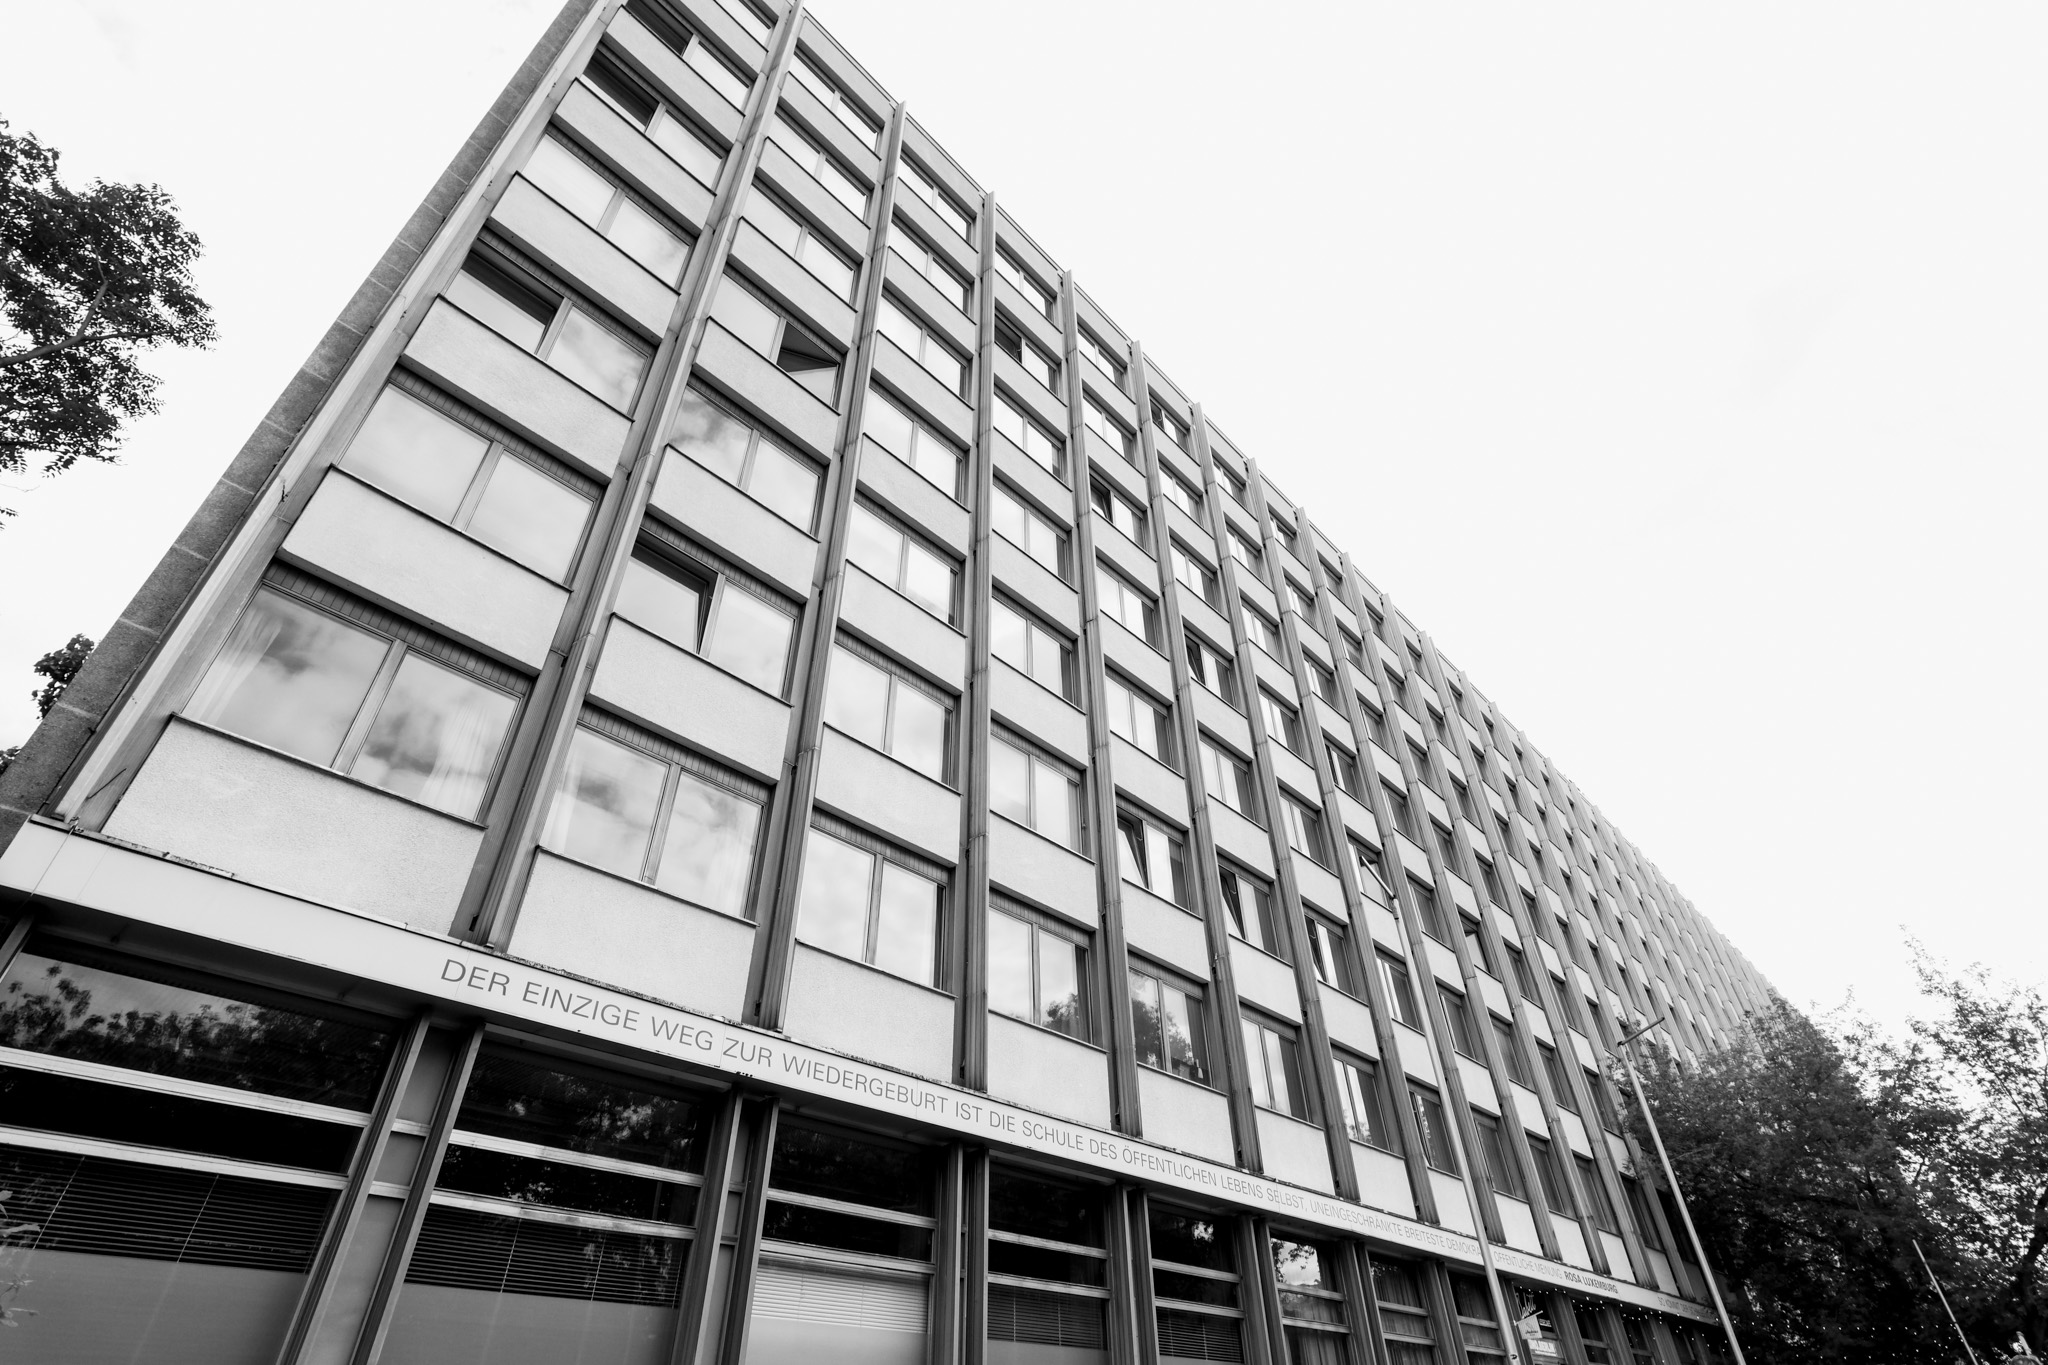
The 12mm focal length (18mm equivalent on typical APS-C sensor) provides an expansive view that suits Berlin’s architecture perfectly. Standing in front of the Paul Loebe Building or exploring Museum Island, I could capture entire structures without stepping into traffic or climbing onto benches. The ultra-wide perspective includes context, the street level activity, neighboring buildings, and urban environment that can make these spaces feel alive rather than sterile.
Sigma 12mm F1.4 DC | Contemporary Fujifilm X-T5 F1.4, 1/3000s, ISO 400Sigma 12mm F1.4 DC | Contemporary Fujifilm X-T5 F1.8, 1/2500s, ISO 400
Sigma 12mm F1.4 DC | Contemporary Fujifilm X-T5 F2.2, 1/2500s, ISO 400Sigma 12mm F1.4 DC | Contemporary Fujifilm X-T5 F2, 1/2500s, ISO 640
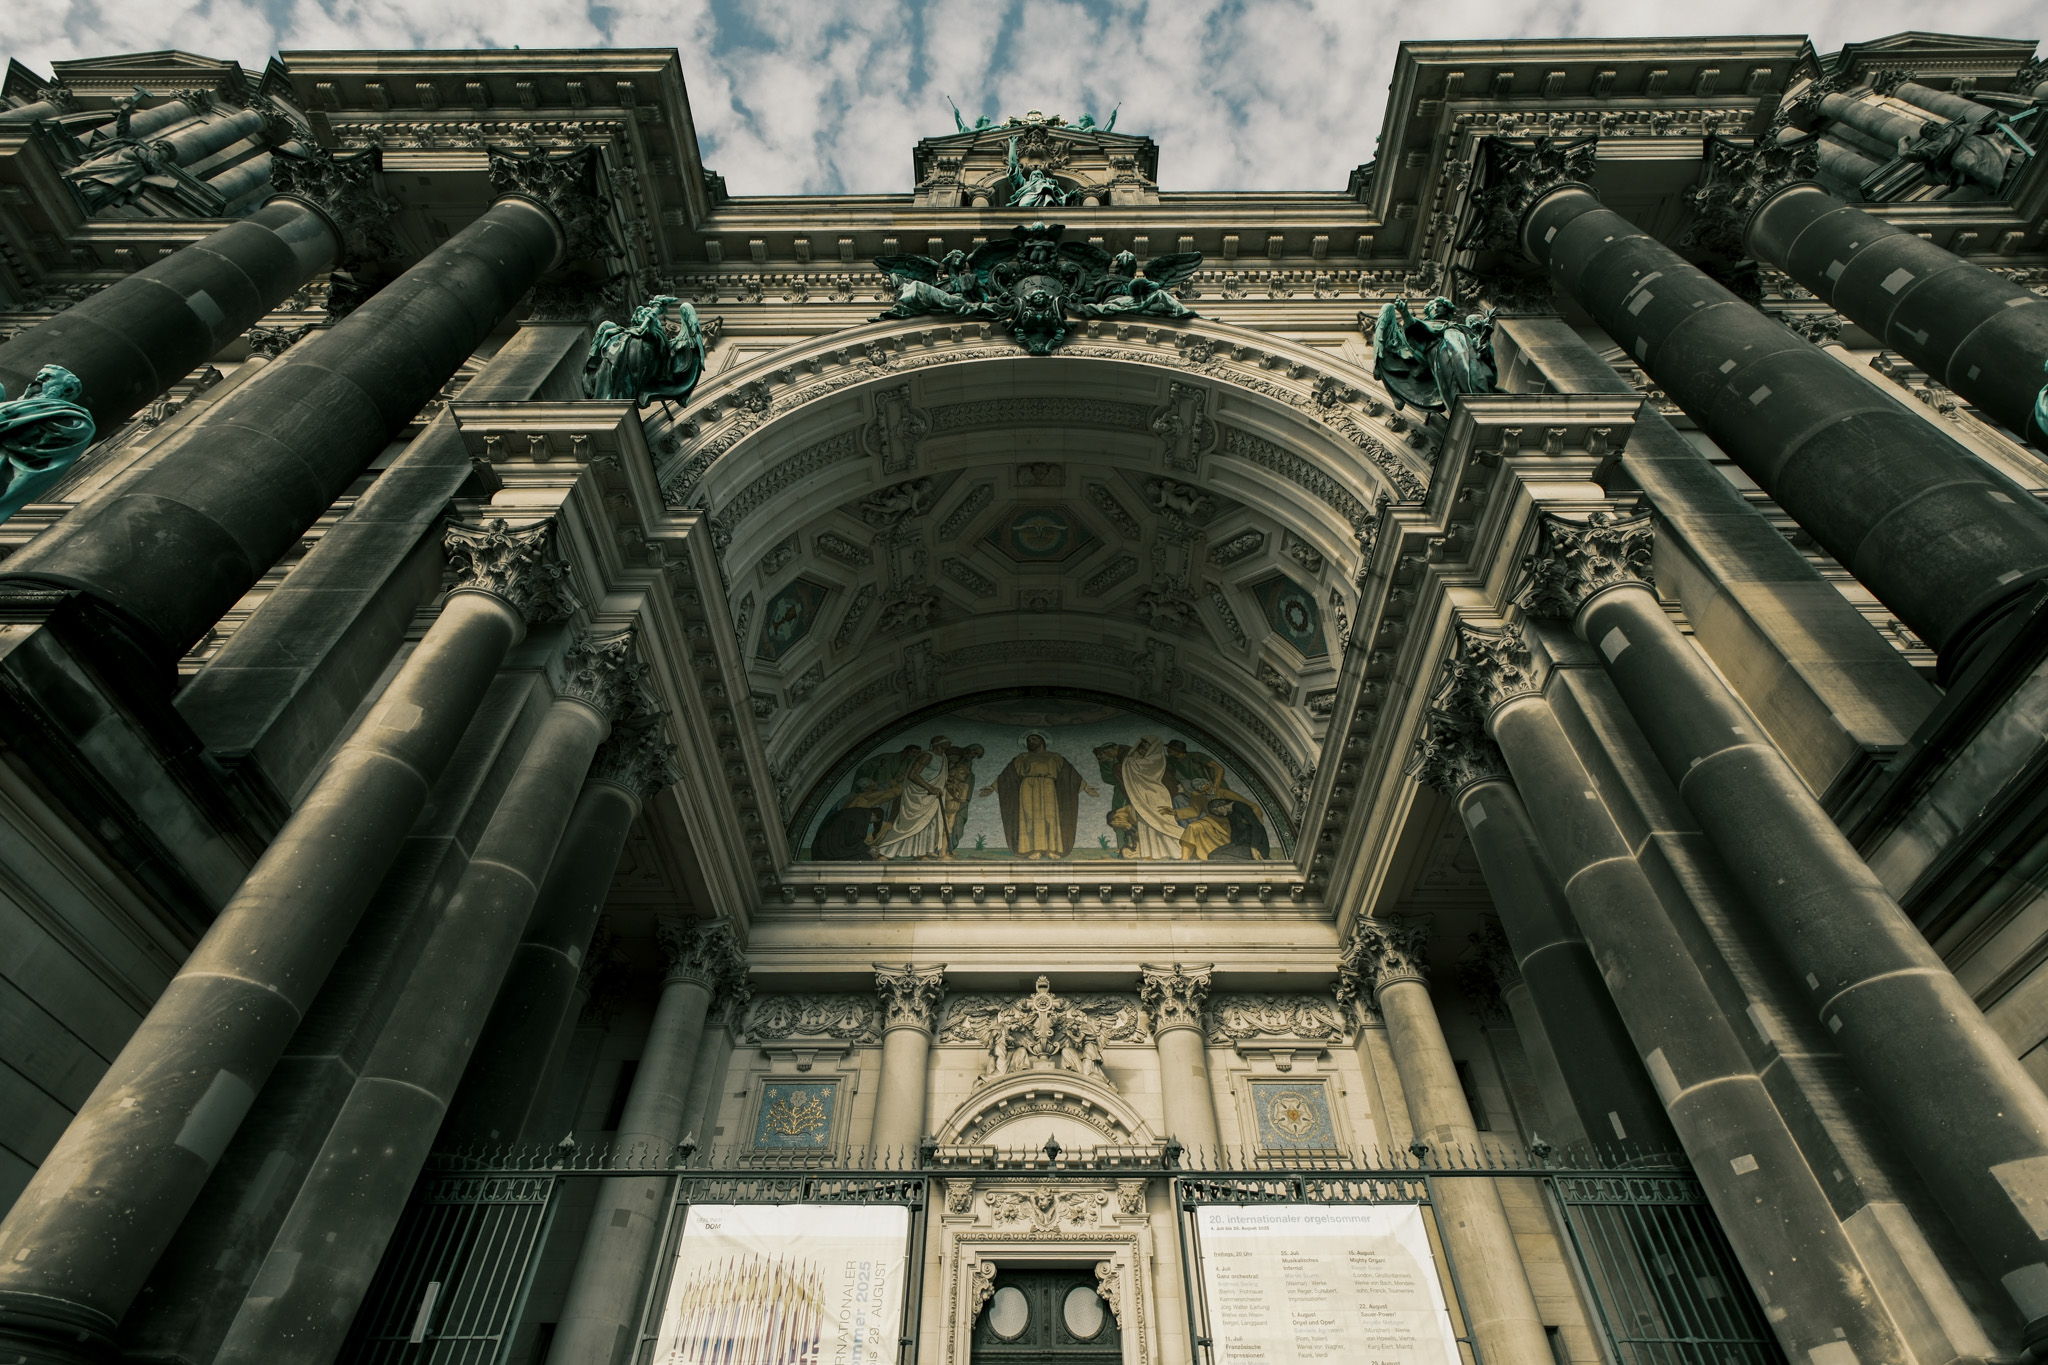
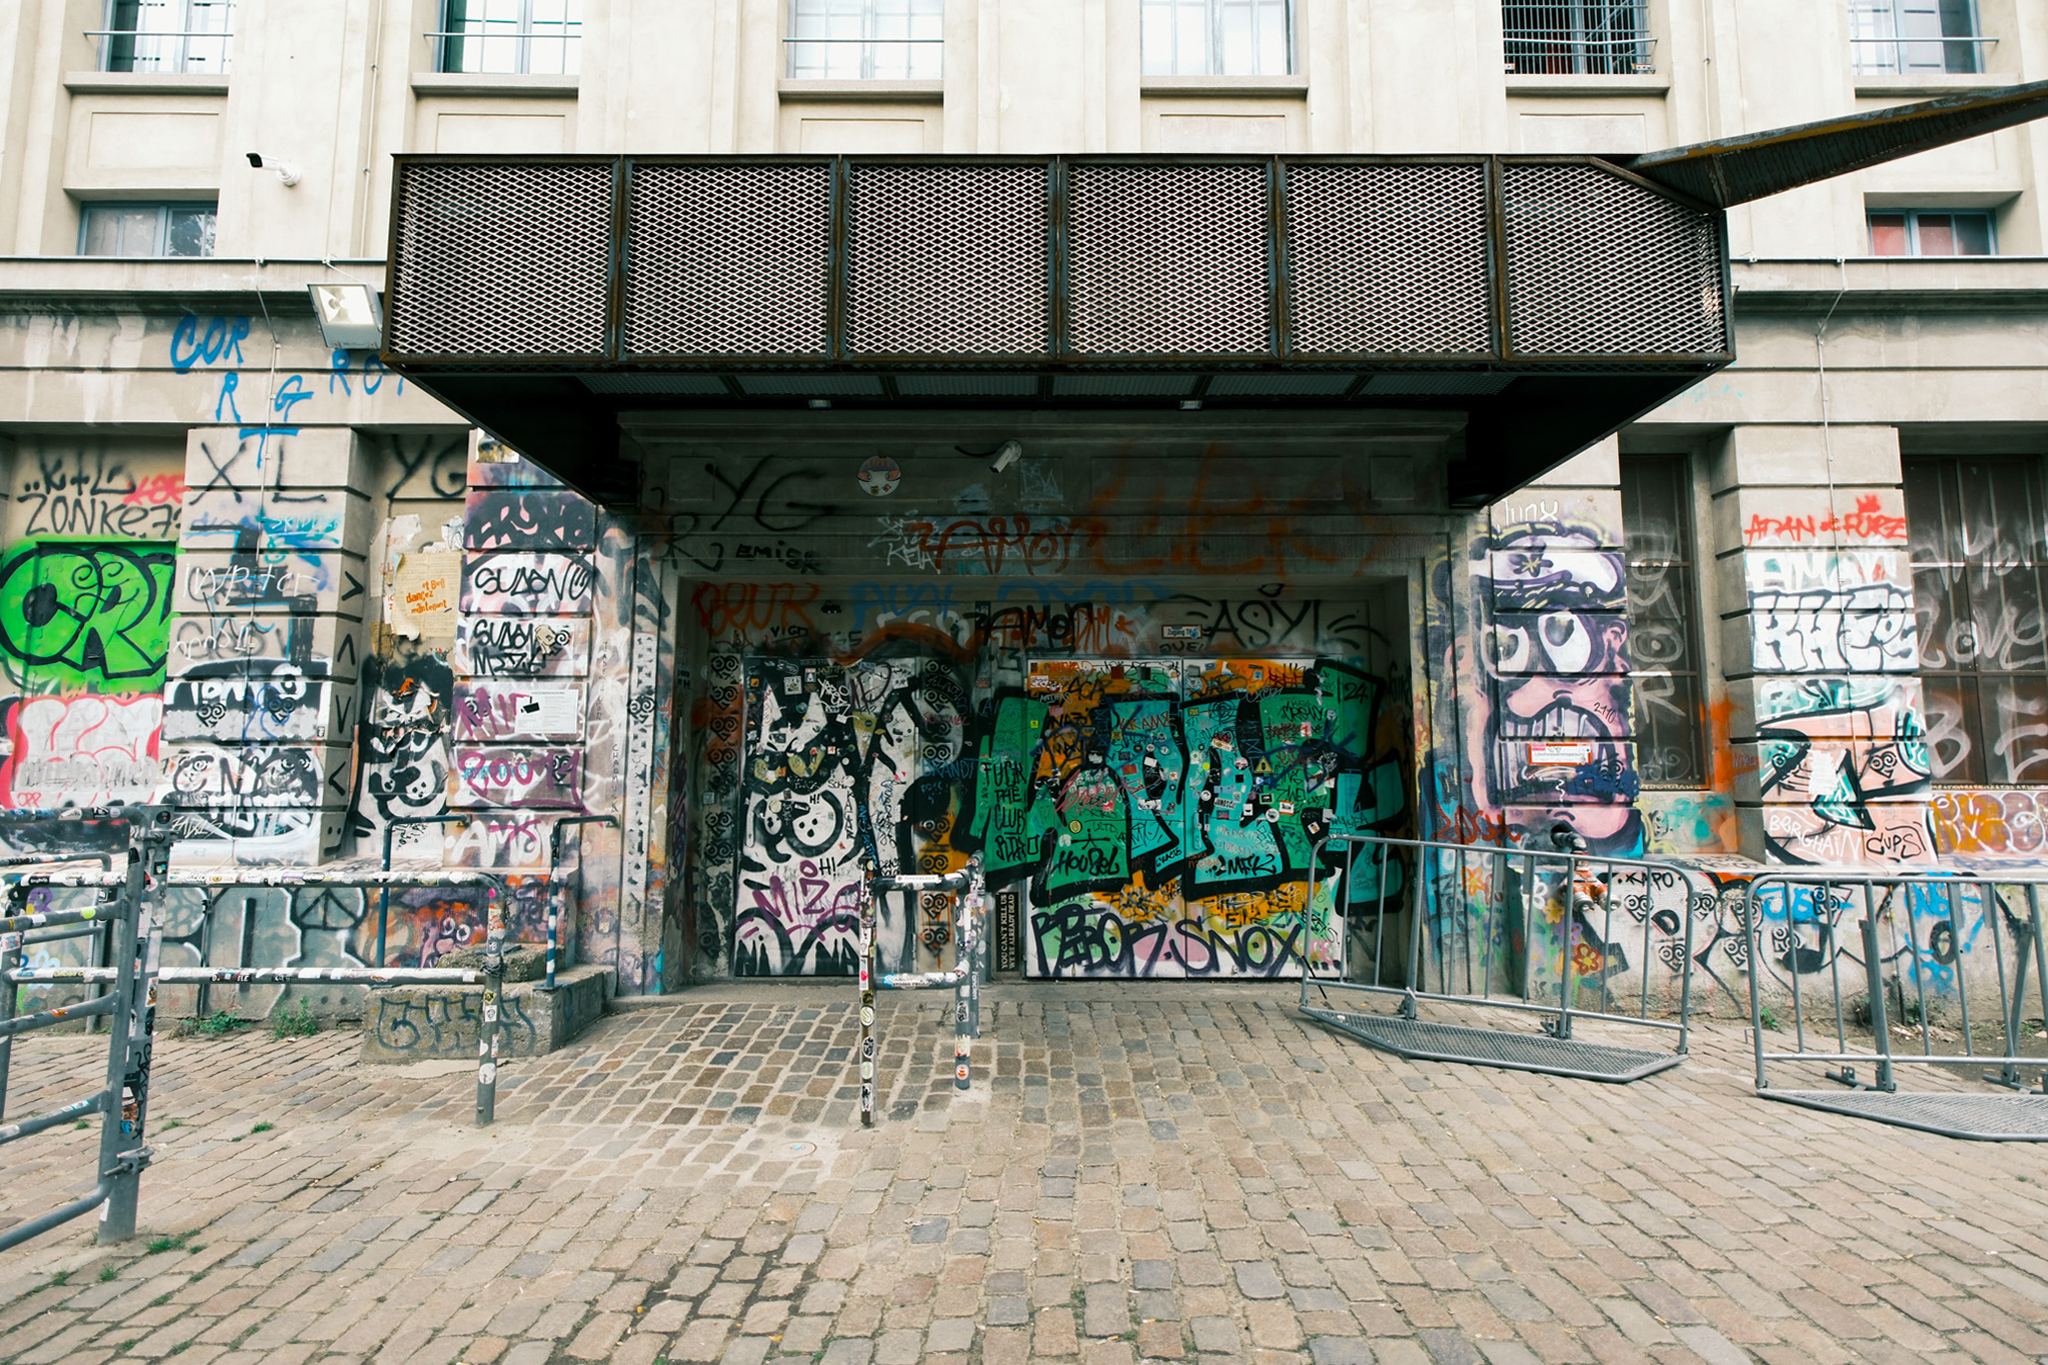
Unlike fisheye lenses, the 12mm F1.4 DC | Contemporarymaintains relatively straight lines, especially through the center of the frame. Barrel distortion exists but stays controlled, reading as natural perspective rather than optical weirdness. This proved essential when photographing Berlin’s mix of architectural styles, from Bauhaus geometry to contemporary glass facades.
Sigma 12mm F1.4 DC | Contemporary Fujifilm X-T5 F1.4, 1/8000s, ISO 250
Berlin’s architecture suddenly made more sense through this ultra-wide view. I wasn’t frantically stepping backward trying to fit everything in frame. The 99.6° angle of view gave me breathing room I didn’t know I needed. More importantly, it let me capture these massive structures while still including the human elements, the urban context that makes these buildings feel alive rather than just monuments.
Sigma 12mm F1.4 DC | Contemporary Fujifilm X-T5 F1.4, 1/4000s, ISO 125
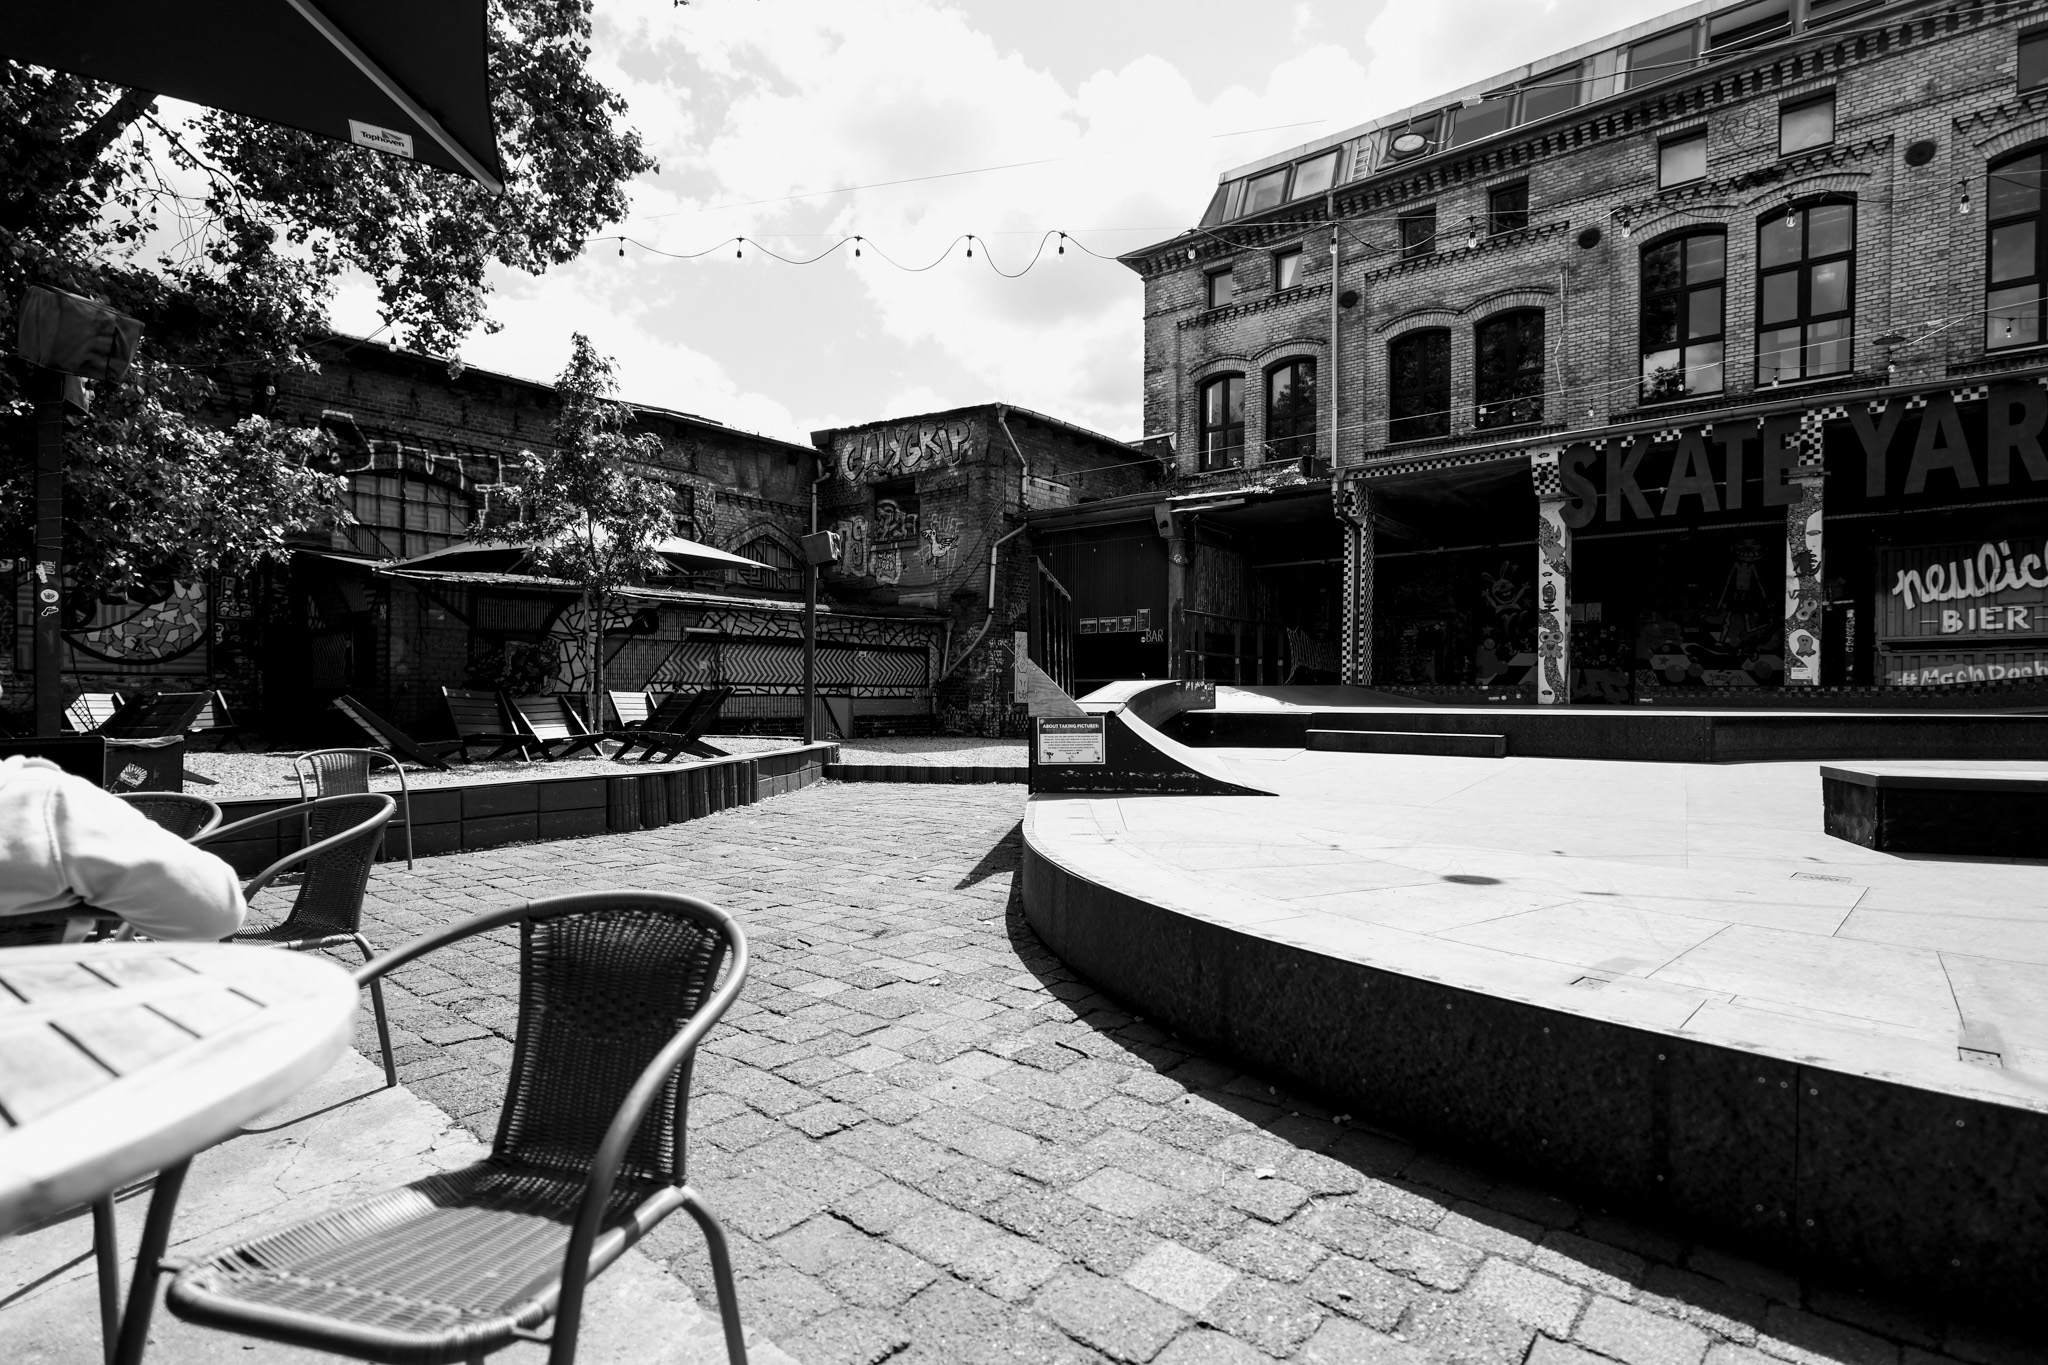
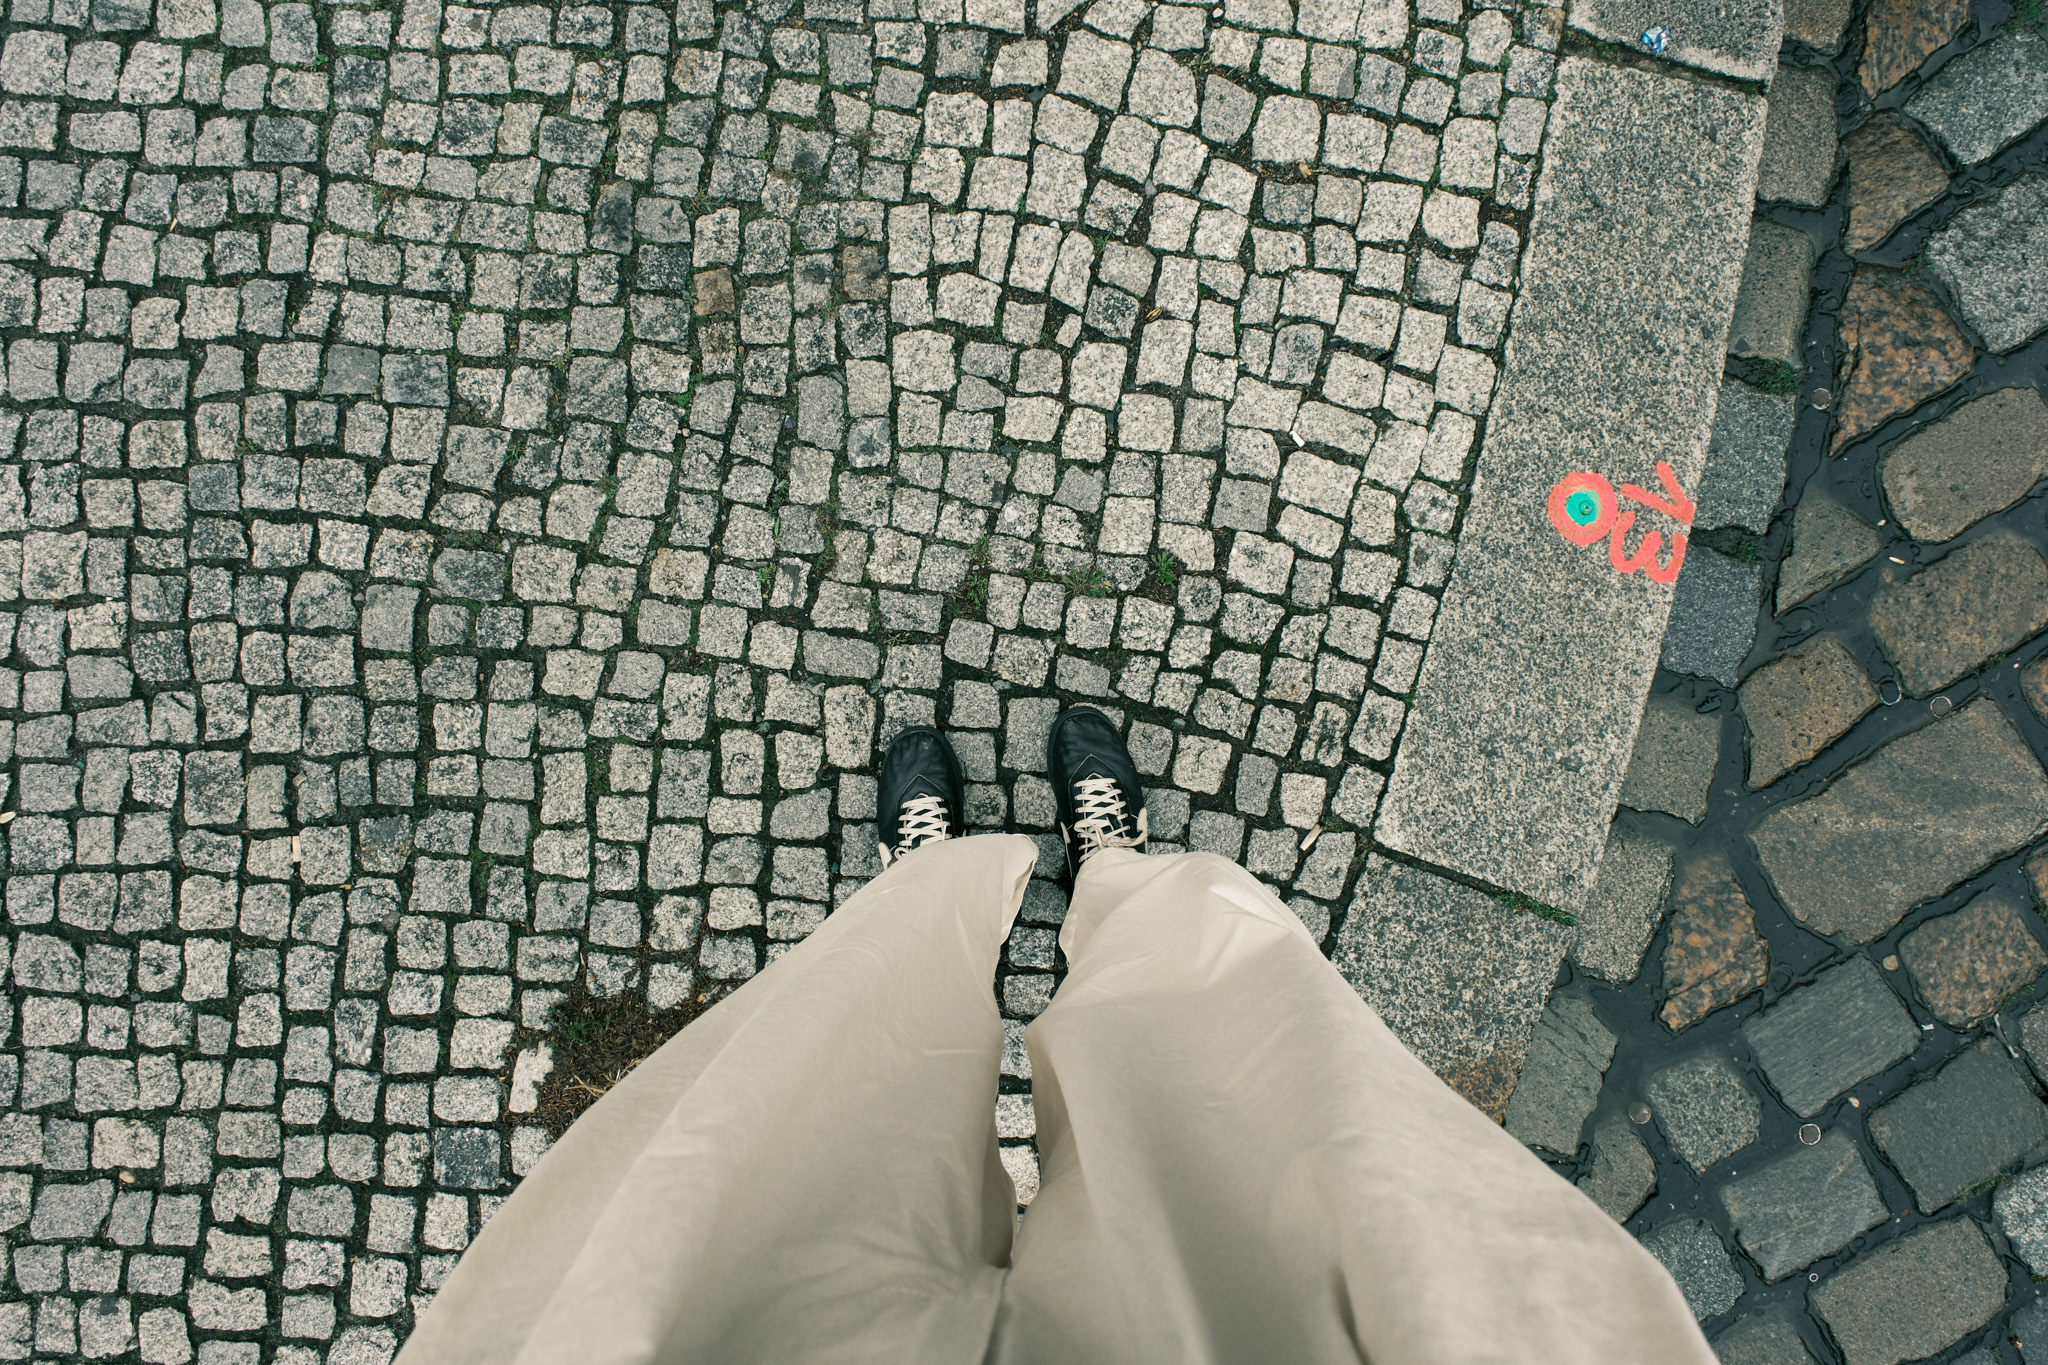
What surprised me most was how the focal length changed what I noticed. With a normal zoom, I’d instinctively frame tighter, focusing on specific architectural details or cropping out distracting elements. The 12mm F1.4 DC | Contemporary forced me to embrace everything in the scene like the messy power lines, construction scaffolding, the way modern glass facades reflect the older buildings across the street. Suddenly these “imperfections” weren’t distractions; they were part of the story.
Sigma 12mm F1.4 DC | Contemporary Fujifilm X-T5 F2, 1/4000s, ISO 160Sigma 12mm F1.4 DC | Contemporary Fujifilm X-T5 F1.8, 1/1250s, ISO 250
The Interior Advantage
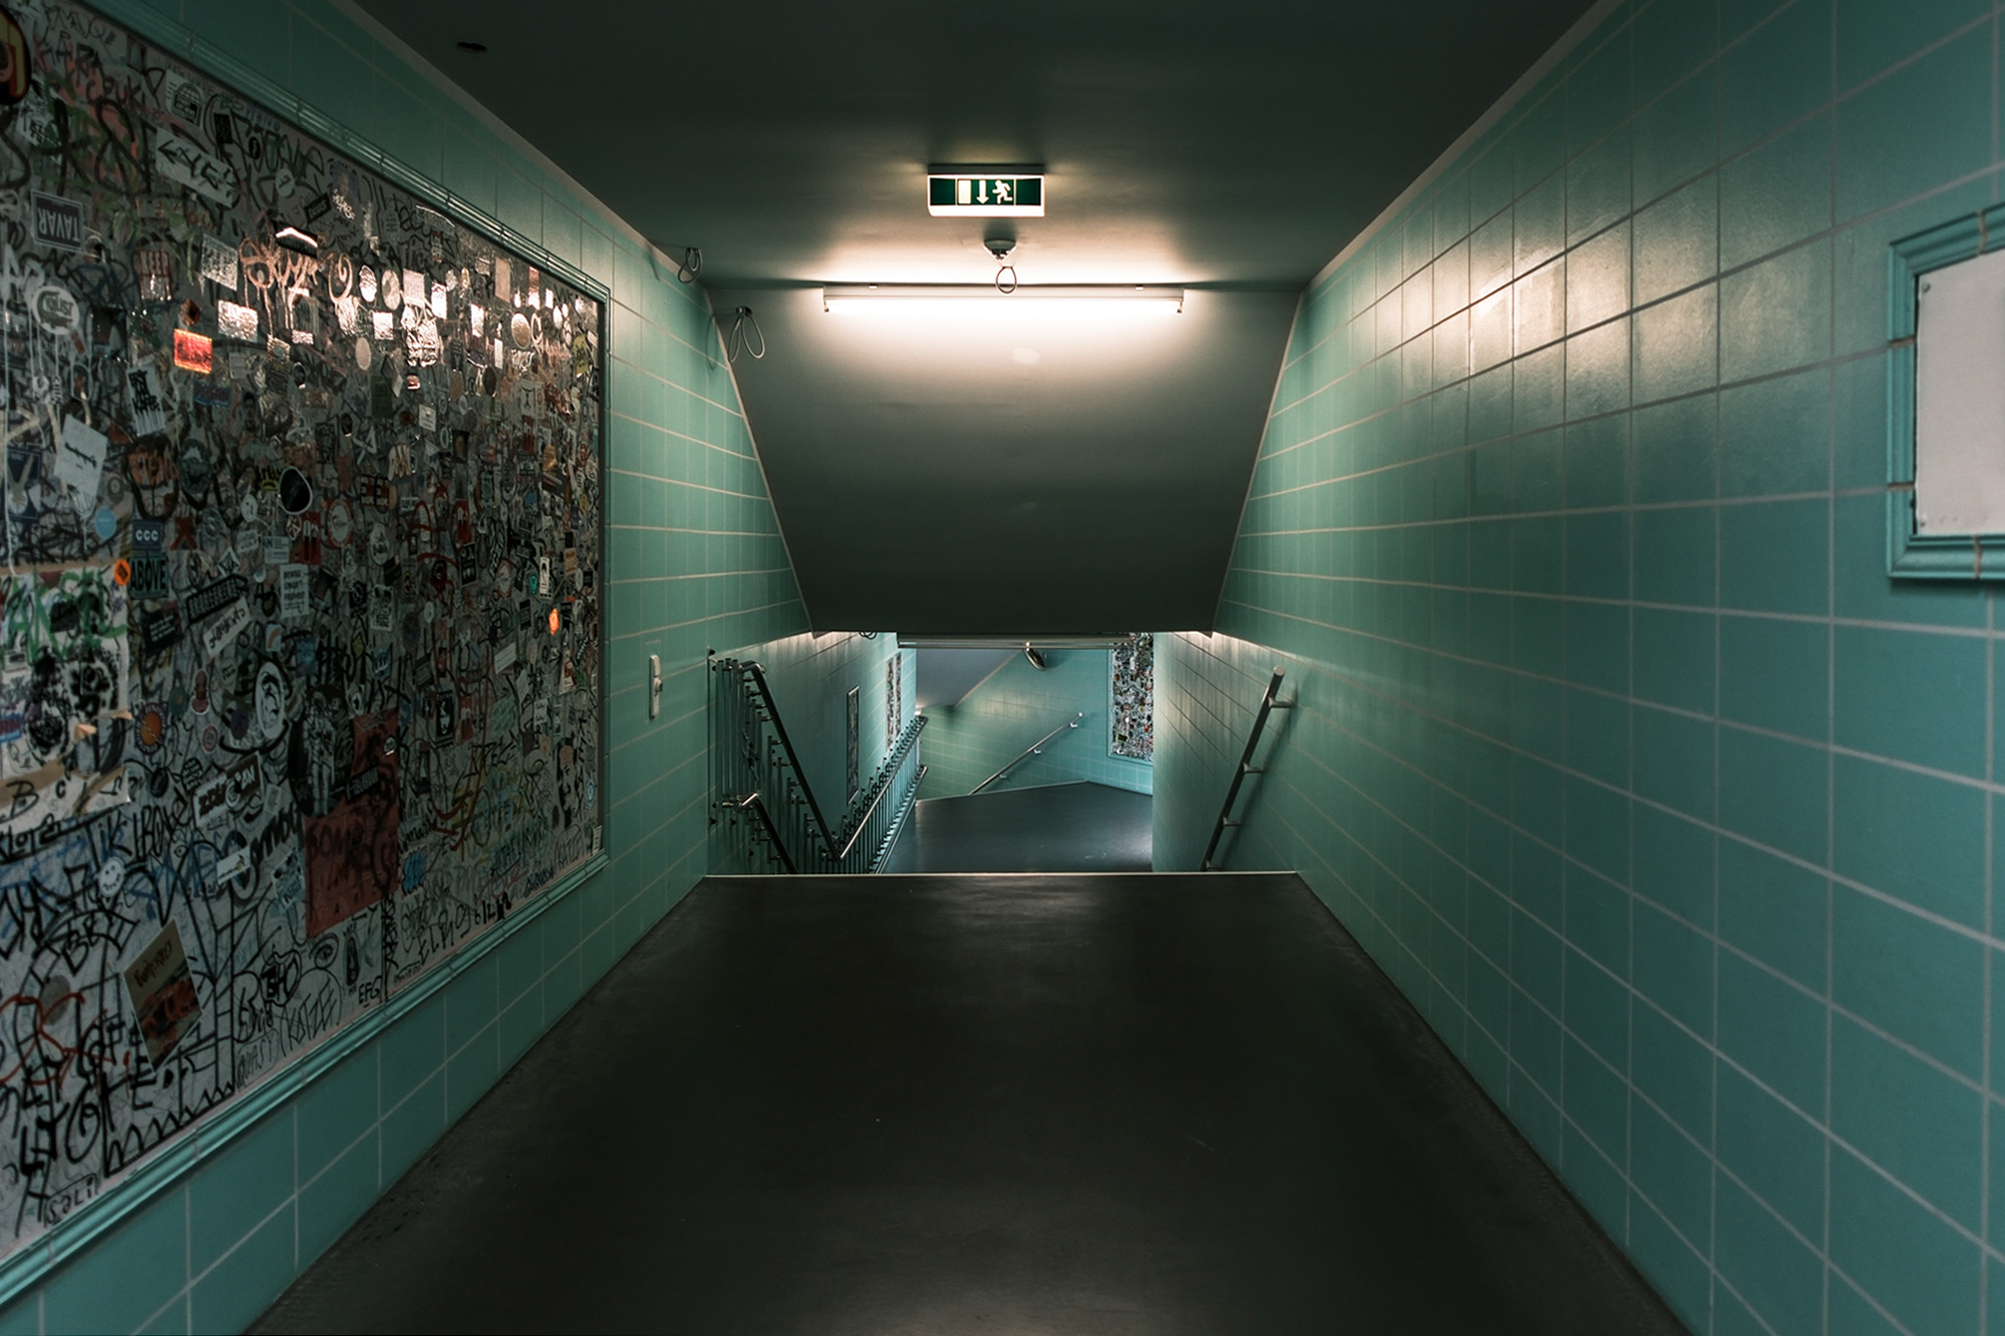
Berlin’s museums became my real testing ground. Anyone who’s tried photographing in galleries knows the struggle of dim lighting, mixed color temperatures, and the constant balance between capturing the space and the art within it. The F1.4 aperture wasn’t just convenient here; it was essential.
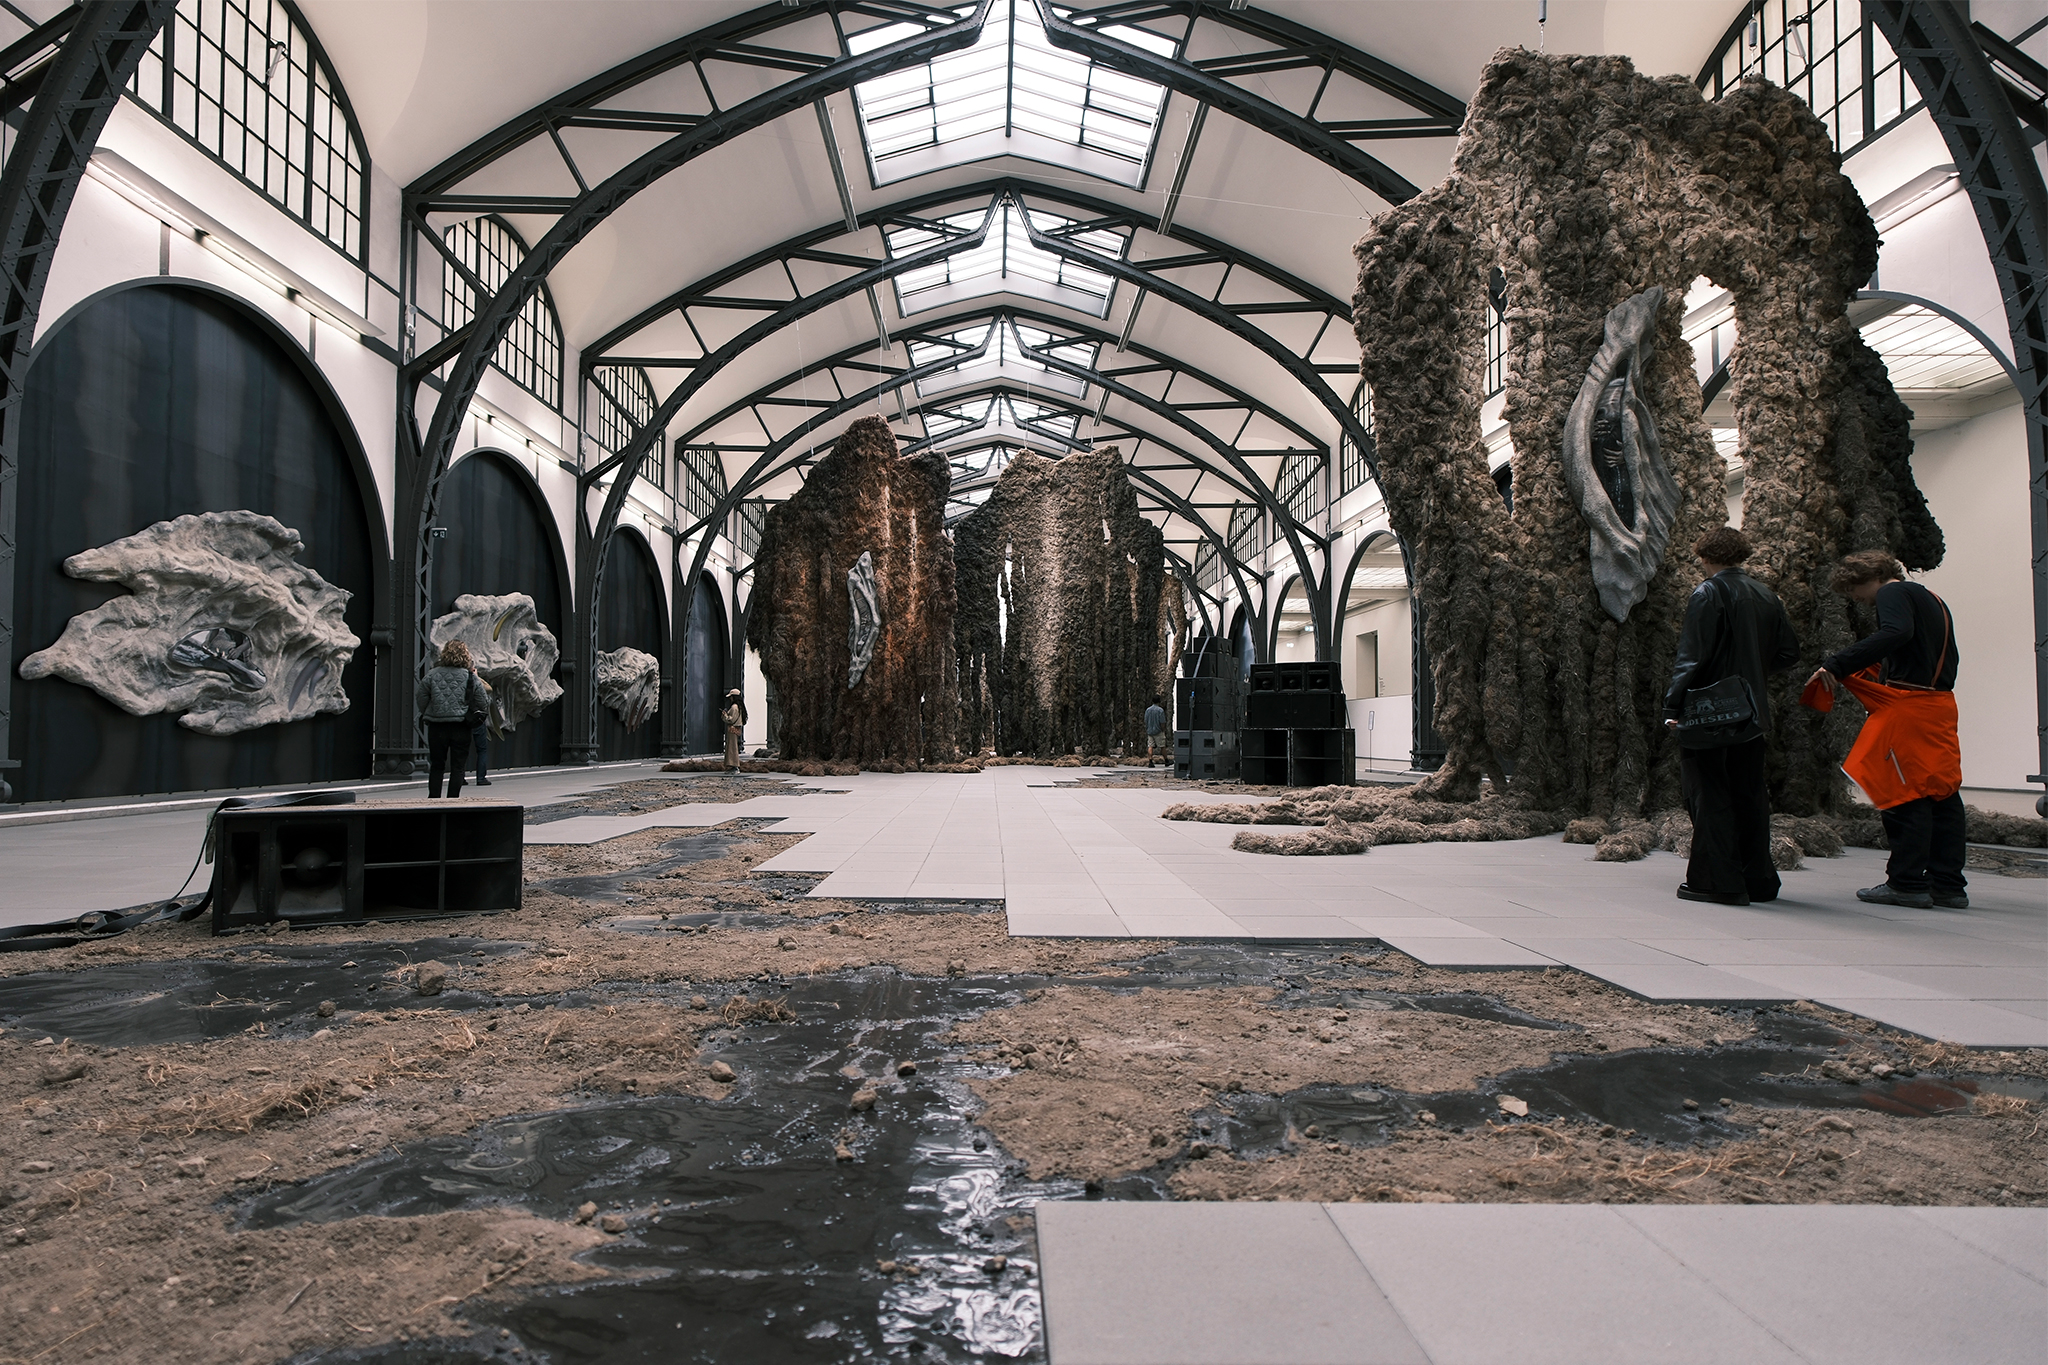
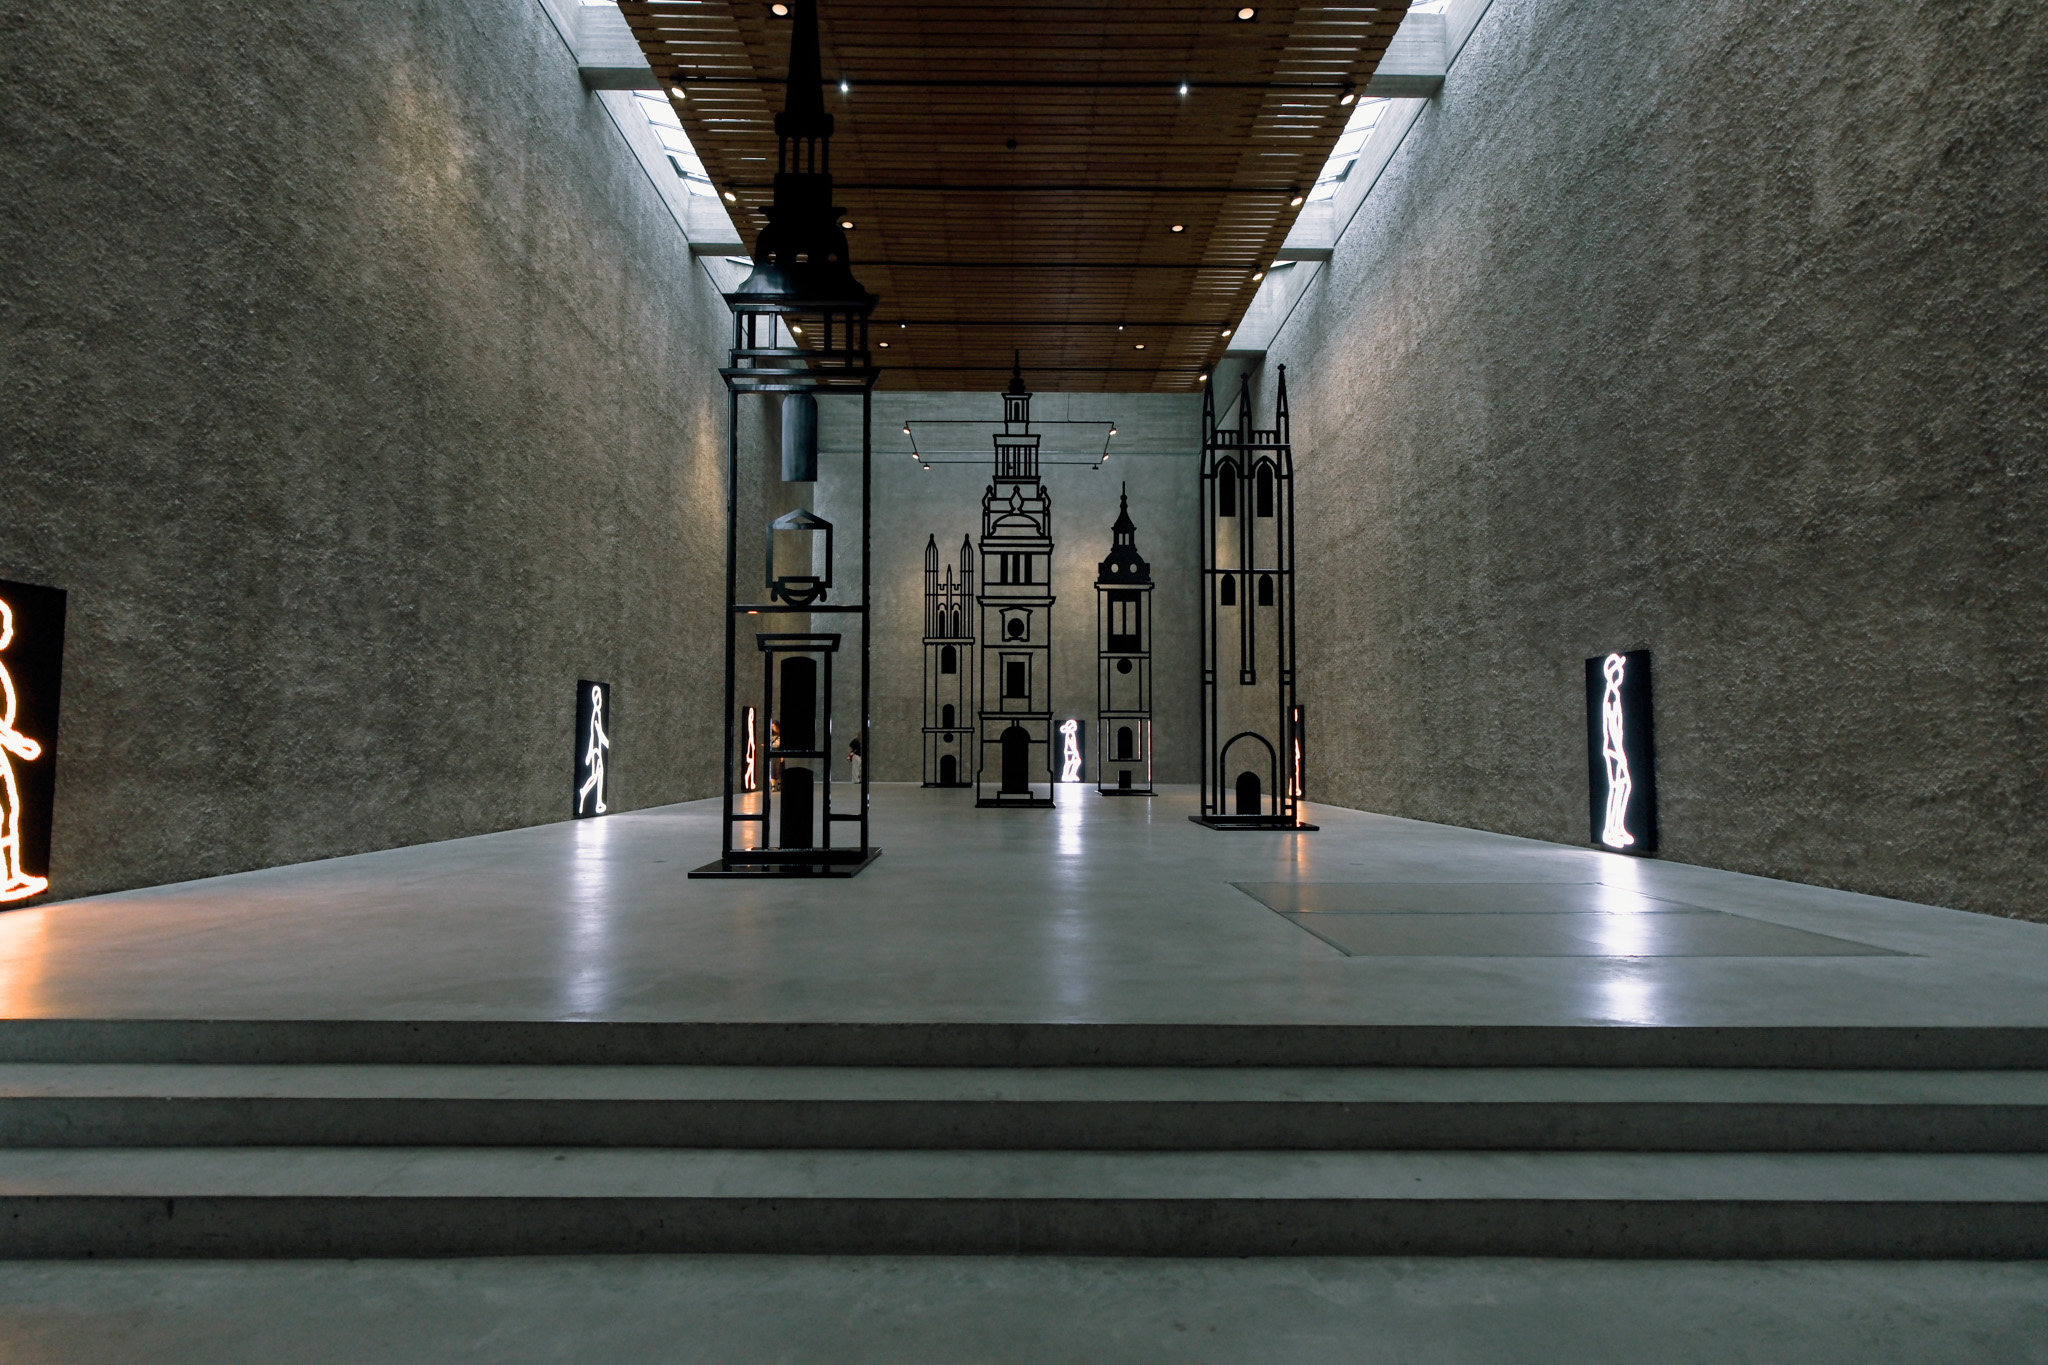
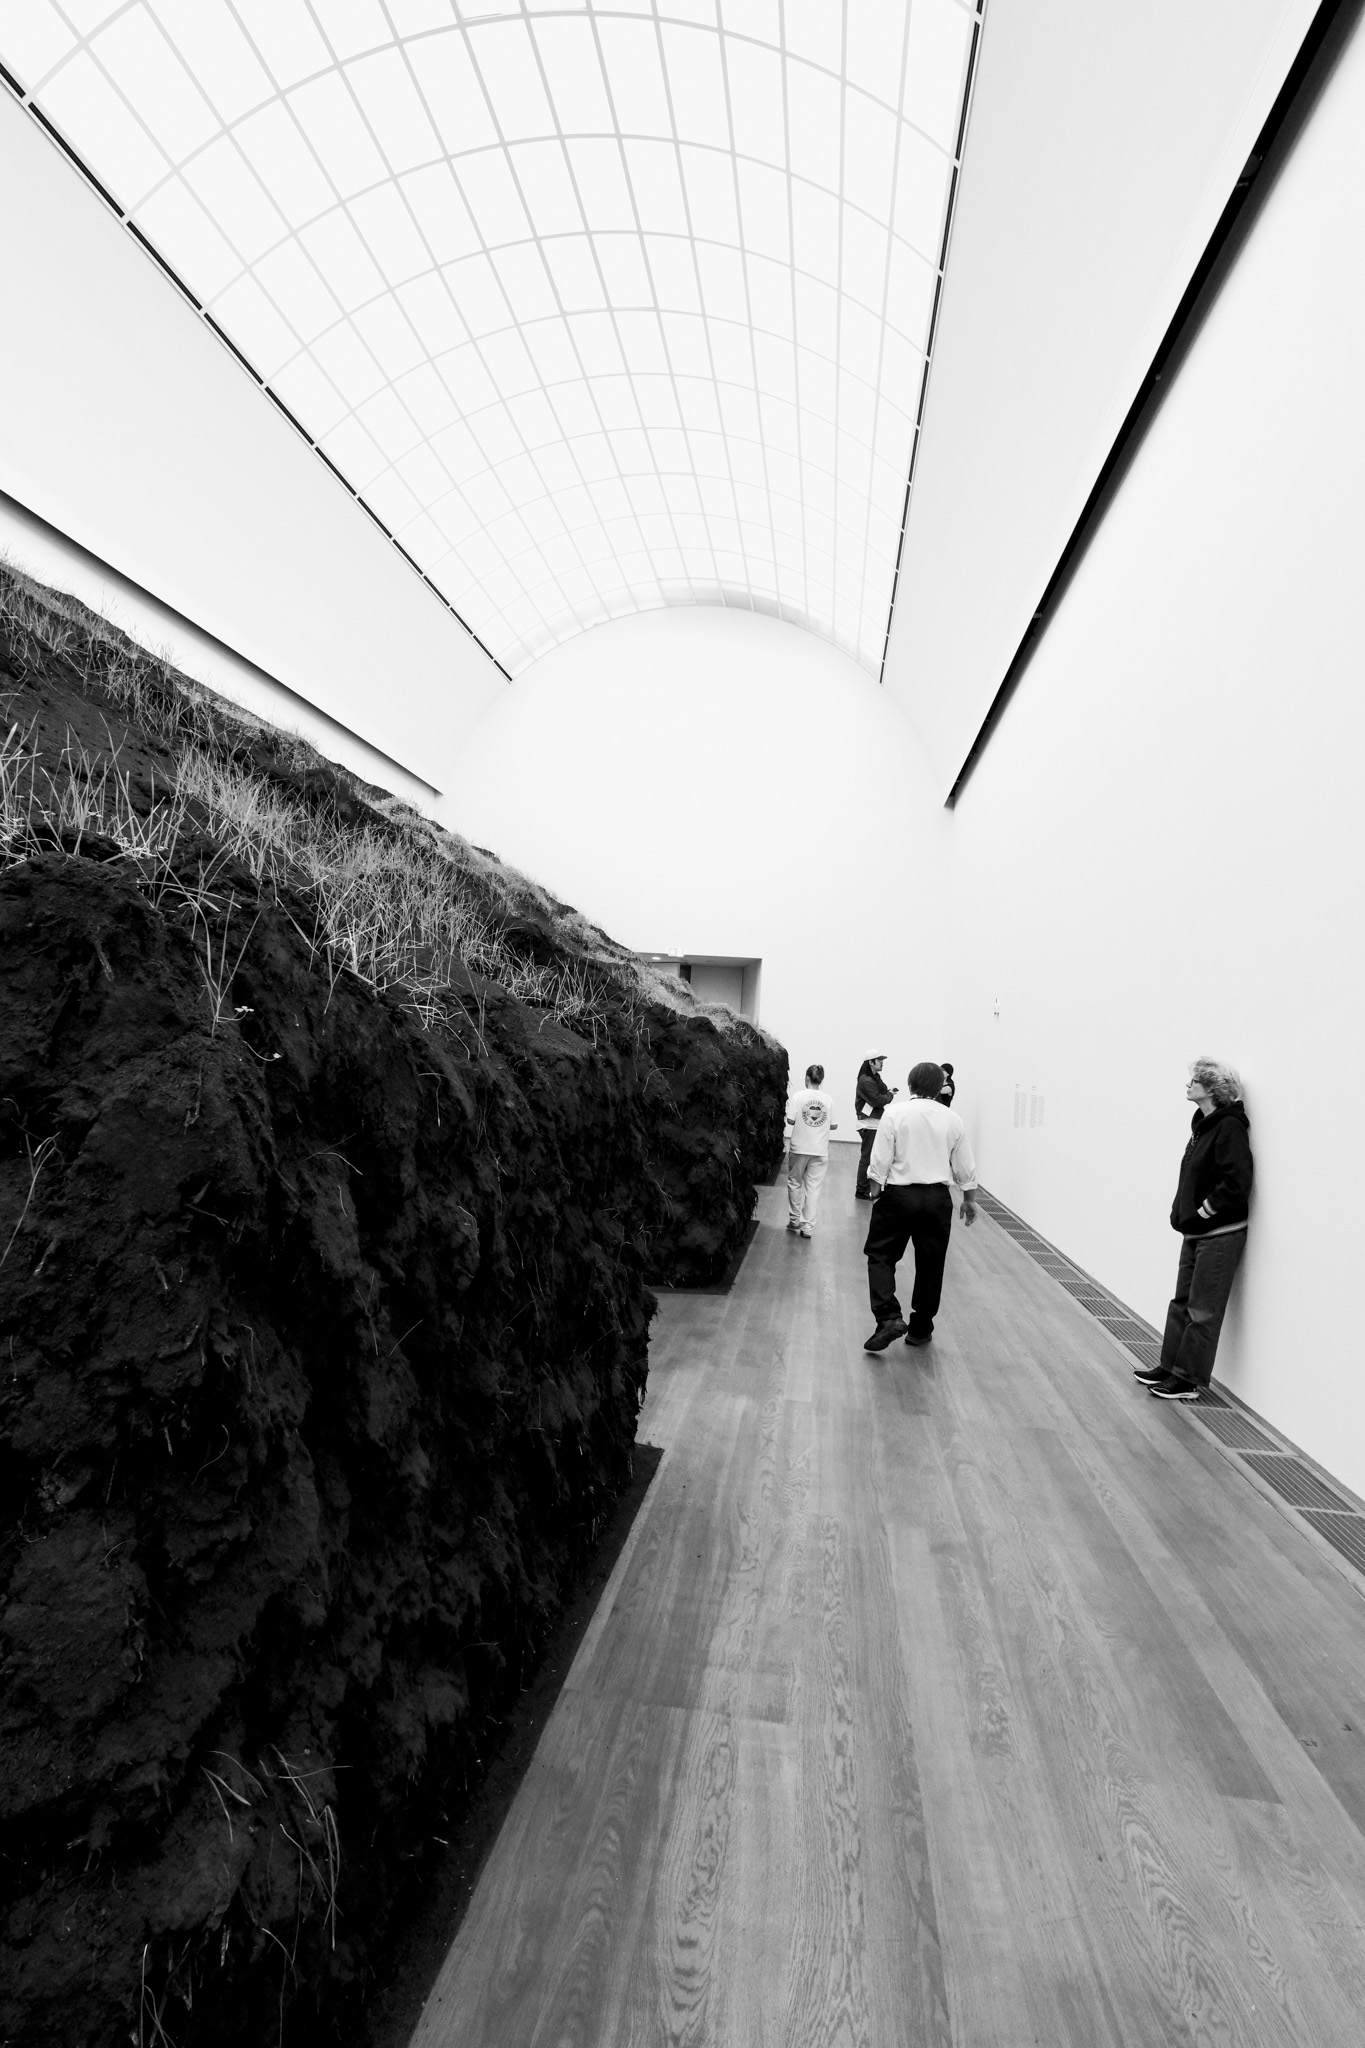
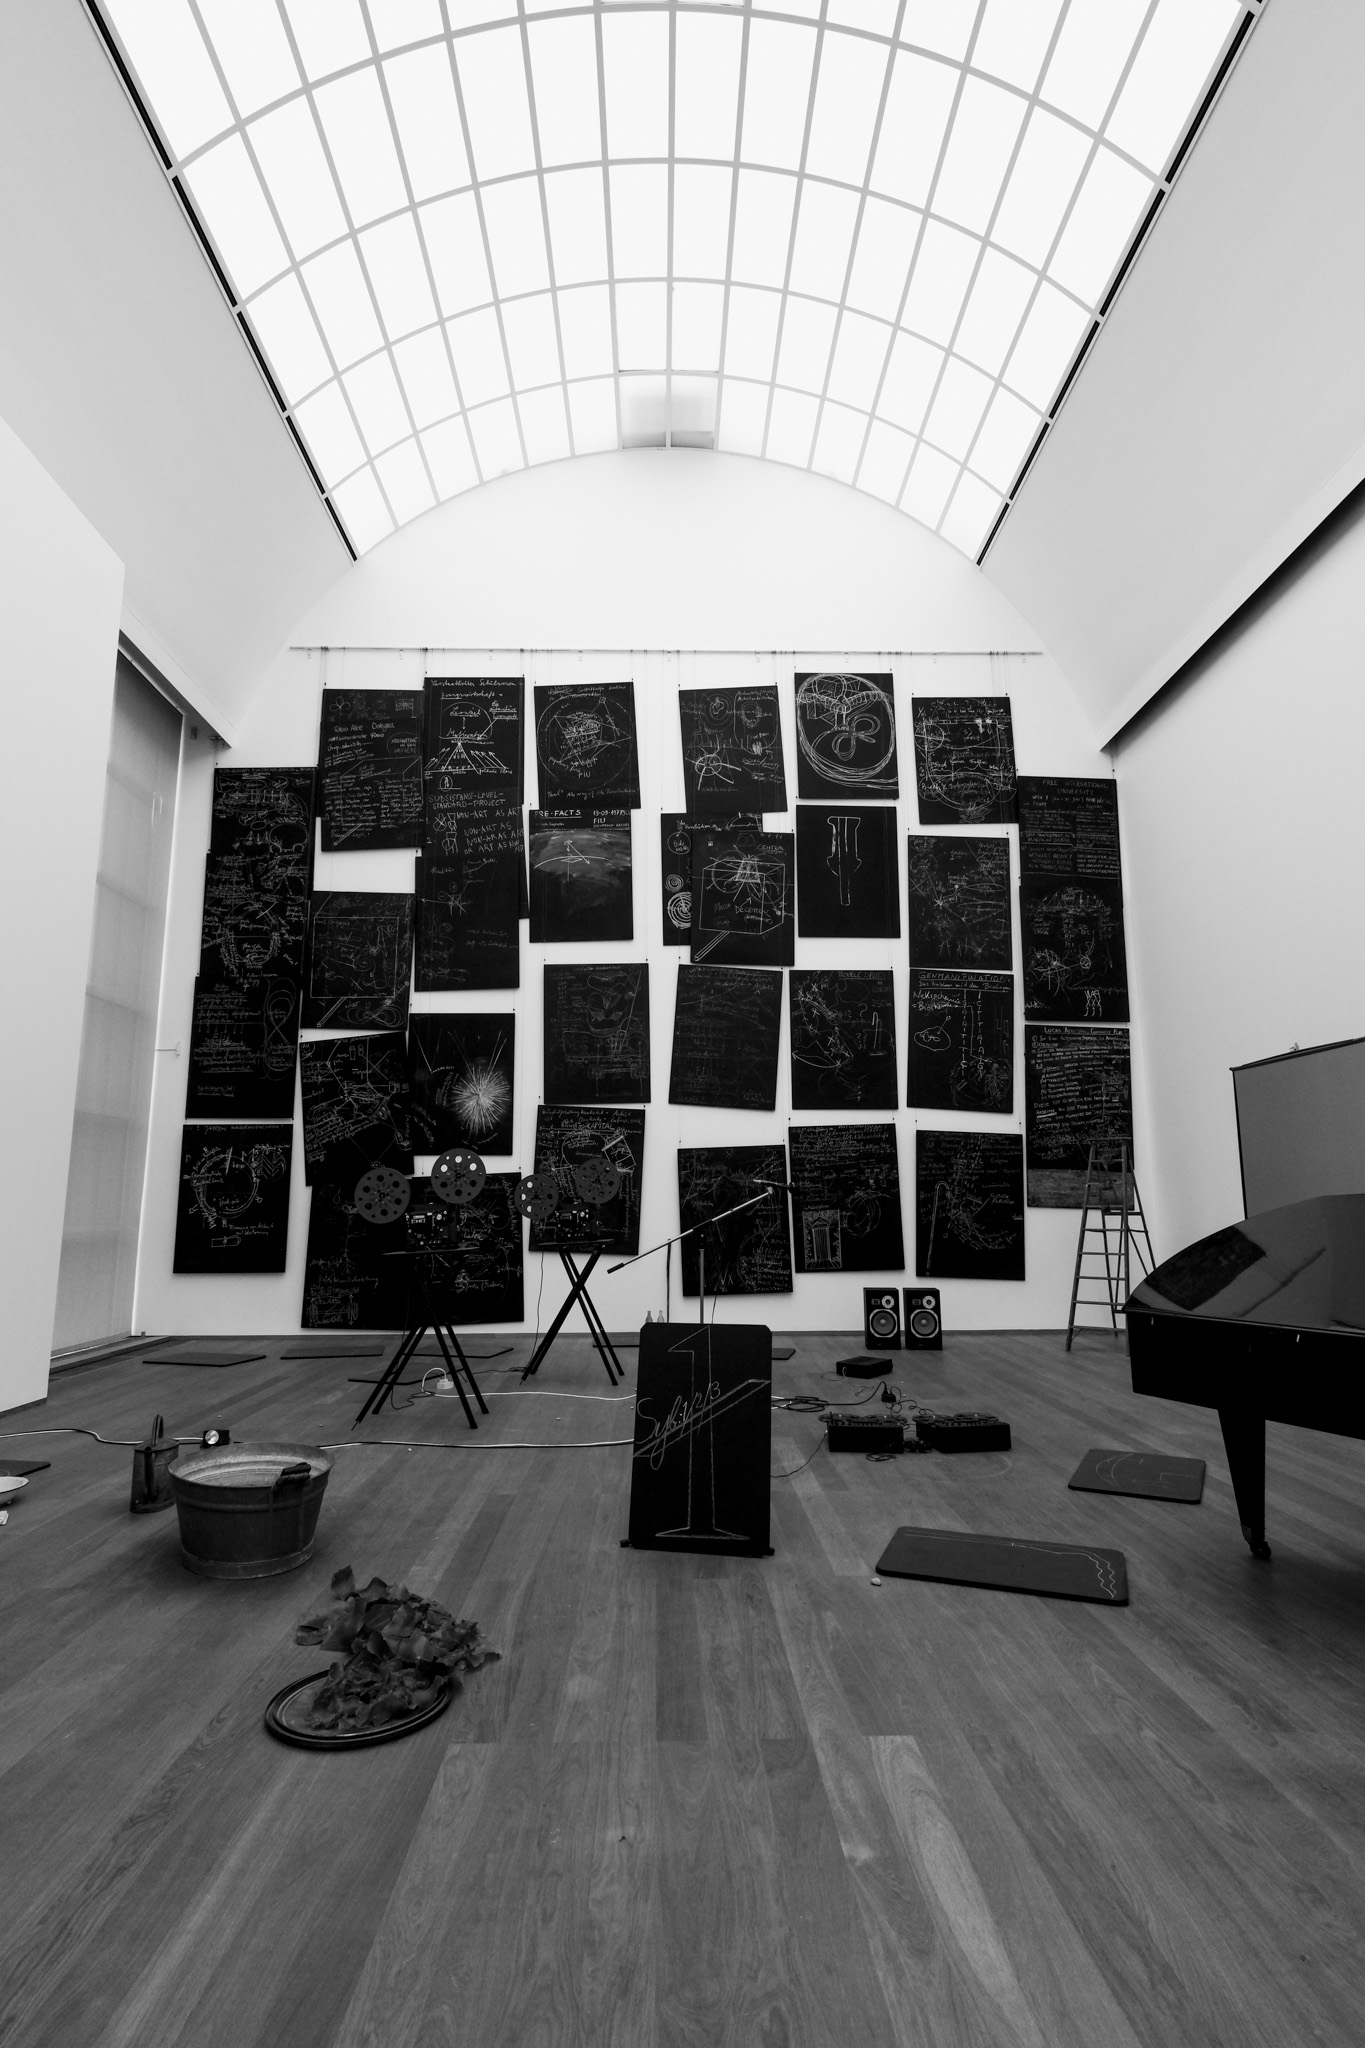
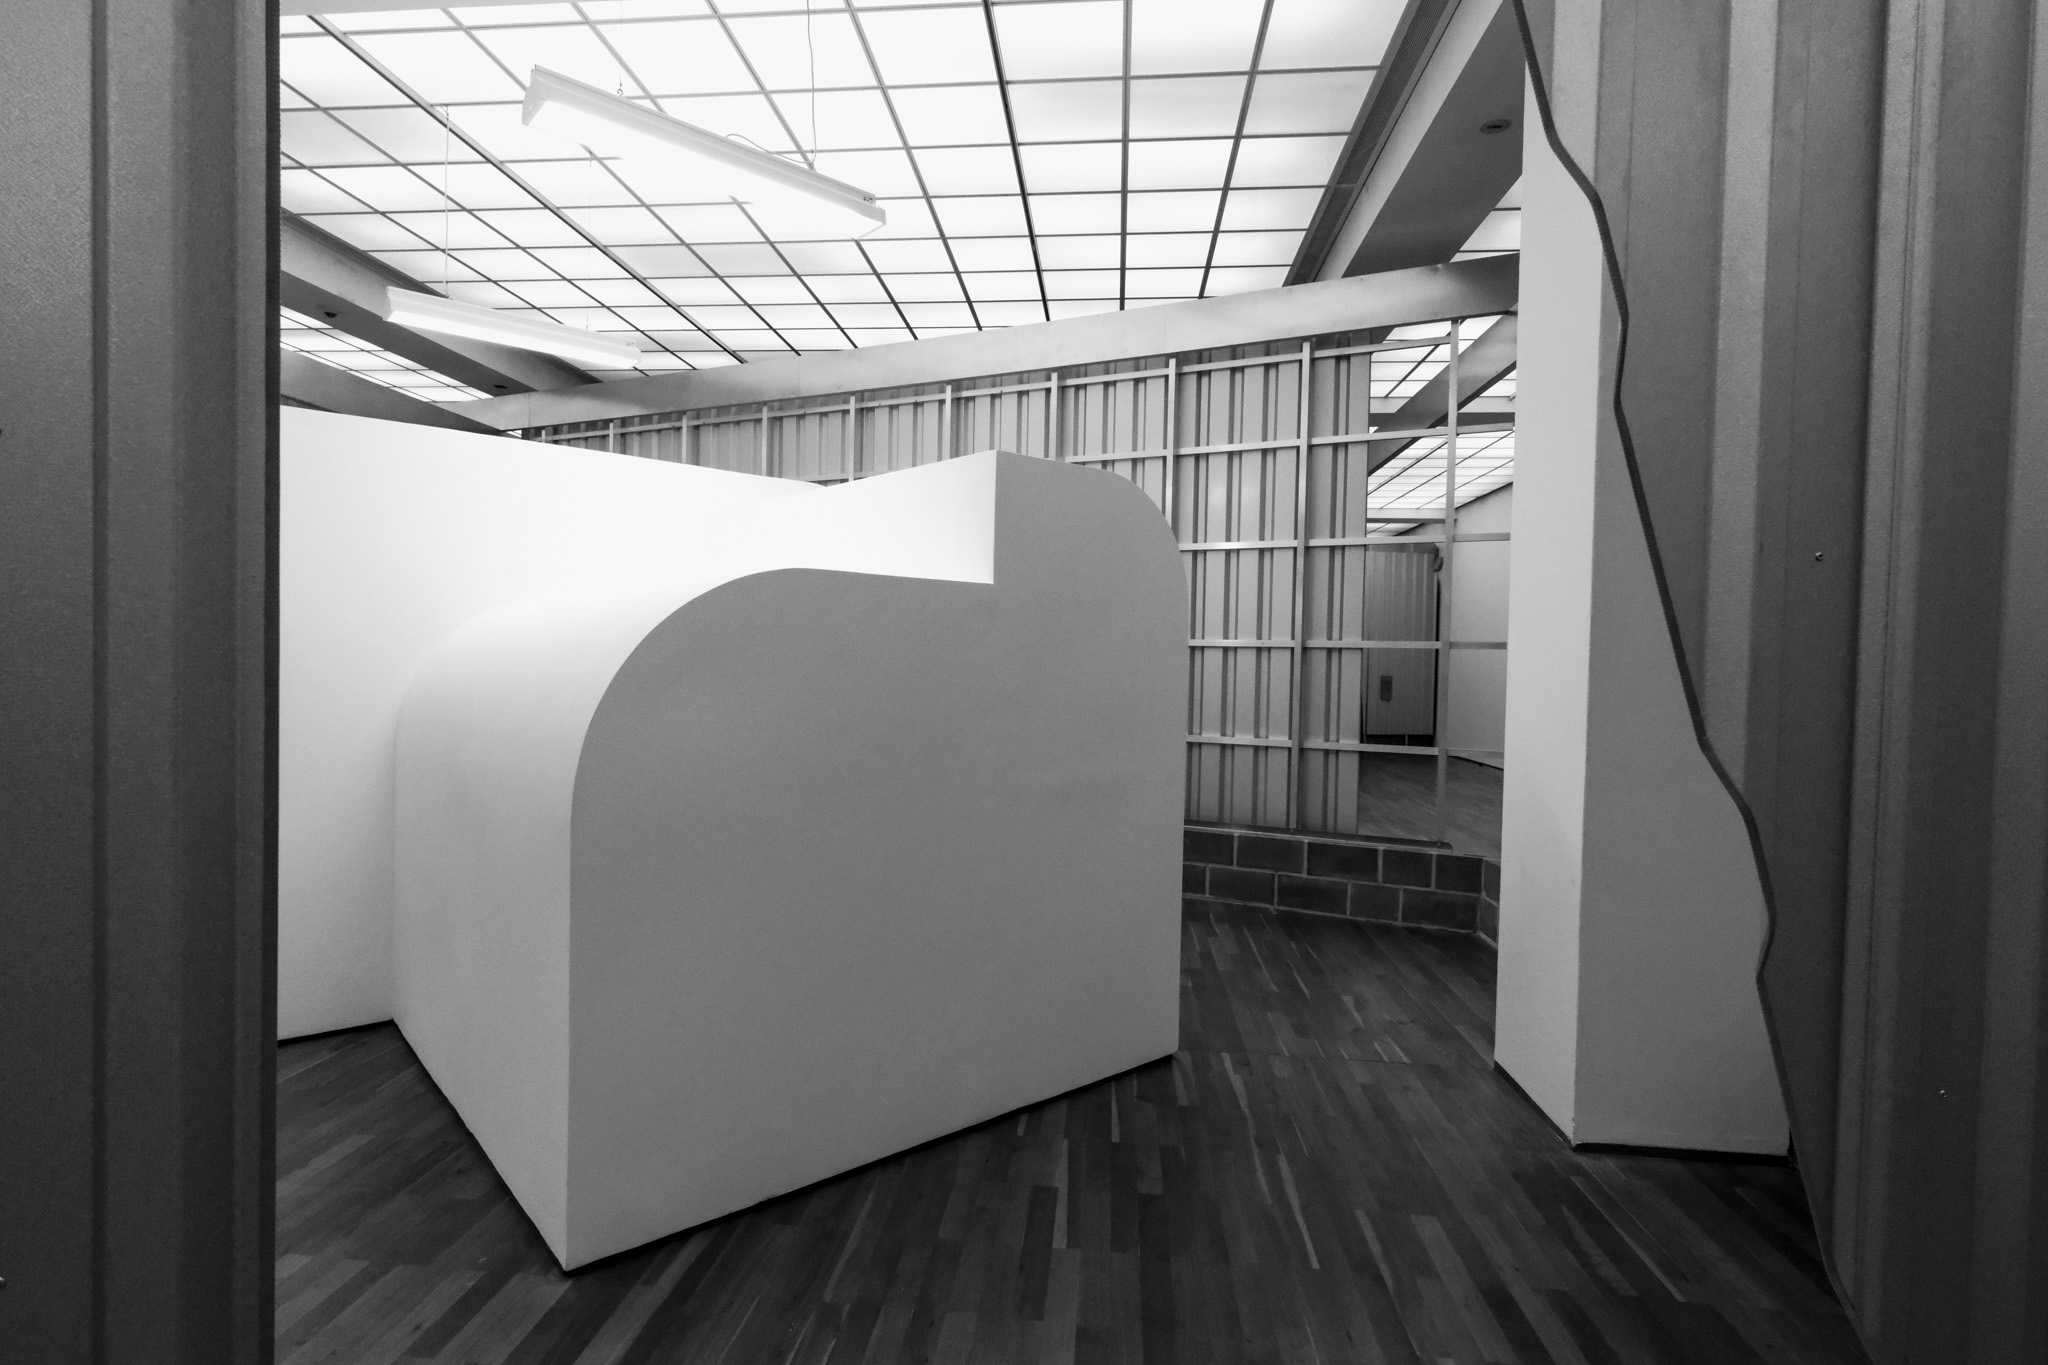
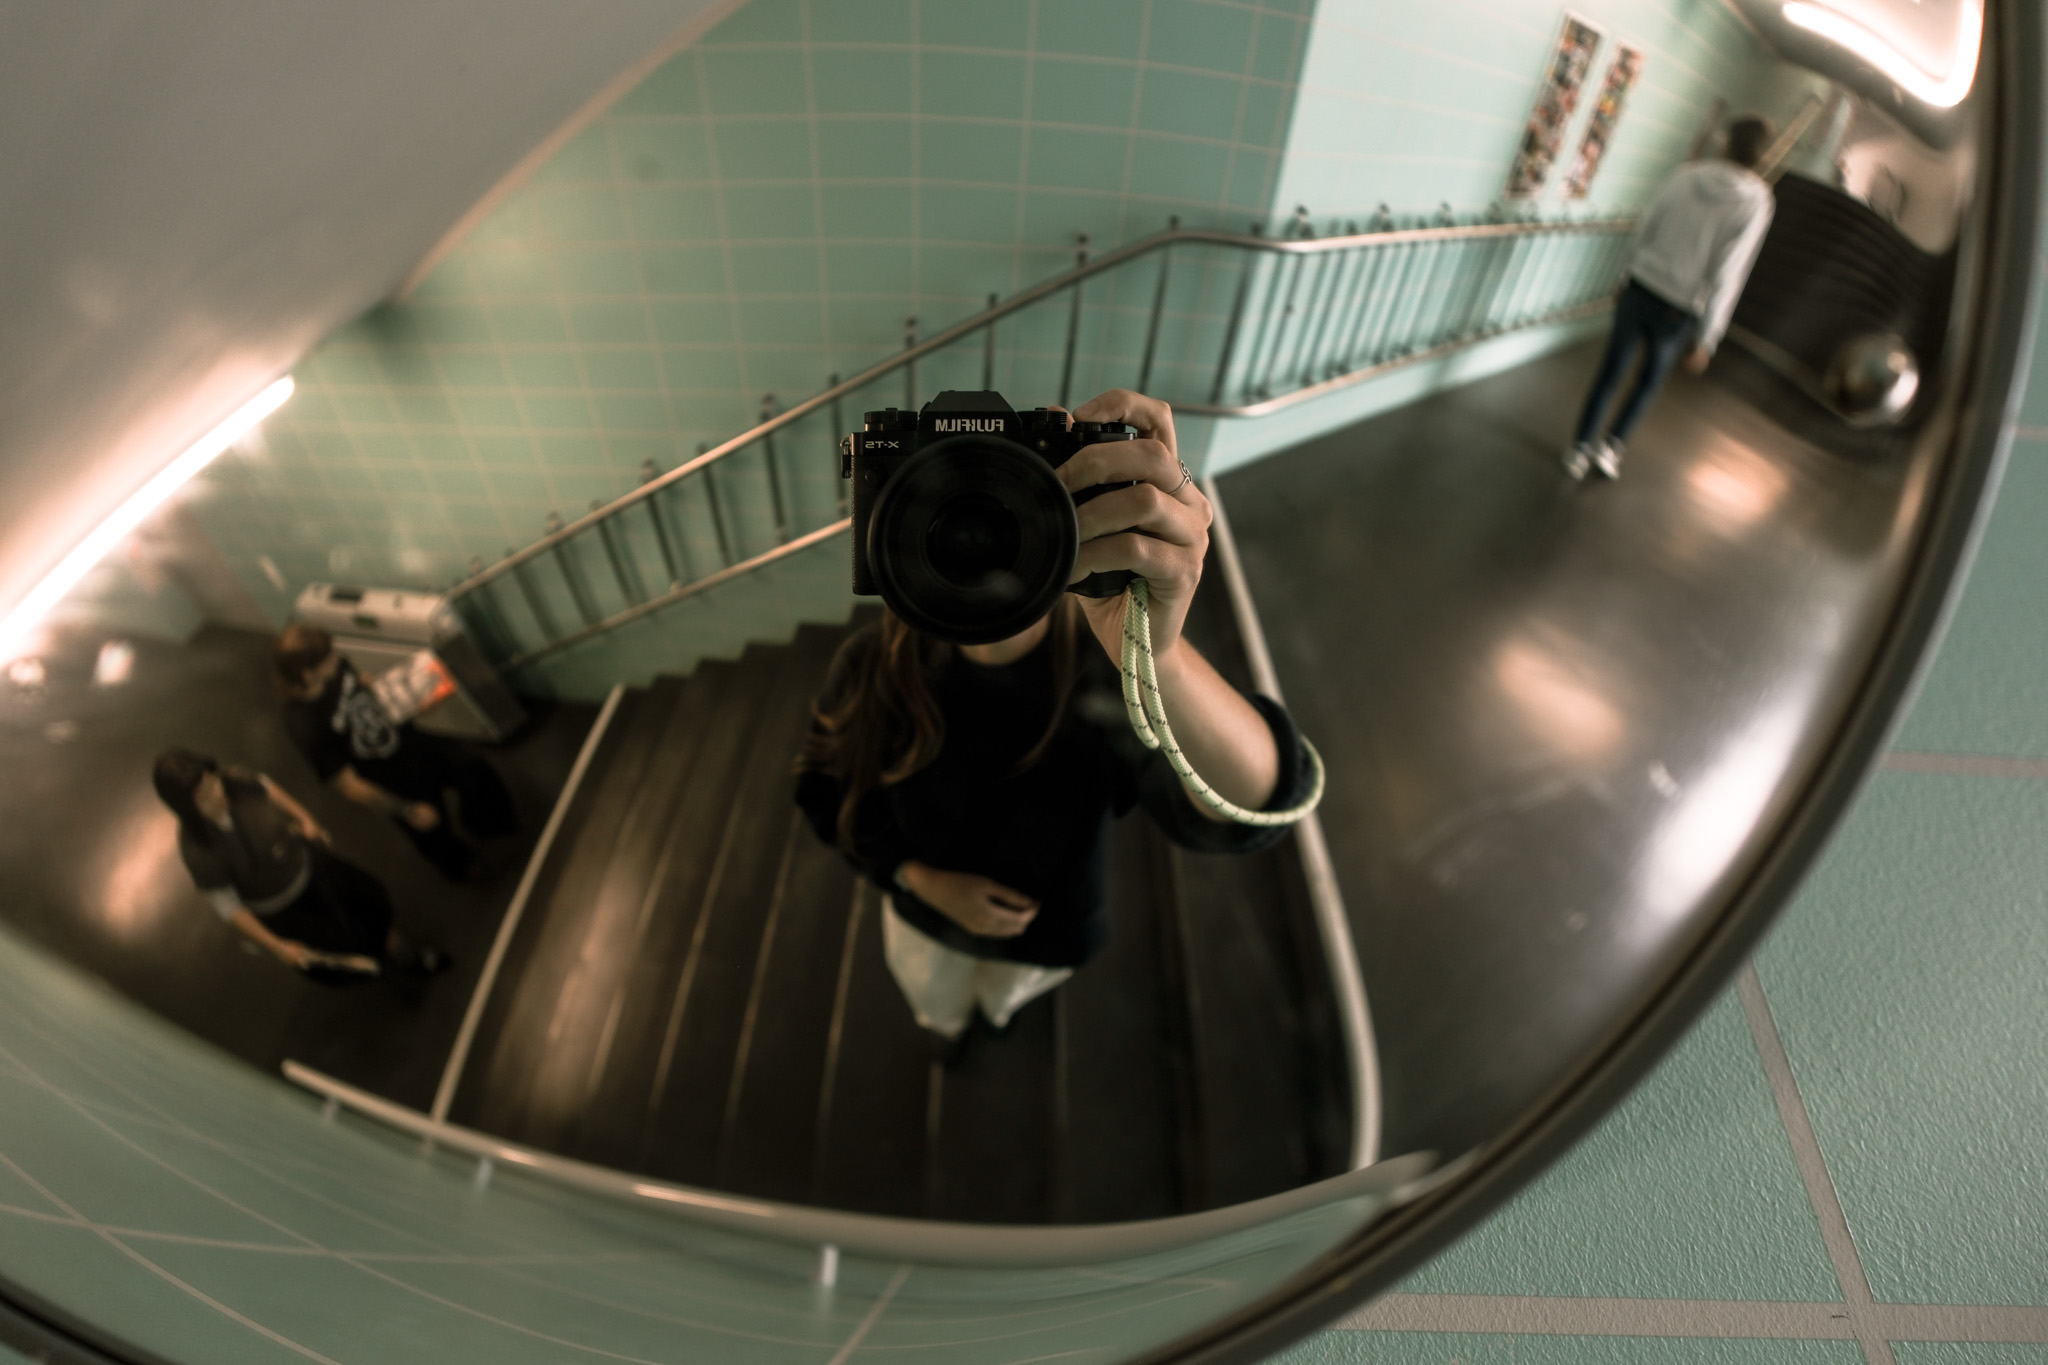
Museums present a unique challenge for ultra-wide photography — you’re often working in tight spaces while trying to capture installations that are meant to be experienced at scale. In Hamburger Bahnhof, this became immediately apparent. The 12mm F1.4 DC | Contemporary allowed me to step back just enough in cramped gallery spaces to include entire large-scale pieces without having to resort to multiple shots or awkward positioning.
Sigma 12mm F1.4 DC | Contemporary Fujifilm X-T5 F1.6, 1/125s, ISO 125
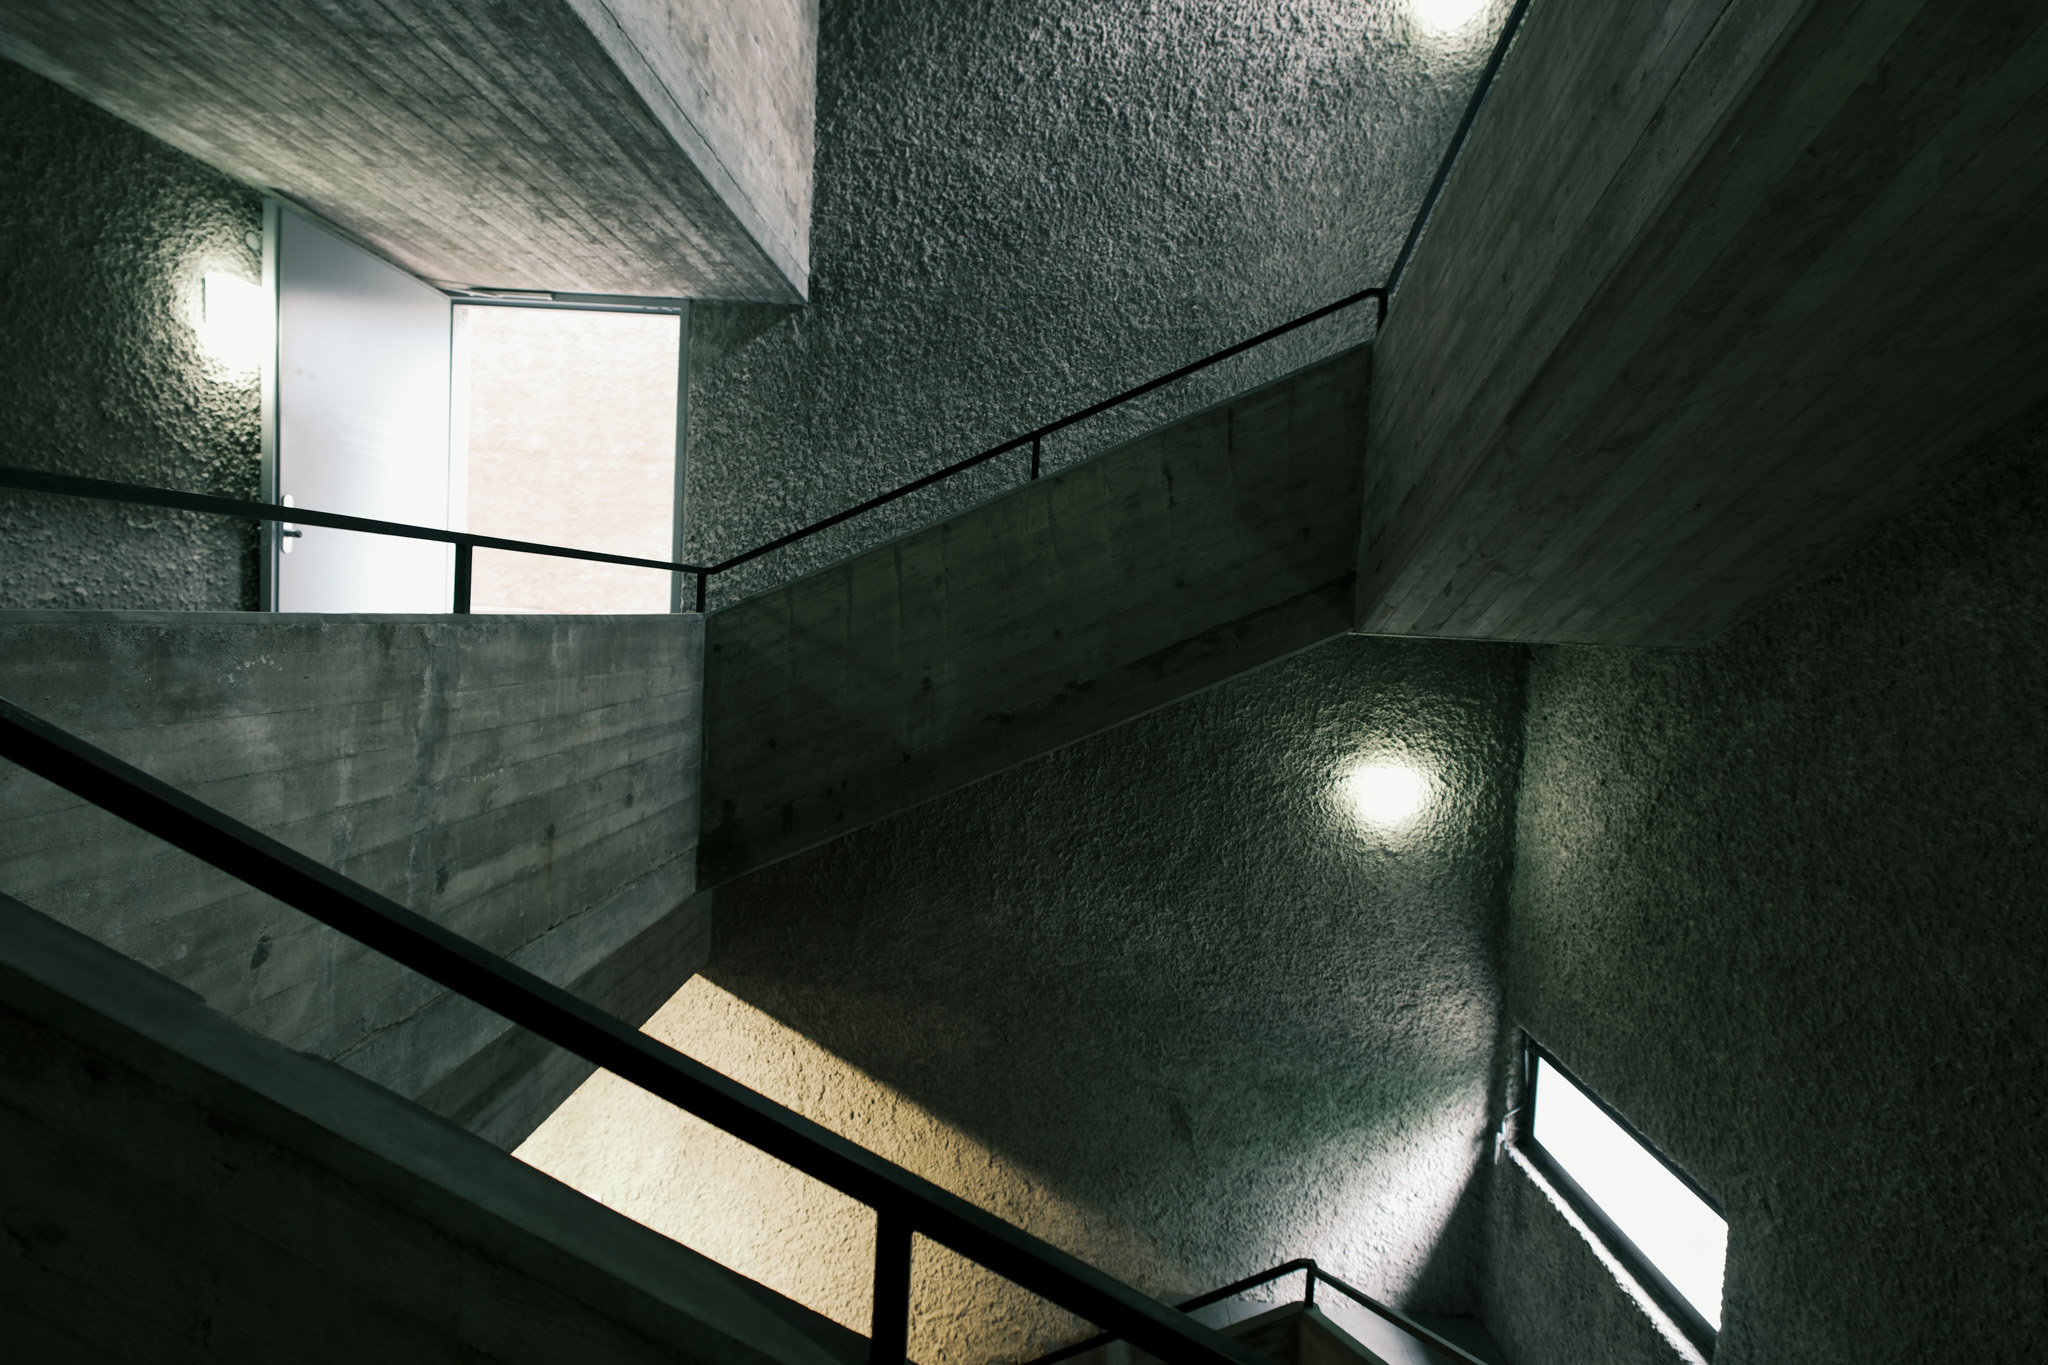
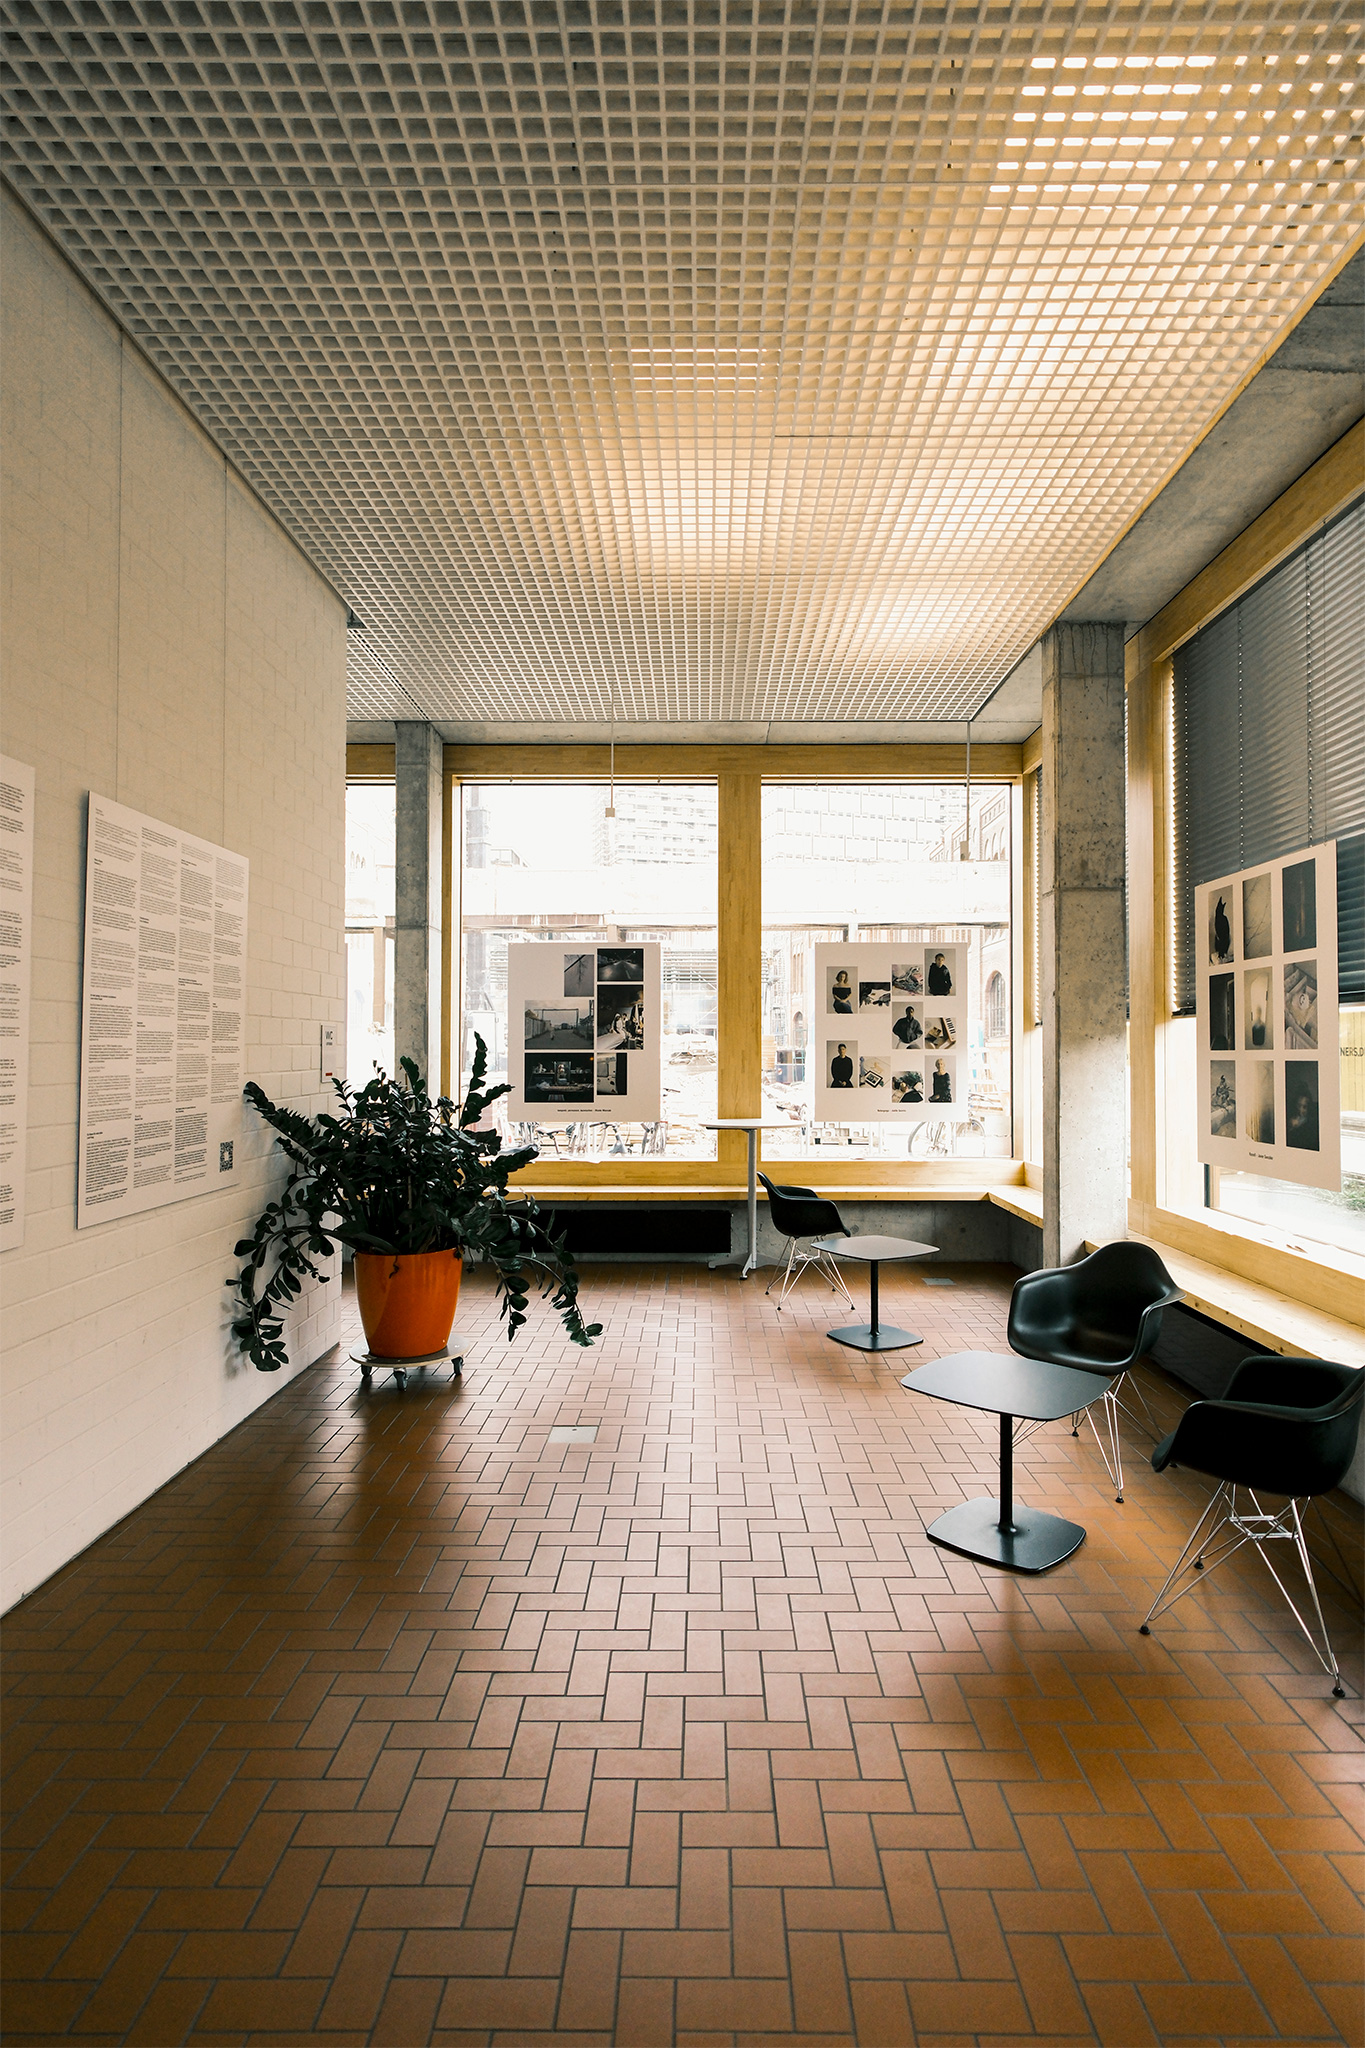
Navigating those dramatic transitional spaces between bright exhibition halls, I found myself shooting wide open more often than not. The lens handled it surprisingly well. I’d expected some chromatic aberration shooting at F1.4, especially with the harsh spotlighting they use to illuminate art pieces, but it stayed remarkably controlled. The color rendition stayed neutral too, which mattered more than I initially thought. Museum lighting is notoriously tricky, with different galleries using different temperature bulbs.
Sigma 12mm F1.4 DC | Contemporary Fujifilm X-T5 F2.2, 1/8s, ISO 320Sigma 12mm F1.4 DC | Contemporary Fujifilm X-T5 F1.4, 1/1000s, ISO 320
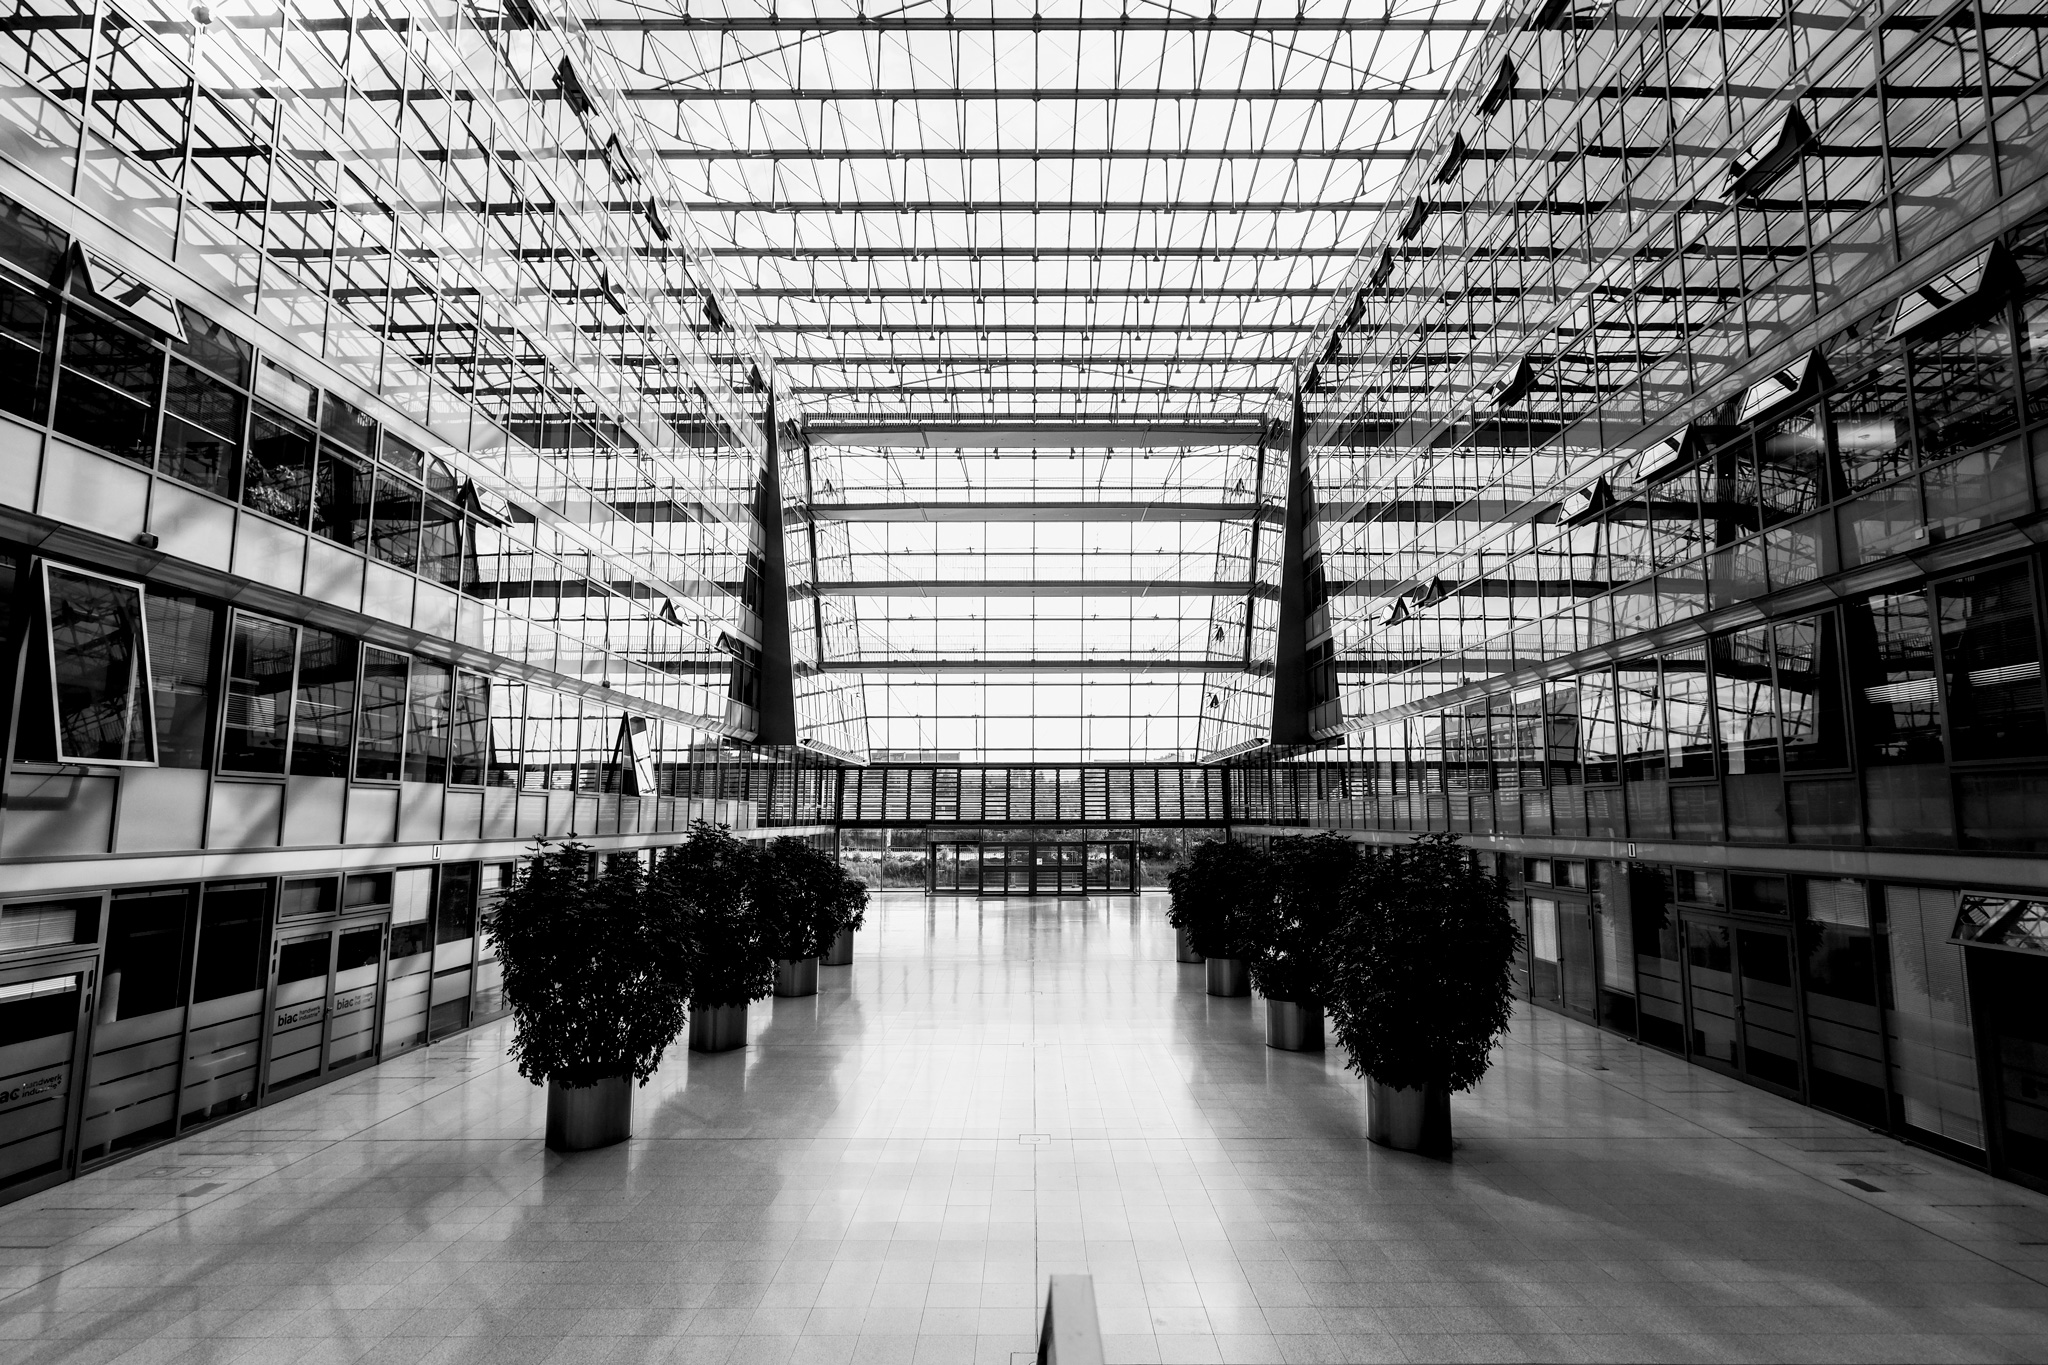
The highlights of the day were being able to capture Klára Hosnedlová’s installation for the CHANEL Commission, and Delcy Morelos’ exhibition, in their full scale with the 12mm focal length. These massive contemporary pieces are designed to envelope viewers, but photographing them usually means stepping so far back that you lose the sense of scale and presence. The 12mm let me include the entire installation while still showing enough of the surrounding space to convey how visitors interact with the work.
Sigma 12mm F1.4 DC | Contemporary Fujifilm X-T5 F7.1, 1/125s, ISO 2000Sigma 12mm F1.4 DC | Contemporary Fujifilm X-T5 F7.1, 1/125s, ISO 1000
Sigma 12mm F1.4 DC | Contemporary Fujifilm X-T5 F7.1, 1/125s, ISO 4000
After Dark
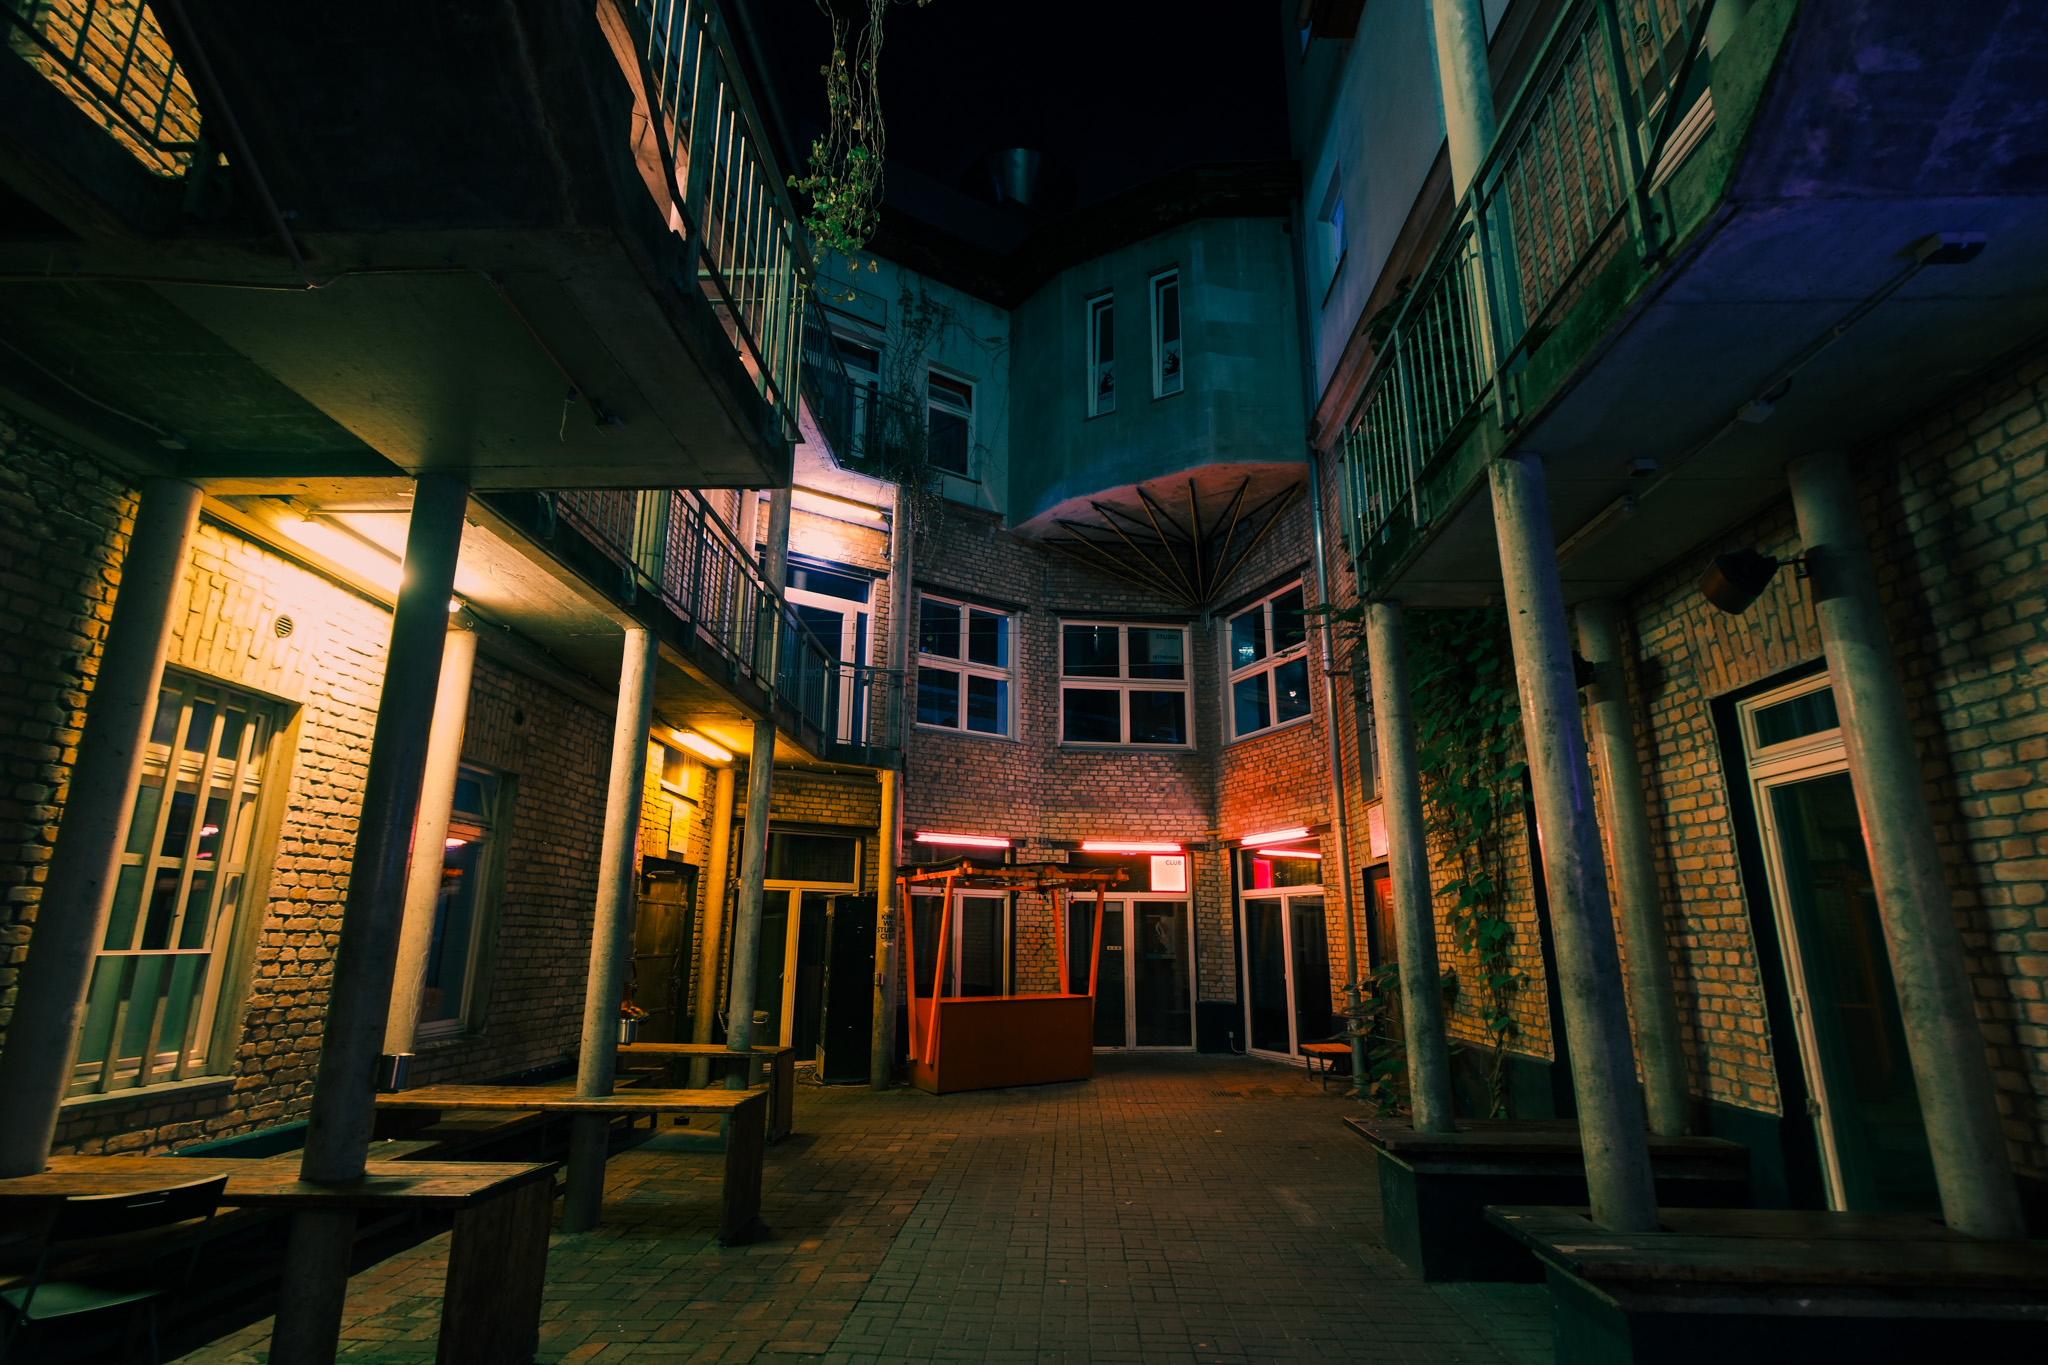
Berlin at night is a different city entirely. The cold war-era buildings take on this almost cinematic quality under street lighting, while the modern glass towers become these glowing monoliths. This is where the F1.4 maximum aperture really earned its keep.
I spent an evening wandering around Kreuzberg and Mitte neighborhoods, shooting handheld as the light faded. With most lenses, I’d be reaching for a tripod by this point or pushing my ISO beyond what I’m comfortable with. The extra stop of light from the F1.4 kept my shutter speeds reasonable for handheld work, even as I tried to capture both the illuminated building facades and the ambient street lighting.
Sigma 12mm F1.4 DC | Contemporary Fujifilm X-T5 F1.4, 1/4s, ISO 200
There’s something satisfying about being able to work quickly and quietly in low light. No tripod setup, no waiting for crowds to clear, just walking and shooting. The lens let me capture those fleeting moments when the artificial lighting hits just right, or when someone walks through the frame at exactly the right spot to provide scale.
Sigma 12mm F1.4 DC | Contemporary Fujifilm X-T5 F1.4, 1/125s, ISO 125
Although it’s not the most lightweight travel lens, it was a lot less noticeable on my shoulder than the normal gear I use for commercial photography, even after a full day walking Berlin’s Museum Island. It’s so nice to have the right gear that’s easy to travel with. But what occurred to me when I edited these images was that I was essentially carrying two specialized lenses in one. An ultra-wide for architecture and a low-light specialist for interiors. There’s something liberating about committing to one focal length and one lens for an entire trip.
Sigma 12mm F1.4 DC | Contemporary Fujifilm X-T5 F47, 1/125s, ISO 400Sigma 12mm F1.4 DC | Contemporary Fujifilm X-T5 F1.4, 1/2000s, ISO 1250
The Distortion Reality
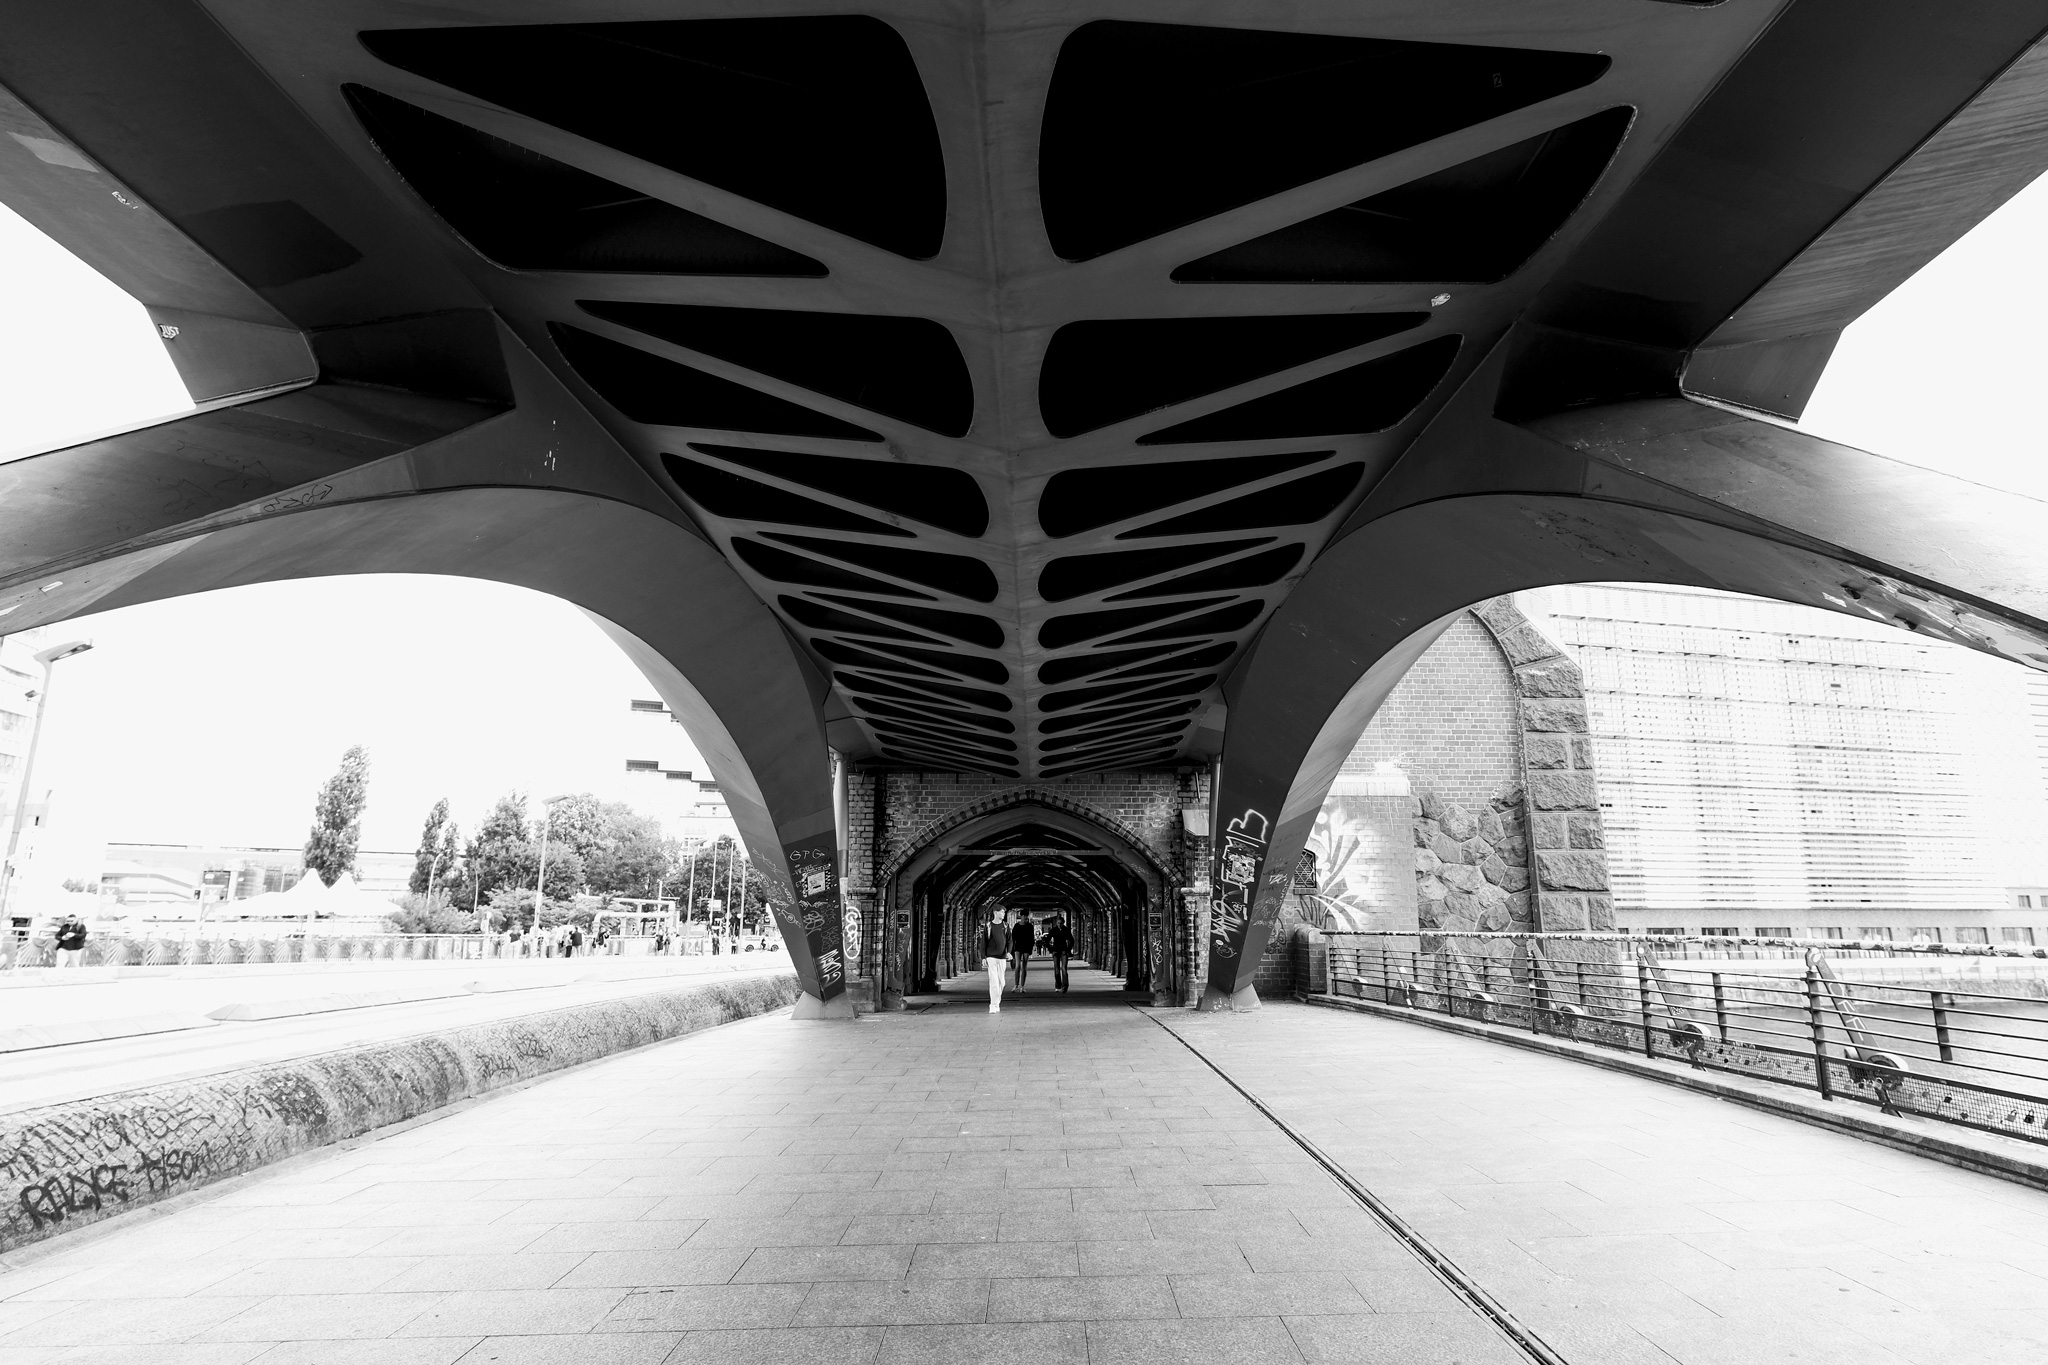
Ultra-wide lenses and distortion go hand in hand, and the 12mm F1.4 DC | Contemporary definitely has it, of course. But it’s controlled distortion, not the crazy funhouse effect you get from fisheye lenses. Straight lines stay straight, especially through the center of the frame. The geometric distortion is there, but it reads as perspective rather than optical weirdness.
Sigma 12mm F1.4 DC | Contemporary Fujifilm X-T5 F1.8, 1/3200s, ISO 200Sigma 12mm F1.4 DC | Contemporary Fujifilm X-T5 F1.4, 1/8000s, ISO 250
This actually worked in my favor when shooting Berlin’s mix of architectural styles. The slight barrel distortion added drama to those sweeping shots of modern museum buildings without making them look unnatural. And when I got close to interesting textures or design details, the distortion helped emphasize the three-dimensional quality of the surfaces.
Sigma 12mm F1.4 DC | Contemporary Fujifilm X-T5 F2.2, 1/2500s, ISO 8000
Sigma 12mm F1.4 DC | Contemporary Fujifilm X-T5 F1.4, 1/125s, ISO 125Sigma 12mm F1.4 DC | Contemporary Fujifilm X-T5 F8, 1/125s, ISO 400
Different Tools, Different Stories
Looking back through the images from this trip, I realize how much the lens shaped what I photographed and how I saw the city. With a standard zoom, I would have shot tighter compositions, focused more on isolated architectural elements, and probably missed a lot of the contextual details that make these spaces feel lived-in.
The 12mm F1.4 DC | Contemporary forced me to include more of the surrounding environment, to think about how buildings relate to their neighborhoods, and how people move through these spaces. It’s the difference between photographing architecture and photographing urban life that happens to include interesting buildings.
Sigma 12mm F1.4 DC | Contemporary Fujifilm X-T5 F2.5, 1/500s, ISO 250
Sigma 12mm F1.4 DC | Contemporary Fujifilm X-T5 F2.2, 1/250s, ISO 320Sigma 12mm F1.4 DC | Contemporary Fujifilm X-T5 F1.4, 1/2000s, ISO 250
Would I recommend committing to a single ultra-wide for an entire trip? It depends on what kind of photographer you are. If you like the safety net of a zoom range, this approach might feel limiting. But if you’re interested in developing a more intentional approach to composition, in really learning to see at a specific focal length, there’s something valuable about the constraint.
The Sigma 12mm F1.4 DC | Contemporary proved itself a capable travel companion in Berlin — sharp enough to capture the architectural details that matter, and fast enough to handle whatever lighting conditions the city threw at it. More than that, it showed me a different way of traveling.
The golden hour is truly a golden time for photographers to capture dreamy images. It is the hour after sunrise and the hour before sunset and the durations can vary depending on your location and seasons. Winter seasons usually have longer golden hours compared to summer but again varies considerably depending on where you live.
During the golden hour, the light is soft and warm, and the shadows are long and dramatic. Depending on what you wish to shoot, you can have the sun falling on the scene from any direction. You need to have a good understanding of light to get the desired shots and to capture the best details and mood in the frame.
Here are some golden shots that were captured during the golden hour, which is during the sunset or sunrise and the time around this.
If you are a beginner or wish to know more about how to use light in your photography, we recommend you to check out this eBook, “Understanding Light” by Photzy. It will help you to master light by learning how to control, manipulate and read light, and produce amazing images. The guide will allow you to discover the secrets used by professionals to read light and produce inspiring images.
Johannes Plenio
Pete Godfrey
Alfonso Betancourt
Jeremy Bishop
Marek Piwnicki
Shana Van Roosbroek
Atul Vinayak
Johannes Plenio
Kellen Riggin
In order to be a great photographer, before diving into anything related to photography gear and settings, one needs to learn how to use light. A good understanding of light and how to use it in your photography will help to capture stunning photos under any light conditions. Check out this eBook, “Understanding Light” by Photzy to learn more about light and how to effectively use it in your photography.
Petr Vyšohlíd
Nazik Mandziuk
Diana Aishe
Philipp Düsel
Ram Gopal
Ray Brown
Kateryna Melnyk
Most photographers chase the best light and tend not to photograph anything when they think that the light is not good enough. In all honesty, we think that there is no good or bad light and waiting for good light will only lead to loosing a lot of photography opportunities. If you do not want to miss any shots as a photographer and want to learn how to work with any light situation, check out this eBook, “Understanding Light” by Photzy. It is a guide with 155 pages of fast and easy learning, packed with illustrations, case-studies and assignments to verify your knowledge.
Sunlight is the best light for photography because it is the only natural light available for us during the day time and at night we also have the moonlight to capture moonlit landscapes. Using natural light in photography can be the best way to make use of available light and it costs nothing. When there are unfavourable light conditions natural light can always be manipulated to our liking with a good understanding of how light works.
Here are some resources that will help you to use sunlight creatively in your photography.
Photo by Samson Katt
Lens flare is something that most lens manufacturers tend to minimise when manufacturing lenses, but it is also something that can give a cinematic and dreamy look to a shot or footage if used well. Usually when backlighting your subjects, it becomes almost impossible to eliminate lens flare if the sunlight is falling straight on the lens. So this article talks about how you can embrace lens flare and control it.
Photo by Omar Prestwich
Backlighting is a very beautiful way to illuminate your subjects because of the stunning rim light that can make your subject’s outline glow. Depending on how you backlight your subject, you may come across a bit of lens flare and this can be used creatively in your photography. This article provides five simple ways to use lens flare for creative photography.
You may have seen those stunning photos where the sunlight may look like starburst. Did you know that it is very easy to capture starbursts in your photo by just setting your camera’s aperture and/or moving around to position the sunlight in a certain way? This article discusses two easy ways to capture brilliant starbursts in your photographs. Here is another article if you wish to read more – How To Create A Starburst Effect In Photographs
Photo by Panoramas
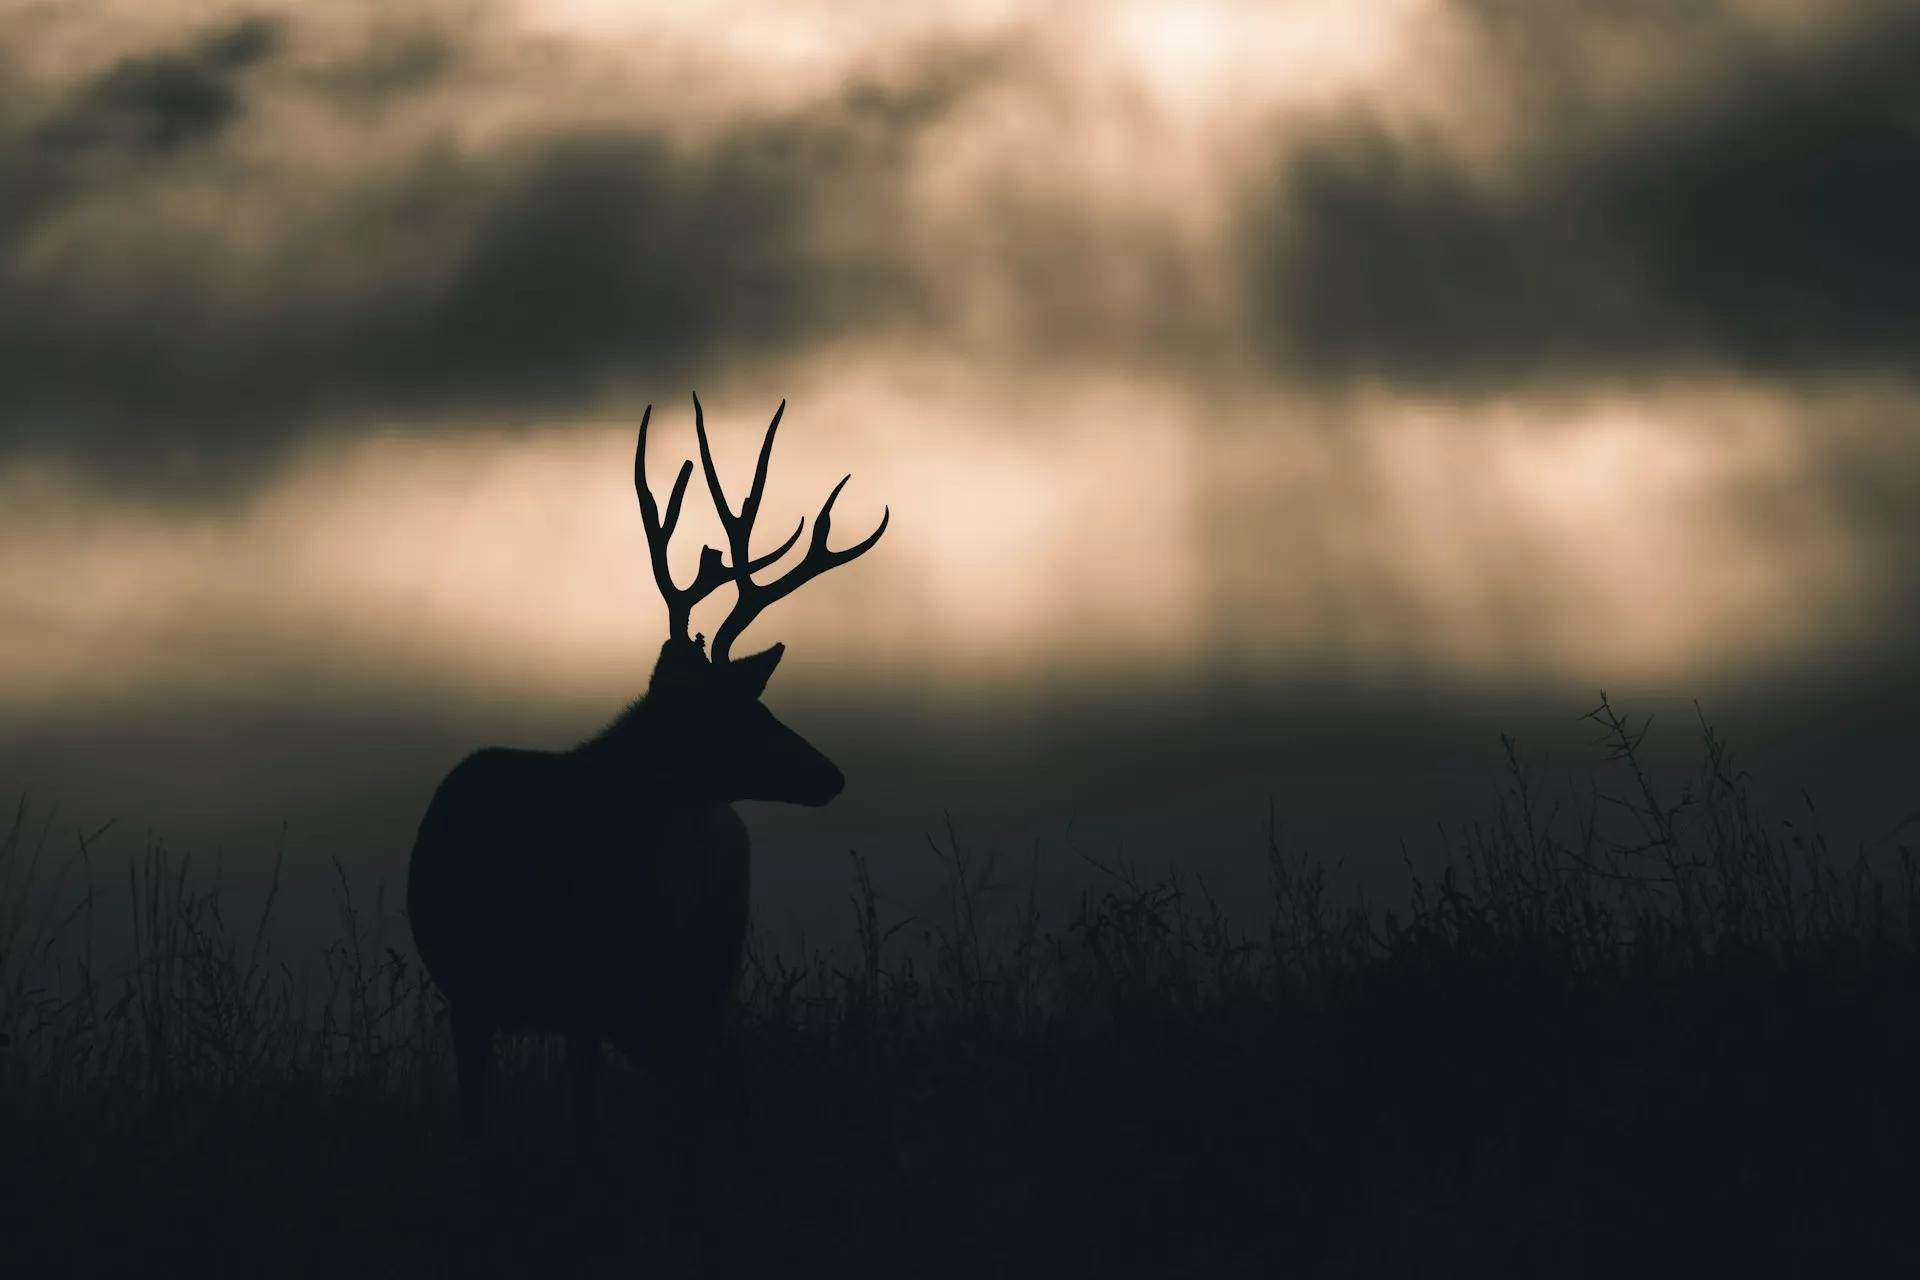
We all know that most of the time, shooting into the sun, and exposing for the sun will give us silhouettes. Silhouettes are beautiful if shot well, but it is not always intentional. There are times when you want to shoot into the sun for dreamy images especially when shooting portraits. Instead of a silhouette, you will want to capture details in the photo and this article discusses that.
Photo by Ben Kelsey
Silhouettes are beautiful and dramatic if shot well. In order to capture silhouettes, you need to shoot into the light. To capture compelling silhouettes, you need to choose your subjects and the background wisely. This article discusses the secrets to capture effective silhouettes.
Photo by Kristian Saks
We have commonly heard about star trails in photography, but did you know that with some creative effort, you can also capture sun trails? Solargraphy is a long exposure technique where a pinhole camera is use to capture sun’s trails over a period of few weeks to months on black and white photographic paper. Check out this article for some sun trail images and an overview of the process.
Photo by Jason Row
When we think of capturing sunrises or sunsets, many photographers are geared towards capturing the sun in an open landscape, which can be exciting at first but can quickly become boring. If you look and compose these shots creatively, by paying attention to the elements in the scene and by carefully choosing the foreground and middle ground, these sunset and sunrise shots can be captured creatively and this article talks about just that.
Photo by Johannes Plenio
Sunlight hits differently during different times of the day and as photographers we need to be looking at how light illuminates the elements in front of us and capture it in creative ways. One of the most common subjects of photography is the sunset and rather capturing a boring snapshot, this article discusses five easy tips to improve your sunset shots.
Photo by Dawid Zawiła
Sunsets are magical and they most of the time lend a dreamy atmosphere in areas where the light falls. Sometimes even the light through a cloud opening can be very beautiful with a spot of light illuminating the area where it falls, leaving the other places look dramatic. This article will help you capture sunsets with an ethereal effect.
I bought my first digital camera in 1999. It was a two megapixel Olympus that recorded onto the now defunct yet surprisingly slim SmartMedia cards. Being some 26 years ago, my memory is a little hazy but as I recall, it shot jpeg and tiff file formats.
The tiff format was significantly larger and with the SmartMedia card I owned, I couldn’t save much more than about 8 shots. So, jpeg became my image format of choice, along with most other adopters of digital photography.
Roll on 26 years, and we still have predominantly two image file formats on our cameras, jpeg and raw. Raw has pretty much replaced tiff due to its much greater latitudes to editing. However, jpeg remains a file format developed long before the advent of digital cameras.
Things, however, are changing and is often the case these days, it’s being driven by smartphones. So today we are going to try and make sense of the current image file formats, hopefully allowing you an informed view on which one to use in your photography.
Jpeg – The Grand Daddy Of Formats.
We all know jpeg. It’s been around longer than many of us have been taking photos. But why has it been so enduring? The simple answer is file size. Jpeg, being a compressed format, enables not only many more images to be recorded to a card, but for them to be recorded quicker.
The computing power in modern cameras, combined with the size of memory cards means this is not a major consideration these days. However, for the first, perhaps, two decades of digital photography, speed and space were very much technical barriers. So the jpeg endured.
Even today it has plenty of uses. Much of the image data, white balance, saturation, contrast, etc., is baked into the file, meaning it requires much less editing.
Its small file size still gives advantages today when shooting large number of shots, very quickly, such as in sports or wildlife photography. Jpeg is not going away anytime soon. Or is it?
As mentioned earlier, smartphones have driven a lot of recent photographic technology. However, being multi purpose devices, their processors are not dedicated entirely to photography. They also have limited internal space and are capable of “on the fly” computational photography. All this adds up to needing a very small, very “fast to write” file format.
Enter, HEIC or HEIF, High Efficiency Image Container or Format. Developed by Apple and some Android manufactures, it has fast become a staple of smartphone photography. However, it is now making its way onto more mainstream, mirrorless cameras as an alternative to jpeg.
The main thing that has been holding the format back has been software. Being Apple developed, Macs have been able to deal with the format since the beginning, however, Windows has only recently started to support the file natively. All this added up to a relative lack of editing software to process these files. That, however, is changing fast and I suspect we will soon see cameras replacing Jpeg with HEIC rather than supplementing it.
Like jpeg, however image data, including computational photography data is backed in. This means it is not as editable as a RAW file. Speaking of which..
RAW – The Digital Negative.
I can’t remember exactly when raw first started to make an appearance in digital photography but I suspect it was the early 2000s. It was a dramatic entrance, more a subtle realisation that there was a format that allowed us a lot of editing leeway and to change white balance in post production.
It was not without some major issues though. These days we simply drop a RAW into Lightroom and get to work. In the early days however, you needed dedicated RAW editing software, making for a complicated and expensive workflow.
RAWs look very flat straight out of camera but reveal the most detail. By Jason Row Photography
Today however, raw is the gold standard. It is by far the most malleable file format, yielding the highest image quality. Technically raw is actually many different file formats, each camera manufacturer has a raw format, and individual camera models can have variations on that raw format. Adobe even has its own raw, dng, which allows for you to convert your OEM Raw file into an all encompassing, generic raw.
It’s not without issues though. It’s a much larger file size than jpeg and HEIC and straight out of the camera the images are very flat and unsaturated. They are, in effect, digital negatives that require you to work on them to get the best results.
Raw files can also come in uncompressed, lossless compressed and compressed formats, adding to the confusion. Unless space is at an absolute premium, uncompressed is the way to go.
Early adopters of new cameras can also come up against issues, where Mac/Windows or editing software developers have not had time to add the new raw file to their systems, leaving photographers without a way to edit their raw files.
However, it is probably safe to say that raw, in its many different forms will be the de facto format for the years ahead.
Whilst jpeg persists and raw reigns, camera companies and phone developers are not standing still. There will be new formats in the future, some of which we are beginning to see now.
Apple’s ProRaw is a relatively recent file format, which on the face of it is a vanilla raw file. However, it is actually a combination of raw and HEIC. This allows for some of the editing leeway of a RAW file whilst incorporating the ability to use computational photography at the time of taking.
The jpeg file format has also gone through a re-imagining in the form of jpeg XL. This is a new variation of the format, that offers higher compression, smaller file sizes but with a much improved image quality. In its lowest compression it offers lossless image visual image quality.
Beyond cameras there are also new image file formats designed for displaying images online but give a much better quality than jpeg or png.
Like VHS/Betamax there will probably only be one dominant compressed file format, whether that is HEIC or jpeg XL remains to be seen.
For now, though, your main choice on mainstream cameras is jpeg or raw. Raw will give you more editing ability, and better image quality. Jpeg will allow you to shoot faster and edit less.
Any new future formats will probably still fall broadly into those same two categories, it will always be quality vs convenience.
Welcome to our weekly community wrap-up. It’s been another great and exciting week on the Light Stalking forums with some great photography by the community. Members have been submitting high quality photos the past few weeks, which makes it even more exciting.
The weekend photography challenge from last week was “Light Of The Ordinary” and members had their creative take on the theme with very interesting shots – some of them are shared below.
This week, we have a new challenge that has some very beautiful submissions already. Join the challenge here – Everyday Stories
Here are some amazing shots from the past week that we thought were great and should be included here:
Backlit Flowery Bokeh – Copyright Robert Apple
Copyright Patrick
In a world of pixels and make believe – Copyright Patrick
Music in black and white! – Copyright David C
Dock Leaves – Copyright Tersha
Purple Haze – Copyright Robert Apple
Dandelion Seed – Copyright Tersha
Please, sir, I want some more … – Copyright Patrick
Light – Copyright Tersha
Copyright Michael
Copyright Holly K
Copyright Marty E
Copyright Marty E
Copyright Marty E
Copyright Rob Eyers
Copyright Patrick
Here are photos shared by members in other forums like General Photo Chit Chat, Landscape Photography, Macro Photography, etc.
Steve shared another powerful storytelling shot of a little girl full on athlete activity
Copyright Steve
Patrick is working on a series of abstract photos and has kindly shared the process on the thread here.
Copyright Patrick
And, Patrick has also started a new hobby. Head over here to check the photos!
Copyright Patrick
Rob captured a photo of crashing waves om his iPhone. The intent was to get a shot that shows scale Let him know what you think here.
Copyright Rob Wood
Discussions:
How do you improve? – Rob started a very interesting discussion on how photographers may fall into a few different groups. Join it here.
Steve started a discussion on Magnetic Filters. Join over here to participate.
If you are someone who captures images with your smartphone, we have a Mobile Photography Challenge where you can post your mobile photos and also check out the works by other photographers. The images must be captured and edited on a smartphone. Join to submit the photos over here.
Pat shared a stunning photo of the Aurora Borealis along with the Big Dipper to the mobile photography challenge, that was captured on her iPhone! Pat shared her experience when capturing this photo.
The sky was dark without any hint of what darkness was hiding. For the heck of it I grabbed my phone and took a shot of a black sky – a sky hiding beautiful shimmering colors.
Aurora Borealis along with the Big Dipper – Copyright Pat Garrett
There are also some members’ picks that are featured. These can be chosen by any of the members and are put in a whole new thread of their own and called out as being a great addition and shot for the forums. Check out those stunning captures here.
Patrick started a thread late last year – “Community Inspired Photo Story Challenge” – capture a story in 3 to 6 photos that hold personal significance and post them with a brief description. While that thread was started to be completed within a week, it has been open with ongoing submissions for the past year and is still open where members can post their stories.
Here are some throwdowns to follow and post your own photos, or you can start your own throwdown too.
Trees That Go Bump In The Night – Robert has started a throwdown and invited members to share their unusual photos of trees (Not Your Normal tree photos)
2025 Reflections Throwdown – a unique way to capture your own reflection, whether abstract or otherwise. There are many beautiful images to go through for some inspiration.
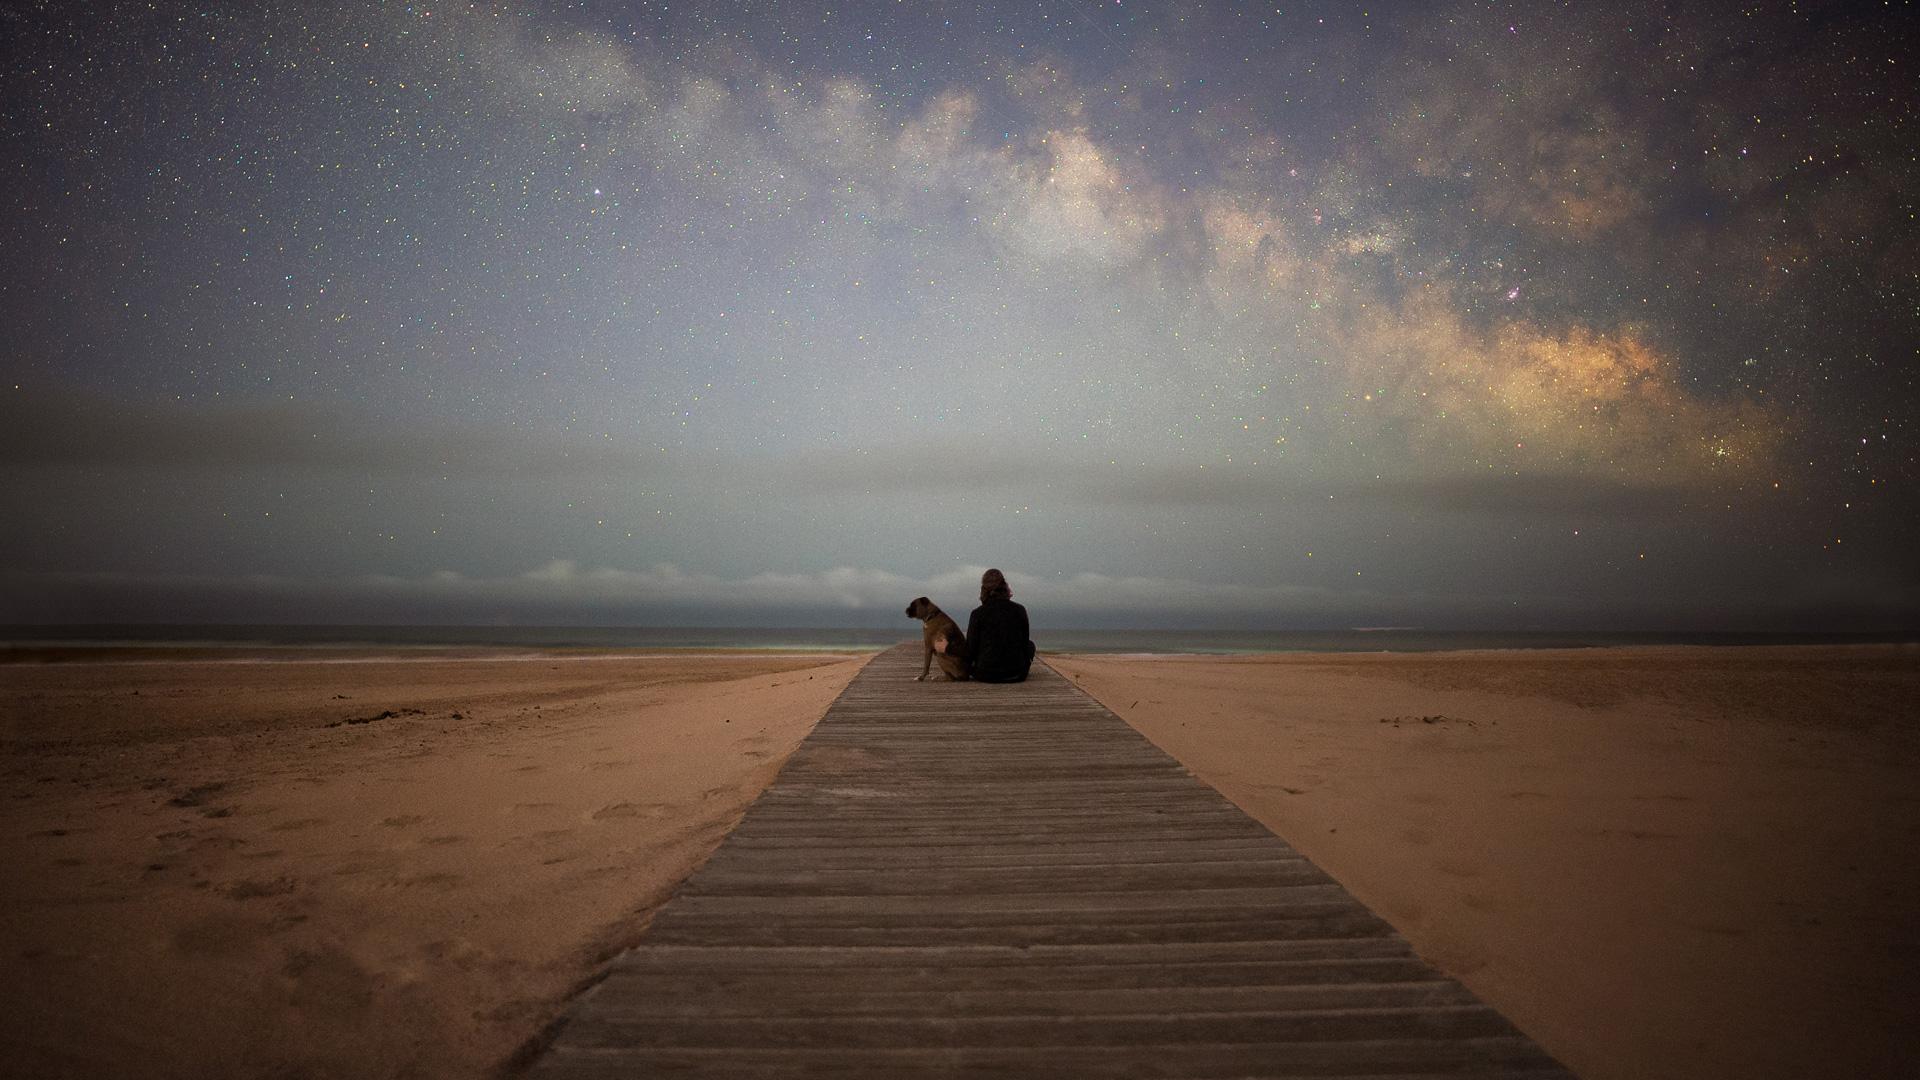
Each night I spend under the stars I return still filled with this desire to encourage anyone that will listen to start making plans to head to dark skies. That feeling of being under a dark sky is something incredibly special. You experience these waves of peacefulness and a welling of emotion as you try your best to consider the vastness and our place, somewhere in it all.
It’s an incredible feeling that I find myself traveling all over to experience and capture in new places.
Whether I’m wandering alone or with other photographers, I yearn to travel to places with exceptionally dark skies.
And with enough travel, you start making decisions based on the question, “Is this something I will use enough for the space it will take up in my bag?”
Introducing the Sigma 12mm F1.4 DC | Contemporary
So, when the word of the 12mm F1.4 DC | Contemporary first came my way, I was excited. I’ve used a number of the lenses in the Sigma Contemporary line and with their long list of qualities, they tend to come in a very compact form-factor.
The compact size of the 12mm F1.4 DC | Contemporary makes it incredibly easy to pack.
But my first thoughts weren’t about the compact size of the lens. Instead, I instantly had a vision of a huge, sweeping view of the night sky. That wide 12mm focal length (equivalent to 18mm on full frame) and fast F1.4 aperture had astrophotography written all over it. My hope was that this lens would live up to my expectations and be a go-to for APS-C astrophotography when I needed to pack light. Thankfully, I had a few trips lined up – Big Sur in California, then Mount St. Helens and North Cascades National Park in Washington.
First images and early impressions
When I finally made it into the field, I put this lens through the same exact test that I would for any other lens. Starting with the aperture wide open and dialing in a sharp focus on the stars. The fast F1.4 aperture provided a beautiful, bright and even view across the screen while using the live view in my camera. This made slowly adjusting the focus ring to nail that tack sharp focus on the stars incredibly easy. Once the stars look sharp in the live view, it’s just a matter of waiting for that first exposure to inspect the image. Although the sky wasn’t quite full of stars yet, the corners were looking pinpoint sharp all the way to the edge.
After the test shots, I started capturing my first images just as twilight was ending. This time of night always has a magical feel to it as our eyes adjust to the darkness and the stars appear one by one. As I took the time to take a closer look at those first few test images, I began having the feeling that this lens would be exactly what I was hoping it to be.
Sigma 12mm F1.4 DC | Contemporary Sony A6600 F1.4, 13s, ISO 1600
On that first night in the field while I was reviewing my first few images, I couldn’t help but reflect on how surprising the size of the 12mm F1.4 DC | Contemporary was. Paired with the right camera, it practically fits in the space I typically reserve for a single lens. Despite its small size, this lens feels solid when holding it and has every bit of the craftsmanship I’ve come to expect from a Sigma lens.
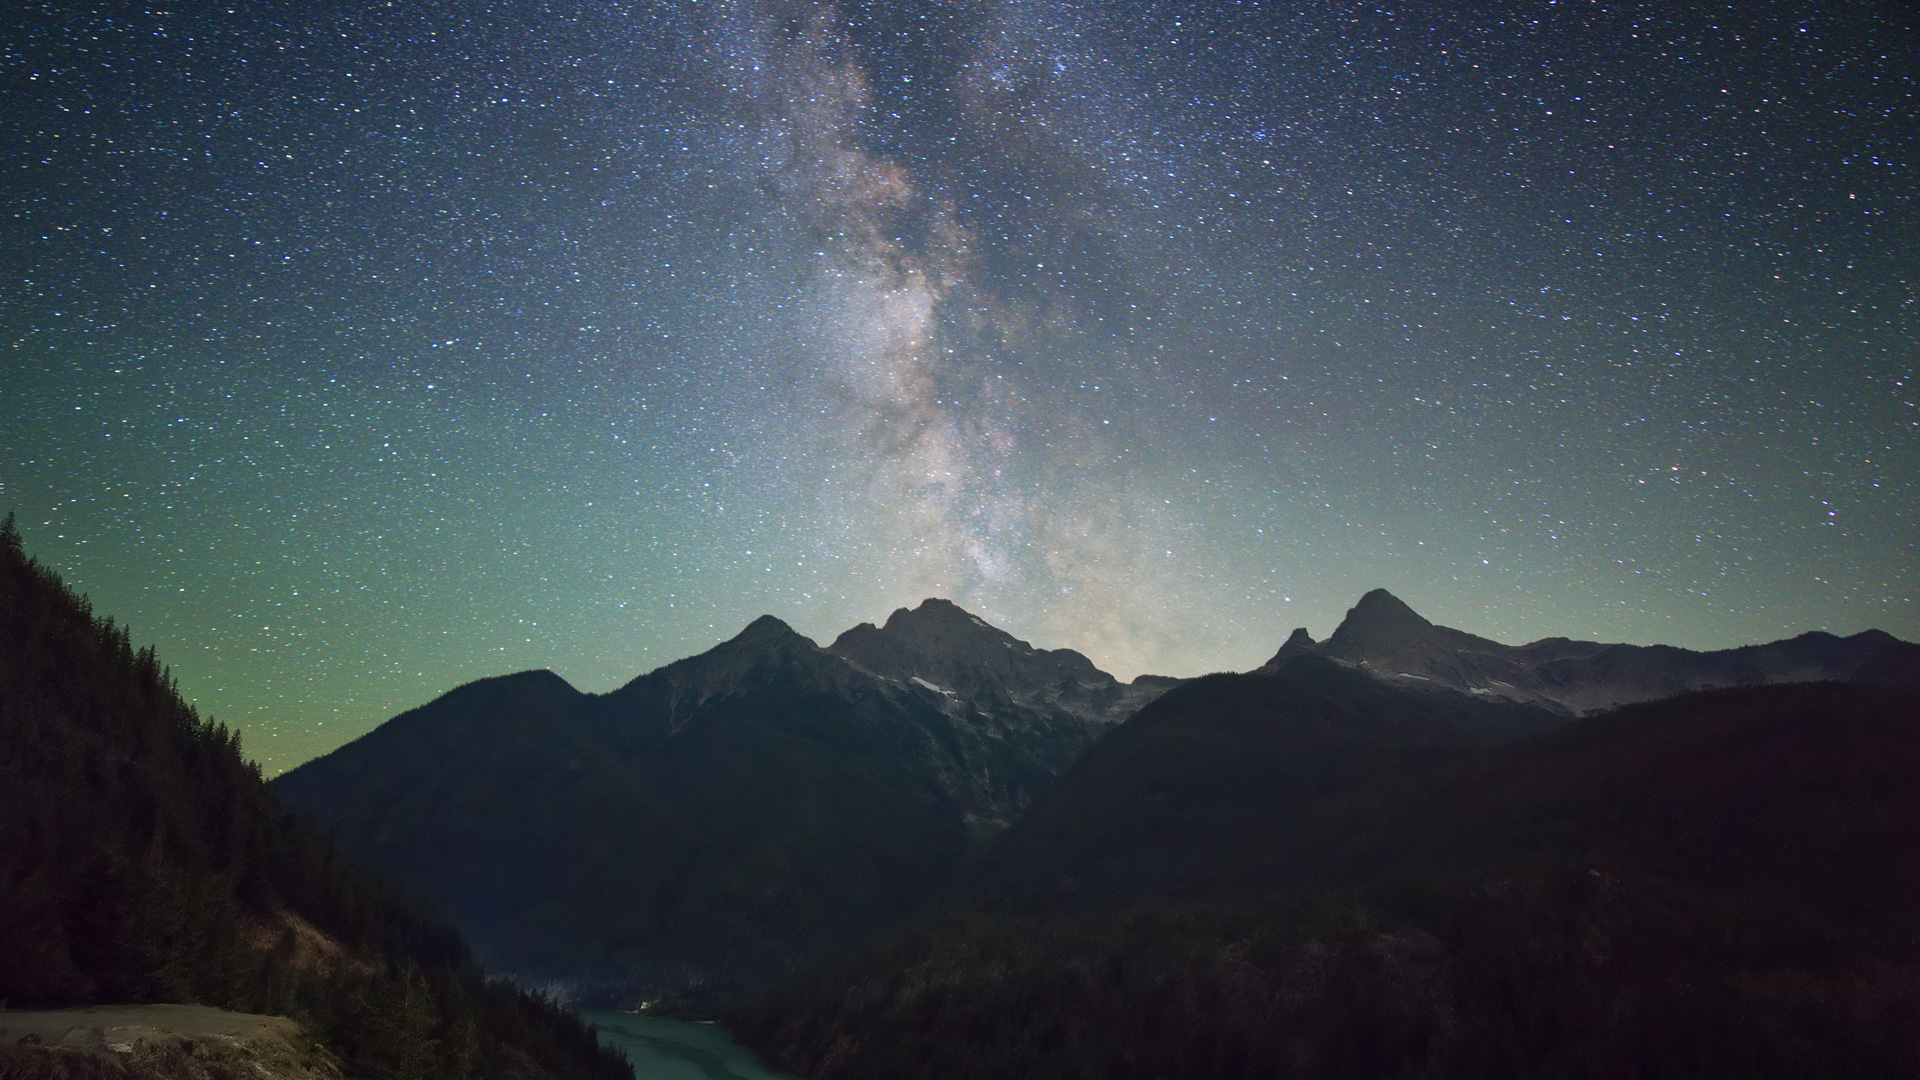
Past blue hour, my first images of the Milky Way would be up next. The wide field of view was perfect for setting up low to the ground and capturing the galactic core glowing in the sky and reflecting off water left behind by the receding tide. Finding the conditions to capture an image like that feels like a dream.
Sigma 12mm F1.4 DC | Contemporary Sony A6600 F1.4, 20s, ISO 1600
Before making my way home, I had a few hours at Shark Fin Cove a bit further north. The lens really began to shine in this area, showing just how sharp it was while picking up detail in every part of the image. A short trek down to the beach meant you were surrounded by large cliffs that would amplify the roar of the crashing waves. I explored the cove as I waited for the Milky Way to drift further south and for the eventual low tide. Unfortunately, a thick layer of clouds would end my night earlier than expected. Nature’s way of always keeping you coming back for more, I guess.
Sigma 12mm F1.4 DC | Contemporary Sony A6600 F1.4, 20s, ISO 1600Sigma 12mm F1.4 DC | Contemporary Sony A6600 F1.4, 20s, ISO 1600
Sigma 12mm F1.4 DC | Contemporary Sony A6600 F1.4, 20s, ISO 1600
Epic wide shots made simple
Next on my schedule was Washington. I’d be heading out near the next New Moon and couldn’t wait bring the 12mm F1.4 DC | Contemporary with me. I was enjoying both the small form factor and the possibilities this lens represented.
My next trip would start with a quick stop near Mount Saint Helens. This can be a really difficult area to photograph the night sky. The sky and foreground are both incredibly dark, but depending on your location, there can be a bright glow near the horizon. It takes a bit of work to balance everything in this type of scenario, but the lens kept everything sharp and distortion free. The exact qualities you want when looking for a wide-angle astro lens.
Sigma 12mm F1.4 DC | Contemporary Sony A6600 F1.4, 30s, ISO 1600Sigma 12mm F1.4 DC | Contemporary Sony A6600 F1.4, 10s, ISO 1600
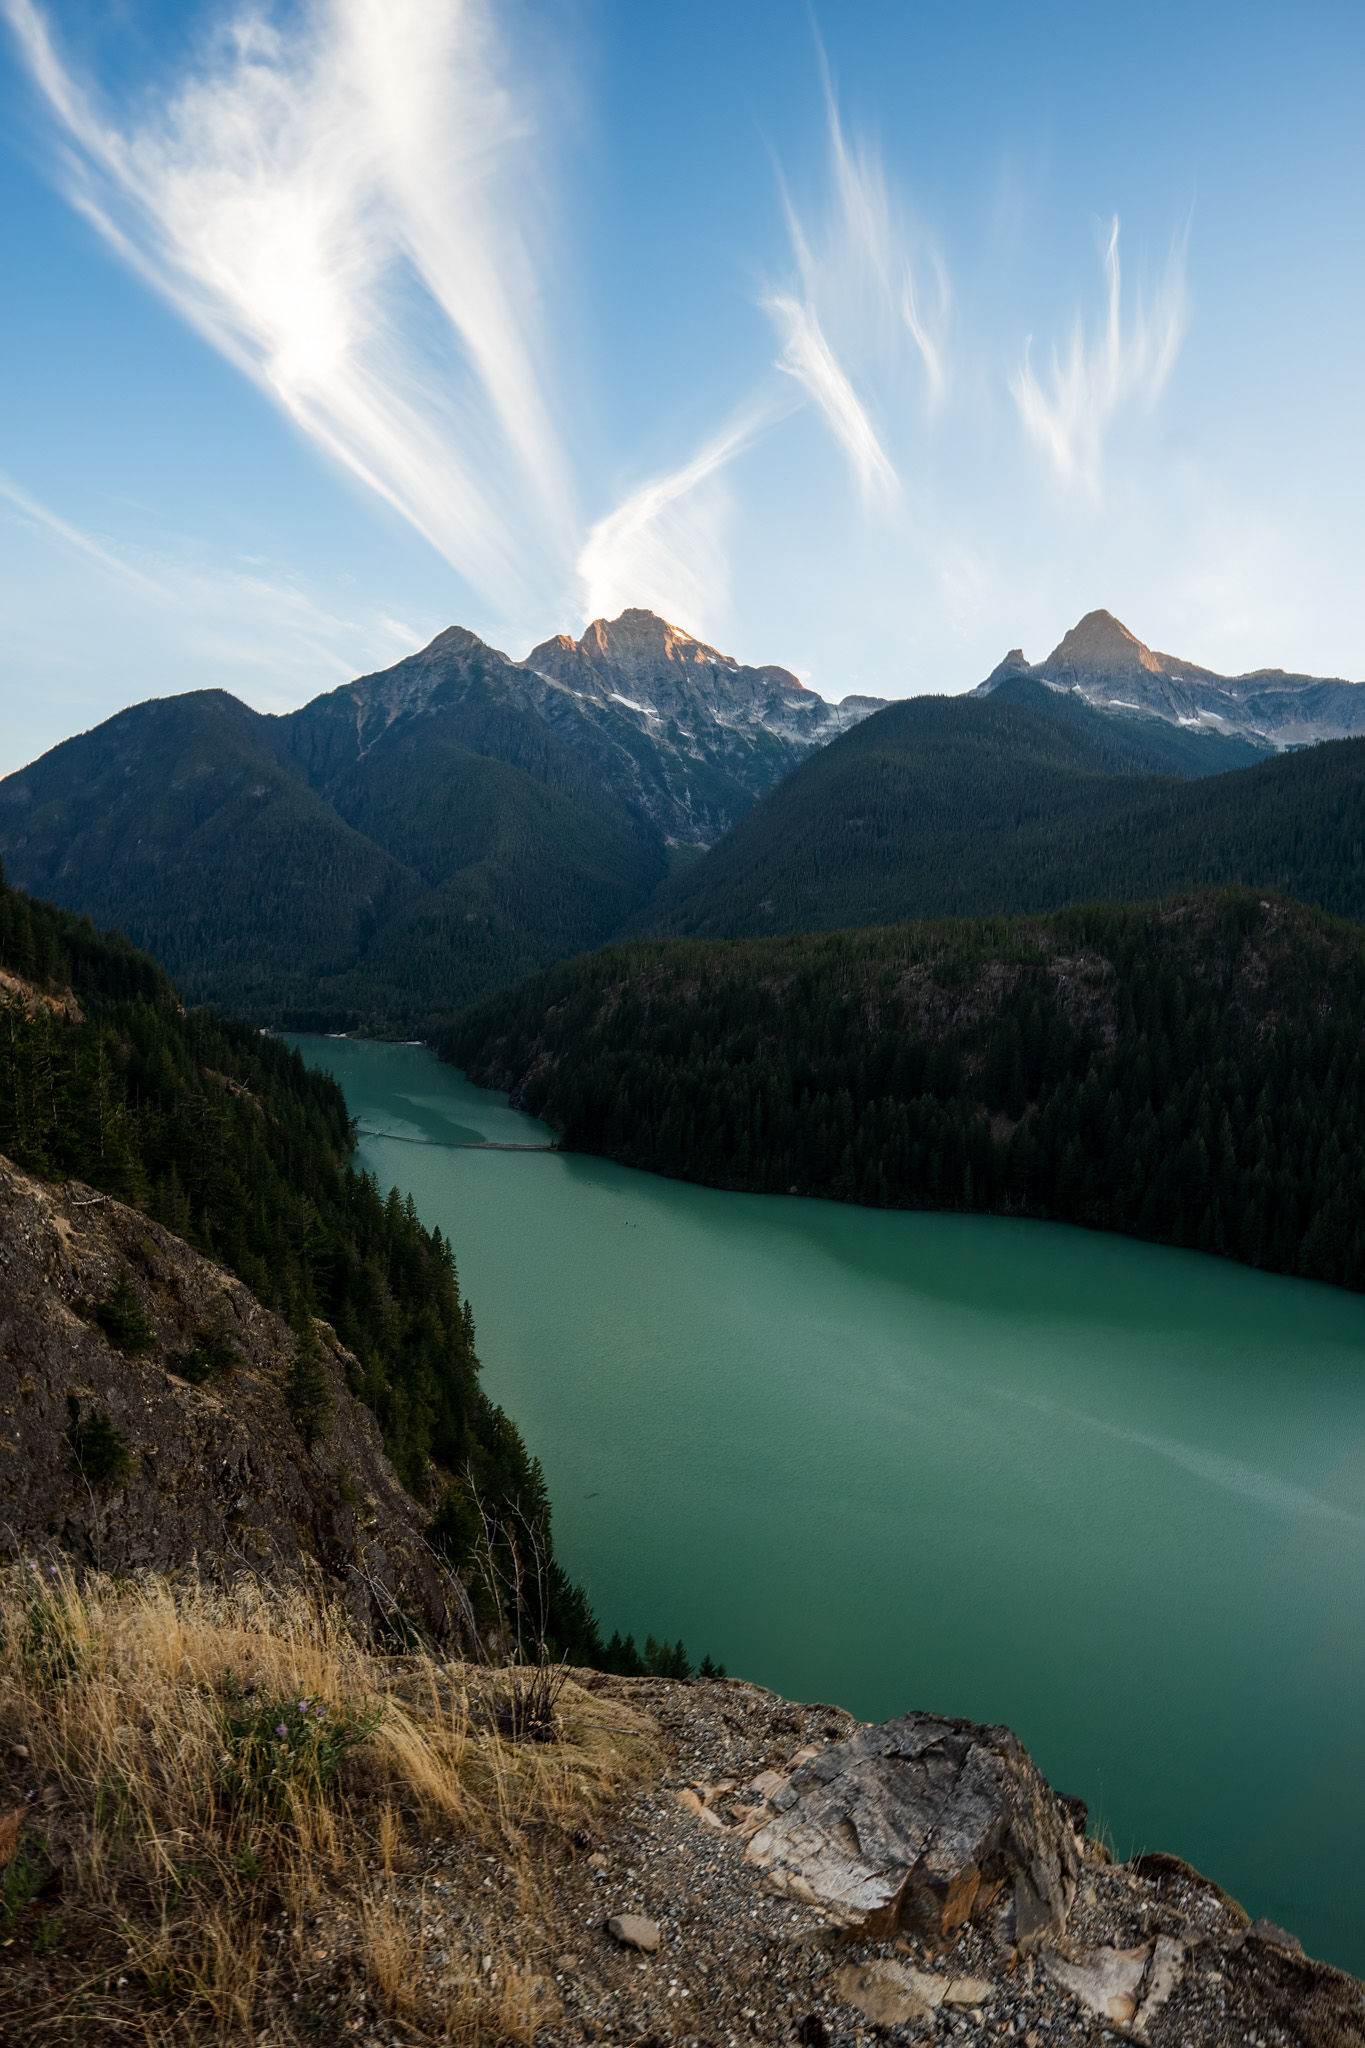
Once again, I found myself traveling north. This time I’d be making my way to Diablo Lake in North Cascades National Park. While I often joke about the graveyard of unedited sunset photos on my hard drives, I couldn’t resist taking the camera out while I was here. The beautiful glacial water with the towering mountains were being met with a soft light and wispy clouds. These spur-of-the-moment photos allowed me to test out the autofocus as it quickly snapped on my subject even as the light continued to fade.
Sigma 12mm F1.4 DC | Contemporary Sony A6600 F8, 1/30s, ISO 100Sigma 12mm F1.4 DC | Contemporary Sony A6600 F3.2, 1/50s, ISO 400
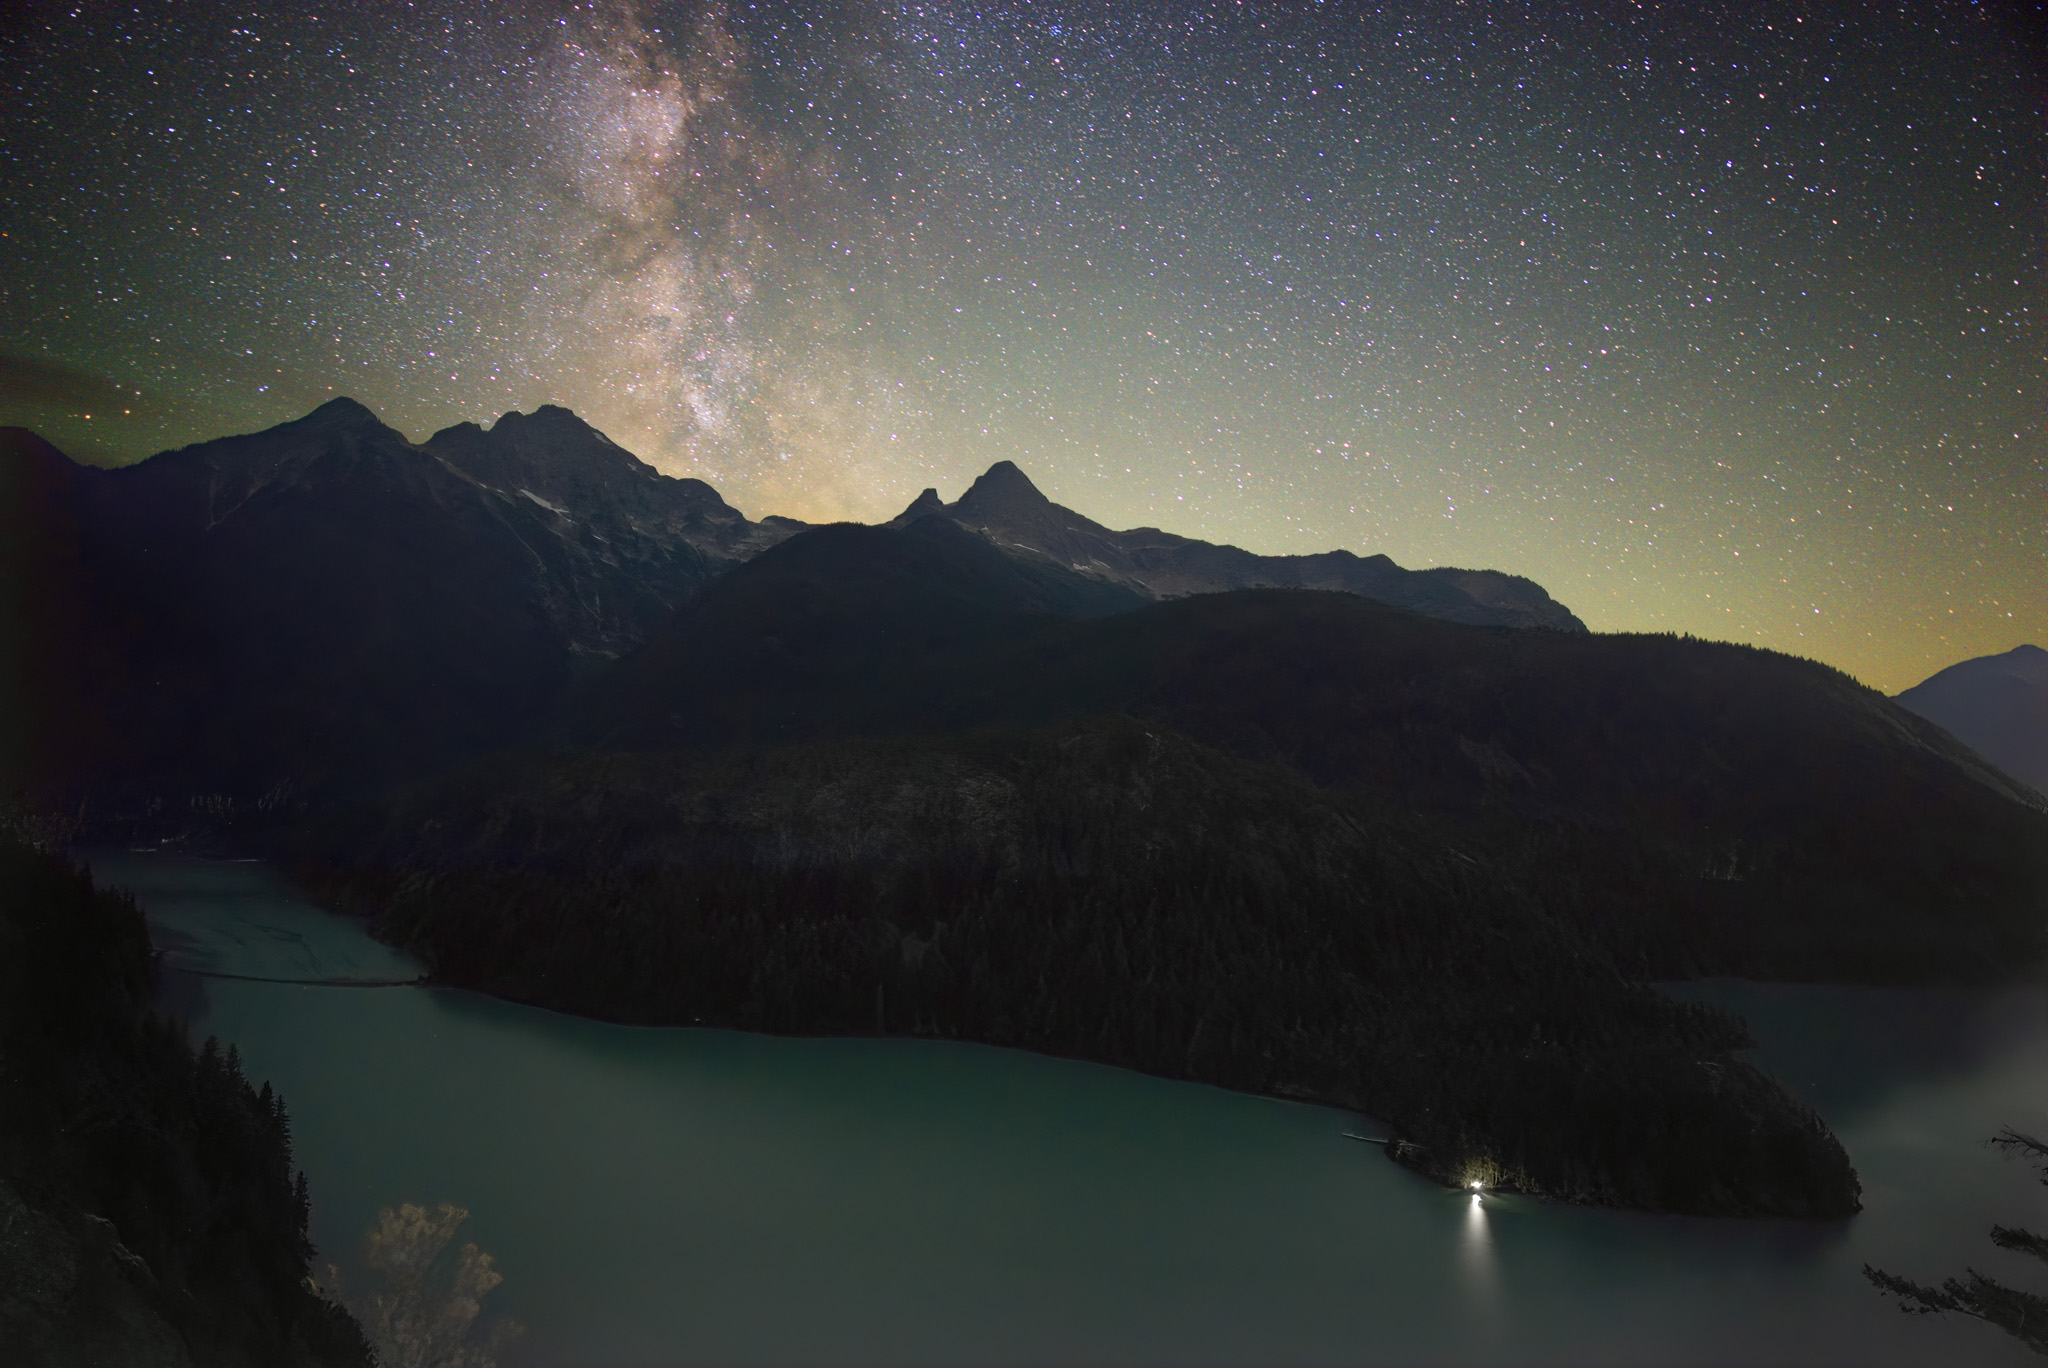
By the time it was dark, I knew exactly what to expect from the night… an astro shoot where I didn’t have to worry about the gear I was using. I wasn’t worried about distortion, letting enough light in, or how sharp an image would be if I was shooting wide open. I was able to dial in my focus and be completely in the moment in this beautiful location. It’s hard to ask for more from your gear and while it’s something that has become expected for Sigma to deliver, it doesn’t go unnoticed or appreciated.
Sigma 12mm F1.4 DC | Contemporary Sony A6600 F1.4, 30s, ISO 1600Sigma 12mm F1.4 DC | Contemporary Sony A6600 F1.4, 30s, ISO 1600
Final thoughts on the Sigma 12mm F1.4 DC | Contemporary
Without compromising quality, this lens opens a new level of astrophotography to APS-C users. Whether you’re looking to lighten your bag on long hikes or flights or you’re hoping to take the next step in your astrophotography journey, this lens won’t disappoint.
That feeling of wonder isn’t something we experience once and it goes away. It’s something that stays with us. Being able to capture even a small fraction of how we feel in those moments can be difficult to put into words, but it’s something that drives and keeps us exploring.
The gear we choose shouldn’t get in the way of those things and those moments shouldn’t feel out of reach. I have no doubts this lens is going to connect people to those moments we spend so much time chasing after.
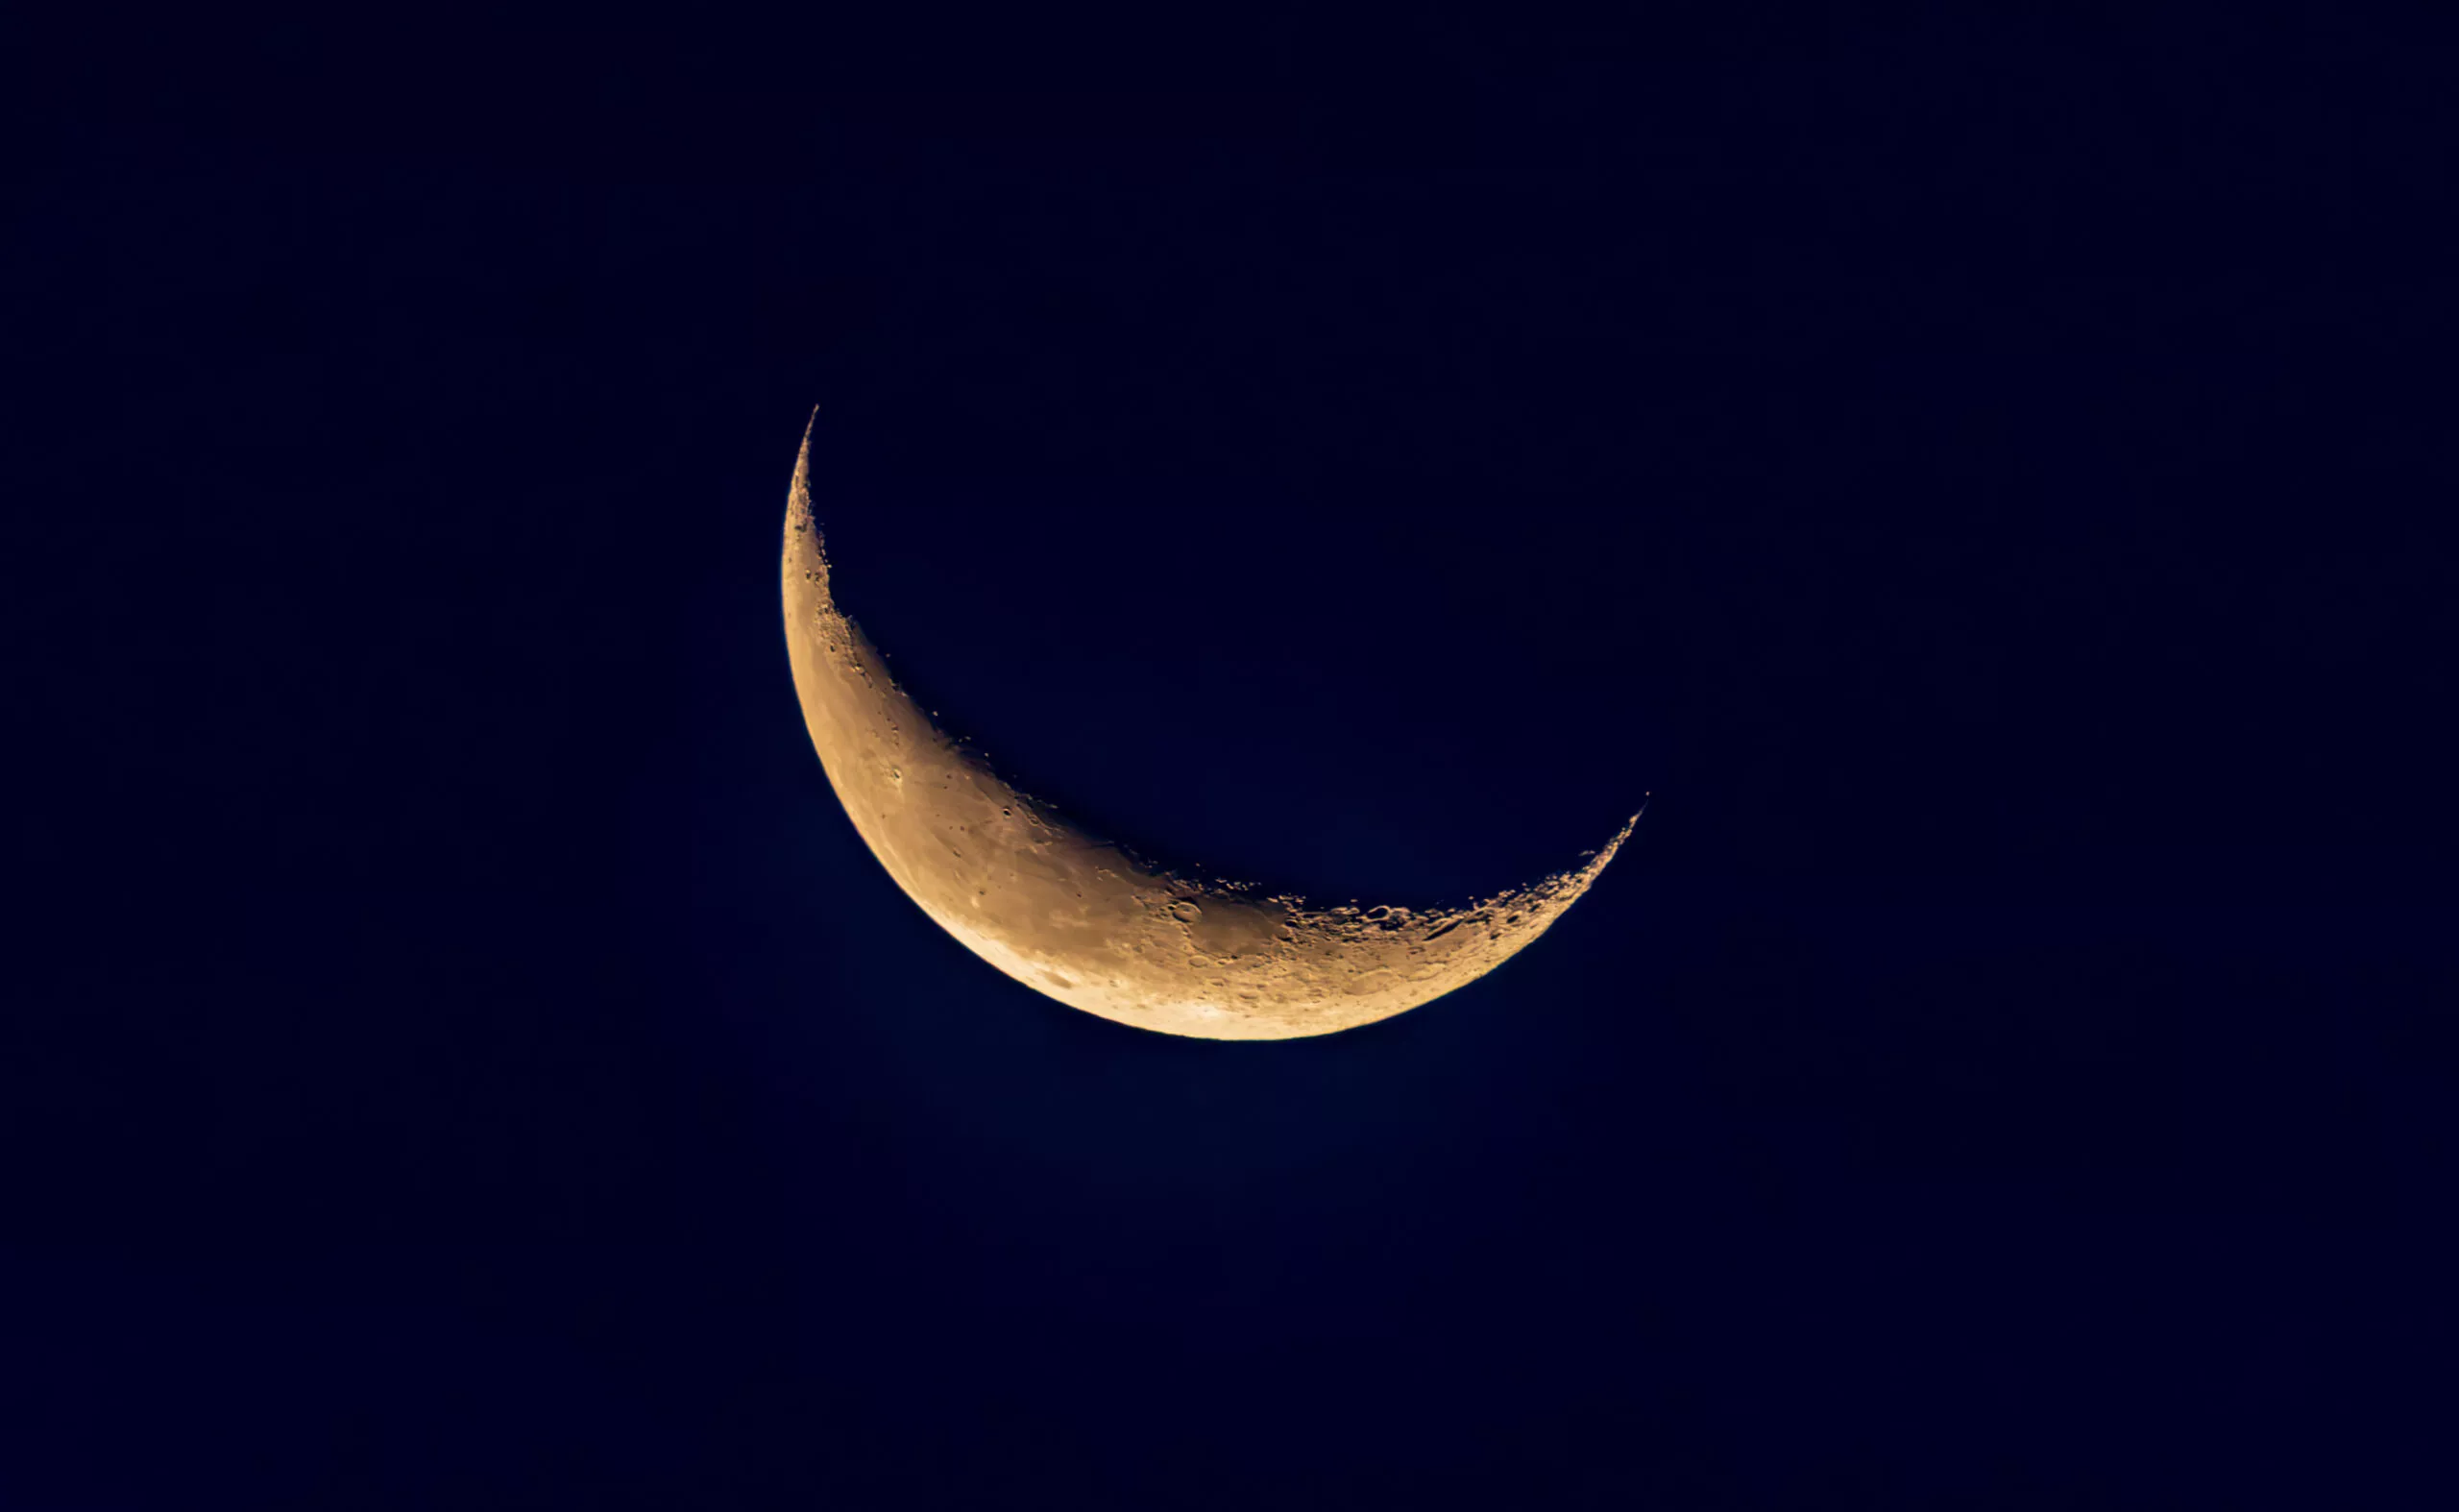
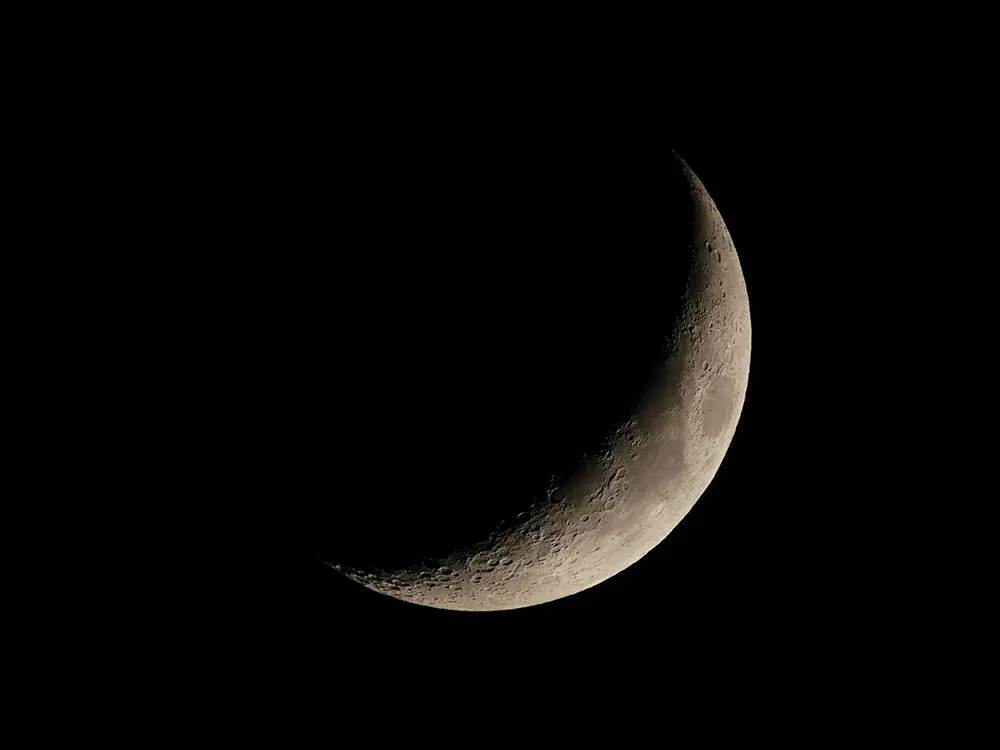
The night sky is stunning and the objects in the night sky are one of the most beautiful subjects that can be photographed mostly from your backyard. One of the most interesting and the brightest subjects in the night sky is the moon. Knowing the moon phases and a good understanding of controlling exposure in your camera can help you capture beautiful images of the moon.
In order to capture details on the moon’s surface, it is good to use a narrow aperture between f/8 and f/11. You will need a tripod, focus manually and use a shutter speed based on the focal length you are using to avoid motion blur. A remote trigger will also greatly help with capturing sharp images.
Grab your Milky Way Photography Blueprint for free righthere.
Here are some resources for effective moon photography tips and techniques.
Image by nousnou Iwasaki
When starting out with moon photography, most of us imagine those closeup shots of the moon that fill the frame, with a lot of details of the moon’s surface visible. When actually capturing the images, they may turn out to be a white blob or spot in the frame. This can be quite frustrating, but without giving up, check out this detailed guide on how to photograph the moon.
Image by Sebastian Voortman
If you are looking for some quick tips to refer to when photographing the moon, then this article quickly goes through a checklist that will help you to capture a quick shot of the moon. Always remember to make minor adjustments based on light, sky conditions and the gear that you use.
Image by Dahlia
Did you know that the moon is not just white but has some interesting colours? This is due to the mineral deposits on its surface. If you have not seen the colours yourself, the next time you photograph the moon, switch to live view and zoom in on the surface of the moon. You will be able to see the colours on its surface without the help of any accessories – just make sure the sky is very clear. Now you can capture the moon and post process to bring out its colours. This article will take you through all the steps required to capture and edit a mineral moon.
Image by Dahlia – shot on iPhone 7 Plus
A lot of photographers these days start their photography journey with their smartphones and some continue to do so for a while. While a smartphone can be a great tool for most genre of photography, it can be quite tricky when it comes to capturing photos of night sky objects. With some patience and understanding of camera settings you can capture decent images of the moon. There are also telephoto lens attachments sold for smartphones that can be used to capture closeup photos of the moon. This article discusses all the essentials required to capture a photograph of the moon using an iPhone or an Android.
Image by Ganapathy Kumar
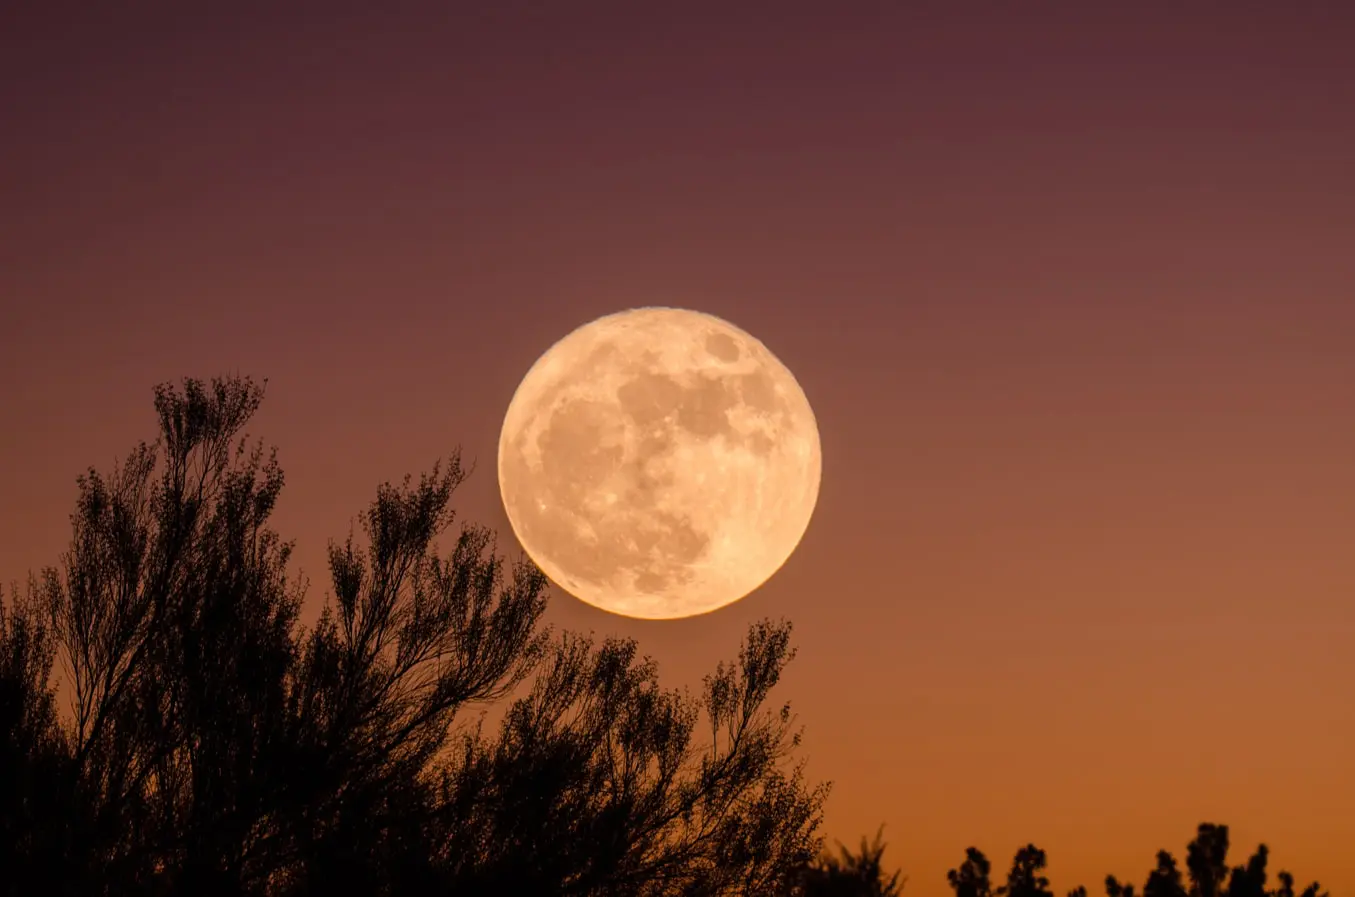
The rising or setting Moon glows in a bright orangish colour very similar to the rising or setting Sun. This is due to the fact that the light from the rising Moon needs to pass through the thick atmosphere, before you can see it. Most of the shorter wavelengths of light in the blue end of the spectrum are scattered while the longer wavelengths towards the red end are visible. During this time the moon can look a bit fuzzy without great details but with some care, stunning photos of the rising Moon can be captured. This article discusses 3 tips to capture a perfect moonrise.
Image by Ganapathy Kumar
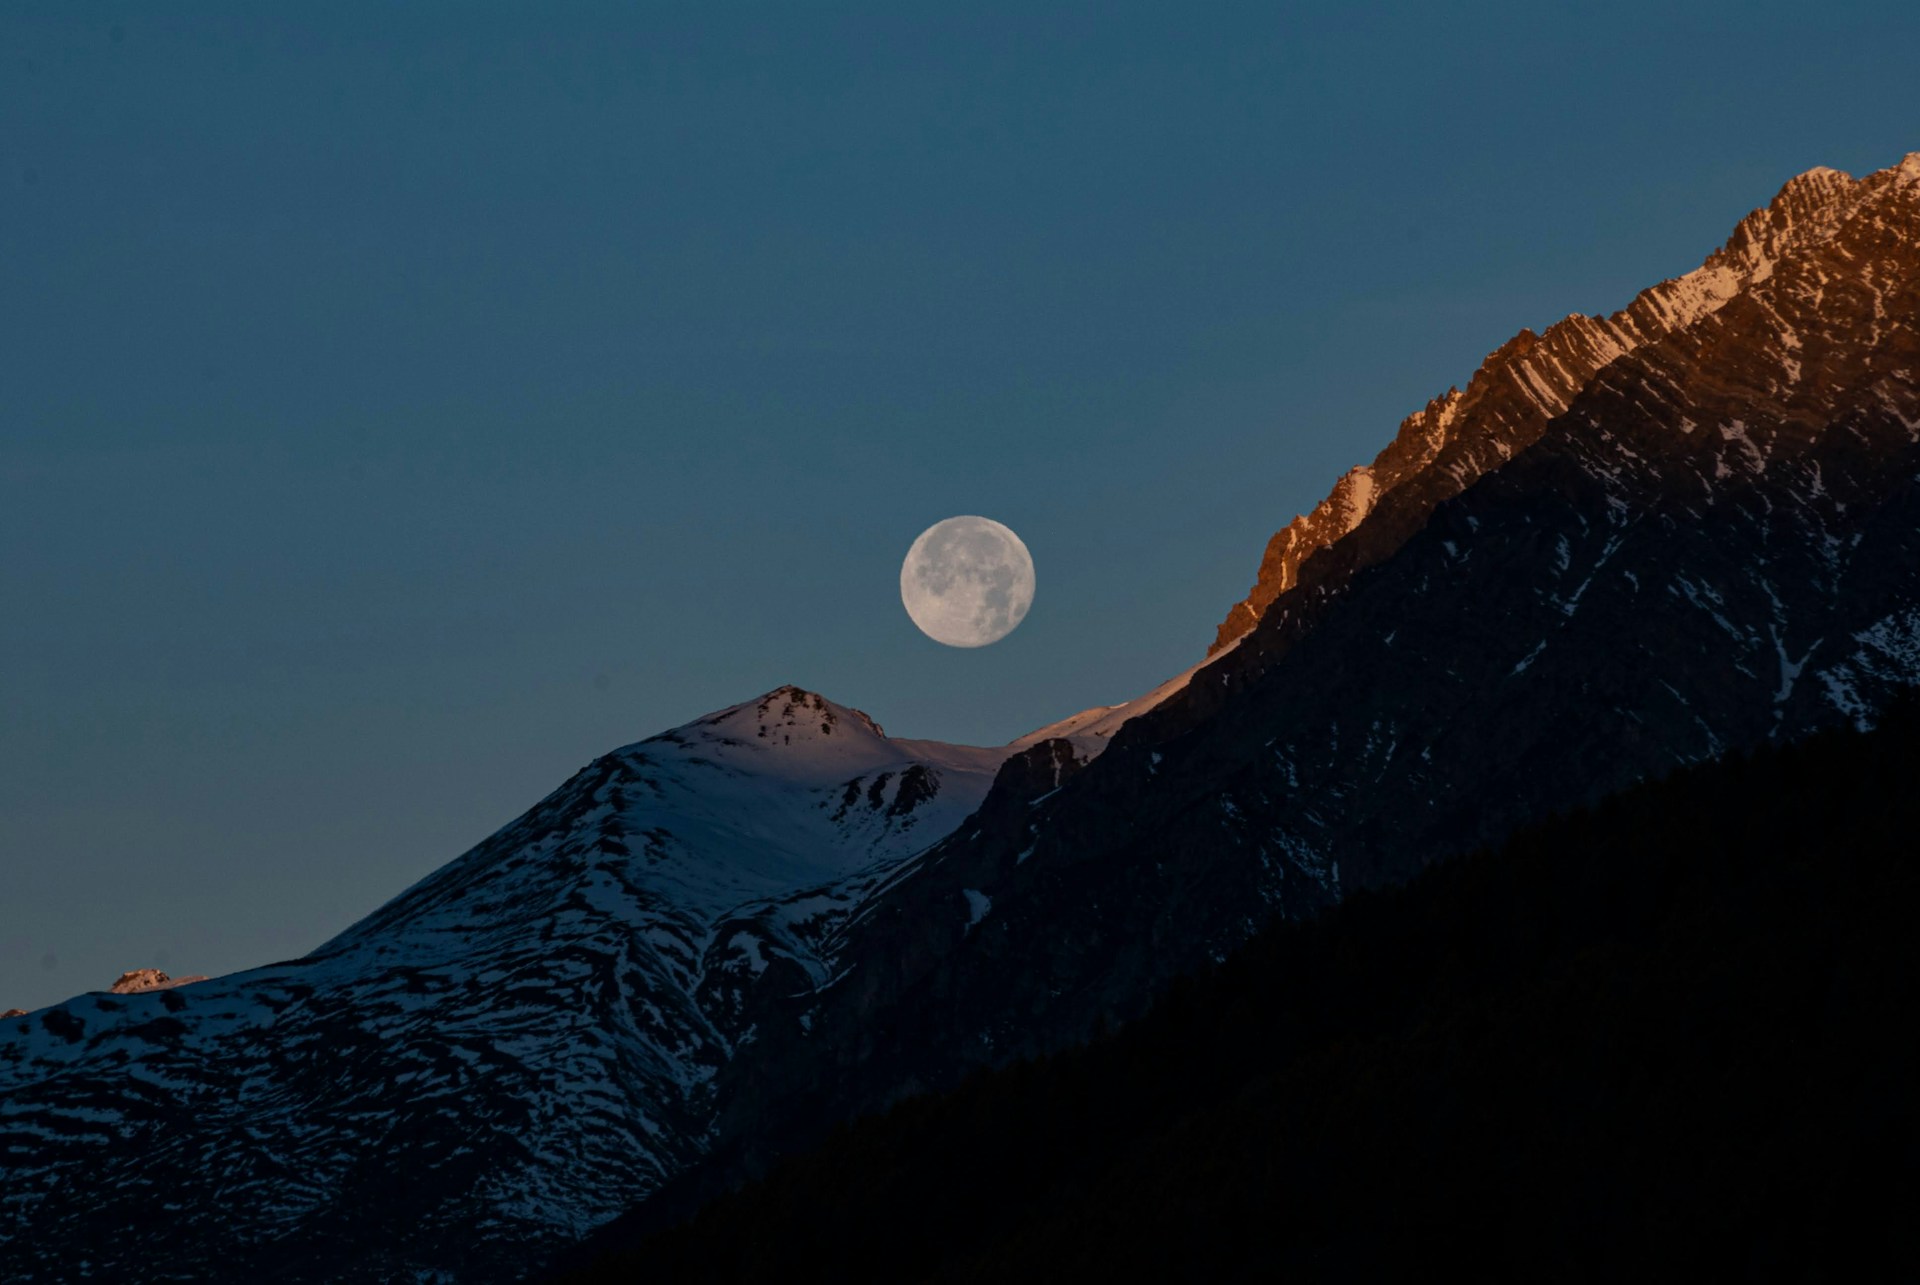
Moonscapes may have a confusing meaning like a Lunar landscape or a devastated landscape, but here in this article, we are talking about a landscape or a cityscape photo, with the moon in the sky. The moon is such a beautiful subject that it can add meaning, story and mood to an otherwise boring landscape or cityscape. In this article, we have provided all the details you need to capture a stunning moonscape.
Image by Temudjin
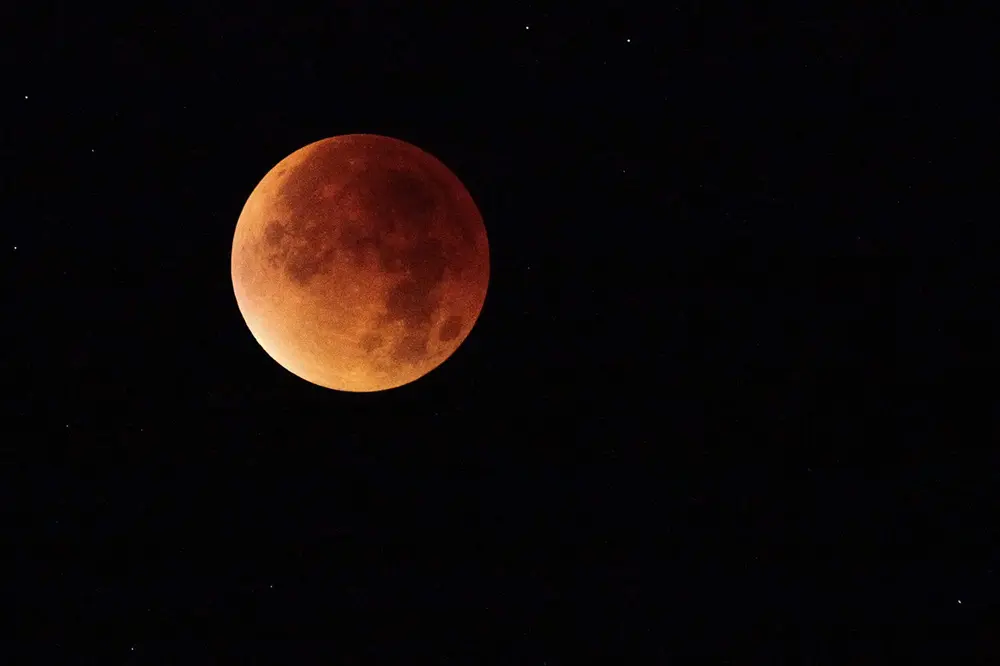
You may have heard of the term blood moon. During a total Lunar eclipse, the moon turns to a beautiful blood red because of the red light getting refracted and falling on the moon. A Lunar eclipse is quite a common occurrence compared to a Solar eclipse, but a total Lunar eclipse can also be a rare one, depending on where you live. So, if you wish to capture a photo of the eclipsed moon in the future, it is quite easy and this article will go through all the steps required to capture the blood moon.
The Moon is the only natural satellite to earth and the brightest object in the night sky. Depending on the sky conditions and the position of moon in the sky, whether day or night, it is a great subject for creative storytelling photos. If you wish to photograph the night sky or wish to photograph landscapes or cityscapes at night or during dawn and dusk, having the moon in the frame will help to capture compelling, visually appealing photos.
Besides the above, the moon can be photographed during various phases and also during an eclipse. Each of these scenarios provide photographers the opportunity to capture the moon differently. Here are some ethereal photographs of the moon and moonscapes, so you can get some inspiration and ideas for stunning moon photography.
Grab your Milky Way Photography Blueprint for free righthere.
Apart from capturing closeup photos of the moon that fill the frame, in order to capture powerful storytelling photos of the moon, you will need to pay attention to composition. When it comes to capturing the moon, paying attention to composition can be quite confusing, but look for natural or manmade subjects that can be captured along with the moon or shoot through them to frame the moon interestingly. If you are looking to improve your compositional techniques, we would recommend you to check out this eBook, “Advanced Composition” by Photzy.
Photo by Lorenzo Molinari
Photo by Mohamed Shaffaf
Photo by Kym MacKinnon
Photo by Xavier Mclaren
Photo by Nathan Anderson
Photo by Joseph Corl
Photo by Cheng Lin
Photo by Fran Lanza
Photo by Anita ajisic
Photo by Vladimir Kondratyev
Photo by Raffaele Mainini
Beginners in photography may always be stuck with just one compositional guideline – the rule of thirds or leading lines. While this guideline may be effective and form a base to many other compositional guidelines, it is important to think out of the box and work towards more effective compositions. If you wish to go beyond the basics and turn your photos into works of art, check out this eBook, “Advanced Composition” by Photzy that will help you to see light, shadows, lines, curves, space, repetition and focal points.
Photo by Alek Newton
Photo by Andras Toth
Photo by Aaron Benson
Photo by Vinicius de Paula
Photo by Egemen Şahin
Photo by Livia
Photo by Navi
Photo by Nuh Enes Sakallı
Photo by Mike Lewinski
Photo by Grant Davies
Photo by Sanjeev Shakya
If you look at award winning photos, you will notice that there are some important factors in play, which are easy to implement but are not talked about much usually. When composing a shot, there are more than one ways in which a frame can be captured. If you wish to move beyond the rule of thirds and capture photographs with advanced compositional guidelines, then we would recommend you to check out this eBook, “Advanced Composition” by Photzy. It is a 239 page easy-to-follow practical guide, packed with training that includes 38 Assignments, 84 Key lessons, and 117 Self-check quizzes!