I mostly use Lightroom CC Classic as my daily choice. The AI tools inside Lightroom are powerful, and I often use the masking panel to create selections and fine adjustments. Occasionally, when I need to do some heavy editing, such as removing a difficult part from an image, I turn to Photoshop. The Content-Aware Crop is brilliant for adding more sky to a picture if cropped too tightly. Or, if I need to have more flexibility with layers, Photoshop is an excellent choice.
For experimenting with a photograph or when I feel too comfortable with editing, I use Luminar Neo. I can easily step into a beginner’s mindset while working with it. And finally, my go-to sharpener at the moment is Topaz Labs Sharpen AI, which does an excellent job when I need to add sharpness to my images. Also, GigaPixel AI is fantastic for ensuring my photographs look brilliant when printed.
AI image editing tools can significantly improve your landscape photography editing process. By using Lightroom, Photoshop, Luminar Neo, and Topaz Labs, you can achieve beautiful results and bring your creative vision to life. While these tools are powerful, they may have some flaws, so finding the right balance and workflow that suits your needs is essential. I recommend exploring and incorporating these tools into your workflow to enhance landscape photography.
Unlock Your Creative Potential
As you delve deeper into the world of AI-powered photo editing tools and unleash their potential, consider exploring some of the resources I’ve created to help photographers at all levels improve their skills and find inspiration.
The Complete Photography Collection. This all-inclusive package features all of my tutorials, presets, and eBooks, offering a comprehensive guide to enhancing your landscape photography and achieving the recognition your photos deserve.
Epic Preset Collection. Transform your editing process in Lightroom with my presets to help you unlock your creative potential and bring your images to life.
1-on-1 Photography Coaching. Whether you’re a beginner or an experienced photographer, my new online 1-on-1 coaching service is designed to provide personalized guidance and support to your needs and goals.
Free Tutorials. For those just starting or looking to expand their skills without breaking the bank, check out my collection of free tutorials covering various aspects of photography and editing.
Remember that AI is a tool; like any tool, it can’t replace the human element in the creative process. Embrace your intuition, emotions, and experiences as a photographer, and let them guide your editing choices. This will help you create images that not only look interesting but also resonate on an emotional level.
Your personal style and artistic voice are what makes your photography unique. While AI tools can help you achieve technical perfection, preserving your creative identity and ensuring that your images reflect your personal touch is essential.
Let me know if you use any of these tools or want to try them out. Thanks for reading!
Disclaimer: I’m an affiliate of some of these programs. Remember that using the affiliate links in this article helps support my work and enables me to continue sharing my experiences and insights with you.
Today, I’m thrilled to share the new 2023 update to The EPIC Preset Collection. So, in this article, I’ll be going through The EPIC Preset Collection. With the help of these updated tools, I can make easier selections and enhance my photography adjustments and editing to bring my vision to life easier than before.
If you already have EPIC Presets, you should have received an update in your email.
What is new in the 2023 EPIC Preset Collection?
How can you make the most comprehensive collection even better? By experimentation and with a passion for creating unique tools to help others. I believe the new updates suit perfectly for different styles and give you the tools to turn your images EPIC! Implementing the AI Masks to a collection this complete is the perfect way to make it even better.
If you want to see how it works in real life, check out the video below. Note that these are just quick edits and if you would like to see more edits with The EPIC Preset Collection, let me know!
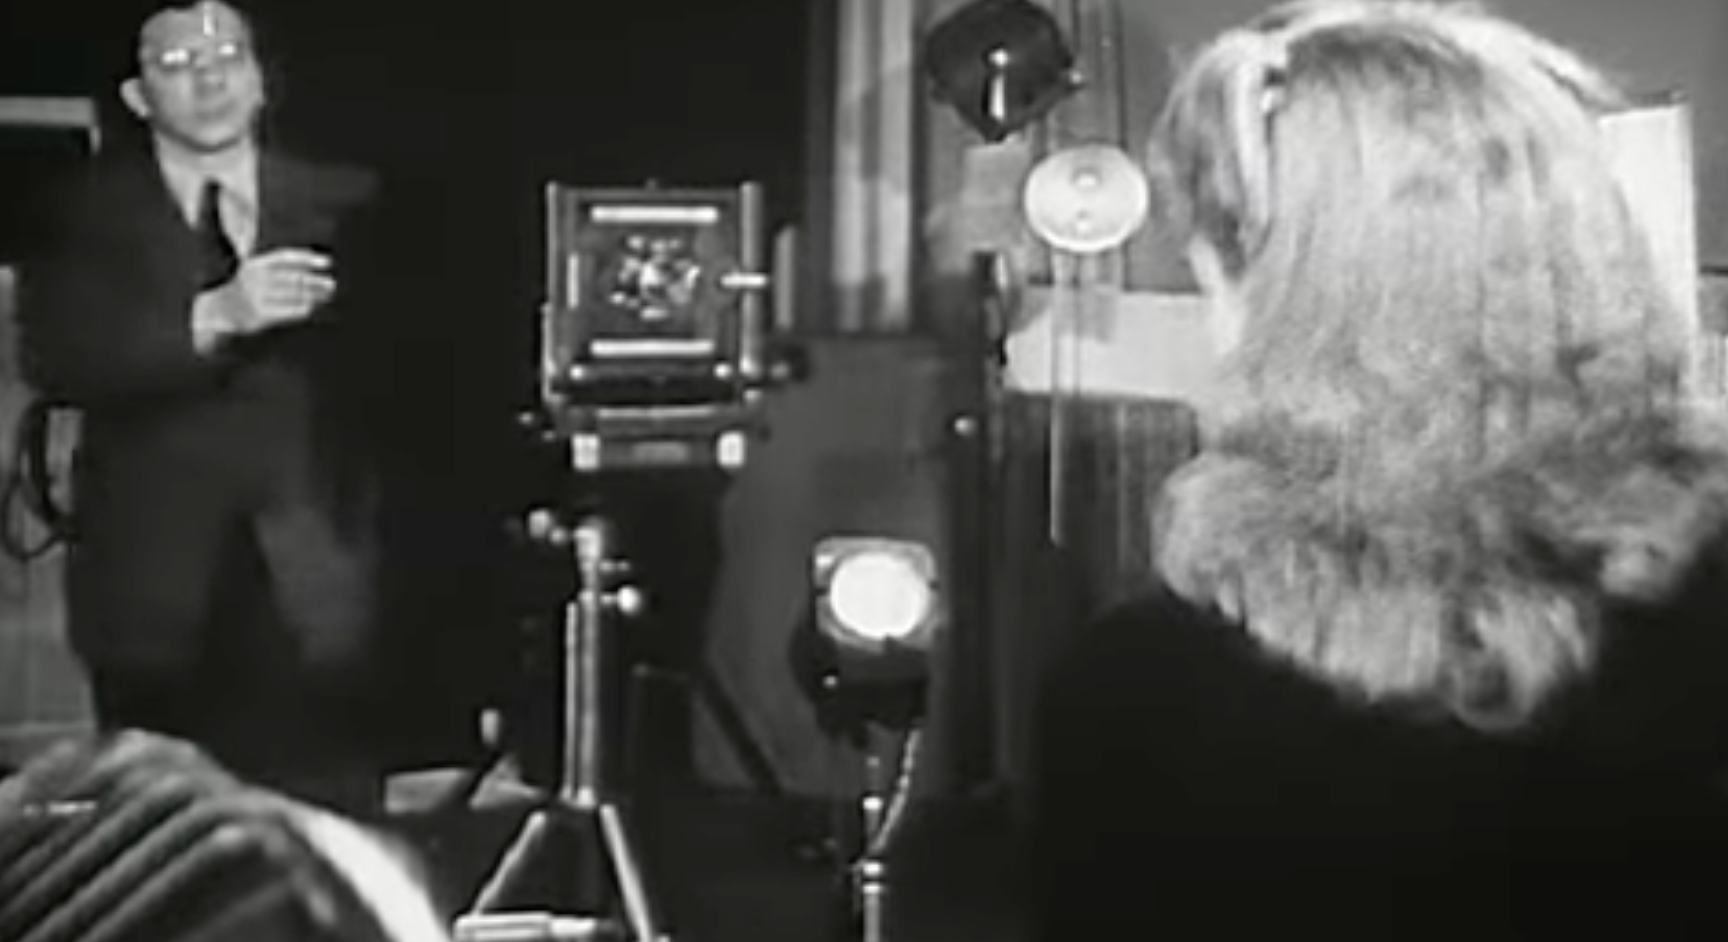
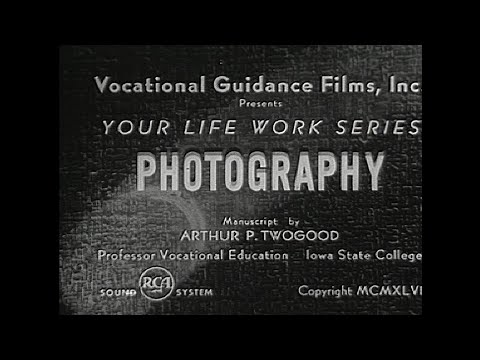
While we spend most of our time here at PopPhoto nerding out about the latest and greatest photography gear, we’re also suckers for truly old-school photo content. This fascinating video outlines what it was like to be a professional photographer in 1946.
Obviously, the industry, technology, and, well, pretty much everything has changed quite a bit back then. But some things do sound familiar. For instance, it’s weird to hear that there was an abundance of people in the profession even back then. The tools were obviously much less accessible than they are now, but even back then, people wanted to get in on the pro photography game.
Videos like this are truly a time capsule, and I have to wonder what it will feel like for people in 2100 to look back on the state of the industry in 2023. Our precious megapixels will likely feel so quaint.
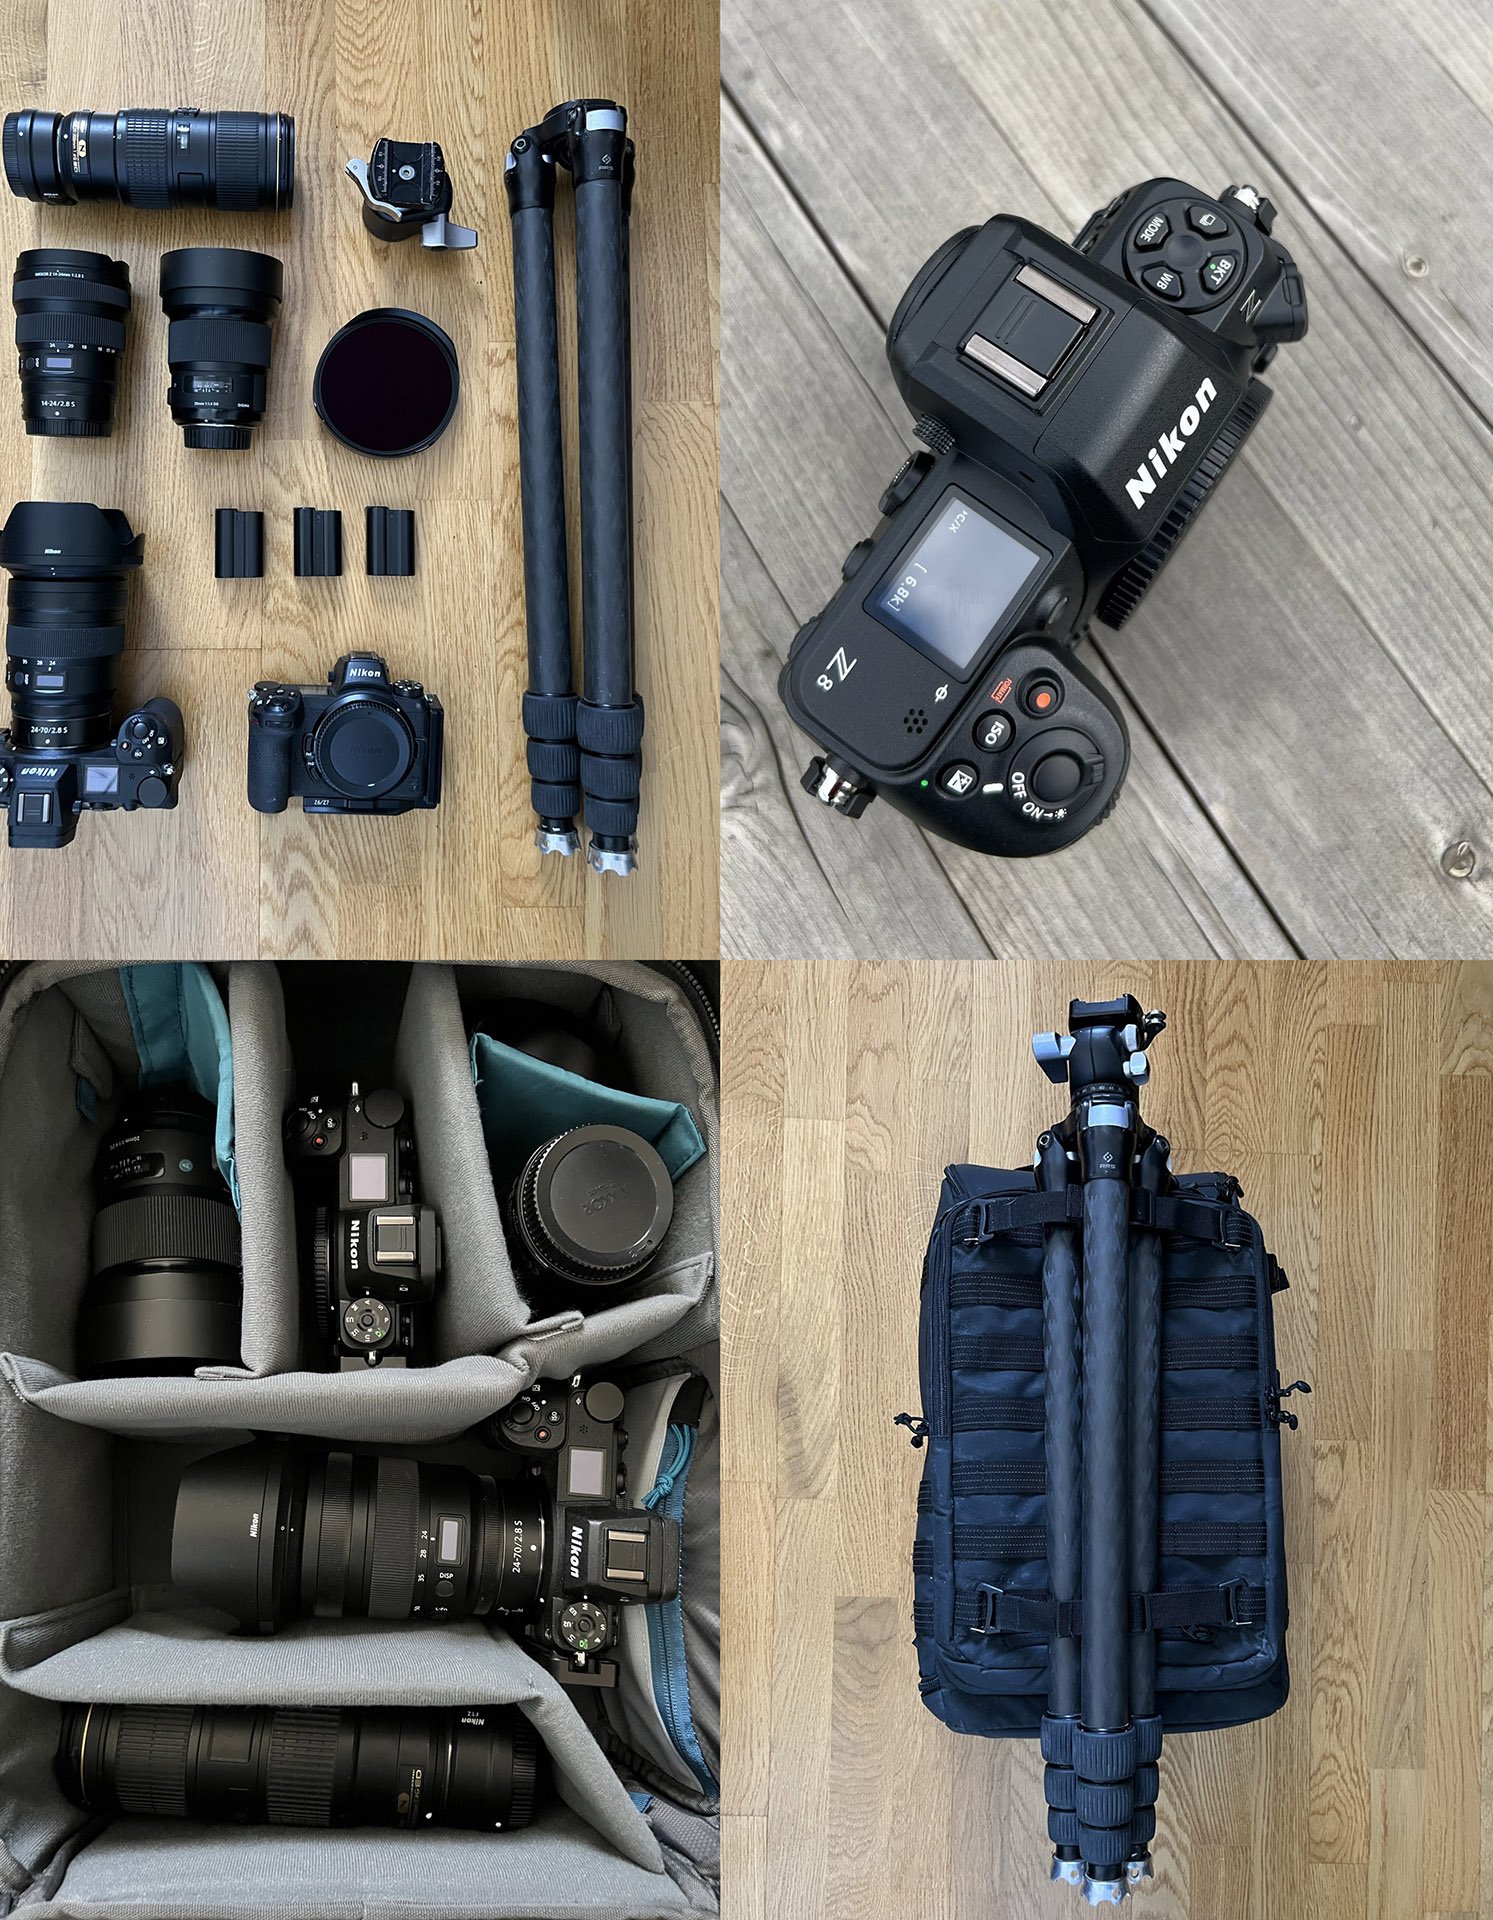
I don’t often write about gear, but it’s the most common question I get, so today, let’s talk about gear and what I currently use in landscape photography. Throughout my journey, I’ve experimented with various Nikon cameras, from D90 to Z7 II and now to the new Z8. I have used lenses from Nikon, Sigma, Tokina, Tamron, and Laowa, ultimately finding the current setup that allows me to express my creative vision.
I used the new Nikon Z 8 for a week in March, and it was fantastic. From a quick overview, I think it delivers an excellent upgrade for the autofocus and video options compared to the Nikon Z 7II. I’ll receive my copy of the Nikon Z8 later, so I can give you more thoughts about the camera. These are my honest opinions about the gear I use. Even though I’m a Nikon Creator, this post is not sponsored by Nikon.
Nikon Z7 II
I have used the Nikon Z7 II as my primary camera for the past year. Before that, I used Nikon Z7 and D810. You can view my review of the Nikon Z7. Now with the Nikon Z7 II, I barely use anything else. The SD card slot is a great addition to the previous version. I’m not currently shooting video much, but that part has also been upgraded from Z7. The battery life is slightly better than in the Z7. When I want to capture time-lapse as well as stills I bring with me the Z7 to have the option to shoot two different perspectives at the same time.
Sensor
Although not the highest-megapixel sensor in the market, the Nikon Z7 II‘s 45.7-megapixel sensor produces high-quality images with incredible detail. It is essential in landscape photography, where every nuance, from the texture of rocks to intricate patterns, adds depth and richness to the final image.
Dynamic Range
The dynamic range of a camera refers to its ability to capture detail in both the brightest and darkest parts of a scene. It is essential when photographing landscapes with high contrast between bright skies and shadowy foregrounds. The Nikon Z7 II excels, allowing me to capture images that retain detail even in challenging lighting conditions.
Low-Light Performance
One of my favorite aspects of landscape photography is capturing the beauty of the night sky. The Nikon Z7 II‘s excellent low-light performance allows me to photograph the stars and the Milky Way with minimal noise and incredible detail. The camera’s high ISO capabilities and noise reduction ensure that my astrophotography images are clean and sharp.
Nikon Z7 II pros and cons
+ Exceptional image quality + Low-light capability + Dynamic Range + Low weight, only 705 g + Dual card slot – No in-camera RAW video capabilities – Relatively slow autofocus – Could have a better battery life
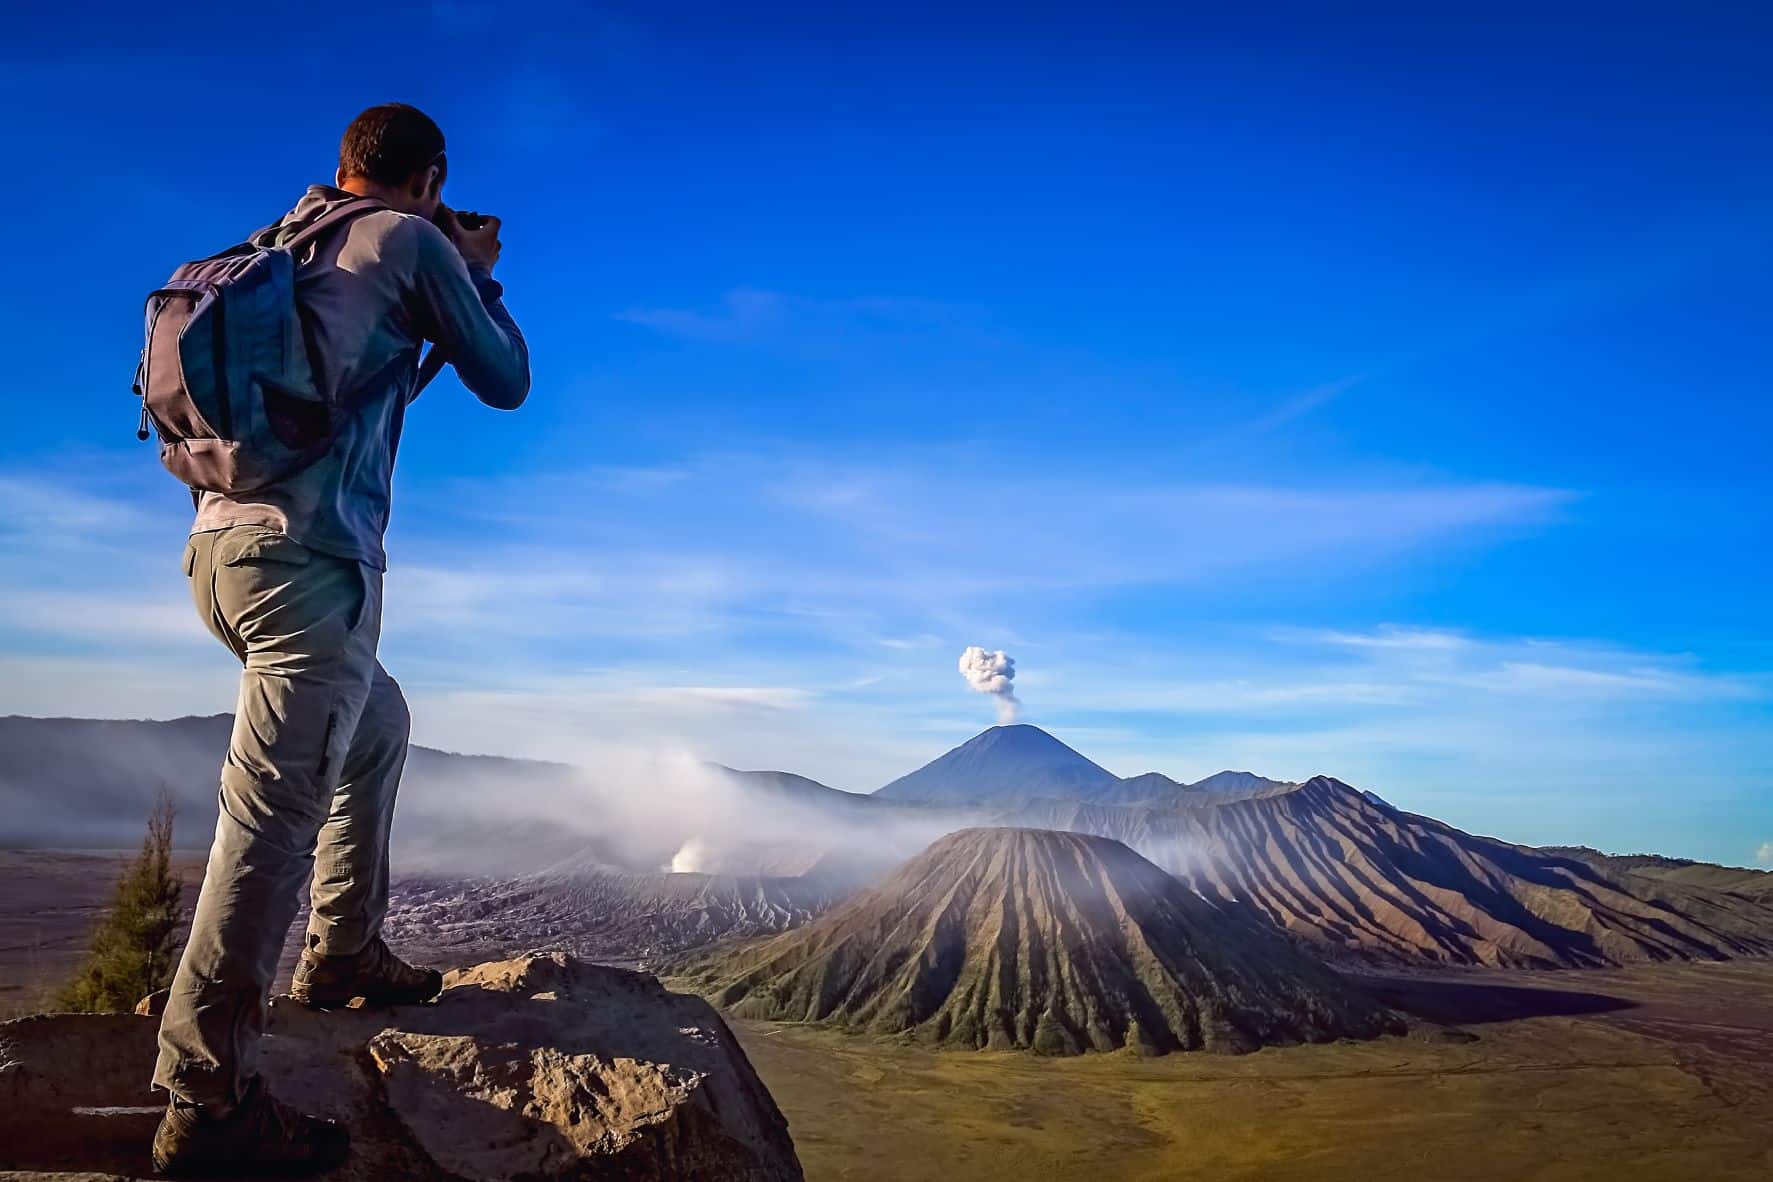
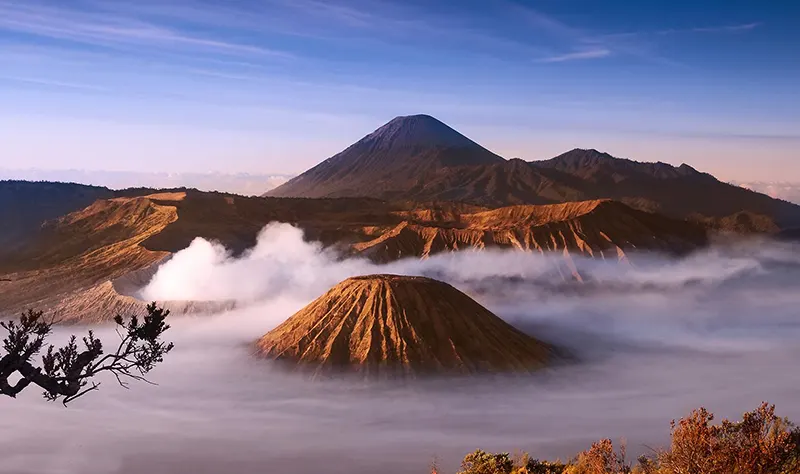
Volcano photography is an enriching hobby. Even though a lot of work goes into the process of capturing the best volcano pictures, the experience makes everything worth it. Yes, it’s risky but it’s an experience like no other.
To photograph a volcano, you’ll need a quick shutter speed to freeze any motion. Set your speed to 1/1000th, then change your ISO and aperture as necessary. Shooting volcanoes from the air, ground, or sea captures dramatically different outcomes and a better view of the lava source.
Read on to learn the best tips on photographing volcanoes and how to do it safely.
[table id=34 /]
Best Ways to Locate Vantage Points
guidetoiceland
If you want to make the process a lot faster, you can ask a local to take you to the best vantage points. When photographing volcanoes, it’s not enough to see the areas in photographs or hear stories from other people. You’ll need to visit them and see them for yourself. Just don’t forget to take the appropriate lens for each possible viewpoint.
When you go to an erupting volcano, take some time to observe the explosion from a safe distance. Determine the eruption’s strength and the direction in which the hot lava is moving for your safety. As we all know, it’s not safe to get near an erupting volcano.
Photographing Tips During the Day
You can catch the most powerful volcanic eruptions and ash clouds by shooting photos of volcanic explosions throughout the day. Shooting lava is an option as well. Your most probable lens will be a 24-105mm lens. A long lens is ideal if you are far away.
You may either try to freeze the motion in daylight photography or create some motion blur.
Freeze the motion: You will need quick shutter speeds to freeze falling lava bombs, or pyroclastic flows captured on camera. Set your speed to 1/1000th, then change your ISO and aperture as necessary. The ISO is probably at or over 1000. You should typically use an aperture of f/8 while taking landscape photography. You may need to use a bigger aperture as it grows darker.
Motion blur: Slower shutter speeds, which may blur motion, are at the other extreme of the shutter speed continuum. Shutter speeds of 1/20th are required to capture the appearance of action. Use this with ash clouds if you can. Shutter speeds of one second or longer are perfect for recording lava movement. Use an ISO of 100 and a narrower aperture to obtain slower shutter speeds. Add a graded neutral density filter if necessary.
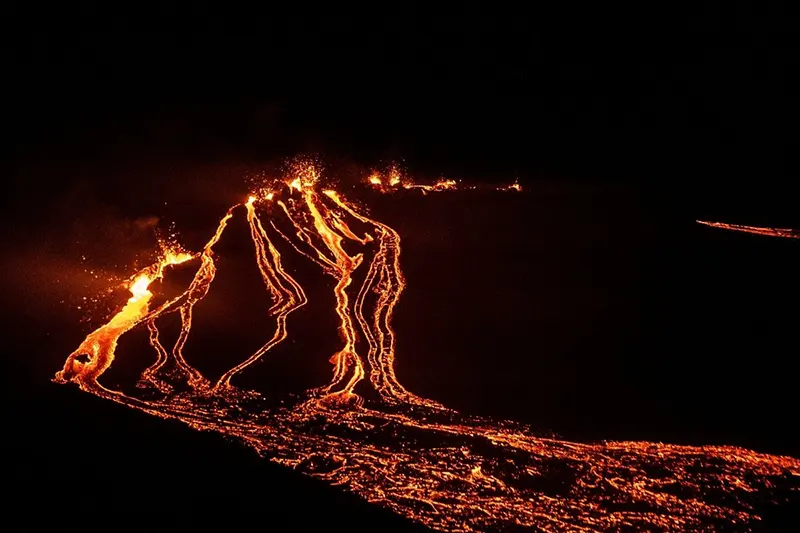
Photographing Tips At Night
news18
Nighttime is one of the loveliest periods to try taking photos of lava. You will be able to detect the glowing lava much better.
The ideal time to take photos is during the late blue hour. You have a higher chance of detecting the volcano’s foreground features. The lava will seem brighter in the picture the later you go into the blue hour. The rocks will become shadows against the lava once wholly dark.
For this reason, you need to try to take pictures while the moon is full. Bring a powerful flashlight so you can illuminate molten rock during the exposure. Look to expose for up to 10 seconds if you want to get the lava streaks.
ND filters are also valuable for blue-hour situations. You may shoot the volcano with prolonged exposure and six- to eight-stop neutral density filters.
Use the same general procedures as when shooting a typical landscape. When feasible, bracket your shots and shoot in RAW. Exercise delicate processing to guarantee that the image you capture is as accurate as possible. Make sure your lava has a red and orange gradient and lessen the brightness.
Protecting Yourself and Your Gear
You will need gear to protect yourself and your photography equipment before anything else.
Safety Gear
Volcanoes pose a wide range of hazards, particularly if you want to approach a volcano or lava flow up close. Most photographers covering volcanoes have a few specific things in their gear.
Helmet: Falling rock is one of the main risks around volcanoes (or lava bombs).
Heat-resistant clothes: Wear heat-resistant clothes since it might be dangerous to approach the lava.
Gas masks: The area surrounding volcanoes may contain deadly gases.
Note: None of these items will shield you from pyroclastic flows.
Photography Gear
The following are the camera gear you need for taking volcano pictures.
Camera body: A must-have is a sturdy camera body and weather and dust-sealed.
Lens: You must carry a wide-angle lens while taking landscape photos, especially for dormant volcanoes. Mid and long focal lengths are preferable for an active volcano.
Tripod: Make sure the tripod is robust and heat-resistant.
UV filter: A UV filter protects from different debris present in an extreme environment.
Camera blowers or towels for cleaning
Hiking Gear
Some volcanoes are located in very rugged terrain. That suggests you also need the following on top of the appropriate safety gear.
Hiking boots
Walking poles
Water and rations
Tent or sleeping gear
First aid kit
Dormant Volcanoes Photography
greatvaluevacations
Even when they are not erupting, volcanoes are breathtakingly gorgeous. They are excellent photographic subjects because of their rough geology and features like crater rims. For times when the lava isn’t flowing, here are some other photographic locations:
Trekking up the volcano: It’s advantageous to climb a volcano when it’s dormant. Deep ravines and leaking gas will still provide challenges. Though even when it is not an active volcano, there are safety risks.
Acid lakes: Acid lakes form when escaping sulfur gas combines with a crater lake. These lakes are highly picturesque and have an odd, otherworldly sense.
Geysers: Geysers are nature’s fountains and make excellent picture subjects.
Sulfur mines: Sulfur mines also make for a compelling photo.
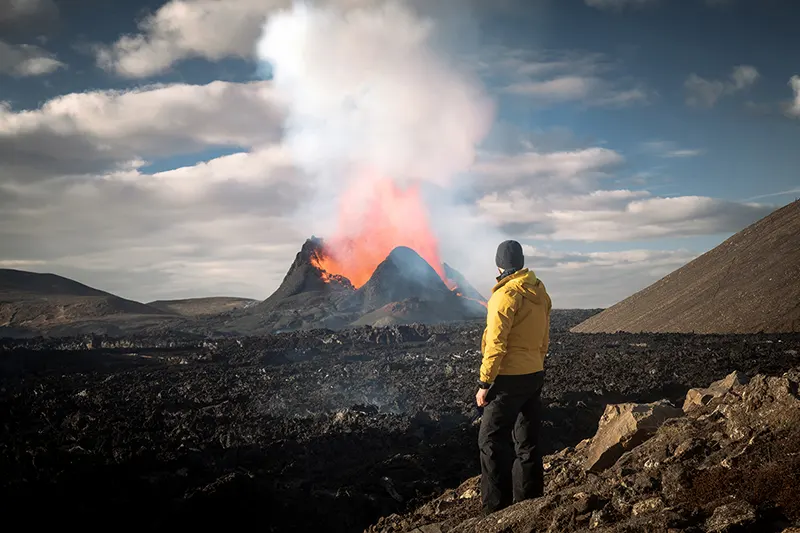
Photographing From The Ground
Photographing from the ground is challenging and poses some particular difficulties. First, it takes a lot of frames and a little luck to get all parts to line up at once.
Don’t forget to get wide and detailed shots when shooting from the ground. Photograph between 14mm and 500mm, and be sure to have all your lenses on hand and keep an eye out for various compositions.
Examine several shutter speeds to determine which effect you like. A 1-second exposure often produces the most remarkable results.
When the blue hour is winding down, there is a perfect balance of light for 15 to 30 minutes. Because it moves quickly, you must be sure that you have chosen the best composition for the excursion at that point.
It’s feasible for your tripod and camera equipment to melt while taking close-up photos with a wide-angle lens. Surprisingly far, lava flows transmit heat.
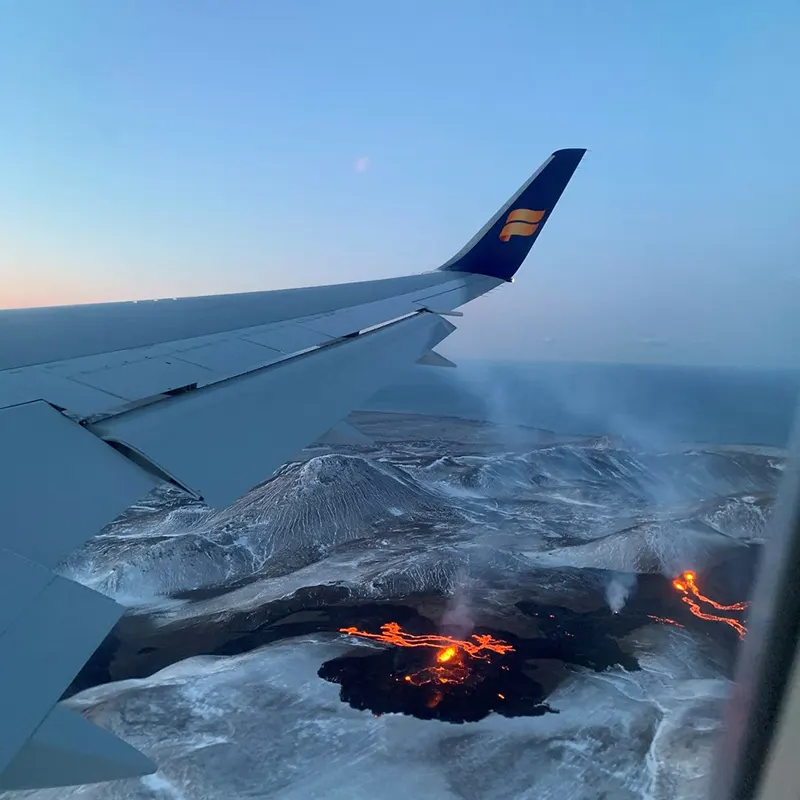
Photographing From The Air
Since many volcanoes are unreachable by land, it is better to have a broad notion of capturing the volcano and setting up your camera correctly in advance.
When the shutter speed is less than 1/500th of a second, vibrating aircraft like piston-engined helicopters tend to produce blurry images. If possible, set shutter speeds to 1/750th or even 1/1000th of a second; however, you may get away with 1/500th if your lenses have image stabilization.
@Icelandair
A fast (f/2.8) lens is advantageous in this situation since you can often shoot wide open and still have everything in focus because the explosive eruptions are far away.
ISO is the only setting you have to work with to get the proper exposure with a wide-open aperture and 1/750th of a second – this is where your camera’s “auto ISO” feature comes in useful.
The last factor is ensuring that the camera chooses the appropriate exposure for you. Use “highlight-weighted metering” if your DSLR has it. Volcanic photography in dark regions is easy to work in a frame with better exposure.
For helicopter safety, do not switch lenses while the plane is in the air. In light of this, keep two camera bodies: one with a 24-70mm lens and the other with a 70-200mm or 80-400mm lens. Keep the camera’s strap connected, and wear them around your neck the whole trip.
Photographing From The Sea
You should certainly see the lava from a boat to get a close-up view while it is entering the water. It is a fantastic view position that makes for a very immersive experience.
A 70-200mm lens (full frame) is ideal for capturing the hot lava trickling into the water in fine detail. A shutter speed of at least 1/250 second was necessary to freeze the motion due to the rocking boat and splashing waves.
Where Are the Best Volcanoes to Capture?
Most of the world’s volcanoes are in tectonically active regions, such as in the country of New Zealand, the Philippines, Japan, Kamchatka, Alaska, and the western coasts of North and South America.
Indonesia, Italy, Iceland, Hawaii, and other places in Africa also have incredibly beautiful volcanoes.
Before going, look at the volcanic eruption history and ask locals about the actual eruption. Consider hiring a guide to accompany you as well.
Find out whether the volcano generates potentially harmful pyroclastic flows. If so, find out which way they often travel.
Conclusion
Taking images of volcanoes is a ton of fun, and the results will blow you away! If you are interested in volcano photography, ensure you have the right gear and a good guide who knows the area well to get some great images.
I wanted to write something different this week. Since it’s been very much a lot of misses on the photography part lately. Even though I have been photographing quite a lot recently, there are times when it just doesn’t happen, and you end up empty-handed.
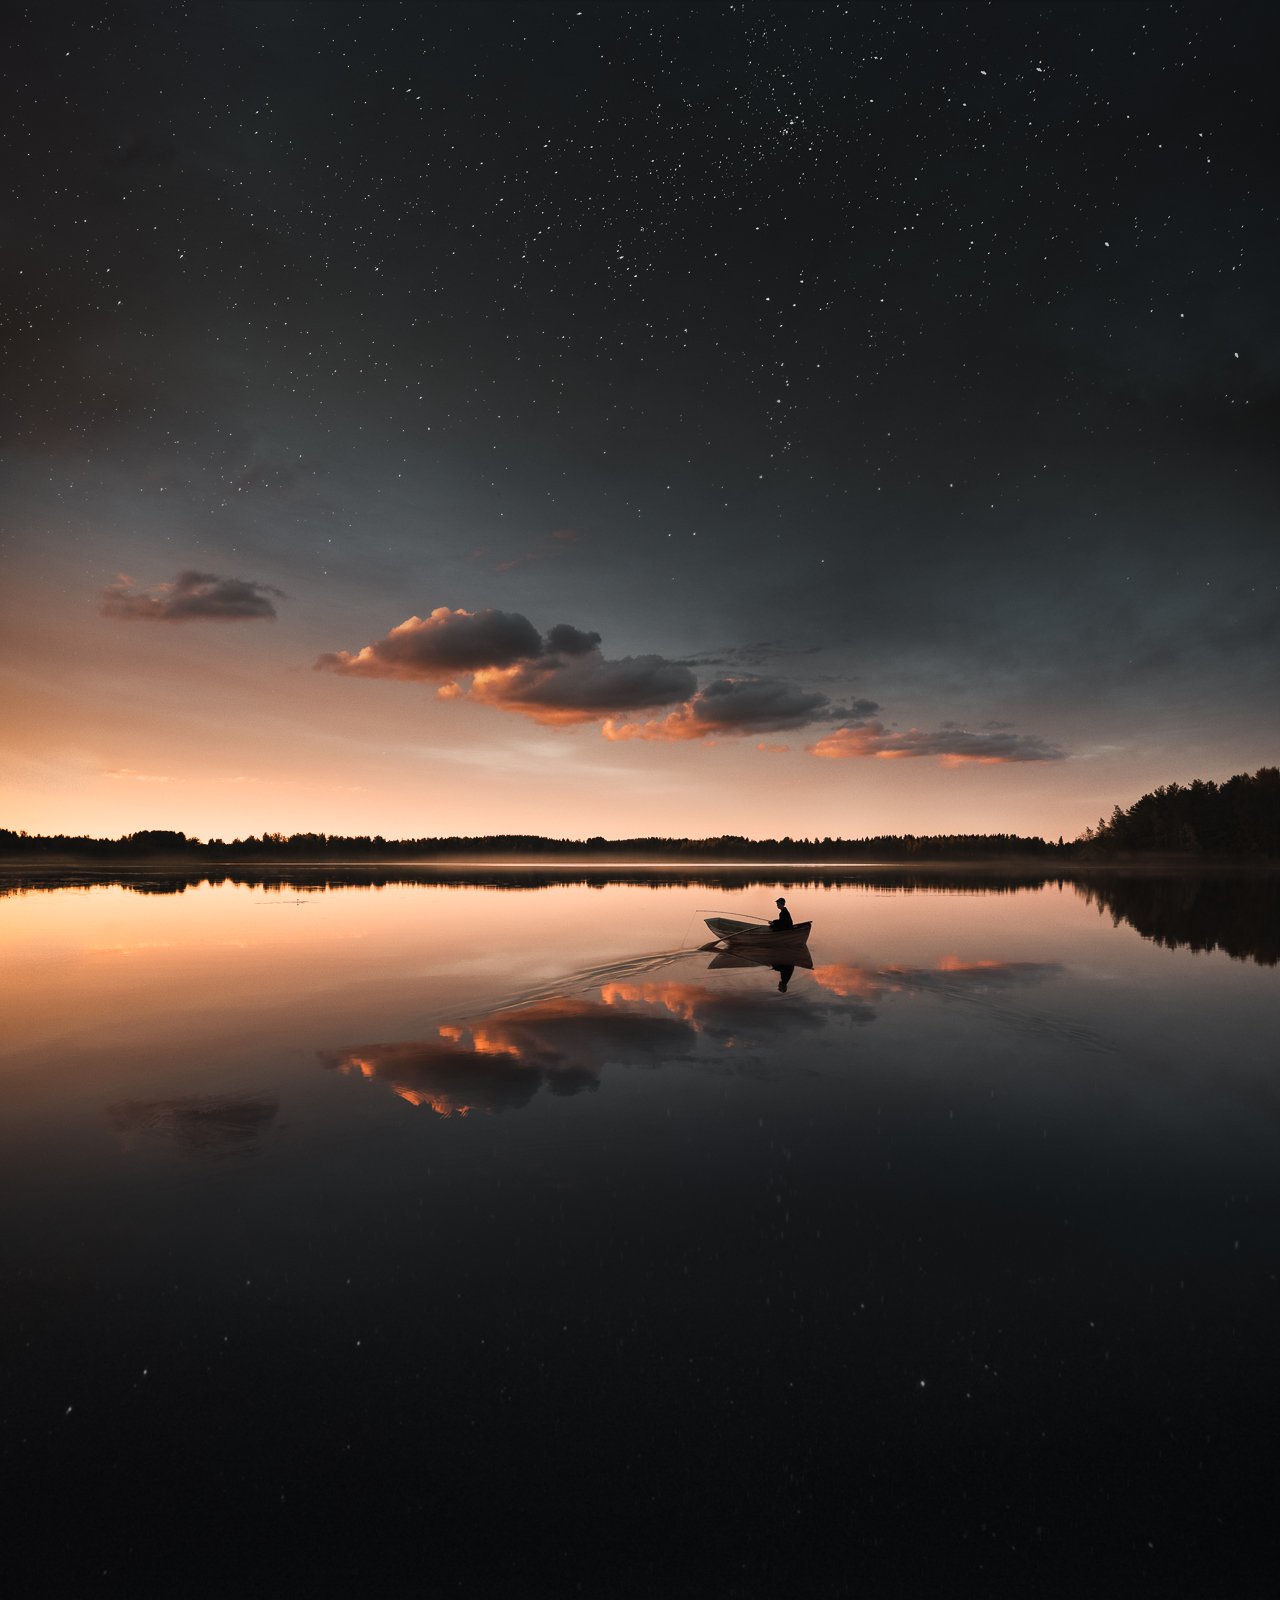
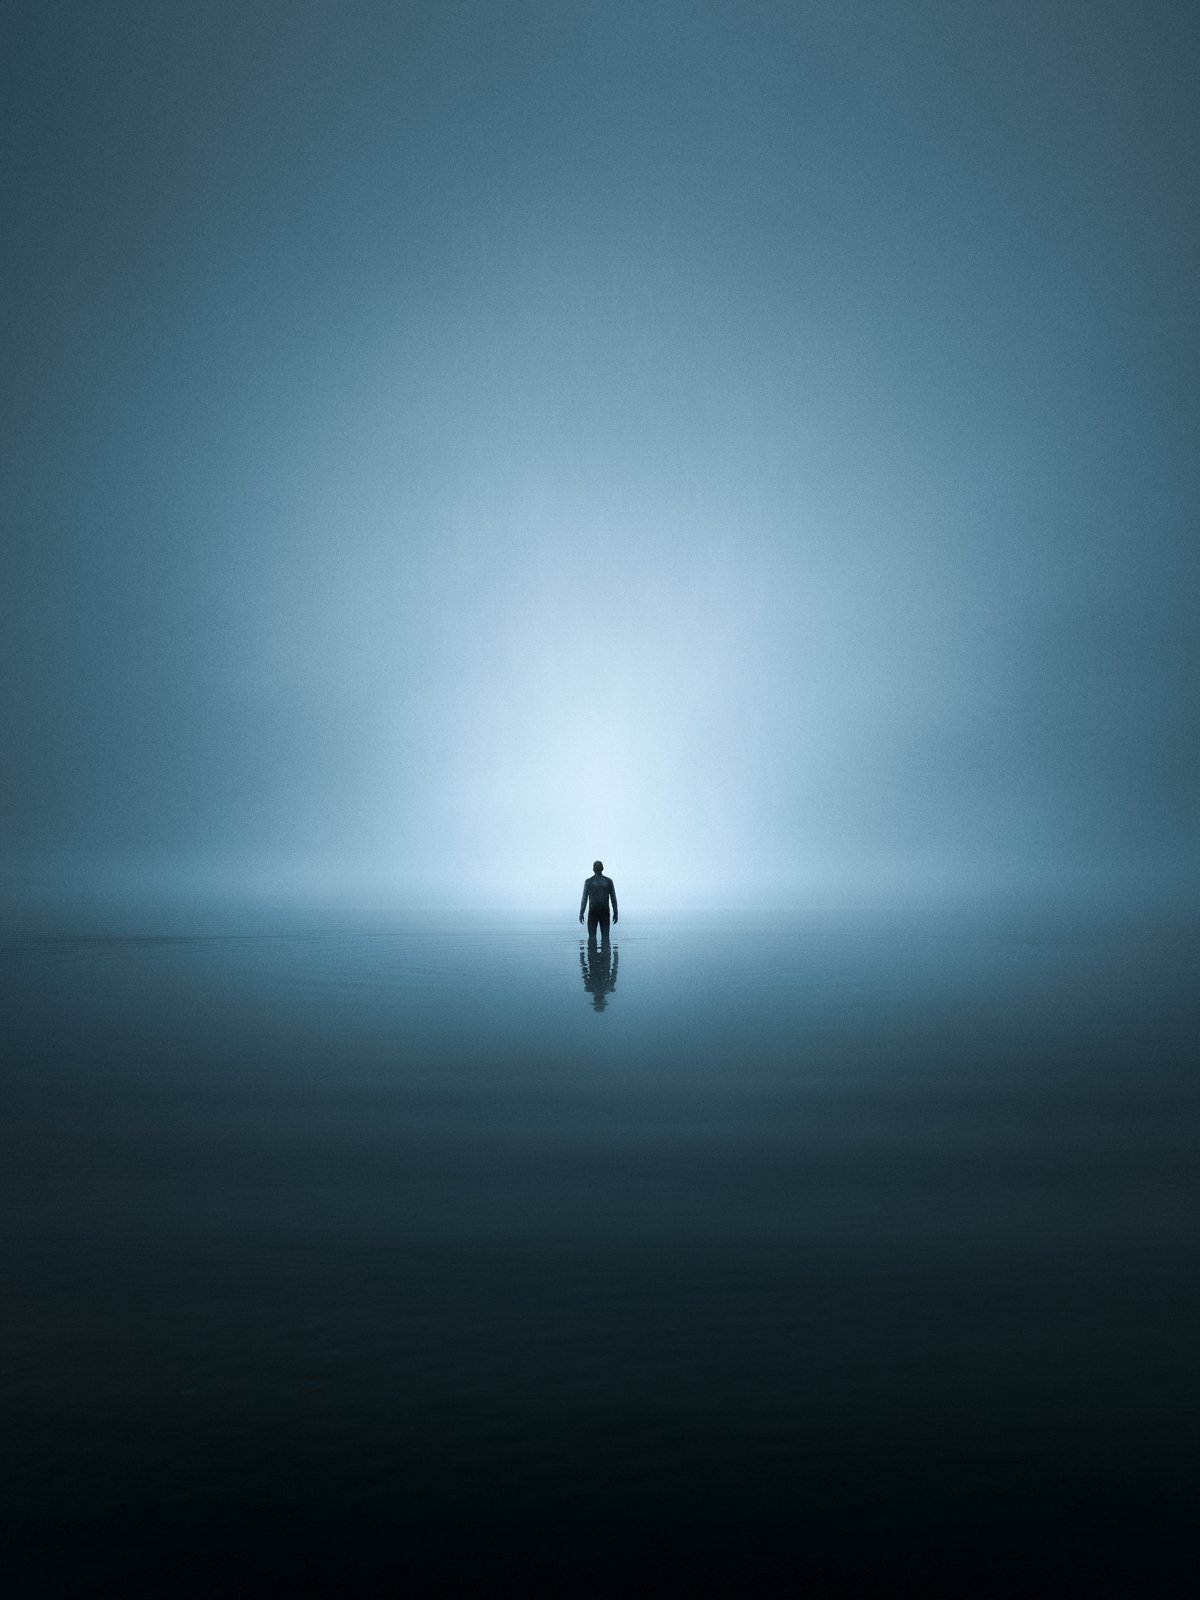
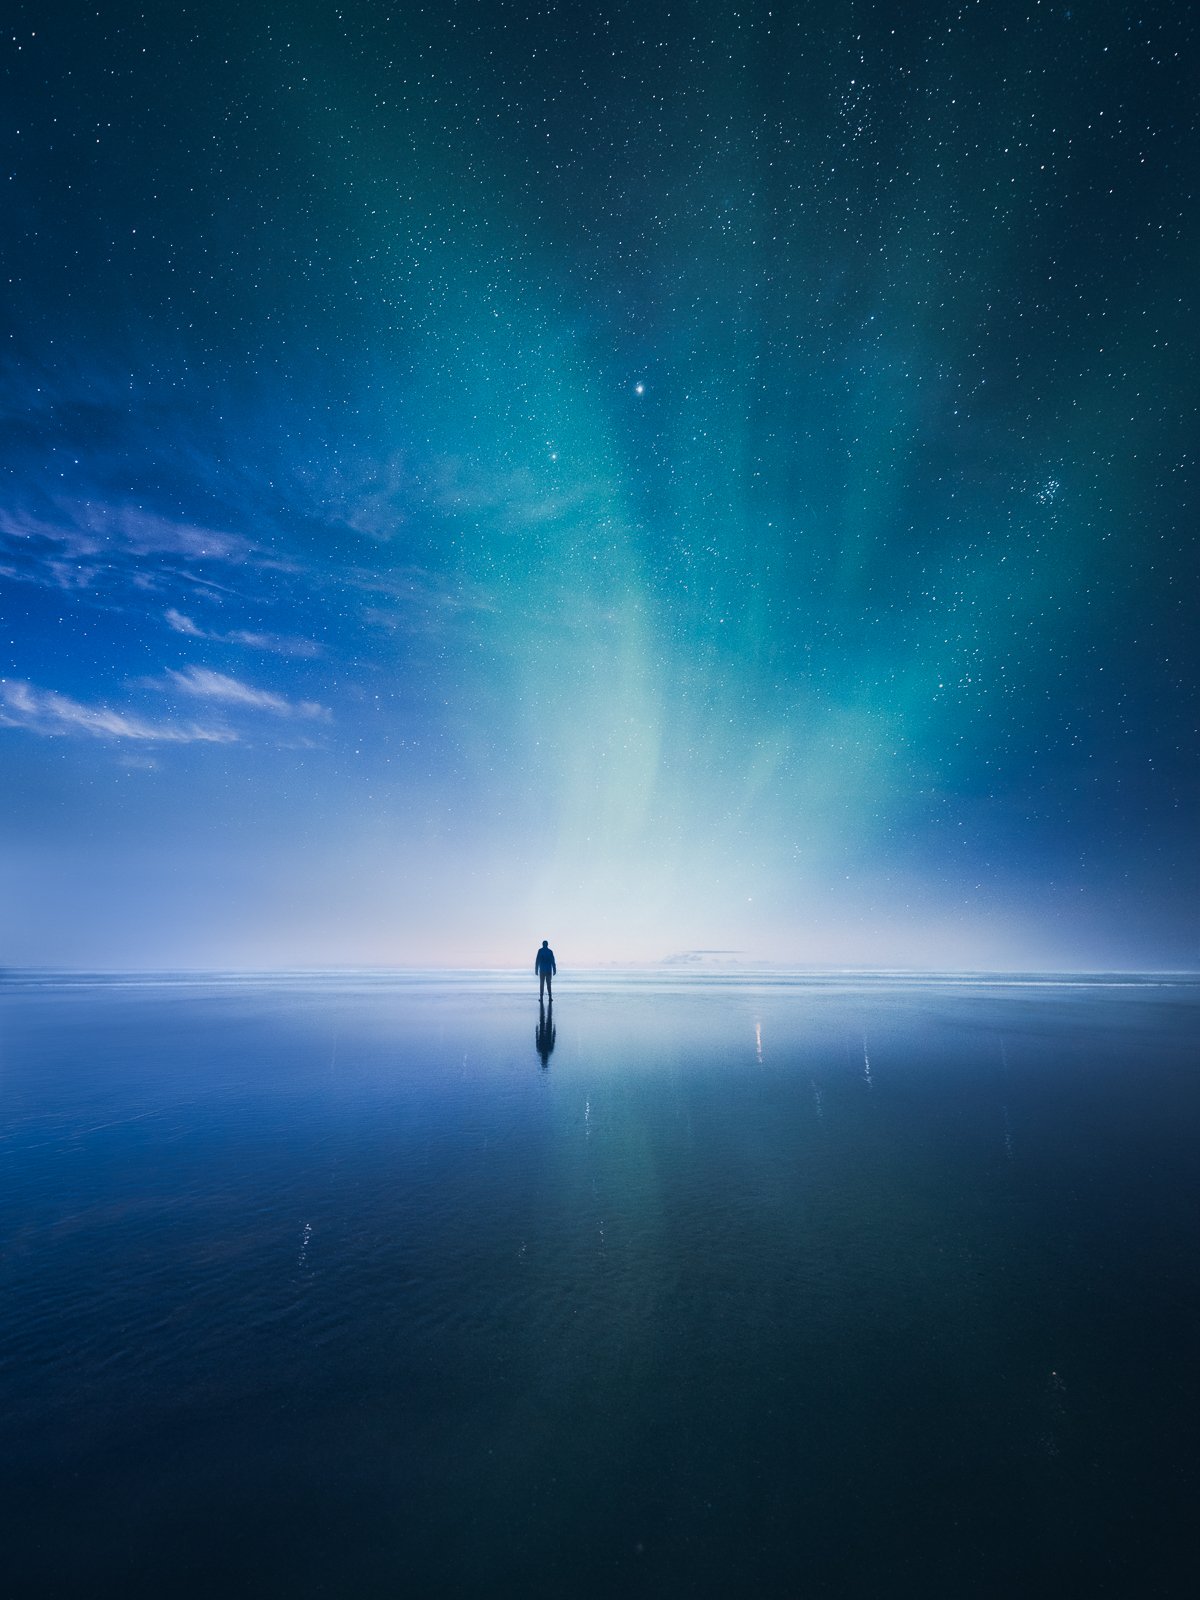
Sometimes, I find it inspiring to reminisce about certain moments while out photographing. The morning I captured the “Morning Echo” photograph was one of those special moments. I left to photograph at this beautiful secluded beach at Päijänne Lake in Finland. My idea was to capture the night sky from this place, spend the night under the stars, and see what the morning would look like.
As I drove to the location, it was already getting dark. Going through the forest and finally arriving at the beach, the moonlight started to illuminate the horizon. It was a beautiful autumn night. I set my camera to take a time-lapse of the beach with the moonlight and stars. The time-lapse came out ok, but nothing special. But as the temperature dropped, the humidity rose from the warmer lake.
In the morning, I woke up before sunrise and explored different views from the location. The mist was already thick, so I was excited to capture different views. Finally, as the light was getting stronger, I went out to the water and tried to see if I could go into the frame and capture myself.
As I walked back and forth from the camera, I set a self-timer that would take nine images after 20 seconds, and I moved and stood in the clear and shallow water. Finally, I captured something I enjoyed.
Inspired by the feeling of solitude, I edited the image to look a bit darker than it was. Those little ripples in the foreground were perfect to give the view more atmosphere.
Equipment, Camera Settings & Post-Processing
Nikon D810, Nikon 14-24 mm f/2.8 AF-S, and RRS Tripod.
ISO 100, 24 mm, f/8.0 @ 1/160 sec.
I edited the photograph in Lightroom. I made changes, such as adjusting white balance, exposure, and contrast, to make the image look how I saw the scenery. The colors were edited with the help of my Preset Collections.
I hope you find this bts post inspiring! Remember that the early morning is one of the most beautiful times of the day.
I hope you are having a wonderful Summer. Even though I love summer, I find it challenging for photography. I have never been a big fan of the midnight sun or bright nights. The mist is something I find inspiring to photograph, yet there are only a handful of mornings when there is some mist in the summer. And as soon as the nights get darker and colder, I find myself inspired to go out and photograph. So for the upcoming dark season, I started writing a comprehensive and inspiration-filled tutorial about night photography. I hope you enjoy it.
As someone who has spent quite a few nights photographing different views, I find night photography fascinating and inspiring. As I was writing this post with the amount of knowledge I’ve gathered, I felt I needed to put this into an eBook, but then I thought to share it on my blog. If you enjoy my posts, you can support me by sharing this article or even buying me a coffee to keep me recharged and continue writing!
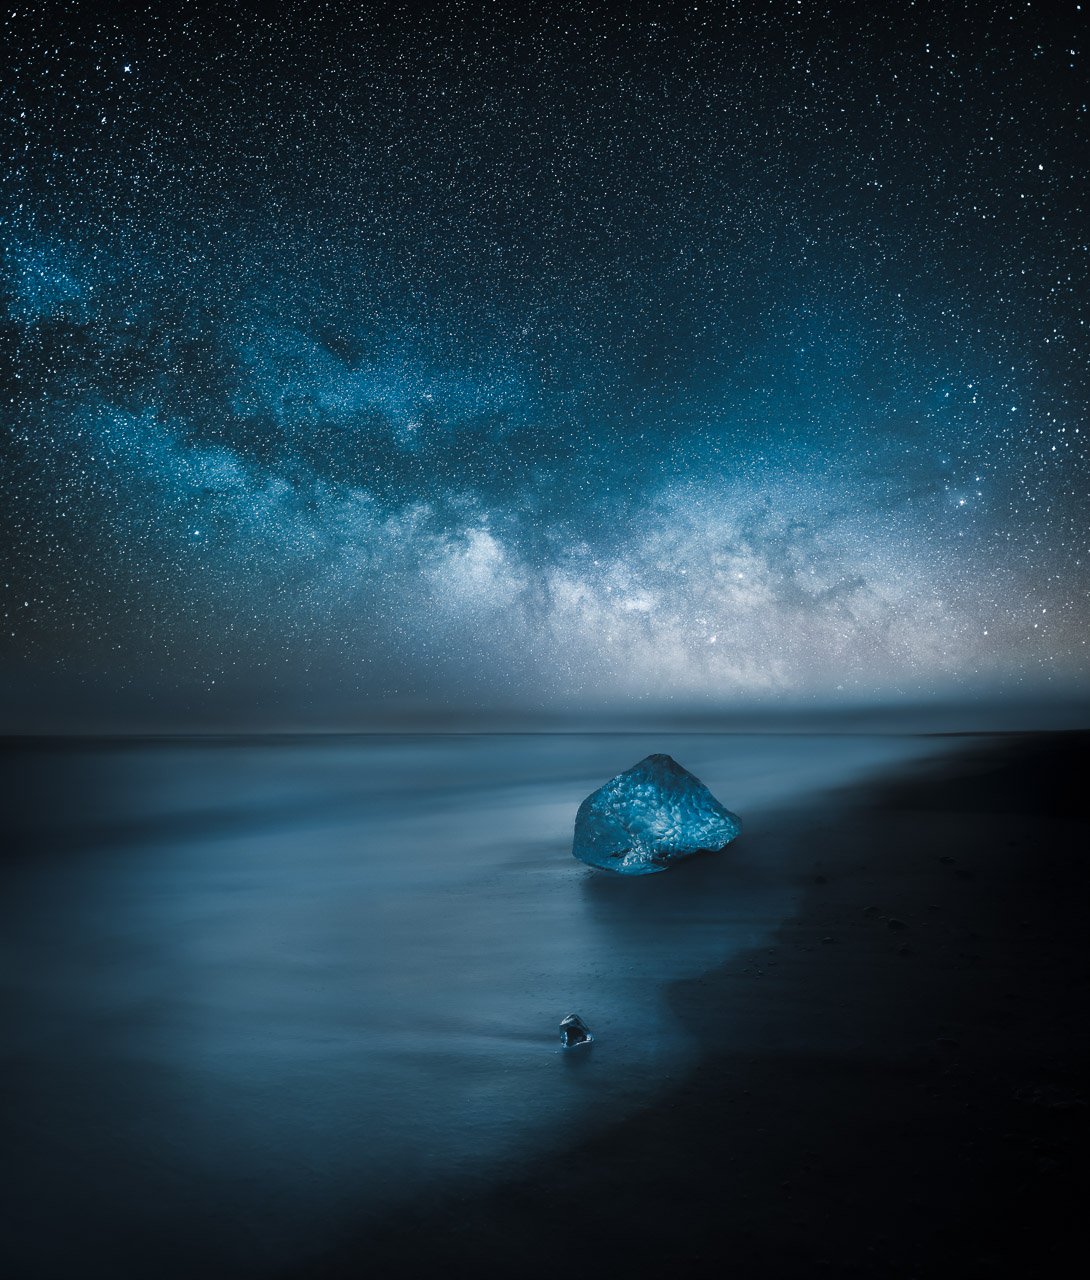
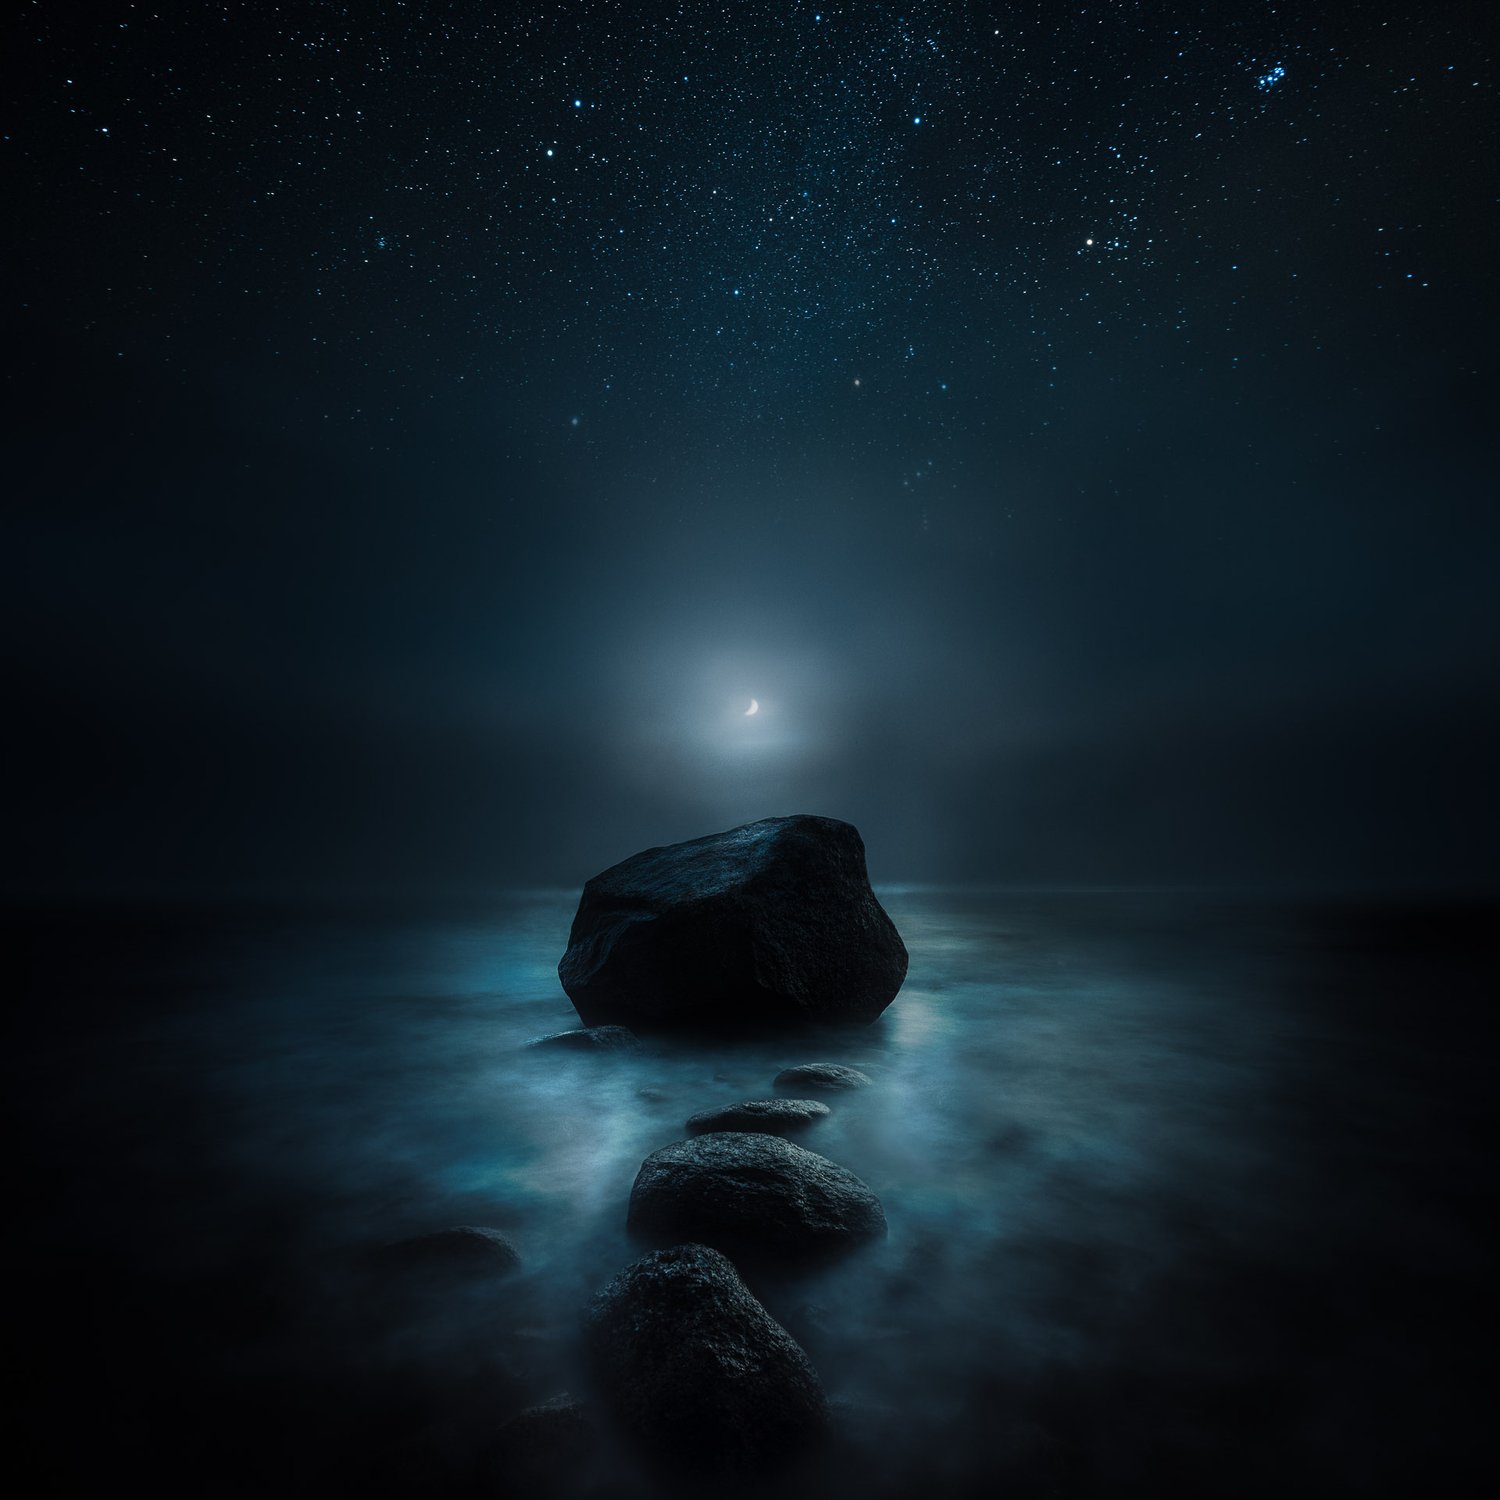
At night, our surroundings transform into a different kind of beauty. The sky becomes a vast canvas of stars, the moon casts a gentle glow, and the aurora comes alive in a luminous dance of lights and shadows. These mesmerizing views can be captured, making night photography a captivating genre full of creative opportunities and unique challenges.
The journey to night photography is planning, patience, and learning. It’s also understanding the nuances of light and darkness and mastering the technical aspects of long-exposure photography. The night presents a different kind of quiet and solitude, allowing introspection and creativity.
This tutorial explores my journey in night photography and guides those who wish to venture into this fascinating genre. Check out my Star Photography Masterclass eBook if you want to dive deeper into night photography and editing.
In this tutorial, we go into various parts of night photography, from capturing Milky Way and moon to vertoramas night. I’ll share the techniques, equipment, and settings I’ve found most effective for capturing stunning nighttime images.
Throughout this post, I challenge you to remember that photography is not just about capturing a scene; it’s about conveying a feeling and telling a story through your lens. The night reveals mystery, tranquility, and natural beauty, and I hope my experiences and insights inspire and guide you in creating unique stories under the stars.
Here are a few other night tutorials I’ve written before:
It is truly unique how the sky presents remarkable spectacles every night. There is always something captivating to observe, from stars and planets to the moon. Of course, those bloody clouds can block the views, but it’s part of the game.
Sometimes, we are blessed enough to witness extraordinary events like the Northern Lights or meteor showers. Although capturing these breathtaking sights through photography can be rewarding, it takes expertise and a lot of patience.
Planning
Photographing the night sky starts with planning. Unlike other genres of photography, where spontaneity can lead to the best shots, night sky photography demands careful thought and preparation. The key factors to consider include the weather, moon phase, light pollution, and the position of celestial bodies. Clear skies are ideal for capturing stars, while the moon’s phase can significantly affect your scene’s lighting. Light pollution can hinder your ability to capture the fainter stars, so venturing away from city lights is often necessary. Finally, knowing the position of celestial bodies can help you plan your composition. There are various apps available that can help you with these aspects of planning. PhotoPills, TPE and Stellarium, are great tools to use.
Camera Settings
The next step is understanding the crucial camera settings for night sky photography. Night photography is a game of light – or, more accurately, the lack of light. Because of this, you’ll need to adjust your camera settings to capture as much light as possible. This means shooting in Manual mode and understanding the “Exposure Triangle” – the relationship between aperture, shutter speed, and ISO.
Shutter speed is critical in night sky photography. Your aperture should be as comprehensive as possible to allow maximum light into the lens. For most lenses, this will be between f/2.8 and f/4. A common rule for shooting stars without creating star trails is the ‘500 Rule’: Divide 500 by your lens’ focal length to determine the longest exposure time before stars begin to blur due to the Earth’s rotation. However, this rule isn’t infallible and may require some adjustments based on your specific camera and lens combination.
ISO settings can be tricky. A high ISO increases the sensor’s sensitivity to light, which is beneficial in low-light conditions. However, pushing the ISO too high can result in a noisy image. Start with an ISO setting around 1600 – 6400 and adjust based on the results you’re getting. I might go as high as 8000 ISO in complete darkness.
Focus
Focusing at night can be challenging, as autofocus systems often struggle in low light. A common technique is manually focusing on a bright star or distant light. Some photographers use the infinity (∞) symbol on their lens as a starting point, fine-tuning from there.
Try different compositions, play with settings, and, most importantly, take the time to enjoy the process. The night sky is a fascinating subject that rewards patience and curiosity. So, step out into the night, and gaze upwards.
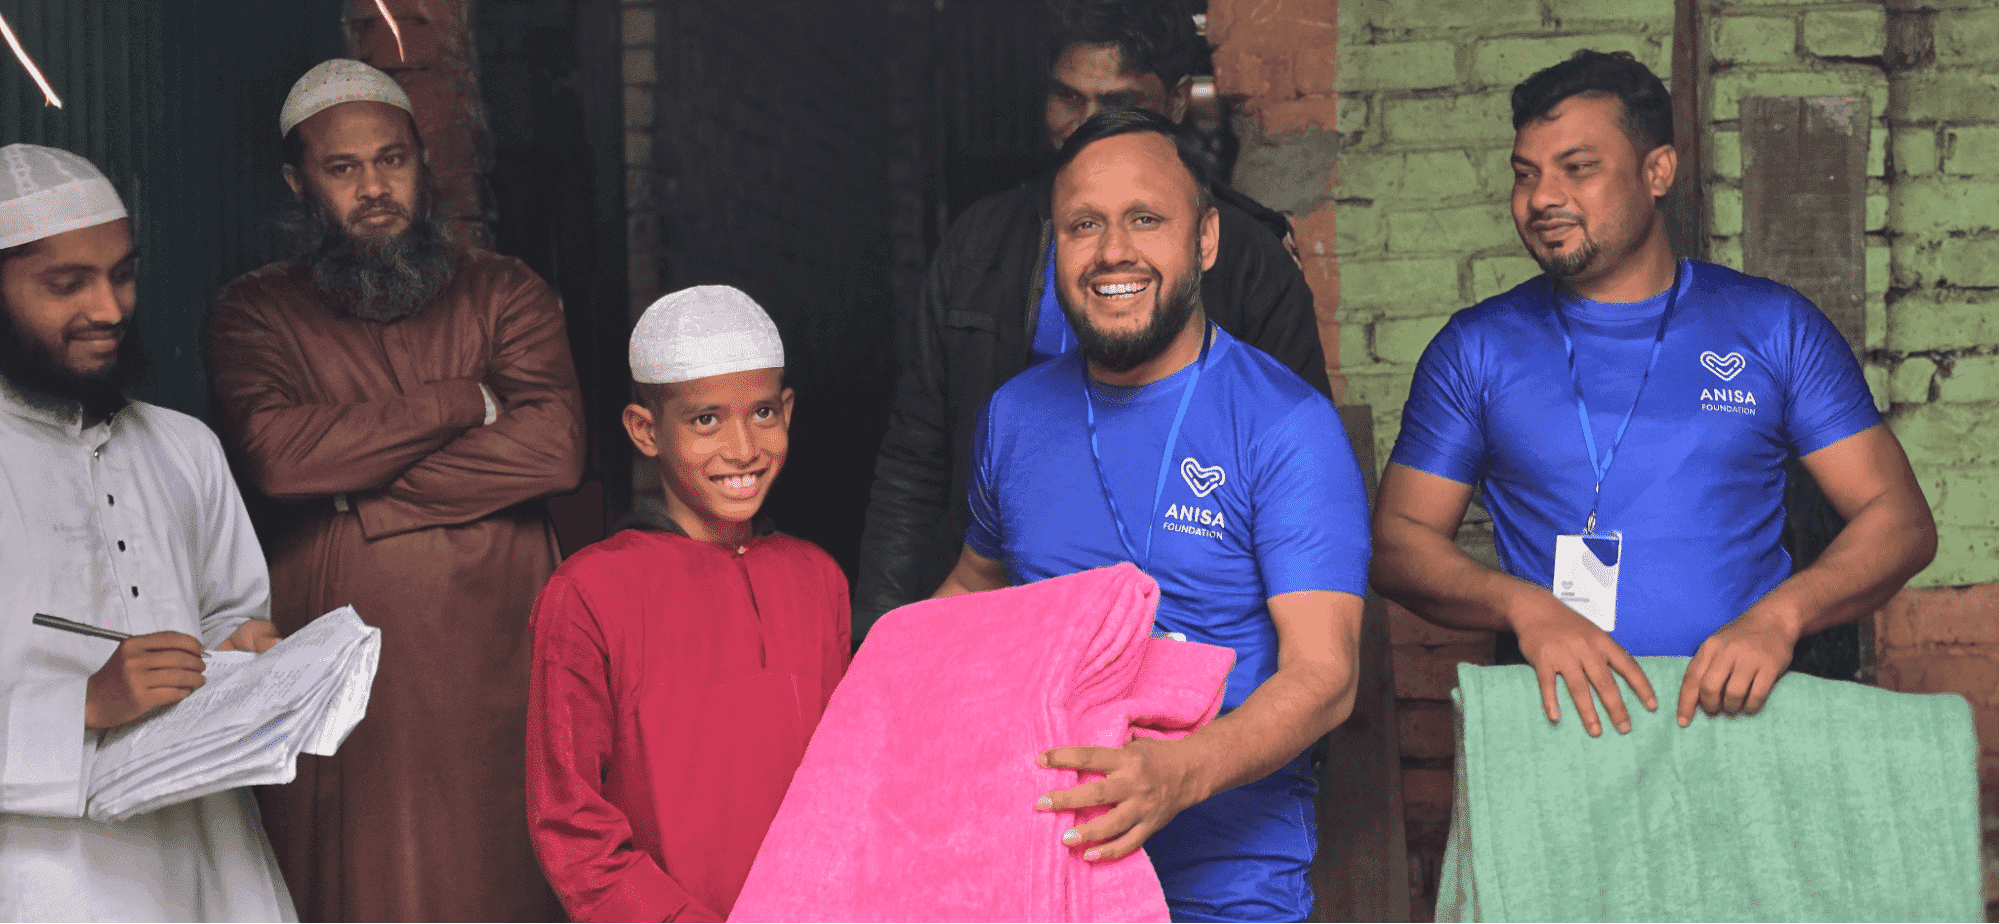
Did you know that 5% of every dollar we make goes to funding life-changing support in our home of Gaibandha through the Anisa Foundation? To celebrate Giving Tuesday on December 3, 2024, we decided to donate 50% of sales to our charitable initiatives—specifically for our annual winter blanket campaign.
Although Bangladesh has hot weather for most of the year, the winter season brings significant challenges for two to three months every year. And rural communities get hit the hardest.
Many families in rural areas, especially students, already lack access to basic necessities, and this is only heightened in the winter months when they need blankets and warm clothing. The cold weather makes it challenging for students to stay healthy and focus on their studies.
Plus, government aid often doesn’t reach remote areas like Chandipur Union in Gaibandha, one of the poorest regions in the country.
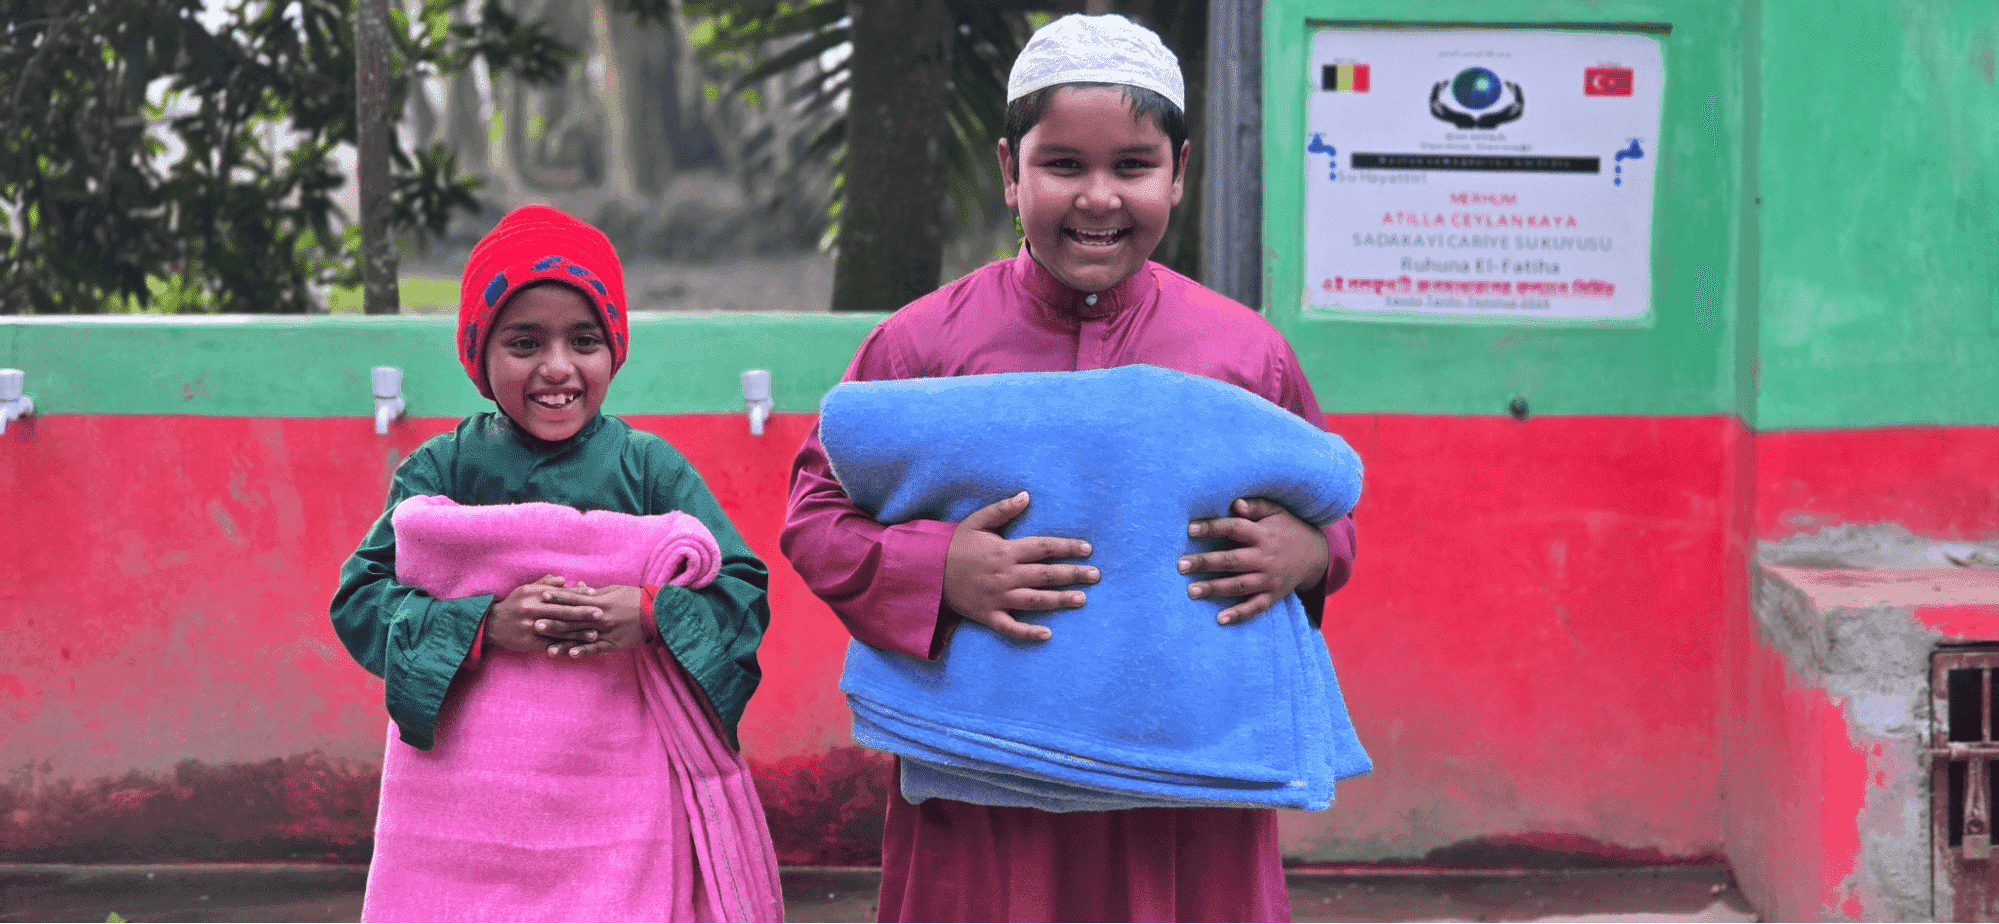
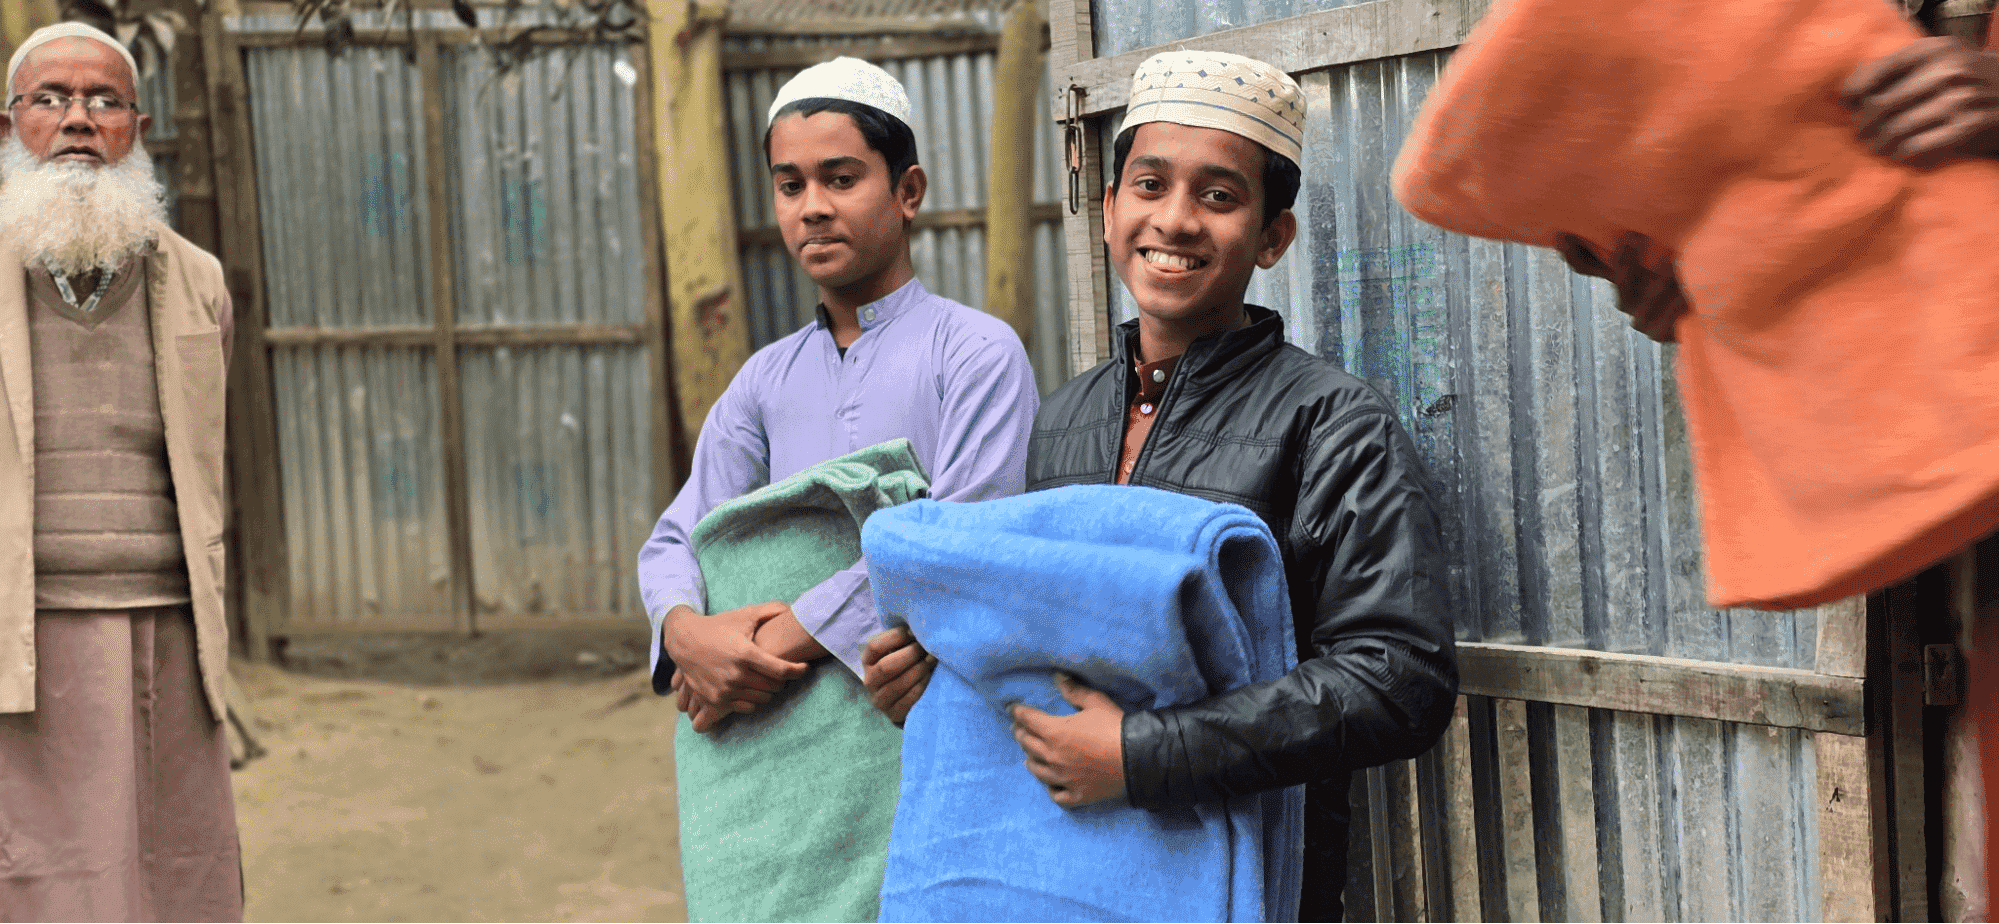
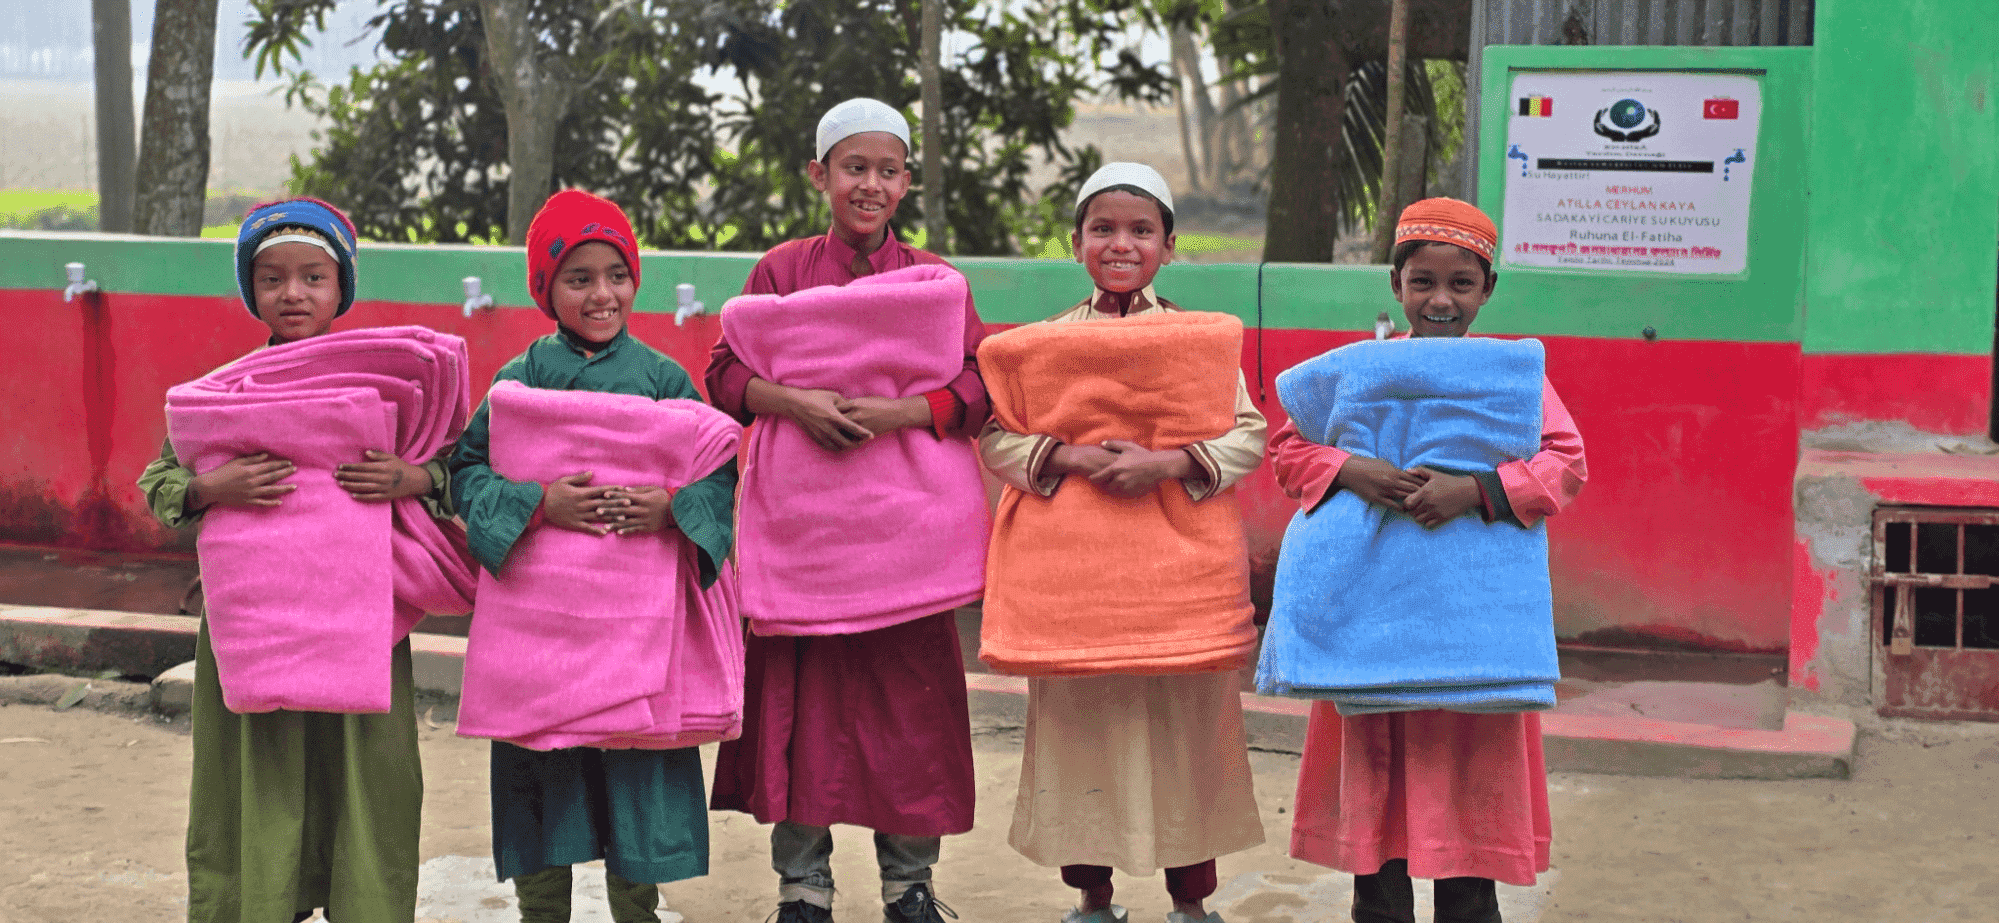
That’s why, every year, we acquire and distribute blankets to those in need at Chandipur Union.
Here’s what YOU helped us accomplish this year:
Together, you helped us raise more than $3,500 on Giving Tuesday. We purchased blankets and successfully distributed them on January 13, 2025 to 715 students in 14 different residential schools.
Now they can make it through the winter without the added burden of enduring the severe cold. They can stay warm, healthy, and focused on school.
Yes – it’s the most wonderful time of the year – Christmas at Longwood Gardens. I’m hoping to make several visits this season, so will be sharing my photos in random order rather than as themed posts that I did in previous years.
I’m excited to announce my new exhibition, ‘In the Solitude of Nature.’ It’s an exhibition including my best photography from the Nordics of the past ten years of my photography journey.
The exhibition is in the Redi Shopping Center, in Finnfoto Gallery in space A2-03, starting on the 1st of August 2023 and running until the 30th of September. The gallery is open 8-23, and it’s free entry. Below are the exhibition notes if you want to read about it.
Exhibition information
‘In the Solitude of Nature’ is a photography exhibition that showcases Mikko Lagerstedt’s profound vision of Nordic landscapes and atmospheric moments. Capturing unforgettable landscapes from the morning mist to the darkness of night. The images do not just capture places; they capture emotions, bringing you closer to the silence of nature.
On display are photographs from Finland, Norway, Iceland, and Sweden, revealing the hidden treasures of these places. The photos are stories created through light, shadow, and color. They are an invitation to step away from everyday life, take a deep breath, and step into the heart of the Nordic countries, where the beauty of the landscapes is untouched, and time seems to stand still.
The exhibition photos present images from both near and far, reminding us that we do not always have to travel to the ends of the Earth to experience magnificent landscapes. The ‘In the Solitude of Nature’ exhibition beautifully manifests different seasons, weather conditions, and locations.
Each photograph in the exhibition holds a story or message. It is up to you to find them.
—
Mikko Lagerstedt (b. 1982) is an internationally acclaimed landscape photographer specializing in minimalist and atmospheric landscape images. Born and raised in Finland, the rural landscapes of his childhood in Kauhava have instilled in him a love for nature and art. His photographs are like visual poems, telling stories through light, shadow, and color.
Lagerstedt’s initial inspiration for photography was born in 2007, on a trip to a relative’s cottage when rain turned into sunshine. It created a stunning combination of fog and light, which he captured with his compact camera— this beautiful moment sparked the desire to document and photograph such atmospheric moments. More than 1.7 million people worldwide follow Mikko’s images on social media.
His images have gained widespread attention and recognition globally. They can be found in the book “Masters of Landscape Photography,” which features photographs from the most renowned landscape photographers. His works have been featured in prestigious publications, including BBC, Business Insider, Daily Mail, and The Telegraph. Additionally, Mikko has worked with photographer Konsta Punkka on the YLE mini-series Exploring Earth, filmed in Patagonia, Chile. One of his most famous photos, “Reflect,” gained special attention when renowned real estate agent Ryan Serhant shared it on social media.
Lagerstedt’s style is characterized by a minimalist approach, capturing the essence of the world in all its splendor – from the peace of a foggy morning to the ethereal brightness of the Northern Lights. He aims to evoke emotions by capturing fleeting moments of nature and creating a deeper connection between the viewer and the landscape.
The meditative nature of landscape photography is emphasized in his work, where being present in the moment and capturing the diversity of nature in his own way is vital. The goal of his images is not just to interest people but also to make them feel something when looking at them as if they were in the picture themselves.
In Finnish – Suomeksi
Luonnon hiljaisuudessa
‘Luonnon hiljaisuudessa’ on valokuvanäyttely, joka esittelee Mikko Lagerstedtin syvällisen näkemyksen Pohjoismaiden maisemista ja tunnelmallisista hetkistä. Aina aamun usvasta, yönpimeyteen taltioiden unohtumattomia ja ajattomia maisemia. Kuvat eivät vain vangitse paikkoja, ne vangitsevat tunteita, tuoden sinut lähemmäksi luonnon hiljaisuutta.
Esillä on valokuvia Suomesta, Norjasta, Islannista ja Ruotsista, jotka paljastavat paikkojen piilotetut aarteet. Valokuvat ovat tarinoita, jotka on luotu valon, varjon ja värin avulla. Ne ovat kutsu pois arjesta, hengittää syvään ja astua Pohjoismaiden sydämeen, missä maisemien kauneus on koskematon ja aika tuntuu pysähtyvän.
Näyttelyn valokuvien tarkoitus on esitellä kuvia läheltä sekä hieman kauempaa. Muistuttaen, että aina ei tarvitse matkustaa maailman ääriin, jotta voi kokea upeita maisemia. Eri vuodenajat, sääolosuhteet ja paikat näkyvät upeasti ‘Luonnon hiljaisuudessa’ -näyttelyssä.
Jokainen näyttelyn valokuva kätkee sisäänsä tarinan tai viestin. Sinun tehtäväsi on löytää ne.
—
Mikko Lagerstedt (s. 1982) on kansainvälisesti tunnettu maisemavalokuvaaja, joka on erikoistunut minimalistisiin ja tunnelmallisiin maisemakuviin. Syntynyt ja kasvanut Suomessa, lapsuuden maalaismaisemat Kauhavalla ovat luoneet hänen rakkautensa luontoon ja taiteeseen. Valokuvat ovat kuin visuaalisia runoja, jotka kertovat tarinoita valon, varjon ja värin kautta.
Lagerstedtin ensi-inspiraatio valokuvaukseen syntyi vuonna 2007, matkalla sukulaisten mökille, kun sade muuttui auringonpaisteeksi. Tämä loi upean sumun ja valon yhdistelmän, jonka hän taltioi kompaktikamerallaan. Tämä kaunis hetki herätti halun tallentaa ja valokuvata tällaisia tunnelmallisia hetkiä. Sosiaalisessa mediassa Mikon kuvia seuraa yli 1,7 miljoonaa ihmistä ympäri maailmaa.
Kuvat ovat saaneet laajaa huomiota ja tunnustusta eri puolilla maailmaa. Niitä löytyy kirjasta ”Masters of Landscape Photography”, joka sisältää tunnetuimpien maisemavalokuvaajien valokuvia. Töitä on esitelty arvostetuissa julkaisuissa, kuten BBC, Business Insider, Daily Mail ja Telegraph. Lisäksi Mikko on työskennellyt yhdessä kuvaaja Konsta Punkan kanssa Ylen lyhytsarjassa Exploring Earth, joka on kuvattu Chilen Patagoniassa. Yksi suosituimmista valokuvista, “Reflect”, sai erityistä huomiota, kun tunnettu kiinteistövälittäjä Ryan Serhant jakoi sen sosiaalisessa mediassa.
Lagerstedtin tyylille on tunnusomaista minimalistinen lähestymistapa, joka vangitsee maailman olemuksen sen kaikessa loistossaan – aina sumuisen aamun rauhasta revontulien eteeriseen kirkkauteen. Pyrkien herättämään tunteita tallentamalla luonnon ohikiitäviä hetkiä ja luomaan syvemmän yhteyden katsojan ja maiseman välille.
Maisemavalokuvauksen meditatiivinen luonne korostuu työssä, jossa on oltava läsnä hetkessä ja taltioitava luonnon moninaisuus omalla tavallaan. Kuvien tavoitteena on, että ihmiset eivät vain kiinnostu niistä, vaan myös tuntevat jotain katsoessaan niitä, aivan kuin he olisivat kuvassa.