برچسب: Will

  • These Tutorials Will Help You Master The Art Of Flower Photography

    These Tutorials Will Help You Master The Art Of Flower Photography

    [ad_1]

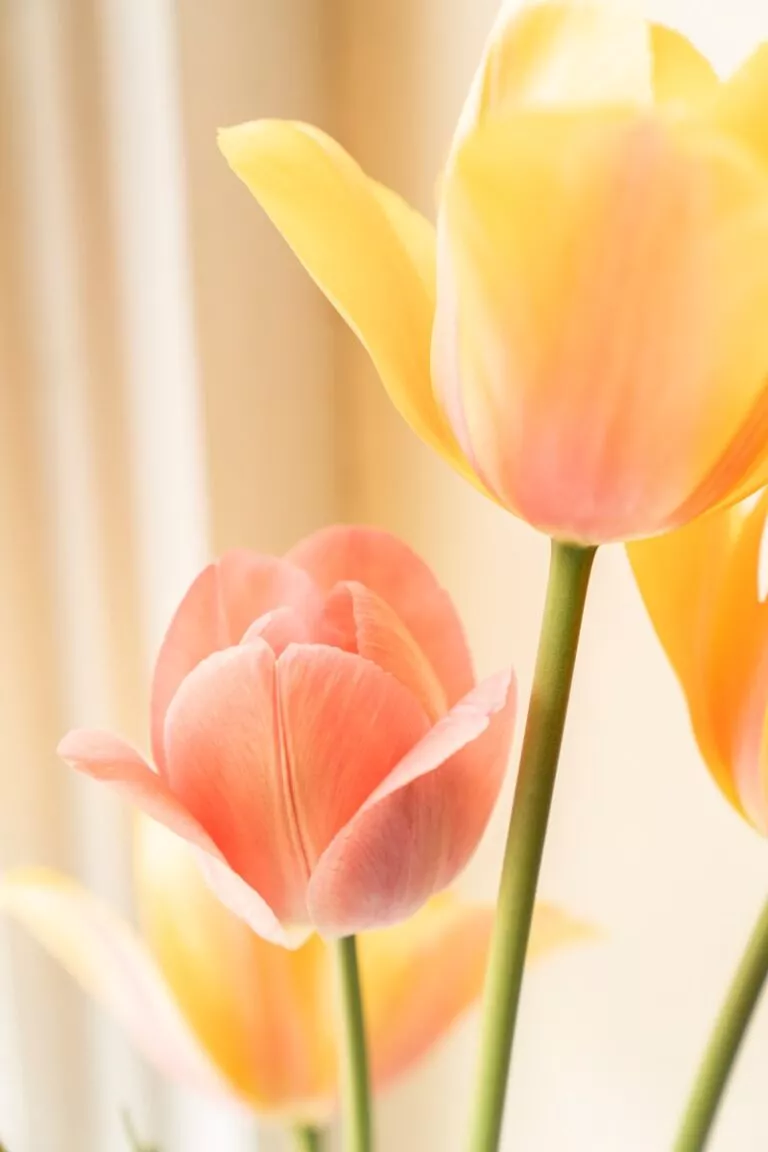
    Flowers are colourful and come in all shapes, sizes, textures and colours. They are also used to celebrate important moments in life and as a daily addition to brighten up spaces. If you are a beginner in photography, flowers are great subjects to start with. Whether you have a camera or just your phone, you can use it to capture beautiful photographs of flowers.

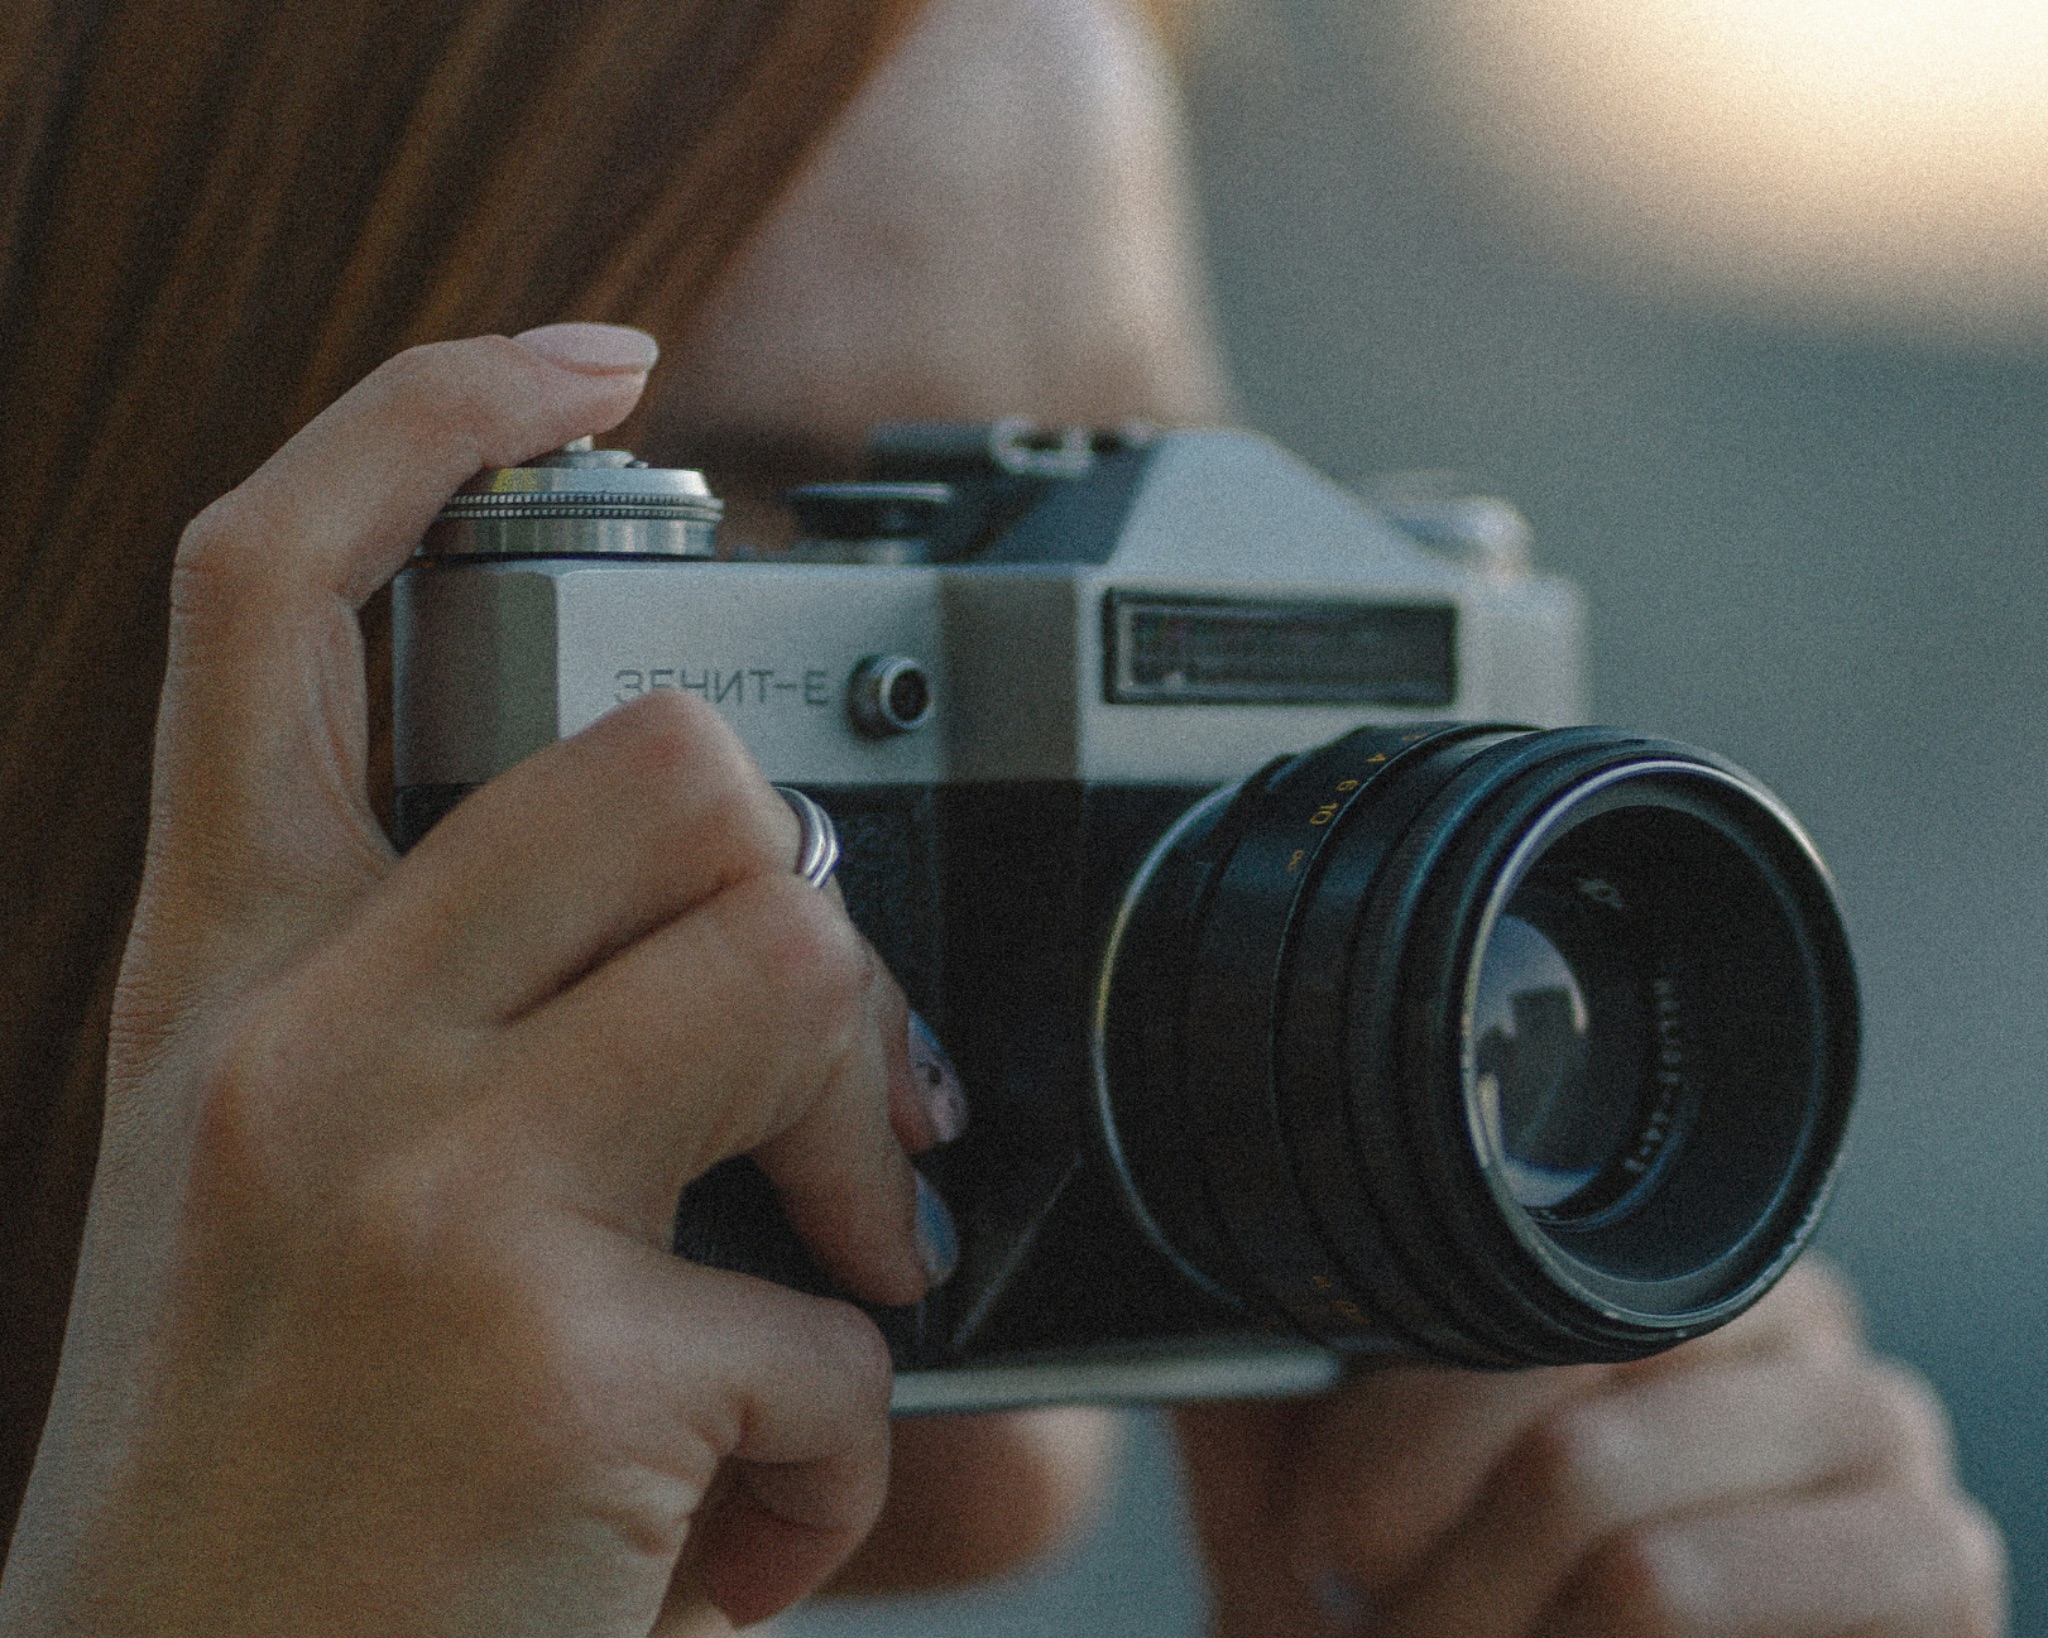
    If you are someone who prints photos to hang in your space, flower photos truly work as great printed pieces and can add a pop of colour to your space. A basic camera and your kit lens or a 50mm lens or even your smartphone, are all you need to get started with flower photography. You can also capture interesting macros of flowers that can be both abstract and intriguing. In this article,, we have put together a set of tutorials that will help you to master the art of flower photography.

    Photo by Zoe Richardson

    When photographing flowers, people may not consider it as a very serious subject and approach it without much thought or any other creative techniques in mind. For example for closeup details of textures on the flower you will need to use a narrow aperture and get quite close to the subject and for a photo where you want the flower to stand out from the background you will need to shoot using a wide aperture. This article provides a detailed guide on how to photograph flowers for great results.

    Photo by Stux

    We cannot imagine a world without flowers, can we? Flowers add a lot of beauty colour and magic to landscapes and gardens. Flowers come in all shapes, colours and sizes and they can be photographed in different ways If you take a little care in terms of light, composition and techniques, and you can create stunning results. This article discusses 8 tips that you should embrace to get the best out of your flower photography.

    We would all imagine that flower photos can only be captured with a wide or moderate focal length lens, but there are times when flowers may be high up on a tree or in a location where you may not be able to get close to the flower/s. Besides, using a telephoto lens for flower photography will also help with achieving various looks and effects in the resulting images. this article discusses how to capture great flower photos using a telephoto lens.

    Photo by Cristiane Teston 

    Flowers are attractive and they most of the time attract birds and other critters with their vibrant colours. There is a lot of science behind why certain flowers are evolved to be in terms of their colour size, form and shape. When the colour is removed you can look deeper into the textures and other details of a flower. Here is a collection of black and white flower images with a small write up of what the author feels about black and white flower photography.

    Photo by  Erik Karits

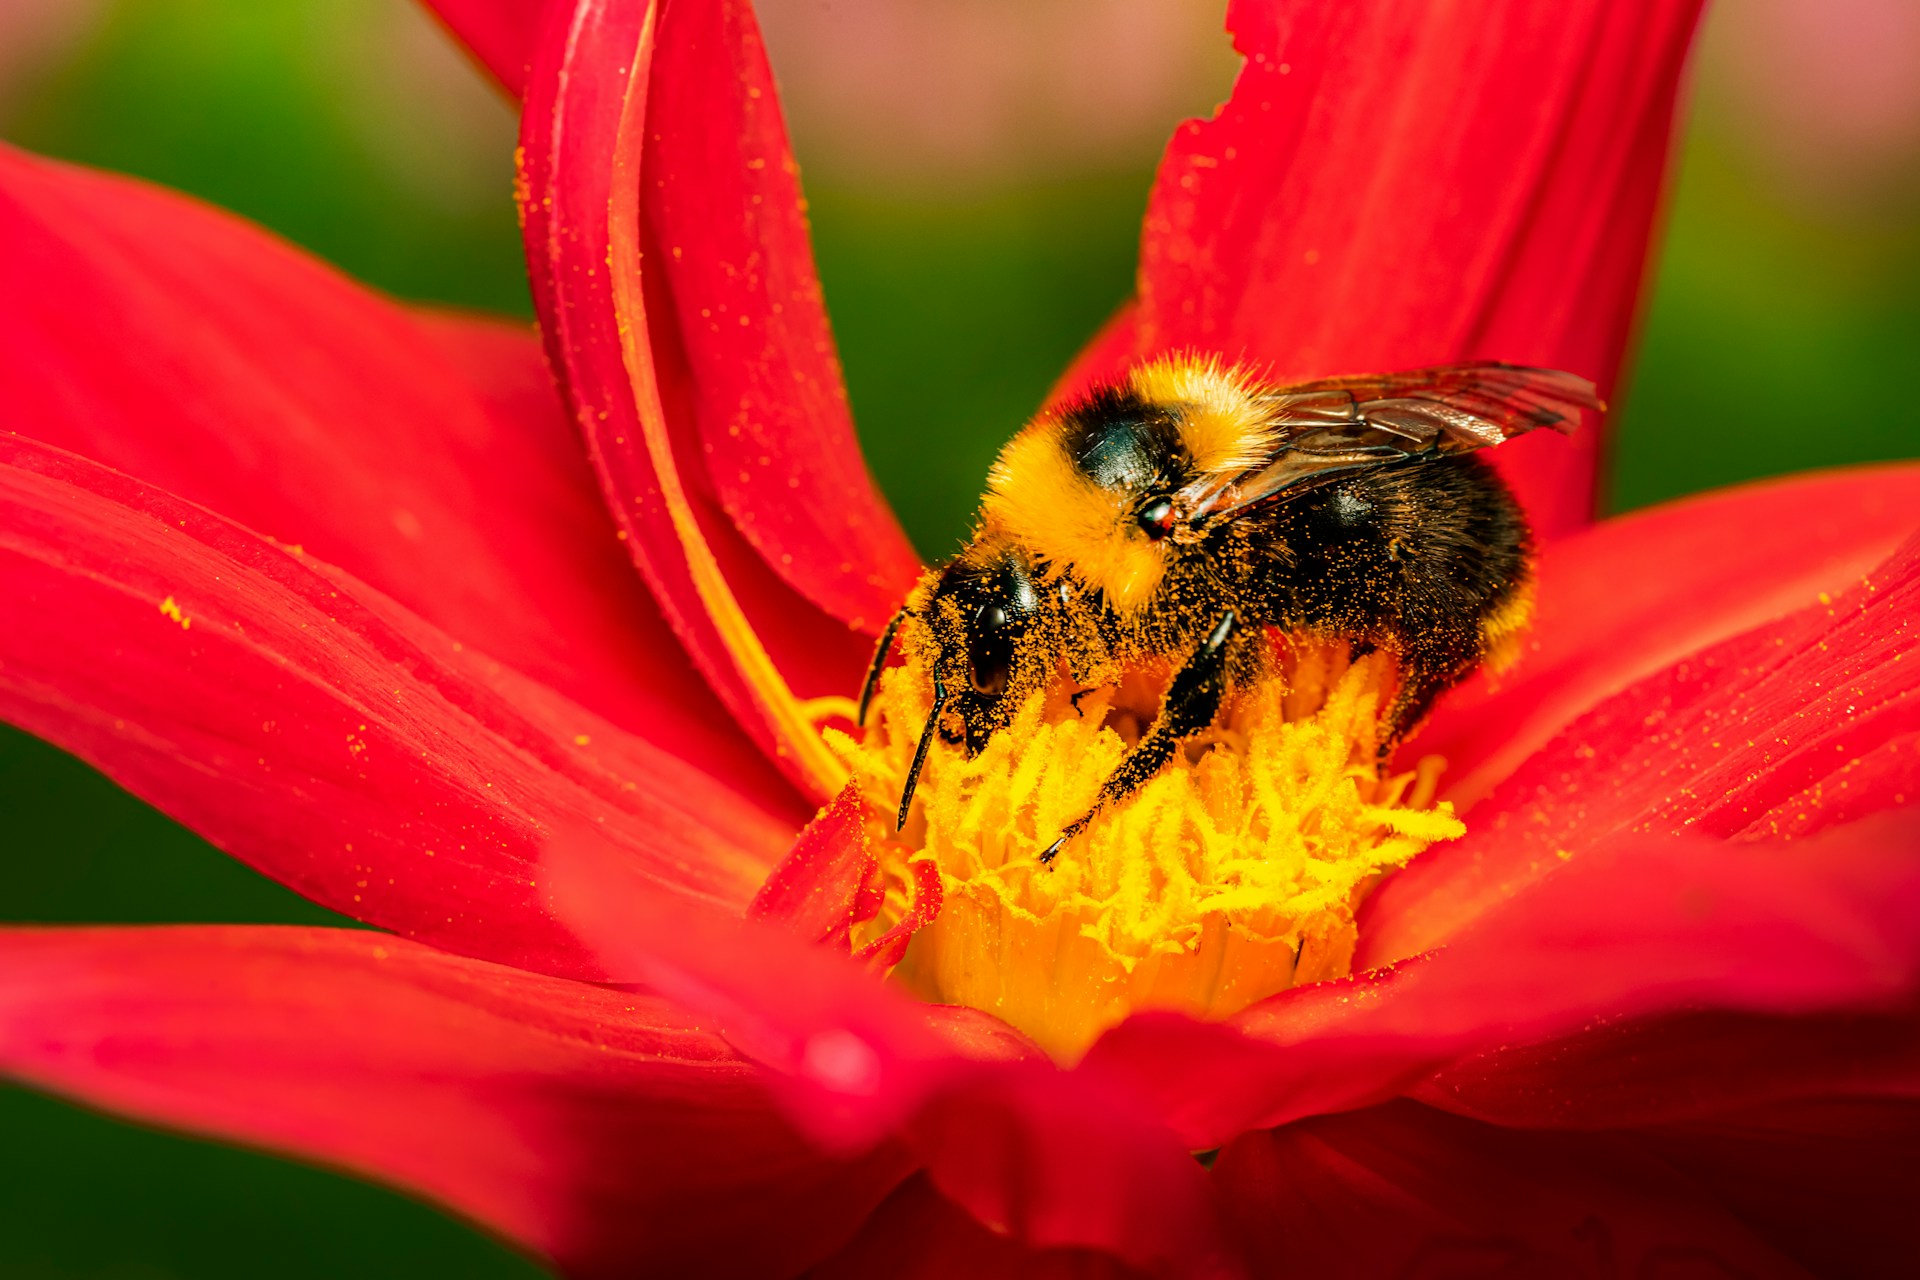
    Have you looked at flowers up close? Observed their intricate details? There are a lot of beautiful textures, and even some forms that can be observed, which can go unnoticed otherwise. Macro photography of flowers is something that will help you to capture these stunning details. If you take care of the lighting, composition and a few other factors, you will have beautiful resulting images and this article discusses those details.

    Photo by Rapha Wilde

    One of the best subjects for macro photography is flowers. Macro photos of flowers can be captured when in the fields but there are times when the weather may not be favourable, especially if it is windy and in those situations, the flower can be brought indoors to capture its minute details. Unless you have good window light that can illuminate your subject, you may need to use some kind of artificial lighting setup to capture sharp details. This article discusses how to set up a lighting studio to capture macro photos of flowers.

    Photo by Danielle Stein

    Flowers are brightly coloured and they bring in a lot of cheer to the place they are in. Some flowers are very brightly coloured and they just bring a pop and mood to a spot or surroundings. When capturing or editing flower photos one does not always need to stick to the bright and cheerful style but can also lean towards the dark and moody vibe which works great for flower photography. When capturing images for this style, and during the editing process, some care needs to be taken, which may be slightly different. This article talks about capturing and editing dark and moody flowers or in general flora.

    Photo by Charles Smart

    Most of the time, we may be photographing flowers in our own garden. When doing so we have a number of opportunities to capture the flowers differently. The tools we use in the garden and other garden features can serve as interesting backdrops or props and this will help to capture interesting storytelling images. This article was written after taking inspiration from my small garden and explains how to capture photos in your own garden for stunning results.

    Photo by Sheen

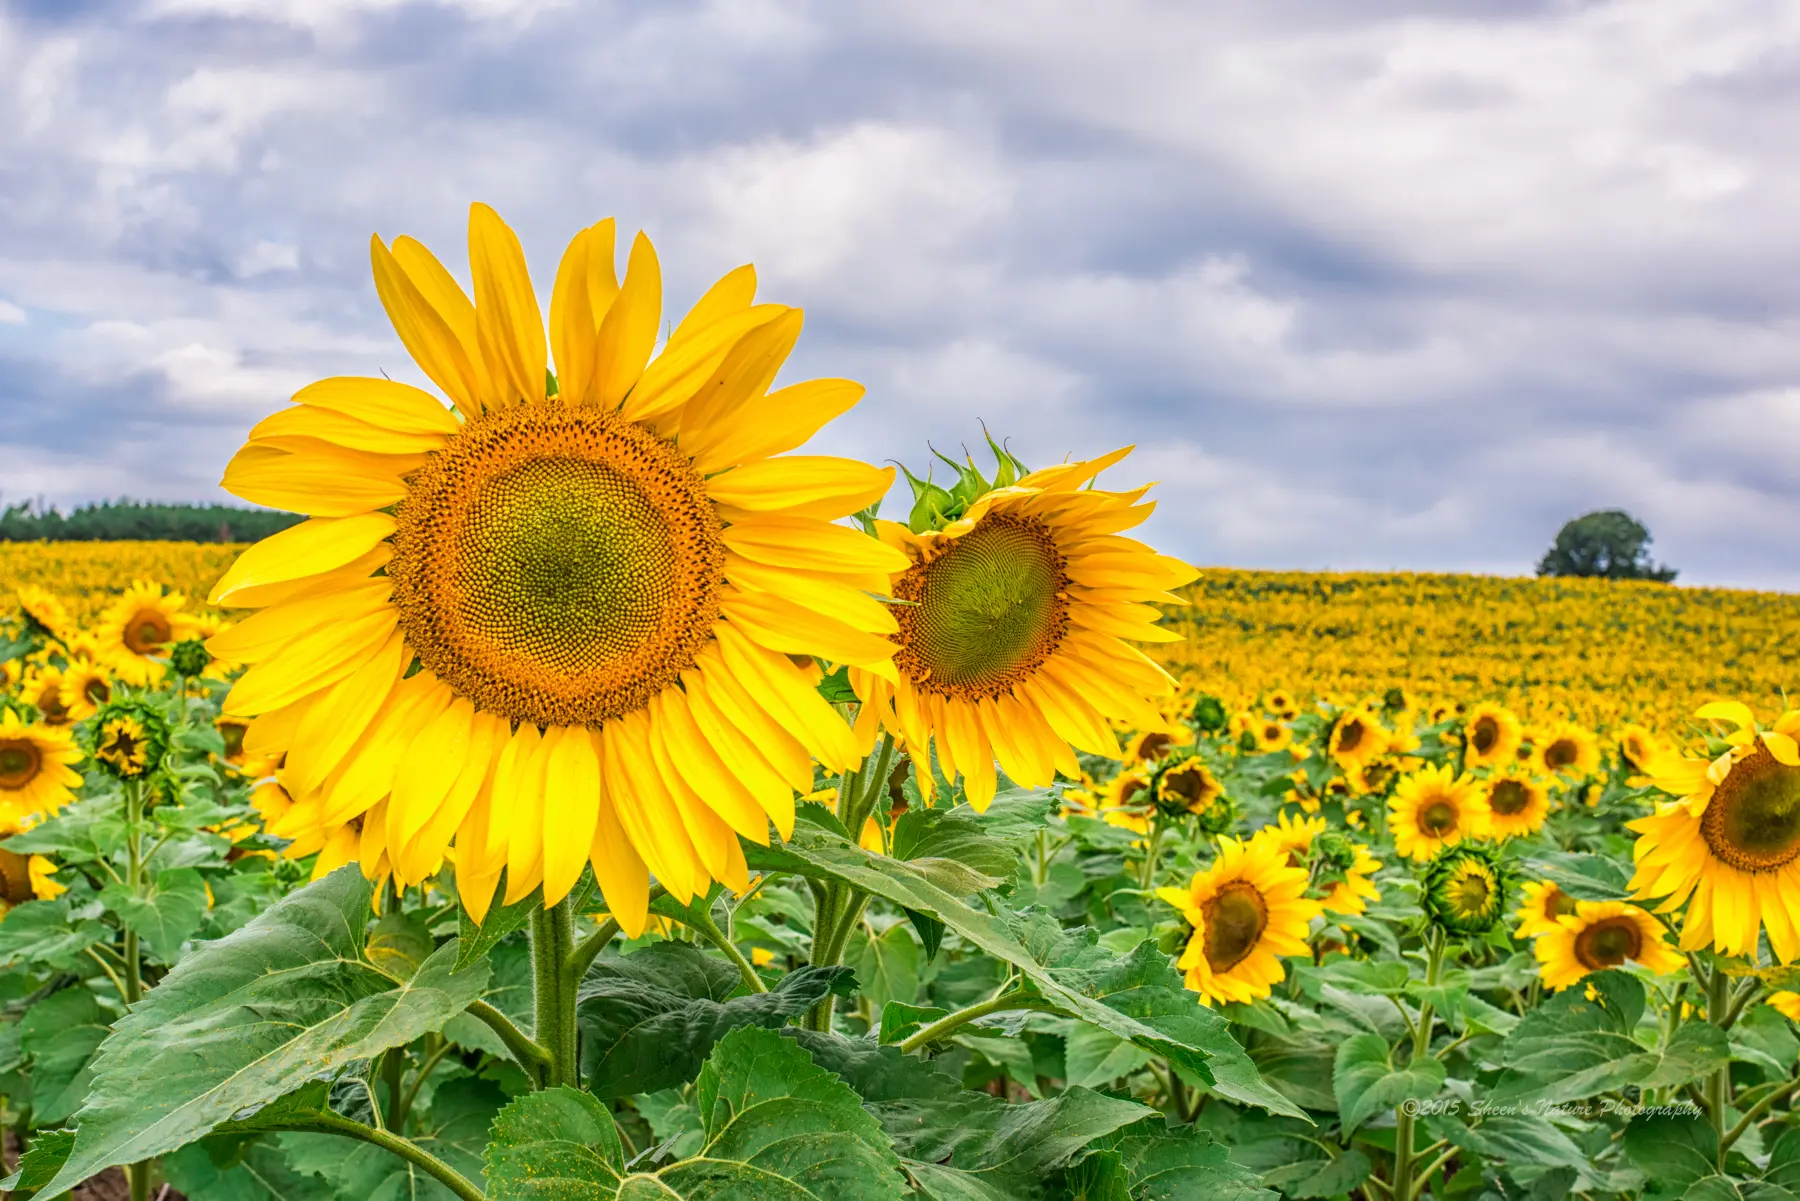
    There are many types of flowers on this planet – some big, some small and others very tiny.. There are times when you may come across a field of a particular flower and you may be running out of ideas to photograph in that location. It may look too busy or you may be confused but the right choice of focal length, and composition can help you capture beautiful shots. This article discusses how you can photograph the gorgeous looking sunflowers in different ways. This can also be applied to other flowers.

    Photo by Sheen

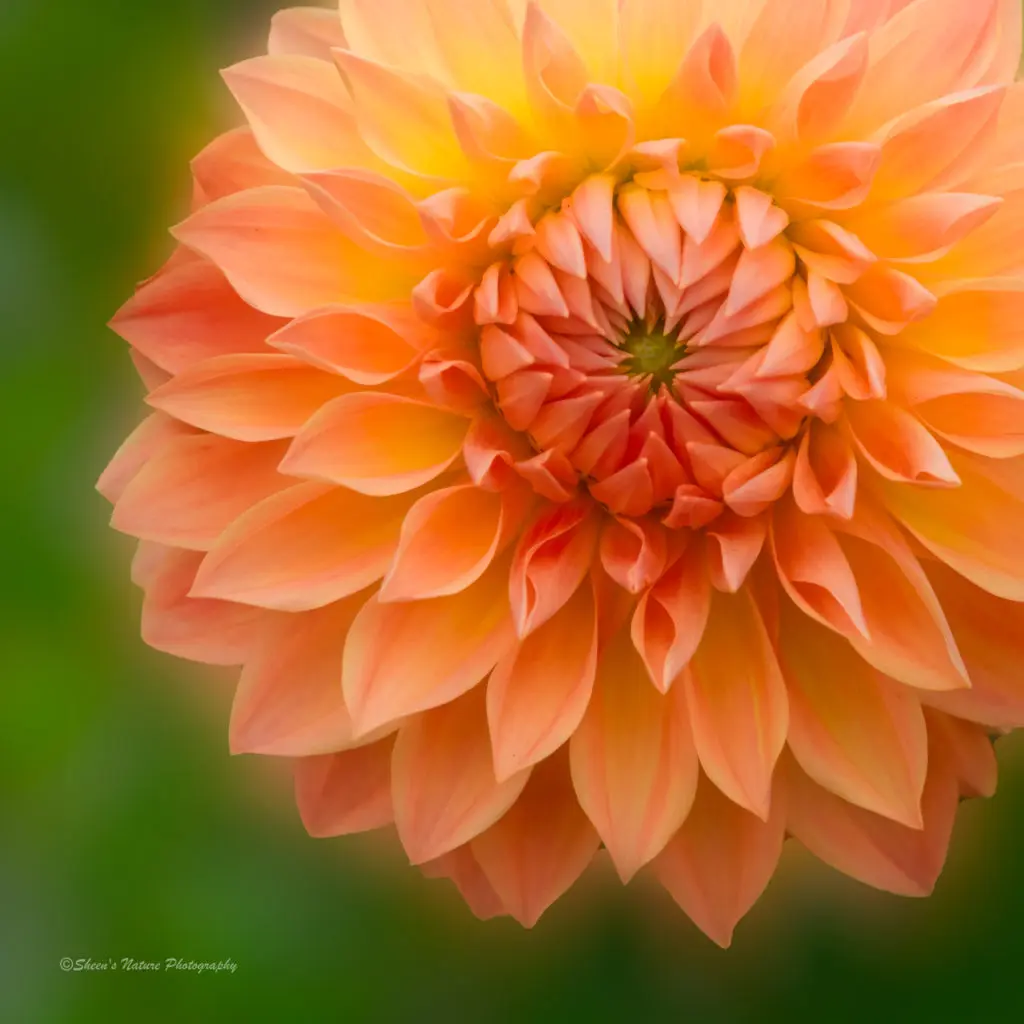
    Here is another article that talks about capturing a particular flower – Dahlias. Dahlias come in a variety of colours, shapes and sizes too and choosing the right combination of colours will work great. If you love dahlias and are interested in capturing their beauty, then this article talks about the different ways these flowers can be photographed, creative post processing including black and white, lens choices and more.

    Further Reading


    [ad_2]

    Source link

  • Nervous About Bird Photography – These Tutorials Will Help You Get Started

    Nervous About Bird Photography – These Tutorials Will Help You Get Started

    [ad_1]

    When it comes to wildlife photography, birds, especially the smaller ones are the most difficult to photograph. In general, birds are the most difficult subjects as they are small, stay in between the foliage most of the time and are always moving or flying around. Bird photographers make it look easy and a lot of YouTube videos (not all) also make it look quite easy but practically being in the field, carrying a heavy lens, focusing through the natural obstacles and capturing the right moment, can all be quite a daunting experience.

    Photo by  Vincent van Zalinge

    Besides the photography techniques part, learning about birds themselves can be very helpful in terms of photographing them at the right moment. Observe and study their behaviour and be very discreet when photographing them.

    Wearing the right coloured clothing is also important for bird photography and wildlife in general. Most importantly, be patient and persistent – do not give up if you do not get good shots during your early days in bird photography.

    In terms of camera settings, the one that has worked for me personally is, shooting in Aperture Priority mode using back button focusing technique and always shoot raw. Here are some valuable bird photography tutorials, that will help you get in the right direction.

    Photo by Ingo Doerrie

    When photographing birds, the images are more compelling and effective, if you capture their natural behaviour in the wild. Birds portray some very interesting behaviour and traits that if observed patiently, can be photographed as well. This article talks about bird photography basics followed by actions you can do in the field to create better photographic opportunities and a few tips on honing your skills.

    Photo by Patrice Bouchard

    Mastering bird photography is a long process that has a lot of factors that need taken care of. They are some of the most difficult and trickiest subjects to photograph and once you get the basics right, making use of the right settings is important for successful bird photography. This article discusses the best settings for bird photography.

    Photo by Zdeněk Macháček

    Birds can be photographed in many ways – capturing their actions, capturing their portraits up close or capturing an environmental shot that includes the environment they are living in, birds in flight, etc. Action photography can be quite difficult when compared to portraits, but again it depends on the type of bird and its behaviour. This article talks about two types of bird photographs that will help to improve your skills.

    Photo by Jay Alexander

    Wildlife photographs can boost any photographer’s portfolio because it is a genre admired the most by many photographers and non-photographers alike. In order to capture wildlife at its best, the photographer needs to have reasonable gear to start with. This article talks about the gear you need to pack when you go out for wildlife photography.

    Photo by R. Mac Wheeler

    Wildlife photography includes photographing birds, animals and other small critters in the wild. While bird photography may require slightly more skills with focusing and longer lenses, the techniques required are quite similar. This article discusses some quick beginner tips that will help you capture some stunning wildlife photographs.

    Photo by Boris Smokrovic

    Wildlife photography is not something that is commonly taken up by most photographers because they think that capturing wildlife is very difficult and that it needs very expensive gear. You can start off with the lens that you have in hand and then invest in a slightly bigger lens when you are confident enough in photographing wildlife. This article provides four tips that include emotion & attitude, nature’s frames & backdrops, unique features and taking advantage of the weather.

    Photo by Rob Potter

    Once you have come back from a bird photography session, you will need to check your images and make some edits before you can present them or even print them. Lightroom is a versatile tool that helps with culling images and also processing images easily and if you have a personal preset that you like to use for your wildlife photos, then that can cut down a lot of editing time. This article talks about editing your wildlife photos in Lightroom for magical impact.

    Further Reading


    [ad_2]

    Source link

  • How Your First Camera Will Shape Your Photography

    How Your First Camera Will Shape Your Photography

    [ad_1]

    Do you remember your first camera? I certainly do. It was a Soviet built Zenit 11 and like most things Soviet, it was built like a tank. The thing is though, I can still clearly remember everything about my first days with that camera. As clear as day.

    That’s even more remarkable when you know those days were coming on 42 years ago. There is virtually nothing else from that period of my life that I recall so clearly. So why did a hefty chunk of Soviet pig iron have such an effect on me? Today we are going to look at how your first camera will shape your photography.

    First Impressions Count.

    My first impressions of the Zenit 11 came in the local camera store. In front of me was the Zenit and an Olympus Trip, by far the most popular camera of its day. It was my 16th birthday and I could choose one of them. Both were similarly priced, but the Zenit looked like a “proper” camera. The type of camera Hollywood stars would use in spy movies.

    The feeling I got from looking and picking up that Zenit was one of excitement mixed with bewilderment. The excitement of this shiny new gadget and the bewilderment of all the dials and buttons on it. The large logo emblazoned on the pentaprism hinted at an unknown. It added to the mystic of this shiny black box. Of course as experience built, I became to realise that logo, was not the pinnacle of camera technology, but that’s a whole other story.

    Woman taking photos with a Zenit film camera
    The hefty lump of pig iron that was the Soviet Zenit. By Eugene Chystiakov on Unsplash

    I am sure everyone of you, from relative newcomers to seasoned and experienced togs, will have experienced similar feelings. I don’t recall the camera even coming in a box, but many of you, at one stage, will have unboxed your cameras, casually thrown the manual to the other side of the room then spent twenty minutes trying to work out how to attach the lens to the body. If you are still passionate about photography today, it was those few minutes, months, years or decades ago that defined that passion.

    Taking Those First Images.

    When I got my Zenit home, I was eager to understand everything about it. But first I needed to shoot with it. Unlike today, I had no fail-safes, no automatic modes, no autofocus. I had literally no idea how to load a film let alone what the aperture and shutter speed dials did. There were strange numbers on the top plate, they might as well have been hieroglyphics for all I knew.

    Like me, you will have experienced the same desire. The desire to skip any understanding of the controls just to get an image. How that image came out will also define how you go forward with photography.

    For me, it was a picture of a friend’s dog. In an age when the Internet is defined by cat and dog pictures, it’s difficult to imagine the massive impact an image of a friend’s canine had on me. It’s also, perhaps, difficult to imagine the anticipation in waiting to see that picture. It was several days perhaps a week before I got the prints back. But what prints they were.

    A black Labrador sitting in a filed of flowers
    A black lab was my hook into photography. By Einar Johnsson on Unsplash

    The dog, a beautiful black lab whose name long escapes me but whose image is burned onto my retinas. The photos were so clear, so colourful, deep blue sky, rich green grass and the deep blacks of the aforementioned lab. Despite the fact that I had no idea how I had created these images, I was utterly hooked. And here’s the most salient point to this. That very first role of film helped define my photographic style, one that I have subconsciously honed over the following 40 years.

    Your first images will be very much the same. Go back to the first shots you took with your first “proper” camera and I wager you will see elements of your own photographic style as it is today.

    Old photographic print of two people walking up a beach backlit by the setting sun. By Jason Row Photography
    One. of my very first images, taken in 1984. By Jason Row Photography

    Your First Camera Will Define Your Technique

    Beyond those first creative flourishes, your first camera will completely define your approach to photographic technique. The Zenit, as I have already mentioned, was entirely manual. There wasn’t even a built in meter per se. It was a selenium cell on the front of the pentaprism, just below the iconic Zenit logo. It worked in much the same way as handheld light meters of the day. You lined up a needle and read off the exposure.

    Close up of the dials of an old photographic exposure meter
    Your first camera will define your entire photographic journey. By Nancy Hughes on Unsplash

    To do that, I had to understand exposure. I had to learn the relationship between shutter speed and aperture. I had to know what ASA (ISO) my film was and how that would affect my image quality. In short, it taught me the essential basics of photography.

    Many of you reading this will have picked up your first camera in the digital age. To be honest, the need to understand exposure (at first) is not essential when starting photography these days. Modern cameras have that sorted for you. However, you will need to know the differences between JPEG and RAW, the effect of white balance, and the way to use different autofocus modes. Those modern functions are essential to digital photography and will define the way you think and shoot way into the future.

    Sunrise long exposure image of Marsden Beach and rock in   North East England. Jason Row Photography
    My early experiences can still be seen in my latest images. By Jason Row Photography

    Your Experiences Will Define Future Photographers

    When I meet up with new photographers, produce YouTube videos, make training courses or write even in my articles here on Light Stalking, I am bringing my 40 years of experience to those newcomers to photography. That experience is very much built on my early days in the craft and as such I am able to impart my understanding of exposure, shooting manually and manual focus to newer photographers.

    In the same way, people starting now, will pass on the concept of JPEG and RAW et al to photographers kicking off their journey in 5-10 years time. The technology will have changed, the priorities in getting a good photo will have changed but the fundamental building blocks to getting that good photo will always be with us.

    So think back to those halcyon days with your first camera, channel the thoughts and experiences that you gained with that camera and bring them forward into the future. The good photographers of the future will be building their abilities on your own experiences.

    Further Reading


    [ad_2]

    Source link

  • 6 Fundamental Composition Techniques That Will Improve Your Portraits

    6 Fundamental Composition Techniques That Will Improve Your Portraits

    [ad_1]

    One of the most interesting subjects to photograph on this planet is the humans and it is because of the varied characters and personalities that each human possesses. Portrait is a unique genre and similar to all other genre in photography, one needs to give importance to composition when creating a portrait.  It is through effective compositional guidelines that the photographer can create a visual impact and connect to the viewer through their photography.

    A portrait needs to convey the character and mood of the person and composing a portrait can be a bit tougher than you might think. There are several things like lighting, right subject, best camera settings and locations you need to get right to create successful and compelling portraits.

    In order to create engaging portraits and not snapshots, you need to have the skills and technical knowledge in making portraits.  One of the most important factors among these are composition techniques and here are six composition techniques that can be used to improve your portraits.

    1. Placing the eyes on the upper third
    2. Filling the frame
    3. Framing your subject using frame within a frame
    4. Using leading lines
    5. Leaving space for your subject to look at
    6. Using different perspectives or angles

    1. Place The Eyes In The Upper Third:

    You may all have heard about the basic rule that most photographers start with – the rule of thirds. In order to create a visual impact in your portraits, when shooting in portrait orientation, it is best to have the eyes of the subject on the upper third of the frame.

    Place the Eyes on the Upper Third when framing your subject
    Štefan Štefančík

    If you are shooting in landscape orientation, then going by the rule of thirds, it is good to have the dominant eye of the subject on or near one of the vertical lines of the rule of thirds grid.

    Place the Eyes on the Upper Third when framing your subject
    Bollie6734

    Note: 

    An exception to the above technique can be when you are shooting full body shots where you can be positioning your subject on the right or left third of the image.

    2. Fill the Frame:

    When making a portrait, you are capturing the character and features of the person. So do not hesitate to get close and fill the frame with your subject’s face. Do not limit yourself to just the headshots, but try filling the frame when you do head and shoulders shots, medium shots or three-quarter shots.

    Filling the frame with the subject’s face also helps emphasize textures and other details like lines, wrinkles, etc. in the portrait. You can also look into the subject through a closer view of their eyes in the photograph.

    get close and fill the frame with your subject’s face
    Luxstorm

    3. Frame Your Subject With Frames Within The Frame:

    When making portraits, you do not have to eliminate or blur the background, instead use the elements like doors, windows, lines, etc. to frame the subject to keep the viewer’s attention on your subject.

    use the elements like doors, windows, lines, etc. to frame the subject
    Clem Onojeghuo

    You can also use elements like windows, doors, arches or any other natural or man-made structures in the foreground to frame your subject to create visually interesting images.

    you can even use leaves and tree branches to frame the subject
    Corey Saldana 
    use the elements like doors, windows, lines, etc. to frame the subject
    Samarth Singhai

    4. Use Lines To Lead The Viewer To Your Subject:

    Lines are another interesting feature when it comes to composition for any genre of photography. They can be so powerful and be used to lead the viewer into the frame to your subject. Use lines and frame your subject in such a way that the lines lead the viewer’s eyes to the subject or their eyes.

    5. Leave Space In Front Of The Subject:

    This is a very important technique that needs to be taken care of. If you are making a portrait where the subject is looking in one direction or their body is facing a particular direction, then, always leave space in the direction your subject is looking into (in front of them)  or their body is facing, just like how you would leave space in the direction of movement of your subject. Do not frame in a way that the subject is positioned, facing a direction where they exit the frame immediately.

    5. Leave Space in Front of the Subject
    Mustafa Omar

    6. Use A Different Angle Or Perspective:

    Do not stop with just straight up shots at eye level, but change angles to show your subject from a totally different perspective. You can get higher or lower or move to the left or right of your subject to get the right composition and personality of your subject. It also helps avoid certain distracting elements behind or around your subject and can lead to powerful portraits sometimes.

    Use a Different Angle or Perspective
    TunaOlger

    These are some of the many composition techniques required to create stunning portraits, but with the techniques mentioned here, you can create beautiful well-composed portraits. Once you master these techniques, do not hesitate to break these techniques in a creative way.

    Further Resources:

    1. 6 Tips To Capturing Better Eyes in Portrait Photography
    2. 5 Mistakes Beginners Make In Portrait Photography And How To Avoid Them
    3. 5 Surprisingly Simple Tips For Stunning Black And White Portraits
    4. 5 Free E-Books on Photographing Candid Portraits
    5. Bite Size Tips – Capturing Classic Portraiture Compositions
    6. 15 Amazing Photos That Will Make You Appreciate Juxtaposition


    [ad_2]

    Source link

  • These Resources Will Help You To Avoid Some Common Mistakes In Photography

    These Resources Will Help You To Avoid Some Common Mistakes In Photography

    [ad_1]

    Photographers are not perfect all the time – even the most experienced or professional photographers are prone to making mistakes at times. Making mistakes in photography is not a huge problem, as long as the photographer learns from the mistake and rectifies the errors in the future. Besides, not all mistakes are serious, as some mistakes can also lead to creative results or learning new techniques in photography.

    There are a lot of different genre in photography and each one has its own guidelines and settings. For example, sports photography will need a different setting compared to landscape photography and long exposure photography will need a different setting compared to street or portrait photography. The same applies to editing too.

    Depending on the desired results or individual photographers’ interests, different workflows are followed by photographers. In this article, we have put together a bunch of resources that we hope will help you to avoid some common mistakes in photography.

    Most of the time, beginners in photography are confused with many problems like getting the settings right, making use of the right light, compositional guidelines, over-shooting, too much post processing and so on. Many photographers start with point and shoot in auto mode, and with the advancement in camera technology, most of the time an image may turn out good but what is important is to have a creative vision and work on achieving that result. Check out this article to learn some of the most common photography mistakes beginners make in photography.

    Photo by Jason Row

    Composition is very important in photography in order to capture effective and compelling images that have a lot of visual interest. Without just pointing the camera at a scene and shooting, taking time to scout the location and capturing images from different perspectives and angles, or watching out for interesting backgrounds, using meaningful elements, etc., will all contribute to great compositions in an otherwise simple image. This article talks about some typical composition mistakes that can ruin the effectiveness of your image.

    Photo by Pietro de Grande

    Portrait photography is a slightly difficult and challenging genre and is one that requires a few important factors to be taken care of, for the best results. Since we are dealing with closeup details of the subjects mostly and also want to capture their personality well, it requires a lot of practice and patience to master portrait photography. Here in this article, there is a list of 7 common mistakes in portrait photography and how to avoid them.

    Photo by Jessica Felicio

    Many think that mistakes are made by only beginners or amateur photographers because they are still learning, but photographers are always learning and professional photographers also make mistakes, including the very successful or famous photographers. Some photographers just ignore their mistakes or do not realise that they are making a mistake. This article talks about some common mistakes that professional photographers need to avoid.

    Photo by NEOM

    From time to time, most photographers shoot long exposure photographs while some shoot them quite often. Long exposure photography is not about just putting the camera on a tripod and setting a longer exposure time to capture the image. There are a lot of things to be taken care of like exposure times, accessories to lengthen exposure, colour shifts, noise, internal reflections, etc. Check out this article to avoid some long exposure photography mistakes.

    Photo by Jason Row

    If you have been into black and white photography for a while, you know that it is not just converting an image to black and white by bringing down the saturation slider all the way down to the negative side, or just applying a black and white preset. Black and white images need tonality in order for them to shine and it is always recommended that you learn to see in black and white, shoot in colour and then convert to black and white. Check if you are making any of these mistakes in black and white photography and see what you can do to avoid them.

    Also check out – Do You Still Make These 2 Mistakes When Working In Black And White?

    Photo by Ehud Neuhaus

    Some photographers shoot raw always, while some shoot jpeg and others a combination of raw and jpeg. Eery photographer may have a reason as to why they are shooting in a certain format, but most images require at least some post processing to give the image a pop and the right contrast, colours and exposure.

    When post-processing your images, it is important to not go overboard and make the images look unnatural, with too much saturation, clarity sharpening, etc. Check this article to see if you make any of these post production mistakes!

    Photo by Tron Le

    Lightroom is one of the most versatile programs that can be used for post processing, and is more popular among professional photographers who require batch processing often. Its features are very useful when it comes to creating and sharing catalogs, and also the many panels that help make post production easier, but as with all programs, overusing any of the sliders can result in bad final images. Check this article to see if you make any of these mistakes when working in Lightroom.

    Photo by Jason Row

    Are you someone who shoots film? There are mistakes film photographers make too and these mistakes can cost a lot. When shooting film, the photographer mostly needs to take care of a lot more things that what a digital photographer would. This article discusses three common film photography mistakes and how to avoid them.

    Photo by Brian Huynh

    Lastly, we would also like to touch on a very important subject that photographers need to take care of – maintaining the gear. Depending on what you shoot, especially in the outdoors, the camera, lens and other accessories are exposed to the elements and other harsh conditions. It is important that we take of our gear and do regular maintenance in order to avoid expensive repairs or replacements. Check out this article on some mistakes to avoid.

    Photo by Matt Bero

    Further Reading


    [ad_2]

    Source link

  • This Will Improve Your Photographic Creativity In One Hour

    This Will Improve Your Photographic Creativity In One Hour

    [ad_1]

    If you have followed my ramblings for a while here at Light Stalking, you will know there is one technique that I really like as a way to improve creativity.

    That technique is to restrict yourself.

    That can be done in different ways. Using a single prime lens is one that I talked about recently. Restricting the number of shots you take is another, as is revisiting the same location multiple times.

    Today, I would like to talk about another restrictive technique that I think really boosts your creativity. Limiting yourself to just one hour. I tried it out recently for a YouTube video I was creating and found it a very compelling way to get more creative, and the images I have used in this article were taken in that one period. Let me explain a little more.

    https://www.youtube.com/watch?v=SCwy6qGuJE4

    Why Restrict Yourself?

    Restricting yourself in photography, in general, might seem a counterintuitive way of doing things. After all, digital gave us the freedom to shoot as much as we liked for as long as we wanted (given enough batteries).

    That, however, is the problem. That freedom to continue shooting everything can often come at the cost of creativity. We speed up, we shoot everything and anything, our photography becomes less considered, less patient, and in my opinion, less creative. I have a disdain for photographers who boast on social media about how many shots they got on a particular shoot. I would rather have 5 good shots than 500 average shots.

    Adding any of the restrictions I mentioned above, you will tighten up your compositions, take more time, and get better shots.

    So why one hour?

    Woman walks up cobbled street towards Durham Cathedral
    This image is from about 20 minutes in. By Jason Row Photography

    Restricting Yourself To One Hour

    When we go out with no fixed time frame in which to capture images, we can get lazy. We can overthink a single image, or conversely, we can try to capture far too much without thinking creatively. We can get a good shot, but ignore the fact that the light is going to improve in 5 minutes, missing out on a great shot. In short, we lose focus on what’s important.

    Many of us live busy lives, and often that can mean that when we do get the chance to take some photos, we tend to try and shoot as much as we can.

    As I mentioned, restricting yourself in general can be a very good thing in photography. Restricting yourself to one hour has some very specific and perhaps surprising results.

    The first thing that you will notice is that you start to think and compose quicker. You start to notice things faster and, in turn, see more of the details in a shot. You may well start to see the light differently, how it can change minute by minute at a given location.

    Rowing boats lined up on the River Wear in Durham
    Time limiting can actually boost creativity. By Jason Row Photography

    Another thing that you may well notice is that you don’t actually feel rushed. You are not trying to cram in as many shots as you can, rush around from location to location. That lack of haste is actually a creativity boost. You will find yourself slowing down despite the time restriction.

    So, how would you go about a one-hour photo shoot?

    The first thing is to manage your expectations. Not just about what you will capture but the location and the weather as well. The concept works best without too much preplanning.

    Pick a location that you think will be suitable. It could be a district of a city or town, a beach, or perhaps a mountain landscape. Choose a time to go and shoot, and don’t worry too much about the weather.

    In terms of equipment, don’t weigh yourself down with loads of kit. Like having too much time, having too much gear leads to indecision on what lens to use, whether to set up a tripod, etc. I like to restrict myself to one camera, one lens, which can be a prime or zoom. My preference is for zooms when shooting in just one hour.

    Get to the location and take a few minutes just to relax and look around. Then set a timer on your phone for exactly one hour and just wander. Try not to look at the timer; doing so can introduce haste. Instead, take your time to observe, compose and shoot. The key to a one-hour photo shoot is not the quantity, but the quality.

    A pretty, pink doored cafe in the heart of Durham, UK
    Remember to look back on your stroll. By Jason Row Photography

    If a particular shot or location is working, don’t feel the need to rush it and move on; instead, simply enjoy what you are doing. I would also advise not to chimp your photos, trust your instinct and enjoy the fruits of your labour when you get home. Often, chimping can lead us to continually retake the same shot, as well as delete shots that might not have worked. Those poor shots are worth keeping as they show us where we went wrong.

    When the timer alarm goes off, stop shooting, regardless of what you are taking at that moment. Put the camera away, perhaps get a coffee, relax and think back over the shots that you have taken.

    Reflection of a statue in the pub window in Durham, England
    There is always something to shoot. By Jason Row Photography

    What Will You Learn In One Hour?

    In a single one-hour shoot, you will learn not to rush and to take time with individual compositions rather than shooting everything you see. However, if you use the one-hour technique on a regular and frequent basis, you will learn much more.

    The first and perhaps most important thing is that you will become much more instinctive with your camera controls. The simple act of raising the camera, choosing the settings, and shooting will become second nature.

    Prebends Bridge and the River Wear in the heart of Durham, England
    The last shot of the hour. By Jason Rowe Photography

    You will find yourself scanning a scene much more carefully, yet picking out good compositions much quicker. You will also find yourself working on a single composition instead of hunting for many.

    Perhaps most importantly, you will find yourself gaining confidence. Confidence not only in your ability with the camera, but also with the work you are capturing.

    Restricting your photography to just one hour might seem counterintuitive; however, if you try it out regularly, you will soon find your creativity improving and your ability with the camera getting more instinctive. That can only be a good thing considering the limited time you need to put into it.


    [ad_2]

    Source link

  • 21 Photos That Will Inspire You To Photograph On A Windy Day

    21 Photos That Will Inspire You To Photograph On A Windy Day

    [ad_1]

    Windy days are not often considered to be a good day for outdoor photography, especially if one is shooting landscape, portraits, etc. When capturing photographs of any genre in general, photographers always aim to have the elements and subjects in the frame in sharp focus. But what if you can use the movements in the frame to your advantage to capture some creative photographs?

    Here are 21 photos, that will inspire you to capture stunning outdoor photographs on a windy day.

    The next time the weather gets windy, do not put your camera away and stay indoors. Some creative long exposure shots of the moving elements or even freezing the movement, can make for great storytelling photographs. Besides this creative idea, if you feel that you are running out of ideas to photograph anything, we recommend you to check out “The Creativity Catalog” by Photzy that will open your mind to the possibilities around you.

    Photo by Fer Nando 
    Photo by  John Fowler
    Photo by Ksenia Makagonova
    Photo by Ivo van Beek 
    Photo by Randy Fath
    Photo by Sinitta Leunen
    Photo by Shashank Kumawat
    Photo by Regine Tholen

    In order for photographers to keep their creativity running, they cannot be always travelling to exotic or new locations to capture new and exciting images. If you wish to come up with your own ideas and projects to kick-start your creativity, we recommend you to check out “The Creativity Catalog” by Photzy. This 209 pages guide covers 20 chapters that include creativity sparking assignments and ideas.

    Photo by Andreas Brunn 
    Photo by Les Anderson
    Photo by Terrillo Walls
    Photo by Brandon Stoll 
    Photo by Vera Davidova
    Photo by Abi Ismail
    Photo by Jamie Street 

    For photographers, walking through the same neighbourhood or familiar places everyday can seem pretty boring and this may sometimes lead to photographer’s block. Photographers should always be ready to see things differently or from a different perspective in order to capture unique and creative shots everyday. Movements can also be used as a compositional tool. The “The Creativity Catalog” by Photzy comes with assignments that will make you feel inspired and motivated.

    Photo by Peter Hoogmoed 
    Photo by Aaron Burden
    Photo by Eugene Golovesov
    Photo by Mohamed B.
    Photo by Matt Seymour
    Photo by Khamkéo
    Photo by Dan Page

    Further Reading:


    [ad_2]

    Source link