[ad_1]
In this section of our three-part series about traveling with film, we’ll talk about the mode of travel most fraught with peril for film photographers: Flying. Back in the pre-digital days, flying with film was a no-brainer; you could pack your camera gear and buy all the film you needed at your destination (and perhaps get it developed there as well). Today, film is harder to find and airport security is tighter (and potentially more harmful to film), so airborne analog photographers have to do a bit more planning.
(Note that the information in this article is specific to air travel in the United States. Other countries may—and likely will—have different regulations and procedures.)
The primary problem facing film fans who fly
Related: How to travel with film by land and sea
Here’s the big problem for airborne film photographers: The scanners and X-ray machines used for luggage inspection produce light energy to which film is sensitive. These machines can potentially “fog” your film, causing dark spots or waves on the negatives (or light spots on slides) as if the film had been exposed to light. So the challenge when flying is to minimize or avoid situations that could potentially damage your film.
Note that only undeveloped film is subject to damage. Developed negatives, slides, and prints are no longer light sensitive and cannot be damaged by airport security equipment.
Can you avoid X-rays altogether?
Depending on your destination, it may be possible to avoid bringing film through the airport altogether. If you’re traveling to a big city, you might be able to buy your film locally. If you’re staying at a high-end hotel with a concierge, they may even be able to buy film for you (but beware of hefty prices and fees). You may also be able to mail-order film and have it sent directly to your lodgings; check with the property first to see if they can receive packages (and bring a couple of rolls in case your shipment is lost or delayed). Likewise, if you use mail-order film processing, consider sending the film off for development from your destination before you leave for home.
Never put film in a ‘checked’ bag
Do not put unexposed or undeveloped film in checked baggage, ever. The scanners used for checked baggage are more powerful than those used in carry-on luggage and will very likely fog your film. Film and loaded cameras should always be taken in carry-on luggage.
Related: Going back to film? Here’s what’s changed
A related side note: When booking your airline tickets, beware of “Basic Economy” tickets, which do not always allow carry-on baggage beyond a small personal item. Buyers of these tickets often board last, when carry-on storage is full, and will sometimes be forced to check their baggage (for a hefty fee), where it could be subject to harmful scanning at stopovers. If you are traveling with film, make sure your air ticket allows you to bring carry-on luggage, and pack your film (and cameras) in a bag small enough to join you in the cabin.
Film in carry-on baggage: Ask for a ‘hand inspection’
The Transportation Security Administration (TSA) says that the X-ray machines it uses for carry-on baggage are safe for photographic film up to ISO 800*. We’ve had slower film scanned with no ill effects, but we also understand that the effects are cumulative and that multiple scans may cause fogging. (We asked TSA if we could run some test scans at our local airport; they politely denied our request, citing security concerns.)
Fortunately, there is one good way to ensure your film will not be damaged: Ask for your film to be “hand inspected,” regardless of its speed.
*Note that at some airports, TSA is introducing more powerful CT scanners for carry-on luggage, which can damage even slower-speed film.
The PopPhoto guide to hand inspections
First: We recommend being patient and polite with TSA agents. Remember that their first responsibility is security, not customer service—and also that they’re subject to a lot of vented frustrations from harried passengers. There’s no need to show fealty; simple politeness and civility will get you a long way.
Film photography is popular enough that most TSA agents should be familiar with hand-scanning requests, but it does slow their workflow. When traveling with film, we always allow an extra ten to fifteen minutes to get through security (a margin we rarely need).
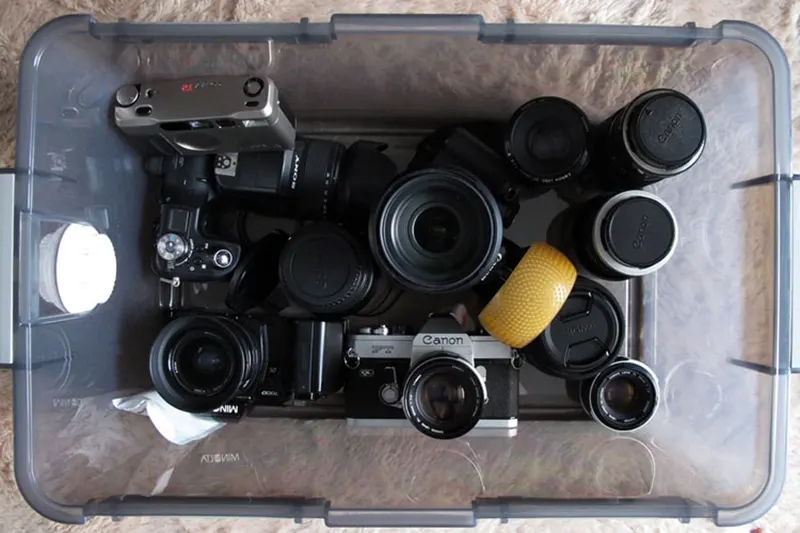
We recommend carrying your film in a clear plastic zip-lock-style bag, with which TSA is familiar. Leave your rolls in their plastic canisters and/or sealed packaging whenever possible. We try to keep our cameras unloaded so they can pass through the X-ray machine, but loaded cameras can also be hand-scanned. Anything you’d like hand-inspected should be kept where it’s easily accessible; a backpack is preferable to a suitcase that must be unzipped.
Before we put our luggage on the belt, we remove our film and loaded cameras, catch the eye of the nearest TSA agent, and say, “I have some film (and cameras) I’d like to have hand-inspected, please.” If asked if the film is under ISO 800 we either say no or (to avoid fibbing) tell them it’s going to be pushed and shot at a higher speed. (They may not know what this means but will generally accept it.)

After walking through the scanners we try to stand somewhere conspicuous without blocking the flow of passengers. Film is usually checked by the same agents inspecting bags that have been pulled for secondary inspection, so there may be a wait. The inspection usually consists of swabbing the individual rolls, then putting the swab in a machine that checks for explosive residue. We’ve occasionally had requests to open boxes and always say yes (so long as they don’t pull your film out of the canister or unspool your 120 rolls, it’ll be fine). Once the machine gives the agent the green light, you’ll likely be sent on your way.
Going home: Have all film hand inspected
Once your film has been shot, it’s still sensitive to light and can still be damaged by scanners, so be sure to have all of your film, shot or not, inspected by hand. We must reiterate: Do not put undeveloped film in checked bags.
If you’ve had your film developed while on vacation, there’s nothing to worry about—as we mentioned earlier, developed film, negatives, prints and slides are not light-sensitive. You can safely put them through the scanners or in your checked baggage.
What about lead-lined film bags?
Several manufacturers offer lead-lined film bags that claim to protect the film from X-rays. (We do not know if these bags protect against CT scanners.) We haven’t tried one in recent years, but if the bags do block X-rays, they will likely show up as a large dark blob on the security scan, which is likely to trigger a secondary inspection. We find it easier to simply request a hand inspection and avoid the inconvenience of having TSA unpack our bags.
Advice for other countries
While we’ve never had a request for hand-scanning denied in the US, we have been refused in Europe, and we don’t know if this was down to security procedures or a language barrier. For this reason, if you do travel with analog cameras overseas, consider bringing a slower-speed film, which is most likely to survive scanning with no ill effects. That said, we understand that some European countries are also introducing CT scanners for hand luggage, which is much more likely to fog film.
Ultimately, it’s best to check the official website for the security agency of the country to which you are traveling. If they don’t have a clear-cut policy covering film, you might want to consider traveling with a digital camera or making provisions to mail your film home before you leave.
[ad_2]
Source link