One of the best times of the year for photography is about to pass, but have you gotten out and taken photos yet?
Let me guess… you’ll do it “next weekend”.
Or even better yet… “I checked the online fall color tracker, the colors aren’t good yet”.
The only way to track Fall colors is to look at them with your own eyes. Even if you’re not into the colors and falling leaves, and the hoopla, it’s still a chance to get out and hike in temperate weather.
The most important thing about Fall is that it’s about moments where light, and wind, all come together to make something rare in the world. And if you don’t get out there and at least try, you’ll miss those rare opportunitities. What are you going to tell your friends and family? That you sat inside and stared out the window while everyone else got out and enjoyed the moment?
“Hey Bob, did you do any photography this fall?”
“Nah, I missed the fall colors the because I believe internet fall color trackers know what the colors are like in my own backyard.”
“OMG, Bob is going senile already… how sad.”
There are times during the fall when a boring old city park looks like the best place in the whole world. Maybe not every year, but every once in a while. I guess if it happened every day it wouldn’t be special, and you wouldn’t have to be a good photographer to get the shot.
I really like this one I got at the park about 20 minutes from where I live:
The key to good photography is sometimes being patient, and other times, it is making things happen. You can keep making stupid excuses, or you can get out there and start finding fall moments.
To sign up for the workshop just Click Here and you’ll get instant access to the course and bonus materials including a Fall Photography Cheat Sheet and an exclusive photo walkthrough of a few of my favorite fall photos from the Smokey Mountains.
Seacam is now shipping its housing for the Canon EOS R1. Canon’s flagship full-frame camera, unveiled in July 2024, features a back-illuminated stacked 24.2-megapixel sensor promising essentially no rolling shutter and delivering 40fps continuous shooting using the electronic shutter (full-resolution RAW images with full AF). The EOS R1 can also record 6K/60p RAW, 4K/120p (pixel binned), and 4K/60p (oversampled) video using the full sensor width.
As you’d expect, Seacam’s Silver housing offers the Austrian company’s well-known combination of ergonomic precision and premium engineering. Depth-rated to 260 feet (80 meters), the housing is milled from a saltwater-proof light metal alloy that is twice hardened and anodized, and the two housing shells are secured with Seacam’s titanium Safety Lock fastening system. The highest quality materials are used throughout, including stainless steel and anodized aluminum buttons and dials.
The housing features removeable integrated handles, a window for viewing the camera’s LCD, and a second small window to view the essential camera information displayed on the R1’s top plate LCD. Users have the option of using legacy EF-mount lenses via a Canon adapter as well as native RF-mount lenses. The housing ships with S6 or N5 bulkheads for rock-solid electrical strobe triggering, but you have the option of fitting fiber-optic bulkheads and/or an HDMI bulkhead. Seacam’s optical-acoustic leak detector comes as standard, with the vacuum valve and pump purchased separately.
The Seacam housing for the Canon EOS R1 is available from retailers such as Backscatter, where it is priced at $7,200.
When purchasing underwater photography equipment like the products mentioned in this article, please support DPG by supporting our retail partner—Backscatter.com.
PRODUCT INFORMATION
The EOS 1 series has been the one and only choice for Canon pro shooters for years – now also available in mirrorless. The perfectly adapted SEACAM housing now opens up all the possibilities of this high-end camera under water, too: Fast action, high precision and ergonomic shapes make the Canon R1 system the perfect professional partner for missions below the surface.
Discover the SEACAM silver Canon R1 in detail here.
Knobs and control levers
Power switch, shutter release, main- and quick control dial, manual focus, zoom, lens release button, M-Fn 2, MENU, AE-lock/AF-point, AF-ON/Movie start, Film/Photo, AF Drive, LCD, +/– Correction.
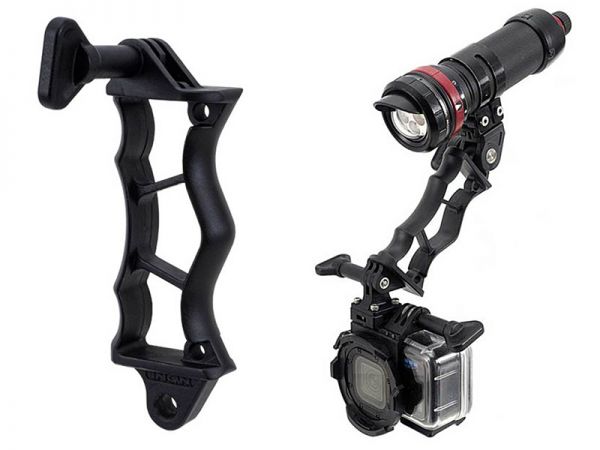
Inon has released the 4D Light Grip for action cameras (JAN/EAN: 4570018121258), a versatile pistol-style grip that allows users to attach both a camera and a light at the same time. The 4D Light Grip is equipped with a GoPro standard mount and YS Mount on both ends, and can be used with the ZD Front Mask for GoPro, Insta360 Ace Pro 2 and DJI Osmo Action 5 Pro.
ZD Front Mask for Ace Pro 2 Grip Set (JAN/EAN: 4570018121234)
ZD Front Mask for Osmo Action 5 Pro Grip Set (JAN/EAN: 4570018121241)
When purchasing underwater photography equipment like the products mentioned in this article, please support DPG by supporting our retail partner—Backscatter.com.
If college students know anything, it is how to find products that give you a bang for your buck. Everything is an investment that takes serious consideration, and when it comes to cameras, you don’t want to take any chances. In my case, this comes in the form of finding lenses that are high-performing, versatile, and reliable.
A little background
I am a film production undergrad student at Chapman University, on track to pursue cinematography as my major emphasis. I didn’t always know I wanted to pursue film, but photography was a central part of my upbringing, and once I hit high school, I naturally became “the camera friend”.
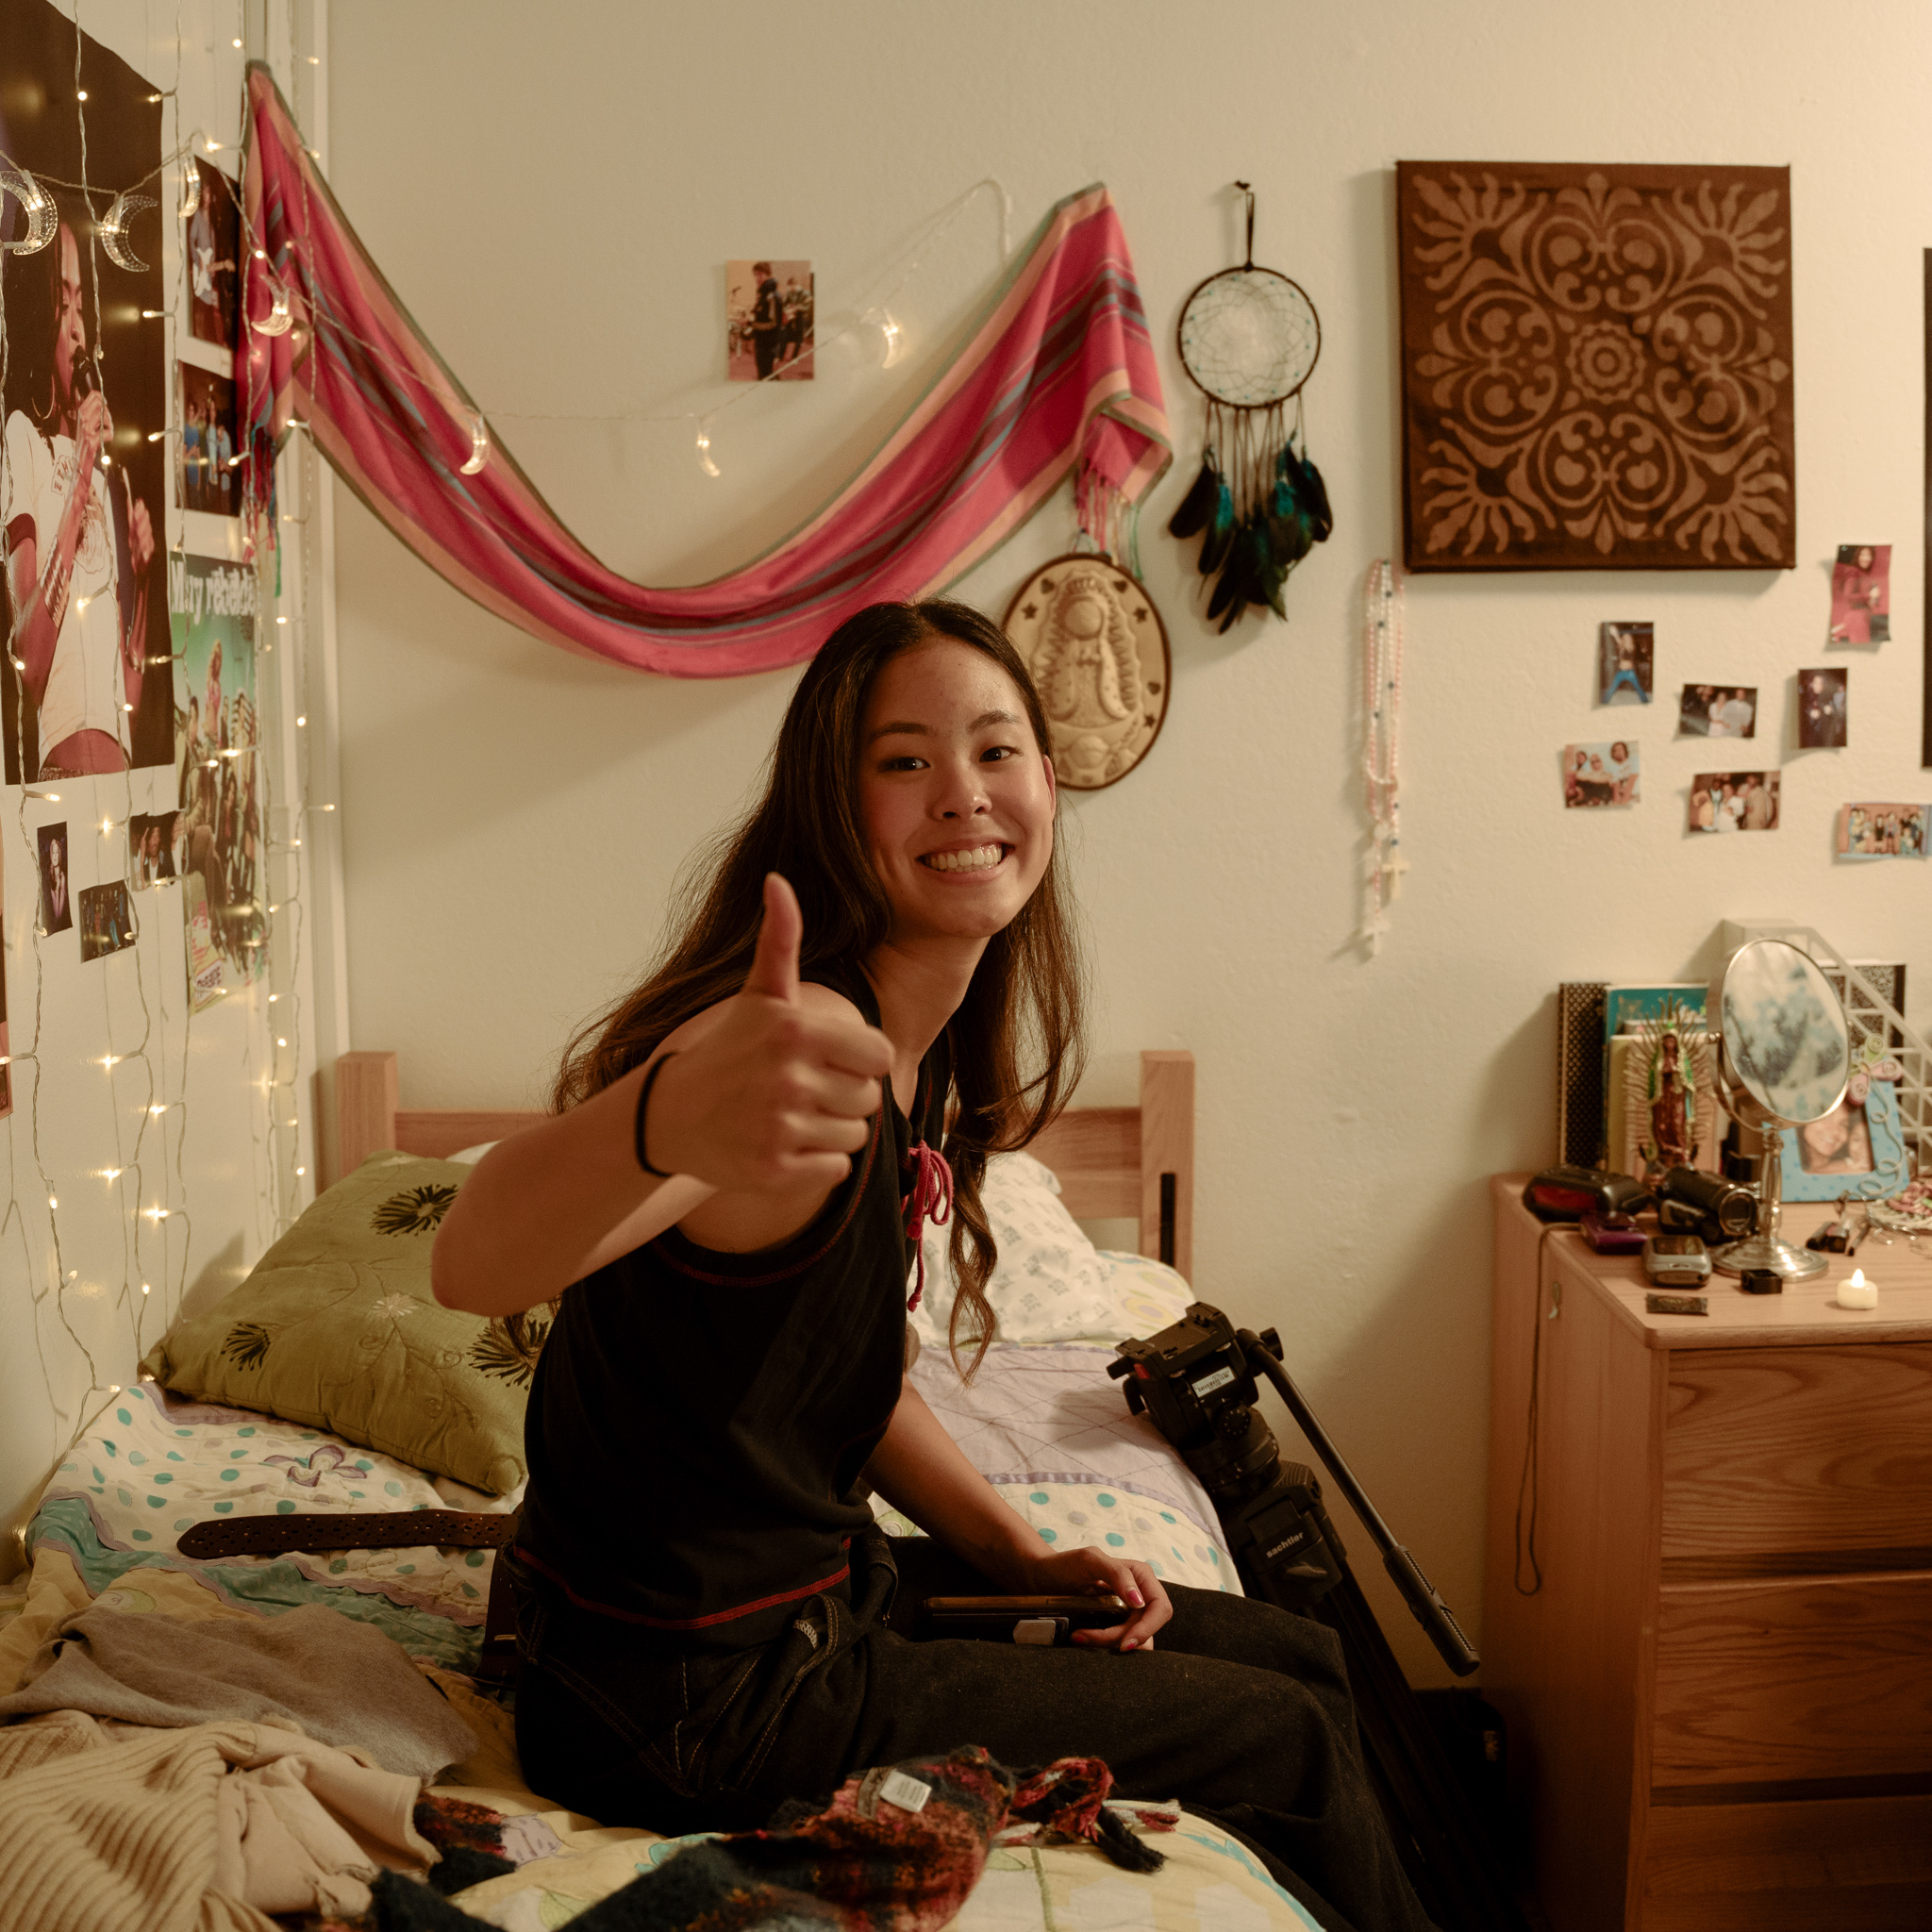
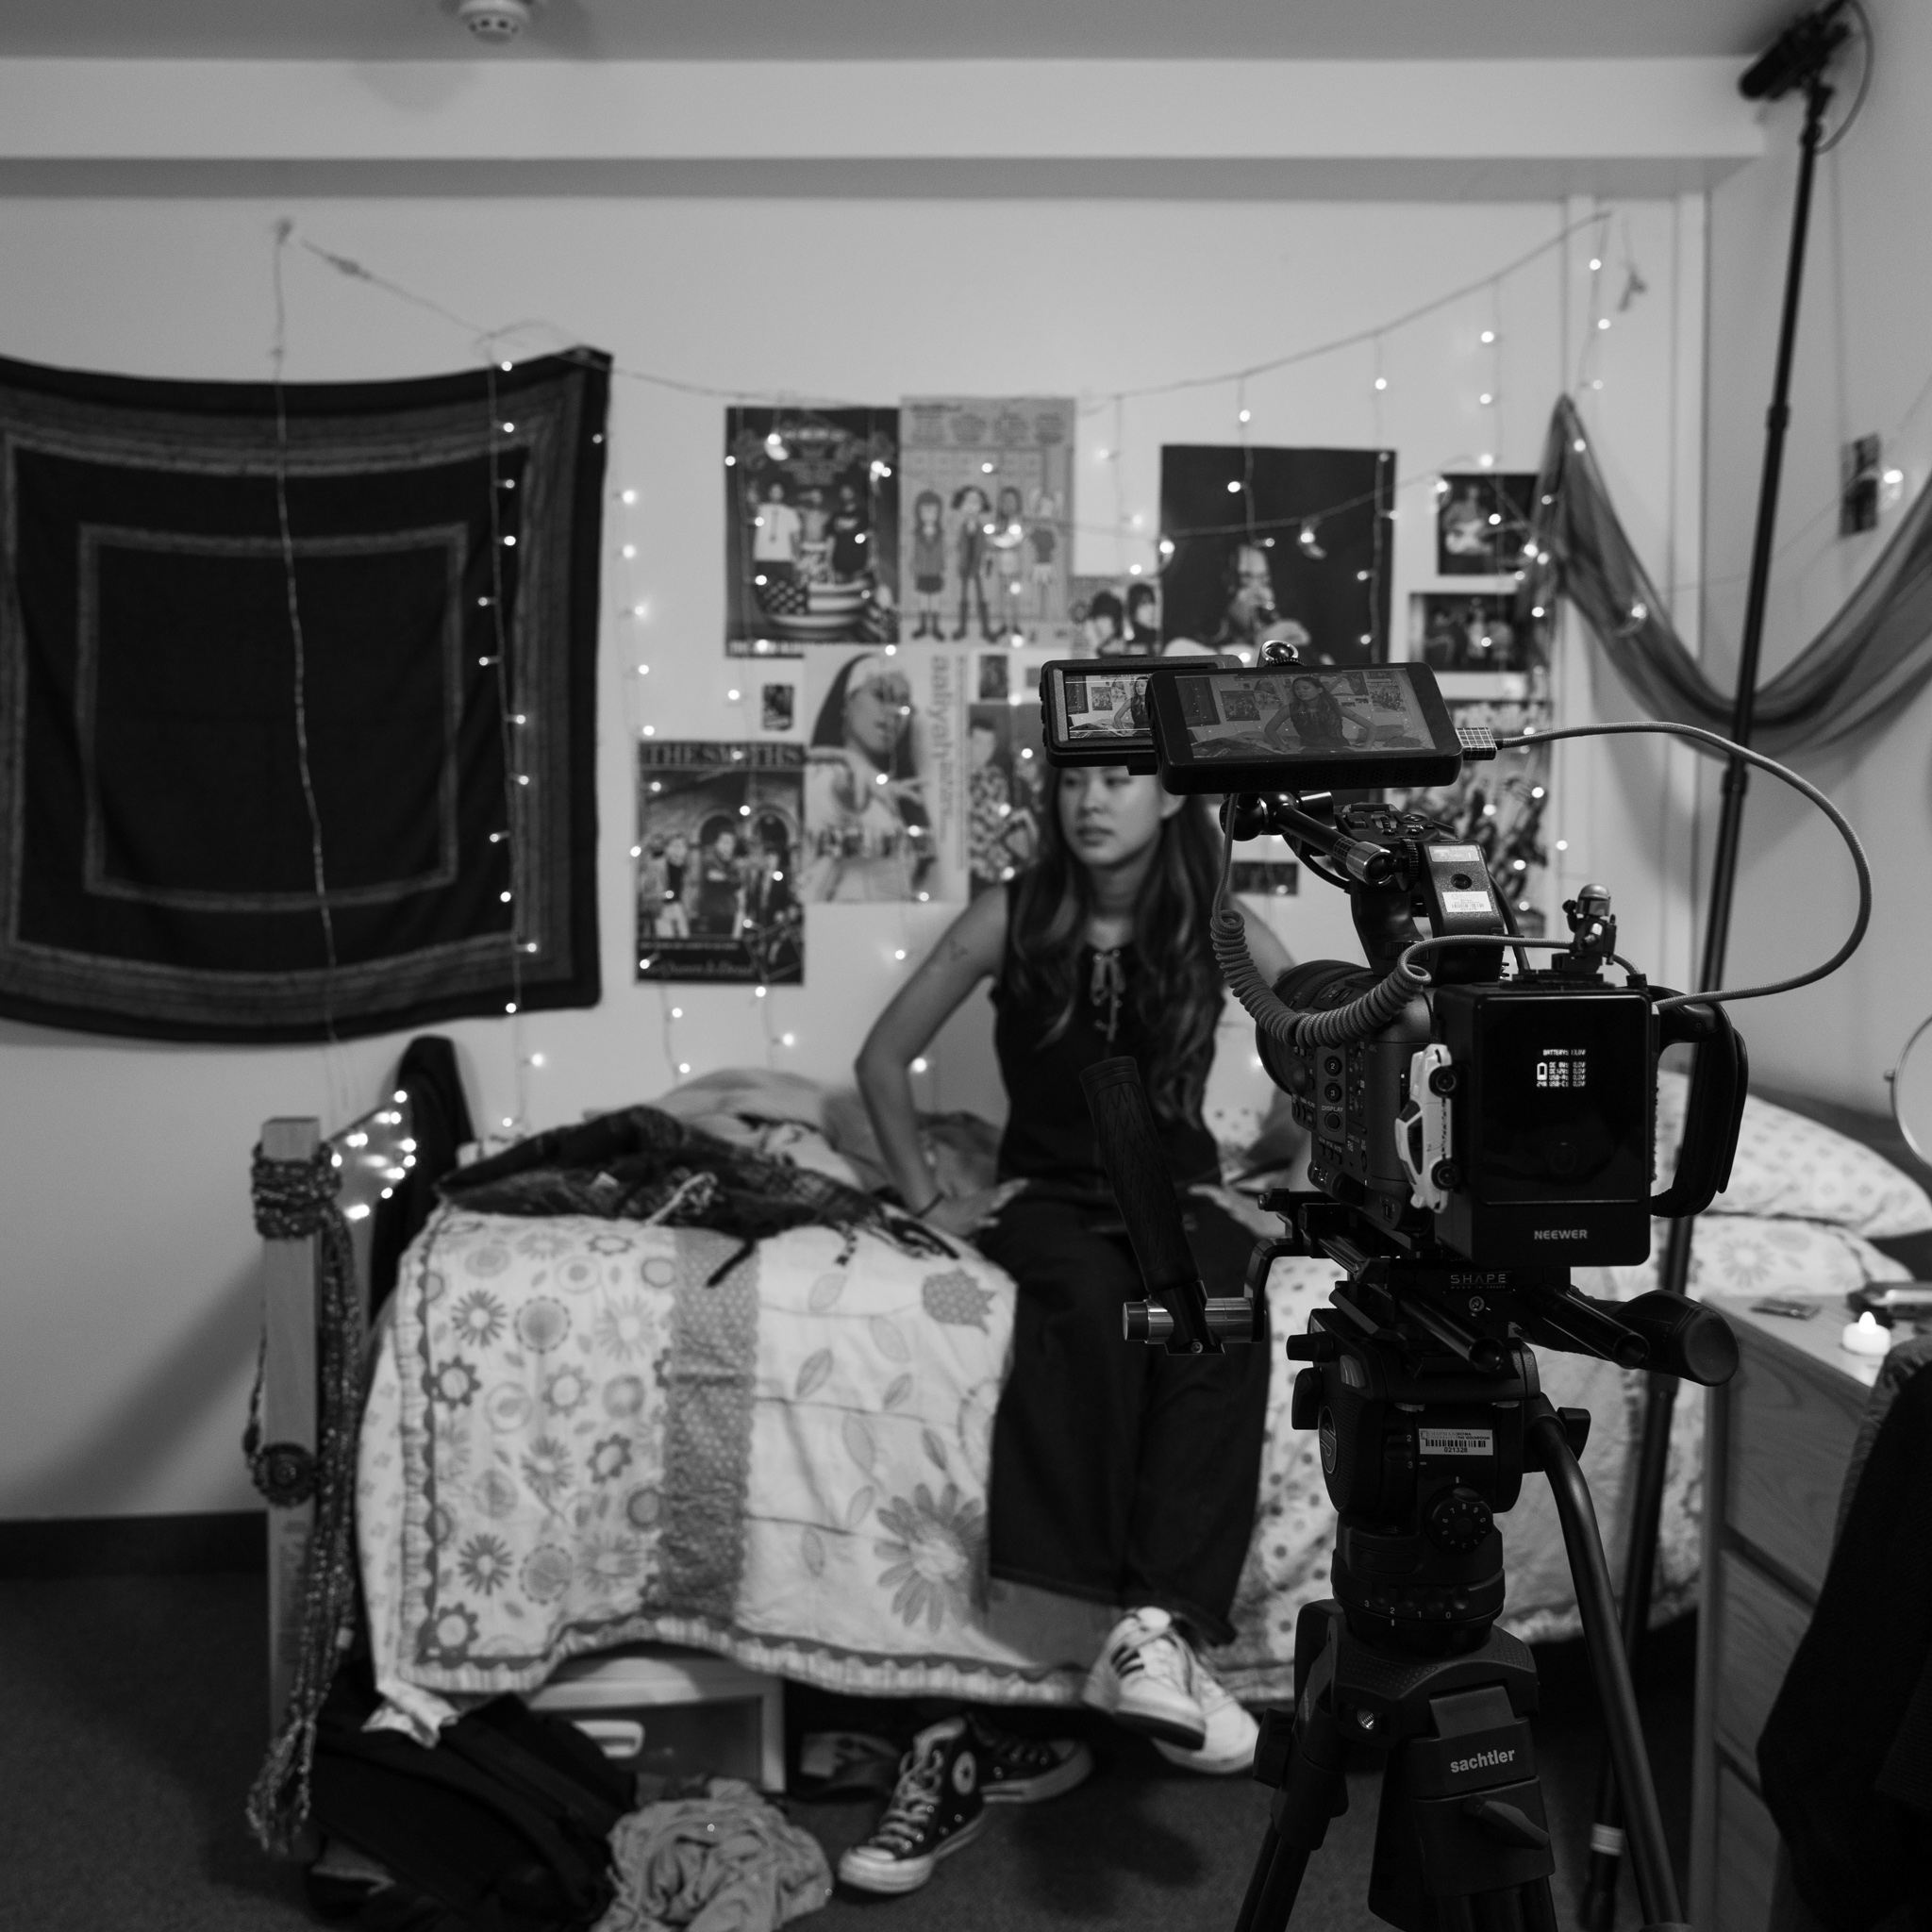
Chapman University film student (and Sigma Ambassador) Sophia Chew
Shooting in your dorm room is an essential part of the film student experience.
Outside of photography, I’ve directed and DP’d a handful of shorts and video projects, but some of the ones I’m proudest of are fan projects. Specifically, two films inspired by songs from Taylor Swift’s album Folklore – August (2024), and Betty (2023). Much of my work is inspired by books, music, and films I love, and I think my obsessions and phases add a personal touch to my work!
As a film student, your creative possibilities can feel limitless, but they can also feel intimidating. There are so many new things to learn, and it can be overwhelming. Thankfully, the safety net and supportive culture of my school program have offered a lot, and my Sigma lenses have been dependable additions to my kit and frequent topics of conversation on my sets.
My go-to gear
Student films and fan projects often operate on strict and fast schedules, which leads me to reach for my zoom lenses more often in order to optimize time. My favorite lenses (at the moment) are the Sigma 28-70mm F2.8 DG DN | Contemporary and the 28-105mm F2.8 DG DN | Art.
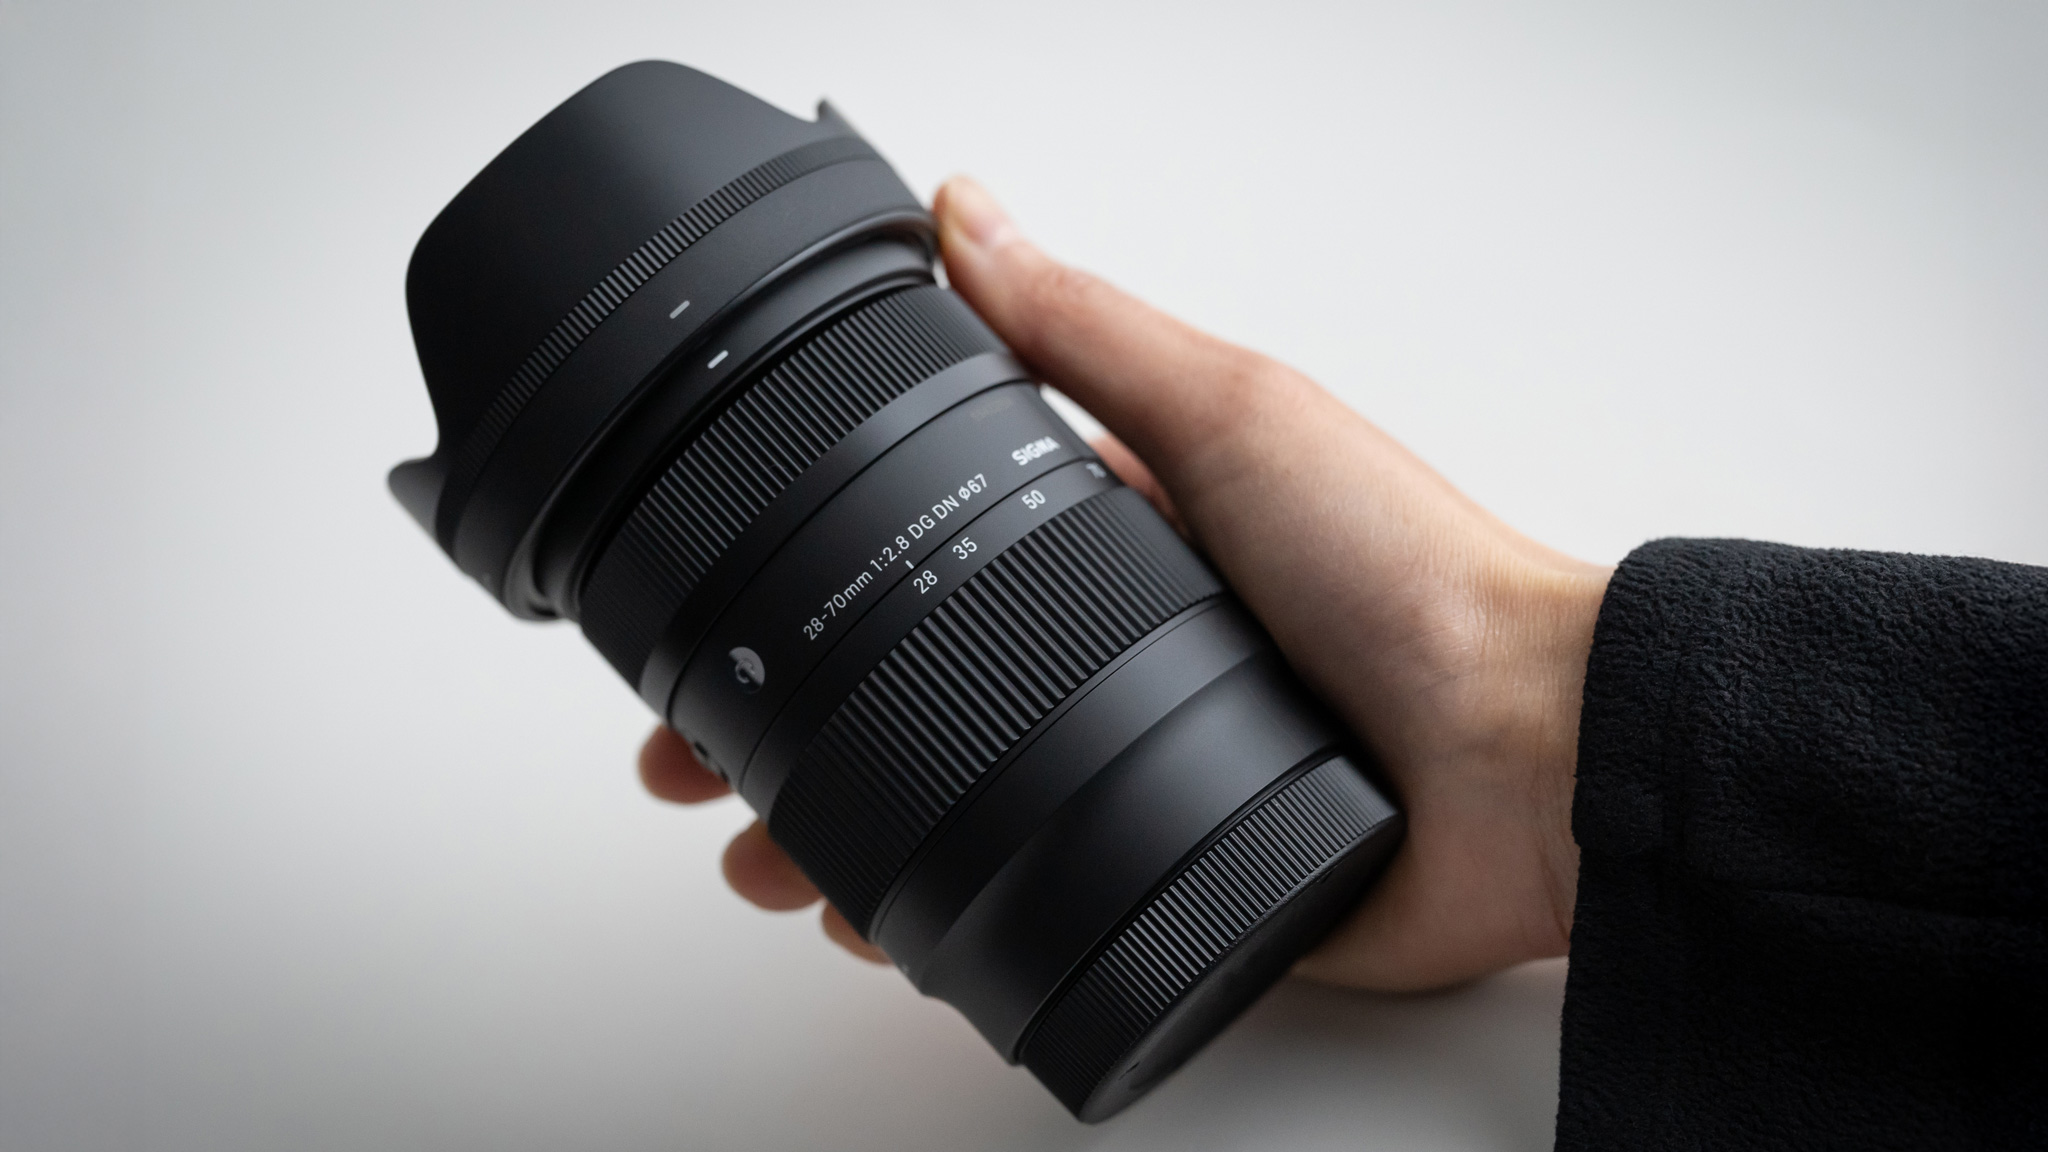
28-70mm F2.8 DG DN | Contemporary
The 28-70mm F2.8 DG DN | Contemporary has been perfect for photography and video shoots on location. As one of most compact full-frame zoom lenses available, the small size makes it perfect to travel with, and the light weight allows for fast setups and efficient shot execution. I feel confident with my close-ups and my portraits. I put a Pro Mist diffusion filter on the end, and love the freedom to construct the look of my images off Sigma’s clean lens builds.
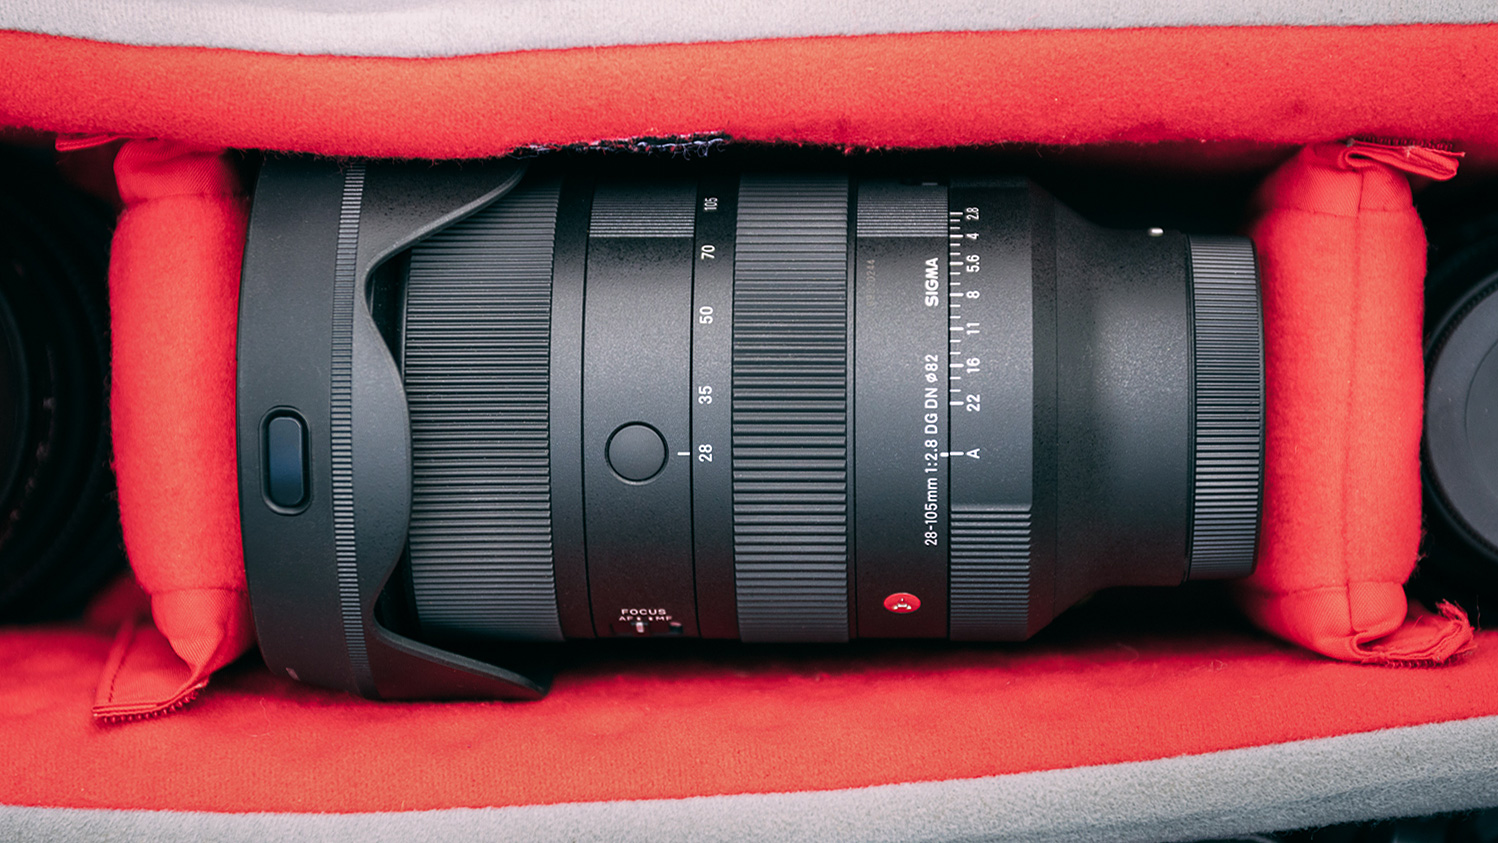
28-105mm F2.8 DG DN | Art
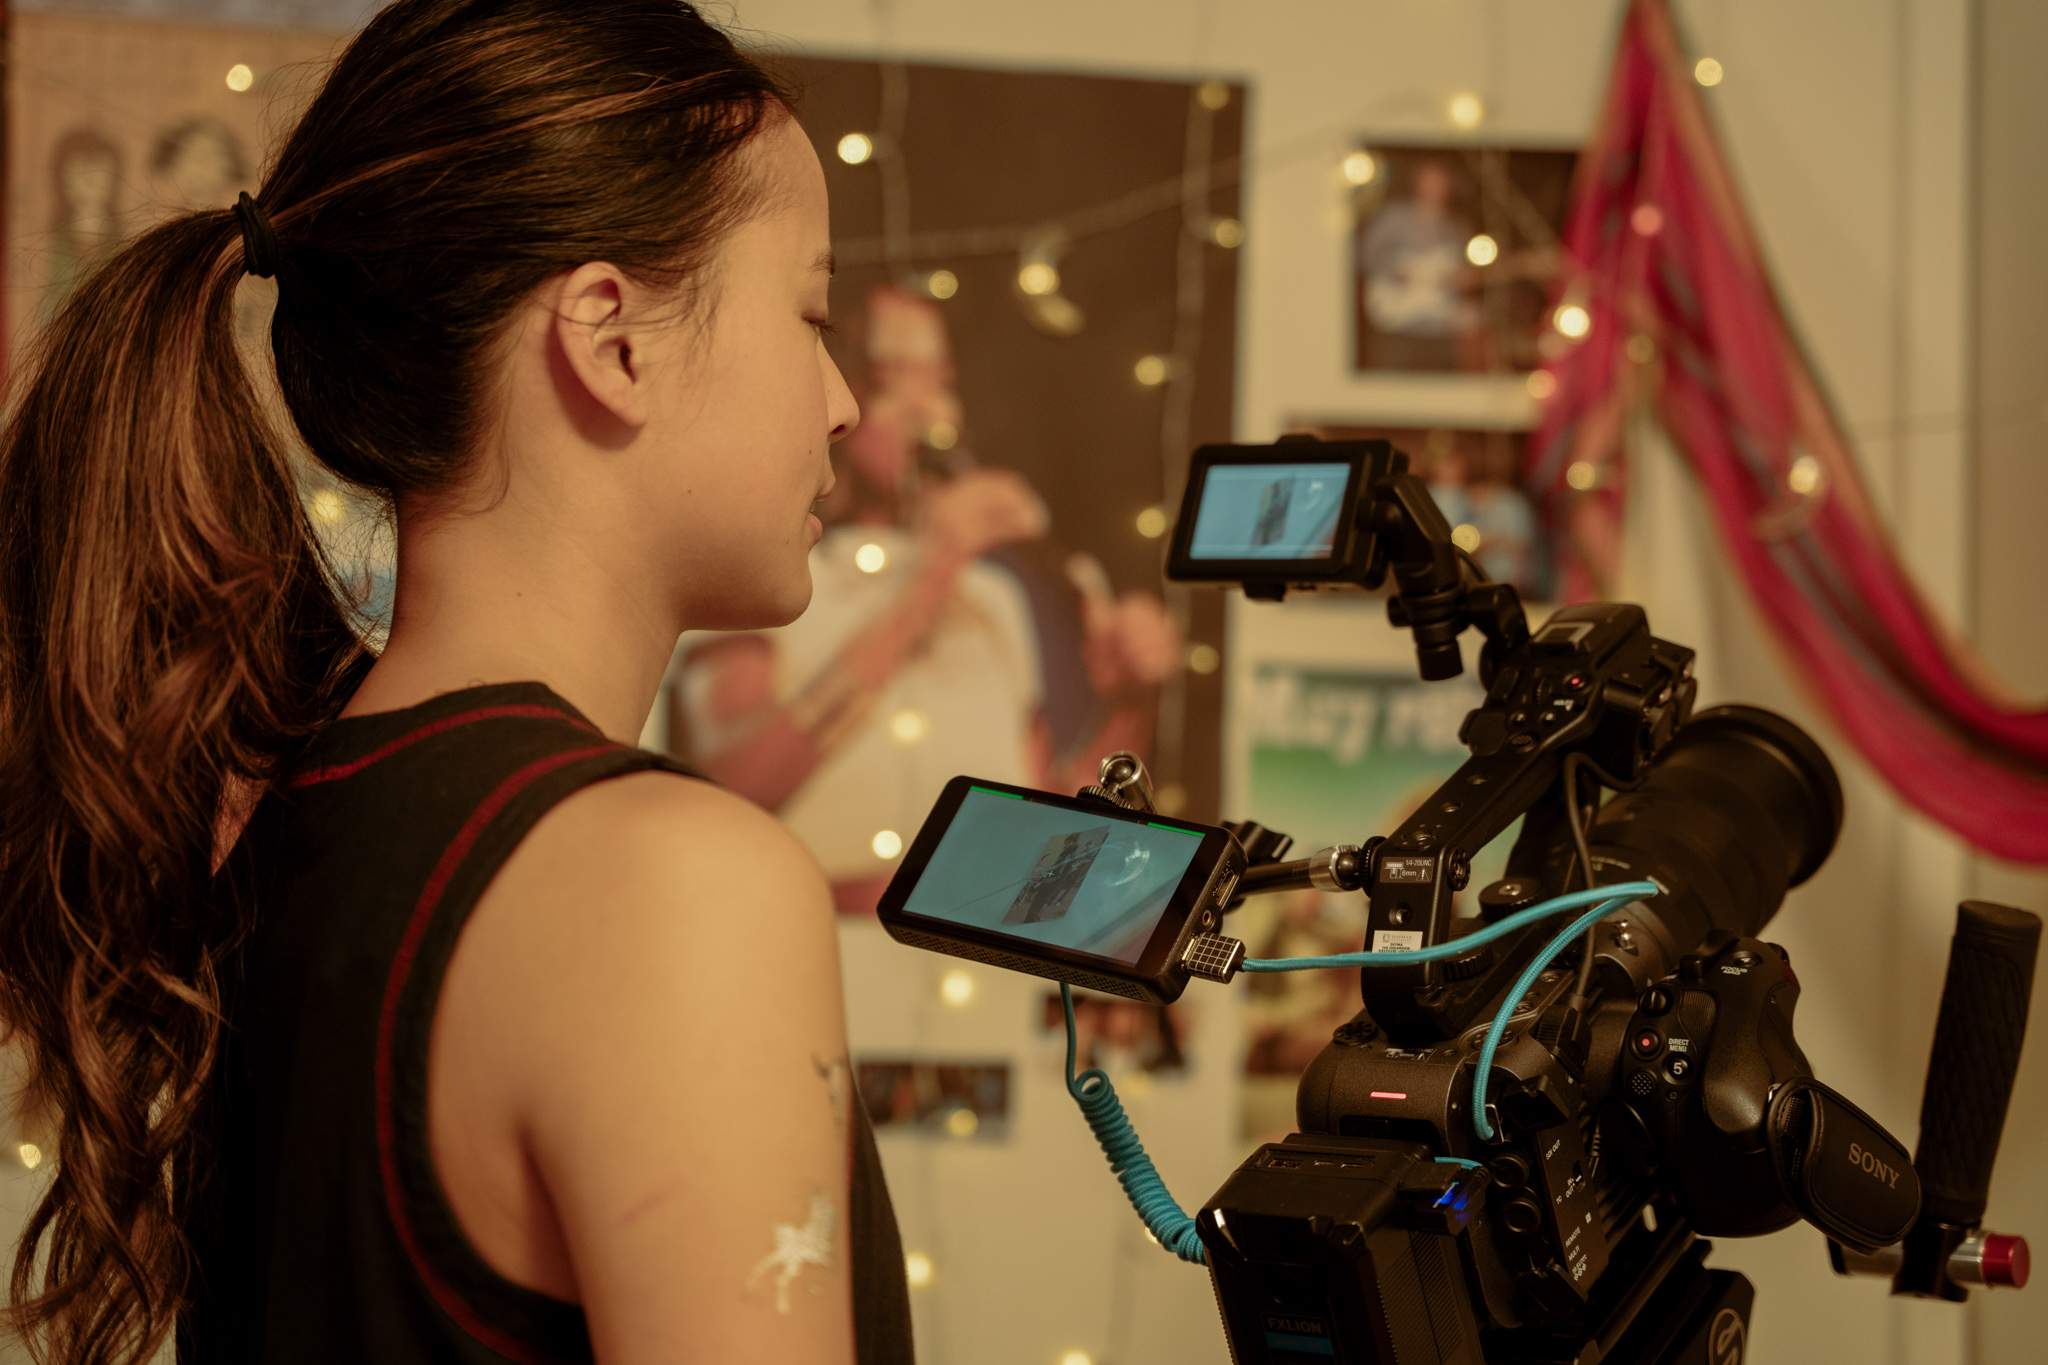
The addition of the 28-105mm F2.8 DG DN | Art to my kit has been game-changing. I recently shot a short film for one of my director friends on the Sony FX6. We shot a simple dialogue scene in an small bedroom. It was a tight fit and I needed a solid range to cover all the shots we needed. The 28mm focal length was ideal for the establishing shot, and as we get closer to the characters in the scene, the 80-105mm range was ideal for capturing their emotions and progressing dynamics. I threw in a few handheld shots when both characters started stressing about their parents coming home. One of them dives under the bed and hides, and this lens could capture all of it!
This location was tiny, cramped, and dim – but the Sigma 28-105mm was able to handle every shot.
When I show the lens to my peers, an unexpected part that stands out is the aperture ring. The satisfying manual addition to the lens makes the relationship between the user to the camera more personal, which is something I’m finding to be important to me when operating cameras.
A manual aperture ring is a nice addition for filmmaking. All Sigma’s latest Art line lenses, as well as the all-metal I series primes, have this feature.
Recommendations
Both lenses quickly became essential for me. As a student photographer and filmmaker, my visual style continues to evolve, and I’ve found these lenses can keep up with my pace. My love for the 28-70mm was part of how I became an ambassador, even before I got the invitation to join the Sigma team.
Whether you’re a starting photographer or an experienced camera user, I can’t recommend these two lenses enough, and I’m excited to use them in my projects next semester!
The night sky is stunning and the objects in the night sky are one of the most beautiful subjects that can be photographed mostly from your backyard. One of the most interesting and the brightest subjects in the night sky is the moon. Knowing the moon phases and a good understanding of controlling exposure in your camera can help you capture beautiful images of the moon.
In order to capture details on the moon’s surface, it is good to use a narrow aperture between f/8 and f/11. You will need a tripod, focus manually and use a shutter speed based on the focal length you are using to avoid motion blur. A remote trigger will also greatly help with capturing sharp images.
Grab your Milky Way Photography Blueprint for free righthere.
Here are some resources for effective moon photography tips and techniques.
Image by nousnou Iwasaki
When starting out with moon photography, most of us imagine those closeup shots of the moon that fill the frame, with a lot of details of the moon’s surface visible. When actually capturing the images, they may turn out to be a white blob or spot in the frame. This can be quite frustrating, but without giving up, check out this detailed guide on how to photograph the moon.
Image by Sebastian Voortman
If you are looking for some quick tips to refer to when photographing the moon, then this article quickly goes through a checklist that will help you to capture a quick shot of the moon. Always remember to make minor adjustments based on light, sky conditions and the gear that you use.
Image by Dahlia
Did you know that the moon is not just white but has some interesting colours? This is due to the mineral deposits on its surface. If you have not seen the colours yourself, the next time you photograph the moon, switch to live view and zoom in on the surface of the moon. You will be able to see the colours on its surface without the help of any accessories – just make sure the sky is very clear. Now you can capture the moon and post process to bring out its colours. This article will take you through all the steps required to capture and edit a mineral moon.
Image by Dahlia – shot on iPhone 7 Plus
A lot of photographers these days start their photography journey with their smartphones and some continue to do so for a while. While a smartphone can be a great tool for most genre of photography, it can be quite tricky when it comes to capturing photos of night sky objects. With some patience and understanding of camera settings you can capture decent images of the moon. There are also telephoto lens attachments sold for smartphones that can be used to capture closeup photos of the moon. This article discusses all the essentials required to capture a photograph of the moon using an iPhone or an Android.
Image by Ganapathy Kumar
The rising or setting Moon glows in a bright orangish colour very similar to the rising or setting Sun. This is due to the fact that the light from the rising Moon needs to pass through the thick atmosphere, before you can see it. Most of the shorter wavelengths of light in the blue end of the spectrum are scattered while the longer wavelengths towards the red end are visible. During this time the moon can look a bit fuzzy without great details but with some care, stunning photos of the rising Moon can be captured. This article discusses 3 tips to capture a perfect moonrise.
Image by Ganapathy Kumar
Moonscapes may have a confusing meaning like a Lunar landscape or a devastated landscape, but here in this article, we are talking about a landscape or a cityscape photo, with the moon in the sky. The moon is such a beautiful subject that it can add meaning, story and mood to an otherwise boring landscape or cityscape. In this article, we have provided all the details you need to capture a stunning moonscape.
Image by Temudjin
You may have heard of the term blood moon. During a total Lunar eclipse, the moon turns to a beautiful blood red because of the red light getting refracted and falling on the moon. A Lunar eclipse is quite a common occurrence compared to a Solar eclipse, but a total Lunar eclipse can also be a rare one, depending on where you live. So, if you wish to capture a photo of the eclipsed moon in the future, it is quite easy and this article will go through all the steps required to capture the blood moon.
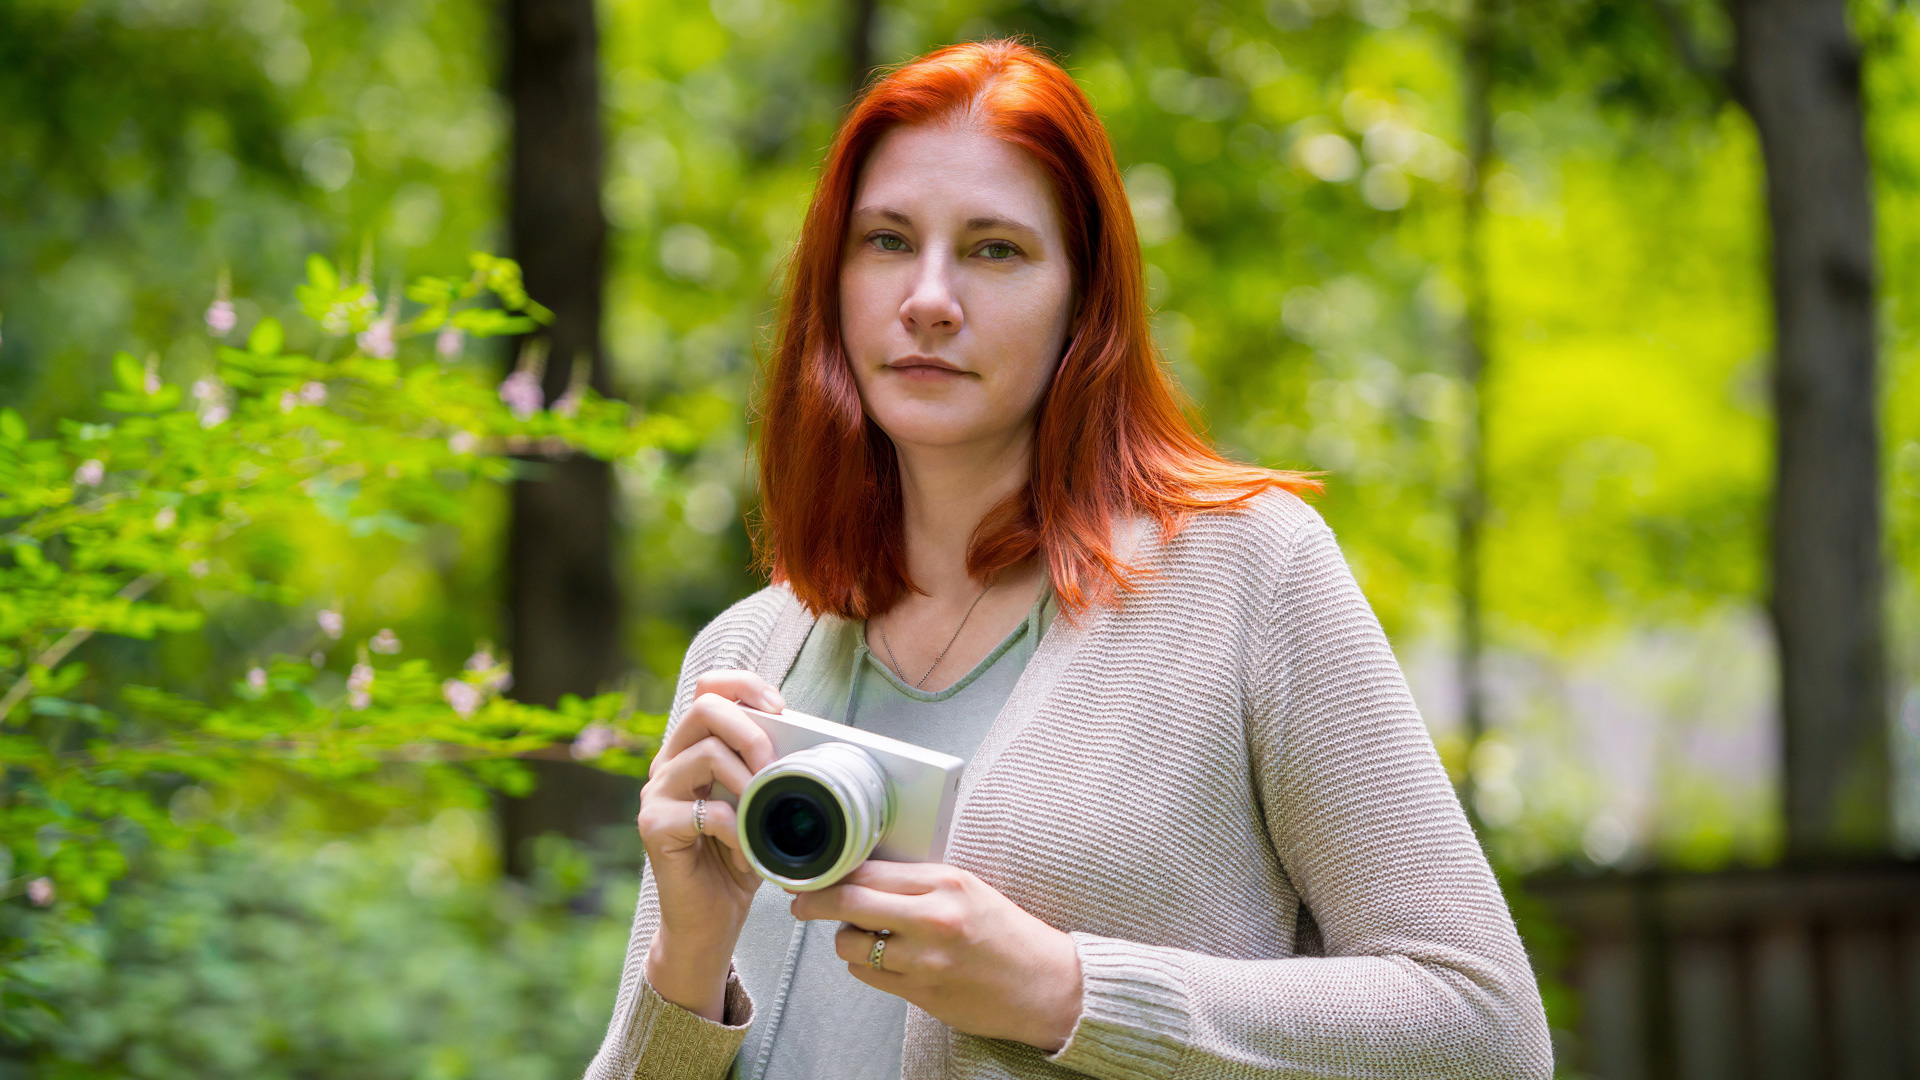
I’m Heather Larkin, and I have been working as a portrait photographer for the past 20 years. Over the years, I’ve used a wide variety of cameras and lenses, but the new Sigma BF is something entirely different. I’ve completely fallen in love with it as my personal fun camera. In the last few months, I’ve used it to photograph various personal subjects. I’ve experimented with three lenses in very different settings, from baby photos to jellyfish, to my own flower studio at home. It’s not meant to replace my workhorse camera, but it has become my favorite grab-and-go camera.
Designed to get out of the way
The Sigma BF is a paragon of minimalist design in the best way possible. It’s intentional, it’s fun to use, and it’s even lovely to look at. The pared-down body and controls are designed in a way to be intuitive and invisible, letting me focus on the experience instead of my gear. It lets me slow down in the most fabulous way.
Three lenses, three perspectives
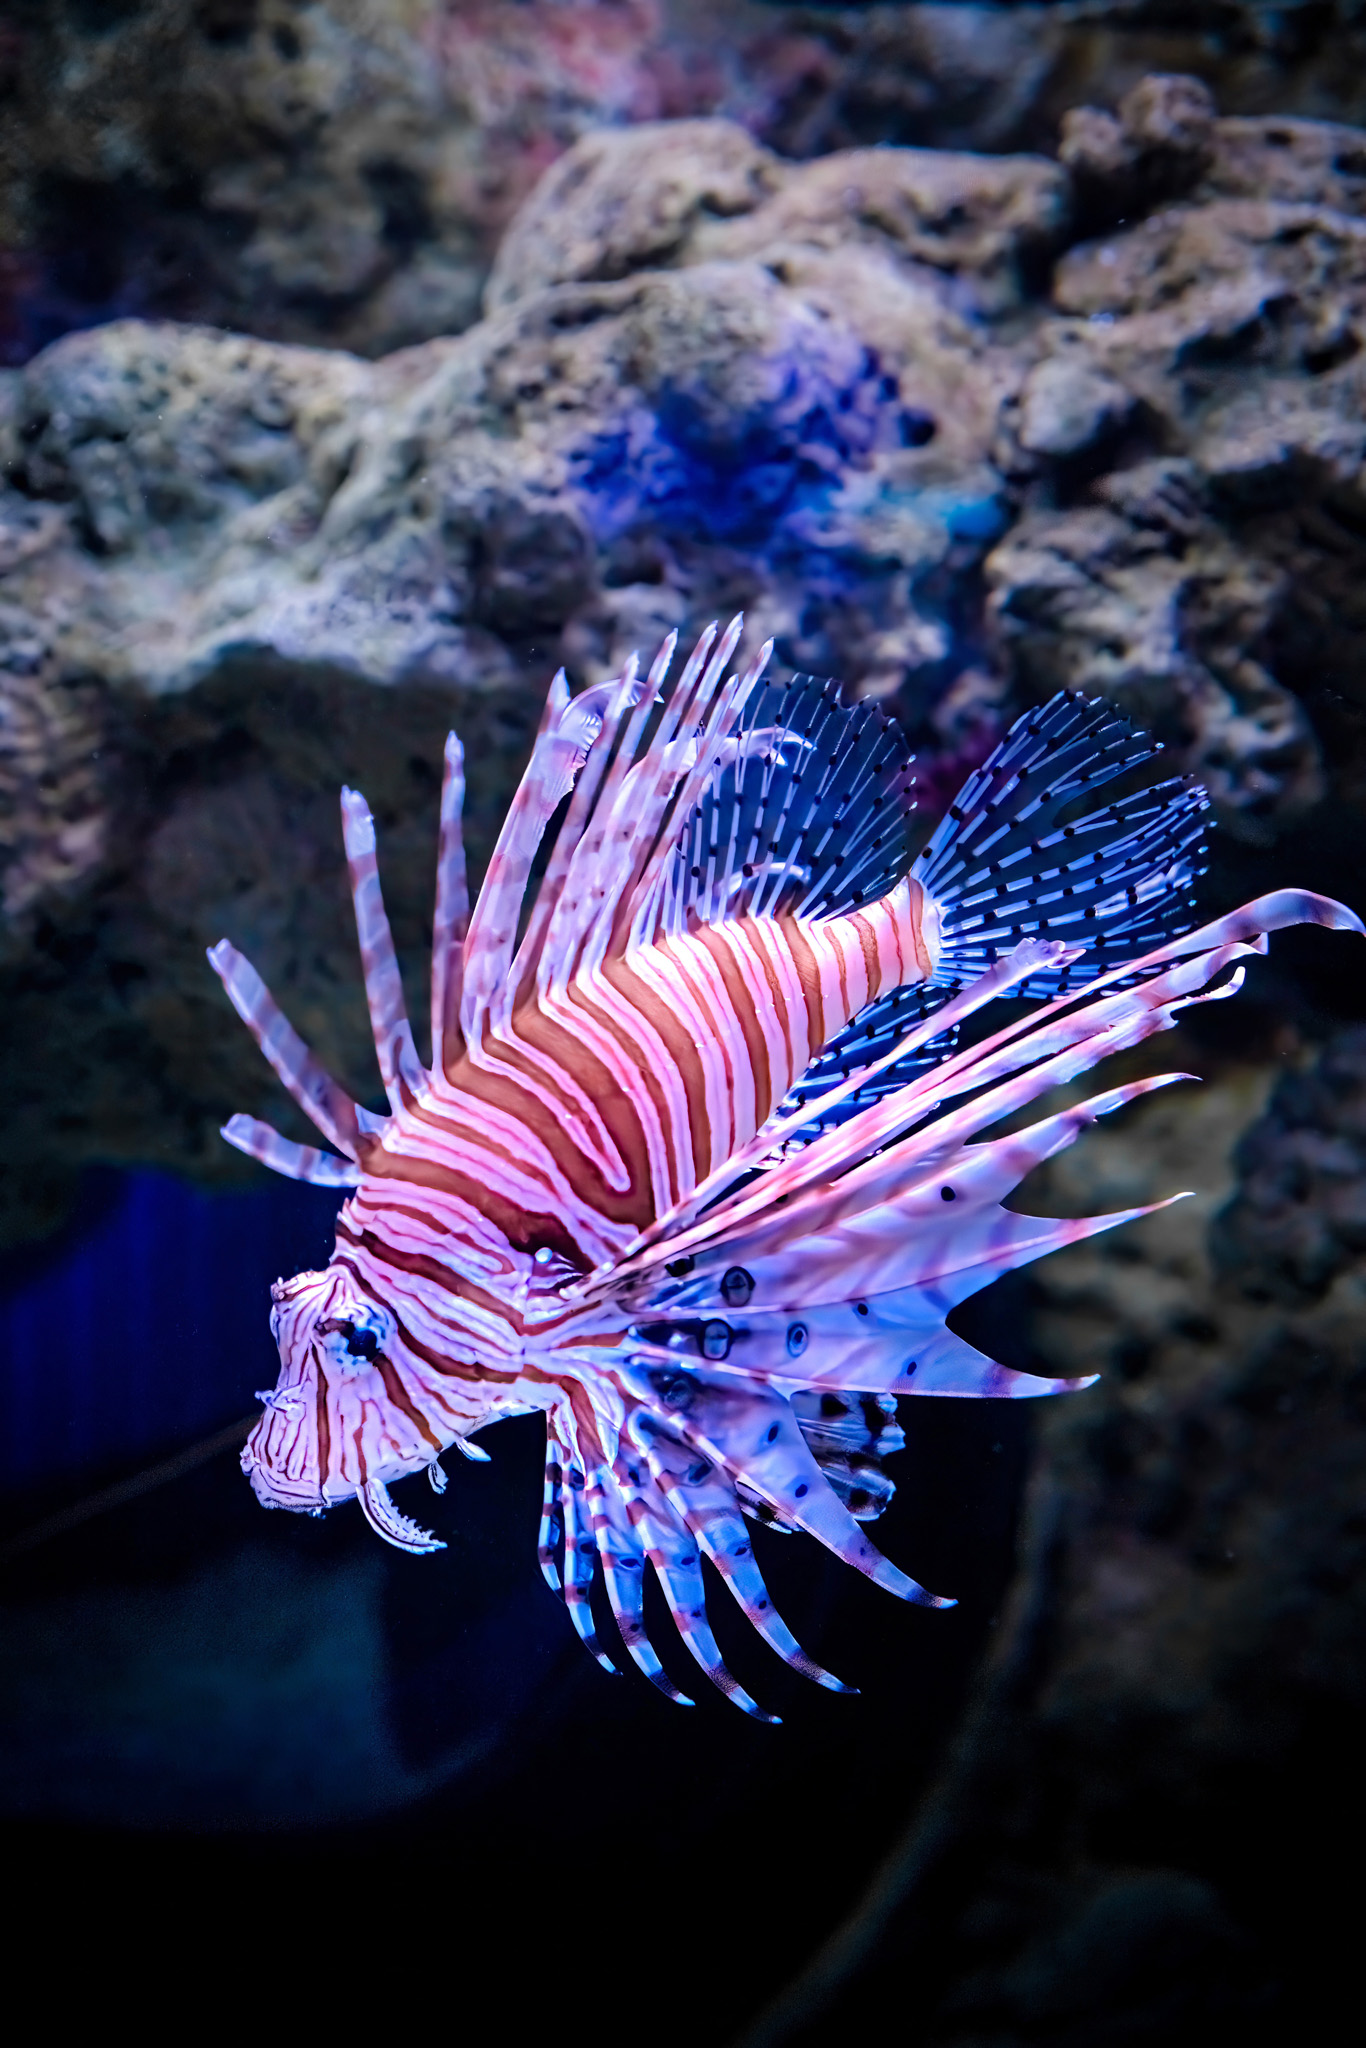
35mm F2 DG | Contemporary – I used this lens for baby photos of my new nieces, in the Seattle downtown area and market, and through the Seattle aquarium. It felt wide enough to handle all of these situations without too much distortion, and it handled tricky lighting super well.
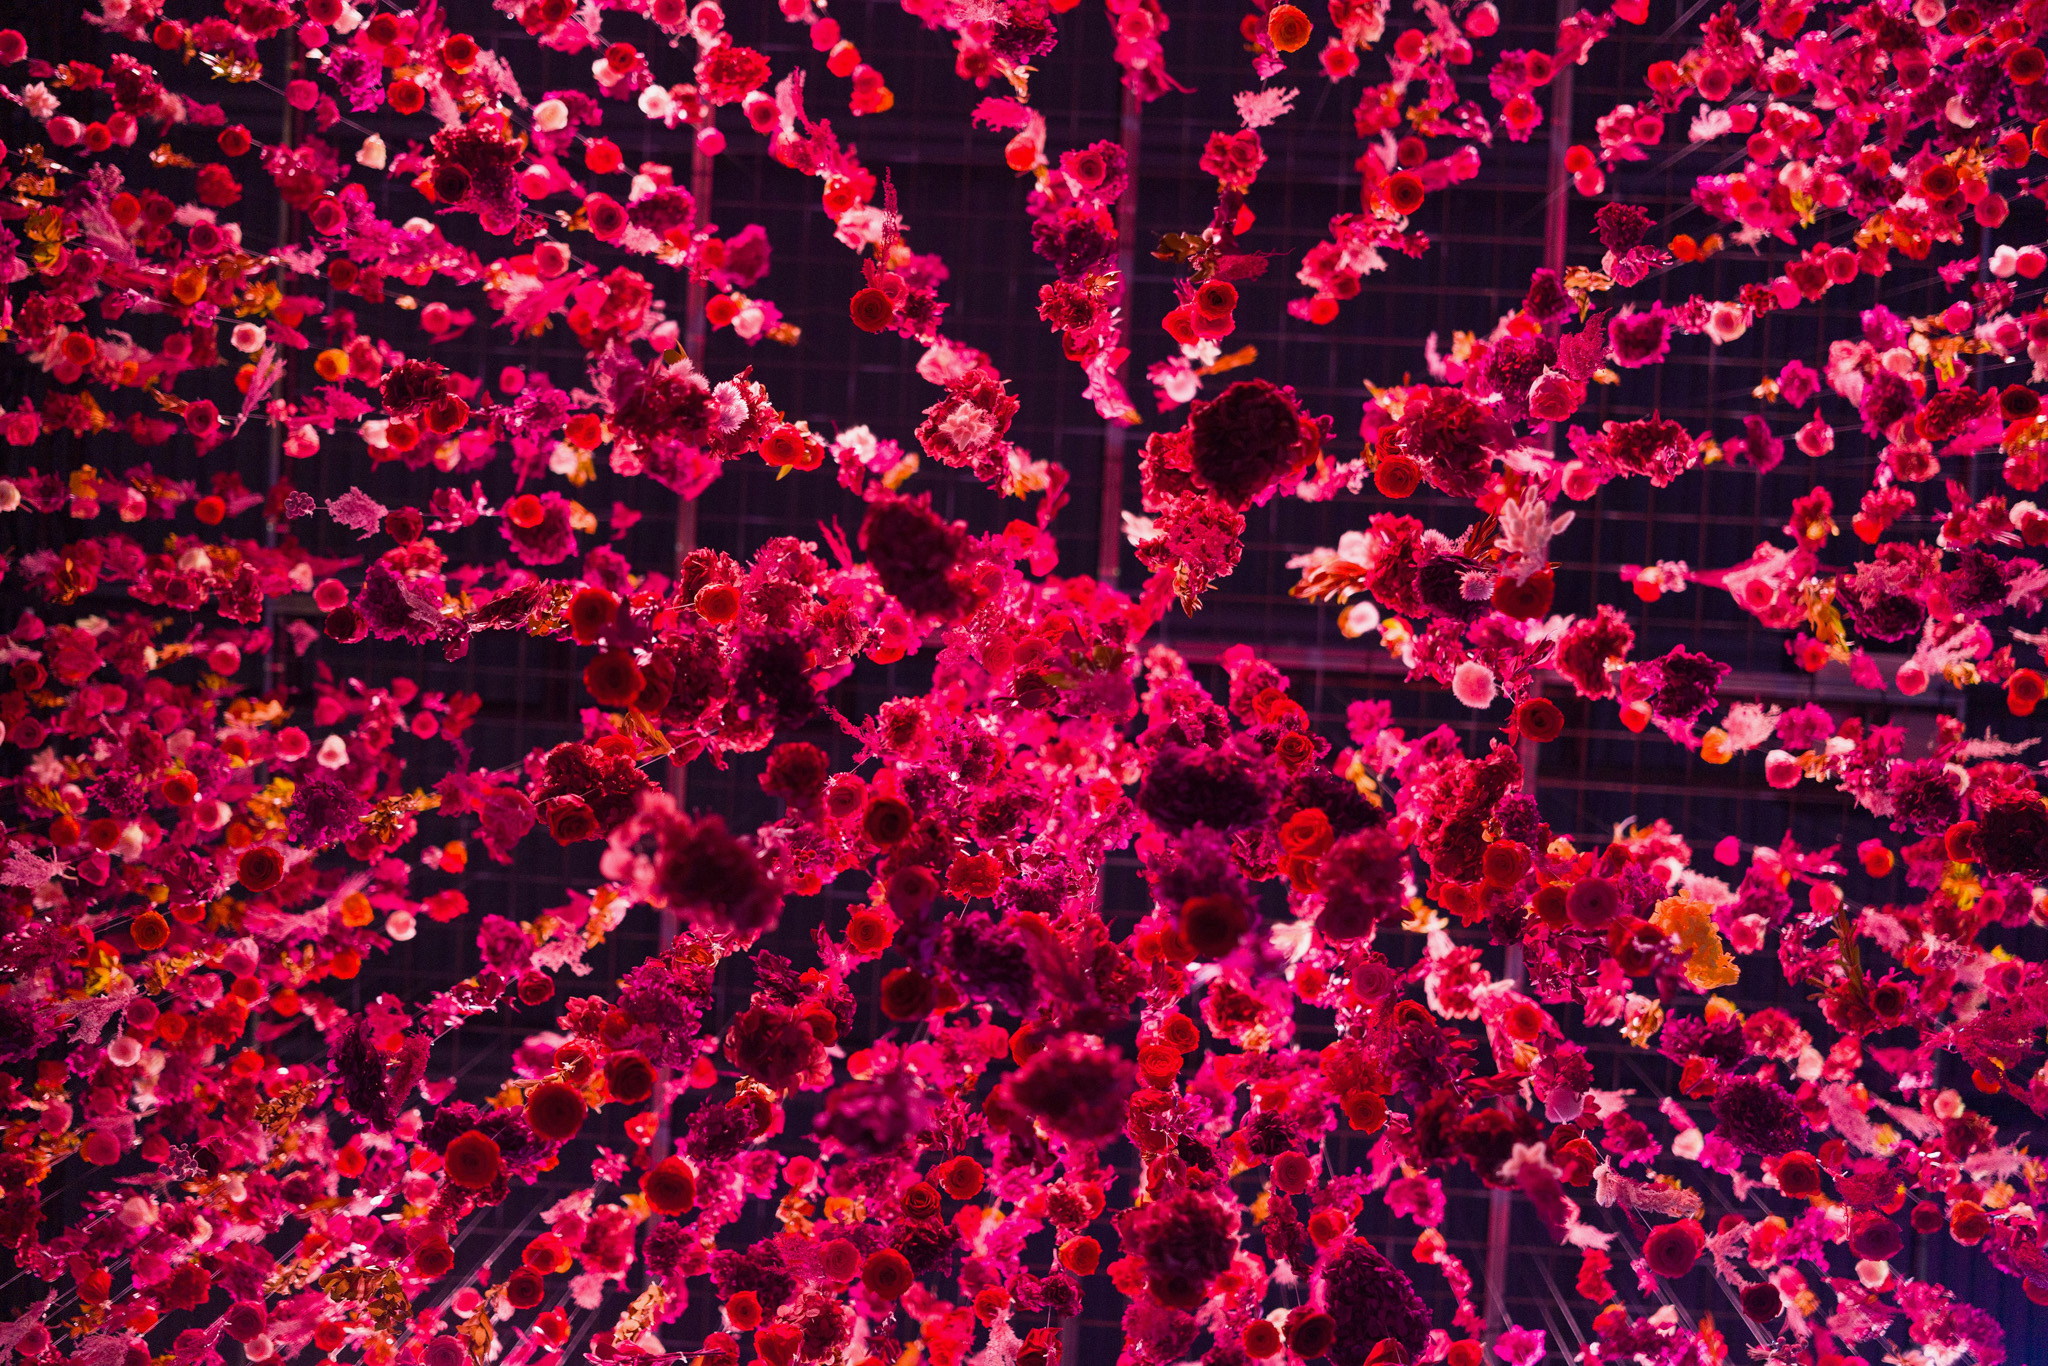
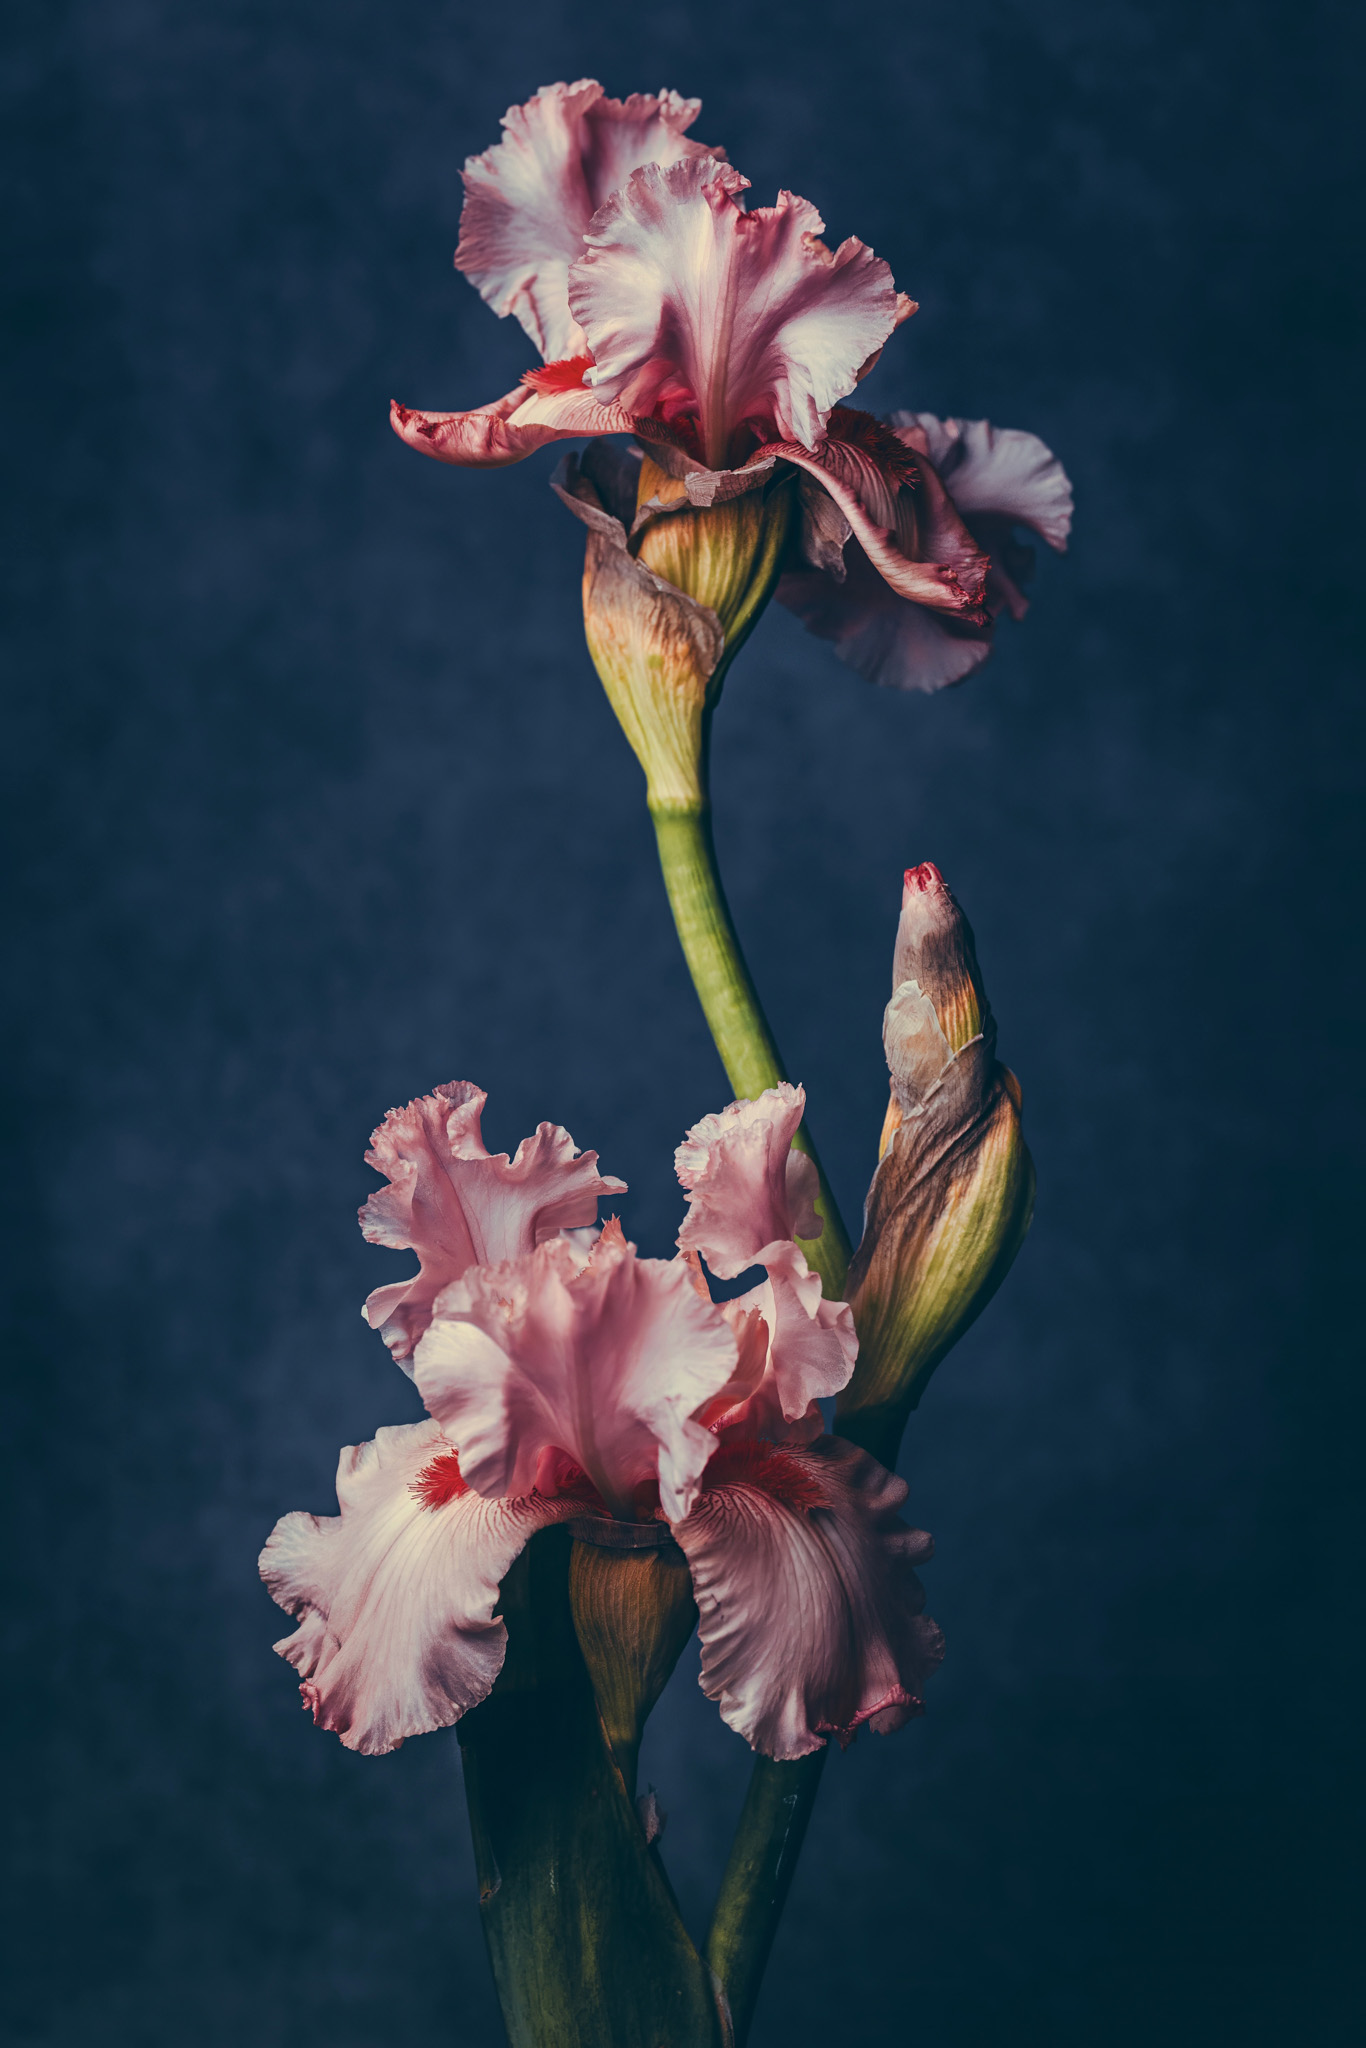
50mm F2 DG | Contemporary – I used this lens at the 2025 Philadelphia Flower Show, and I also love using it in my own home flower studio for simple flower portraits. It’s great for isolating subjects in busy spaces like the flower show, but I also love the depth it gives on a studio backdrop.
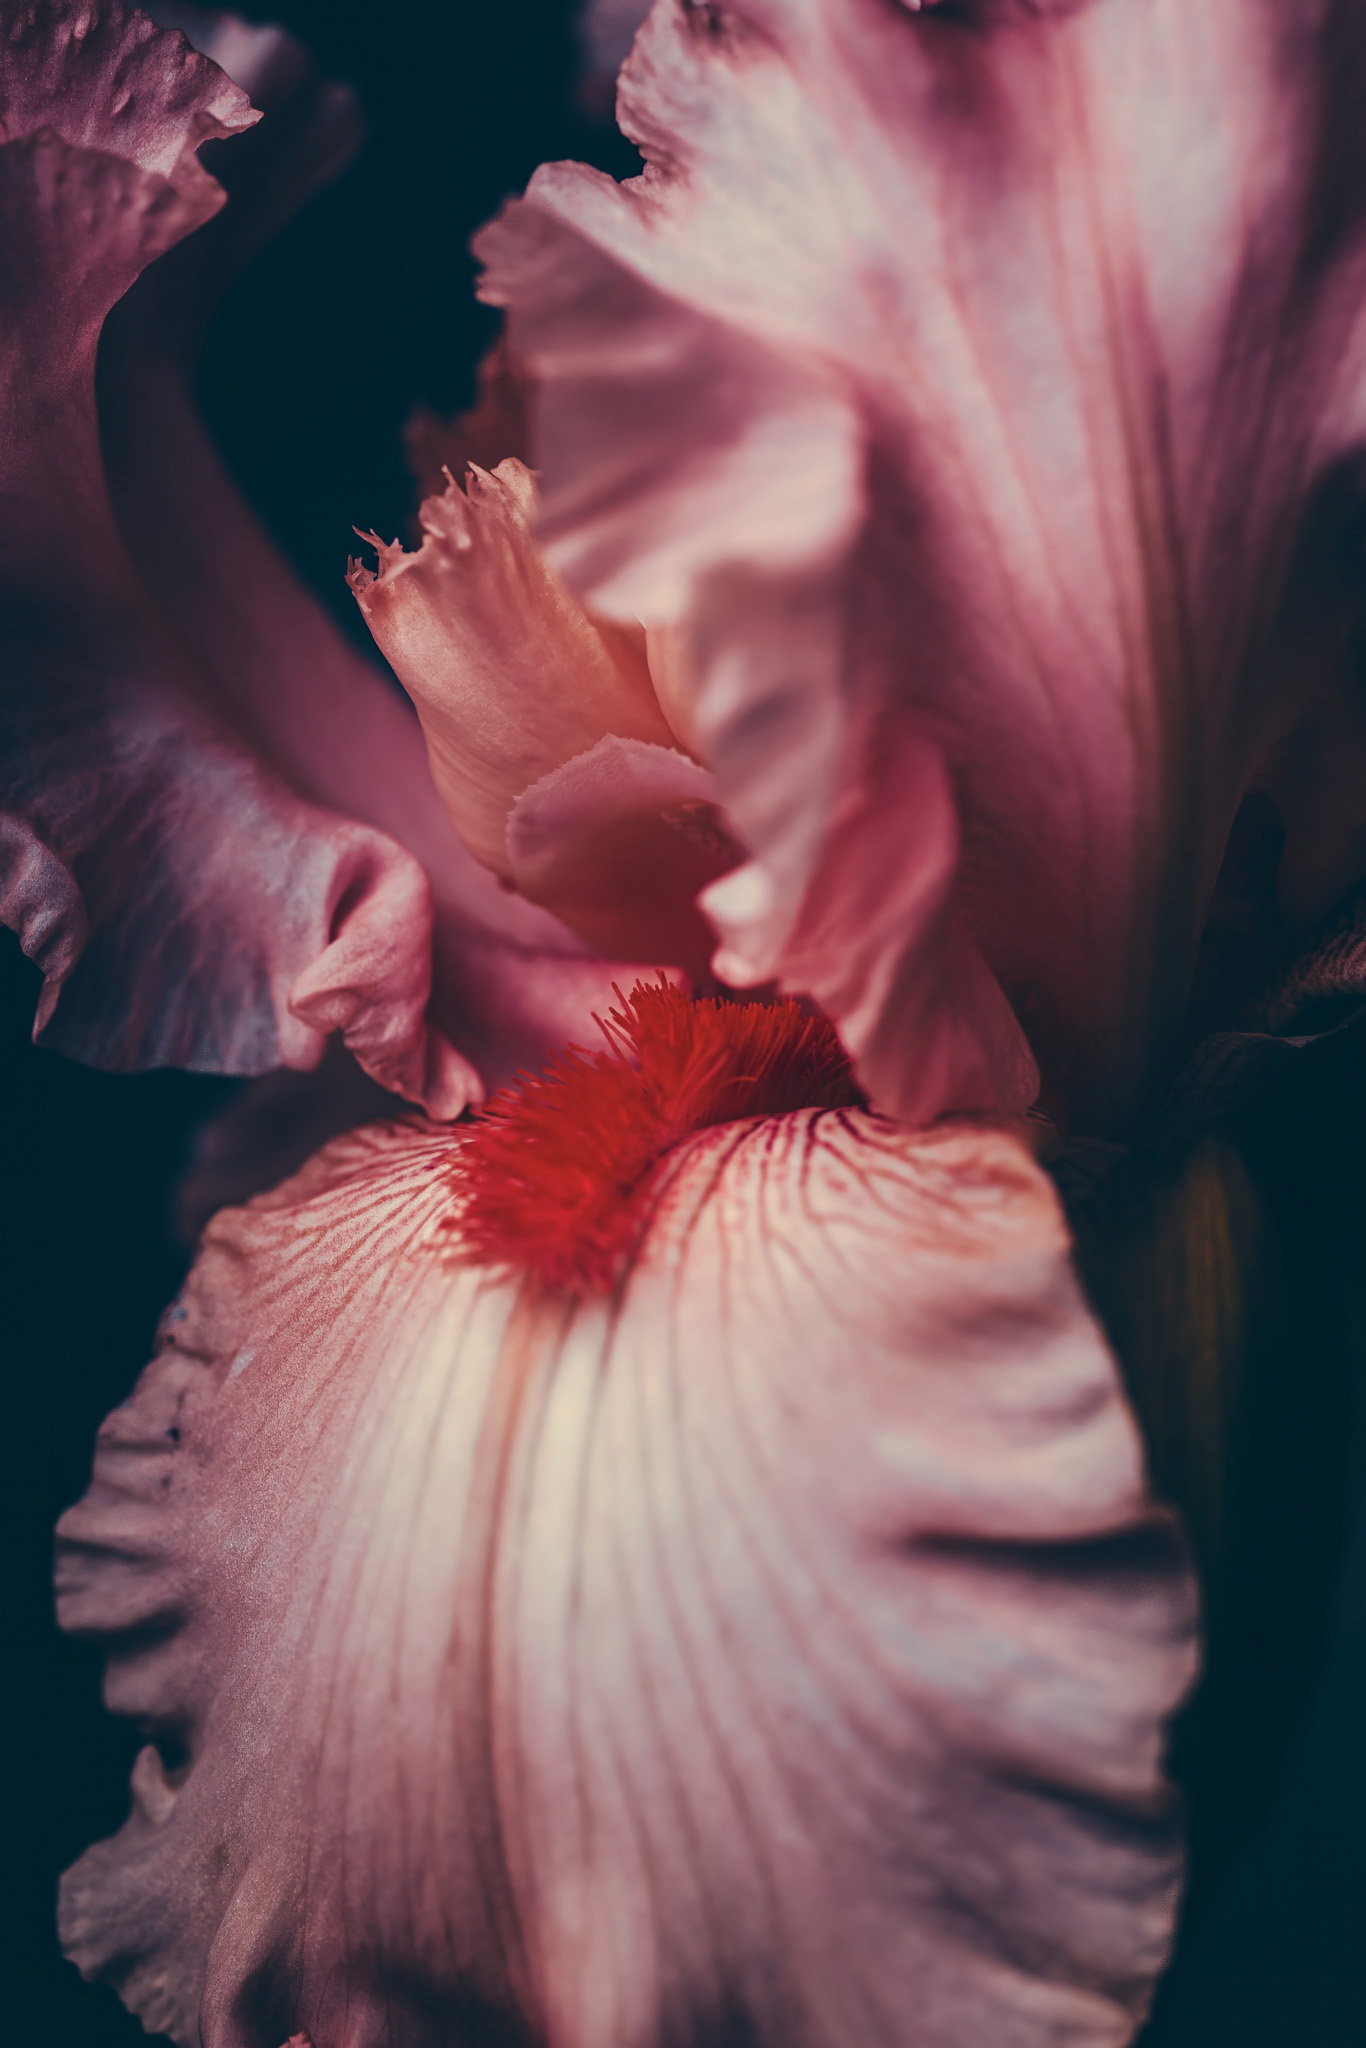
105mm F2.8 DG DN Macro | Art – This lens is pure fun. I’ve used it in my own garden, for studio macro play, and during quieter moments while traveling. The process is slow and thoughtful, and the images are so rich in detail. I love macro photography, and seeing all the little things brings me so much joy.
I used the BF for a semi-impromptu photo session for my niece’s five-month-old baby pictures. We picked a few simple outfits for a natural light portrait session so I could focus on her little perfect face and bright eyes. She’s not sitting up yet, but she’s certainly going to tell you all about things. The BF was quick to focus while she was wiggling and chatting to me, and I turned on the focus tracking feature so I could concentrate on making Florence smile… a difficult thing when all she wanted to do was watch the camera. I mean, it is gorgeous to look at, right? We didn’t overthink things, and I didn’t have to overthink my gear. The 35mm F2 lens was great for letting me stay close without getting in the way, and the BF is small and light enough to use one handed so I could tickle the baby at the same time.
I am not usually much of a street photographer, but the BF is the perfect camera to take into the crowded market. It’s unobtrusive and light enough to carry all day. The energy, color, and movement of everyday tourist life are captivating. The 35mm lens focuses close enough to capture market details, and it’s wide enough to convey the feel of the whole scene. Every person I spoke to noticed the BF and asked about it, but it wasn’t really noticed otherwise while I was walking around. I had it on my Spider Holster at my hip, and it was small enough to maneuver through the busy crowd without hitting anyone with it.
Wow, if you could create a tougher challenge for a camera besides being in the water, I’d like to see it. Lighting issues were the name of the game this afternoon. The colors of the aquarium—the blues and yellows—are already difficult, but then add things like reflections, subject motion, and dark corners, and it becomes quite a challenge for any camera. The BF handled it all with grace. I loved having this camera with me; it made me feel present, and the slower pace allowed me to notice more. I think my favorite photos of the day were the jellyfish.
The Philadelphia Flower Show is another set of fun lighting challenges. It’s busy, bold and colorful. So many flowers and so many people and so much texture. I used the 50mm F2 to help simplify cluttered scenes. The BF handled the lighting shifts well and I never felt like I had to babysit the camera, so I got to really enjoy the whole show. I found that controlling the aperture on the lens dial and setting the camera’s ISO to auto while using the exposure compensation on the back dial for changing lighting was the quick way to get the photos I wanted without concentrating too much on my gear.
Unlike the Flower Show, I can control the lighting in my own home studio. It’s a slower setup, making it very zen to just sit there and tilt the flower or adjust the light just so. Tiny adjustments lead to great effects, little by little. It’s a calming practice. The BF makes this enjoyable, simple and relaxing, just like the studio flowers. I chose both the 50mm F2 and the 105mm F2.8 Macro for these shots.
My home and local gardens are really where the camera disappears and lets me create. I love macro at all times, and to have this camera just adds to the calming enjoyment. The spot focus option and tracking are perfect for getting the composition I want while retaining focus while I’m recomposing, or I can just use the touchscreen to change my focal point. The 105mm F2.8 Macro lens on this camera feels light enough to use one-handed occasionally while being nicely balanced. Plus it’s small enough to get into the shrubbery without really scaring any wildlife I might be photographing. I don’t know why, but doing macro with this camera just makes everything feel so much more artistic somehow. The color is absolutely perfect for this.
I was talking to Aaron, our senior tech rep at Sigma America, and he said something that really stuck with me. He was talking about the BF and how it’s so accessible. He said something that we’ve all heard: “the best camera is the one you have with you.” But then he expanded and said that the BF is the perfect everyday camera because it is so easy to take with him. He takes more pictures and has more photos he loves because he has a good camera with him when he wants to take those photos. It’s inspiring and I really felt that way too. I find myself taking pictures of things I never would on my phone… because the BF is there and I know the result will be so much prettier.
I am really happy with this camera, and I want to take pictures of everything while I have it. Perfection isn’t my goal; instead, I look for the fun and joy that comes from taking photos, and this camera really brings that! I think nothing is too small to photograph; every little detail can share a story worth telling. This camera isn’t trying to compete with professional studio cameras, nor does it need to. Its main appeal is being stylish and easy to carry — perfect for those who want to enjoy the fun of photography again. I truly believe that everyday creators and artists will love this unique camera, as it helps them show their creativity without the stress of being perfect. It’s a gateway to enjoying photography again.
I didn’t expect to love the Sigma BF this much. This camera made me slow down in the best way. It keeps reminding me how fun photography can be when it’s just for you. It’s going to keep staying with me because it just makes me want to take and keep those images.
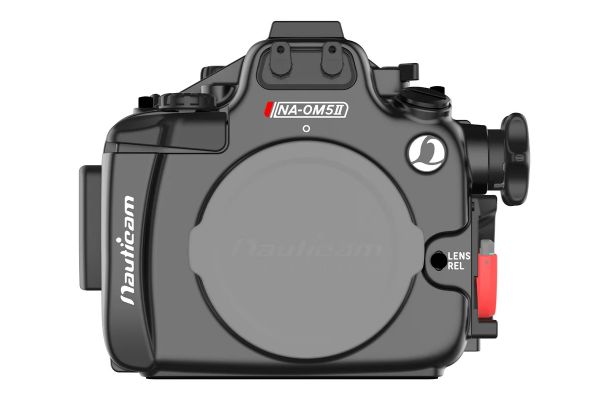
Nauticam has unveiled their NA-OM5II housing for the new OM System OM-5 Mark II, the second iteration of the Japanese company’s entry-level mirrorless interchangeable lens Micro Four Thirds camera. The OM-5 Mark II features a 20-megapixel sensor, TruePic IX image processing engine, and five-axis image stabilization. The camera shoots 10fps continuously with its mechanical shutter and can record 4K/30p and 1080/120p video using the full sensor width.
The NA-OM5II housing features Nauticam’s signature ergonomic design, with controls for the front and rear dials, REC, AF-ON, Fn1 and Fn2, and the Mark II’s new “CP” custom button. Naturally, there’s full compatibility with Nauticam’s extensive range of water-contact optics, such as the WWL-C, SMC-3, CMC-2, and MFO-3. Optical ports are provided for triggering strobes (using the company’s Mini Flash Trigger for Olympus), while a port is available for adding a Nikonos-style bulkhead for electrical triggering. An M16 port allows the installation of an HDMI bulkhead for use with monitor/recorders such as the Atomos Ninja V or monitors such as the Nauticam T7 HD UltraBright.
The NA-OM5II is priced at $2,000 and is available now from retailers such as Backscatter.
When purchasing underwater photography equipment like the products mentioned in this article, please support DPG by supporting our retail partner—Backscatter.com.
PRODUCT INFORMATION
INTRODUCING NA-OM5II
OM System OM-5 Mark II Camera
The OM-5 Mark II, renowned for its compact and lightweight design, is an ideal choice for travel photographers. It boasts a 20.4MP Live MOS sensor, a TruePic IX image processor, and robust 5-axis in-body image stabilization and exceptional weather sealing. Convenient charging is now possible with the introduction of a USB-C port. The OM-5 Mark II also incorporates the user-friendly menu system initially introduced on the OM-1 Mark II. For video recording, two new color profiles, OM Cinema 1 and OM Cinema 2, are available, allowing videographers to create cinematic video without specialized processing or grading. DCI 4K is supported at 24p, while UHD 4K is supported at frame rates up to 30p.
Key Features
20.4MP Live MOS Micro Four Thirds Sensor
TruePic IX Image Processor
DCI 4K/24p & UHD 4K/30p Video Recording
5-Axis Sensor-Shift Image Stabilization
IP53-Rated, Weather-Sealed Construction
121-Point Hybrid Contrast + Phase AF
SD Memory Card Slot
2.36m-Dot Eye-Level OLED EVF
3.0″ 1.04m-Dot Vari-Angle Touchscreen
Wi-Fi and Bluetooth
NA-OM5II HOUSING
The NA-OM5II adheres to Nauticam’s Mission Control philosophy, ensuring accessible and intuitive control for critical functions. These include Front & Rear dials, REC, AF-ON, CP, Fn1 and Fn2 Lever. Nauticam’s Port locking system facilitates rapid and seamless lens changes. Battery and memory card replacements are equally effortless thanks to the rotary-style housing lock and lens release button. An optional M14 vacuum valve unlocks the full capabilities of the pre-installed Vacuum Check and Leak Detection System. The NA-OM5II LCD window, available as an optional feature, enables the utilization of Nauticam Full Frame viewfinders for enhanced viewing. For lighting and accessories, the housing incorporates an M10 treaded mounting point, a cold shoe mount, and optional handles and tray equipped with strobe mounting balls.
Flash Triggering
For high-speed manual flash triggering, the optional Mini Flash Trigger for Olympus (26306) can be used. The trigger is powered by onboard coin-style lithium batteries, with thousands of flashes available from a set. Electrical triggering of legacy wired strobe systems is possible via an electrical Nikonos style bulkhead (optional).
Premium Professional Optics
A camera system is only as good as the optics placed in front of it. Nauticam’s extensive line of dome and flat ports support a wide variety of Micro Four Thirds lenses. For even higher image quality and versatility, the NA-OM5II can be used in conjunction with Nauticam’s lineup of Water Contact Optics. For example, with the Olympus 14-42mm f/3.5-5.6 EZ Lens, the Nauticam WWL-1 provides a full zoom through ultra wide-angle 130º field of view.
Integrated Vacuum Check and Leak Detection System
The Nauticam vacuum check and leak detection system is standard equipment on the NA-OM5II. When combined with the optional M14 Vacuum Valve II (PN 25624), this monitoring system continuously provides updates on the water tightness and safety of the housing. A simple coded LED lighting system informs the user if the vacuum is functioning properly or if the housing is losing vacuum. Leak detection is integrated into the same circuit, so if water enters the housing, an audible and visual indication will be given.
WHAT’S IN THE BOX
NA-OM5II Housing
Housing Cap
2x Optical bulkhead caps
Panasonic CR-2032 Battery (pre-installed for moisture alarm)
90139 Spare main O-ring, O-ring remover and lubricant
Set of Allen Keys
Padded housing bag and shoulder strap
RECOMMENDED ACCESSORIES
Housing Tray and Hand Strap
71206 Easitray II with left handle (with 2pcs 1/4” screws)
71207 Flexitray II with left handle (with 2pcs 1/4” screws)
71208 Adjustable right handle II (for Easitray II & Flexitray II)
71209 Flexitray plate II W with left handle (with 2 tripod holes)
71311 Strobe mounting ball for Easitray& Flexitray
(xxxxx Handle bracket for NA-OM5II may be required)
36316 Hand strap for Mirrorless IL camera & compact camera housing (Standard)
36323 Long hand strap for Mirrorless IL camera & compact camera housing
Shutter Extension
25200 Compact/MIL Housing Shutter Release Extension (for use with 71207/71209 and 71208)
Lightroom is a versatile program that has evolved over the years and comes with amazing tools that makes it a one stop platform for most beginner and experienced photographers. Most professional photographers rely on Lightroom because of the efficiency in batch processing files, making it a great hit among many wedding and event photographers including others.
Besides, various features that help photographers organise their photos, sharing them as catalogs, using the creative cloud feature, etc., has made Lightroom a go to program for many photographers. If you are looking to improve your Lightroom skills or wish to learn more about the features that you do not use, here are a number of tutorials that will help you to understand Lightroom better.
Photography is about spending time capturing images with your camera and spending little amount of time post-processing the images. There are times when photographers may hate editing or maybe need a quick boost to their images without spending much time. Lightroom comes with tools that can make editing a breeze. Read to find more!
It doesn’t matter what program you use for editing, but it is important to have a specific workflow that can help you work faster and more efficiently to produce great results. Light room comes with rating systems, labels, tags, import settings, etc., that can make your work easier. This article shows how you can streamline your Lightroom workflow and save time.
Photographers have a huge collection of photos from each session most of the time and sometimes photos are also scattered across several hard drives. It would be great to organise the photos and find the ones we’re looking for easily, without having too much trouble. Here are some ways to organise your images using lightroom.
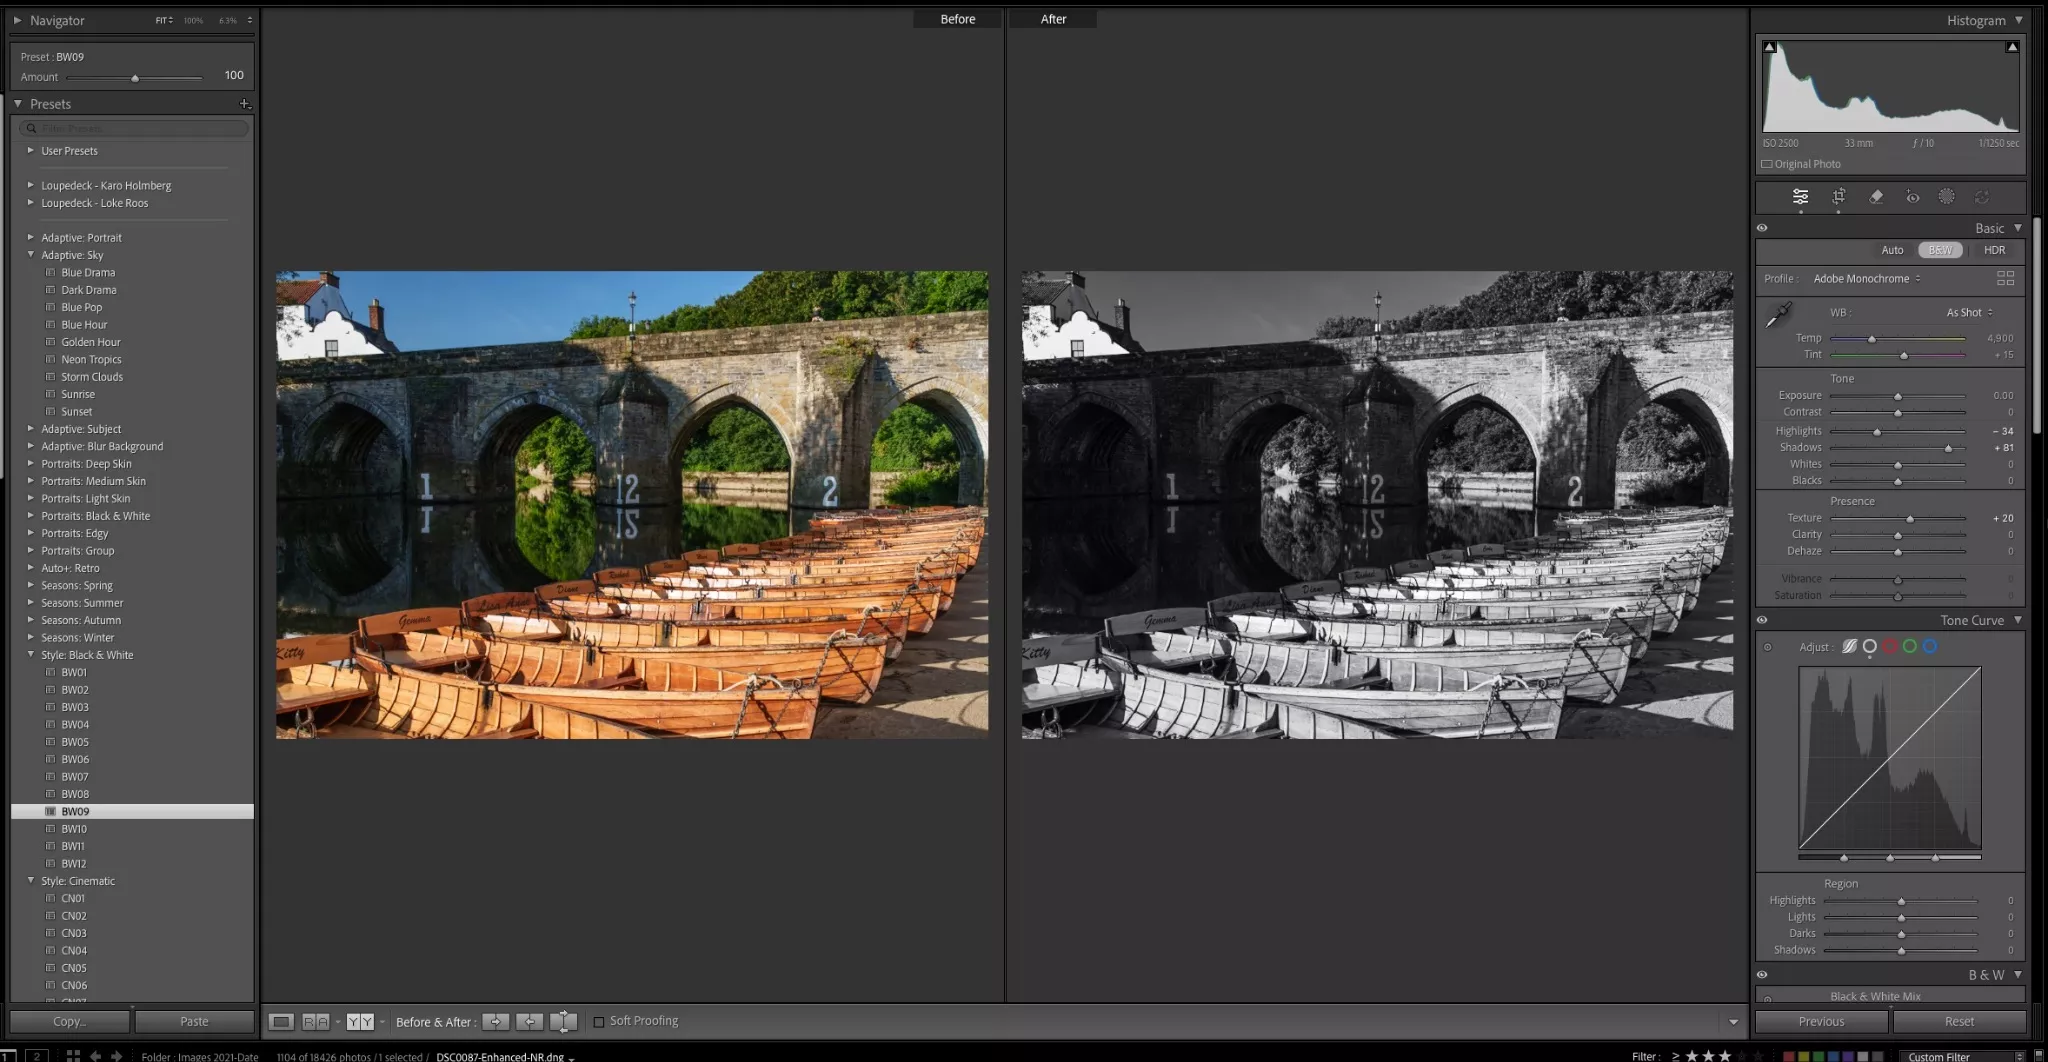
Lightroom comes with a lot of powerful tools, most of them packed in the “Develop” module and most of the time if the image is captured well in camera, there are only a few subtle edits one needs to do, to make an image presentable. Some tools like the clarity, texture, dehaze and sharpening, if not used well, can make the image look overprocessed or awkward. This article talks about five subtle tools you should learn to use in Lightroom.
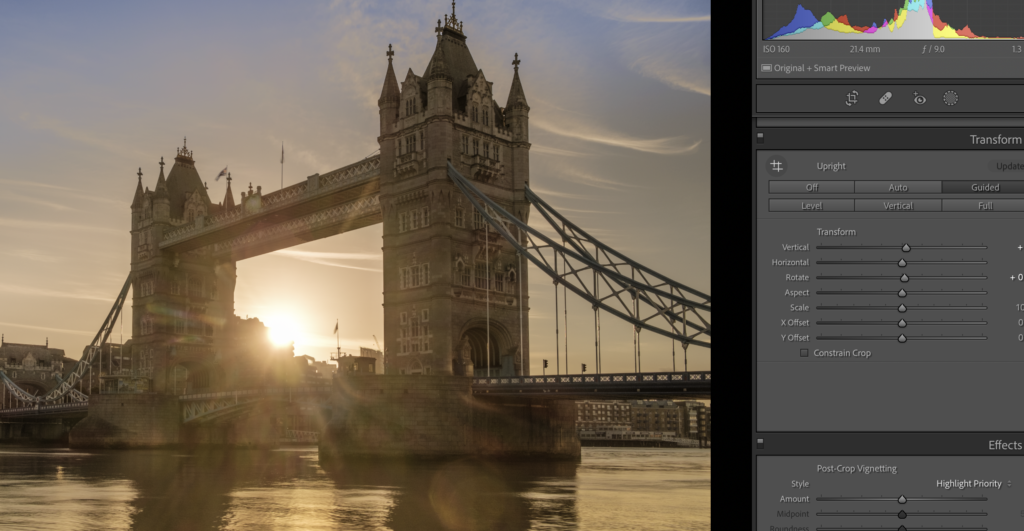
Using the vertical tool manually in Lightroom. By Jason Row Photography.
If you are someone who has interests in architectural photography, chances are that when post-processing, you will need to correct the verticals and remove lens distortions. This may also apply sometimes to other genre in photography. This article talks about the transform and lens correction tools in Lightroom and why you need to use them.
Lightroom provides a lot of tools to make a photographer’s workflow easier and faster. There are a lot of little things that photographers need to know in order to use this program efficiently. Who doesn’t love hacks in order to get editing jobs done easily? This article provides 10 hacks for Lightroom classic.
The recent updates over the past year use AI technology to reduce the amount of time required to work on certain tasks within Lightroom. Some of these tools were not available in older versions of Lightroom and they can come in handy if required. Here are some quick but useful Lightroom tools that you should know.
Lightroom as simple as it may seem, has some really powerful masking tools that make selective editing quite easier for photographers. Depending on what you need to mask, there are various masking options – using just a brush or select objects, subjects, sky, background, etc. Here is a quick guide on how to use the masking tool in Lightroom for the best results.
Besides the basic colour corrections and other important tools that Lightroom provides, there is a separate section to colour grade photos if you are someone who wishes to bring in a cinematic or another specific look to your images. Lightroom has three colour wheels, one each to control the colours in the shadows, mid-tones and highlights. Check out this article to find out how to use these wheels.
If you want to work faster in Lightroom, you need to get into your Lightroom settings and makes some changes to improve its performance. Many beginners may not be aware of these settings. Most of the issues arise when working in the develop module or even the simple process of scrolling across to the other images may be slower. Here are some ways to get better performance in Lightroom Classic.
Some users may not be aware of the fact that Lightroom can also be used to edit videos. Although it does not have any advanced tools for video editing, if you are someone who occasionally captures a couple of videos and wishes to make some basic edits, then Lightroom can be useful if you do not want to invest in other expensive video editing programs. Here are the pros and cons along with how to edit a video using Lightroom.
Lastly, if you are someone who likes to make edits on the go on your mobile device, Lightroom has a mobile app that can also sync your edits via creative cloud so you can continue from where you left, when working on this app from your computer. Here is a quick guide to using the Lightroom mobile app.
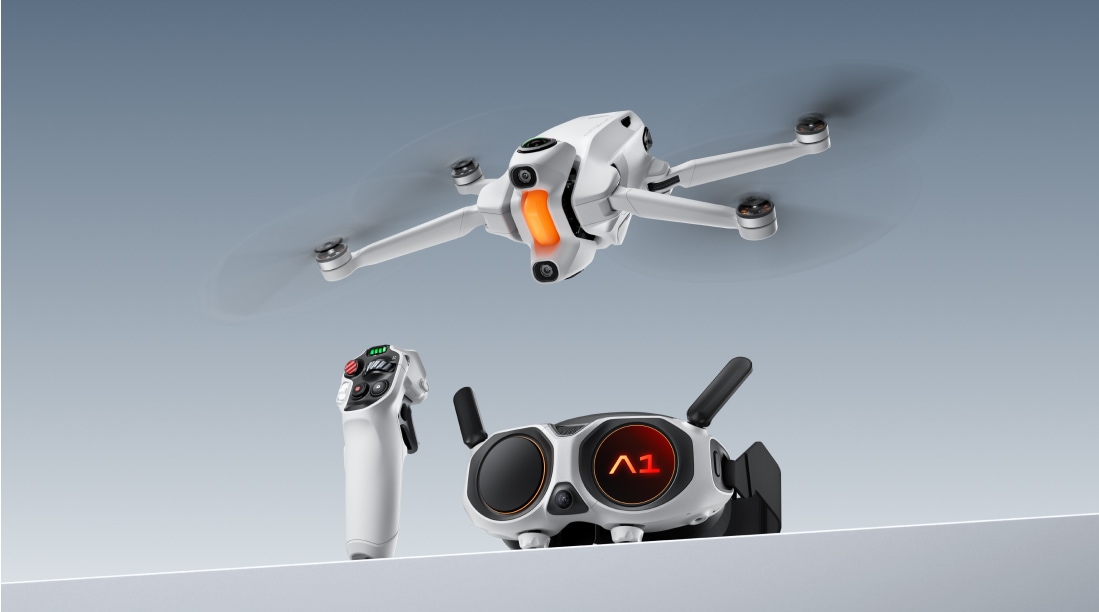
Last month, we wrote about Antigravity, the first 360 drone incubated by Insta360 and a group of third parties. They have now unveiled their first product, Antigravity A1, which will be the first drone in the world that boasts an 8K 360 degrees capture, combined with an immersive flying experience.
Image via Antigravity
Antigravity A1 comes with a dual lens camera so the footage can be captured in 360 degrees. One of the lenses is mounted on top and another at the bottom of the drone and this helps with capturing the entire 360 degree view.
The vision goggles that comes with the drone gives the drone pilot an immersive experience. It comes with FreeMotion technology and head tracking that allows the pilot to explore the surroundings from aerial view even if the drone is flying in a different direction. The rendering process uses advanced image stitching technology to make the drone invisible when viewing using the goggles and in the final footage, making the scenes look realistic.
The dual camera allows capture of everything in view allowing the user the flexibility to reframe the footage when post-processing. This also enables new editing possibilities like tiny planet, dynamic camera moves, horizontal flips, etc.
The grip controller allows drone pilots to use hand movements to control the drone and this paired with the goggles helps the user explore the surrounding in 360 degrees real-time. The drone also has safety features like return-to-home and a payload detection system to prevent misuse and unauthorised modifications.
Antigravity weighs only 249g making it light, compact and meeting the drone regulatory requirements in most countries. This drone is perfect for everyone right from families to creators.
The drone is scheduled to launch globally in January, 2026. Antigravity is also accepting applications for its Antigravity co-creation project where selected participants will be invited to test, explore and share their ideas.
You can check more details about this product here and here. We have more news for you to read if you are interested at this link here.