Photoshop’s Magic Wand Tool: You’ve definitely heard of it and, depending on how much you use Photoshop in your day-to-day, you may have even used it.
Learn what the Magic Wand Tool is and how to select and mask in Photoshop with it. This Photoshop masking tutorial will turn you into a pro in no time.
The Photoshop Magic Wand Tool is a quick and easy way to select and mask certain portions of an image, giving you the ability to alter one part of your image while leaving other parts intact. One of the most common uses of this tool is to swap out or remove the background of a product photo, leaving the subject of the image in place.
Related: Clipping Path vs. Masking: What’s the Difference?
The Magic Wand Tool works by selecting an area of solid color within an image. Once your selection is made, the Magic Wand Tool gives you multiple options for refining that selection.
The Magic Wand Tool is a go-to tool when you want to display a product in various settings by showing it against different backgrounds, or when you want to remove a background altogether so your product stands on its own.
This is often the case for marketplaces like Amazon or eBay, which have product photo requirements of their own that outline the approved backgrounds your images can have.
Tutorial: Learn how to create a ghost mannequin in Photoshop
https://www.youtube.com/watch?v=e_y3vFhp_Bs
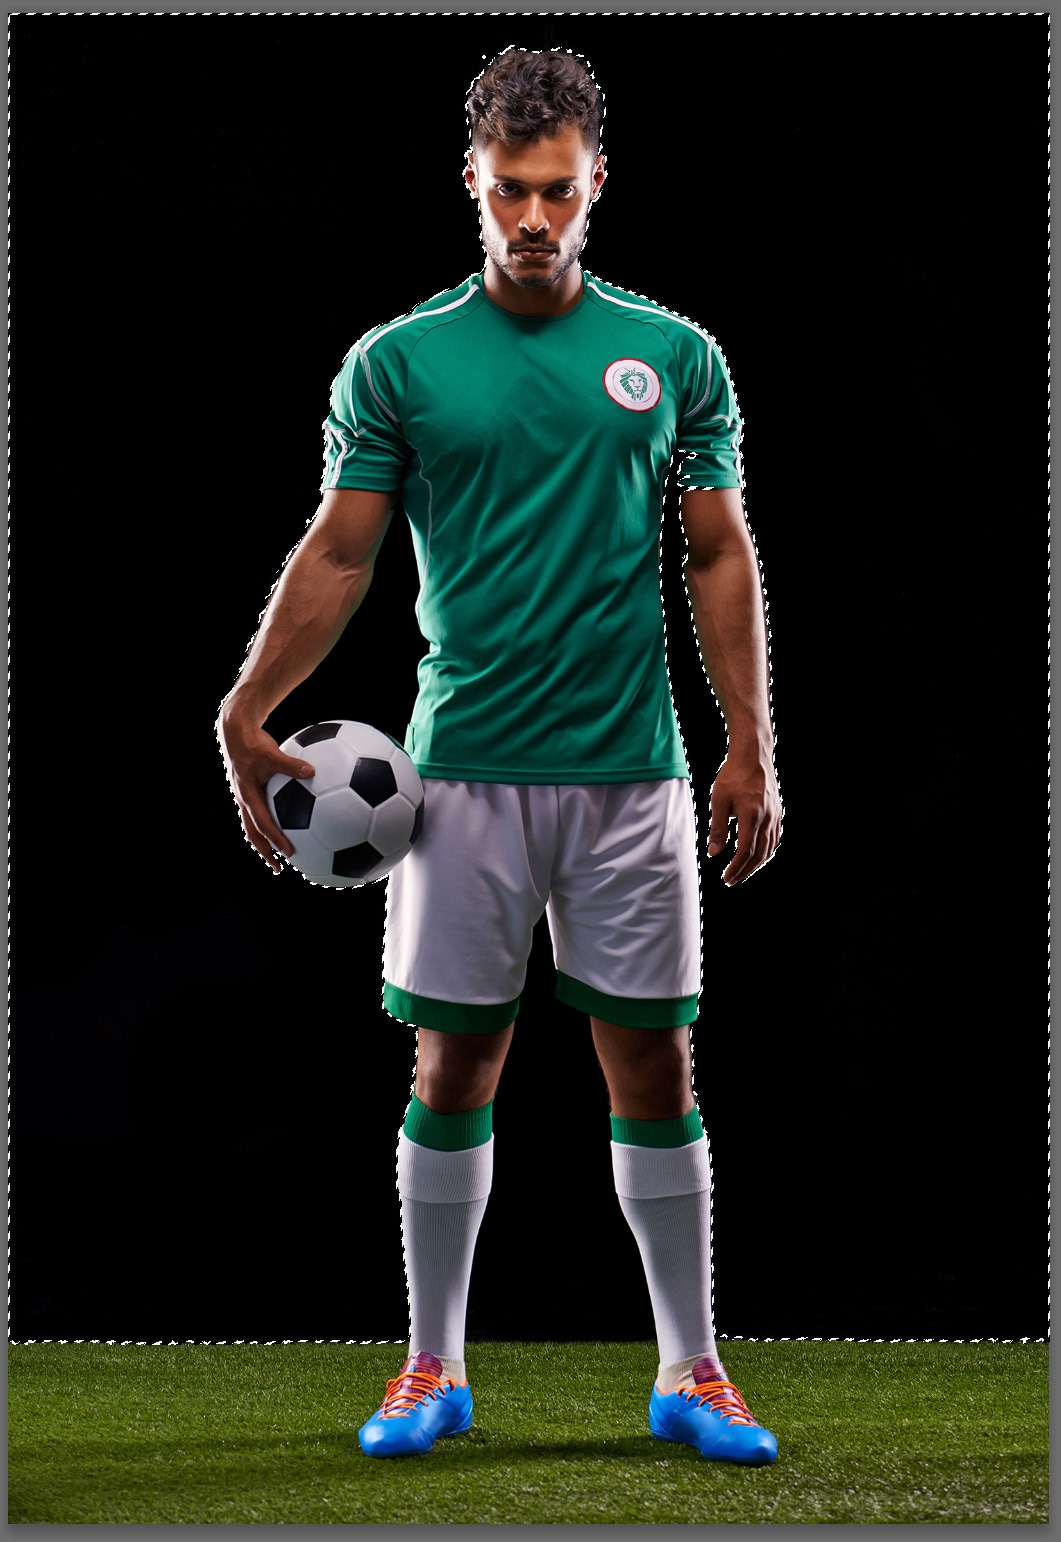
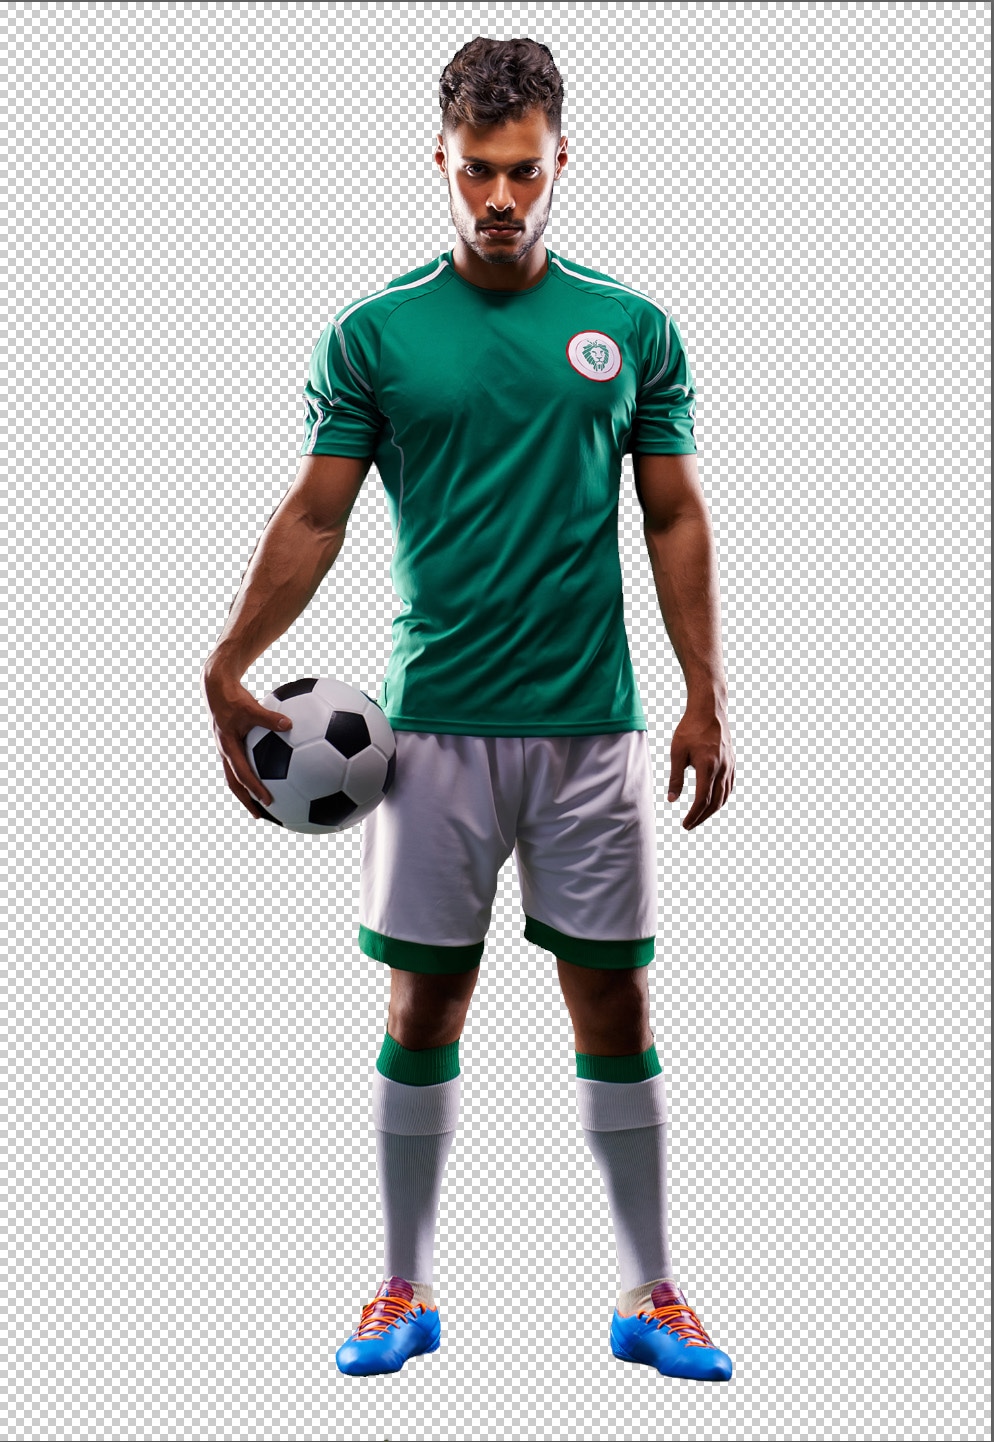
For the following tutorial, we’ll be working with this photo of a soccer player. You’ll learn how to remove the background from the player using the Magic Wand Tool, so that you can later put the player into different scenes. The Magic Wand Tool is a great option for removing backgrounds on photos with a mostly solid background.

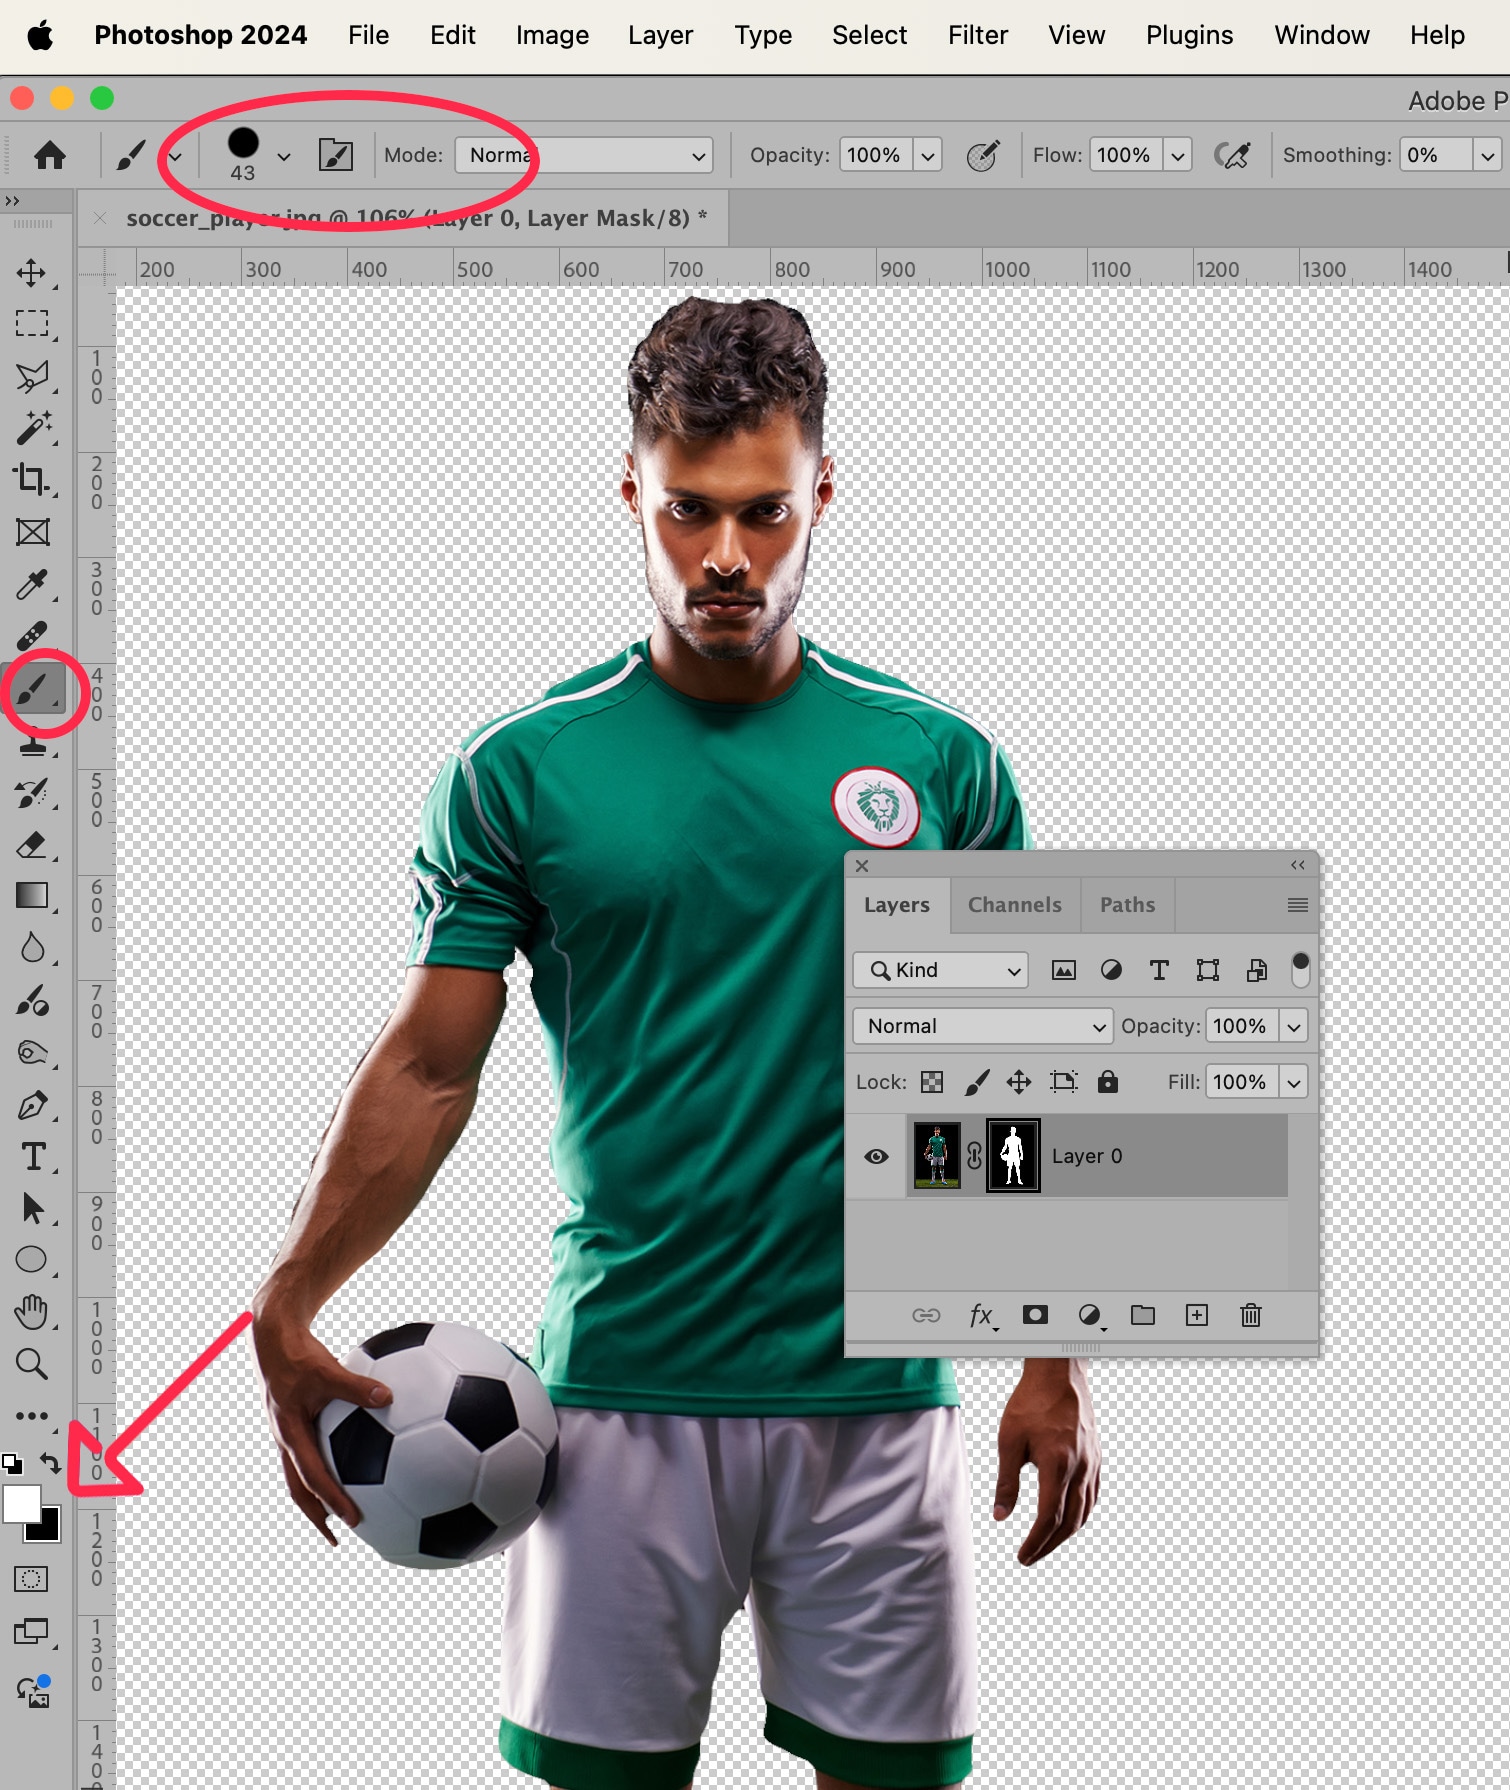
Before you can use the Magic Wand Tool, you’ll need to make sure your layers are set up correctly. Go to your Layers panel, located by default in the lower right-hand corner of Photoshop 2024’s application window. If you don’t see the Layers panel, you can bring it forward by choosing Window > Layers from the dropdown menu at the top of the application window.
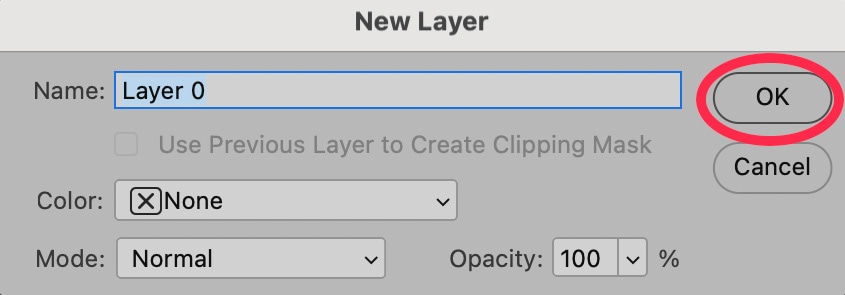
Within the Layers panel, double click on the Layer entitled Background.
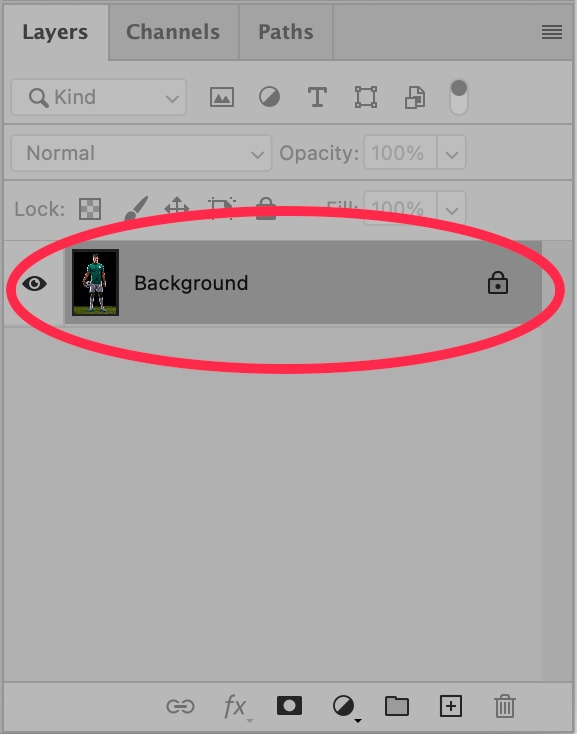
A pop-up window will appear, prompting you to rename the layer “Layer 0.” Click OK.
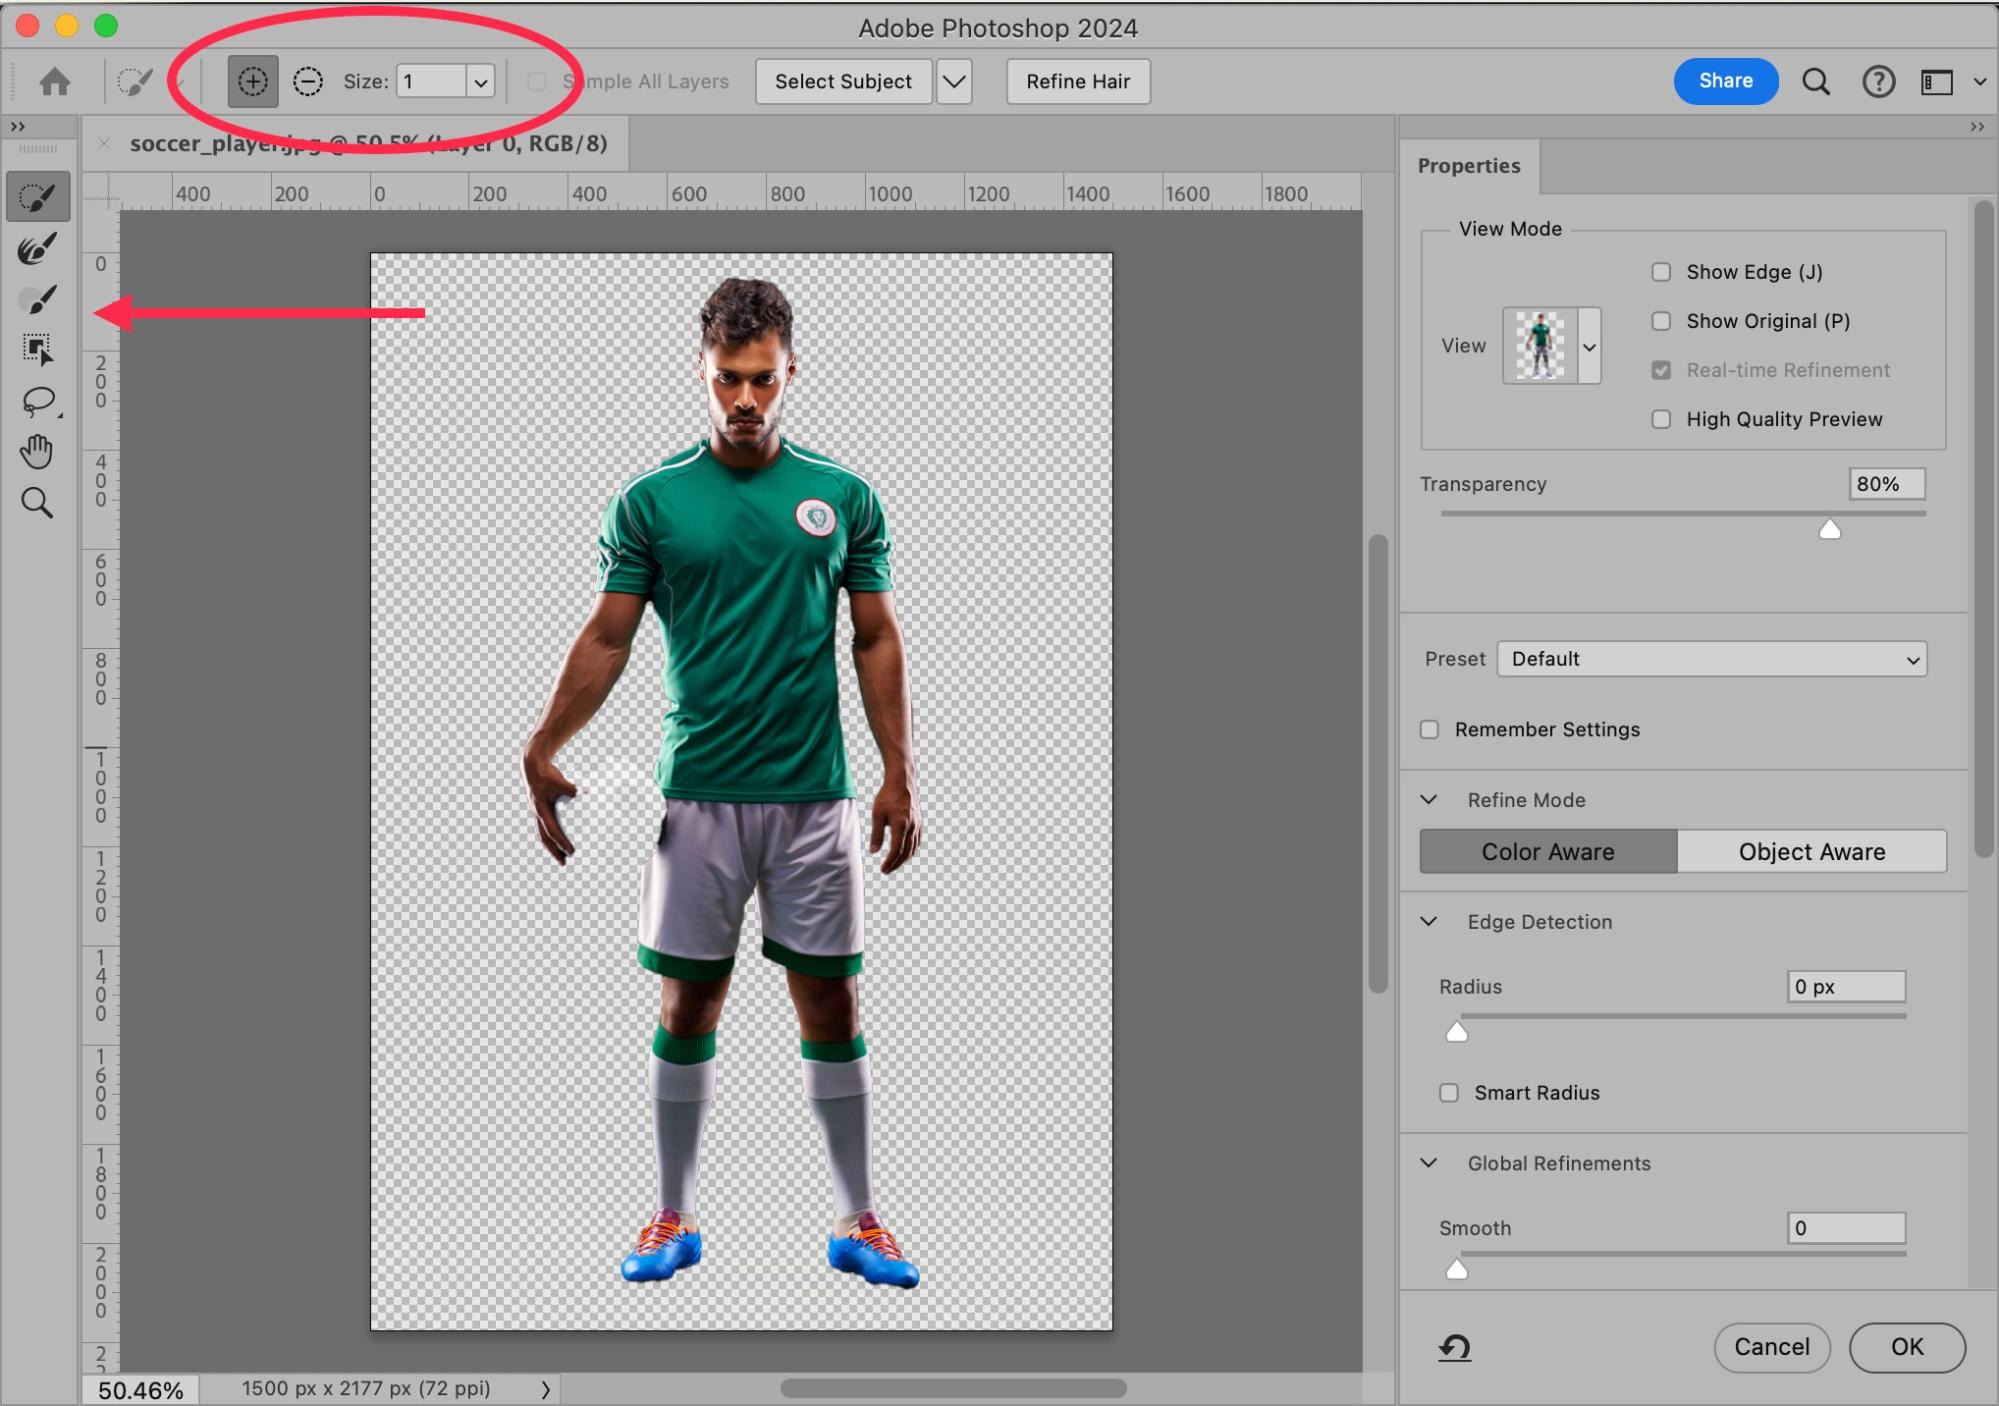
Within Adobe Photoshop 2024, choose the Magic Wand Tool from the Toolbar. By default, the Toolbar is placed to the left of the application window. The Magic Wand Tool may be hidden behind the Object Selection Tool or Quick Selection Tool.
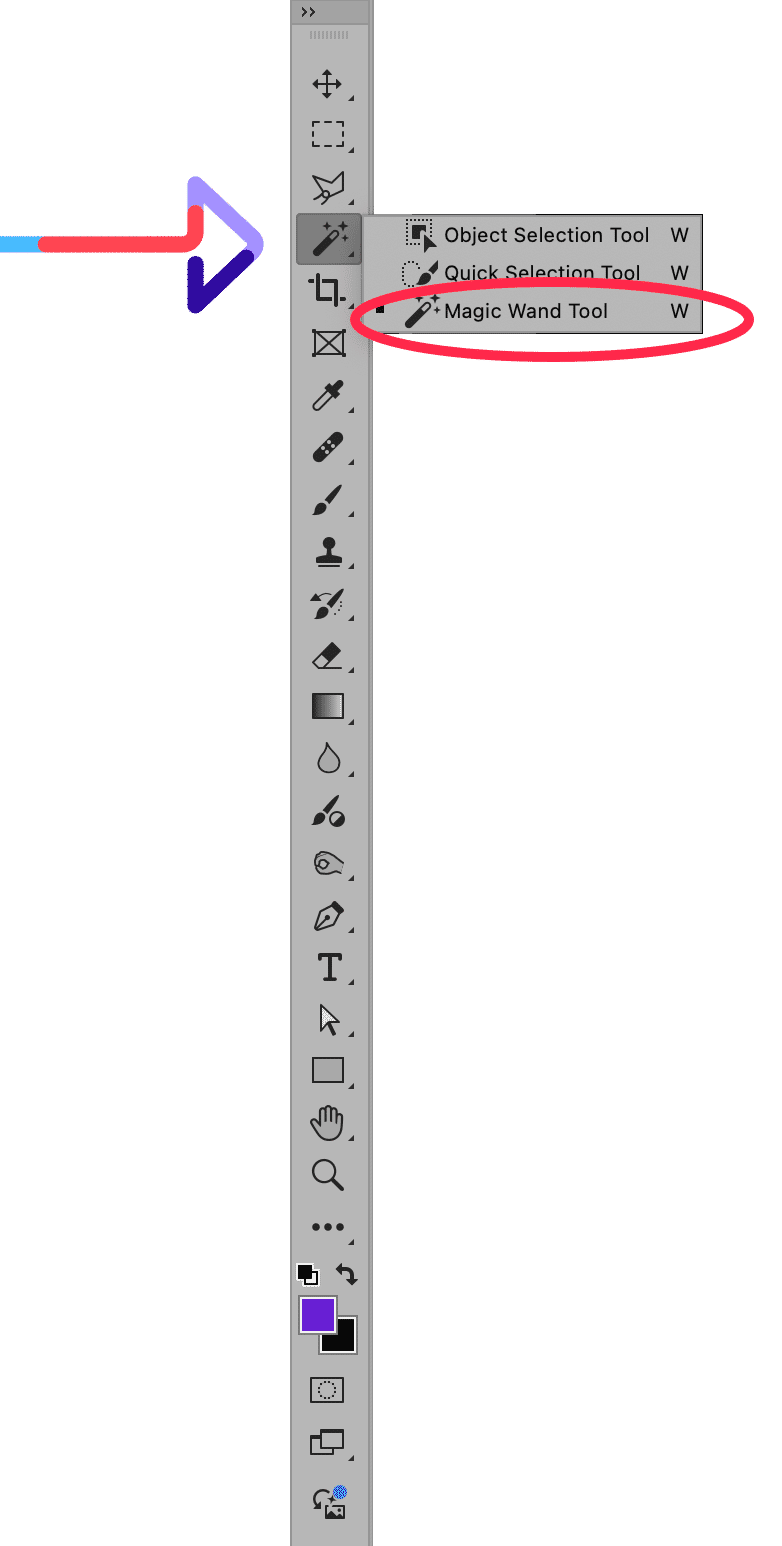
Note: To select any tool that is hidden “behind” another tool, choose the tool that is in front, and then hold the mouse button until other tools are visible. Then, select the visible tool you need.
Save time and outsource it: Our background removal services start at $0.49/image
There are several different ways to use the Magic Wand Tool to remove a background. We’ll start with the simplest method and work our way to more advanced methods as we refine our selection.
When you click on a portion of your image using the Magic Wand Tool, the tool selects the pixel you selected along with adjacent pixels of the same (or similar) colors.
Once you have the Magic Wand Tool selected, you’ll see several different options in the Options Bar at the top of the screen. You can adjust the Tolerance of the Magic Wand Tool here. The higher the Tolerance, the more similarly colored pixels will be selected alongside the pixel you select with the tool.
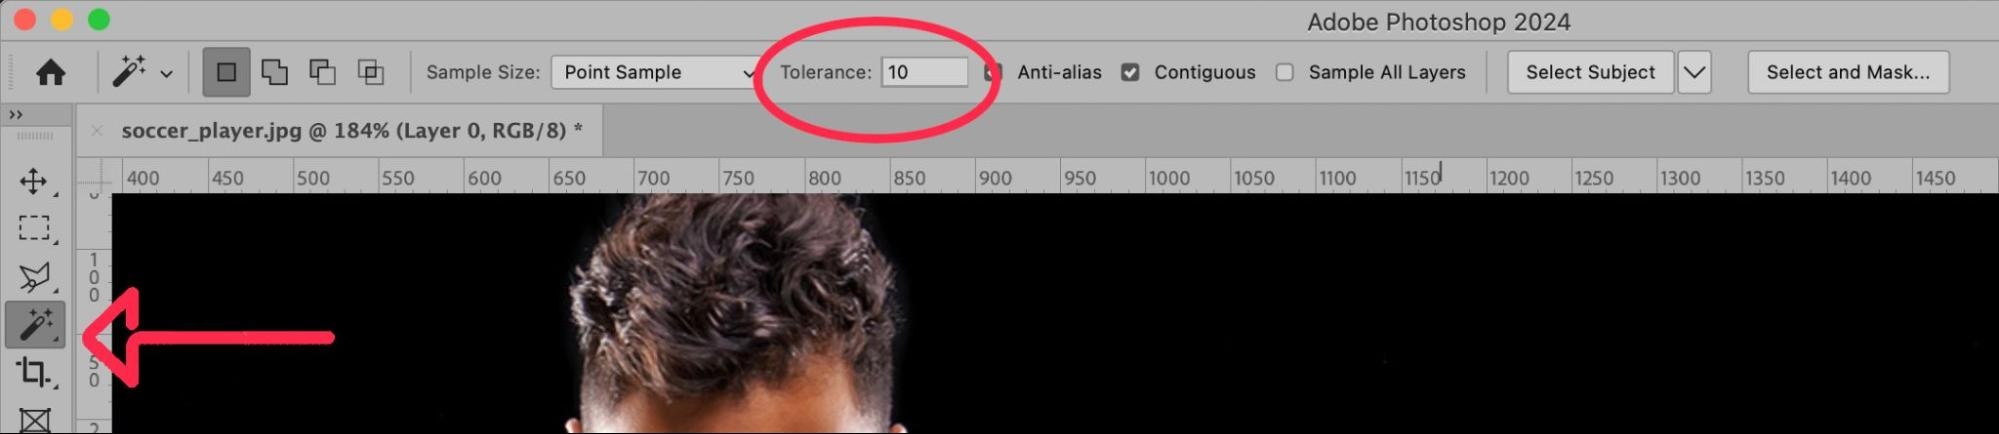
For this example, we will keep the Tolerance at 10.
Click somewhere within the background of the image. The Magic Wand Tool will create a selection of all contiguous portions of your image that are roughly the same color as the background portion you selected.
The Magic Wand Tool did a relatively decent job, but there are some portions of the background (such as between the player’s legs and under his right arm” that are not selected.
To select areas of the background that did not get selected, hold down the SHIFT key and click within those areas that need to be selected. Holding SHIFT allows you to add to the existing selection without deselecting anything.

Step 3: Select other portions of the background and foreground
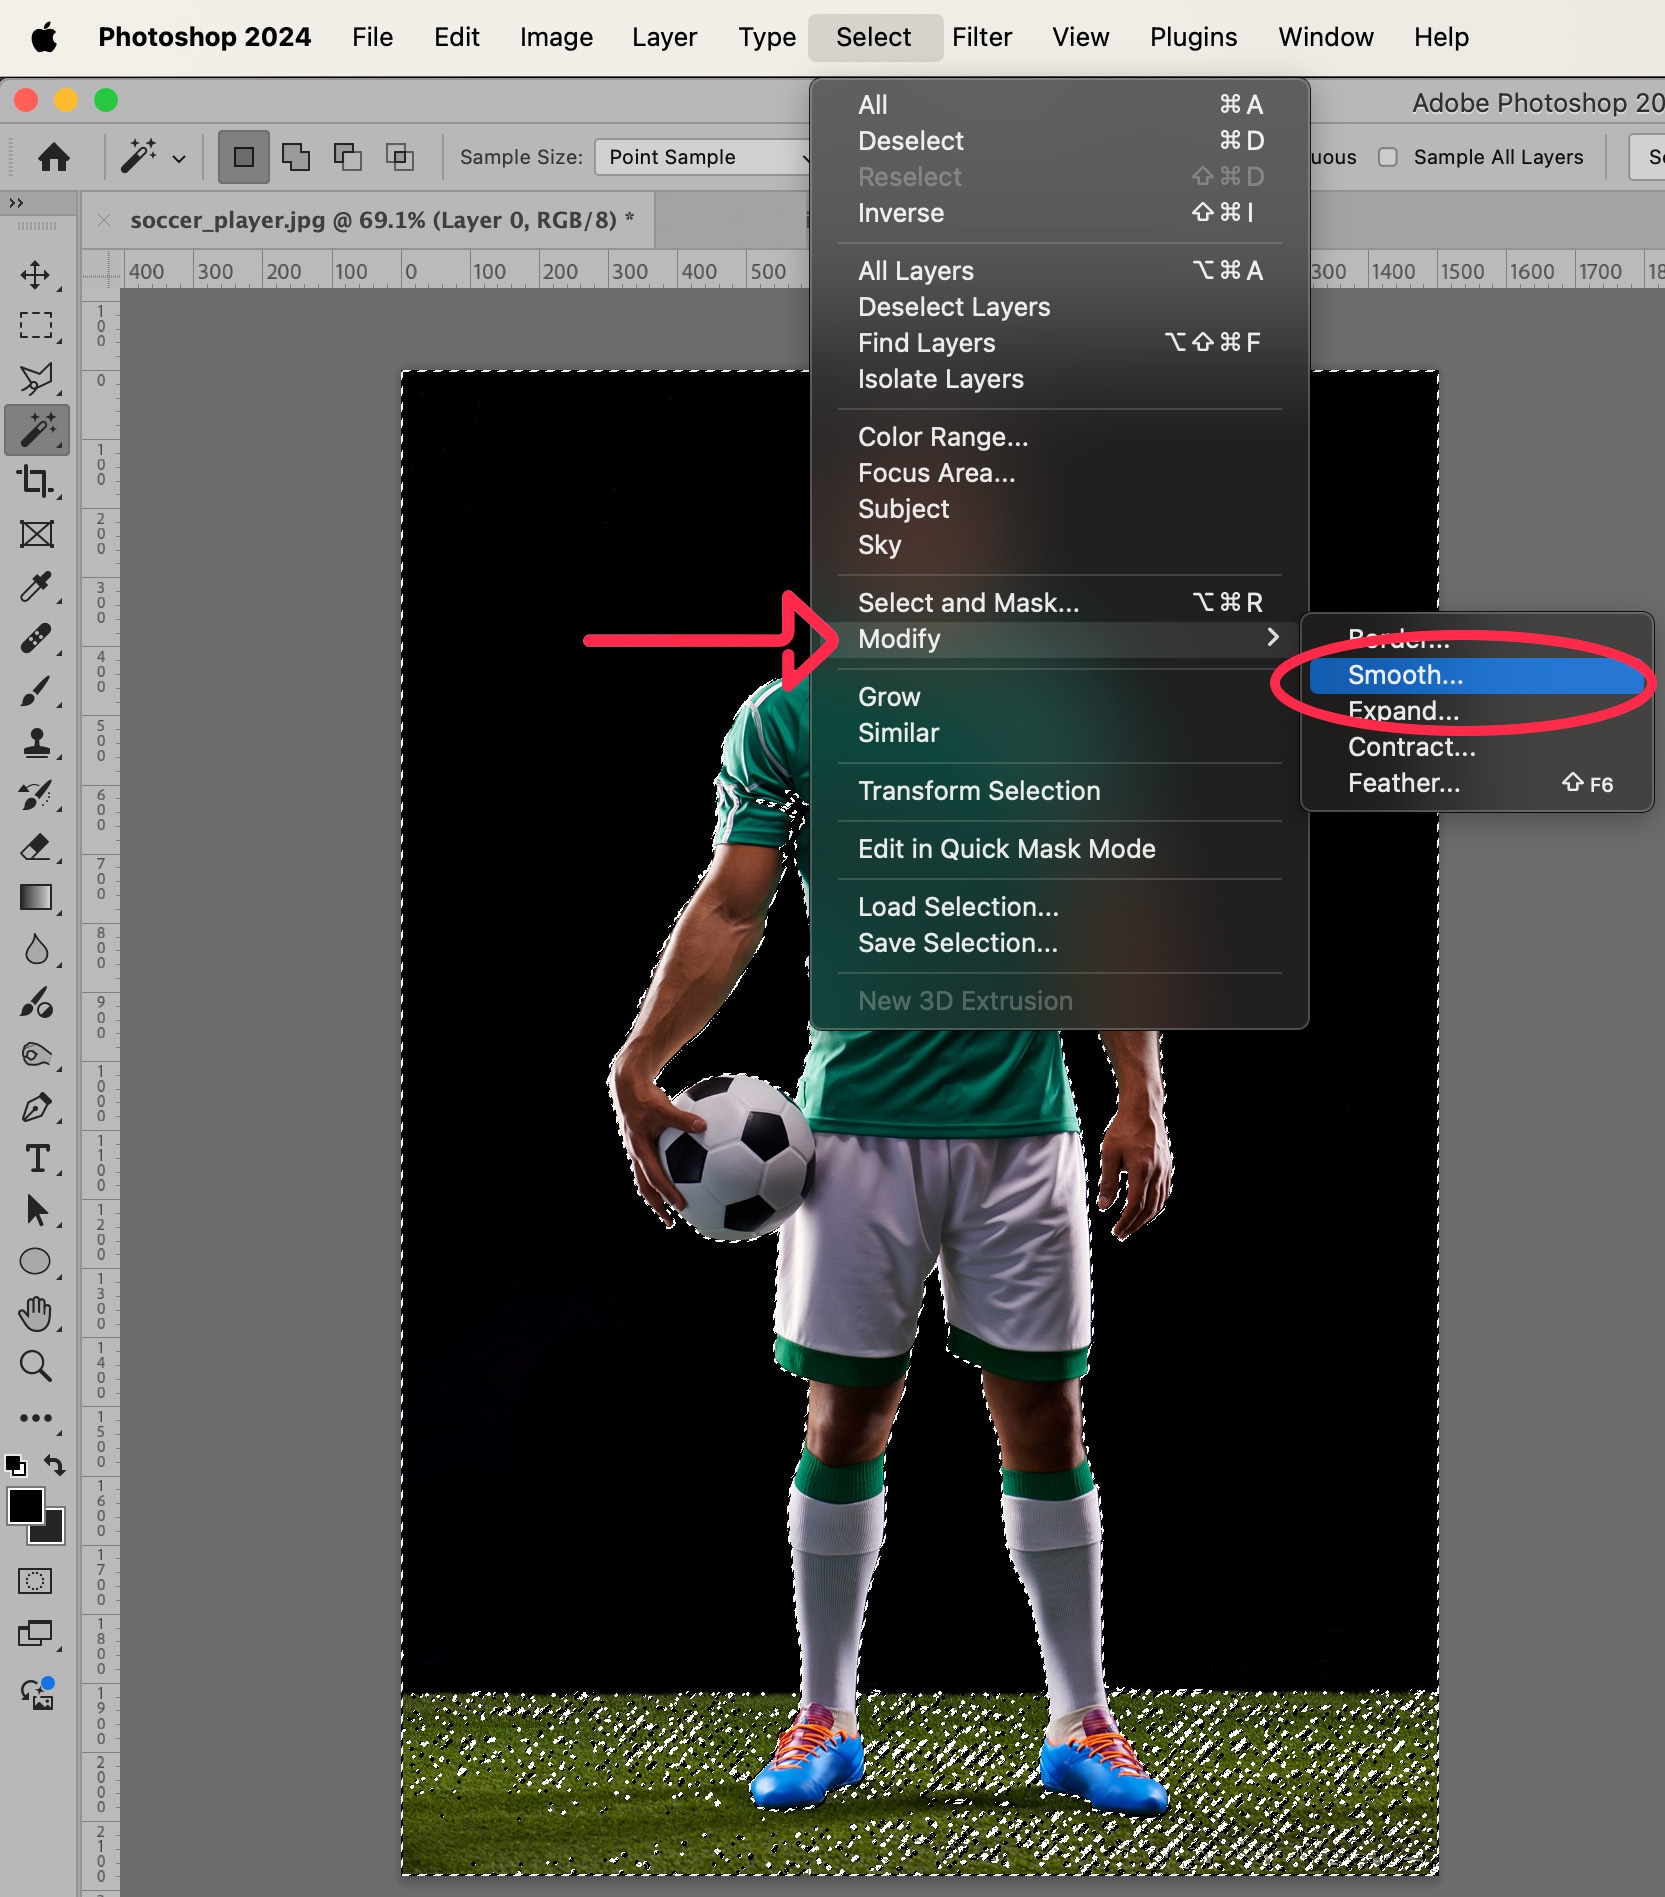
The ground in this photo is not a solid color like the background. It is, however, all varying shades of green. In order to select an area that is all about the same color but has a lot of detail, we need to adjust the Tolerance of the Magic Wand tool to a higher value. In this example, we’ve set the Tolerance to 50 and selected the grassy ground area of the photo.

The results are less than perfect, but if we were to make the Tolerance much higher, we might accidentally select portions of the player’s legs.
To smooth out the selection, choose Select > Modify > Smooth… from the dropdown menu at the top of the application window.
In the Dialog Box that appears, set the smooth value to something large enough to smooth out the edges of the selection but small enough to keep the integrity of the selection’s outline. For this example, we’ll set the value to 5.

Click OK.
The selection now looks almost close to perfect. Almost.

Step 4: Create a mask
Select the inverse of your current selection by choosing Select > Inverse from the dropdown menu or by typing SHIFT + CTRL + I (SHIFT + COMMAND + I on a Mac).
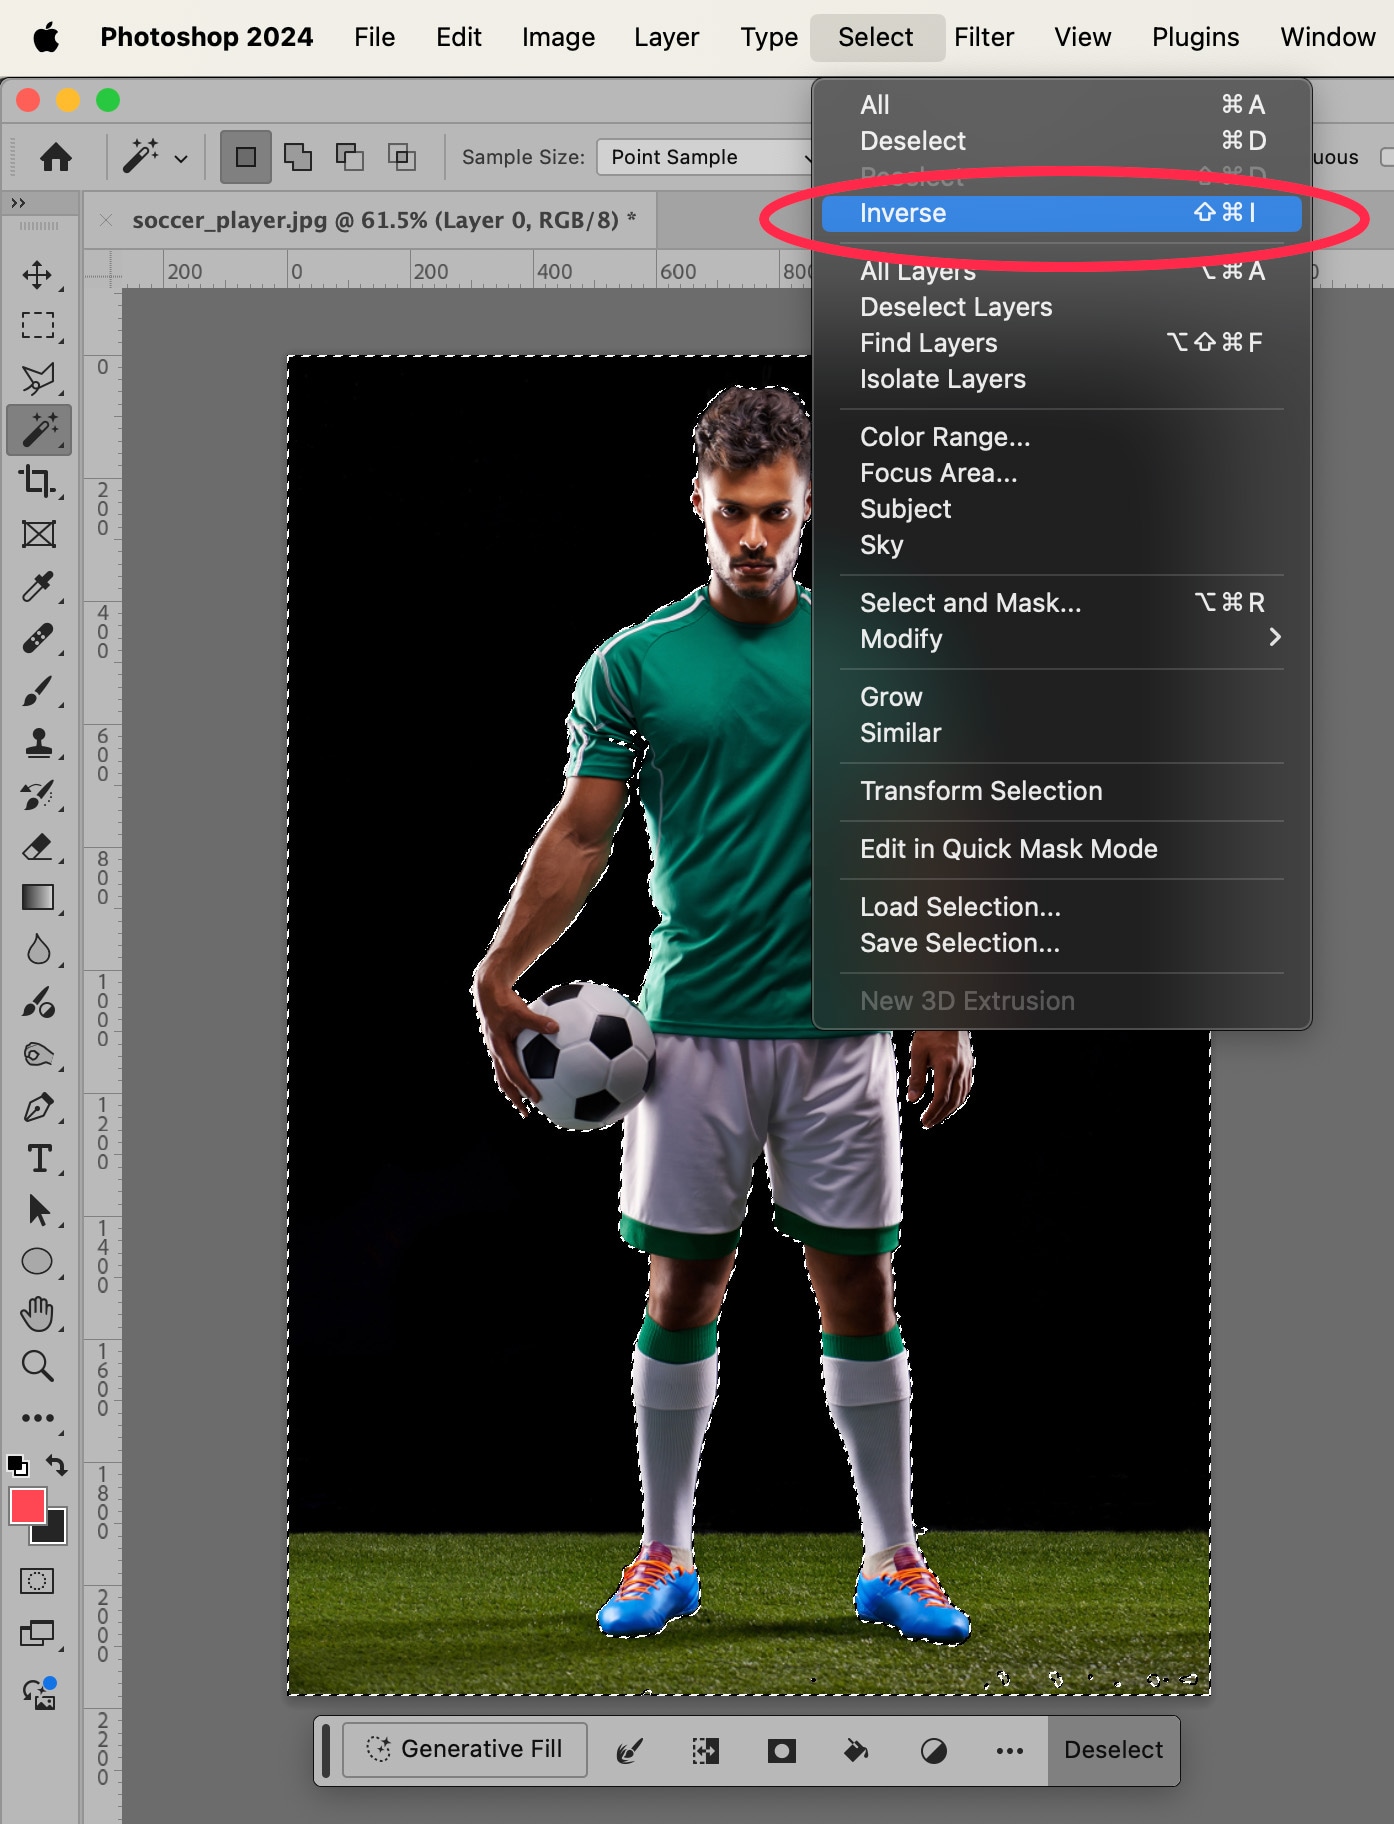
Now, your subject is selected (instead of your background).
Next, go to Select > Modify > Contract… to tighten the edges of the selection. This is to compensate for any artifacts that may have appeared in the selection when we smoothed it earlier.
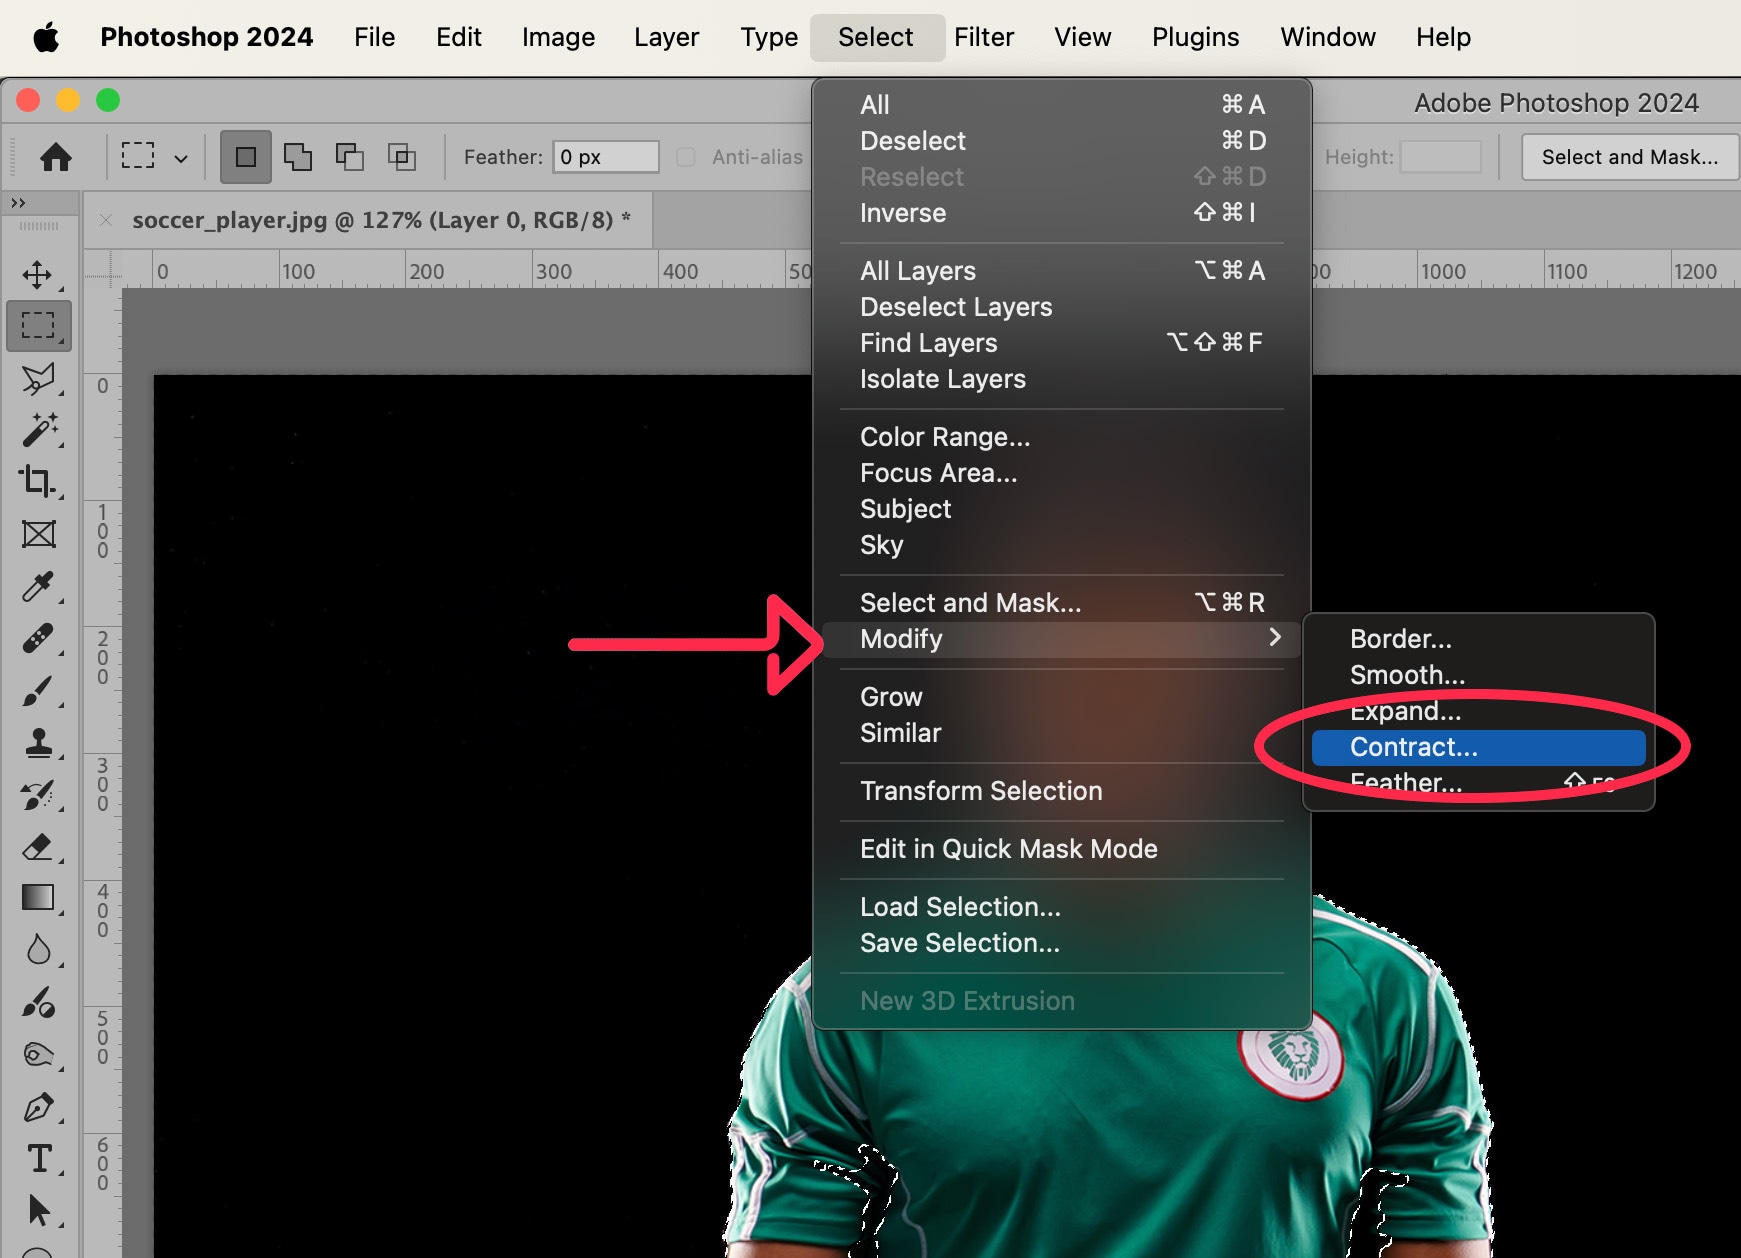
Click OK.
In your Layers panel, look for the Mask icon at the bottom of the panel. It will look like a black rectangle with a white circle inside of it.
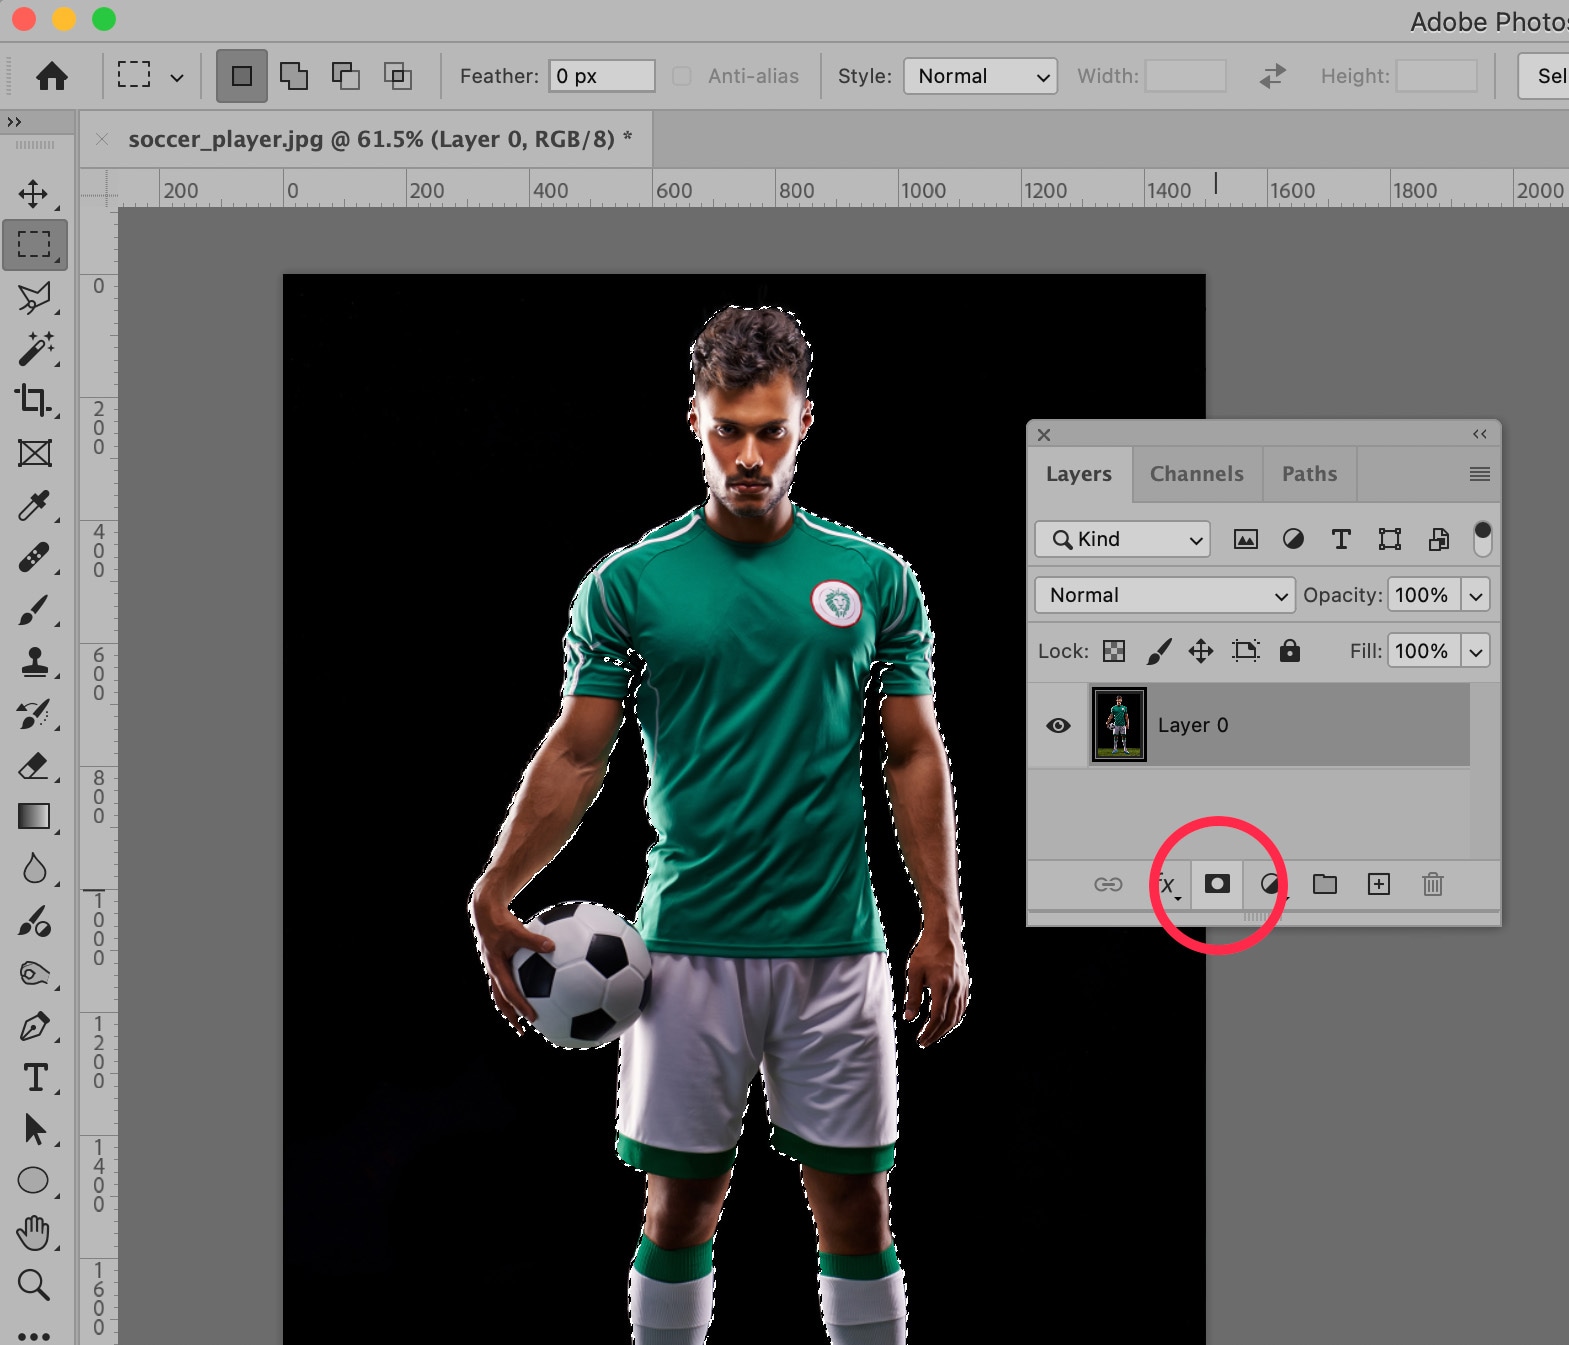
With Layer 0 selected, click on the Mask icon. You will now see your subject isolated against a transparent background.

We’re almost there, but there are a few things we need to fix before we’re done.
Step 5: Clean up the selection using the mask
As advanced as Photoshop 2024 is, nothing can match the human touch for perfecting a selection. In order to finalize your image, you will need to use your Brush Tool, and your judgment, to modify and perfect certain areas of your selection.
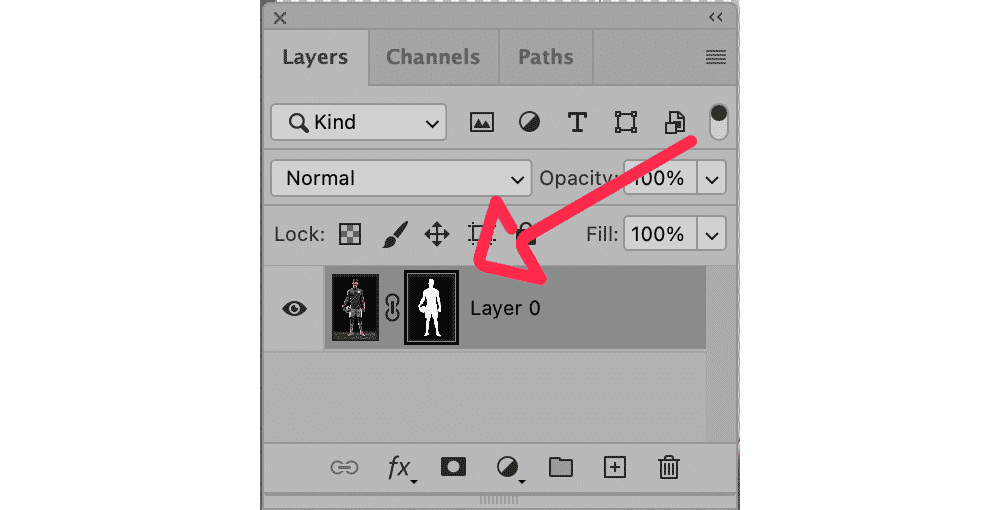
In Layer 0 of your Layers Panel, make sure you have the new layer Mask selected. When the Mask is selected, you’ll see a small, black outline around the Mask. Look closely as it’s a little hard to see.
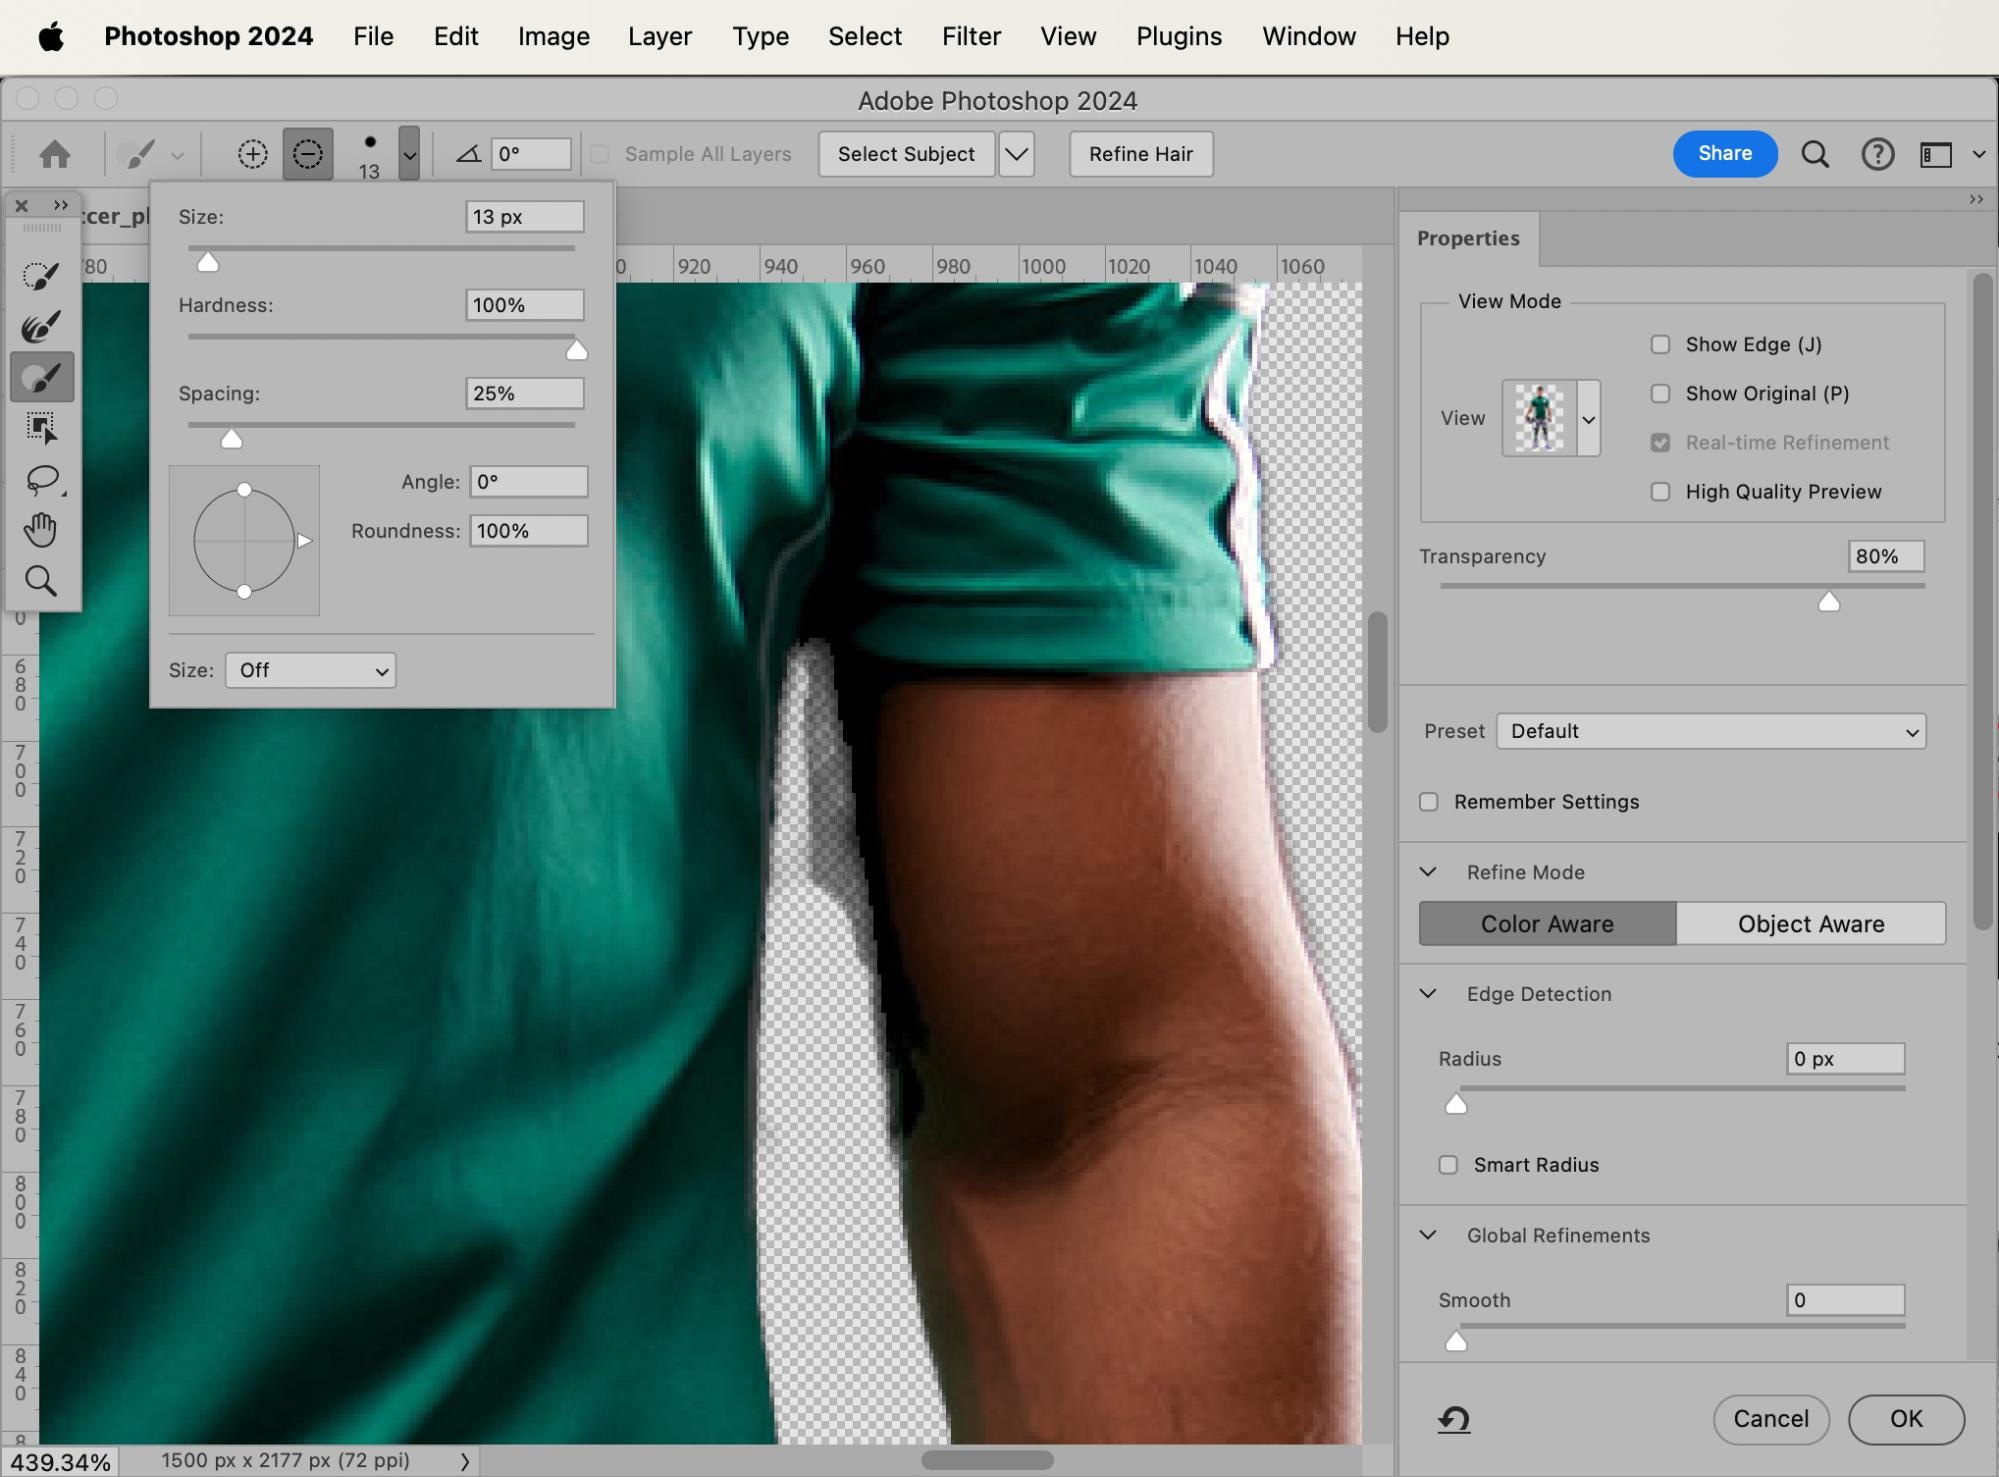
Next, select your Brush Tool from the Toolbar to the left of the application window. In the Options Bar at the top of the application window, you can set the width and hardness of your brush.
If you have correctly selected the Mask icon in Layer 0, then the Foreground and Background colors in your Toolbar will be black and white. When white is the Foreground color, you can “paint back” portions of your masked image. When black is in the Foreground, you remove areas of your selection and they become masked.
For instance, in our example image, certain portions of the player’s sleeves disappeared when we created our initial selection. Therefore, using the Brush Tool, we can “paint back,” or add those portions of the sleeve back in.
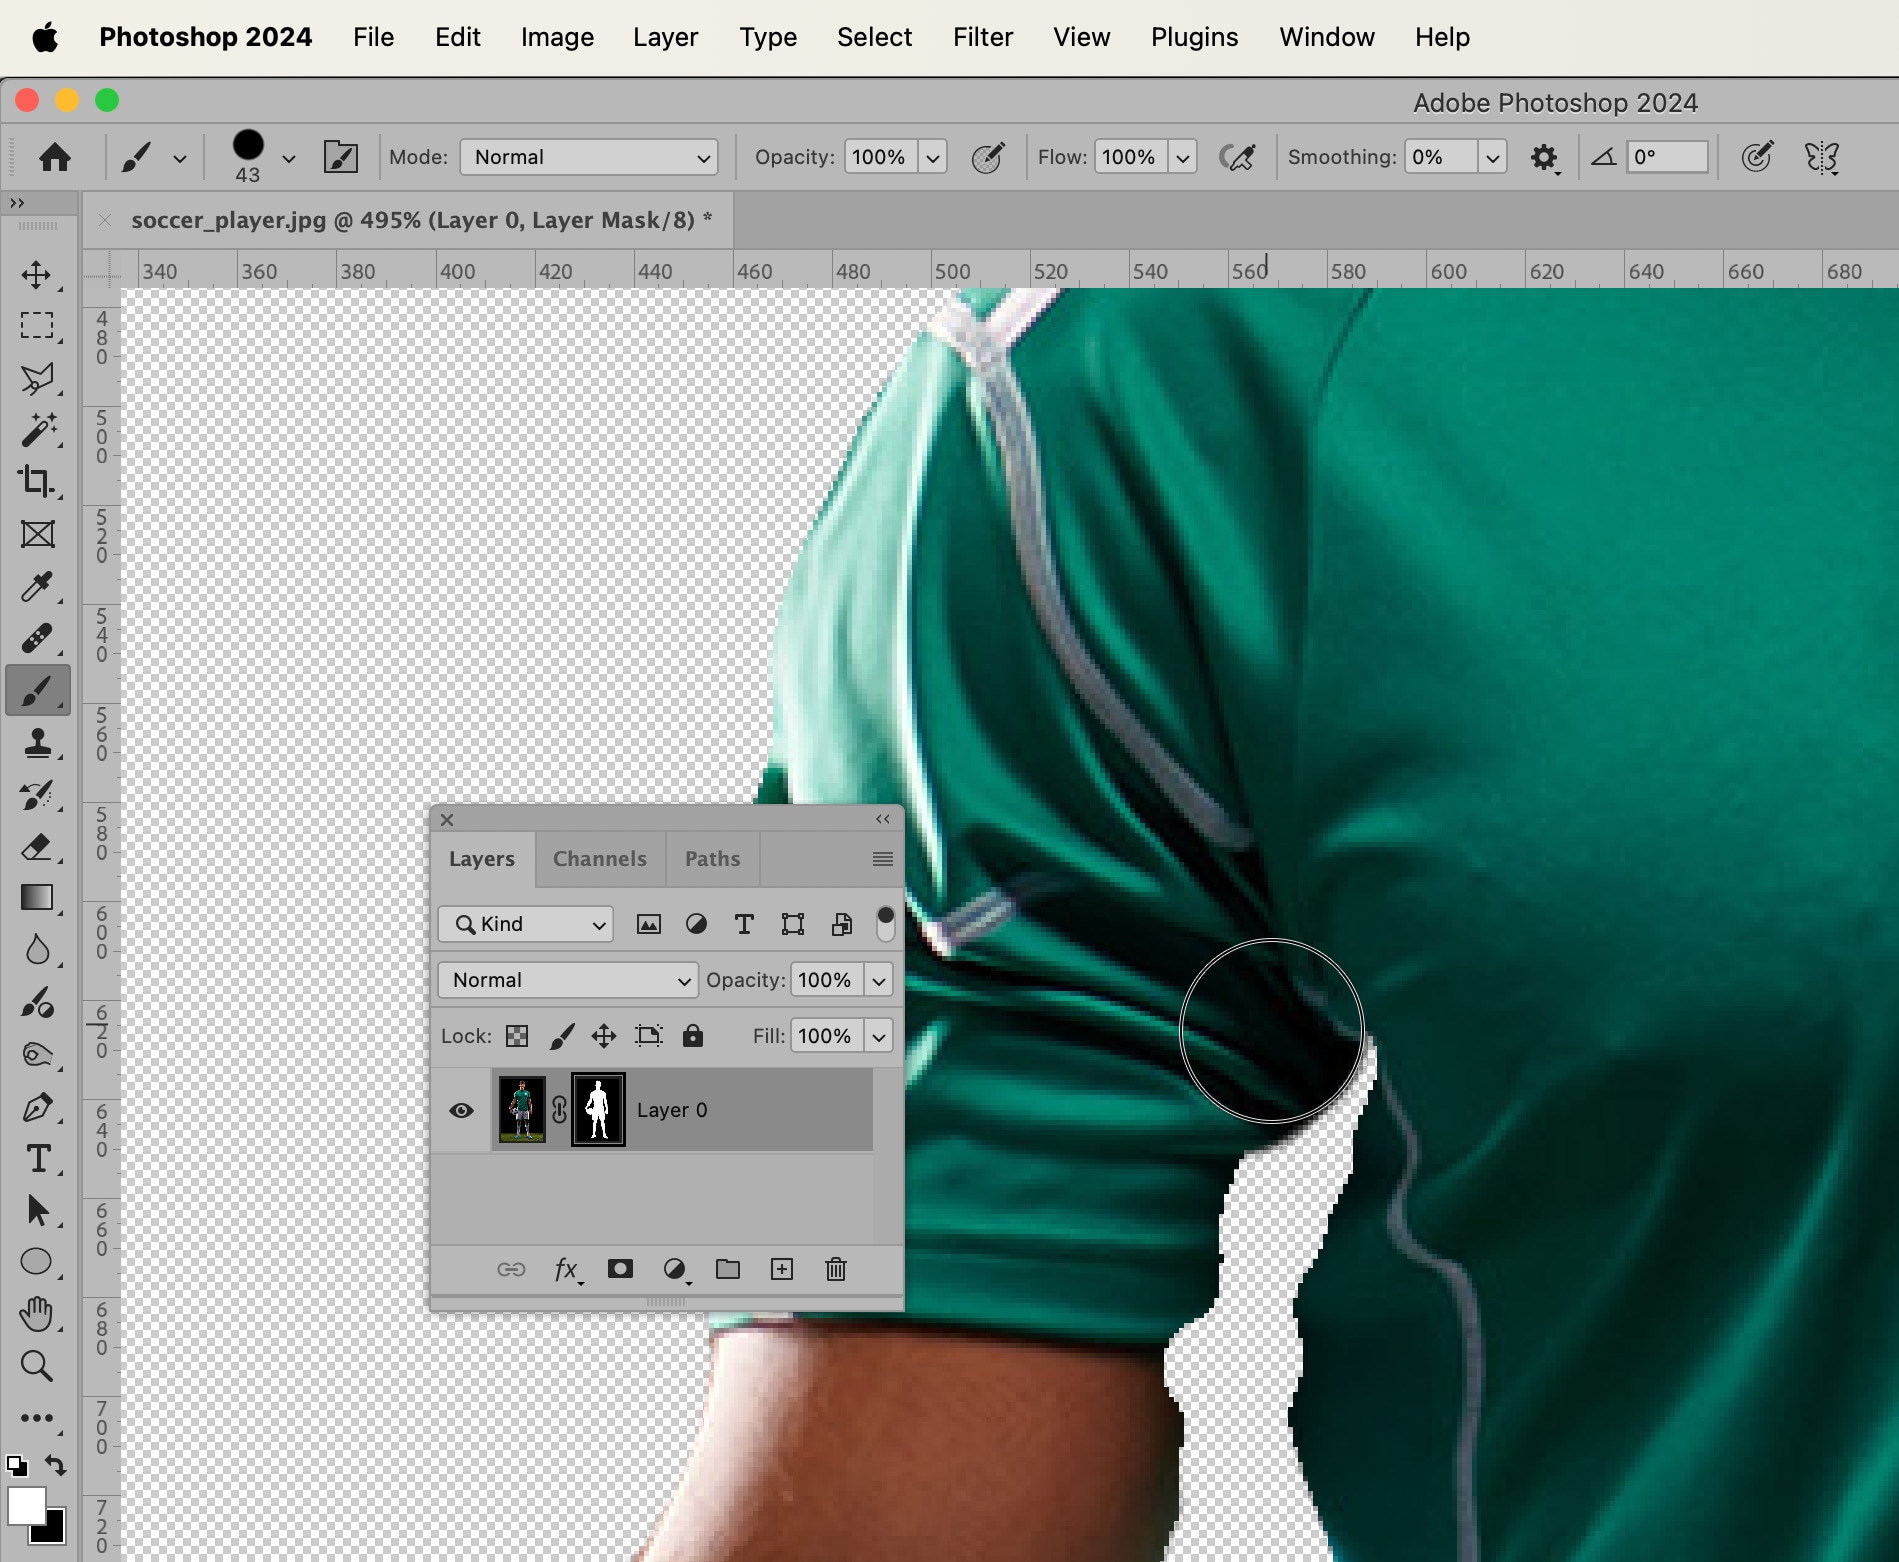
Changing the size of the brush and switching between a white foreground and a black foreground, fix any edges of your selection that need finessing.
Other ways to select and mask in Photoshop 2024
Photoshop 2024 also offers another option for Selecting and Masking that may or may not be easier for you. Let’s start with the original image again to learn this second method.
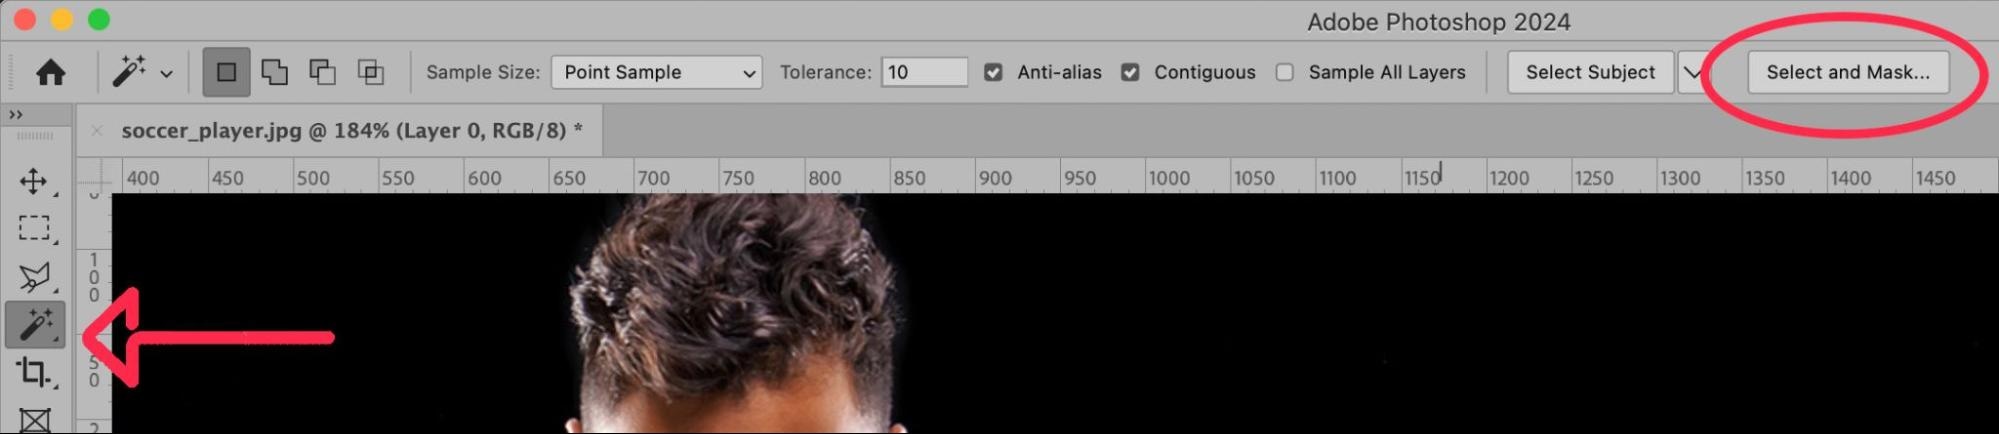
When your Magic Wand Tool is selected, you’ll notice there are some selection options available in the Options Bar at the top of the application window. At the far right of the bar, click Select and Mask….
A new window will open showing most of the image erased. Don’t worry–the image is still there; it’s just been “masked.”
At the top of the screen, click the button that says Select Subject.
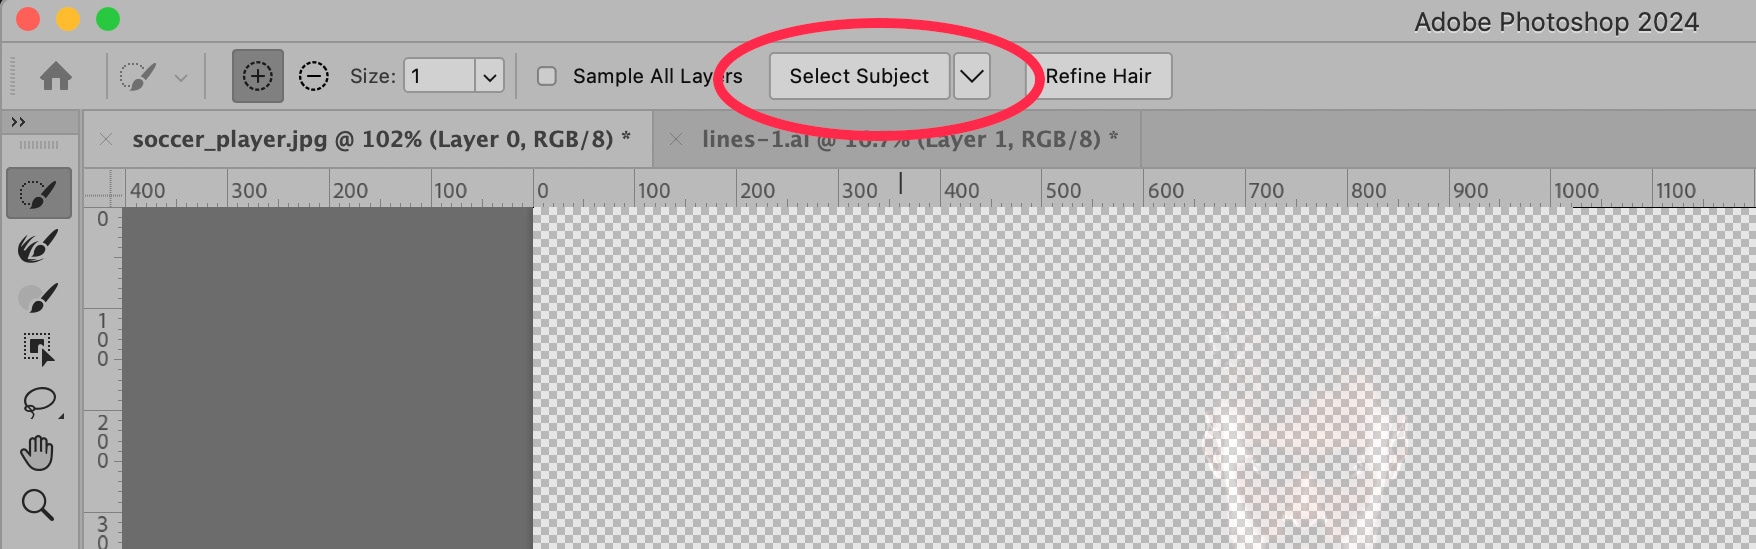
Photoshop will attempt to interpret and select the subject of your image. Though, as you can see in the image below, the results are not always perfect.
At the top of the window, you will find Add and Subtract buttons. These work to add to your selection or subtract from it using the modification tools on the left-hand side of the window. You can also control the size of the tool.
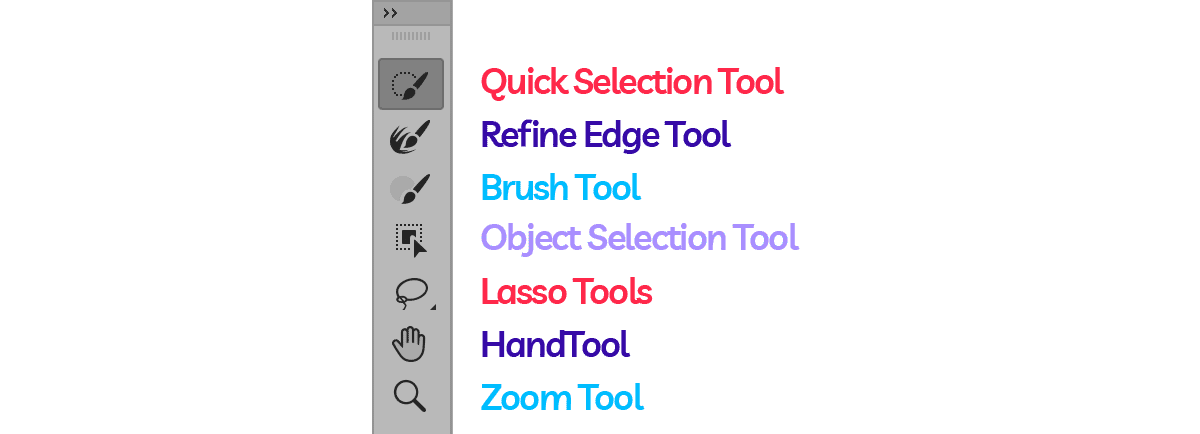
On the left side of the window are tools you can use to modify the selection. These tools are rather intuitive to use.
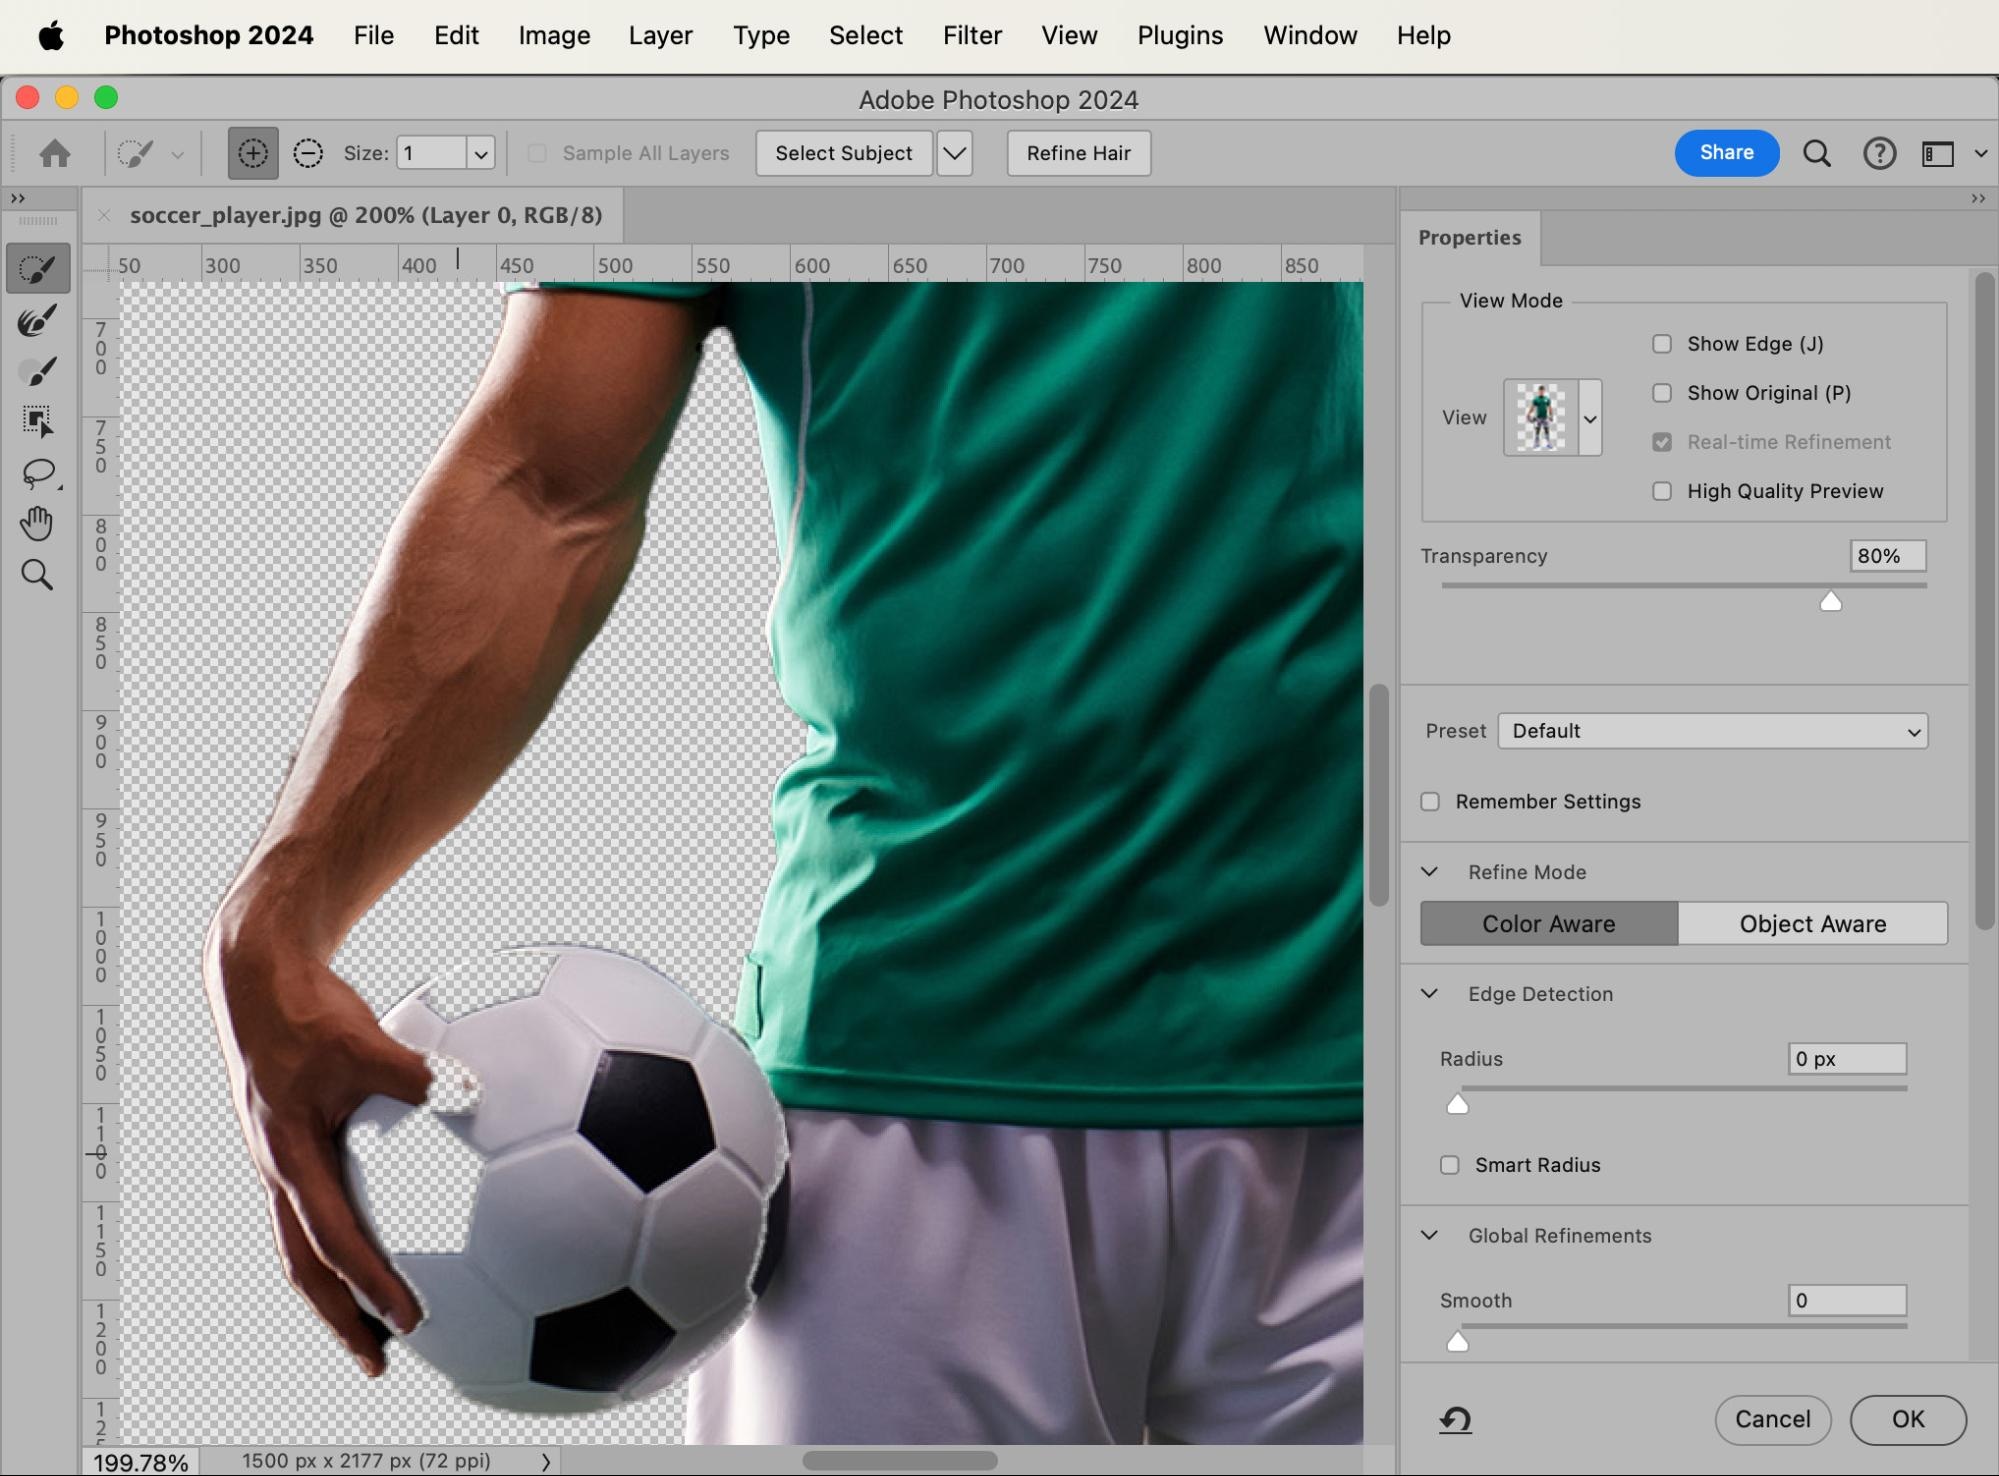
The first tool, the Quick Selection Tool, allows you to grab whole blocks of color at once. This is a good tool to use to “paint back” the ball in the image.
The next tool, Refine Edge Tool, helps when defining or redefining the edge of your selection. Below that is the Brush Tool, which works just like the regular Brush Tool in Photoshop (and like the Eraser Tool when the Subtract button is activated).
The Object Selection Tool tries to figure out where certain objects begin and end in your image, the Lasso Tools allow you to freeform select areas of the image, and the Hand Tool and Zoom Tool help you navigate around the image as you work to refine the selection.
Once you’re satisfied with the selection, click OK. You will see that nothing has changed in your original image, but there’s a “marching ants” selection around your subject.
Next, just like in the first method listed above, you’ll need to make your Background Layer into an unlocked Layer 0, and create a Layer Mask.
Whichever way you choose to create your selection, you now have your subject isolated from its background, and you can place your subject into whichever new setting works best for your branding needs.
Learning how to select and mask in Photoshop with the Magic Wand Tool is helpful because it’s a technique you can apply to a range of photos—sports, product, ecommerce, portraits, headshots, and more. Here are a just a few scenarios where it comes in handy:
- Show your subject in various environments. Help your audience connect with your subject emotionally by seeing it in a beautiful or familiar setting when changing the background. This can also help you prepare the image for different target segments, so you can swap out backgrounds that make more sense for your audience.
- Select your subject so you adjust its size or color without altering the setting in which it has been photographed. This means you can show different color variants for your product without having to take multiple photos.
- Remove the background from a photo so your subject stands out on its own.
- Create a white background image so you can list products on third-party marketplaces, like Amazon or eBay.
Not up for the tedious task yourself? Get a quote for your background removal needs