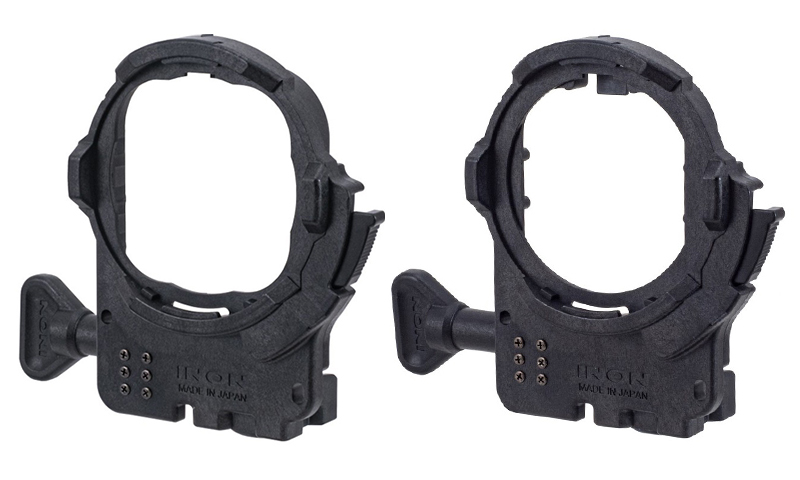
If you want to use your action camera with Inon’s latest wet lenses—the UFL-GR140 ZD/UFL-GR140 Pro ZD and UFL-G140 ZD semi-fisheye lenses, and the UCL-G55 ZD, UCL-G100 ZD and UCL-G165II ZD close-up lenses—you’ll need their latest ZD Front Mask, which attaches to your action cam’s waterproof case.
There’s already an ZD Front Mask for GoPro HERO9–13. Now, Inon has introduced ZD Front Masks for the Insta360 Ace Pro 2 and DJI Osmo Action 5 Pro. If you prefer a pistol grip, Inon will soon be releasing the 4D Light Grip, which can be used with the ZD Front Masks for GoPro, Insta360, and DJI action cameras.
The new ZD Front Masks are available now, while the 4D Light Grip is arriving in September. Consult your Inon dealer for pricing.
When purchasing underwater photography equipment like the products mentioned in this article, please support DPG by supporting our retail partner—Backscatter.com.
PRESS RELEASE
INON INC. releases two new ZD Front Mask on August 5, 2025: the ZD Front Mask for Ace Pro 2, designed to fit the official Dive Case for Insta360 Ace Pro 2, and the ZD Front Mask for Osmo Action 5 Pro, made specifically for the official Osmo Action 60m Waterproof Case.
Attaching the INON ZD Front Mask allows the use of the underwater semi-fisheye conversion lens UFL-GR140 ZD (*1) which can deliver wide and quality view with its large-aperture optics across more wide-angle FOV settings on Ace Pro 2 and Osmo Action 5 Pro, as well as the compact UFL-G140 ZD.*
Also, the wide variety of INON close-up lenses (UCL-G165ll ZD, UCL-G100 ZD, UCL-G55 ZD) (*2) now allows Ace Pro 2 and Osmo Action 5 Pro users to enjoy macro imaging that wouldn’t be possible with the camera alone.
INON also releases the 4D Light Grip in late September, which can be mounted onto the housings of various action cameras. This highly versatile grip allows users to attach both an action camera and a light at the same time.
(*1) Lens hoods included with UFL-GR140 ZD shipped before Augst 5, 2025 may be visible in footage. Please use the updated “Lens Hood II (for UFL-GR140)” which is available for separate purchase.
(*2) UCL-G100 and UCL-G55 shipped on or after August 5, 2025 will come with newly designed Focus Stick that helps prevent interference when used with Ace Pro 2 and Osmo Action 5 Pro. For existing UCL-G100/UCL-G55 users, updated Focus Stick II is available for purchase to replace the original Focus Stick.
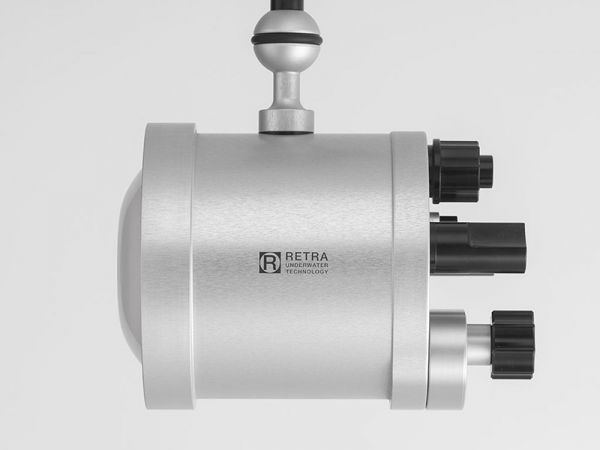
First, as you might have guessed, it’s significantly more powerful, packing 190 Watt-seconds (Ws) of output, up from the 140Ws of the Pro Max. Retra says that translates to “65% more actual light output” because the new strobe features a redesigned reflector, “optimized” power handling, and a better triggering system, where less energy is lost to heat. According to the company, recycle times have been improved by 25%, and at “low” power settings, it’s possible to shoot continuously at up to 60fps.
Other aspects have been improved, too: The target light is twice as bright as before (1,000 lumens as opposed to 500 lumens), the power dial now offers 17 positions (instead of 13), and the strobe even starts up faster. As previously, the battery compartment accepts four AA batteries as standard, plus an additional four AAs when the Booster is added, but the strobe, battery cap and Booster all now boast gold-plated contacts. Retra says you’ll get up to 2,000 flashes at 25% power using the 8×AA configuration.
If all that wasn’t enough, Retra are sweetening the deal for their launch offer: If you pre-order now, you’ll get a Booster and two USB chargers free of charge. Shipping from June 30th, the Retra Flash Pro Max II costs $1,800 with the standard three-year warranty, with the option to extend the warranty to five years for $50 extra.
When purchasing underwater photography equipment like the products mentioned in this article, please support DPG by supporting our retail partner—Backscatter.com.
PRODUCT INFORMATION
Introducing the Retra Flash Pro Max II: Maximum Power. Proven Reliability
We’re proud to announce the launch of the Retra Flash Pro Max II, our most advanced professional strobe to date. Built on five generations of innovation and field-proven performance, the Pro Max II redefines what’s possible in underwater lighting—delivering Li-ion-level performance using safe and widely available NiMh batteries.
Power Meets Efficiency
With an impressive 190Ws of flash power, the Pro Max II produces 65% more actual light output compared to its predecessor—all while maintaining the same compact size and weight. This significant leap in brightness is achieved through a redesigned reflector, optimized power handling, and an improved triggering system that channels more energy into light rather than heat.
Whether you’re shooting fast-paced action or intricate macro scenes, you’ll appreciate the 25% faster recycle times and the ability to shoot up to 2000 flashes at 25% power using the 8×AA configuration. It even supports continuous shooting up to 60 frames per second on low power settings.
Designed for the Creative Edge
The 120% brighter pilot light, now outputting 1000 lumens, provides exceptional visibility for precise snooting and creative lighting setups. With 17 power levels available via the control dial, you get fine-tuned control over your light output in any situation.
We’ve also added several hardware enhancements for reliability and ease of use:
Real gold-plated contacts in the strobe and battery cap ensure dependable performance, even in harsh conditions.
The startup procedure is now faster, with no waiting required in BATT/TEST mode.
Special Pre-Order Offer
The Retra Flash Pro Max II is available now for pre-order at a special price of $1799¹, which includes:
Retra Flash Pro Max II
Booster (free of charge)
Dual USB battery chargers (free of charge)
Every unit comes with a standard 3-year Retra Warranty, with the option to extend to 5 years for just $50¹ per strobe (standard warranty conditions apply). Save $280¹ with this launch offer.
Shipping starts exactly on 30th June 2025—with no delays.
If you would like to purchase in EUR (€), please write to us and we’ll be happy to assist.
Built for the Long Run
The Pro Max II is more than just powerful—it’s built for the long haul. We chose NiMh batteries not just for their safety and travel ease, but because we’ve refined our electronics to deliver Li-ion performance without compromise. This means faster recycle times, greater autonomy, and trusted reliability on every dive.
Whether you’re working on demanding commercial shoots or chasing creative breakthroughs, the Retra Flash Pro Max II is ready to perform.
1All prices exclude local taxes and shipping costs. Import duties and customs fees are not inclusive. If shipping address is within the EU tax zone, VAT is automatically added during checkout (except for RetraCare+Warranty Extension).
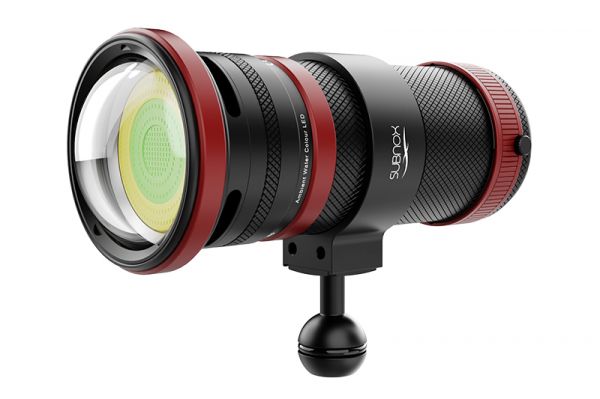
Unveiled at DEMA Show 2024, the SUBNOX brand was founded by professional underwater cameraman Kay Burn Lim, with the aim of creating advanced underwater lighting products designed to meet the needs of working videographers. Now, the new company has put the finishing touches to its first offering—the SUB10KEF, a 10,000-lumen wide-angle video light with some innovative features.
The powerful but compact video light is equipped with a specially designed light head and COB LED that produces three different light outputs. One mode is “traditional” light with a CRI of 93 and a color temperature of 5600K, equivalent to daylight. In the other two “Ambient Blue” modes, the light output is equivalent to ambient light at 6–13 meters (20–43 feet) and ambient light at 13–20 meters (43–66 feet).
As depth increases and water absorbs colors from the light spectrum, white balance controls or red filters are used to restore natural colors, but this causes subjects illuminated by regular (daylight) video lights to appear overly red. Blue filters on video lights results in more natural-looking footage by helping to balance the foreground subject illuminated by the lights and the bluish background. However, the downside is that such filters reduce light intensity significantly.
With its built-in ambient light options, the SUB10KEF provides ambient water color illumination approximately 2.5 times brighter than using physical blue filters. By covering two depth ranges—6–13 meters (20–43 feet) and 13–20 meters (43–66 feet)—at the twist of the rear dial, the SUB10KEF can be used in a variety of daytime lighting conditions as well as at night, when the 5600K (daylight) mode can be used.
The SUB10KEF features an ergonomic 11-step (0–10) magnetic power control ring at the rear, and a rear-mounted LED display showing the brightness level as you turn the power control ring. After setting the brightness level, the display defaults, after five seconds, to the remaining burn time in minutes for the selected brightness level. The video light’s air-travel safe 72Wh battery pack can be charged from 0–80% in two hours and to 100% in three hours.
Shipping late May, the SUBNOX SUB10KEF is priced at $800.
PRODUCT INFORMATION
SUB10KEF Wide Angle Video Light – 10,000 Lumens With Daylight 5600K & Ambient (BLUE) Water Colour
$800.00 USD
The SUB10KEF is a compact 10,000 lumens (93 CRI) wide angle video light with the patented ability to switch between a daylight colour (5600K), and ambient water colours for 6–13m or 13–20m.
Patented Light Head
With the patented specially designed light head and COB, It does not require any physical blue filters to achieve this specially tuned ambient water colour illumination. This allows the torch to be used at various depths and lighting conditions night or day. (Ambient blue is not required for night dives).
Power Control Ring
The SUBNOX SUB10KEF utilizes a large 11 step (0-10) magnetic power control ring ergonomically located at the rear of the torch. This allows for smooth, effortless and intuitive control over the brightness level.
The rear mounted power control ring is designed for one handed use in a single motion over a 180 degree turn of the ring. It is designed for easy use even with thick gloves. No more reaching over your torch to press buttons, or fiddling with tiny control knobs. Just grab and twist!
Light Colour Selector & Power Switch
The rear knob below the LED display allows users to switch between the 3 light options:
5600 Kelvin (Daylight)
Ambient Blue (6–13m)
Ambient Blue (13–20m)
The button at the center of this knob functions as the master switch for powering the SUB10KEF On or Off.
LED Display
The rear mounted LED display shows the brightness level as you turn the power control ring.
Once the brightness level is set, the display will default after 5 seconds to the remaining burn time (battery level in minutes) for the brightness intensity chosen. A simple 4 bar battery icon is also displayed for all settings.
3 different LED indicators display the current colour settings. 5600K, Ambient Blue (6–13m), Ambient Blue (13–20m).
USB-C Rechargeable Battery
The Battery pack for the SUB10KEF utilizes a fast charging USB-C controller that allows the battery to be charged from 0–80% within 2 hours (full charge from empty requires 2 hours 45 minutes) and is rated at an air-travel safe 72Wh.
Each battery pack provides enough power for 35 minutes of continuous use at maximum brightness for the 5600K light setting, or 1 hour at 70% brightness settings.
The battery pack will last for 55 minutes at 100% brightness when used with the ambient water colour settings.
For maximum charging speeds. Please use a high quality 40W USB-C charger (Not included). A high speed USB-A to USB-C cable is included.
All batteries come with silicone protective cases for travel and protection of battery contact terminals when not in use.
Specifications
Lumens (5600K LED): 10,000
Beam Angle: 128 degrees underwater
CRI (5600K LED): 93Ra
Ambient Water Colours Built in: Ambient Blue 6–13m, Ambient Blue 12–20m
Making a film and creating an ad for that film require skill. Let one of the 20 Final Cut Pro movie trailer templates free and premium in this article help you create a great impression for your project. They’re especially helpful if you don’t know how to make a movie trailer.
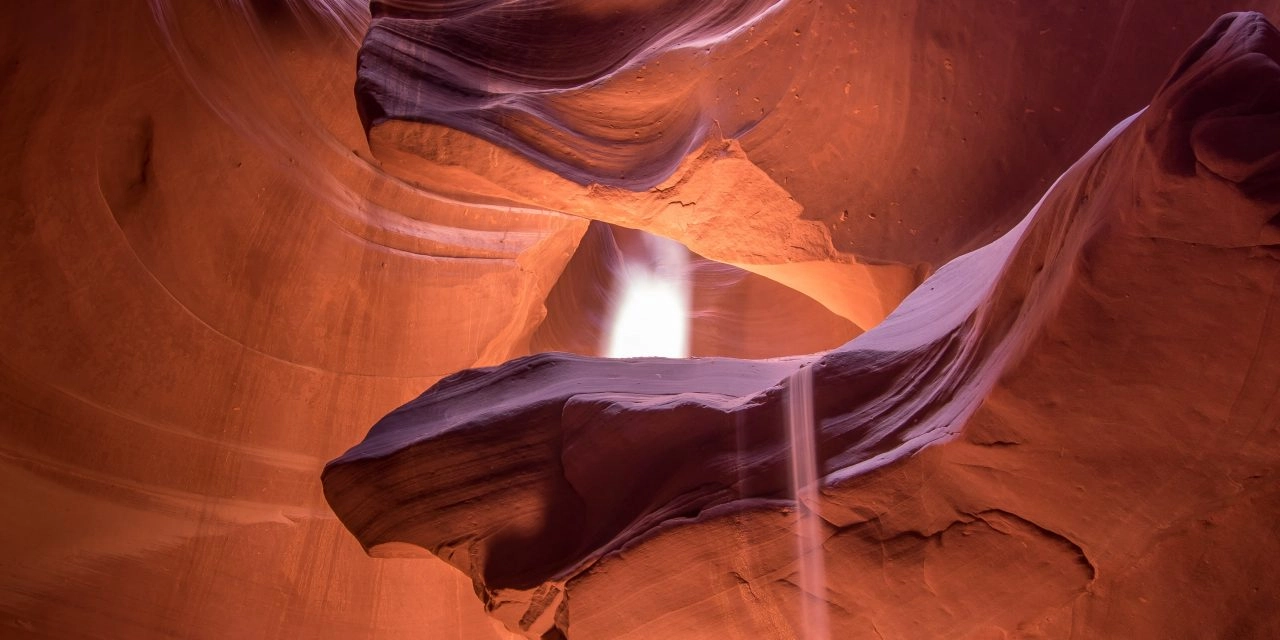
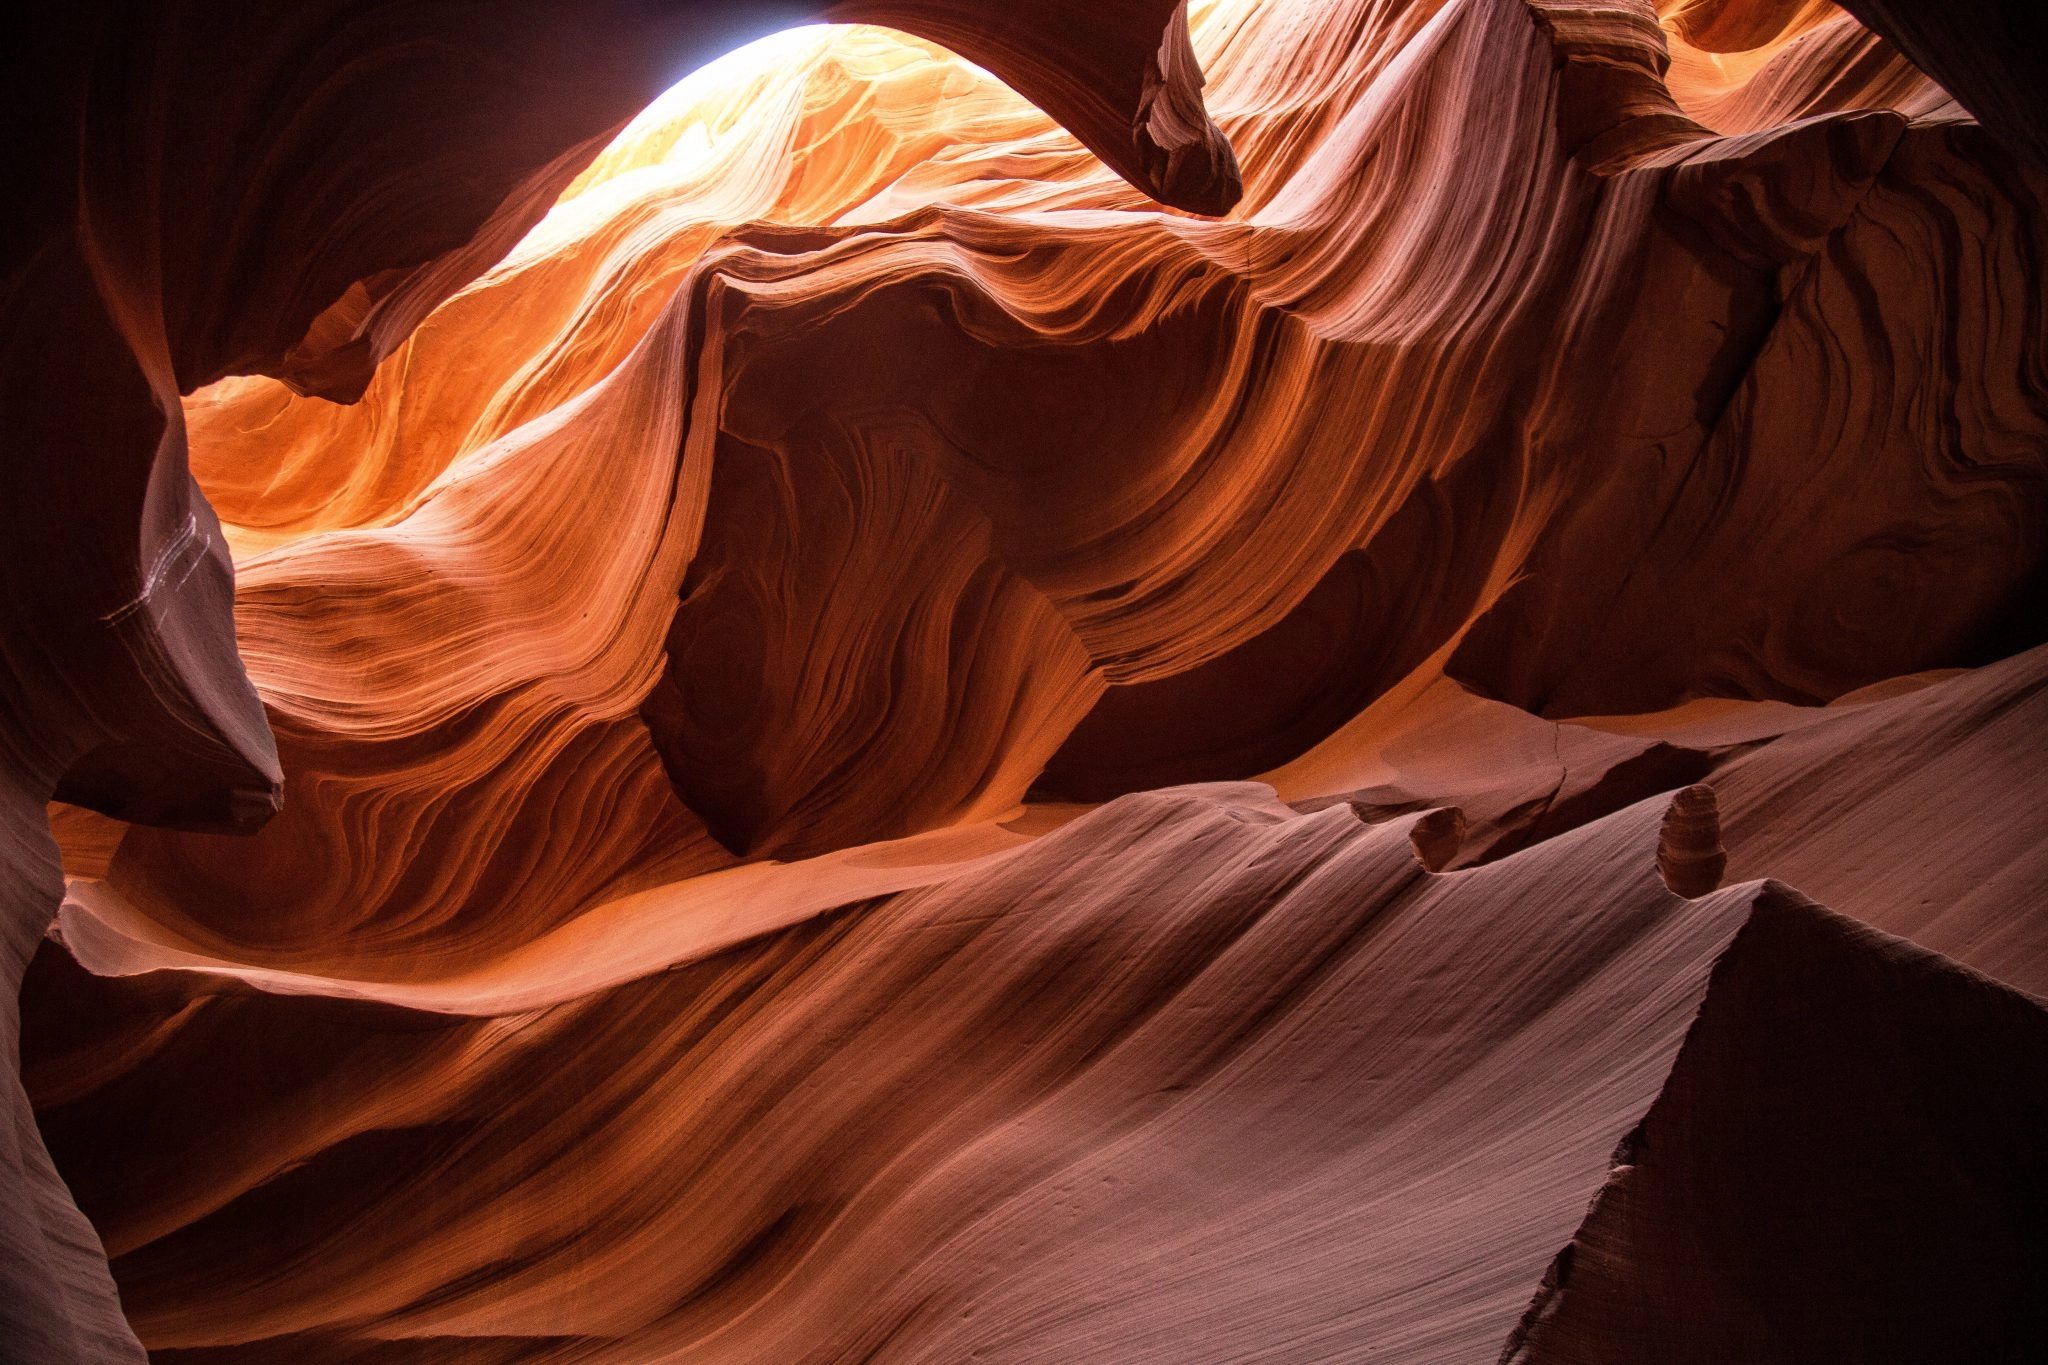
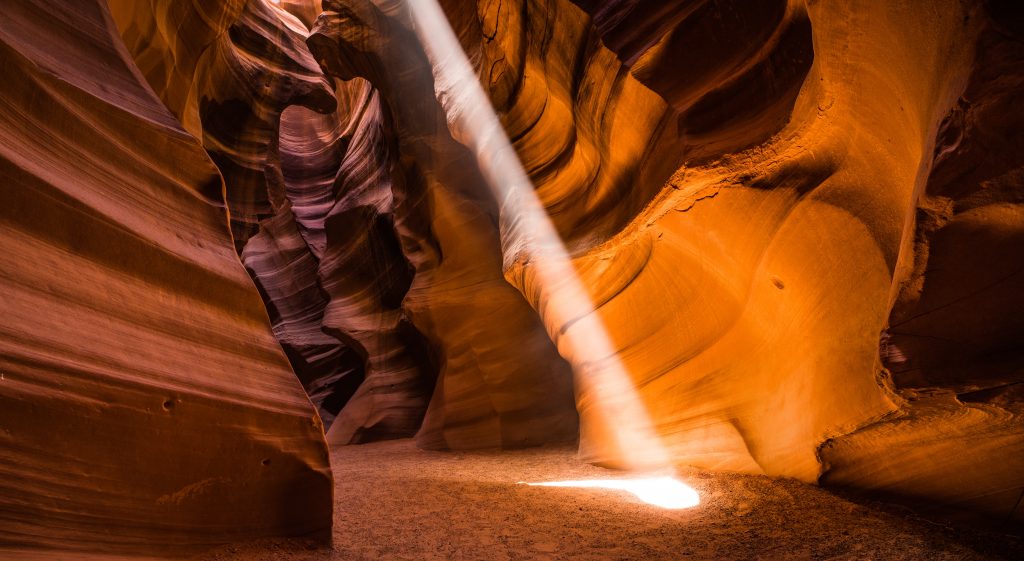
“Wow” is an understatement when describing the beauty of Antelope Canyon. Its beautiful and glowing red canyon walls, sleek curves, scalloped rock faces as well as striking light beams can leave you speechless.
Fortunately, you don’t have to be a professional photographer just to get great Antelope Canyon pictures. With your camera, you can actually take great photos of the area.
Keep reading this article for tips on how and where to position your camera to get spectacular shots.
[table id=29 /]
Antelope Canyon: Interesting Facts
Antelope Canyon
Antelope Slot Canyon is located in Page, Arizona.
It is made up of the Upper and Lower Antelope Canyons. Both canyons are part of the Navajo land in Northern Arizona. The Navajo people are responsible for the care and preservation of the Antelope Canyon.
The formation was created millions of years ago. These canyons were created due to water and wind erosion caused by flash floods in Arizona. Both slot canyons are open for tourists. Oftentimes, when people say Antelope Canyon, they normally refer to the Upper Antelope Canyon.
The Upper Antelope Canyon is more popular than the Lower Antelope Canyon. However, tours for the Lower Antelope Canyon are relatively cheaper. With a Navajo guide, you may visit both slot canyons in one day.
The road leading to the canyons is gated by the Navajo Nation. The Navajo Nation protects its people as well as the canyons. That is why only guided tours with authorized tour guides are allowed entry into the canyon.
As majestic as it is, this natural beauty can cause danger during monsoon season. Rainwater can quickly fill up the canyon which can cause flash flooding due to the canyon’s narrowness. In 1997 a flash flood cost the lives of some tourists.
Because of the 1997 incident, visiting the canyon is only through guided tours. Aside from the issues of safety, only authorized guide tours are permitted entry into the canyon to prevent vandalism and preserve this natural landmark.
If you are planning to visit the canyons, make sure to check the weather conditions on your planned dates. You want to enjoy your trip and bring home great memories and not get stranded on the ledge because of the rain.
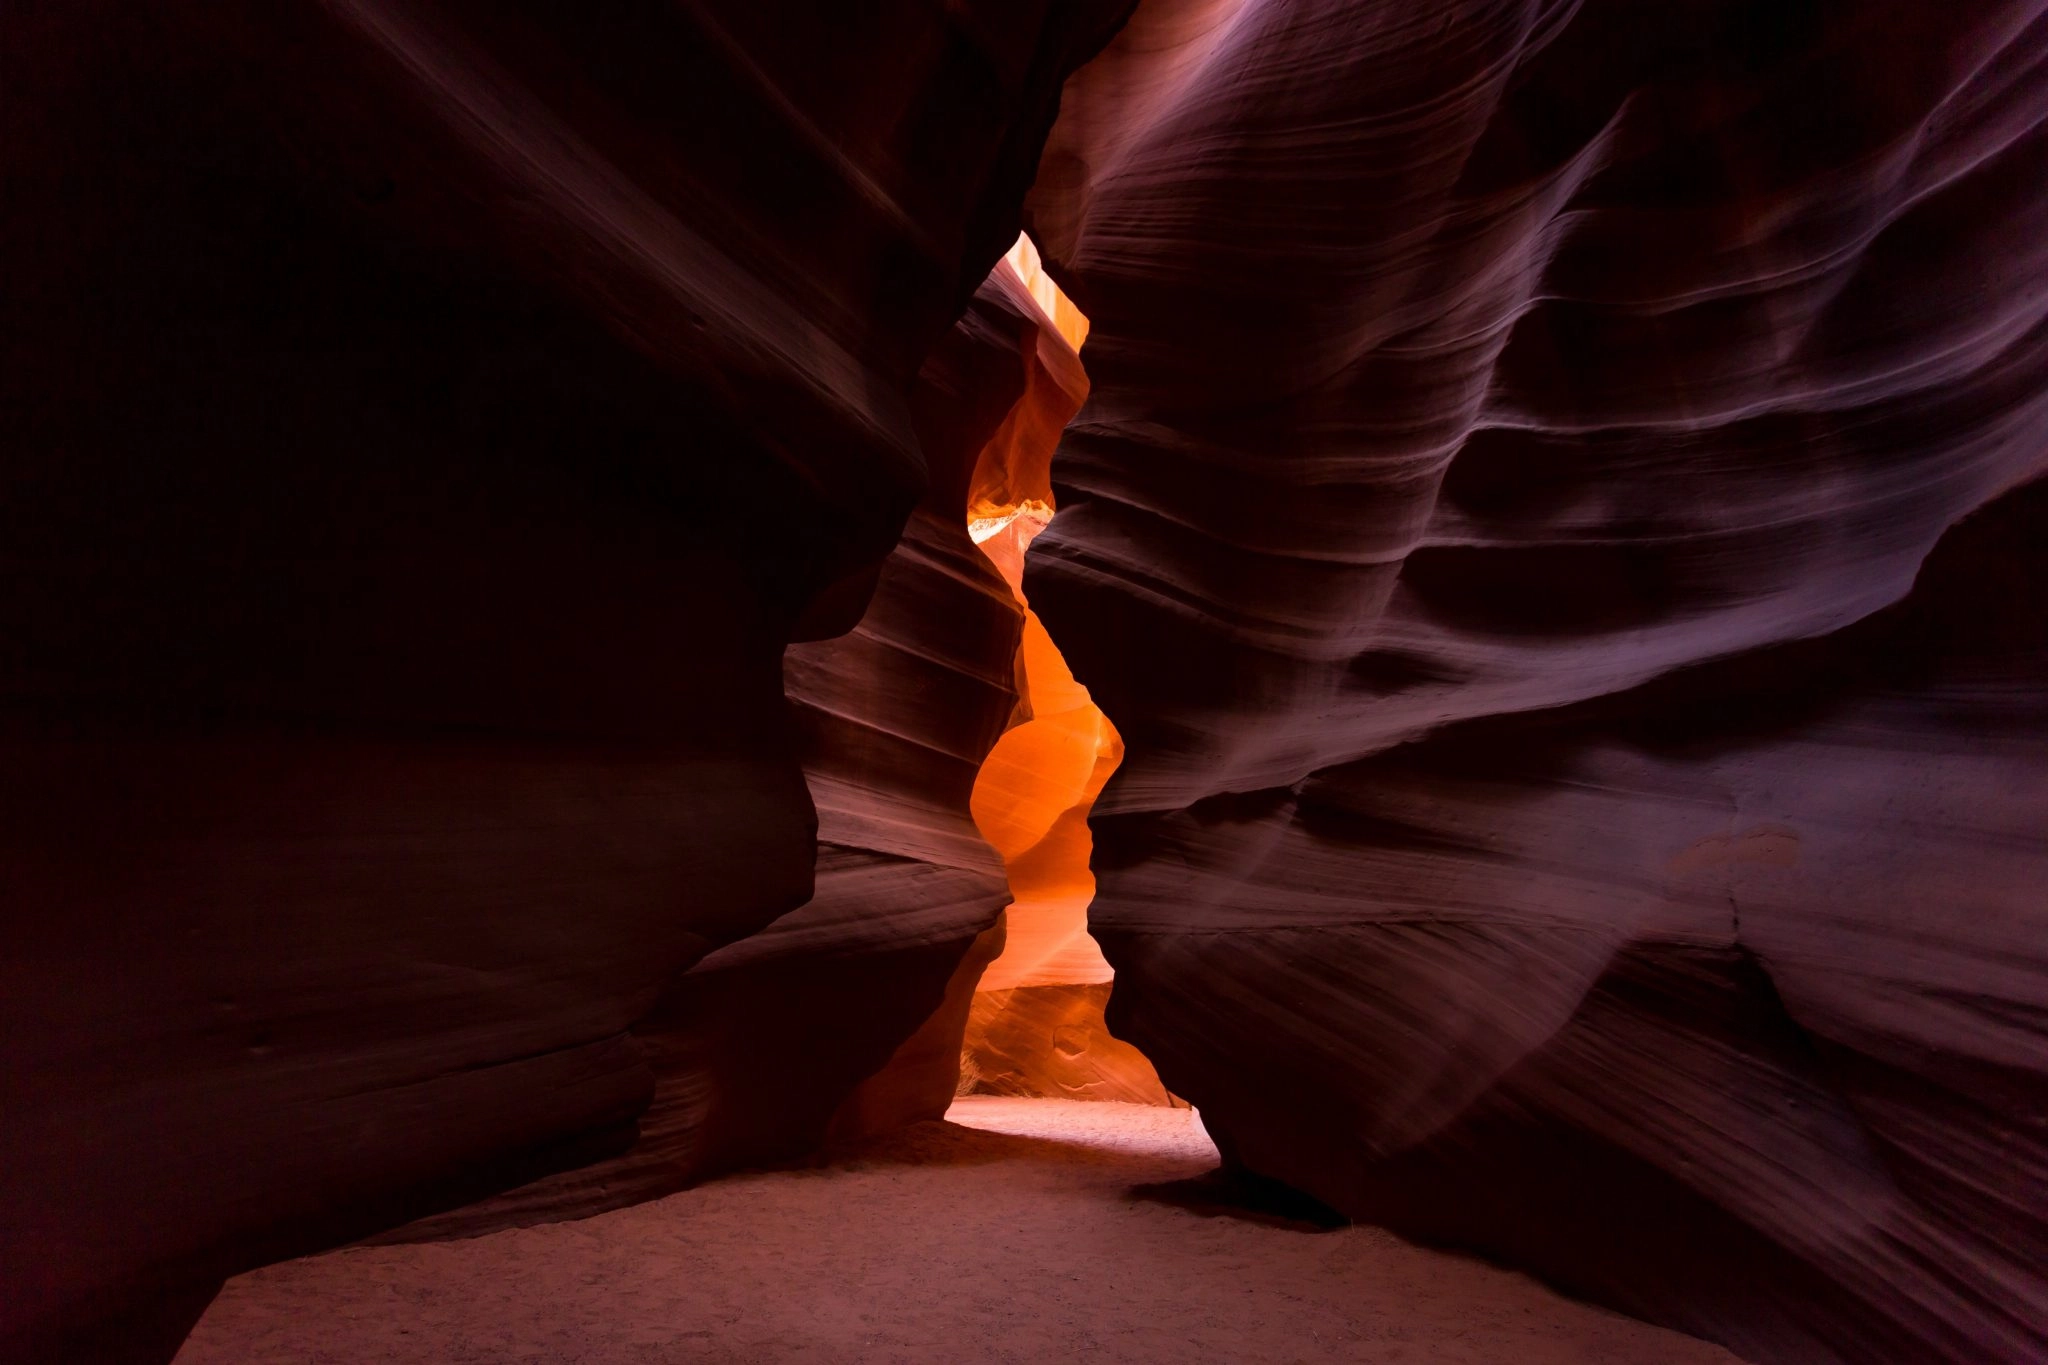
The Lower Antelope Canyon
Lower Antelope Canyon
The Lower Antelope Canyon is also called “The Corkscrew” and has a Navajo name “Hazdistazi”. The Navajo name for the Lower Antelope Canyon translates to “spiral rock arches”.
If you like narrow passageways and ladders, you may find the Lower Antelope Canyon to your liking. The canyons here are shallower and lighter in shade than the Upper Antelope Canyon because of their upright V shape.
The Lower Antelope Canyon is located near the Upper Antelope Canyon. Unfortunately, in 2018 tour operators no longer offer general tours and even photography tours.
The Famous Upper Antelope Canyon
Upper Antelope Canyon
The Upper Antelope Canyon is also called “The Crack” and has a Navajo name “Tsé bighánílíní”. The Navajo name for the Upper Canyon translates to “ the place where water runs through cracks”.
It is characterized by high and dark canyon walls, light beams shining down, and falling sand. The Upper Antelope Canyon is somehow shaped like an inverted V. It is narrow at the top while it is wide and passable at the bottom.
Because of its high canyon walls, light beams are easily created when the sun shines at certain angles. The narrow top also makes the canyons look darker and the surrounding atmosphere cooler.
How to Visit Antelope Canyon?
The Antelope Canyon is only open for scheduled tours. You may inquire about tour packages, exclusive deals, and even discount codes from tour companies. It is highly encouraged that you make reservations for tour slots at least three months in advance.
The whole tour usually lasts for 1.5 hours which is inclusive of the travel time and touring the canyon. So many people who want to visit this place. It is not surprising for many want to witness this majestic site up close and personal.
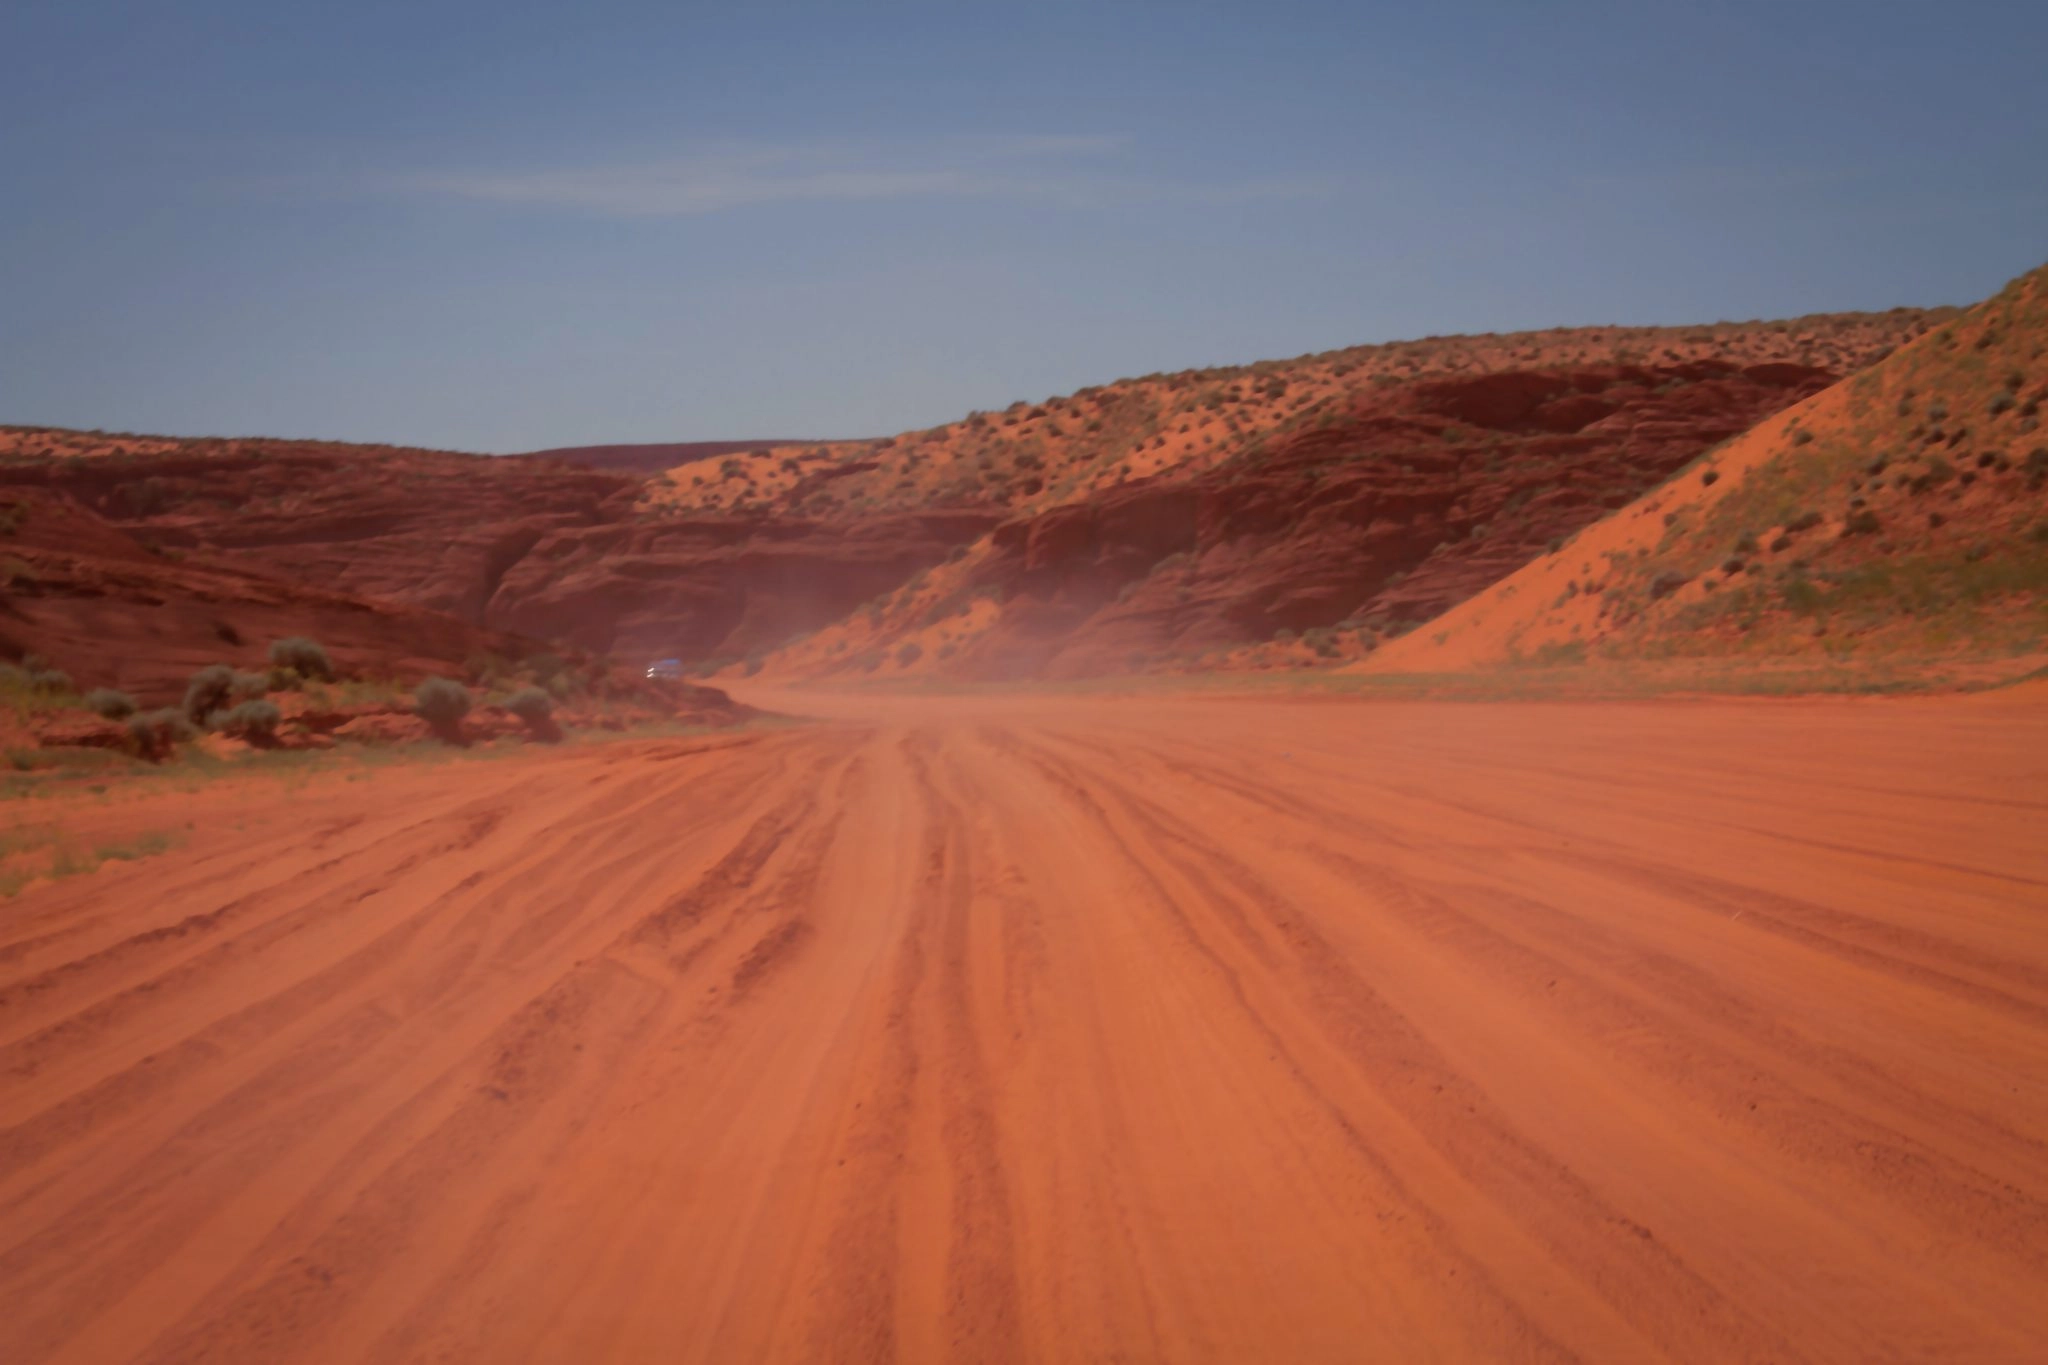
Road to Antelope Canyon
Most tourists flock to Antelope Canyon during summertime. Midday is the most crowded time. Tourists prefer to visit during this time so they can get more great stock photos. If you want to avoid the crowd and take your time taking pictures, you can visit earlier or later in the afternoon.
Tips for Capturing Gorgeous Antelope Canyon Pictures
Both slot canyons are photogenic. However, you can capture more stunning photographs at the Upper Antelope canyon. It is during midday that you can get gorgeous photos of light beams as well as falling sand.
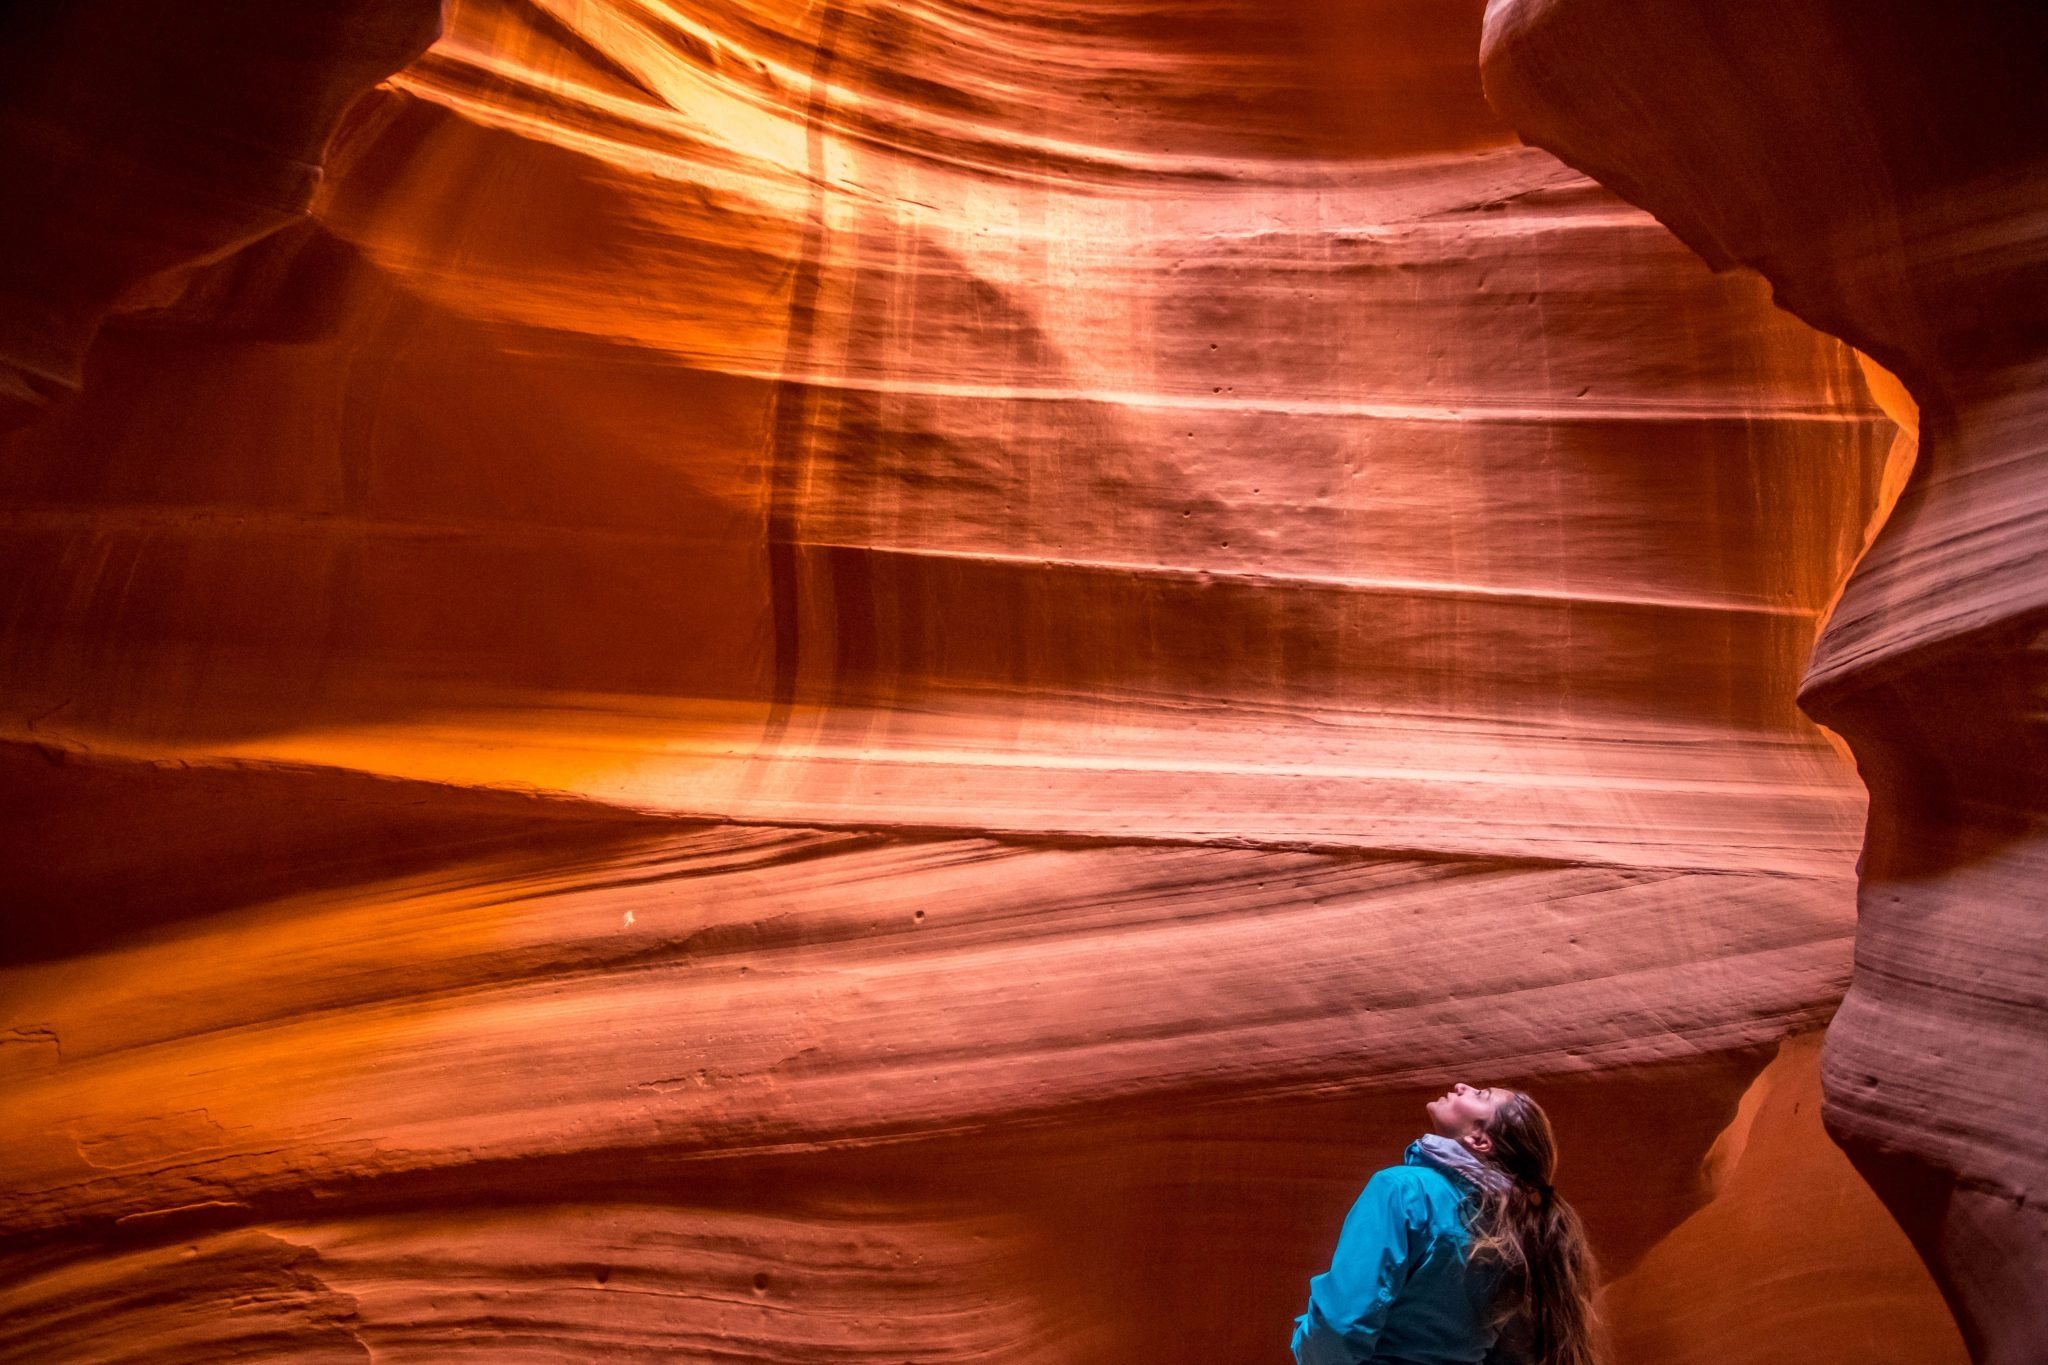
Don’t forget to look up
Tourists Looking Up
When you are on tour with so many tourists, taking great pictures can be challenging. One important piece of advice to get great shots is to look up. The canyons look lovely from that perspective. Also, if you are lucky, you can get gorgeous images of light beams shining down.
Tripods and selfie sticks are prohibited
Only handheld photography is permitted. Unfortunately, handheld photography in the Upper Canyon can be challenging especially after midday because the canyon walls look noticeably darker.
Taking Selfie
As an avid photographer, you will surely be in awe at the lighting conditions in the canyons. At the Upper Antelope Canyon, for instance, you can capture various gorgeous pictures of the sandstone walls changing color throughout the day depending on the sun’s angle.
You may also find yourself wandering about, looking for the perfect shot because there are several compositions you can make. If you hire a Navajo guide, they can bring you into the canyon at the right time for you to capture amazing light beams.
Light beams don’t last long
Antelope Canyon Light Beam
You have to bring in your A-game and capture as many pictures as you can. If you still have time after you take all the necessary shots, you can stare at the majestic view in front of you and absorb it all. Not everyone gets to witness such beauty of nature.
The Antelope Canyon is a great surprise and unique experience if you are an enthusiastic landscape photographer. You take a lot of abstract photographs and the art compositions are limitless. Not everyone will have the same composition. Each photo is unique.
If you get to take shots of a particular spot in the canyon with your preferred lighting condition, the result is magical. You will notice that the contrasts and transitions between cold and hot tones are spectacular.
Depending on the time of day you are inside the canyon, you can capture varying contrasts of purple, red, and orange. If you have an active imagination, you may spot some human or animal formation to capture on a frame.
What Is So Special About Antelope Canyon?
Antelope Canyon is special because of its wave-like canyon walls. These walls change color throughout the day depending on lighting conditions. The sunbeams and falling sand also add to the spectacle of the place. These make Antelope Canyon the most photographed slot canyon in the southwest USA.
If you’re thinking of visiting the area, it is from the end of March until the first weeks of October that you can enjoy Antelope Canyon the most. It is from 11:00 am until 1:30 pm that you can witness the ultimate beauty of the Antelope Canyon, especially the Upper Antelope Canyon.
On average, it can take you 1 to 1.5 hours to walk through Antelope Canyon both Upper and Lower Antelope canyons. You get to traverse a distance of approximately 1,800 meters (1.10 miles) round trip. Walking is easier in the Upper canyon than in the Lower canyon.
Final Thoughts
Beautiful Canyon
Antelope Canyon is one breathtaking and jaw-dropping natural destination. It offers tourists a different kind of experience. This American Southwest is truly amazing. A true gem of the world.
The lines, tones, as well as color separation, are a spectacle to behold. These are perfect elements for an abstract photograph. It is a perfect place for abstract photographers to create their masterpieces and draw design inspiration from.
If you seek thrill and fun, it is best to visit the Lower Antelope Canyon. On the other hand, if you want to take great stock photos, then the Upper Antelope Canyon is your best bet.
Whatever your reasons are for visiting the Antelope Canyon, one common thing stands out from all tourists – the appreciation and gratitude for Mother Nature’s creation. Bring your most trustworthy camera and create priceless memories in Antelope Canyon, Arizona.
A playground for the wealthiest, Monaco is not just one of the most prosperous countries economically speaking. It’s a photogenic country, from luscious green gardens, clustered hills, and magnificent architectural designs to the infamous Mediterranean Sea. This place is way more abundant than money.
With so many good spots, it’s a nice idea to have a list of the very best areas to take your camera out and click its shutter. Below is a list of places where you can take the best Monaco pictures for your gallery.
[table id=31 /]
Palais du Princes
visitthefrenchriviera
Palais du Princes is the official residence of Prince Albert II. The palace is a quick 5-minute stroll through the Rocher lanes or a 10-minute incline hike through the Major ramp for more fit people. The vistas are pretty stunning, so the walk is well worthwhile.
Even though this place is a private residence, it is still open for visitors occasionally. Please take part in the castle tours to learn more about Monaco and the history of its royal family.
During your visit, you can take your Monaco picture of the Mediterranean Sea’s stunning views. Upon entering the residence, there is an Italian-style gallery. The Blue Room is famous for its blue and gold accent silk tapestry.
The best Instagram-worthy you can capture here is the Changing of the Guard at 11:55 in the morning. You do not want to miss this ceremony!
Monaco Grand Prix
speakyourpeace
Nobody wants to miss the infamous Grand Prix in Monaco. The Formula One Grand Prix is unquestionably one of the most thrilling sporting events. Monaco’s circuit is one of those that are used for Formula One racing.
On April 14, 1929, the inaugural Formula One Monaco Grand Prix took place. It’s noteworthy that the Monaco Grand Prix is the shortest of all the races (just 3.337km).
Boulevard Albert 1 is where the race begins, and Place du Casino is where it ends. The Automobile Club of Monaco is organizing this competition. Even though the region is exceptionally congested during races, it is worthwhile to visit.
Keep in mind that the Cannes Film Festival takes place in May. Make sure to bring your motion camera to take a photo of the fast-moving automobiles.
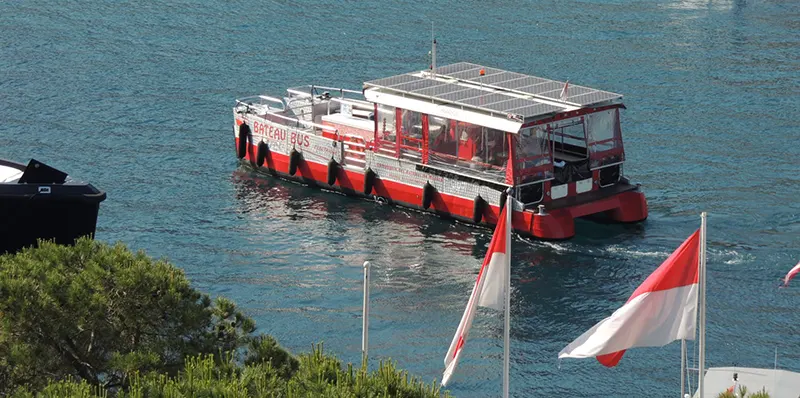
Bateau Bus
Another great spot you might want to take your Monaco pictures in is the Bateau Bus. It is a tiny boat where you can sit outside and carry your outdoor camera for some snaps as you look back to Monte Carlo.
By just paying 2 Euros for a trip to Port Hercule, you can have a chance to get a glimpse of some lovely views from the water.
It will only take 3 to 5 minutes to cross the harbor in a fun and exciting way. A day trip would also be best in the evening as the lights glisten while you float on the water.
Musée Oceanographique de Monaco
frenchriviera-luxury
Who would have thought there would be a guard watching the oceans for over a century? The Oceanographic Museum, built on the side of Monaco’s fabled Rocher, was established by H.S.H. Prince Albert II of Monaco’s great-great-grandfather Prince Albert I.
It has been keeping an eye on the oceans for more than a century. The Museum has more than 6,000 specimens on exhibit and is known for its global expertise. The architecture of the museum is photo-worthy since it elicits the marine world.
On Wednesdays, you can visit the touch tank and feed the animals there. A light and sound show will also be found in the Whale Room. Prepare your camera because this place needs your unlimited snaps.
Cathédrale de Monaco
flicker
If you have eyes for architecture, then this Monaco picture spot will definitely. The cathedral is situated at 4 Rue Colonel-Bellando-de-Castro. You will be in awe of the intricate details of its facade.
Aside from the Roman-Byzantine architectural design of the building, many notable persons are buried in the area, making it more historic.
Photo Tip: The cathedral is best photographed when the sun directly hits its exterior. The light and shadow play will create more texture for your snap.
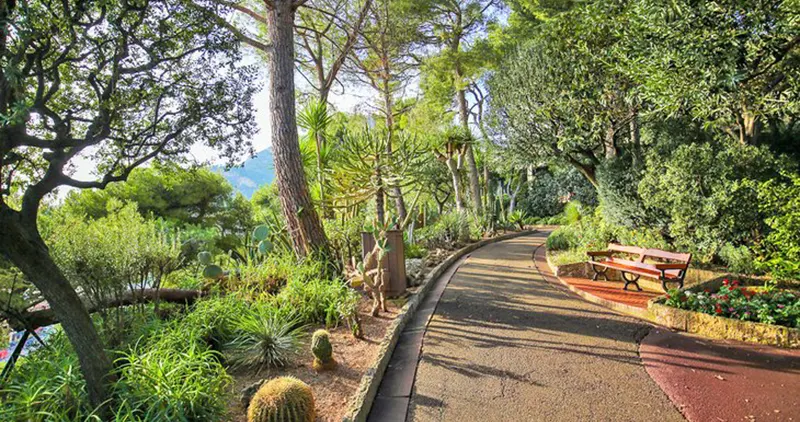
Jardin Exotique
visitthefrenchriviera
Located at 62 Blvd. du Jardin Exotique, modern Monaco is one of the famous places to visit in this country. Jardin Exotique started receiving visitors in 1933.
The garden encapsulated a lot of species of different varieties from across Latin America, Mexico, and Africa. Any spot here would definitely be beautiful.
The large succulents and cacti will make you feel like you are in Eden of some dessert. Ready your camera and enjoy their Observatory Cave and Anthropology Museum. There are tours available every hour after 10 am.
Jardin de Saint-Martin
planetware
Looking over the Port de Fontvieille, Saint-Martin is one of the photogenic spots in Monaco. You will see how the orange-washed houses contrast with the aquamarine waters of the port.
This place is near the Palace of Justice. To get the best Monaco pictures, try to angle your camera at your back as you glance through the terrace. Make sure to cover the houses and the waters too!
Another garden spot is near the statue of Prince Albert I. There are stairs nearby that the photographer can use as a platform to take the photo at a higher angle. The subject should stand the railings as if it is a balcony overlooking the tall, beautiful buildings across.
Pro Tip: Wear some aesthetic or white pieces of clothing to make your Monaco pictures more pleasing.
The Meditteranean
pocruises
Lying from the east and south of Monaco, the Meditteranean Sea is known for its deep blue waters across the globe. Beneath the Museum of Oceanography, you will find a pathway connecting to the marina. I will share with you some not-so-famous spots where you can enjoy the view.
To find this path from Port Hercule, you need to stay by the water. Enjoy the view, and do not forget to take some snaps of the sea! Search for the stone staircase that links you through the rocky beach.
Bridge St Huntsville Movie Theater
simpleviewinc
Bridge Street is located at Huntsville Al 35806. It hosts the number one theater in North Alabama. You can enjoy a nice full bar and scene with plenty of food options, and upgrade your movie with their luxurious loungers.
To choose your movies and reserve tickets beforehand, you can go to Cinemark’s official page or site and have your reserved theater seating. To read more of the previous visitors’ reviews, you can go to their Facebook page or find relevant content in other sites.
Other Things Aside From the Eye-Catching Views
There you go; I hope the list of vantage points will help you on your trip to Monaco. Aside from that, there are also some things worth knowing about the place. You will enjoy the following:
The mild climate is terrific!
It is a great place to shop luxuriously
You can get there by helicopter (if you want an epic experience!)
The place will teach you about marine science
Movie theater in hunstville
October is the perfect month to visit the place especially when you bring your friends with you. Last but not least, even though Monaco is known for the lavish lifestyle it requires, your travel does not have to be expensive.
There are free museums and viewpoints within the country. Some activities will not cost you a fortune.
However, if you worry about your accommodation, you can stay in a city nearby Monaco. In that way, you can find some affordable places to stay in. Manage your bookings beforehand!
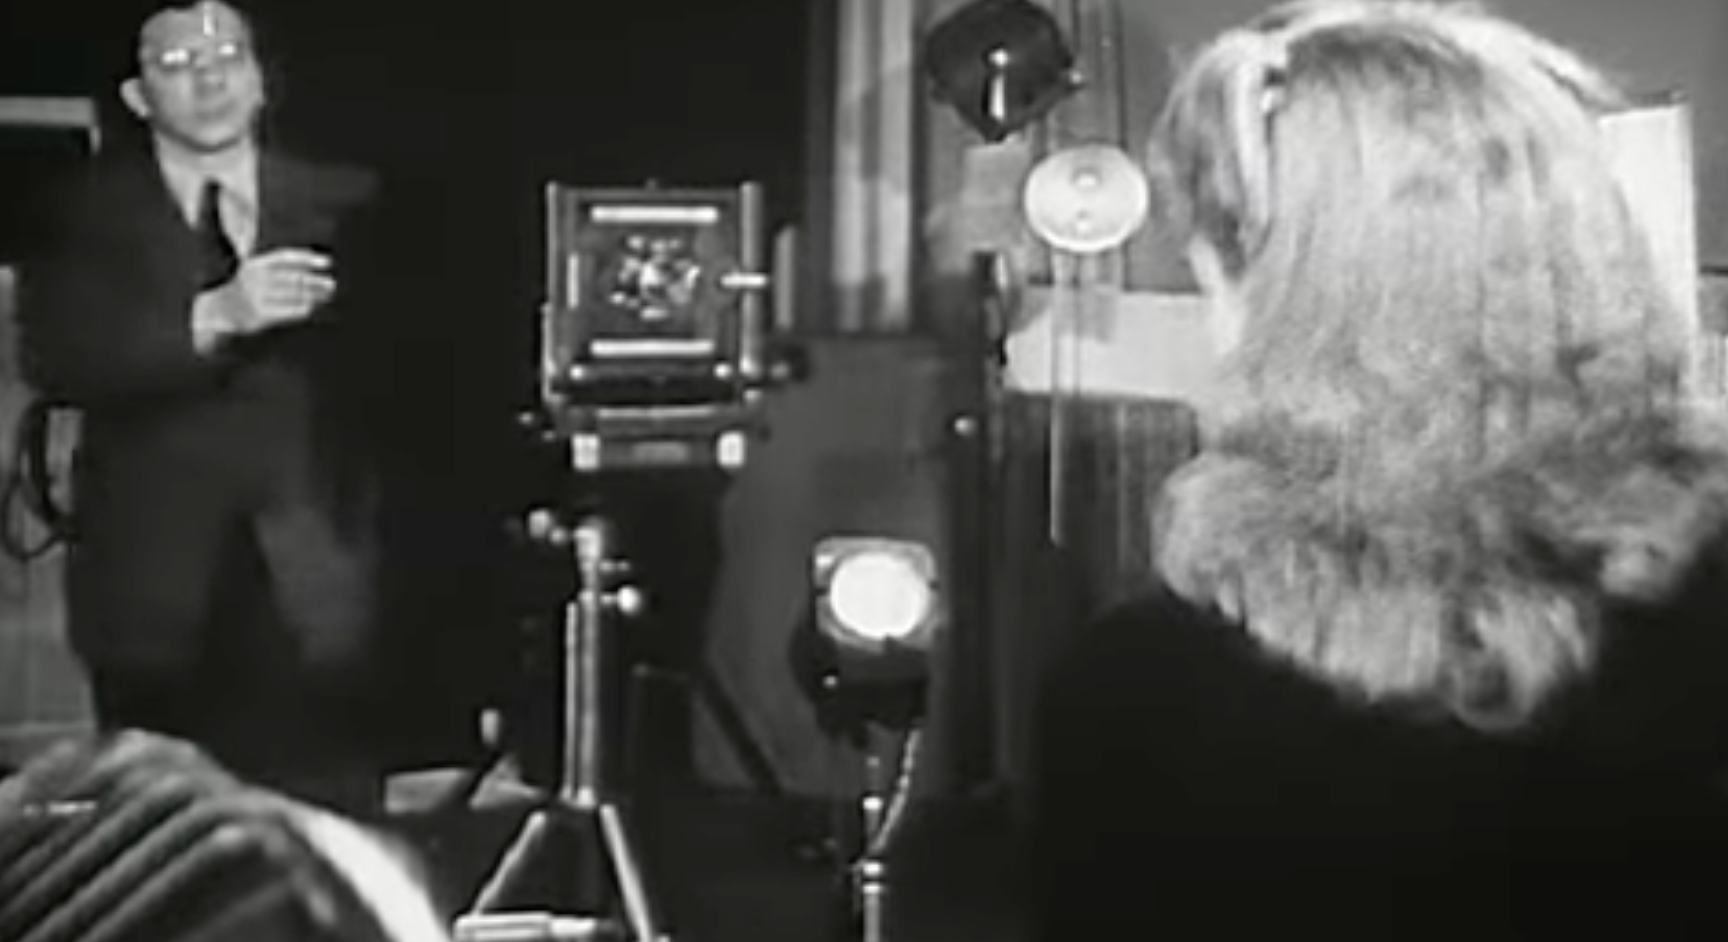
While we spend most of our time here at PopPhoto nerding out about the latest and greatest photography gear, we’re also suckers for truly old-school photo content. This fascinating video outlines what it was like to be a professional photographer in 1946.
Obviously, the industry, technology, and, well, pretty much everything has changed quite a bit back then. But some things do sound familiar. For instance, it’s weird to hear that there was an abundance of people in the profession even back then. The tools were obviously much less accessible than they are now, but even back then, people wanted to get in on the pro photography game.
Videos like this are truly a time capsule, and I have to wonder what it will feel like for people in 2100 to look back on the state of the industry in 2023. Our precious megapixels will likely feel so quaint.
I’ve got something a little different today. Call it a slight expansion of my teaching skills. Teaching to my passions, if you will. Or you can just think of it as little bit of Friday fun and entertainment.
Specifically, I show you the steps needed to shoot and edit a handful of clips, so that they’re all in sync with the music. Final Cut Pro makes this really easy, but if you don’t know where to look in the software, it’s hard to figure this out. To illustrate, I use the video clips from my own song and music video, A Very Cozy Christmas, which I released back in 2020.
Now, I realize, that a lot of my readers probably don’t use Final Cut Pro, or have any intention of every making a music video for that matter, but who doesn’t love a good music video? The classic ones have such cultural significance in our lives. Or at least they once did.
With that in mind, it might just be fun to watch this video, just to see how they’re made, and to support my efforts. If you enjoy my teaching style, this is a great way to help me expand my audience, which helps me continue to make more photography tutorials. So, even if you’re not a Final Cut Pro user, or a music producer, please consider watching and leaving a comment, just for that reason.
So whether you were raised on videos like Thriller, Jump, Every Breath You Take, Hungry Like the Wolf andSledgehammer, or not, thanks so much for your support and have a great weekend, and I promise, I’ll get back to making some more photography tutorials very soon!
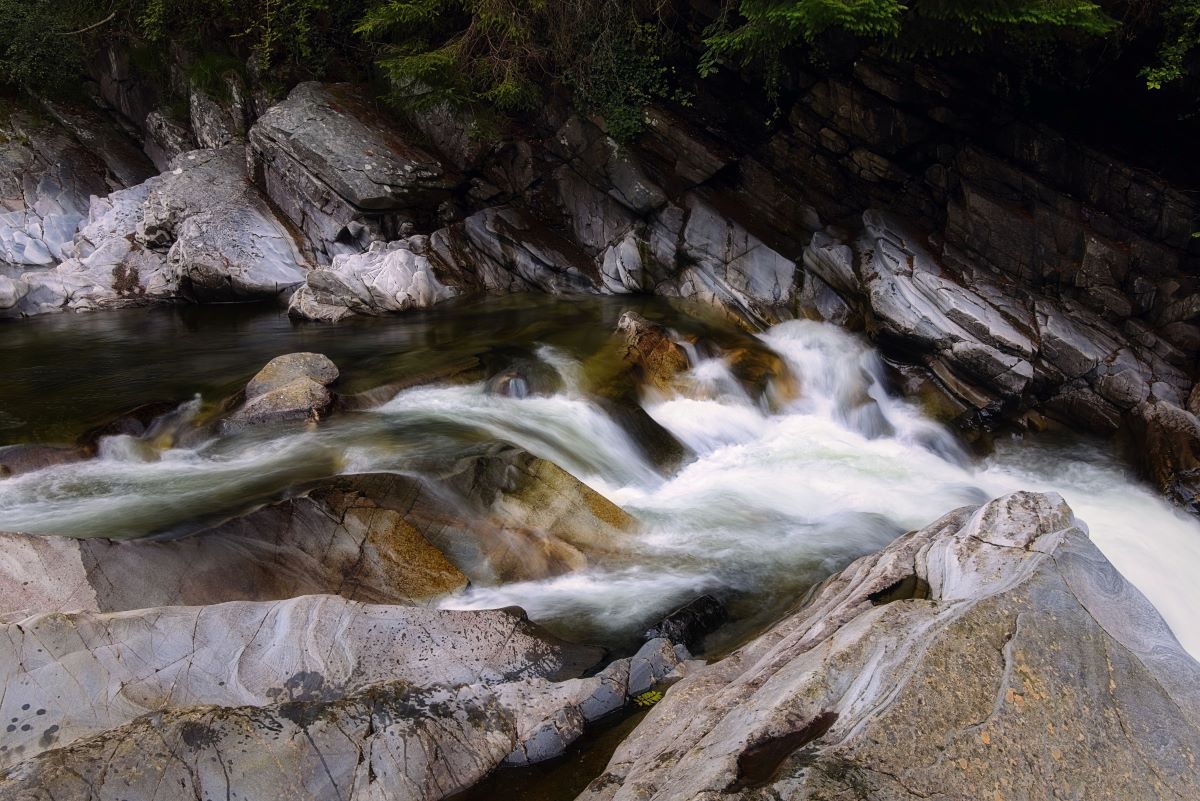
As a landscape photographer, you often find yourself drawn to the expansive views and deep sceneries you create. However, even tiny subjects may have a significant influence. Photographs of intimate landscapes may provide stunning pictures alone or enhance the enormous views that draw viewers to your images.
To photograph intimate landscapes, you must incorporate design elements such as lines, textures, patterns, colors, and forms into the frame. Keep an eye out for details that convey a narrative about a subject or provide viewers with background info about it. The type of elements you need to capture while shooting an intimate landscape are present in these “small details.”
Read on to learn tips and a tutorial helpful in navigating an environment with intimate landscape photography.
What Makes an Incredible Intimate Landscape?
This branch of nature photography is deserving of some appreciation. Intimate landscape photos seduce us with delicacy and peaceful invitation, in contrast to the grand landscape, which dazzles us with vivid hues and stunning near-far perspectives. It tempts us to delve deeper into the event captured in the picture.
Making incredible intimate landscapes is all about the little things. Think of landscape photographs as falling into three subgenres: the expansive view, the extreme close-up, or the intimate landscape photography.
It takes more than merely filling the frame with things to create the intimate compositions of a landscape, even while textures, lines, forms, and patterns are essential elements. It recounts a section of the narrative.
Consider what “smaller details” are in every site that provides context for the area. When you have your entire scene, compose it using a visually appealing layout. The mix of pebbles, kelp, and a bird feather at the beach tells a complete story. You may get a sense of the setting from any small scenes.
Choices of Equipment
Many often bring just one lens, for the goal is to capture the subtleties of a larger landscape. To make sure you have everything you need when photographing intimate landscapes, check the list below:
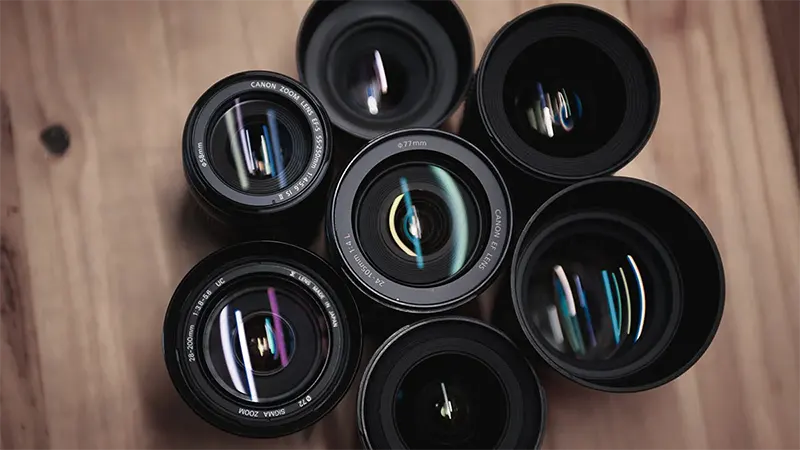
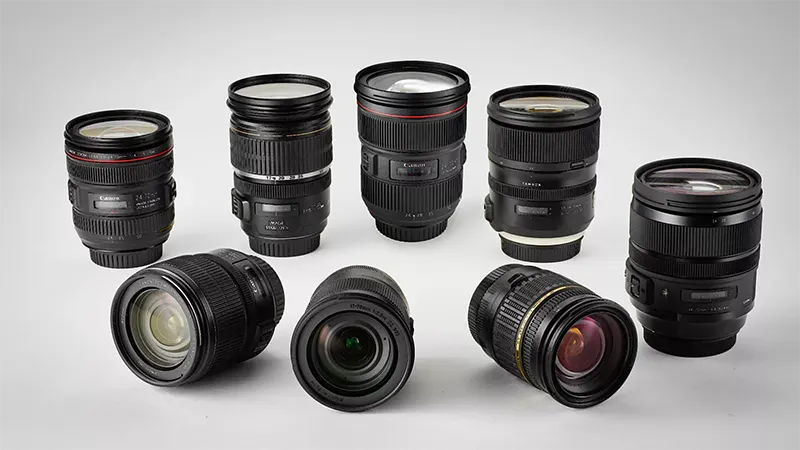
Extra Lenses
adorama
Because you only have one lens, you must focus on selecting a worthwhile subject and creating a better image. By changing lenses, you are losing time on the scene for searching, discovering, and taking pictures.
Without the weight of extra gear, you can move more quickly, trek further, and locate things that you otherwise wouldn’t have been able to. When you are constantly changing lenses, it might be challenging to focus on that.
Mid-Range Zoom Lens
futurecdn
A mid-range zoom lens is best for capturing an intimate landscape. Wide-angle lenses are often beloved by landscape photographers.
Still, when it comes to a small, intimate scene, wide-angle lenses tend to contain too much backdrop and too many distinct subjects, which detract from all the details that are the primary focus. Although it’s not a strict rule, a mid-range zoom with a fast shutter speed typically works best.
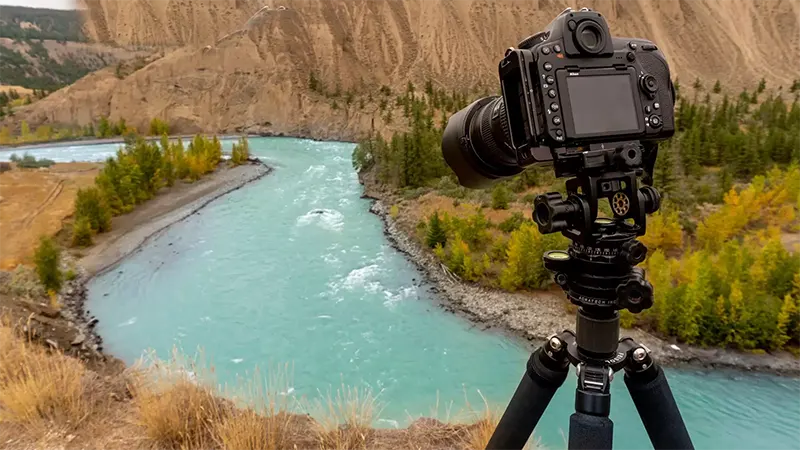
Tripod
photographyacademy
A tripod is yet another crucial gear to capture the intimate details of your intimate landscape. A tripod helps you slow down, even in conditions where you have enough light to work with, and may not require a slow shutter speed.
You may find the distinctive nuances that make a scene unique by spending time and getting to know the area; they are the ideal scene for your intimate landscape.
Compositional Methods
Just because we aren’t taking pictures of grand vistas doesn’t imply we should neglect good compositional techniques. When practicing intimate landscape photography, the same compositional strategies still hold. We may approach this subgenre in many different ways.
Lines are one of the best methods to guide your viewer around a small scene. Using lines from photographing nature is more than just large-scale landscapes.
Even when photographing intimate landscapes, leading lines are an excellent method to show the viewer the image’s main subject.
This strategy allows you to display a larger scene that, at first look, is just a repeat of the same thing. But the beauty of this strategy is that, upon closer examination, the spectator may revel in the variations you often see in nature.
Depiction or Portrayal
photopills
Do you recall attempting to identify shapes in the passing clouds when you were little? The strategy is the same.
Here, finding natural components that mimic something altogether different is the aim. This strategy’s appeal lies in its ability to capture your and the viewer’s imagination.
Separation or Isolation
photzy
Isolation is often found in varied textures and light rather than epic fog when capturing more abstract landscapes. The sudden change in texture in a photo is what provides the whole narrative.
Contrast or Duality
contrastly
When capturing more abstract features in the environment, similar to balancing in expansive views, you may examine various components using the this vs. that approach. The notion is practical when two incompatible natural components coexist peacefully in a constrained space.
Simple examples are dark background vs. bright contrast or complementary colors. Or it might be more intricate, as in the resulting photographs showing the distinction between explicit and reflected water waves.
The Framing
pixinfocus
In many facets of photography, but notably in the grand landscape, the idea of framing is helpful. With framing, you make the main subject the center of some vignette form by using a small portion of the surrounding area.
The framing approach requires the photographer to locate anything in the surroundings that pulls the viewer to a particular photo section. It is much like how a frame enhances a photograph or painting by bringing the observer into the center.
The Colors
improvephotography
All landscape photographers should learn about and become comfortable with the color wheel. When it comes to complementary and similar hues, this is particularly true.
Similar hues create harmony because they are close to one another on the color wheel, while complimentary hues are on opposing sides. You must learn how colors interact with one another.
8 Simple Tips For Better Intimate Landscape Photography
Here are some photography tips to assist you in navigating the intimate landscape photography world.
1. Start Small
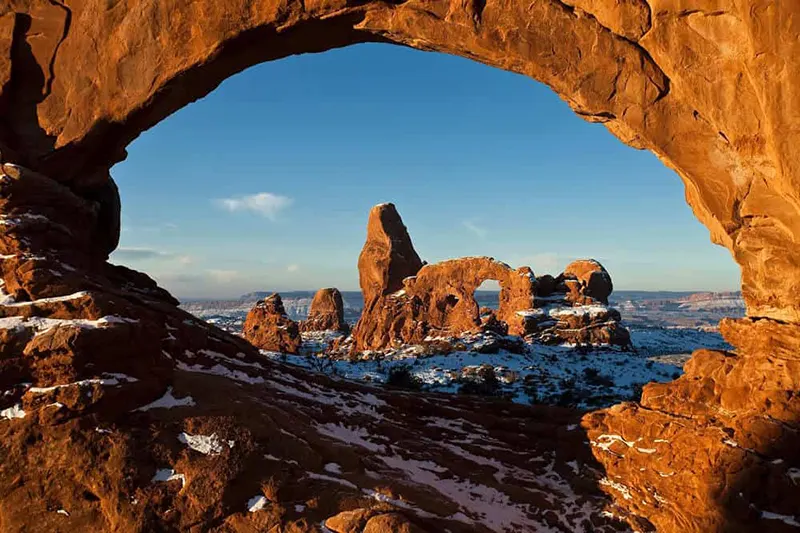
One advantage of finding intimate landscapes is that you don’t need to visit parks like Glacier National Park or Zion National Park. You may find it everywhere, in your backyards, surrounding parks, besides the stream, metropolitan museum, or the neighboring forests.
Any time of day, if you take your camera on a stroll, you will come across some intimate landscapes. You will discover that close-up landscapes often lend themselves to various styles.
2. Get Closer and Personal
A telephoto lens is a great lens to use when focusing on small scenes in the most intriguing area. Compress and eliminate distracting elements from the scene using a telephoto zoom lens or fixed lens to frame it closely.
You may use a mid-range lens instead of a telephoto lens if you don’t have one, and then “zoom with your feet” to get closer to your subject.
Consider utilizing your 24-70 mm lens to capture a scene with a mountain and grand vista. Step a few steps forward and start exploring for interesting compositions, or zoom in to the most significant focal lengths on your lens. Your eye will learn to see in smaller details as a result.
3. Eliminate Distractions
Asking oneself, “Is this a significant component of the photo?” is a valuable habit to get into while taking intimate landscape photos. A little shift in perspective may make disturbing components in more intimate compositions disappear.
The sky is one component that often draws attention away from the subject of your shot. Work to remove the sky from your composition as much as you can.
It will distract your viewer from the focal focus of your photograph since it is often the brightest part of your frame. When we eliminate context from our landscape photographs, we allow our viewers to see with their imaginations.
4. Start Wide, Go Narrow
You may take your wide-angle lens out of the bag as you approach that expansive, gorgeous scene. Start focusing on the more compelling compositions that fit within the bigger picture.
Using a wide-angle lens to capture a picture and then using the magnify button on the camera’s rear to browse through the image to look for any small scene. More interesting compositions inside the frame will help you find more intimate photos.
Before you even take the camera out of the bag, you may use a card to frame smaller scenes. A frame card is a little mat board with an opening proportionate to your sensor.
5. Recognize Patterns, Different Textures, Shapes, and Lines
The two dimensions of an image are its limitations. Therefore, there are a few extra tools that you may use to add shallow depth and movement to your composition.
The artist may create an appealing photo using various techniques, including texture, lines, colors, tonal value, and forms.
When you train your eye to recognize the fundamental elements of composition, you will start to see them everywhere — in the texture of grasses, the contrast of colors on the surface of the water, the shapes and lines of sticks, and the forms of rocks.
Make your composition using the colors in nature photography. Develop your two-dimensional vision.
6. Use The Scene With Multiple Shots
insider
Consider employing intimate landscapes to communicate a more sweeping tale about the setting where you are photographing.
For example, looking inside an abandoned place, you will see several discarded objects that reveal the place had been abandoned and was in a state of disrepair. Combined with other images, it supports a fuller narrative than a snapshot of the place alone.
7. Illustrate The Focal Point
You may see a suitable focal point as the anchor in landscape composition, such as an eye-catching boulder near a canyon’s entrance. Once you’ve captured that composition, experiment using the focal point as a separate composition.
For example in street photography, the grass is a lovely subject, and the water mirrors the sky, providing a little more subtle interest to the photo.
8. Notice Details in Abstract Compositions
Abstract painting has numerous options in this type of landscape. Intimate landscapes can’t depend on spectacular sunrises to draw in viewers. Therefore, composition is crucial in creating an intimate experience.
Consider alternatives to the “rule of thirds,” often used in photographing nature’s smaller scenes. Pay particular attention to how the composition’s lines and forms direct the viewer’s eye and how they may arouse feelings.
For instance, horizontal lines evoke tranquility since everything parallel to the Earth is at rest. Vertical lines provide the impression of strength, size, and force. Diagonal lines produce movement and energy. Furthermore, symmetry suggests stability.
Don’t forget to Have Fun!
It is very refreshing and memorable to see and capture intimate, grand landscapes. Remember to discover humorous images while searching for serious and artistic ones!
Conclusion
A challenging yet worthwhile photographic strategy is intimate landscape photography. Your photos tend to be more original, artistic, and emotional since you are capturing intimate moments.
With this, you may connect with your audience more significantly and profoundly than ever.
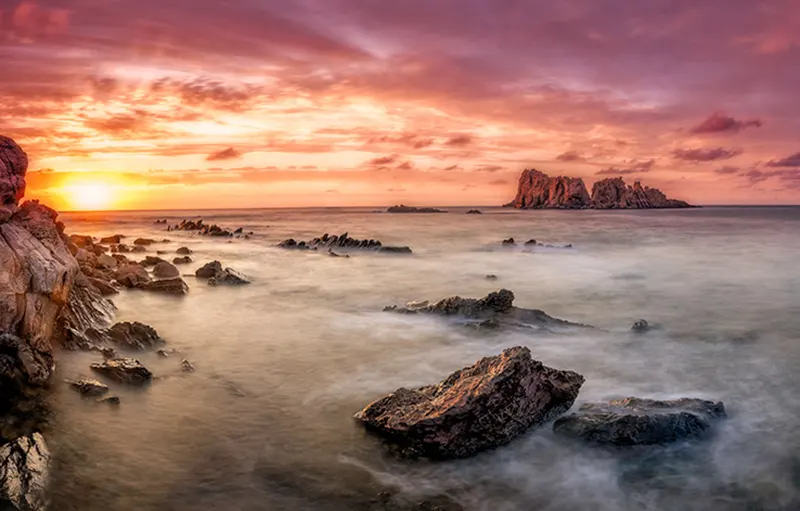
The weather can be unpredictable, even in the most temperate of climates. Rainy days can make for a great photo shoot opportunity, but if you’re unprepared and don’t have the right gear, it could also mean some costly repairs for your camera.
Protect your camera from bad weather by investing in high-quality rain protection gear, covers, rain sleeves, waterproof backpacks, and UV filters.
Whether you’re shooting in the rain, snow, or extreme heat, there are steps you can take to ensure that your camera stays safe and functional:
Quick Navigation
16 Tips for Weatherproofing Your Camera
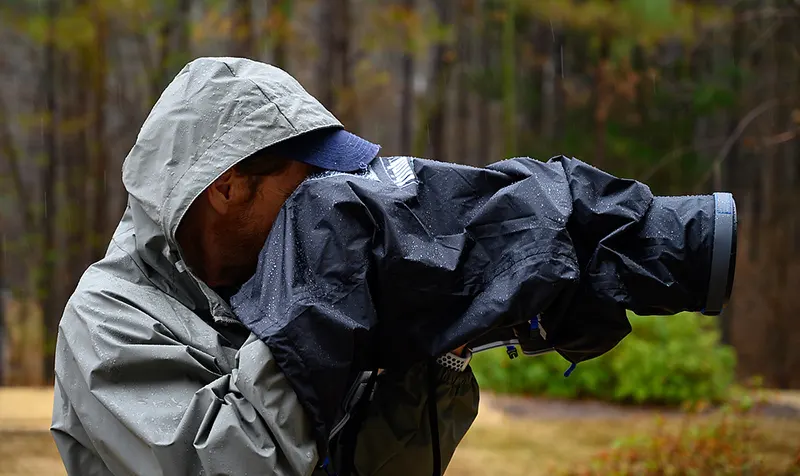
1. Invest in a Camera Rain Cover
A camera rain cover is the first line of defense against rainy conditions, and it’s a must-have for any serious outdoor photographer.
upaa
It is a simple and effective way to protect your camera from the elements. It fits over your camera and lens, creating a barrier between the camera and the rain.
A good rain cover will protect your camera from rain, snow and sand—and can also be used to shield it from the sun’s UV rays. Rain covers attach to your camera using hook-and-loop fasteners (a type of adhesive), allowing you to easily remove or reposition the cover as needed.
2. Use a UV Filter
For those who don’t know, UV filters are basically clear pieces of glass that fit in front of your camera lens to protect it from scratches and damage. So why would you want one?
Well, they’ll help keep dust out of your camera and prevent moisture from getting inside. Aside from that, they help reduce the amount of UV light that enters the lens, which can cause lens flare and other problems. A UV filter also provides an extra layer of protection for your lens.
They’re also easy to clean when they do get dirty while you’re working outside with your camera! These filters come in all shapes and sizes – we recommend purchasing one with just a bit wider diameter than the front element on your lens so that it can easily slide into place without having to worry about vignetting (light falloff).
3. Change your Lens Cap for a Tulip Hood
To protect your camera from the elements, you can use a tulip hood. A tulip hood is an alternative to using a lens cap that will save you time and money. The benefits of using a tulip hood are:
It’s easy to attach and remove from your camera.
There is no need to remove it every time you want to take pictures.
It protects both sides of the lens at once—the front and back sides of the lens are equally protected by this cover!
4. Use a Rain Sleeve on your Camera
You can also use a rain sleeve as an additional protection for your camera gear. A rain sleeve is a protective cover for your camera that helps keep it dry and protected from the elements, including dirt, dust and water.
Rainsleeves come in several sizes: some are designed for specific models like DSLRs or mirrorless cameras; others are universal and will fit any size device.
If you’ve got multiple lenses that need protection but don’t want to buy multiple covers, consider buying an ultralight backpack instead of individual bags—many backpacks have built-in lens cases that can be opened with one hand while shooting!
A good quality rain sleeve will have an adjustable strap to attach it securely around your DSLR or mirrorless camera body. It should also be made from high-quality material with waterproof zippers so that it doesn’t let any water in when you open the case up after using it in inclement weather conditions like heavy rain, light rain or snowfall.
If you don’t want to buy one of these sleeves for every time you go out shooting photos outdoors during bad weather conditions then consider investing in a lightweight plastic bag instead (or even just zip lock bags).
This way you can keep them as spares when photographing outdoors so that if something does happen with your gear while taking photos outside during rainy days then there’s always an extra layer protecting their expensive equipment!
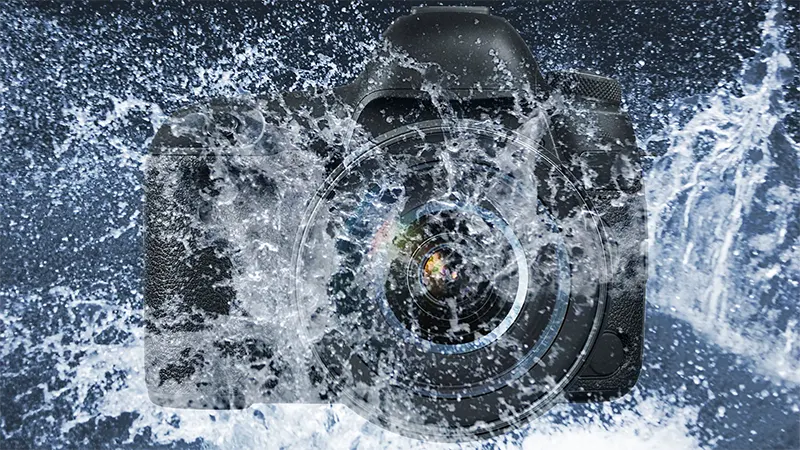
5. Keep your Camera Away from Direct Water Contact
photofocus
The last thing you want is for your camera to get wet, so make sure you take precautions before heading out on your next adventure. If there’s even a chance of rain, keep your camera gear safe in a waterproof camera housing, bag or case for better protection. You must always be ready with weather-sealed cameras.
And if it’s too late and the weather has already turned against you, try taking the battery out and bringing just that part inside.
If a storm happens while you’re out in nature, quickly seek shelter under some trees or rocks until it passes—but don’t risk getting lost by trying to find shelter outside! If all else fails, consider changing plans altogether and rescheduling them for another time when it won’t be raining as hard (or at all).
6. Carry Dry Bags with you
Keep your camera inside a dry, protective bag. Dry bags are waterproof and can protect your camera from the elements.
A camera bag with a weather-resistant exterior can help protect your camera gear safe from the rain and other elements. It’s also a good idea to store your camera in a dry place when it’s not in use for better protection.
They come in all shapes and sizes, so you can choose one that fits your needs. Make sure the zippers are strong enough to keep all the water out and make sure there’s a way for air to escape if it does get inside (don’t buy a dry bag with just a single valve).
You can also use them to keep any other electronics you’re carrying dry. You can typically fit your photo gear, waterproof camera housing, a phone, wallet, passport, etc. in one of these small bags and just throw it into your bag or backpack.
7. Shoot in RAW format
Shooting in RAW format is one of the best ways to protect your camera from bad weather. Unlike JPEG files, which are compressed and have their colors reduced, RAW files are not processed by your camera settings until you open them on your computer.
This means that they contain all of the information captured by the camera’s sensor—uncompressed, high-resolution images with more detail than JPEGs can ever hope for.
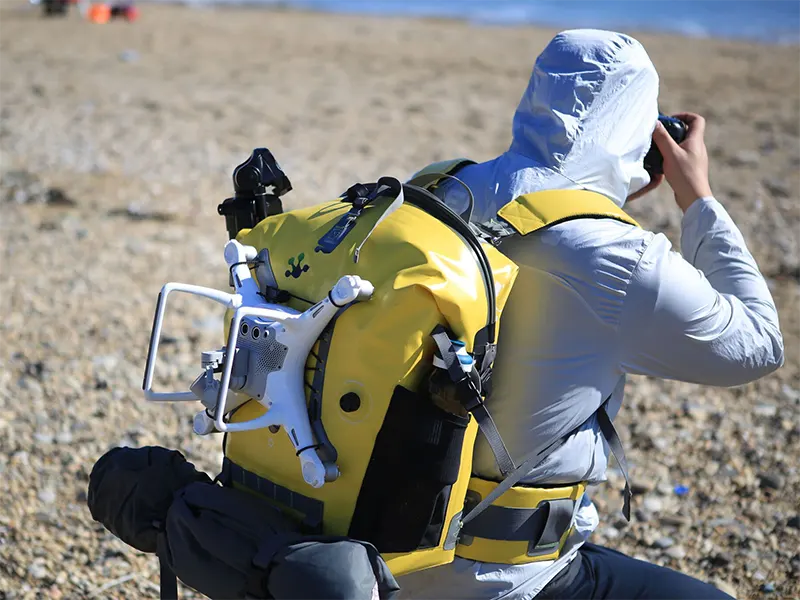
8. Buy a Waterproof Backpack to Protect your Gear
You may want to invest in a good waterproof backpack to keep your camera dry. Even if you are confident that your camera and lenses can stand up against wet conditions and the elements, it’s always better to get added protection and to be safe than sorry.
dpreview
Look for one that has been designed specifically with photographers in mind. It should feature an internal memory card slot, multiple accessory pockets and dividers for organizing equipment. It also needs to have padded straps to comfortably keep your camera inside during long hikes or treks through the city streets.
The additional cost is worth it to protect your cameras and gear and keep them safe from the rain, cold, and other extreme conditions.
9. Keep an Extra Camera Battery Handy
The weather is not going to care if you are shooting a wedding or just trying to get that perfect shot of the sunset. You need to be prepared, as your camera’s battery life will be affected by all sorts of things, including temperature and humidity.
As with human batteries (iPhones), the amount of charge left in your camera’s battery will decrease over time. If you use your camera often, then you should consider replacing the original battery with an extra one.
10. Protect your Camera from Heat and Humidity
If you store your camera for long periods of time, make sure it is dry and cool. Do not leave your camera in a car or on any surface that might get hot from sunlight or indoor heating.
For extra protection, keep the lens cap on when not in use to prevent dust accumulation on the surface of the lens. If you’re going to be putting your cameras away for a while, consider storing it in a temperature-controlled environment (such as an air-conditioned room) or climate-controlled storage facility.
11. Carry a Microfiber Cloth
A microfiber cloth can be used to wipe away any excess moisture or dirt that gets on your camera. It’s a good idea to keep one in your camera bag at all times.
12. Avoid Changing Lenses in Bad Weather
If you need to change lenses, try to do it in a covered area to protect your camera from the elements. If you must change lenses in the rain, turn your camera off and cover the body and lens with a rain cover or umbrella to minimize the amount of moisture that gets inside.
13. Use a Lens Hood
A lens hood is a piece of plastic or metal that attaches to the front of your lens. It helps to shield the lens from heavy rain, snow, and other elements. It also helps to reduce lens flare and improve image quality.
14. Avoid Shooting in Extreme Heat
If you’re shooting in very hot conditions, try to keep your camera in a cool, shaded area as much as possible. Avoid leaving it in a hot car or direct sunlight for extended periods of time, as this can cause damage to the camera and its batteries.
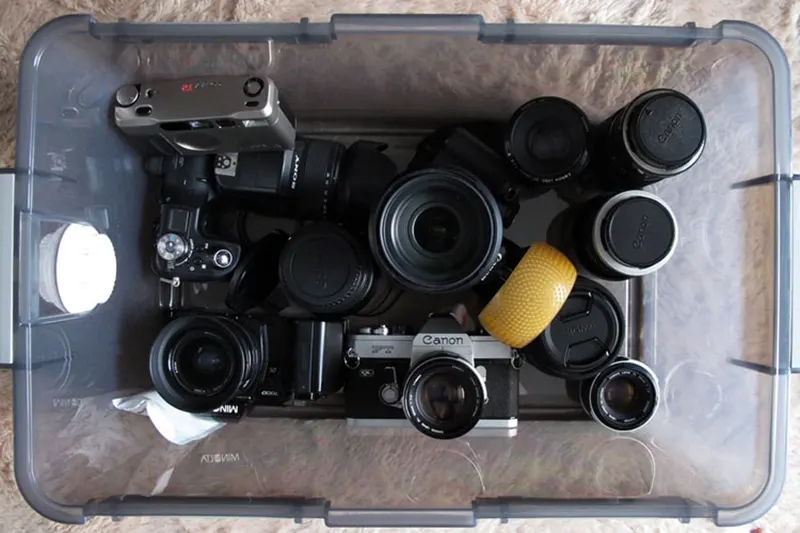
15. Use a Dry Box or Silica Gel Packets
drycabinets
If you’re traveling to a humid location, consider using a dry box or silica gel packets to protect your camera and lenses from moisture. A dry box is a small, airtight container that absorbs moisture, while silica gel packets absorb moisture and help to keep your gear dry.
16. Use a Tripod in Windy Conditions
If you’re shooting in windy conditions, a tripod can help to keep your camera steady and prevent it from being blown over. It’s also a good idea to use a cable release or self-timer to minimize camera shake
Takeaway
The takeaway from this article is that you need to be aware of the weather conditions and keep your camera safe when you are outdoors. You should also take precautions before heading outside.
If it looks like it will rain or snow, keep your camera weather sealed, stay indoors, and wait for the storm to pass. Be sure to wipe off any moisture on your camera if it gets wet in the rain or snow, and make sure you keep it dry when indoors so that moisture doesn’t build up inside of it and damage its internal parts.
The most important thing is to not let yourself get frustrated or discouraged when things don’t go as planned. Remember that there will always be beautiful days for photography.
It’s impossible to keep the bad weather completely out of the picture. Tips, we shared can help you protect your camera from bad weather, and ensure that it stays in good working order, and takes better photos for years to come. Happy shooting!