When we first start out in photography, be it with a smartphone or a full size camera, we tend to capture exactly what is in front of our eyes. We are, by default, taking pictures 5 to 6ft above the ground, straight on with a subject more than a few meters away.
Modern cameras tend to flatter us with their amazing technical capabilities, great colour, spot on exposure and tack sharp focus. We see those first images and we are wowed by them.
If you have been doing photography for a few months or years, I urge you to go back and take a look at them. There is one thing that may well stand out above all others. They look flat, very two dimensional.
Now, I can hear a few people screaming at me right now, “of course they are flat, they are photos”. But they are missing the point.
Whilst every photo will always be two dimensional, that doesn’t exclude us from purveying a sense of depth in them. In fact, adding depth to your images will make you a better photographer and your photos more engaging.
But how do we do that? We do it by training our eyes to see the layers around us. Let me explain.
What Are Layers?
Every scene we photograph is three dimensional. Even if we are photographing a painting in an art gallery, it will have three dimensions. The thickness of the paper and the frame gives us that third dimension.
Good photos will consist of three main layers, the foreground, midground and background. Each will be distinct from the other, separated by a camera technique or compositional element. Going back to our early photographs we will see that we do indeed have those three layers. However, what we have not done is separate them sufficiently.
This image has layers but they are flat and not well defined . By Jason Row Photography
By isolating those layers we not only add depth to our image but we also create visual storytelling. We are leading the eye of the viewer through the image, to the subject. That subject doesn’t have to be in the background, it can equally be in the midground or foreground. However, by using visual separation, we create depth and draw the eye to the subject.
This image has multiple layers that are linked, drawing your eye through the photo. By Jason Row Photography
In the above image, the subject is in the midground. The shallow depth of field has separated the background of the street and the foreground, the rails. Our eye is naturally drawn to the subject, the image tells a story and it also has depth.
How Do We Learn To See Layers
It’s actually not that difficult and there is a pretty good chance you are already doing it. If you have ever shot a photo with leading lines, you have isolated at least the foreground and background, and if there is a subject on the leading lines, a midground too.
When preparing to photograph a scene, make a conscious decision to look for the layers. In the example below, the foreground is the nearest building to the bottom right. The roofline of this creates a leading line into the midground, the two bridges and associated buildings. The background is the modern concert hall. Despite a deep depth of field all three layers are clearly defined. The light trains of the morning traffic serve as a connection between the layers.
Depth of field is a powerful tool in isolating layers. A wide aperture allows us to bring the eye to one single layer, whilst a deep depth of field, such as the bridges example above, can show multiple distinct layers.
In the image below, the shallow depth of field brings our eye purely to the foreground layer. However, the composition clearly shows a midground – the sea and a background, the rising sun. The image has a distinct three dimensional feel whilst only concentrating on a single layer.
Background, midground and foreground but it’s clear which one to concentrate on. By Jason Row Photography
Next time you are out shooting, before you even raise the camera, look for the layers. They could be rocks in the foreground, a treeline in the background, perhaps people in the midground. Start to train your eye to look for those separations and you will soon see that every scene that you shoot has layers.
Up until now we have been concentrating on physical layers, however they don’t have to be.
Layers Do Not Have To Be Physical
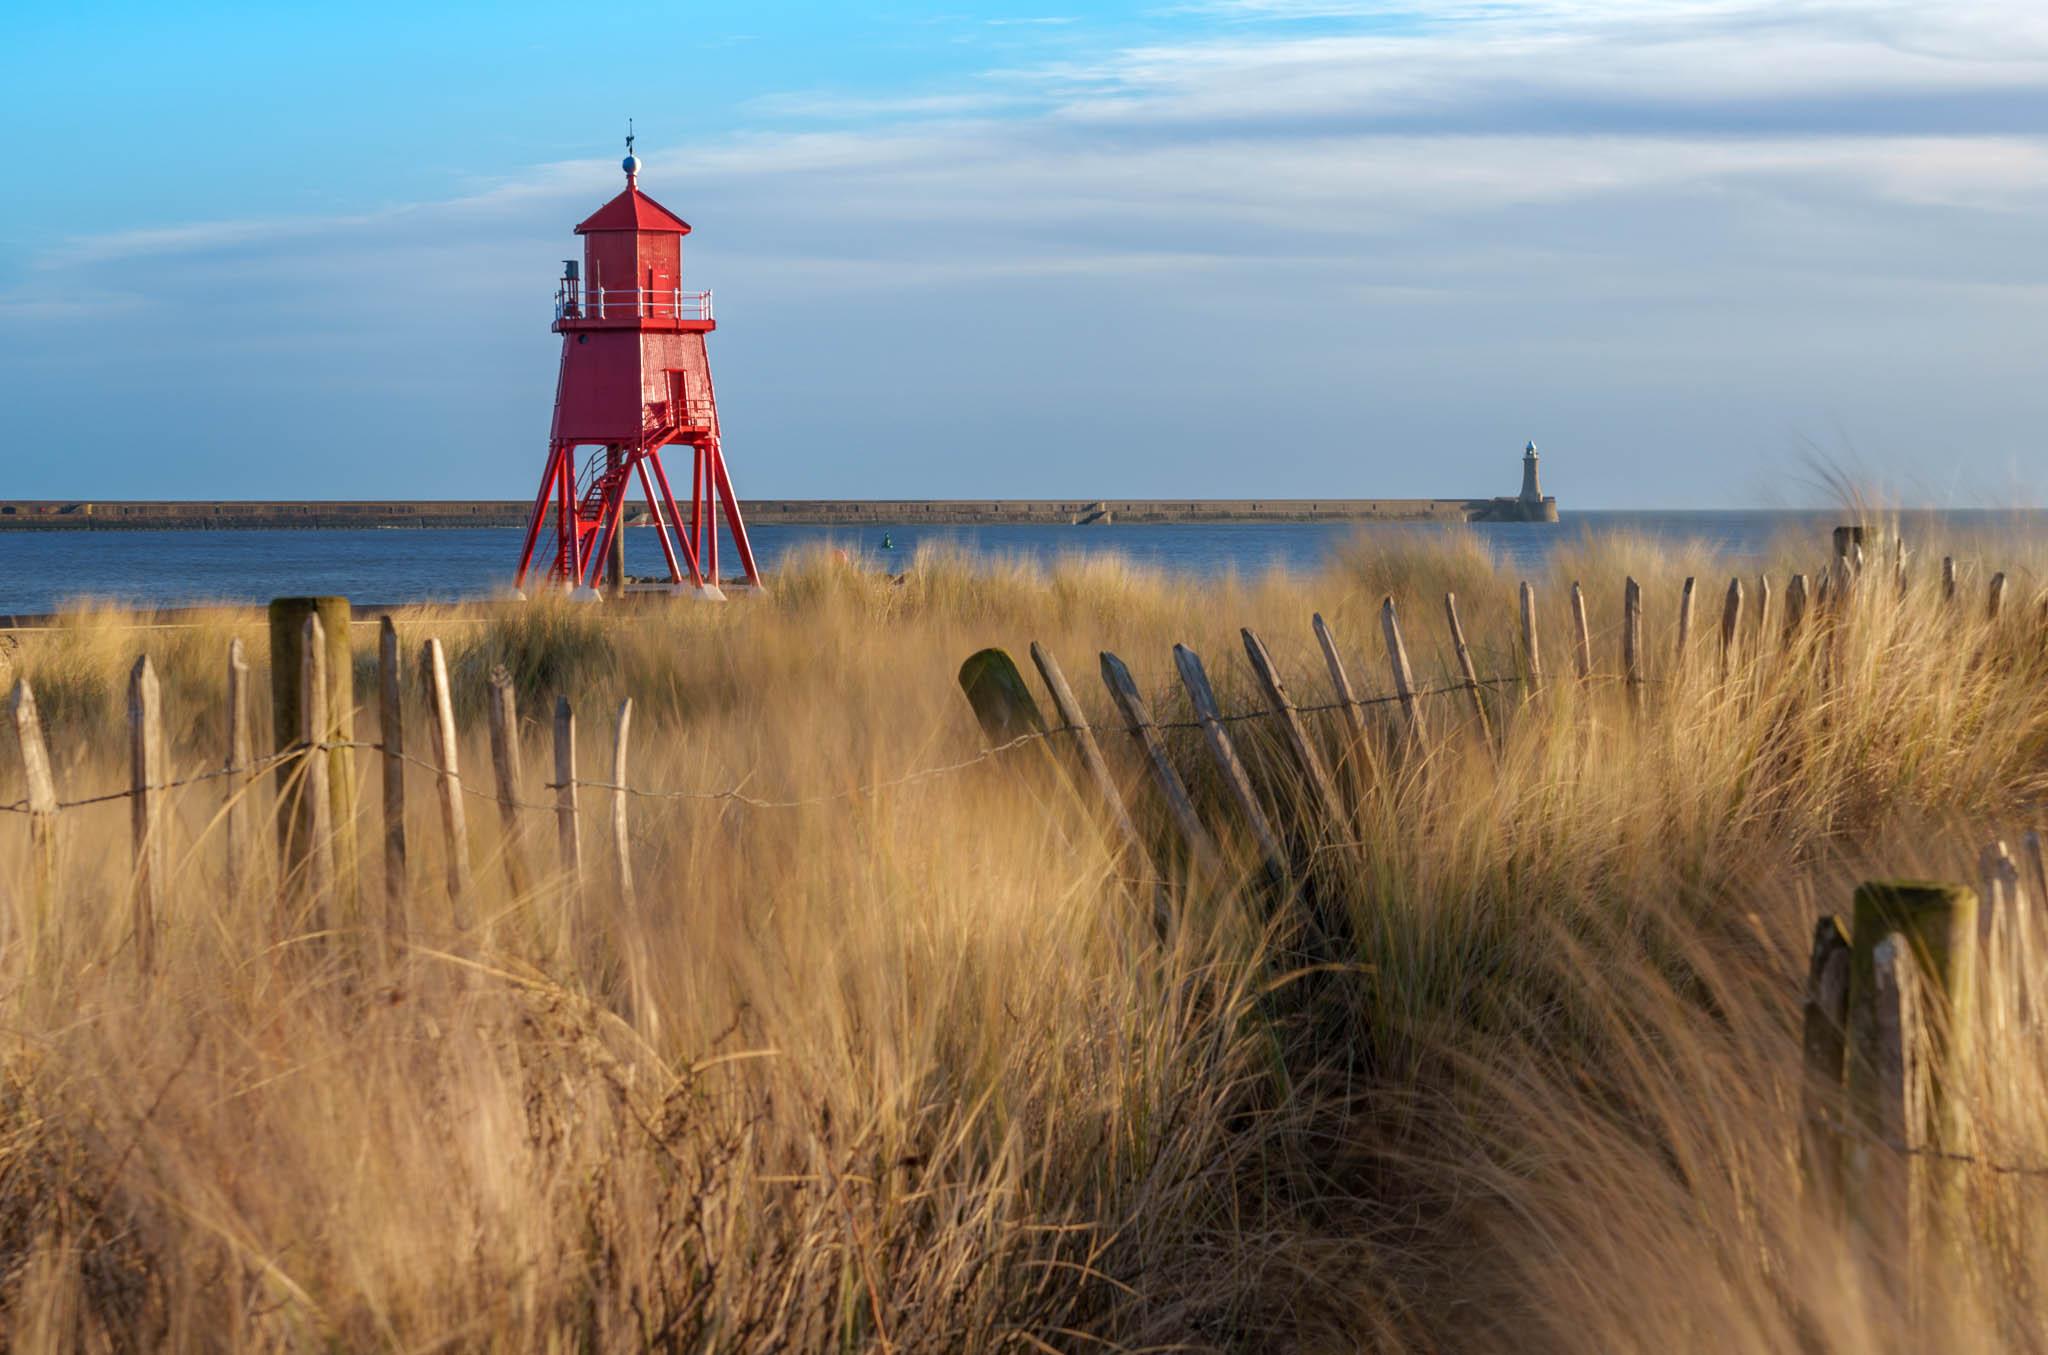
Light and shade are the fundamentals of photography. They are also fantastic tools for adding depth and layers to our images. Look at the image below. Whilst the lighthouse is the obvious background and a physical element, the foreground and midground are much more about two things. The light and shade on the grass and the motion of the grass in the wind. Both draw the eye through the image to the distant lighthouse.
Although containing physical layers, the wind is adding depth to this image. By Jason Row Photography
The best images will have multiple layers that use both the physical and the conceptual combining together to lead the eye through the image as well as tell a story. This is illustrated in the image below.
The physical elements are the walls and cannons. The cannons are the foreground, the walls, the midground. The light and shade works as a leading line to the frame but also as a way of providing definition between the midground and foreground. The frame itself reveals the background. The combination of these gives the image a very three dimensional feel.
In this last image below, we also have very defined layers created both physically and by light and shade.
The monument to the right is in complete shade but clearly defined as a foreground. The hole through the monument leads our eye to the background which is the lighthouse. However, the walking figure to the left of the shot draws our eye to the midground and helps hold the whole image together.
As mentioned earlier, layers are everywhere. Every scene we shoot has layers. Our task is to define them and isolate them. This can be through depth of field, light and shade or through composition such as leading lines. When we do, our images become so much more three dimensional and in turn, more interesting and engaging.
We’re happy to announce the winner of July’s competition, “Textures and Layers.”
For those who don’t know, the Light Stalking Monthly Photography Competition carries a $100 People’s Choice Award and a $100 Overall Winner Award. The People’s Choice Winner is selected by a vote of the community, whereas our guest judge selects the overall winner.
The “Textures and Layers” Photo Contest
Textures and layers are a powerful combination in photography and they are difficult to photograph well. Combining textures and layers in an image needs careful observation, wise choice of subject, elements and the right lighting to get the best resulting image.
Textures are interesting and photographing just the textures close-up may not always end in compelling photographs. Layers on the other hand can be a powerful tool to enhance depth and visual interest in an image. Combined, both work together and help achieve great results in a photograph.
When capturing textures, the photographer needs to take into account the camera settings as well, in order to capture the details well. Narrow aperture values for crisp texture details and low iso values to capture neat noise free images.
The contest theme for July was “Textures and Layers’ and the photos from the participating members included interesting submissions covering various genre in photography like macro, portraits, abstracts, nature, landscape, still life and even street photos. The submitted photos portrayed unique interpretations of the theme with images shot under great lighting and also some submissions making use of light and shadow to enhance the layers and depth in the image.
When choosing the winning photos, we wanted to make sure that the decision process was based on a good interpretation of the theme, followed by other factors like light, composition, story, details, creative vision, etc. The results are entirely subjective and there are no losers in any competition as we all know.
Here are July’s winners:
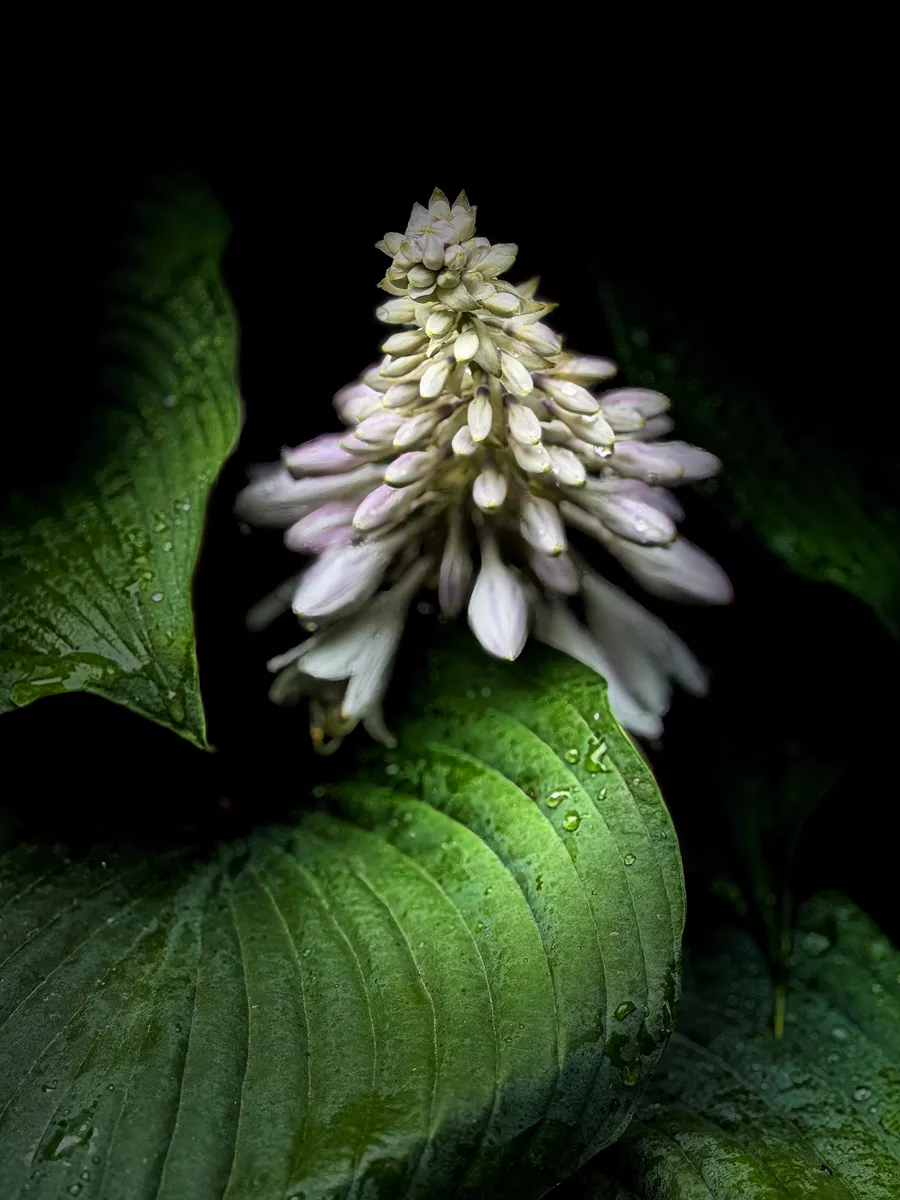
First Place: “Wet, Layered, and Blooming” by Pat Garrett
Wet, Layered, and Blooming – Copyright Pat Garrett
Pat submitted this image of a Hosta along with its flower and this image really stood out in terms of composition, light and is a great example for the contest theme. The textures, colours on the leaves and flowers complement each other while the light used is great to highlight the elements, reveal the layers and in the process add depth to the image.
Pat’s choice of perspective and angle has made use of the lines in the leaves leading to the flower, making them natural leading lines to draw the viewer’s attention to the flower. Also the leaves act as a natural frame for the flower.
The light and shadows in the image are used cleverly to reveal depth by choosing the right choice of lighting and the water on the leaves add a fresh mood to the photo. Congratulations on the win Pat and for capturing this interesting and unique shot.
Second Place: “Organic Textures and Layers” by Frogdaily
Organic Textures and Layers (Water and oil in a plate on top layer with kale on bottom layer reflecting the texture to the bubbles and plate.) – Copyright Frogdaily
This organic textures and layers photo by Frogdaily is interesting taking into account how it was executed and photographed. The monochrome colours in the photo make it even more visually appealing without much distraction in terms of colours.
The water and oil droplets on a glass plate with kale at the bottom is a very interesting concept making every element in the frame almost organic too. The textures created by kale and the tiny droplets are really beautiful and the light is just right with details in all parts of the image.
Congratulations Frogdaily on this cleverly executed shot.
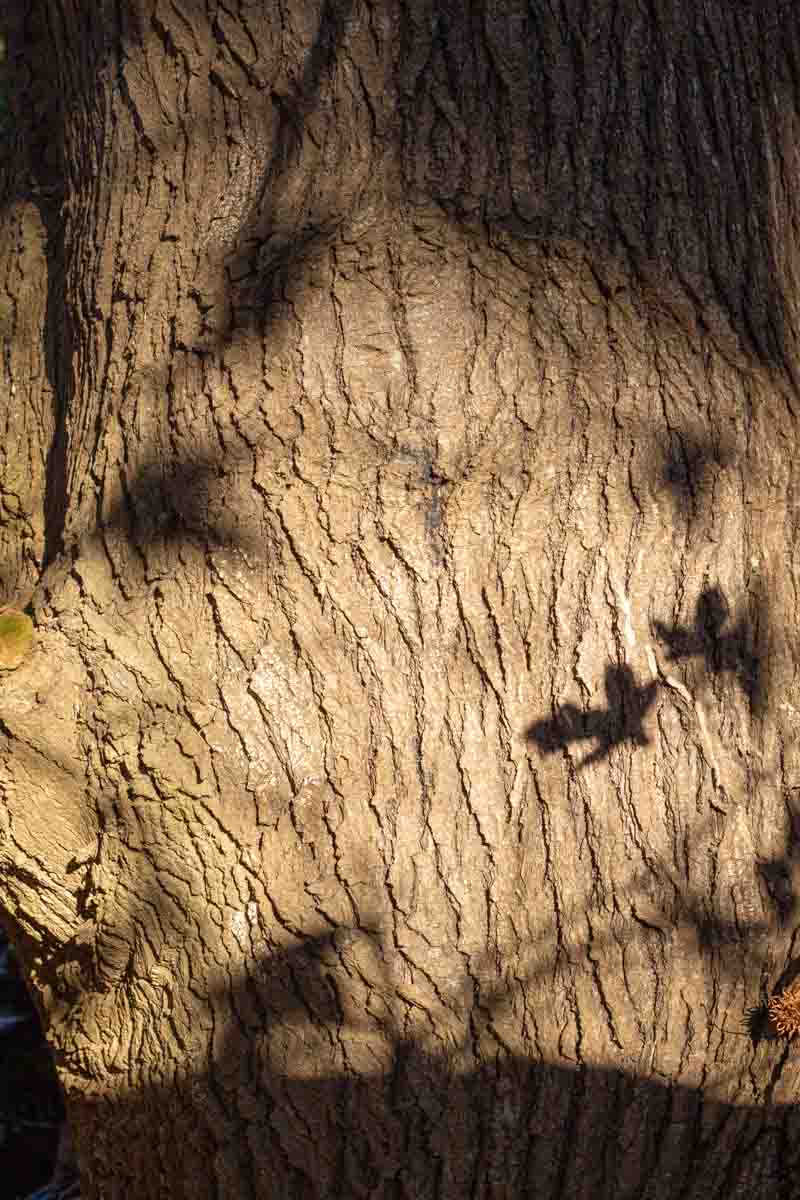
Third Place: “Liquidambar bark” by Beverley Kirkby
Liquidambar bark – Copyright Beverley Kirkby
This textural image by Beverly really stood out in terms of the textures, colours and the amazing light and shadows — the star shaped leaves really add so much visual interest to the image. The Liquidambar bark would not have looked very interesting if it was photographed without the shadow of its leaves.
Besides the above, Beverley has made use of the right light when photographing the bark – it is neither too harsh nor too soft but the right amount to reveal the bark details, add some depth and provide those interesting shadows with enough contrast.
Congratulations Beverley on capturing this beautiful photo.
People’s Choice Award Winner
Our monthly photo contests also come with a People’s Choice Award. The winner of this part of the contest receives $100 worth of store credit on Light Stalking which they can spend as they please on our blueprints, drills, courses or Presets.
Start with a List… – Copyright Pat Garrett
The most popular photo for July, voted by the contestants was “Start with a List…” by Pat Garrett, which has won the people’s choice award. The many textures and layers formed by reflections on glass makes the photo more interesting and at the same time a very engaging one, making the viewer quite curious.
Pat has managed to avoid any light reflecting off the glass, which may have otherwise created bright spots and ruined the image. The subject is beautifully illuminated with soft light and Pat has captured the right amount but still very sharp details in the photo. Congratulations Pat on the win.
We are about two weeks into this month’s photo contest and still have a couple of weeks left to submit photos to our August’s monthly contest. This month, our theme is “The Art Of Reflection.”