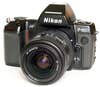
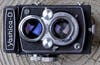
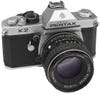
At the end of 2024, I had a brief but cathartic flirtation with film photography again. There was a very personal reason for this, when my father passed away, he left an old Minolta X300. This was the same camera model that I had used in my early days of photography.
Photo by Tetzemann
I wanted to celebrate his memory by running some film through the camera. It became quite the emotional journey and indeed, I wrote about the experience here on Light Stalking.
However, beyond the emotional journey, I want to share with you what I learnt from a technical and creative viewpoint, in my brief flirtation with film.
I should preface this by saying that I had shot film before, in fact if you have followed my articles here, you will know that much of my early photographic career was film based. However, it has been at least 20 years since I had shot a roll of film, and so this is more about what I had forgotten than new things that I learned.
Every Shot Has A Value
This is something that has always been the case when shooting film. Every single image you make is going to cost you. There is the purchase price of the film, the cost of development and the price of printing to factor in.
That was not an inconsiderable sum in the pre-digital days, but these days, it is a highly significant amount. To get from film to contact sheet you are looking at around $30 per roll of 36. Quite a bit more if you decide to get prints made.
However, this is not necessarily a negative. It teaches you that every single exposure you make has a value. That in turn slows you down. It makes you think both creatively and technically every time you press the shutter. It’s a sobering counter to the digital concept of spray and pray.
Exposure Is Important
Modern digital cameras are incredible. Even if somehow you manage to get the exposure completely wrong, you can pull it back into something decent. This is not so with shooting film.
Most film has a much lower latitude to exposure mistakes than digital. There are one or two black and white films that get close, but in general if you make a significant exposure mistake on film, there is little to no chance of pulling it back either as a print or as a scan.
When I shot Ilford HP4 on my father’s camera, I bracketed, much like I do on digital. However, the images that were 1 or more stops over or under exposed were significantly degraded compared to a digital equivalent.
That also leads to a big increase in something else we don’t worry too much about in digital – grain aka noise.
The upshot of this is that you become keenly aware of how important exposure is to getting the optimum image. This is made even more important by the lack of exposure tools available to you. Speaking of which…
Trusting Your Eyes and Instincts.
The Minolta X300 is a very basic film camera. It has manual and aperture priority exposure modes, and that’s about it. The viewfinder has a +/- scale for exposure and split/Fresnel screen for focusing. Yes, that means manual focusing.
That viewfinder is also really quite dark compared to any modern DSLR or mirrorless. This all combines to make taking photos with the X300 quite challenging.
For focusing, I find the split screen the easiest to use. However, you have to center the camera on your focal point, focus then recompose the shot. There is none of this guiding a focus point using a joystick or d-pad.
Like with exposure however, it slows you down, makes you think clearly about where exactly your subject/focus should be.
There is a complete lack of aids on older film cameras. No histograms, no live views, no focus peaking, none of the tools we are used to. That means you need to visualise in your head exactly how you want the image to look and then use your own experience with that camera and film type to make the vision a reality. Experience is the keyword here, as it trains you to understand so many elements of photography that we often take for granted.
Want to shoot something inside, handheld? You cannot just bump up the ISO and get on with it. You will need to swap out the film for one of a higher ISO.
That’s not necessarily the end of the story. If you are going inside to shoot, you will probably be shooting under artificial light. It’s not as simple as putting a higher ISO film in. You need a film that’s colour balance is tuned to interior lights, in general tungsten film. Without it, your images are going to have a deep orange cast.
It is perfectly possible to remove films mid-roll, however, you will lose a few frames of that film (every frame costs) and you need to be meticulous with labelling. If you remove a film with 20 exposures shot, you need to label that film well. Then when you come to use the film again you need to shoot with the lens cap on and wind on at least 24 frames, before you can start shooting again. Again it’s a game of patience and planning.
Shooting with film brought back a lot of memories, some good, some bad. There is no doubt that we have lost some important skillsets in the move to digital. The most significant is perhaps building up an instinct that when you press the shutter button, you have got it right. In a digital world, that instinct is much diminished because we can review the image before and after we take it.
More importantly, perhaps, is that shooting film teaches you to slow down and think about every shot that you take. You become keenly aware that every image has value.
Would I like to go back to film permanently? That’s a resounding no. The convenience and image quality of digital far outweigh the educational aspect of film. However, as an occasional cathartic exercise in creativity it’s nice to know that I can still take my father’s camera for a run out.
The San Diego Undersea Film Exhibition (SDUFEX) returns this October for its 26th year. Featuring some of the best underwater short films from around the globe, the exhibition takes place on Friday, October 10th and Saturday, October 11th at the Irwin M. Jacobs Qualcomm Hall in San Diego, California. More than 70 submissions from 20 countries were received this year.
The exhibition’s carefully curated programs, each night offering a unique lineup, feature captivating films ranging from encounters with sharks and whales in the deep sea to vibrant coral reefs and California’s own kelp forests. The festival highlights both acclaimed filmmakers and emerging talent, with opportunities to meet many of them during intermissions and at Saturday’s post-screening reception.
Tickets go on sale August 25th at www.sdufex.com. For those unable to attend in person, a virtual festival will be available to stream from October 15th through November 30th.
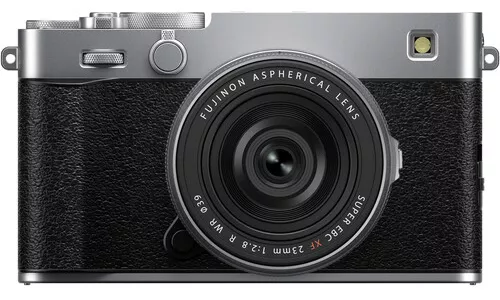
Fujifilm announced the launch of its new rangefinder style mirrorless camera in the X-E series, the Fujifilm-X-E5, that has a classic look and comes with an updated elegant design. One of the most interesting design features is the customizable “Film Simulation” (FS) dial that features an indicator window.
Image via Fujifilm
The Fujifilm-X-E5 allows you to navigate between Fujifilm’s own presets via the FS dial and also allows the user to save their own three customizable film simulation settings. Fujifilm has used the term “recipes” for the film simulation settings, much like the presets that users develop and save in some mobile photo apps as recipes.
The X-E5 has a compact design and comes with a 40.2MP APS-C sensor. It features a five-axis in-body image stabilization, AI powered autofocus and many other interesting features for aadvanced image capture.
Here are some of the most important features of the Fujifilm X-E5:
40.2MP APS-C, X-Trans CMOS 5 HR sensor
X-Processor 5 imaging engine
Five-axis sensor-shift IBIS
3″ touchscreen LCD with three-axis tilting
Single SD/SDHC/SDXC card slot
Captures videos up to 6.2K
Lower base ISO of 125, improving low light performance
Latest AF Algorithm, subject detection AF
Teleconverter with digital zoom settings of 1.4 and 2.0x
Continuous shooting for uncompressed Raw images – up to 20 fps
Long exposure up to 1 hour in bulb mode
20 unique Film Simulation modes
Maximum frame rate of 29.97 fps in 6.2K, 59.94 fps in 4K, and 240 fps in Full HD
Weight approximately 445 g
Built-in Wi-Fi 5 and Bluetooth 4.2
USB-C power input for charging
More details about the Fujifilm X-E5 can be found here. Along with the announcement of the X-E5, Fujifilm has also announced the FUJIFILM XF 23mm f/2.8 R WR Lens that comes with a 11 blades round aperture, manual focus ring, autofocus motor and is a great lens for low light shooting. Both these products are available to pre-order and are estimated to ship by end of August, 2025.
We have more news for you to read if you are interested at this link here.
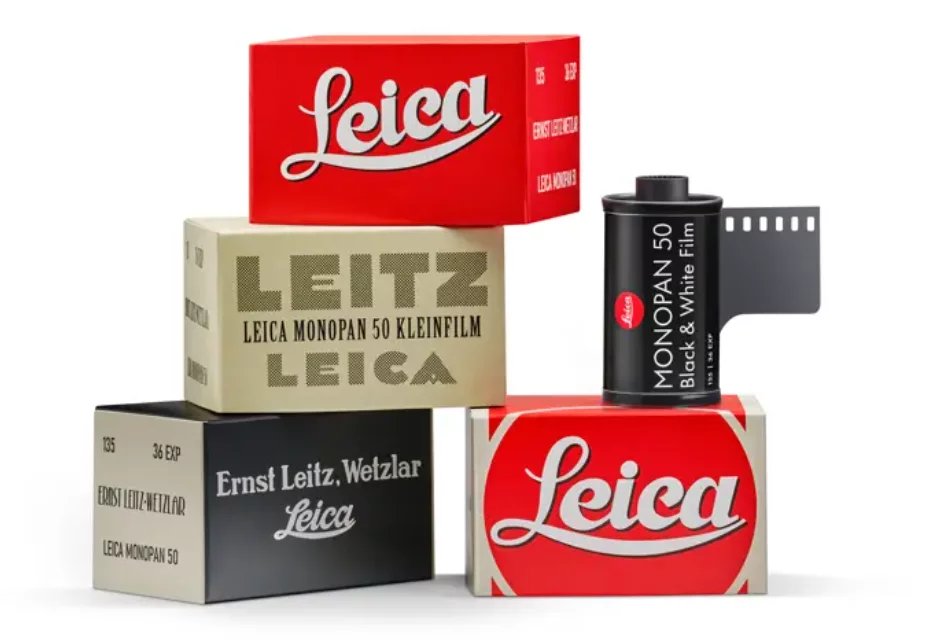
Analog photography is something that has been appreciated more in the recent years with many photographers looking to shoot film. Not many companies manufacture film cameras but there are a lot of trusted sites that sell used cameras. One of the companies that still sells analog cameras is Leica and they are launching their own black and white film, the Leica MONOPAN 50.
Image via Leica
Leica mentions,
With its distinctive look, our Leica MONOPAN 50 black-and-white film recalls the early days of 35 mm photography. It takes us back to 1925, when we presented the revolutionary Leica I to the world.
The Leica MONOPAN 50 film allows 36 high resolution shots, since it has ultra fine grain and super panchromatic sensitivity. The resulting images are amazingly sharp with great tonal range. The film can be processed in all developers available to develop black and white film.
As the name suggests, the iso sensitivity for the Monopan 50 film is at 50 which means it can be used to capture images in bright light conditions using a wide aperture value. It can be a perfect film to use with the fast M-lenses of Leica’s analog cameras.
Here is a summary of the film specifications:
Type of film – Black and White
Number of frames – 36
Iso sensitivity – 50
Resolution – 280 line pairs/mm
Sensitivity – super panchromatic 780nm
Price is about $12
Can be developed in all developers for black and white film
The specifications for the Monopan 50, match the ones for Adox HR-50. Leica has also mentioned that the enhanced spectral sensitivity of the Leica MONOPAN 50 film makes it a great choice for infra-red photography. The film can also be used along with Leica’s yellow, orange and green color filters, to capture high depth, contrast, tonal values and character in black and white images.
More details about the Leica Monopan 50 film can be found here and the film will be available from August 21, 2025.
We have more news for you to read if you are interested at this link here.
Film photography has never really gone away. Sure, it’s declined massively since the arrival of digital, however these days increasing numbers of newer photographers are trying their hand at film photography.
I have written several articles about shooting film here at Light Stalking, yet I have realized that there may well be an entire section of you that know little to nothing about it.
Many of you will have developed your photographic skills through the digital age, and whilst understanding the existence of film photography may be daunted by trying it out for yourselves. So today I am going to look at the absolute basics. Cameras, films, processing and shooting on film. Let’s get into it by looking at film.
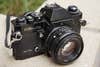
There are a plethera of film cameras available for all budgets. By Mali Maeder on Pexels
Photographic Films
Photographic films can be broken down into three main types. Black and white negative film, colour negative film and colour transparency film also known as slide film.
Negative films do exactly as the name suggests, they record a negative image to the film. Blacks and whites are reversed, primaries become secondaries on colour negative film. Some of you might have seen processed colour negatives and wondered why they are orange. This is simply to mask the imperfections of the dyes in the film.
Negative films are made so because they are designed for printing. When you expose a negative onto photographic paper, you get a normal, positive image.
Transparency film is designed to be projected rather than printed, much like you would have watched a film in the cinema before the advent of digital projectors. It is much less tolerant to incorrect exposure than negative films. It used to be able to be printed via an Ilford process called Cibachrome, however that has been discontinued. As far as I am aware, the only way to print transparency films these days is to digitise them.
What’s also important to note, especially for digital photographers is that the ISO, also known as ASA, is fixed. A film will have a speed rating such as 100, 200 or 400 ISO and the camera must be set to that ISO to shoot. There are ways to change the ISO through the film processing, however that’s not for this basic guide.
I should note that photographic films and processing are relatively expensive these days compared to the film era. This is a simple supply and demand issue, whilst film is seeing a resurgence, it’s nowhere near large enough to bring prices down. Typically you will pay $8-10 for a roll of 35mm black and white film plus $15-20 for processing and scanning.
As digital photographers you will be aware of different sensor sizes, from the very small ones on our phones to the medium format sensors of Hasselblad and Fuji. Film cameras are very much the same. At the peak of film photography in the 1990s, the smallest commercial film was Disk Film, this was really tiny and as the name suggests, each frame was placed around a disk rather than a roll.
Next came 110 and 126, before we got to the ubiquitous 35mm. From there we stepped up to 120/220, both the same width of film but 220 being able to take twice the number of exposure. These are commonly known as medium format. Above that we had 5×4 and 8×10 sheet film used in plate/field style cameras.
Returning to the modern day, 35mm, 120 and sheet films are still made and available, the smaller films are now obsolete.
Apart from a few speciality companies, film cameras are not mass produced anymore. However there is a massive secondhand market for these cameras. The recent resurgence of film photography has pushed up the price of these significantly, however they are still bargains compared to modern mirrorless cameras.
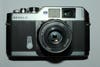
As you might guess, the camera you buy determines the film that it requires. By far the most commonly used format is 35mm and there are two main camera types you will find. The SLR is the direct predecessor to the modern DSLR and shares a lot of the same ergonomics. Secondly there are the compact, rangefinder cameras. These can be as simple as the excellent Olympus Trip all the way through to Leica Ms with their interchangeable lenses.
Medium format, 120 film gets a little more complicated and a lot more expensive, even used. The smallest medium format cameras are 645. These take 15 images on a roll of 120 and as the name suggests the frame size is 6 cm by 4.5 cm. Next we step up to 6×6, the most common medium format, then 6×7 and 6×9. Generally all these formats use different cameras. For example Mamiya did a compact 645 camera and a 6×9 Press camera whilst Hasselbald were famous for their 6×6 cameras.
As a newcomer to film photography, I would strongly recommend a 35mm SLR camera. These are the cheapest and most available. Buy from a reputable used dealer rather than eBay or marketplace. This will ensure that the camera is in good working order. Things to look out for are light leaks, slow running shutters and electrical issues.
You can also break down SLRs into two main eras. Pre 1990s, cameras were mainly manual focus, manual film wind and with fairly rudimentary exposure meters and modes. The 1990s saw the introduction of many of the features we see in modern cameras such as matrix metering and autofocus. They also often had motorized film advance built in.
Shooting With A Film Camera
Those used to modern digital cameras will be in for quite a culture shock. The first thing you will notice is how bright the viewfinders are, before realizing that the information in that viewfinder is severely lacking, often just an exposure scale.
There will be a dial on the exterior of the body for setting ISO and this is very important to set as the wrong ISO will give you incorrectly exposed images. Plus of course, you cannot see that the images are incorrectly exposed.
On older cameras, focussing can be quite a challenge. Even more modern autofocus film cameras were slow and unreliable. Focusing manually, you would have the viewfinder’s fresnel screen or split screen. If you have less than stellar eyesight, this can be quite a challenge.
Loading film requires dexterity and practice. Getting the end of the film into the slots on the spool can be hard and often different cameras have slightly different ways to achieve this. One tip for manually wound cameras, is to watch the film rewind lever after loading the film. If this turns as you wind the film on, it is loaded correctly.
You are going to need to get used to shooting either 24 or 36 frames before needing to change the film but more importantly not 100% knowing whether you have nailed the shot until you get the films processed. Speaking of which.
Film Processing and Printing
At the top I mentioned the three main types of photographic film, colour and black and white negative film and transparency. Each of these has a different way of being processed. Standard black and white film is actually pretty easy to process yourself, however you need to have a dust free environment to do it. You don’t actually need a darkroom as you can load the film into a processing tank inside a dark bag. This can be a bit fiddly at first but becomes second nature with practice. Once the film is in the drum you can do the actual processing in light.
Both colour negative and slide films require much more complicated processing that are really best suited to a professional lab. Slide/transparency film, in particular, is very prone to colour variations when processed.
If you do not want to go down the home processing route, most labs will also offer black and white processing. These days there are plenty of processing labs available although they are unlikely to be local. You usually have to post your film in, and wait a week or two. The lab will probably offer processing and printing or processing with scans only.
Printing colour or black and white negative films has two options. You can print directly from the negative onto photographic paper, or you can scan the negative and print on a home printer. Most modern labs will actually be scanning your negative although that scan will be output to real photographic paper.
The more ambitious amongst you might want to try printing black and white at home. Although you can print under a red light, your darkroom must be completely sealed from any external white light.
Enlargers and processing trays are readily available, and most decent camera stores stock the processing chemicals. It’s not a difficult task to print black and white yet, immensely satisfying.
So that’s my brief beginners guide to film photography. Film photography is a wonderful medium that can teach you patience, the value of an image and a deep understanding of exposure. It can be relatively expensive compared to digital but can give great satisfaction.
We may earn revenue from the products available on this page and participate in affiliate programs. Learn more ›
Film photography is enjoying a resurgence in popularity, but unfortunately, so are used film camera prices. Granted, analog cameras are still bargains compared to new digital cameras, but some of the best-known models are creeping up in value, and as the film photography community discovers more hidden gems, their prices rise as well.
But film camera prices aren’t always based on quality or features; more often than not, it’s the fondly-remembered cameras that demand higher prices. Happily, there are plenty of less-popular cameras—often from the same manufacturer!—that can do the job just as well as their better-known brethren. In this article, we’ll talk about 10 well-known and expensive cameras, explain why they demand the prices that they do, and introduce you to reasonably-priced alternatives that do the job just as well—and some for much less money.
Skip: The Nikon F4 or F5
The Nikon F4 and F5 were the go-to professional film cameras from the late 1980s until the mid-2000s. Built like tanks, they were—and still are—tools designed to get the shot under any circumstances. Today, the F4 and F5 are highly regarded and highly priced—we’re talking $200 to $350 for a body in usable condition, and double that for a mint rig that hasn’t led the hard life so typical of these workhorses.
Instead buy: The Nikon N8008/N8008s
The Nikon N8008 was also sold as the Nikon F-801s. George Rex
Back in the ‘90s, many F4/F5-toting pros kept a Nikon N8008 in their bag as a backup. Introduced concurrently with the F4, the N8008 was Nikons’ top consumer camera, with sophisticated-for-the-time matrix metering and a fast autofocus system. (It was also an incubator for the F5’s DSLR-like interface.) Like its pro-grade brother, the N8008 almost always gets the shot. The N8008 and N8008s (a later model with a spot-metering mode; they’re called F-801/801s outside North America) lives in the shadow of the more-advanced N90, and as a result, it’s largely underappreciated and underpriced: Bodies sell for a mere $20-$50, a ridiculous bargain for such a sophisticated camera.
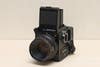
Skip: A Hasselblad 500-series Medium Format camera
Hasselblad is often labeled as the Rolls-Royce of film photography, and the 500-series Medium Format cameras certainly are impressive machines. Not only are they exceptionally well-engineered and well-crafted, but they are also relatively small and light for their film size. But man-oh-man, are they expensive! A complete 500 C/M rig (body, lens, viewfinder and film back) will set you back at least two grand—likely more—and lenses aren’t cheap either.
Instead buy: A Bronica SQ-series Medium Format camera
Bronica cameras were often referred to as “Japanese Hasselblads”. Like the ‘Blad, the Bronica SQ is a square-format leaf-shutter SLR that is compact and light. The optics are excellent, the bodies are reliable, and you should be able to assemble a complete system for less than $1000, and closer to $500 if you are willing to patiently watch the auction sites. If you prefer a rectangular 6×4.5cm negative format, the Bronica ETRS and Mamiya 645-series are bargains as well.
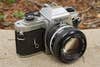
Skip: The Nikon FM2/FM2n
Nikon’s FM2 is among the most prized of 35mm film SLRs, and with good reason: It’s all-mechanical (which means it can operate without batteries), has a fantastic feature set, and uses Nikon’s outstanding lenses. No surprise, then, that it’s one of the more expensive 35mm SLRs on the used market, with working examples easily fetching between $250 and $500.
The irony here is that the FM2’s predecessor, the FM, sells in the $100 to $200 range, sometimes even cheaper. The older FM has a slower top shutter speed (1/1000 sec vs 1/4000 sec) and slower flash sync speed (1/125 sec vs 1/200 sec or 1/250 sec for the 2n), and… that’s about it. Under the skin, the FM has similarly robust all-mechanical construction for which the FM2 is prized, and if you can do without the faster shutter speeds, it’s a great bargain. An even cheaper alternative is the Nikkormat FT2, which is bigger and heavier than the FMs but fully compatible with Nikon’s less-expensive pre-AI lenses.
Skip: The Canon AE-1 Program
The AE-1 Program was Canon’s first consumer-grade camera to have a program mode, one that could set both aperture and shutter speed. It was a strong seller in its day and remains popular with those transitioning from digital to film, as it combines that old-school SLR feel with the ease of fully automatic exposure control. No surprise, then, that the AE-1 Program commands high prices—$150 to $300 in good working order.
Instead buy: The Nikon FG
Aaron Gold
Introduced in 1982 as a low-cost AE-1 Program competitor, the FG is one of the most controversial Nikon bodies, derided among Nikon purists for its built-to-a-price-point construction. Though it lacks the heft and feel of other Nikons, read online reviews and you’ll see that most modern-day FG owners (your author included) love them. The FG is small and light and provides aperture-priority, shutter-priority, and full-auto program modes with all Nikon AI-S manual focus lenses. Thanks to its poor reputation, it’s easy to snag an FG for $75 or less.
Skip: A Rollei Rolleiflex TLR
Mention twin-lens reflex cameras and many film photographers imagine a Rolleiflex. Designed with German precision, Rollei’s Medium Format TLRs are elegant, reliable, and admirably small and light. And in their day they were prized by both casual snapshooters and professional photographers. Their well-earned regard translates to high prices: Depending on the model, Rolleiflex cameras range from $300 to $2,500 or more, and even Rollei’s lower-end Rolleicord cameras go for $200 and up.
The Japanese-made Yashica twin-lens camera was designed as an affordable alternative to the Rolleiflex. But don’t let its budget status fool you, Yashicas are high-quality cameras. For some reason, though, these fine TLRs continue to lurk in Rollei’s shadow. Happily, this is reflected in their prices: Working Yaschicas sell in the $50 to $300 range. You might also consider the Mamiya C220 and C330, rare among TLRs in that they have interchangeable lenses. They’re larger, heavier, and more expensive than the Yaschicas—figure $250 to $500—but they too are excellent cameras.
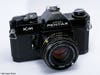
Skip: The Pentax K1000
The K1000 is one of the best-known 35mm SLRs in the film world, largely because Pentax kept it in production for an epic twenty-one years, from 1976 to 1997. Cheaply priced when new and virtually indestructible, the Pentax K1000 became the go-to student camera for generations of photographers and is fondly remembered today. That nostalgia keeps prices up: Despite a massive supply, working K1000s routinely sell between $120 and $150, which is rather steep considering the K1000’s limited feature set.
What many photographers don’t realize is that Pentax derived the K1000 from their KM of 1975-77. The KM is actually a more feature-rich camera; its self-timer and depth-of-field preview were eliminated from the K1000 in order to get the price down. There’s one other big difference between the KM and the K1000: How much they cost today. Despite having more features, the lesser-known KM routinely sells for under $100. If the K1000’s slightly-higher price tag isn’t a budget-buster, though, consider your author’s favorite Pentax, the KX, which uses the same mechanism with a mirror lock-up and a better light meter.
Skip: A Leica M-series rangefinder
Are Leica’s legendary 35mm rangefinder cameras worth their sky-high prices? That debate will likely never be settled, but with the price of entry starting around $1,500 for less-desirable models and rising well above $5,000 for a nice M6—and that’s before lenses!—it’s a question for which few of us will have the opportunity to give an informed answer.
Voigtländer is another German brand, except the Bessa R isn’t exactly German—it’s made by Cosina, a Japanese company that has manufactured cameras and lenses for numerous other well-known brands. Hard-core Leica fans might dismiss the Voigtländer as a plastic knock-off, but those who have used both cameras don’t seem to find the Bessa’s performance lacking. The Bessa R uses the 39mm Leica screw mount while the R2 uses the Leica M-mount. And while the Bessas don’t come cheap—figure $500 to $1,500—they are a great value compared to Leica. (Note that the Bessa T and Bessa L are less expensive, but the T has no viewfinder and the L lacks both viewfinder and rangefinder.)
Skip: The Nikon FE or FE-2
The FE-series was Nikon’s state-of-the-art consumer camera throughout most of the 1980s. A stablemate of the mechanical FM, the FE features an electronic shutter with an aperture-priority automatic exposure mode along with full manual control. Though cheaper than the FM-series cameras, the FEs still command healthy prices in the $100-$300 range.
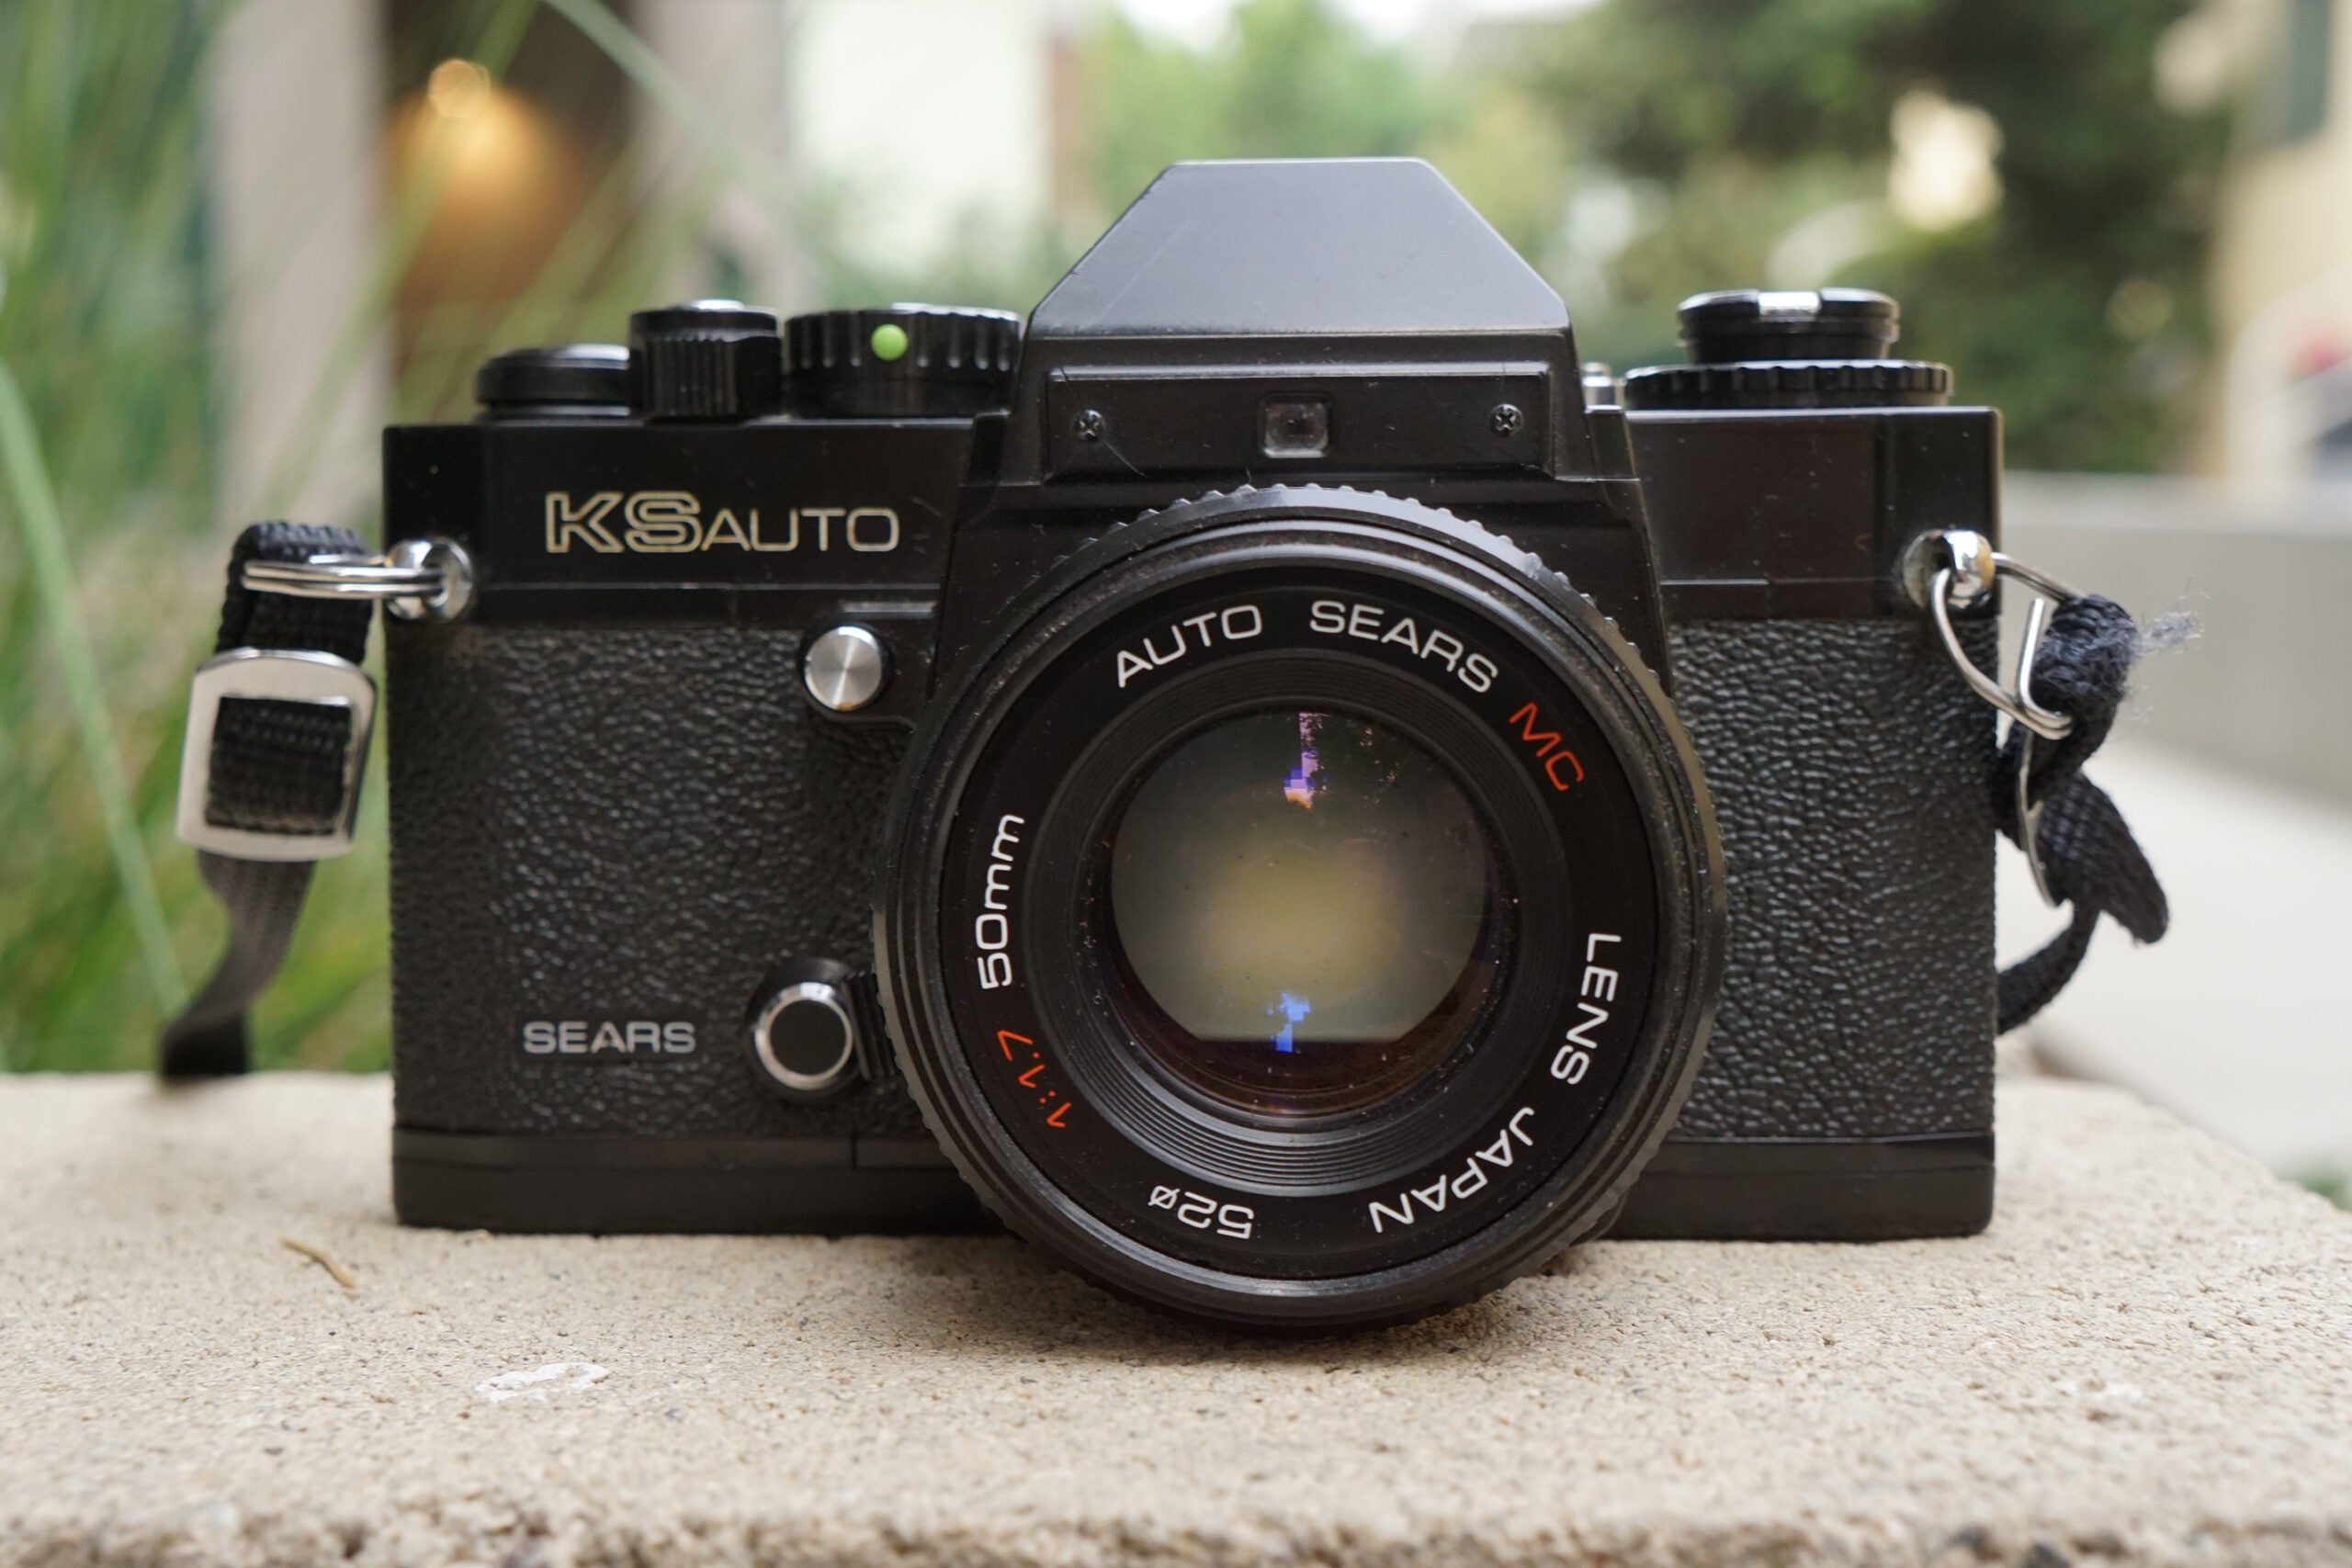
Instead buy: The Ricoh XR-2 or XR-2s
The Ricoh XR-2 was also sold as the Sears KS Auto. Aaron Gold
Back in the 1970s and ‘80s, Ricoh was known for making feature-packed cameras at discount prices. The XR-2 and XR-2s (the latter accepts a power winder) have a similar feature set to the FE, including a match-needle meter display, shutter speed range of 1/1000 sec to 4 sec (the FE goes to 8 sec), and aperture readout in the viewfinder. Ricoh XR cameras are compatible with Pentax K-mount lenses, which are cheaper than Nikkor and of comparable optical quality (though Ricoh’s own Rikenon lenses are fine, too). Their plastic bodies feel a bit cheap, but don’t be fooled—Ricoh was an early adopter of durable polycarbonate, two decades before Canon. You’ll find the XR-2 for $50 or less, and the Sears-branded version, the KS Auto, is even cheaper.
Skip: The Pentax LX
Back in the 1970s and ‘80s, Pentax primarily pursued the consumer market, and the LX is one of their few pro-level film cameras from that era. An impressive camera, it features a weather-sealed body, interchangeable viewfinders, and an unusual hybrid shutter that is mechanically timed at high speeds (1/75 sec to 1/2000 sec) and electronic at slow speeds (4 sec to 1/60 sec). Among die-hard Pentaxians, the LX is considered the brand’s most desirable 35mm body, and prices are high, typically between $200 and $400.
A predecessor to the LX, the K2 was actually Pentax’s first (albeit half-hearted) attempt at a “pro” camera, and while it lacks many of the LX’s pro-specific features, it offers similar functionality and uses the same K-series lenses. Its electronically-timed shutter offers speeds of 1/1000 sec down to 8 sec, and it’s the only camera in the K-series to offer an automatic exposure mode. The K2 DMD version was compatible with a motor drive and a data back and tends to sell for a bit more than the regular K2. You’ll find K2s in the $100-to-$150 range, sometimes even cheaper.
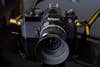
Skip: The Minolta Maxxum 9
The Minolta Maxxum 9 (known as the Dynax 9 in Europe and the α-9 in Japan) was Minolta’s last professional 35mm body. With weatherproof construction, a highly advanced autofocus system, and a 1/12000 sec top shutter speed, the 9 was a formidable competitor for the Nikon F5. The 9 was ignored for many years, but appreciation for this camera is growing rapidly, as are prices—they’re trading in the $250-plus range and prices are on the rise.
Instead buy: The Minolta Maxxum 5
Aaron Gold
If the Maxxum 9 is a sleeper among pro bodies then its mid-level brother is a sleeper among Minolta SLRs. One of Minolta’s last advanced-amateur film bodies, the 5, encompasses many of the features of the Maxxum 7 (which some argue was a more advanced camera than the 9). It’s not weatherproof and its shutter tops out at a mere 1/4000 sec, but it has sophisticated autofocus and autoexposure systems and a plethora of programmable options. Because they appeared towards the end of the film era, many used examples have seen little use. Best yet, the Maxxum 5 is laughably cheap, with plenty on the auction sites for $30 or less. Your author bought his, in like-new condition and with a lens, for a mere $17.
In this section of our three-part series about traveling with film, we’ll talk about the mode of travel most fraught with peril for film photographers: Flying. Back in the pre-digital days, flying with film was a no-brainer; you could pack your camera gear and buy all the film you needed at your destination (and perhaps get it developed there as well). Today, film is harder to find and airport security is tighter (and potentially more harmful to film), so airborne analog photographers have to do a bit more planning.
(Note that the information in this article is specific to air travel in the United States. Other countries may—and likely will—have different regulations and procedures.)
Here’s the big problem for airborne film photographers: The scanners and X-ray machines used for luggage inspection produce light energy to which film is sensitive. These machines can potentially “fog” your film, causing dark spots or waves on the negatives (or light spots on slides) as if the film had been exposed to light. So the challenge when flying is to minimize or avoid situations that could potentially damage your film.
Note that only undeveloped film is subject to damage. Developed negatives, slides, and prints are no longer light sensitive and cannot be damaged by airport security equipment.
Can you avoid X-rays altogether?
Depending on your destination, it may be possible to avoid bringing film through the airport altogether. If you’re traveling to a big city, you might be able to buy your film locally. If you’re staying at a high-end hotel with a concierge, they may even be able to buy film for you (but beware of hefty prices and fees). You may also be able to mail-order film and have it sent directly to your lodgings; check with the property first to see if they can receive packages (and bring a couple of rolls in case your shipment is lost or delayed). Likewise, if you use mail-order film processing, consider sending the film off for development from your destination before you leave for home.
Never put film in a ‘checked’ bag
Do not put unexposed or undeveloped film in checked baggage, ever. The scanners used for checked baggage are more powerful than those used in carry-on luggage and will very likely fog your film. Film and loaded cameras should always be taken in carry-on luggage.
Always carry your film onboard with you. To avoid a potentially destructive zap from the X-ray or CT scanner, stow (preferably) unopened film in a clear plastic bag and ask for a “hand inspection” at security. Dan Bracaglia
A related side note: When booking your airline tickets, beware of “Basic Economy” tickets, which do not always allow carry-on baggage beyond a small personal item. Buyers of these tickets often board last, when carry-on storage is full, and will sometimes be forced to check their baggage (for a hefty fee), where it could be subject to harmful scanning at stopovers. If you are traveling with film, make sure your air ticket allows you to bring carry-on luggage, and pack your film (and cameras) in a bag small enough to join you in the cabin.
Film in carry-on baggage: Ask for a ‘hand inspection’
The Transportation Security Administration (TSA) says that the X-ray machines it uses for carry-on baggage are safe for photographic film up to ISO 800*. We’ve had slower film scanned with no ill effects, but we also understand that the effects are cumulative and that multiple scans may cause fogging. (We asked TSA if we could run some test scans at our local airport; they politely denied our request, citing security concerns.)
Fortunately, there is one good way to ensure your film will not be damaged: Ask for your film to be “hand inspected,” regardless of its speed.
*Note that at some airports, TSA is introducing more powerful CT scanners for carry-on luggage, which can damage even slower-speed film.
The PopPhoto guide to hand inspections
First: We recommend being patient and polite with TSA agents. Remember that their first responsibility is security, not customer service—and also that they’re subject to a lot of vented frustrations from harried passengers. There’s no need to show fealty; simple politeness and civility will get you a long way.
Film photography is popular enough that most TSA agents should be familiar with hand-scanning requests, but it does slow their workflow. When traveling with film, we always allow an extra ten to fifteen minutes to get through security (a margin we rarely need).
We recommend carrying your film in a clear plastic zip-lock-style bag, with which TSA is familiar. Leave your rolls in their plastic canisters and/or sealed packaging whenever possible. We try to keep our cameras unloaded so they can pass through the X-ray machine, but loaded cameras can also be hand-scanned. Anything you’d like hand-inspected should be kept where it’s easily accessible; a backpack is preferable to a suitcase that must be unzipped.
Before we put our luggage on the belt, we remove our film and loaded cameras, catch the eye of the nearest TSA agent, and say, “I have some film (and cameras) I’d like to have hand-inspected, please.” If asked if the film is under ISO 800 we either say no or (to avoid fibbing) tell them it’s going to be pushed and shot at a higher speed. (They may not know what this means but will generally accept it.)
It’s best to hold off loading your cameras with film until you’ve reached your destination. Getty Images
After walking through the scanners we try to stand somewhere conspicuous without blocking the flow of passengers. Film is usually checked by the same agents inspecting bags that have been pulled for secondary inspection, so there may be a wait. The inspection usually consists of swabbing the individual rolls, then putting the swab in a machine that checks for explosive residue. We’ve occasionally had requests to open boxes and always say yes (so long as they don’t pull your film out of the canister or unspool your 120 rolls, it’ll be fine). Once the machine gives the agent the green light, you’ll likely be sent on your way.
Going home: Have all film hand inspected
Once your film has been shot, it’s still sensitive to light and can still be damaged by scanners, so be sure to have all of your film, shot or not, inspected by hand. We must reiterate: Do not put undeveloped film in checked bags.
If you’ve had your film developed while on vacation, there’s nothing to worry about—as we mentioned earlier, developed film, negatives, prints and slides are not light-sensitive. You can safely put them through the scanners or in your checked baggage.
What about lead-lined film bags?
Several manufacturers offer lead-lined film bags that claim to protect the film from X-rays. (We do not know if these bags protect against CT scanners.) We haven’t tried one in recent years, but if the bags do block X-rays, they will likely show up as a large dark blob on the security scan, which is likely to trigger a secondary inspection. We find it easier to simply request a hand inspection and avoid the inconvenience of having TSA unpack our bags.
Advice for other countries
While we’ve never had a request for hand-scanning denied in the US, we have been refused in Europe, and we don’t know if this was down to security procedures or a language barrier. For this reason, if you do travel with analog cameras overseas, consider bringing a slower-speed film, which is most likely to survive scanning with no ill effects. That said, we understand that some European countries are also introducing CT scanners for hand luggage, which is much more likely to fog film.
Ultimately, it’s best to check the official website for the security agency of the country to which you are traveling. If they don’t have a clear-cut policy covering film, you might want to consider traveling with a digital camera or making provisions to mail your film home before you leave.