[ad_1]
There are many types of photography—spotrts being one of them. Likewise, there are many different types of sports photography, too. We work with all kinds of sports photos at Path.
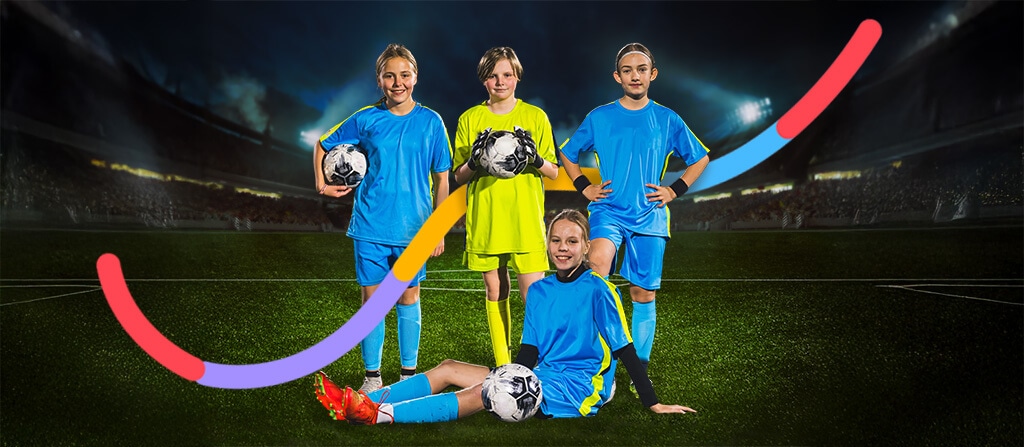
One of our favorite types of sports photos is the team photo. Let’s take a look at what a team composite is and how to create one.
What is a team composite photo?
A team composite photo is a single image that combines individual portraits of team members into a unified group display. These photos are often used when it’s not possible to gather the entire team in one location for a traditional group photo. Each person’s portrait is taken separately and then digitally arranged into a cohesive composition, often with a consistent background, layout, and theme.
How to create a team composite photo
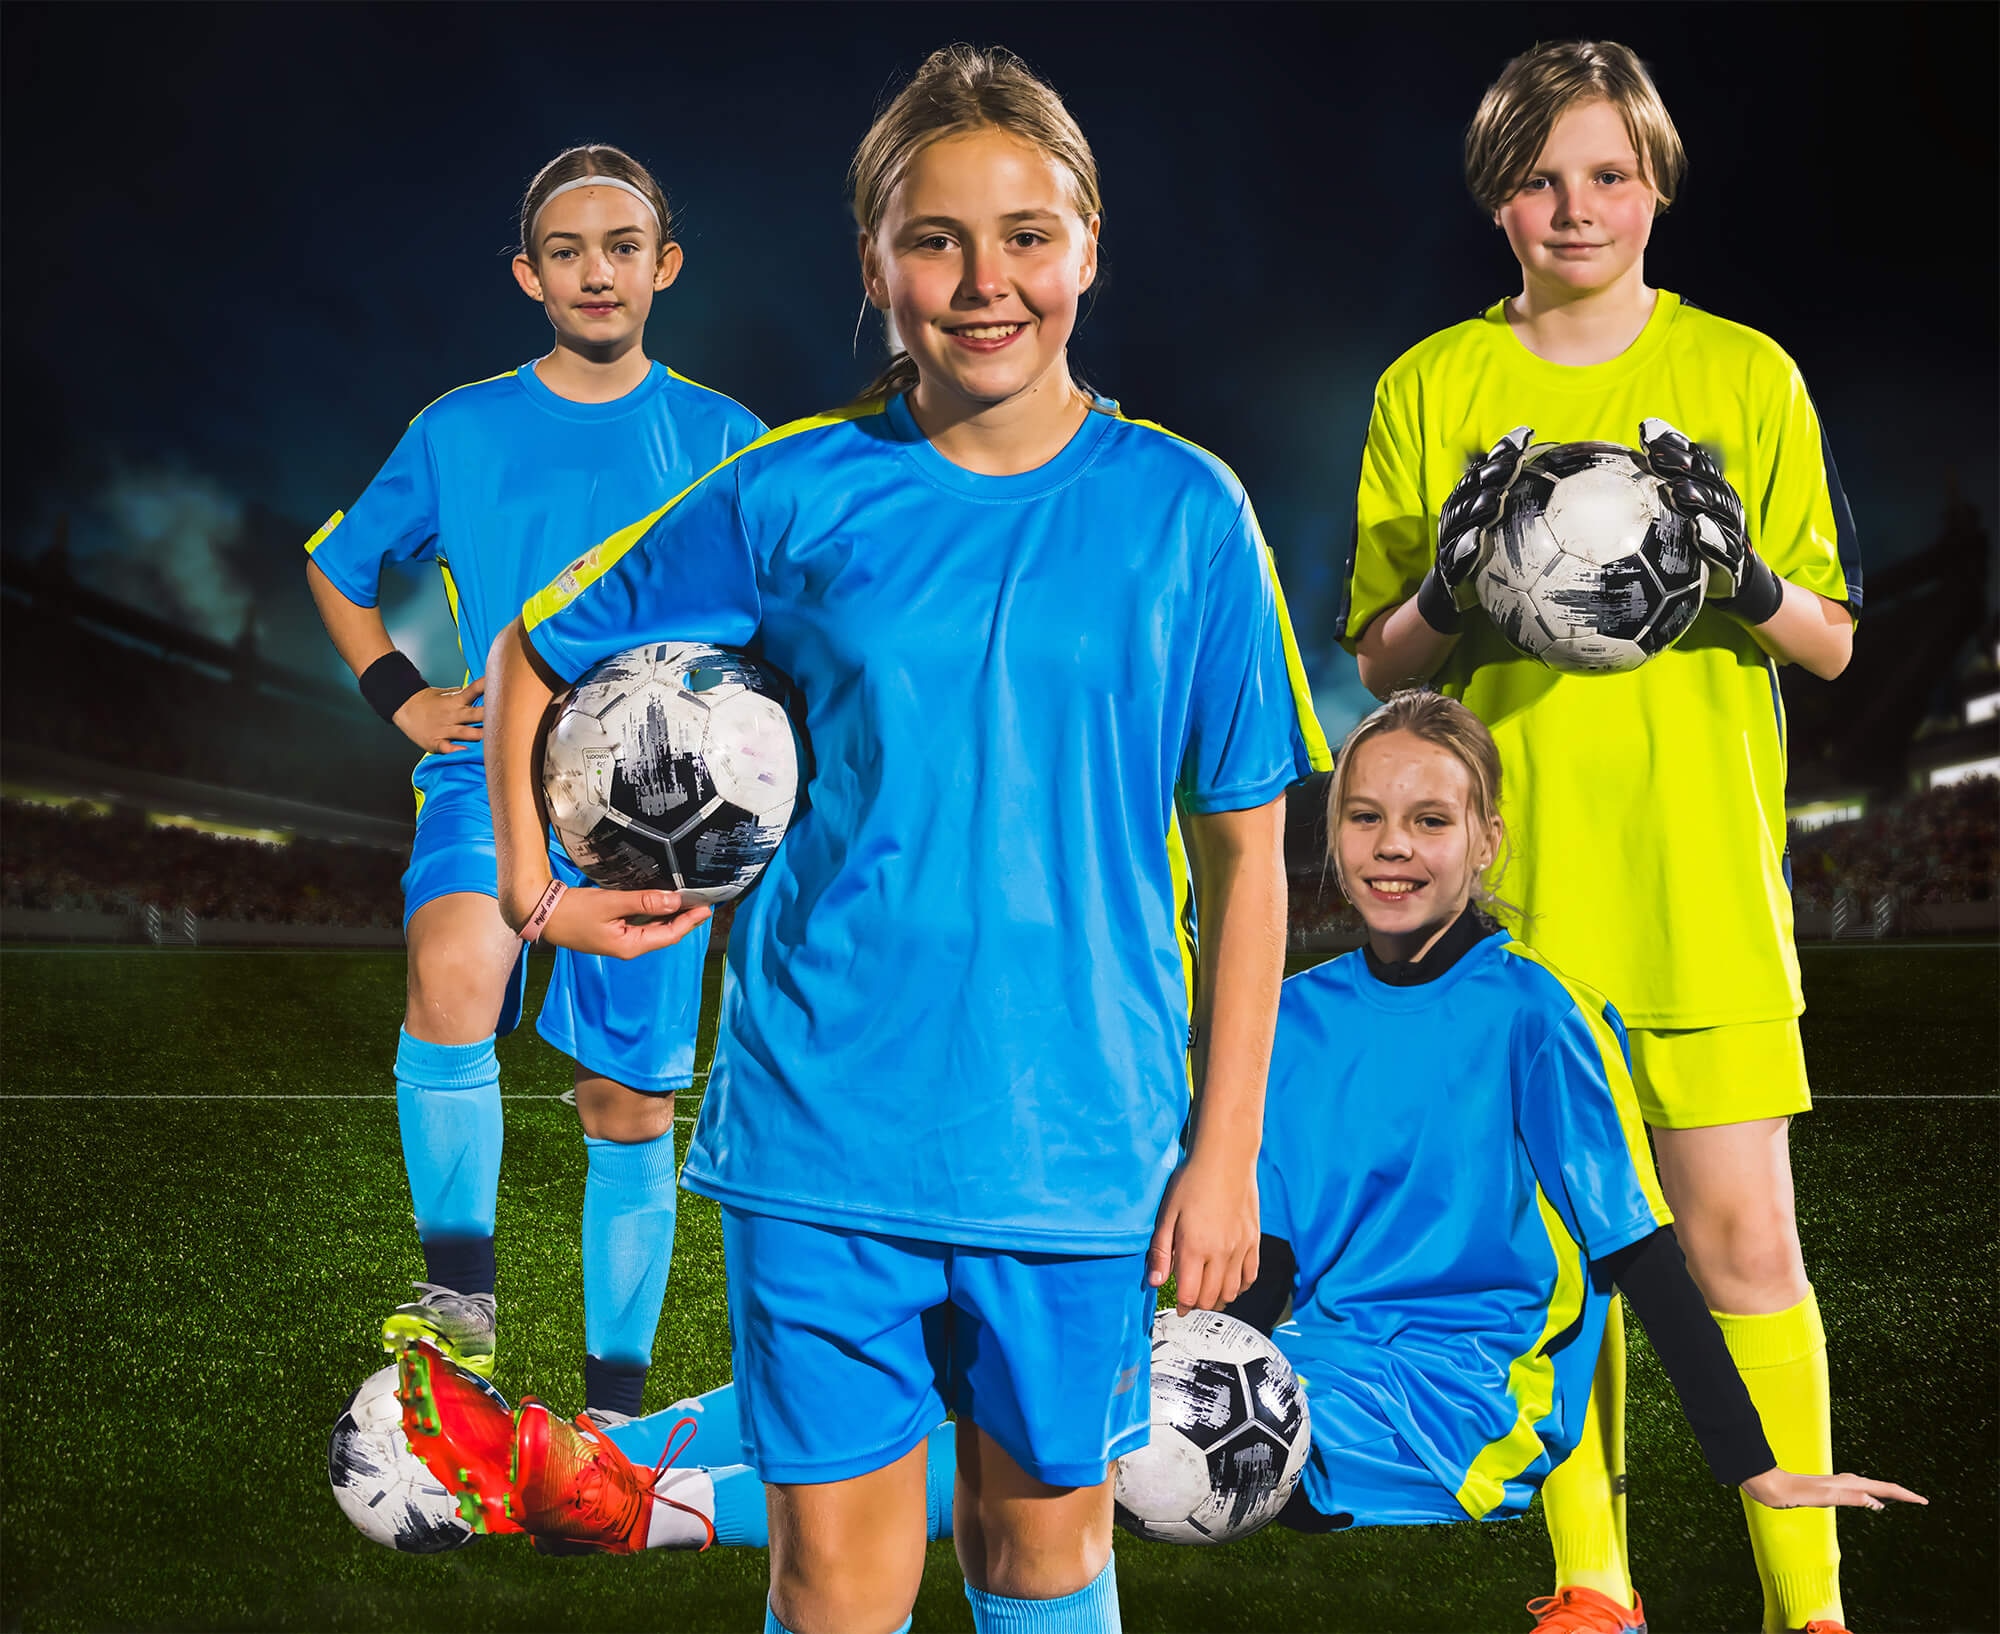
In our composite, we’ll use these photos that a photographer took of four players on a girls soccer team:
Notice that, while all the images have similar lighting, the camera was at a different distance from each of the players when the photos were taken. This means the girls aren’t uniform in size throughout all the images. We’ll fix that when we create the composite photo.
We also need to choose the background photo that the girls will be placed against before we begin. The background photo needs to have similar lighting to the images of the players, but it can be very stylized and dramatic to enhance the intensity of the final photograph. For this example, we’re using a beautiful photograph of a soccer field at night.

From these five images, we’ll make a team photo composite.
Step 1: Remove background from individual portraits
We need to select just the girls from each photo. The easiest way to achieve this is to use Photoshop’s built in Select Subject tools. If you don’t see the option to Select Subject in the Options Bar at the top of the screen, or the Contextual Task Bar at the bottom of the image, choose the Magic Wand Tool from the Toolbar at the left-hand side of the screen. The option to Select Subject will now appear in both these places.
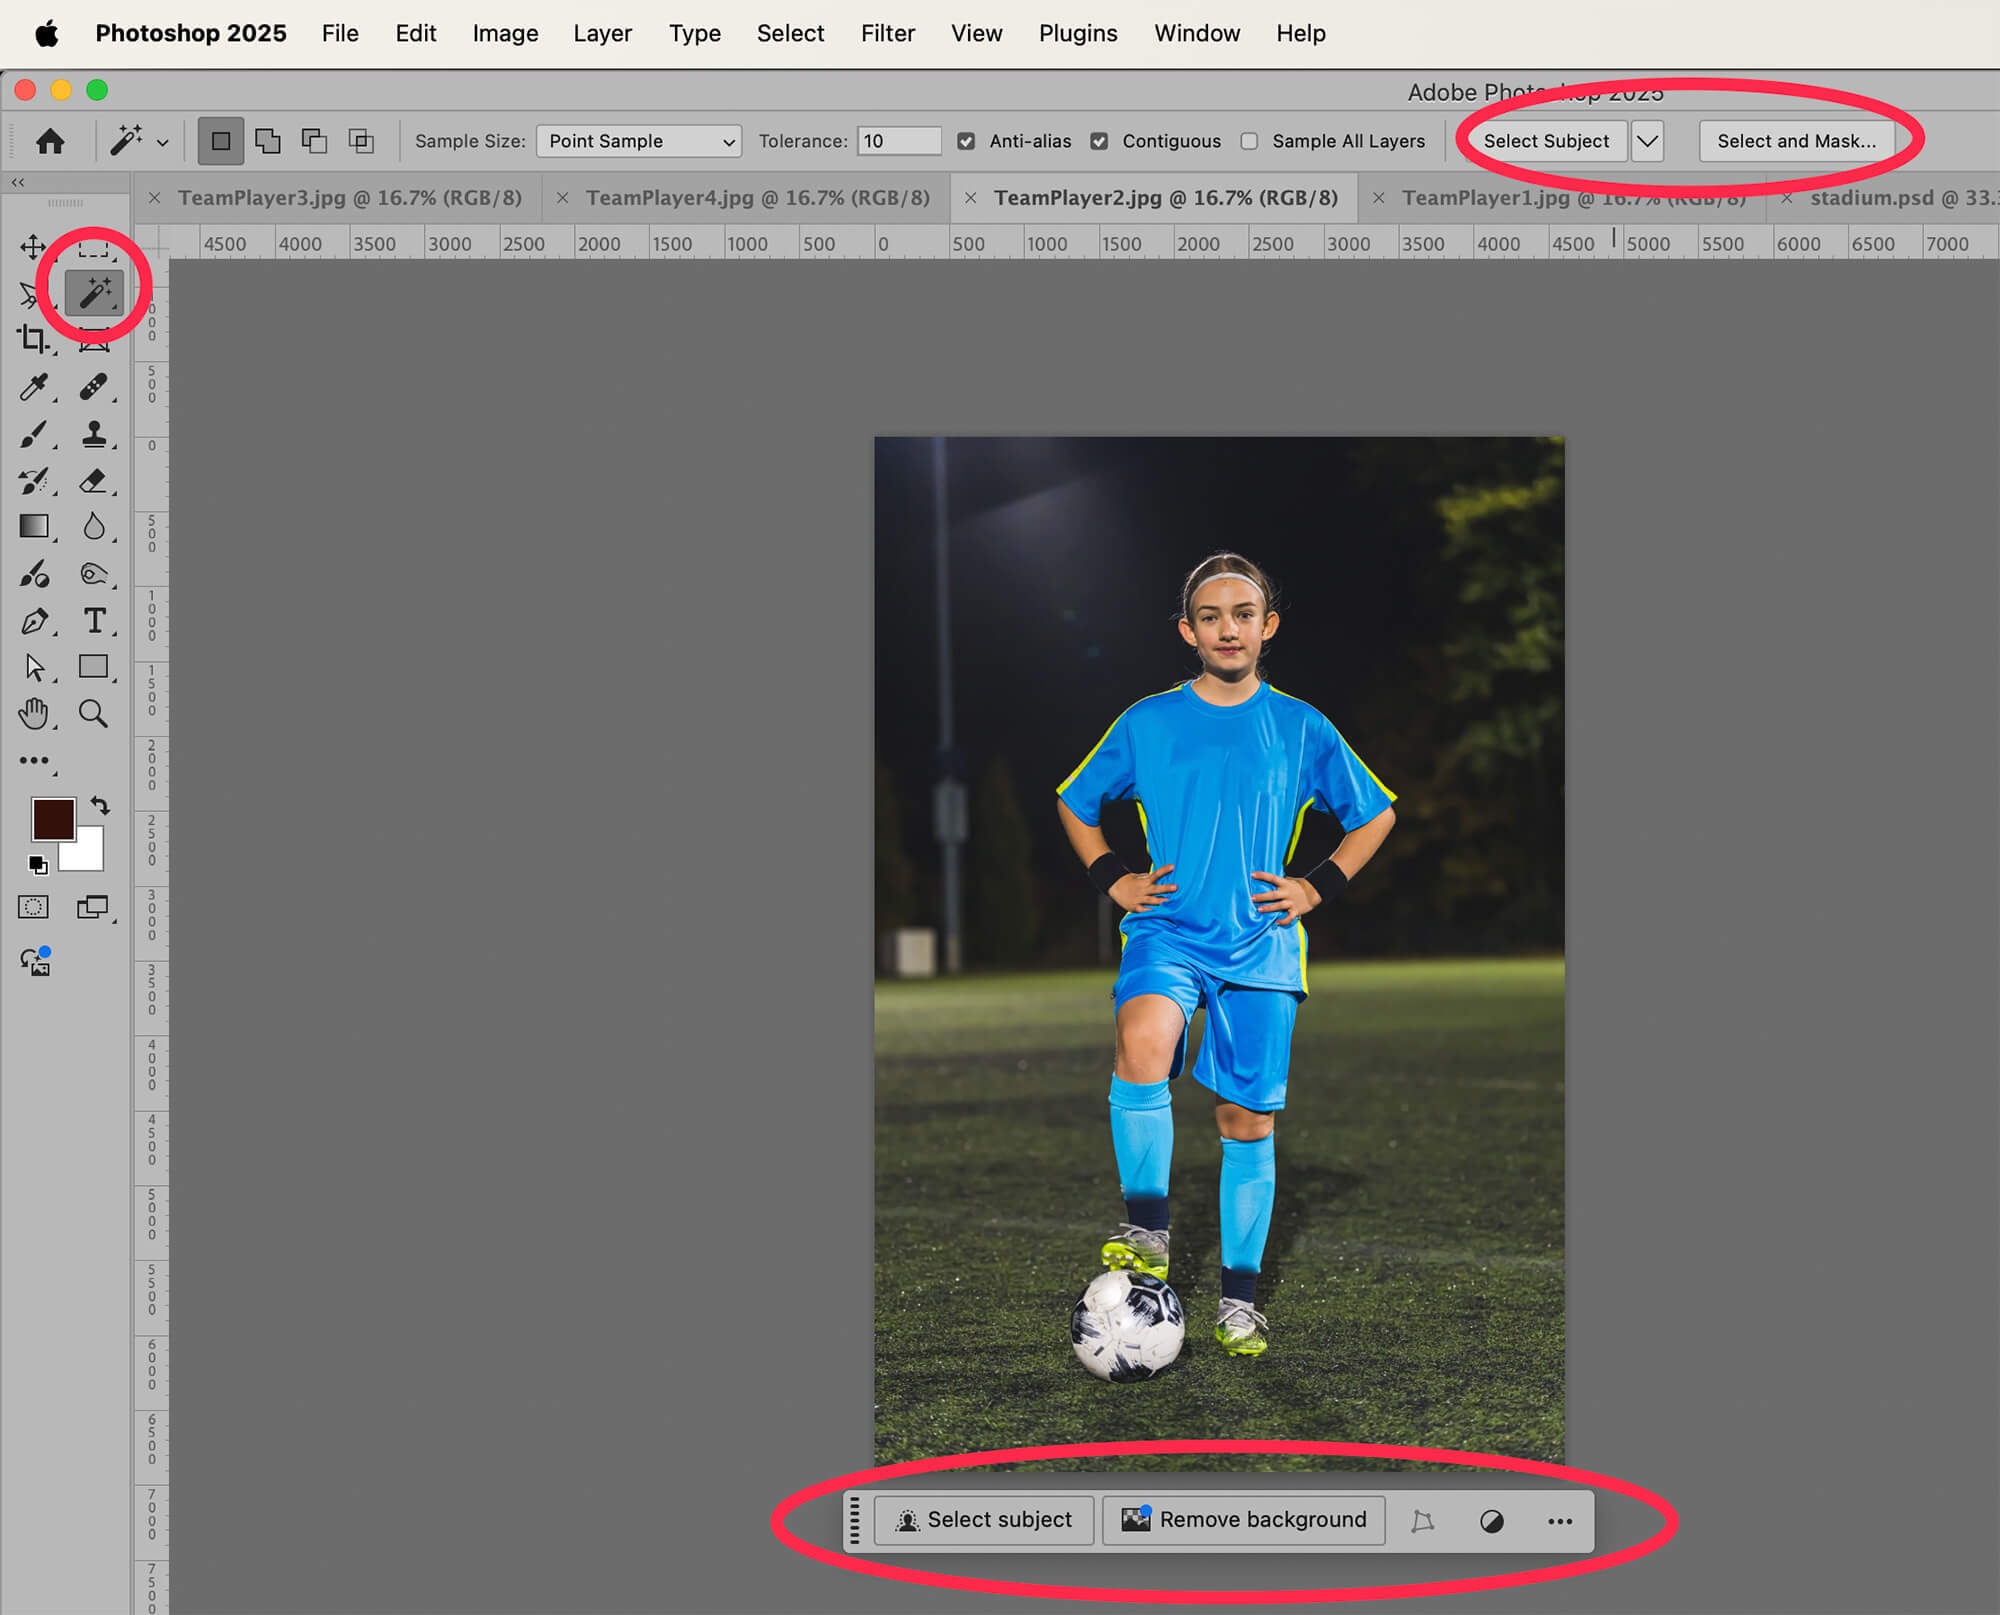
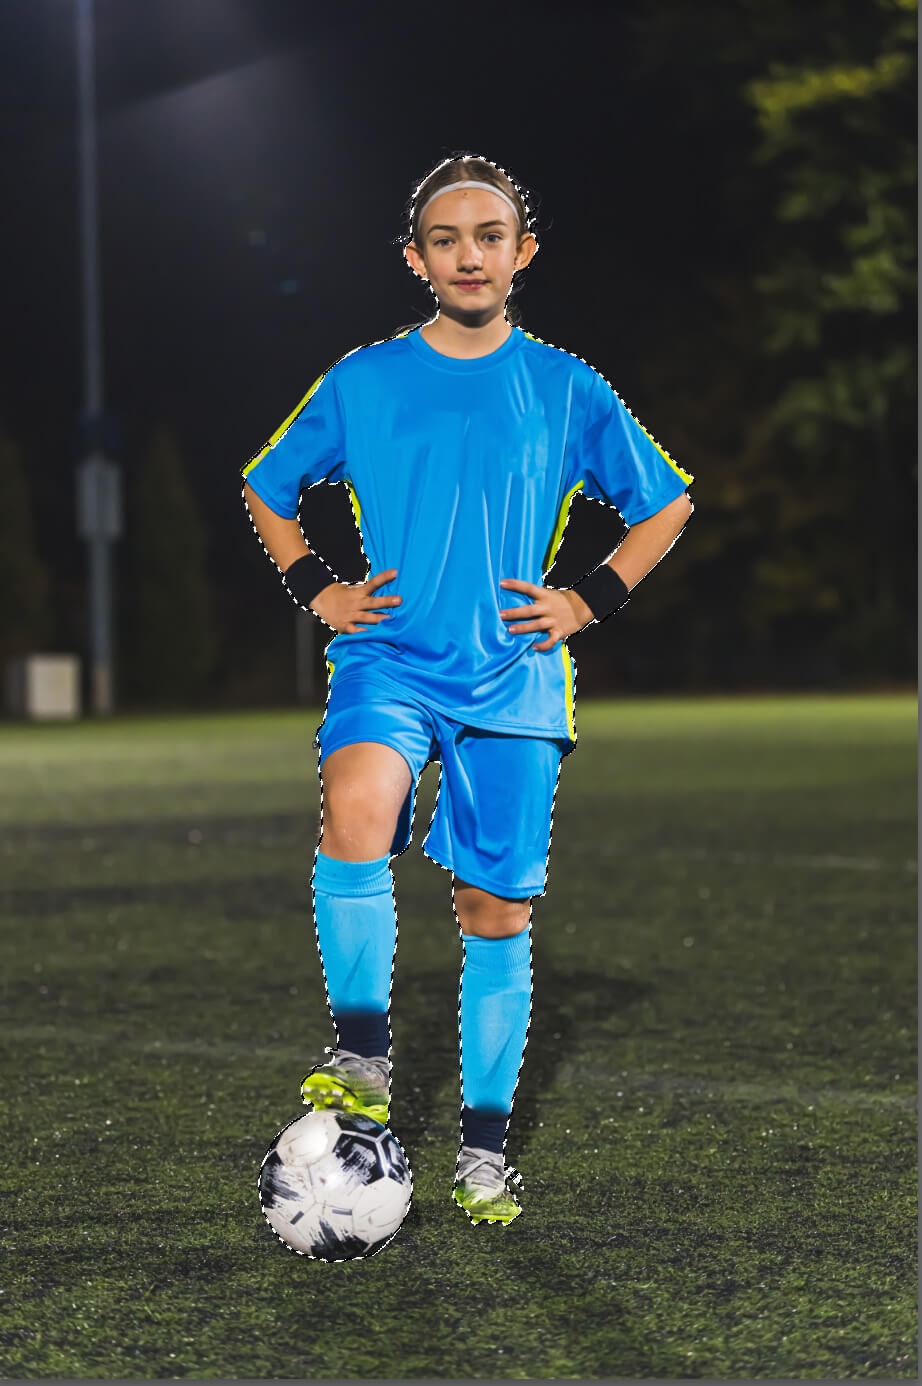
When you click on “Select Subject,” Photoshop attempts to determine the subject of your photograph and create a detailed selection of that subject. In the case of our soccer players, the subject would be the girl and the ball she is holding.
If you want a more refined selection, choose “Select and Mask…” from the Options Bar at the top of the screen to refine the selection further. Check out this article for detailed instructions on how to use Select and Mask….
How you choose to select the subject depends on the level of detail you require.
Step 2: Copy and Paste the team players onto the background image
With your selection still visible, type CTRL+C (COMMAND+C on a Mac) to copy the selection. Then, go to your image of the background you’ll be using. Type CTRL+V (COMMAND+V) to paste the team player selection onto the background.
Don’t worry about the size of the figure in relation to the background just yet. We’ll resize all the players once we have them in the composite.
Continue steps 1 and 2 for all team players.
Step 3: Resize players within composite photo
We want the girls to look like they’re standing next to each other in the final photo. Therefore, they all need to be about the same size relative to one another.
In the final photo, we will have the three standing girls in a row, and the seated girl sitting in front of them.
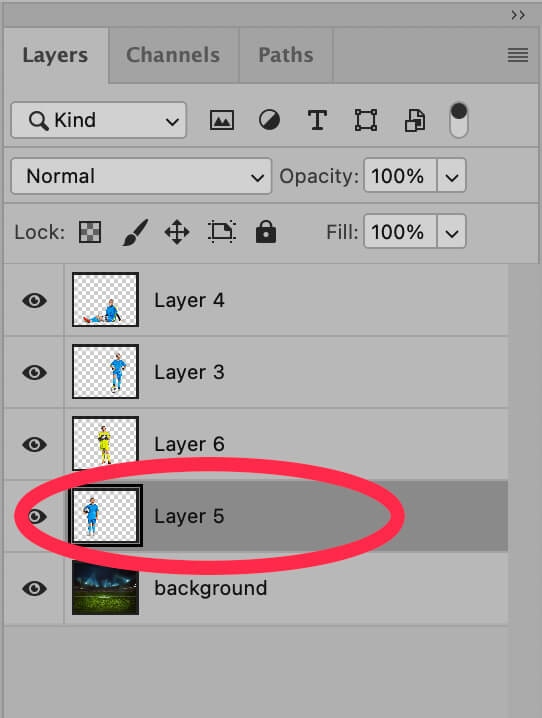
In the Layers panel, select the layer with the first player. If you don’t see the Layers panel, you can make it visible by choosing Window > Layers from the dropdown menu at the top of the application window.
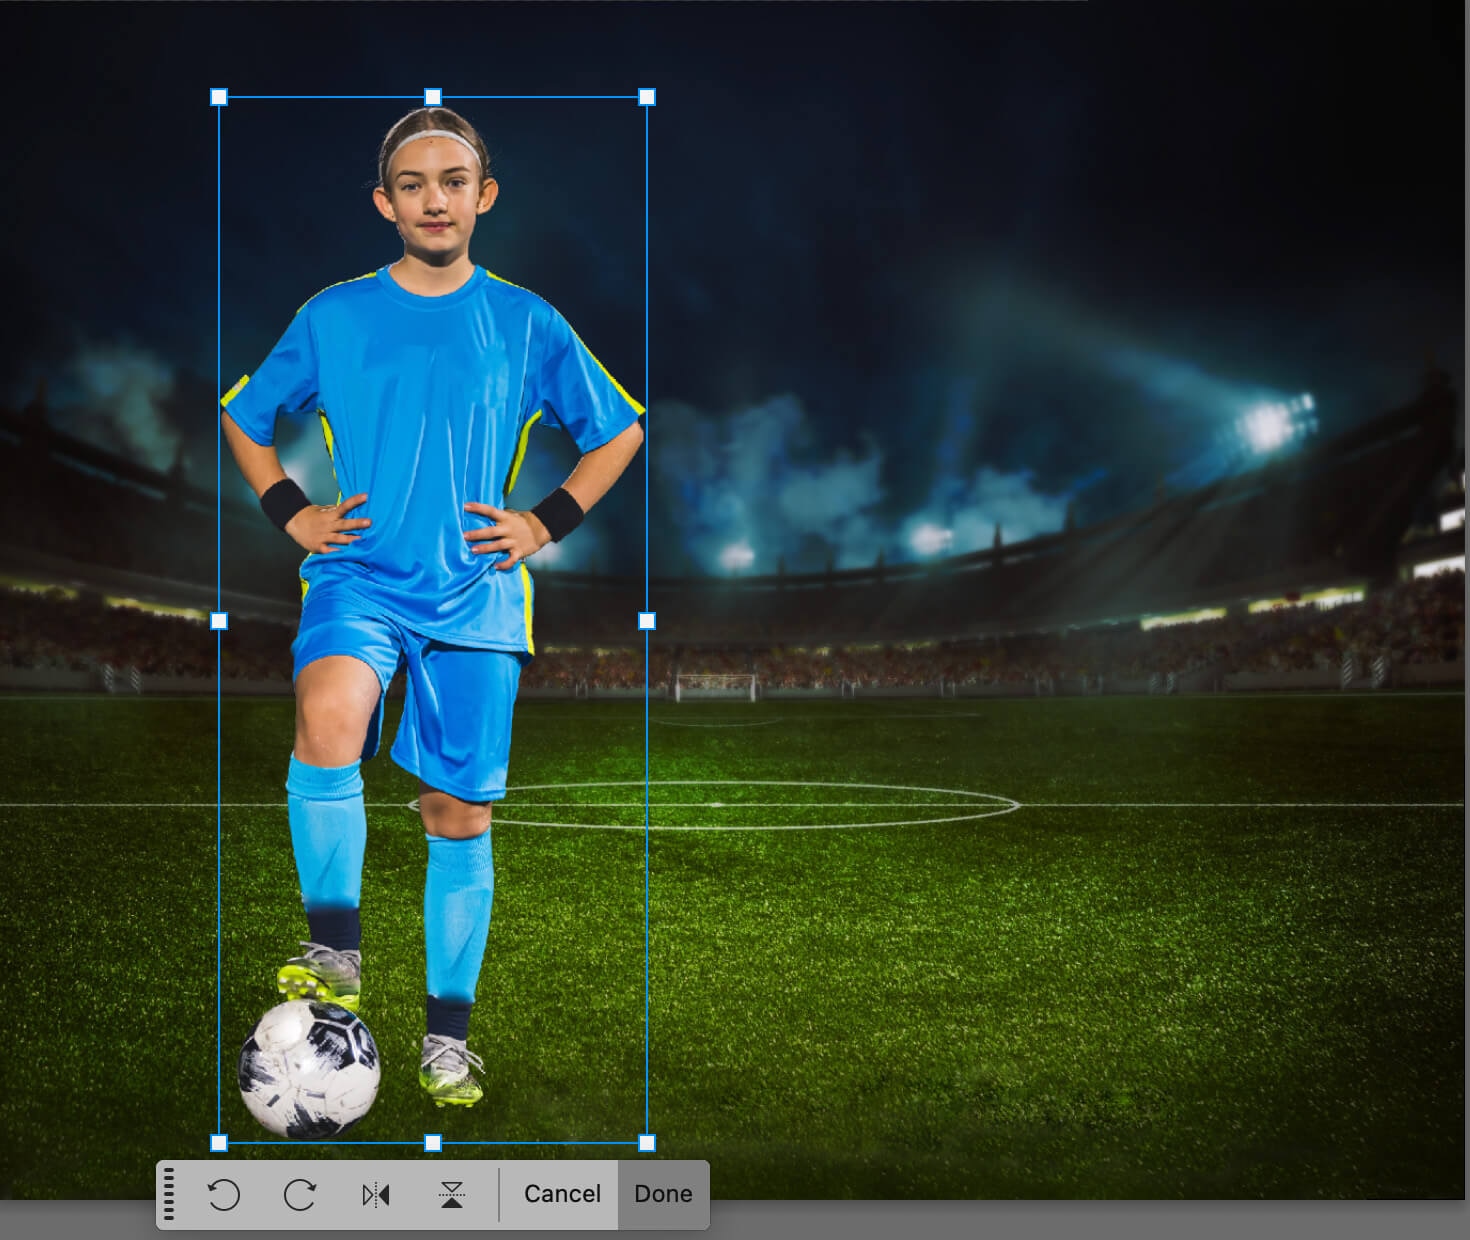
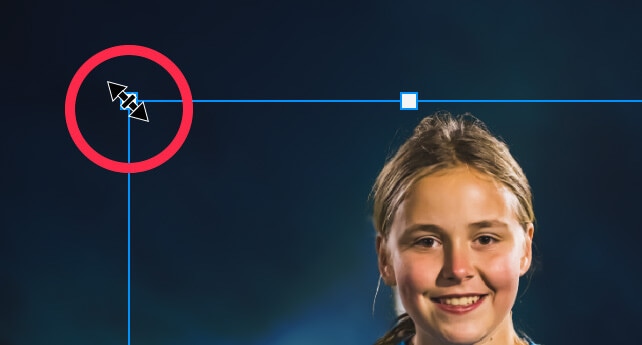
Once the layer is selected, go to Edit > Transform > Scale from the dropdown menu at the top of the application window. A blue box will appear around the player in the image.

Hover your cursor over one of the corners of the blue rectangle until you see a double-sided arrow appear over the corner. Then, drag it to resize the figure to the size you want.
In newer versions of Photoshop (Photoshop 2023 and higher), the image will resize proportionally by default (you do not need to hold down the SHIFT key).
If, however, the image looks squished or stretched as you resize it, that means the default settings have been changed. Hold down SHIFT as you drag to resize to adjust the image proportionally.
If you are unsure if the resizing is proportionate or not, you can look at the Options Bar at the top of the screen. If the values for Width and Height are the same, and the link icon between the Width and Height values is checked, then the image is sizing proportionally.

Select the rest of the players’ layers one by one and resize them all. Since the images in this example were taken at different distances from the players, we had to manually resize each photo to get a uniform look across all players.
However, if all players need to be reduced in size by the same amount (91%, for example), you can type that value into the Width and Height boxes in the Options Bar instead of resizing manually with your cursor.
Once you have all the players resized, position them onto the background so that it looks like they were there all along.

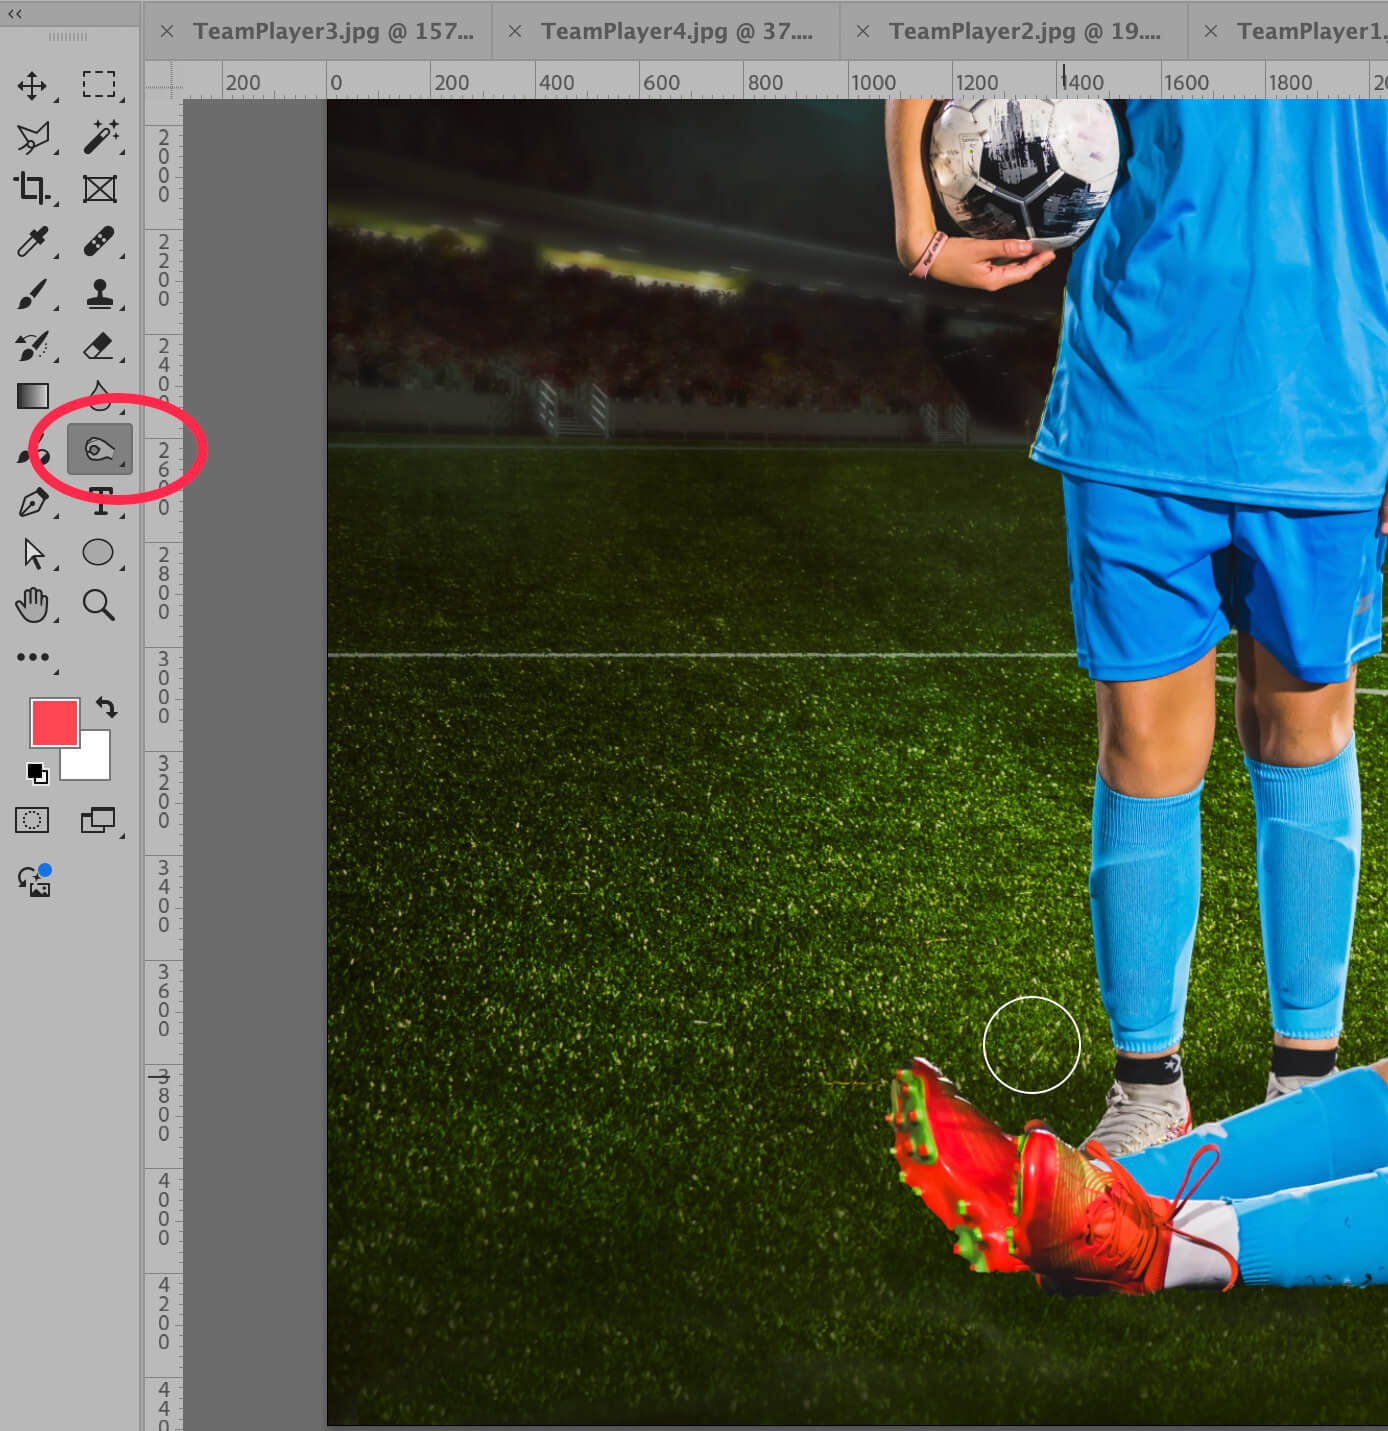
Step 4: Add depth to the background
Even though this is a team composite photo doesn’t mean we can’t make it look more realistic!
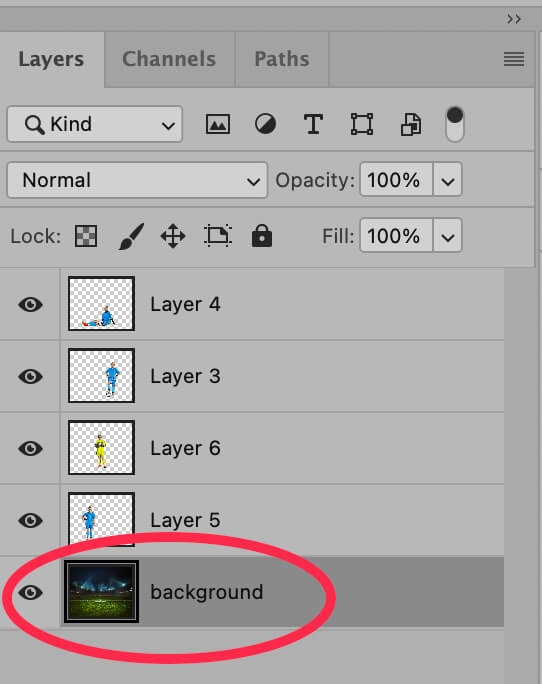
Select the background layer, which in our example holds the image of the stadium.
With the Background layer selected, choose the Burn Tool from the Toolbar at the left-hand side of the application window. The Burn Tool may be hiding behind the Sponge Tool or the Dodge Tool.

With the Burn Tool selected, “paint” over the area of the background just under the players to create a shadow effect. You don’t need to overdo this–a little goes a long way. You will need to use your judgement to determine exactly how much shadow you need to make the image look more realistic.
And you’re done! You can now use your new team photo composite as is, or add your team logo and other elements to it.

Photography tips for team composite photos
Save these tips for when you shoot team players and coaches to improve your team composite sports photos:
- Shoot all players at the same angle, with the same lighting, in the same place. The easiest way to achieve this is to shoot in a closed studio where you can control the lighting, or at night. Set up a tripod to make sure the camera is in the same place for every photo, and place a marker on the ground for each of the players to stand on during the shoot.
- Pay attention to the horizon line when you shoot the players. You want the horizon line to be in roughly the same place as the horizon line in the background image you’ll ultimately use. This will make it easier when editing sports photos for the team composite shot.
- Choose the right equipment for the job. Make sure you have the best sports photography equipment with you for the type of photos you will be taking. This doesn’t just mean having a tripod; you also need to bring adequate lighting for the type of shoot you will be doing (indoor, outdoor, nighttime) and a lens that is best suited for the job.
- If possible, photograph the players against a solid, neutral background. This will make removing the players from the background easier when you create your composite. Opt for a background that does not share any colors with the team uniforms, but also try not to use a bright background such as a green screen, as these colors might show up as a reflection on clothing and skin even after the background is removed.
- Make sure your setup can be taken down and set up again in the exact same way. Keep track of the location of your lights, camera, background, etc. If a player can’t make it to the shoot, you want to be able to schedule a makeup and replicate your studio setup exactly.
Send your team composite edits to Path
Making team composite photos can be a tedious and time-consuming process, especially when you’re working with lots of teams with large rosters. Let Path handle some of the work for you—the most challenging cutouts and clippings, and retouching to perfection.
[ad_2]
Source link