برچسب: Check

  • Want To Use Sunlight Creatively In Your Photography – Check Out These Resources

    Want To Use Sunlight Creatively In Your Photography – Check Out These Resources

    [ad_1]

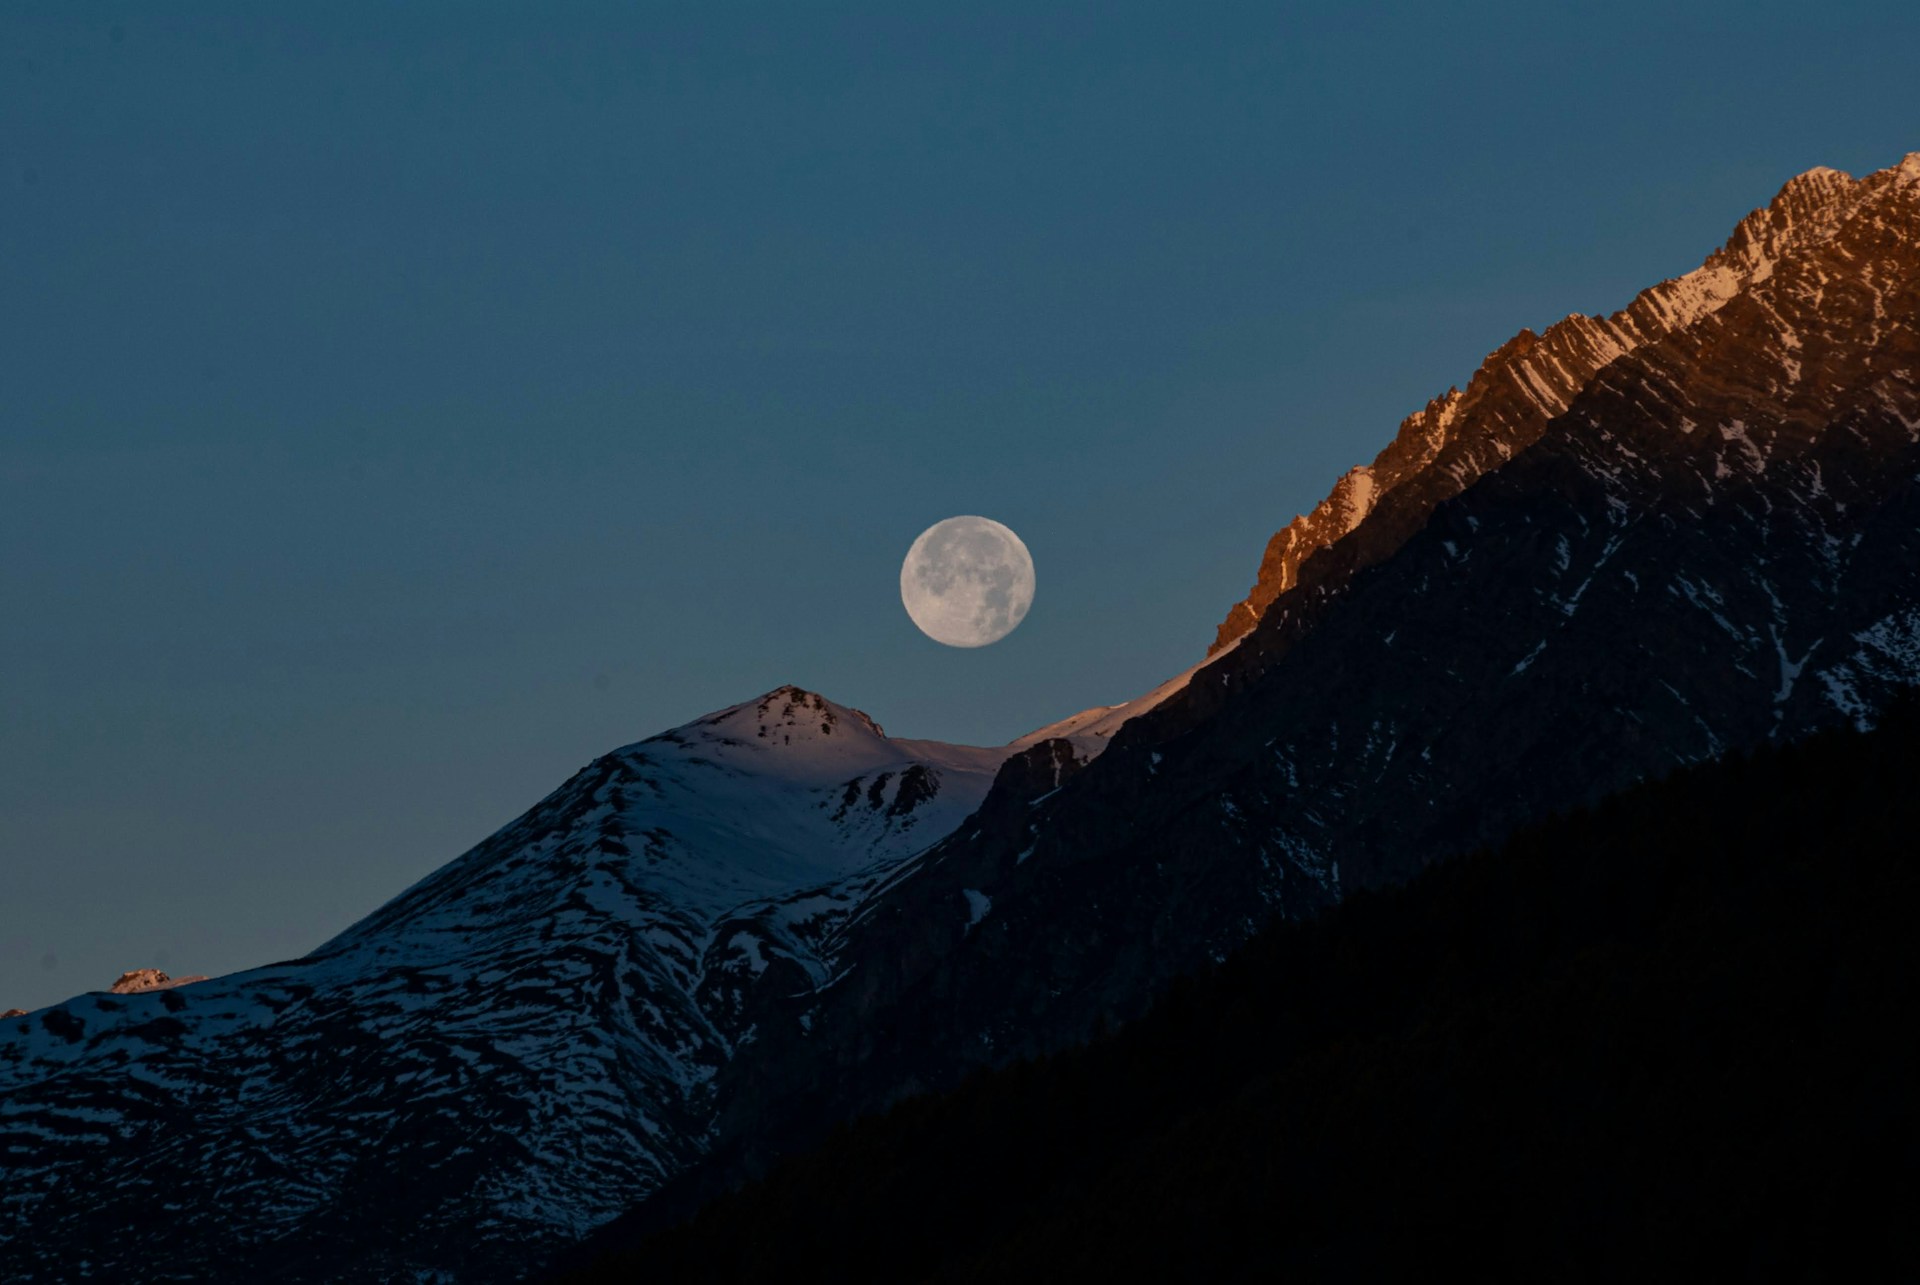
    Sunlight is the best light for photography because it is the only natural light available for us during the day time and at night we also have the moonlight to capture moonlit landscapes. Using natural light in photography can be the best way to make use of available light and it costs nothing. When there are unfavourable light conditions natural light can always be manipulated to our liking with a good understanding of how light works.

    Here are some resources that will help you to use sunlight creatively in your photography.

    Photo by Samson Katt

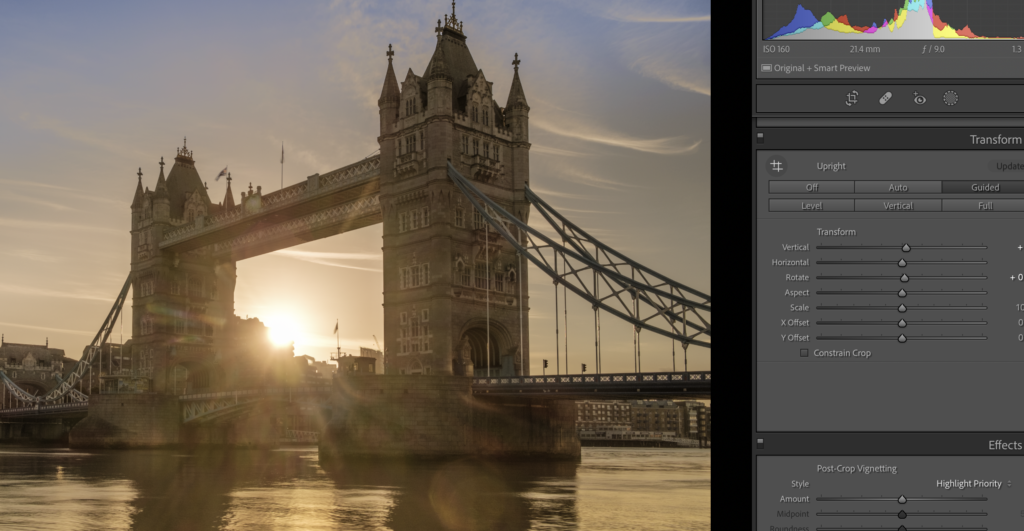
    Lens flare is something that most lens manufacturers tend to minimise when manufacturing lenses, but it is also something that can give a cinematic and dreamy look to a shot or footage if used well. Usually when backlighting your subjects, it becomes almost impossible to eliminate lens flare if the sunlight is falling straight on the lens. So this article talks about how you can embrace lens flare and control it.

    Photo by Omar Prestwich

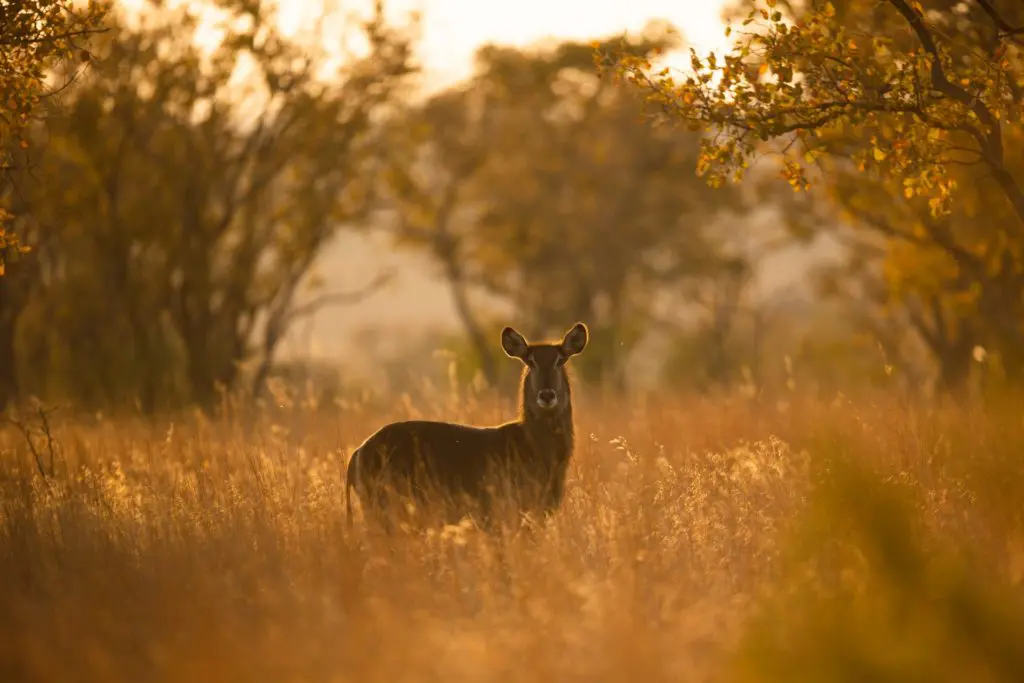
    Backlighting is a very beautiful way to illuminate your subjects because of the stunning rim light that can make your subject’s outline glow. Depending on how you backlight your subject, you may come across a bit of lens flare and this can be used creatively in your photography. This article provides five simple ways to use lens flare for creative photography.

    Note: If you wish to reduce lens flare, check out this article – How To Reduce Lens Flare

    Photo by Sheen

    You may have seen those stunning photos where the sunlight may look like starburst. Did you know that it is very easy to capture starbursts in your photo by just setting your camera’s aperture and/or moving around to position the sunlight in a certain way? This article discusses two easy ways to capture brilliant starbursts in your photographs. Here is another article if you wish to read more – How To Create A Starburst Effect In Photographs

    Photo by Panoramas

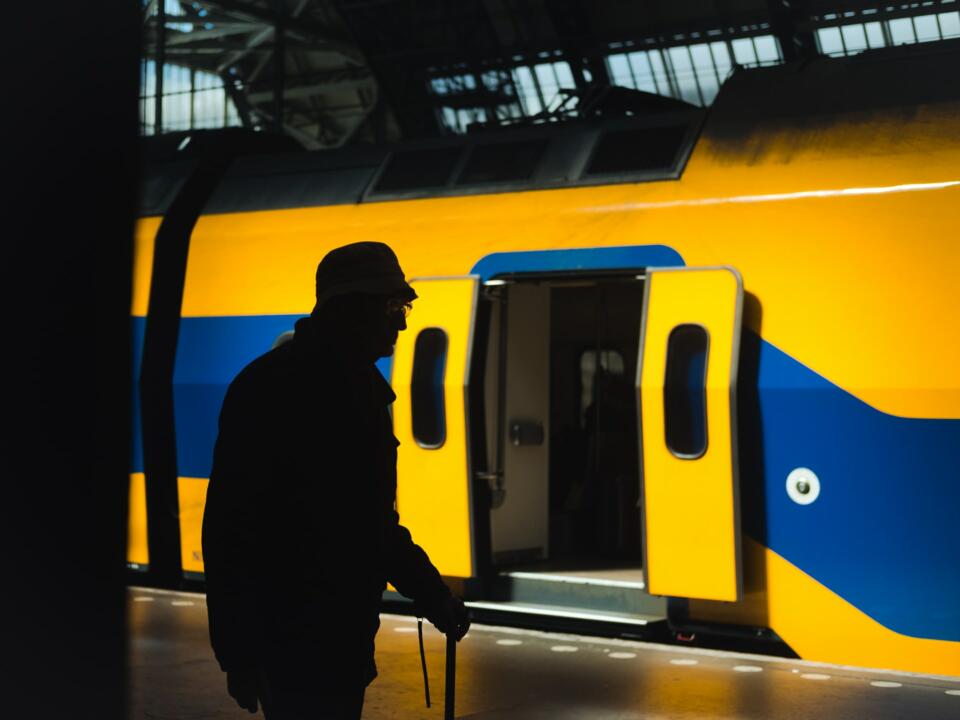
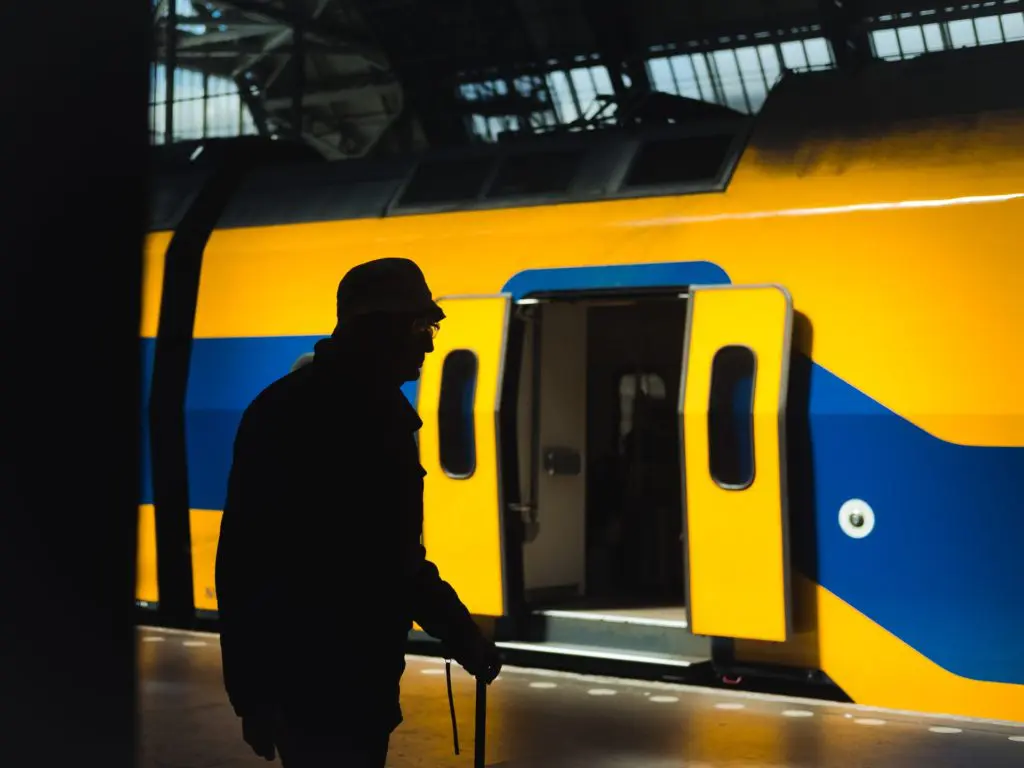
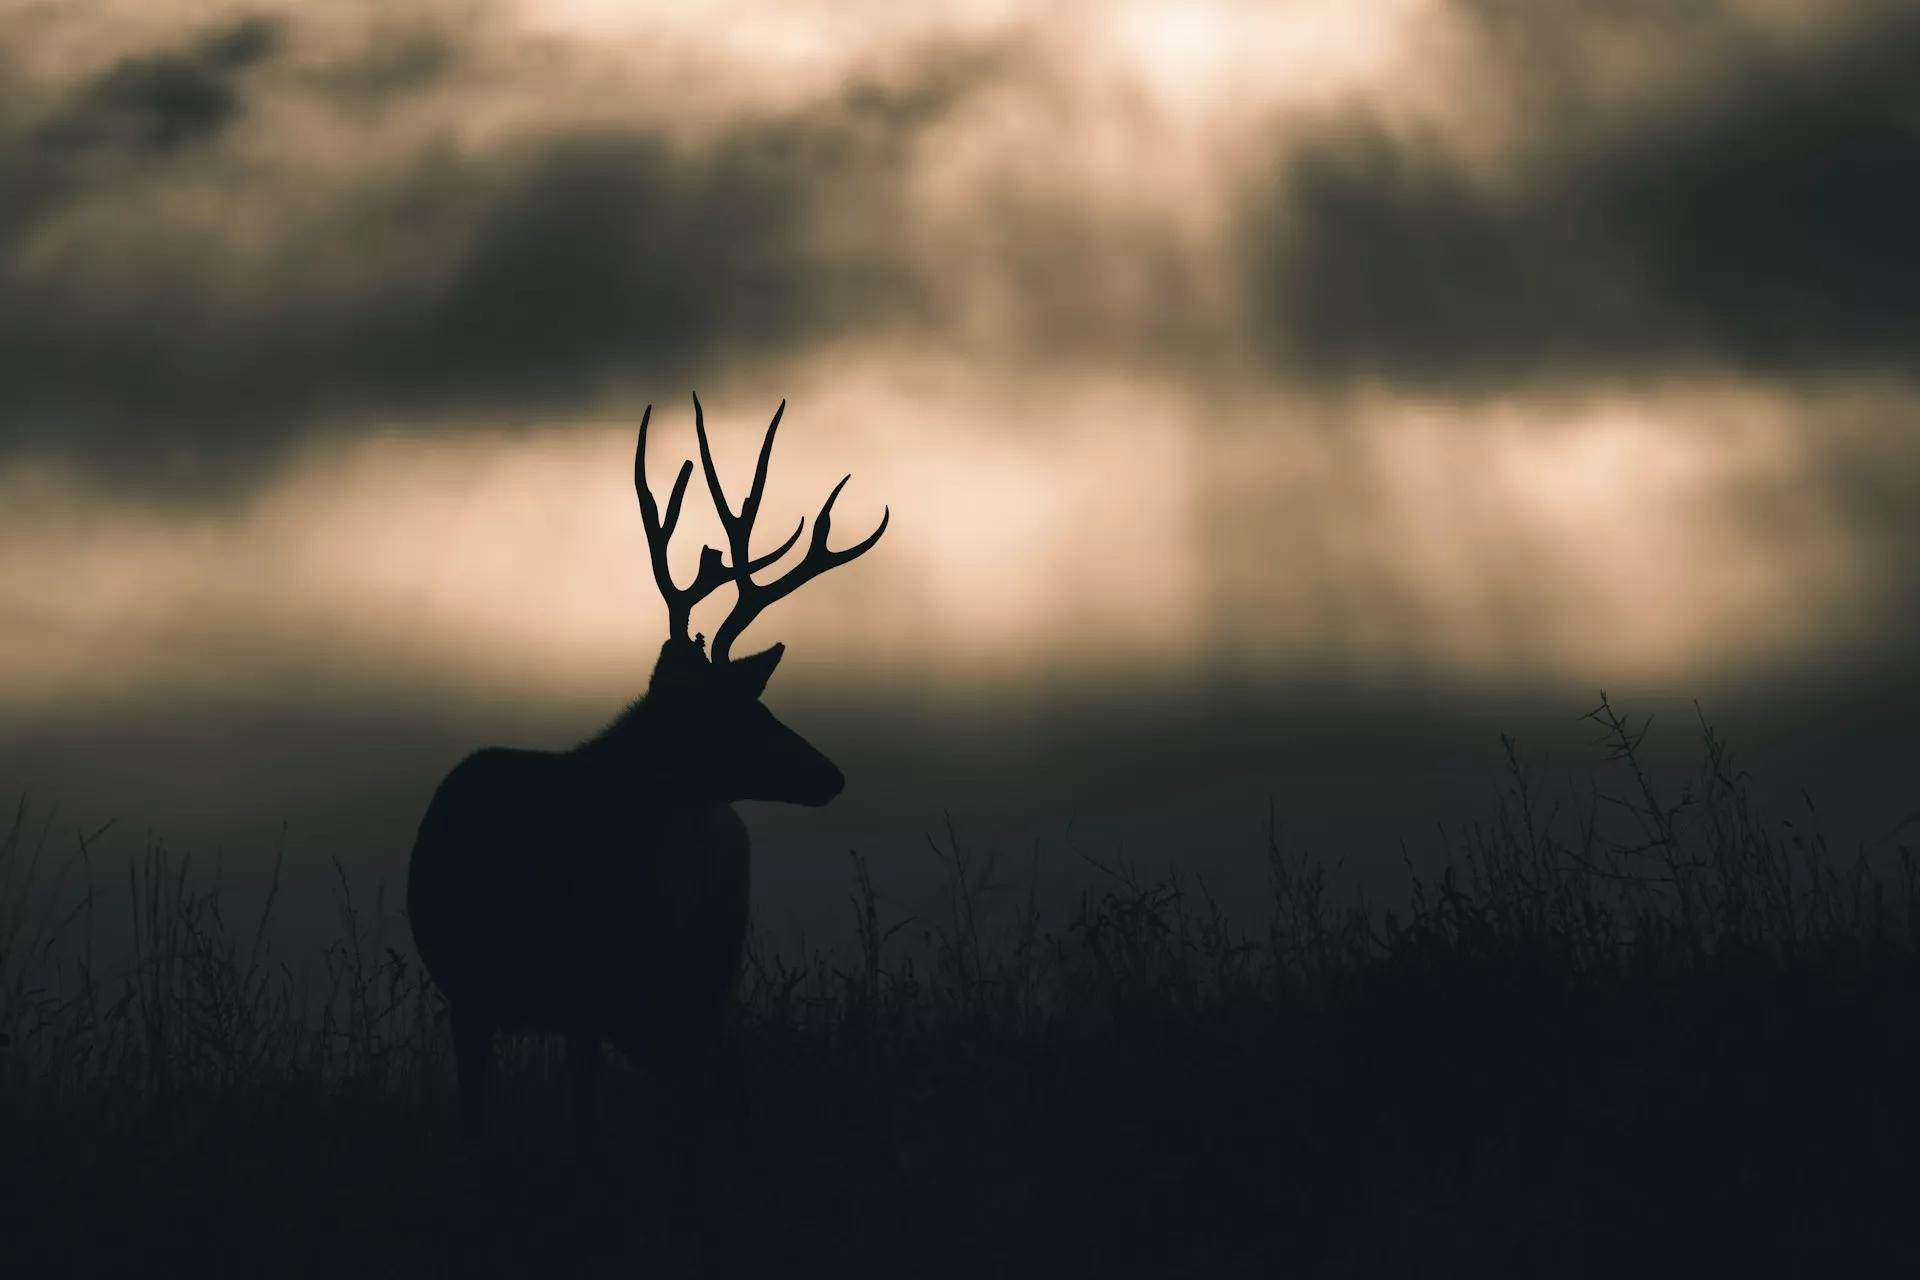
    We all know that most of the time, shooting into the sun, and exposing for the sun will give us silhouettes. Silhouettes are beautiful if shot well, but it is not always intentional. There are times when you want to shoot into the sun for dreamy images especially when shooting portraits. Instead of a silhouette, you will want to capture details in the photo and this article discusses that.

    Photo by Ben Kelsey

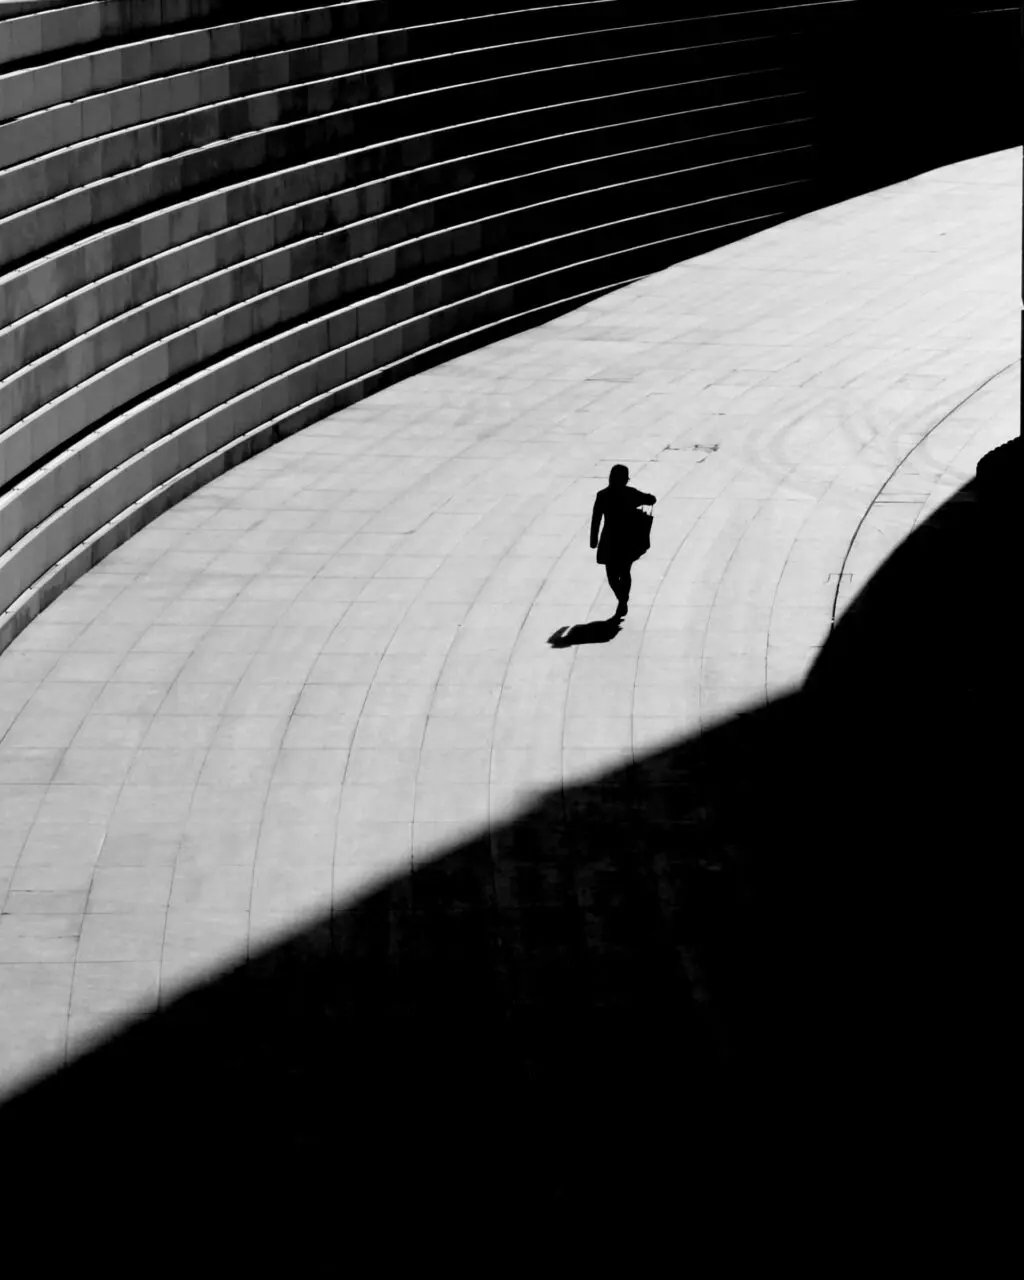
    Silhouettes are beautiful and dramatic if shot well. In order to capture silhouettes, you need to shoot into the light. To capture compelling silhouettes, you need to choose your subjects and the background wisely. This article discusses the secrets to capture effective silhouettes.

    Photo by Kristian Saks

    We have commonly heard about star trails in photography, but did you know that with some creative effort, you can also capture sun trails? Solargraphy is a long exposure technique where a pinhole camera is use to capture sun’s trails over a period of few weeks to months on black and white photographic paper. Check out this article for some sun trail images and an overview of the process.

    Photo by Jason Row

    When we think of capturing sunrises or sunsets, many photographers are geared towards capturing the sun in an open landscape, which can be exciting at first but can quickly become boring. If you look and compose these shots creatively, by paying attention to the elements in the scene and by carefully choosing the foreground and middle ground, these sunset and sunrise shots can be captured creatively and this article talks about just that.

    Photo by Johannes Plenio

    Sunlight hits differently during different times of the day and as photographers we need to be looking at how light illuminates the elements in front of us and capture it in creative ways. One of the most common subjects of photography is the sunset and rather capturing a boring snapshot, this article discusses five easy tips to improve your sunset shots.

    Photo by Dawid Zawiła

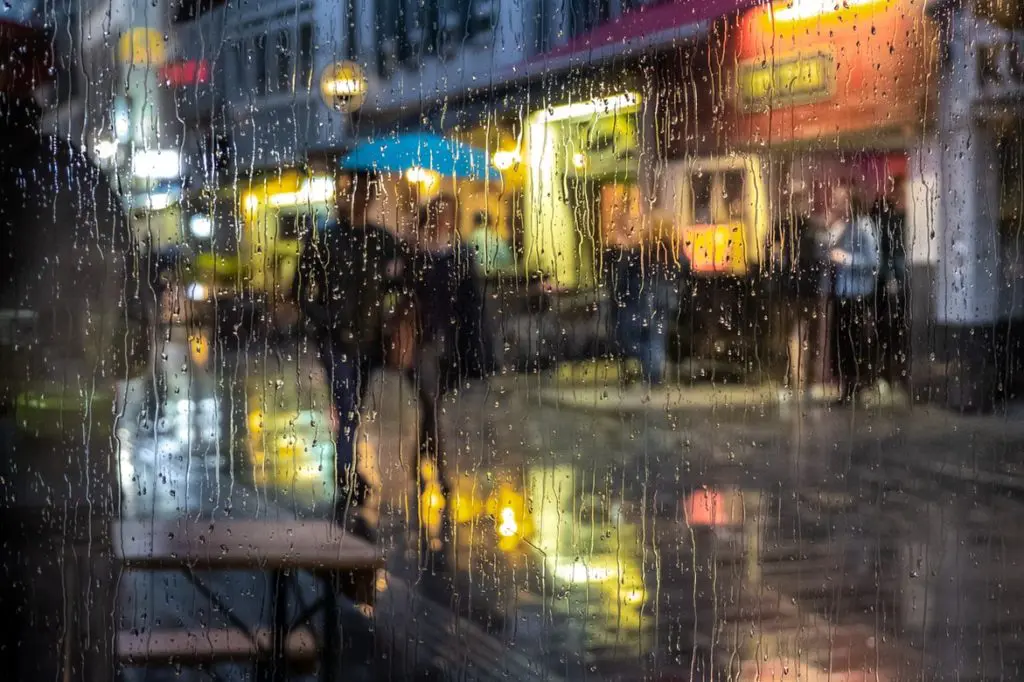
    Sunsets are magical and they most of the time lend a dreamy atmosphere in areas where the light falls. Sometimes even the light through a cloud opening can be very beautiful with a spot of light illuminating the area where it falls, leaving the other places look dramatic. This article will help you capture sunsets with an ethereal effect.

    Further Resources


    [ad_2]

    Source link

  • Moon And Moonscapes – Check Out These Ethereal Photographs

    Moon And Moonscapes – Check Out These Ethereal Photographs

    [ad_1]

    The Moon is the only natural satellite to earth and the brightest object in the night sky. Depending on the sky conditions and the position of moon in the sky, whether day or night, it is a great subject for creative storytelling photos. If you wish to photograph the night sky or wish to photograph landscapes or cityscapes at night or during dawn and dusk, having the moon in the frame will help to capture compelling, visually appealing photos.

    Besides the above, the moon can be photographed during various phases and also during an eclipse. Each of these scenarios provide photographers the opportunity to capture the moon differently. Here are some ethereal photographs of the moon and moonscapes, so you can get some inspiration and ideas for stunning moon photography.


    Grab your Milky Way Photography Blueprint for free right here.


    Apart from capturing closeup photos of the moon that fill the frame, in order to capture powerful storytelling photos of the moon, you will need to pay attention to composition. When it comes to capturing the moon, paying attention to composition can be quite confusing, but look for natural or manmade subjects that can be captured along with the moon or shoot through them to frame the moon interestingly. If you are looking to improve your compositional techniques, we would recommend you to check out this eBook, “Advanced Composition” by Photzy.

    Photo by Lorenzo Molinari 
    Photo by Mohamed Shaffaf 
    Photo by Kym MacKinnon
    Photo by Xavier Mclaren
    Photo by Nathan Anderson 
    Photo by Joseph Corl
    Photo by Cheng Lin 
    Photo by Fran Lanza 
    Photo by Anita ajisic
    Photo by Vladimir Kondratyev 
    Photo by Raffaele Mainini

    Beginners in photography may always be stuck with just one compositional guideline – the rule of thirds or leading lines. While this guideline may be effective and form a base to many other compositional guidelines, it is important to think out of the box and work towards more effective compositions. If you wish to go beyond the basics and turn your photos into works of art, check out this eBook, “Advanced Composition” by Photzy that will help you to see light, shadows, lines, curves, space, repetition and focal points.

    Photo by Alek Newton
    Photo by Andras Toth 
    Photo by Aaron Benson
    Photo by Vinicius de Paula
    Photo by Egemen Şahin
    Photo by Livia
    Photo by Navi
    Photo by Nuh Enes Sakallı
    Photo by Mike Lewinski
    Photo by Grant Davies 
    Photo by Sanjeev Shakya

    If you look at award winning photos, you will notice that there are some important factors in play, which are easy to implement but are not talked about much usually. When composing a shot, there are more than one ways in which a frame can be captured. If you wish to move beyond the rule of thirds and capture photographs with advanced compositional guidelines, then we would recommend you to check out this eBook, “Advanced Composition” by Photzy. It is a 239 page easy-to-follow practical guide, packed with training that includes 38 Assignments, 84 Key lessons, and 117 Self-check quizzes!

    Photo by Vasti Vanhee 
    Photo by Hadrian Weatherall 
    Photo by Maksim Samuilionak
    Photo by Emilio Garcia 
    Photo by Kym MacKinnon
    Photo by Cristina Glebova
    Photo by Sayed Abdelsalam 
    Photo by Baptiste Buisson 
    Photo by Dmitry Shamis
    Photo by Chirag Saini
    Photo by Thomas Griggs

    Further Reading


    [ad_2]

    Source link

  • Check Out These Tutorials To Add Magic To Your Wildlife Photography

    Check Out These Tutorials To Add Magic To Your Wildlife Photography

    [ad_1]

    Wildlife photography is capturing photos of birds, animals and other critters in the wild, in their natural habitat. It is completely different from capturing photos of animals or birds in the zoo. Wildlife photography is not easy and requires a lot of patience and skills. It also needs educating oneself about different animal behaviours and having great respect towards wild animals.

    Photographing wildlife will require special gear like a long lens and a camera that has continuous autofocus and can shoot in burst mode. In this article we have put together a set of tutorials that will help you to get started in wildlife photography.

    Photo by Pieter van Noorden 

    Wildlife photography is one of the most rewarding genre in photography and working with such stunning subjects requires a lot of observational skills, research and understanding of the subjects, to get the best shots. Scouting for locations, working with the light and elements and wisely choosing compositional techniques are some of the most important factors that will help to capture the best wildlife photos. In this article, we have put together some tips that will help you to capture beautiful wildlife photos.

    Photo by Jeremy Hynes

    Wildlife photography is quite different compared to other genre of photography in the sense you cannot always predict the behaviour of your subjects and it is also difficult to spot them in the wild. You may have heard of wildlife photographers who have spent days, weeks and months looking for their favourite or a particular subject. Besides you will need to take into account a few other factors as well in order to capture the best shots. If you are a beginner in wildlife photography, this article will help you get started.

    Photo by Harsh Singh 

    In the early days into wildlife photography, you may be practicing with a smaller lens like your kit lens that came with your camera. Most of the time when this lens is used with a crop sensor camera, it will work well for shots of bigger animals that are not too far away and also for good environmental shots. Wildlife photography can be done better with the right gear if you are planning to take it up seriously and this article discusses the gear you need to get started.

    Photo by Polina Koroleva

    Some wildlife photos can be done better if you take care of some little things when out in the field. All animals portray attitudes and behaviour and capturing these against a good background can result in compelling photos. You just need to move around a bit and look at your subject from a different angle and perspective. This article provides some tips to add a wow factor to your wildlife photos.

    Photo by Frida Lannerström

    You may have started wildlife photography and shot a few photos but found that they are not very interesting. Following a few tips and techniques can help you capture better wildlife photos. This article talks about research, patience, backgrounds, light, settings for creative shots, composition, ethics and gear for wildlife photography in the form of short tips.

    Photo by Alpha Perspective

    If you are someone who lives in urban areas, you would have come across a few species off wildlife in public places. Photographing these wildlife is a way to get started in wildlife photography. Most of the urban wildlife are not very shy and come quite closer to humans compared to the animals and birds in the wild. Practicing wildlife photography in an urban area, is a great way to start wildlife photography. This article gives a few tips to shoot urban wildlife

    Photo by Max Zaharenkov 

    There are times when photographers plan safaris or other wildlife expeditions and they will need to be in locations where they will need to work with the gear in hand for a few days or even more. Even if you go out for a day safari or wildlife adventure, you will need to pack the necessary gear in order to capture the shots without any stress. This article talks about the gear you need to pack when you go out for wildlife photography.

    Photo by Debjoy Biswas

    Once you have captured your wildlife shots, you will need to edit them to give the image a pop and the right colours. Remember to always shoot raw for effective post processing. A slight adjustment in exposure, contrast, adjusting the white balance, highlights and shadows will help to bring out the best from your raw files. Depending on the files, you may need to make further adjustments like vibrance, sharpness, clarity etc. This article talks about editing wildlife photos in Lightroom for visual impact.

    Further reading


    [ad_2]

    Source link

  • Looking For Some Great Lightroom Tutorials – Check These Out!

    Looking For Some Great Lightroom Tutorials – Check These Out!

    [ad_1]

    Lightroom is a versatile program that has evolved over the years and comes with amazing tools that makes it a one stop platform for most beginner and experienced photographers. Most professional photographers rely on Lightroom because of the efficiency in batch processing files, making it a great hit among many wedding and event photographers including others.

    Besides, various features that help photographers organise their photos, sharing them as catalogs, using the creative cloud feature, etc., has made Lightroom a go to program for many photographers. If you are looking to improve your Lightroom skills or wish to learn more about the features that you do not use, here are a number of tutorials that will help you to understand Lightroom better.

    Photography is about spending time capturing images with your camera and spending little amount of time post-processing the images. There are times when photographers may hate editing or maybe need a quick boost to their images without spending much time. Lightroom comes with tools that can make editing a breeze. Read to find more!

    It doesn’t matter what program you use for editing, but it is important to have a specific workflow that can help you work faster and more efficiently to produce great results. Light room comes with rating systems, labels, tags, import settings, etc., that can make your work easier. This article shows how you can streamline your Lightroom workflow and save time.

    Photographers have a huge collection of photos from each session most of the time and sometimes photos are also scattered across several hard drives. It would be great to organise the photos and find the ones we’re looking for easily, without having too much trouble. Here are some ways to organise your images using lightroom.

    Lightroom comes with a lot of powerful tools, most of them packed in the “Develop” module and most of the time if the image is captured well in camera, there are only a few subtle edits one needs to do, to make an image presentable. Some tools like the clarity, texture, dehaze and sharpening, if not used well, can make the image look overprocessed or awkward. This article talks about five subtle tools you should learn to use in Lightroom.

    Using the vertical tool manually in Lightroom. By Jason Row Photography.

    If you are someone who has interests in architectural photography, chances are that when post-processing, you will need to correct the verticals and remove lens distortions. This may also apply sometimes to other genre in photography. This article talks about the transform and lens correction tools in Lightroom and why you need to use them.

    Lightroom provides a lot of tools to make a photographer’s workflow easier and faster. There are a lot of little things that photographers need to know in order to use this program efficiently. Who doesn’t love hacks in order to get editing jobs done easily? This article provides 10 hacks for Lightroom classic.

    The recent updates over the past year use AI technology to reduce the amount of time required to work on certain tasks within Lightroom. Some of these tools were not available in older versions of Lightroom and they can come in handy if required. Here are some quick but useful Lightroom tools that you should know.

    Lightroom as simple as it may seem, has some really powerful masking tools that make selective editing quite easier for photographers. Depending on what you need to mask, there are various masking options – using just a brush or select objects, subjects, sky, background, etc. Here is a quick guide on how to use the masking tool in Lightroom for the best results.

    Besides the basic colour corrections and other important tools that Lightroom provides, there is a separate section to colour grade photos if you are someone who wishes to bring in a cinematic or another specific look to your images. Lightroom has three colour wheels, one each to control the colours in the shadows, mid-tones and highlights. Check out this article to find out how to use these wheels.

    If you want to work faster in Lightroom, you need to get into your Lightroom settings and makes some changes to improve its performance. Many beginners may not be aware of these settings. Most of the issues arise when working in the develop module or even the simple process of scrolling across to the other images may be slower. Here are some ways to get better performance in Lightroom Classic.

    Some users may not be aware of the fact that Lightroom can also be used to edit videos. Although it does not have any advanced tools for video editing, if you are someone who occasionally captures a couple of videos and wishes to make some basic edits, then Lightroom can be useful if you do not want to invest in other expensive video editing programs. Here are the pros and cons along with how to edit a video using Lightroom.

    Lastly, if you are someone who likes to make edits on the go on your mobile device, Lightroom has a mobile app that can also sync your edits via creative cloud so you can continue from where you left, when working on this app from your computer. Here is a quick guide to using the Lightroom mobile app.

    Further Reading


    [ad_2]

    Source link

  • Check Out These Tutorials To Capture Unique Urban Photos

    Check Out These Tutorials To Capture Unique Urban Photos

    [ad_1]

    Many photographers consider urban spaces as boring locations to photograph, due to the fact that they may be too busy and/or cluttered. Moreover, these places can be quite crowded most of the time and noisy too, but if you are willing to slow down, and take time to observe and photograph some unique and interesting shots, then urban spaces provide a lot of photographic opportunities.

    Urban spaces or cities provide opportunities for several genre of photography like architecture, street, urban wildlife, etc. It is always recommended to scout locations beforehand, get to know the area and study how light falls in a particular area during certain times of the day, etc., so you can come back with very compelling photos.

    Here are some tutorials that we have put together, so you can get some ideas and be inspired to photograph in urban spaces.

    Here is a tutorial or a walkthrough for an interesting start on how urban spaces can be photographed. This article includes a lot of sample images with details along the way to give you an understanding of how light, perspective, angles, etc., can be used to capture interesting urban photographs.

    Photo by Hongmei Zhao

    When we hear the word landscapes, we immediately think about natural landscapes in the wilderness like the ones that have meadows, grasslands, hills and mountains, beaches etc. Landscapes can be also extended to urban areas where urban landscapes can be captured as they are quite interesting if you follow some tips.

    Photo by Adam Borkowski 

    While many photographers choose to stay indoors on rainy days in order to protect their gear and themselves, these days provide great atmosphere for photography and many creative opportunities. Urban landscapes transform into magical spaces during or after a rain and with some precautions and safety measures, one can capture stunning urban photos on a rainy day. Here are some tips for rainy urban photos.

    Photo by Gil Ribeiro

    Cities are places where something keeps happening all the time – there are a lot of stories, events, cultural activities and so on, that can be photographed. Besides, cities provide great opportunities to capture architecture during various times of the day and seasons, street photography, environmental photos, etc. Here are some ideas to capture stunning city photos.

    Photo by Jason Row

    Street photography in a city can offer unique perspectives on what is happening in a city and the light falling through tall buildings and alleyways can offer interesting compositions and stories. Right from train stations to city centres, each space provides different stories and elements that can be used to capture the life in the city. A keen eye for details and a story telling mind is all that you need for capturing great street photos in a city. Here are some tips and ideas.

    Photo by Marc Kleen

    A lot of people choose to live in cities because of the vibe and the other interesting things they can experience there. Cities are also spaces that are filled with architecture and other structures, both new and old. It is not just about capturing the buildings in a city, but also the life there, that makes for epic cityscape photographs. Here are some ideas on how to capture cities in unimaginable ways.

    Photo by Abigail Keenan

    Do you live in a city? If so, are you bored of photographing the place that you live in? We all have this habit of not photographing the places we live in, because we see it all the time and don’t feel that it has anything new or interesting to contribute. If that is the case, you are wrong. Your city has a load of photographic opportunities and you need to look at it with the eyes of a tourist. Read to find out how!

    Photo by Michael Discenza

    Have you seen wildlife in urban spaces? Unlike capturing wildlife photographs in the wild by staying very far away from the animals and birds, urban wildlife that are used to humans around them can be captured up close as they mostly stay close to human residents, parks, etc. The wildlife in urban spaces can be interestingly photographed against daily happenings in the cities and towns. This article gives you tips on how to photograph urban wildlife.

    Photo by Luna Wang

    Besides all the stunning subjects and cityscapes in urban spaces, if you are a photographer interested in capturing portraits, cities offer amazing opportunities to capture interesting portraits. Some very interesting geometrical compositions can be used to capture portraits in urban areas, Here are some tips to start with.

    Also, if you are interested in learning about geometrical compositions, check out this article – How To Use Geometry For Creative Composition In Photography

    Photo by greekfood-tamystika

    We have all heard of the golden hour as the best time to photograph anything because of the glorious, soft but dramatic light the sun casts during that time. Do not pack your camera bags after sunset, because the blue hour is one of the best times to capture very emotive and soft photos especially in the city when the lights are just turned on. Here is how to shoot cityscapes during the blue hour.

    Photo by Mick Haupt

    If you are someone interested in urban decay, or wish to shoot something different in urban spaces,, then urban decay is a genre that will be of interest to you. Moreover these spaces will not be crowded, so you can take time to explore and capture them from unique perspectives and angles. Make sure you have permission to enter and photograph these spaces as some areas and buildings may have restrictions or may be private. Here are some tips for you to get started.

    Photo by Patrick Tomasso

    Finally if you are interested in black and white photography, urban spaces are great because of the light, textures and drama they can lend to great black and white photographs. Make sure that you have a good tonal range in the scene so the resulting black and white image is powerful. You need to learn to see in black and white in order to capture images to convert to black and white.

    Photo by Jason Row

    If you want to check out some creative urban photos, check out these “Urban Etchings” by Grant Legassick, which is a definitive study of an urban environment comprising multiple images layered over one another, giving the impression of a fine, delicate pencil drawing or metal etching. These images are mind-blowing and the photographer shares how these were made.

    Photo by by Grant Legassick

    Further Reading


    [ad_2]

    Source link

  • Check Your Composition

    [ad_1]

    I gotta tell you, I have no idea how any of us ever managed to learn this craft well enough to make the photographs we do. There’s just so much to learn! Exposure alone can be tricky at first, but these days, there are so many different modes and buttons and dials. With time, it becomes intuitive-feeling, but it’s a lot.

    And even then, we can master the camera without ever really mastering the skills needed to make a compelling photograph.

    Last week, I was going through the many resources I’ve created for you over the years, and I came across one that you might not have seen: The Composition Checklist.I’d like you to have a copy of that, together with a video I made with three suggestions on how to make the most of the checklist.

    When I first introduced these two resources, I made the mistake of advertising them on Facebook. Totally free resources—no catch, no strings attached—and they still drew out the haters and the critics! 😂 One of them berated me for the idea that composition could be reduced to a checklist, which, of course, it can’t (and I didn’t at all mean to imply that it could be). But there are ideas that are helpful to remember when you’re framing a photograph, and I thought an easy-to-reference guide might be useful to you.

    Composition is important; it’s the visual language photographers use to make their photographs compelling. And for some reason, it’s some of the last stuff we are taught (if we’re taught at all).

    A quick story. Years ago, before Covid wrecked everything, I did a series of workshops in places like Italy. We’d put some time aside in the middle of the day to look at images and discuss them. The assignment was (I thought) simple: look at the image and describe one decision the photographer made to make the image and what that decision contributed. You could talk about balance and how it was achieved. You could talk about how the vertical framing reinforced the vertical elements in the image. Perhaps you might talk about how the main subject was well isolated using depth of field or a longer lens. Or you could talk about what didn’t work. Maybe important elements were getting cut off by the edges of the frame. Maybe the chosen moment wasn’t strong enough to create a dynamic composition. I mean, the sky was the limit. Yet, the reply I most often got was just a blank stare and a mumbled, uncomfortable version of, “Well, I like it…”

    “That’s all? That’s all you can say about this photograph? That you like it??” I felt like I was taking crazy pills. I wanted to have a lively conversation about composition, and it always ended up feeling like an interrogation.

    It taught me an important lesson. I was asking photographers to think in ways they hadn’t yet been taught. I had ambushed them and expected them to have the same vocabulary that I did. Many of them knew cabalistic things about cameras that I still don’t understand, but when it came to photographs, they struggled. Ideas like balance and tension, or using contrast or juxtaposition (I talked about this in this recent post/article). Ideas like repeated elements or thinking about the energy of the photograph were all a bit foggy.

    So let me ask you: how’s your composition? Do you think about the way the elements in the frame relate to each other and what they accomplish in the image? Is it time to check in with some of those ideas? 

    Anyways, The Composition Checklist is a simple thing, but combined with the accompanying 10-minute video, I’m hoping it can give you a bit of a nudge and maybe help you ask some important questions as you shoot.

    You can get your copy of The Composition Checklist by clicking here. Still free, still no strings attached. Just click this link, tell me where to send it and I’ll send you both the PDF checklist and the video to download.

    Don’t be that photographer who knows more about camera design than visual design. And once you’ve checked out these two free resources, if you want to chat about composition or ask questions, I would love to have that conversation in the comments here on my blog.

    For the Love of the Photograph,
    David


    [ad_2]

    Source link

  • Check Out My Brand New Online Photography School!

    Check Out My Brand New Online Photography School!

    [ad_1]

    A couple weeks ago, I asked my subscribers to let me know what kinds of online photography courses they’d like to see me teach, and I got some incredible feedback! After reading hundreds of answers, I have some solid direction about how to proceed, and I’m looking to start filming some brand new courses in the next few weeks.

    With that in mind, I’m excited to announce the launch of my brand new online school, which features a free course, called Creative Color Techniques for Photographers and brand new options for personalized individual coaching.

    My Signature Course – Now in 3 Flavors!

    In addition, I’m now offering 3 different options for my signature 30-lesson course, Photography On The Brainthat are designed to better match a variety of budgets and commitment levels.

    ESSENTIALS gets you unlimited access to all 30 lessons and downloadable PDF assignments, at the lowest price I’ve ever offered. (Even lower with the discount below!) 

    WORKSHOP adds full forum access where you can share you own insight, post your images for critique, and get input from me and other students. 

    MENTORSHIP goes even deeper by adding personal coaching with a series of 4 one-hour video calls. This is the ultimate way to keep your motivation up and get targeted instruction and insight as you progress through the lessons. 

    Photography On The Brain is still the most thought-provoking instruction on composition and creativity that I’ve ever offered. 

    I cover such a wide variety of topics that you are guaranteed to come away with a huge batch of new ideas, confidence and inspiration.  

    If you want to be better at composition gain more creative confidence, then I strongly urge you to check out this course, because I know it will help you expand your creative skills in a big way.  

    Go Deeper with Personal Coaching

    I’m also unveiling my brand new PERSONAL PHOTOGRAPHY COACHING SESSIONS

    With three different video call options that range from 30-minute Quick Coaching sessions, 60 minute 1:1 sessions and an extended series of 4 one-hour monthly sessions, I can give you one-on-one advice, targeted instruction, and provide critiques, direct feedback and direction that will help you progress in your current photography life. 

    Whether you just need quick answers about a specific topic you’re struggling with, insight about how to better apply a certain creative technique, or if you want more in-depth feedback and ongoing follow-up, this is an incredible option for learning. 

    Awesome New Course Interface and iOS App

    I’m so excited about my new course site, which is built with the Teachable interface. The user dashboard and lesson pages are so easy to navigate, and they look great! You can view the lesson videos and assignment briefs with unlimited access on any device, and there’s even a free iOS app you can use for streamlined viewing of lesson material when you’re offline. 

    I actually did a 12-week online singing/vocal course last winter that was built with the the same framework, and I was really impressed by the clean format and ease of access that Teachable offers. That’s why I’m using it for my own courses, and I think you’re really going to like how it looks and functions.  

    Limited Time Launch Discount!!! 

    Finally, to celebrate the launch of my new course site, I’m offering my readers a special limited time discount code for Photography On The Brain.  

    Use coupon code LAUNCH20 at checkout to save 20% on either theESSENTIALS or WORKSHOP tiers(This code is only good for the next two weeks.)

    My readers have been incredibly supportive over the years, and that’s why I’m so excited about my new course site. I know that you guys like to learn from me, and you deserve the best possible user experience to access and absorb the information that I share.  

    I’m looking forward to building and uploading more courses in the coming weeks and months, but for now, I encourage you to check out the site, try out my free color course, and the share my courses with your other photographer friends.  

    Thanks so much for reading and take care.

    [ad_2]

    Source link